How to Lengthen Pants That Are Too Short
This post may contain affiliate links. Please read our Disclosure Policy.
If you have pants that are too short but still fit at the waist, you can easily lengthen them by adding a fabric extension at the bottom. While I’m using my daughter’s pants in this tutorial, this same sewing method works just as well for adult pants too.
I’ll show you how to lengthen pants with a simple cuff using a beginner-friendly sewing technique.

Table of Contents
How to Lengthen Pants That Are Too Short
I’m a big believer in reusing and transforming things instead of replacing them, especially when they’re still in good shape. Pants are often the first thing kids outgrow, even when everything else still fits.
That’s why I love this simple sewing method. By adding a fabric extension at the bottom, you can give pants a second life with very little effort. I’m using my daughter’s pants as an example here, but this technique works just as well for adult pants too.
Some pants are easier to revamp than others. When you don’t have enough hem to let down, you can lengthen your pants by adding a fabric cuff to the bottom.
Dig through your fabric stash for a piece of fabric, ruffle or lace that you can sew onto the bottom of each leg to create a cuff: This is a fun and pretty option and can work for jeans or for dress pants.
Project snapshot
- Project Type: Sewing
- Skill Level: Beginner
- Time Required: 1–2 hours
- Works For: Kids’ and adult pants
- Best For: Pants that fit at the waist but are too short
- Tools required: Sewing Machine (hand sewing possible for small extensions)
- Customization level: Fully customizable
- Budget range: Low
Supplies:
- Pants
- A cute fabric of your choice
- Matching thread
- Fabric marker, pencil or chalk.
Tools:
- Sewing machine
- Scissors
- Ruler
- Pins

Instructions:
Step 1: Measure How Much Length You Need
Put the pants on and measure how much extra length is needed at the bottom of the pant leg.

To calculate the fabric height for the cuff:
- Take the extra length needed
- Add 1 inch for seam allowance
- Double that measurement (the cuff is folded)
Example:
If you need 1½ inches of extra length:
1½ + 1 = 2½ inches
2½ × 2 = 5 inches total fabric height
Measure the width of the pant leg at the hem, double it, and add ½ inch seam allowance on each side.
Step 2: Prepare the Fabric Cuffs
Cut two fabric rectangles using the measurements from Step 1.

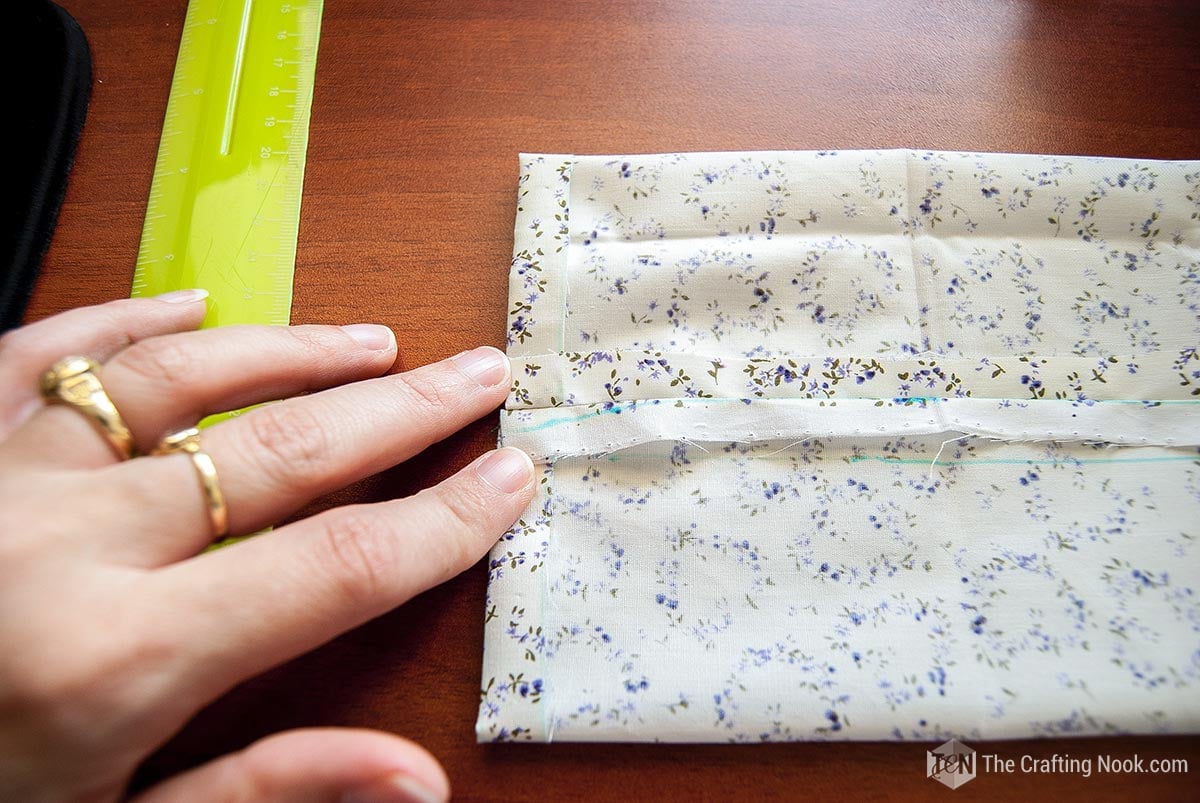
With wrong sides together, fold each cuff piece lengthwise and press. Open it back up.
Turn the long edges under ½ inch on both sides and press again.
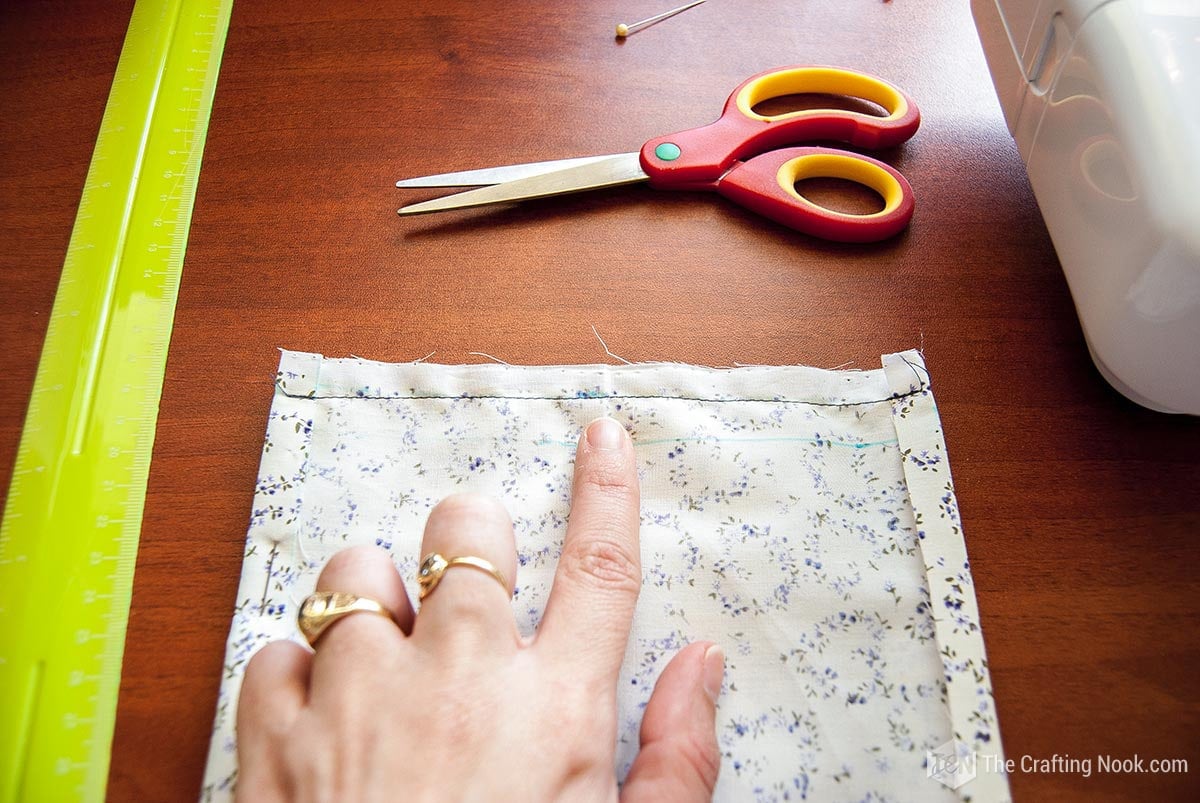
Fold each cuff piece in half lengthwise with right sides together, aligning the short edges.
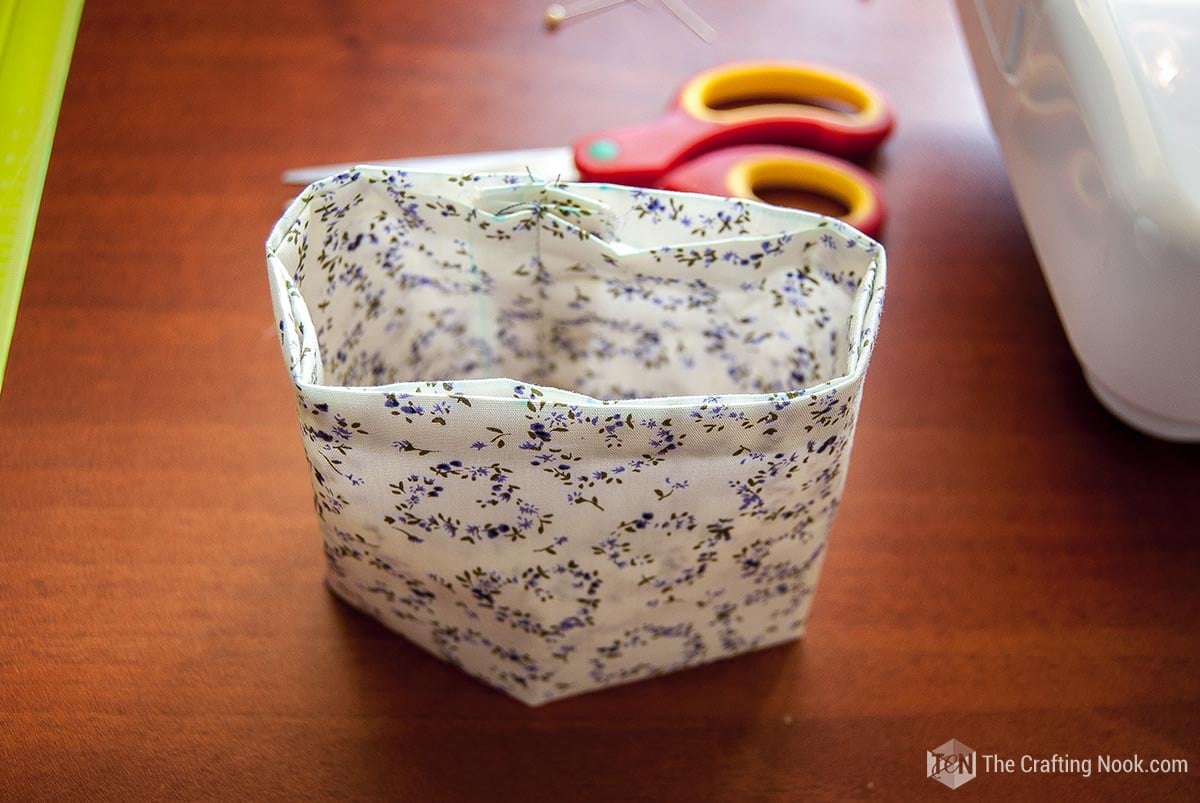
Sew the short edges using a 1 cm (½ inch) seam allowance to form two fabric tubes. Press seams open.
Fold the wrong sides together, aligning the hems.
Step 3: Attach the Cuffs to the Pants
Find the inner leg seam of the pants and match it with the seam of the fabric cuff.

Insert the pant hem between the two layers of the cuff so the original hem is sandwiched inside. Pin all around.


Turn the pants to the wrong side and fold the cuff upward along the pressed fold. The folded edge of the cuff should extend about ¼ inch (0.5 cm) past the seam joining the cuff to the pants. Press and pin.

From the right side of the pants, stitch in the ditch along the seam where the cuff meets the pants, making sure to catch the inner edge of the cuff underneath.

Fold the extension down to hide the seam and press.


Optional Step: Add a Matching Pocket
If the pants don’t have any back pockets, this could be a cute way to add a cohesive detail to the overall look.
Cut a fabric rectangle sized to fit the back of the pants. Leave about ½ inch seam allowance on each side.
Fold ½ inch to the wrong side and press, then fold again another ½ inch to enclose the raw edge. Stitch the top edge to form the pocket opening.

Pin the pocket in place and sew around the sides and bottom.

Crafting Tips
- This cuff technique can be used even if pants don’t need length yet. Sewing the cuffs in advance lets you fold them down later as your child grows.
- Choose a fabric weight similar to the original pants to keep the cuffs from pulling or twisting over time.
- When working with jeans, using a slightly different shade of denim for the cuffs can still look intentional while being easier to source.
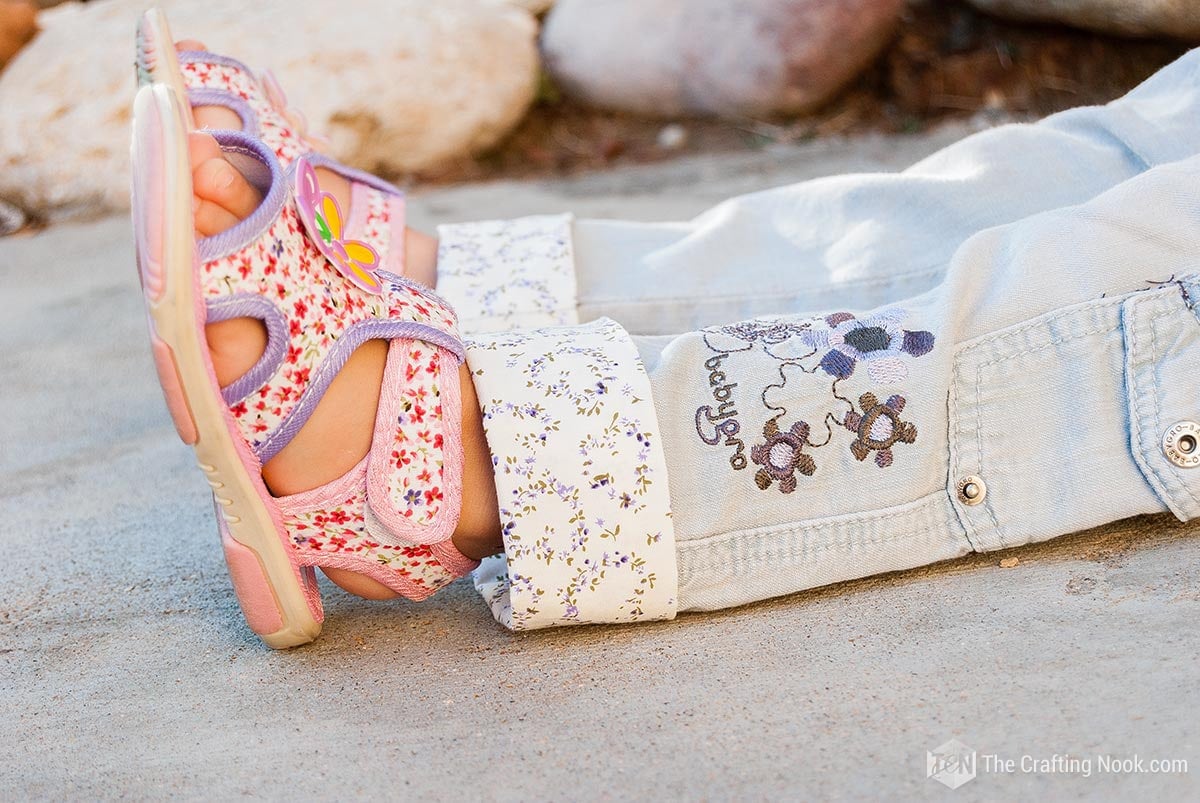
Final Result

That’s it — a pair of pants with added length and a finished look. This method helps extend the life of pants that still fit well, whether they’re for kids or adults.

I love how it turned out and my girl loves it too!

Alternatives & Variations
Instead of a straight cuff, you can add ruffles for a softer, decorative look.
Laces are also another really nice alternative.
Mixing or layering different fabrics in the cuff can create a more playful or bold design, especially for kids’ pants.
For adult pants, keeping the cuff simple and neutral usually gives the most versatile result.
Frequently Asked Questions
Yes. If there isn’t enough fabric to let the hem down, adding a fabric cuff or extension at the bottom is one of the most reliable ways to lengthen pants while keeping a finished look.
It does. This technique works well for jeans, cotton pants, and similar fabrics. When working with denim, using a similar or slightly contrasting denim fabric for the cuff usually gives the best result.
You can always stitch it by hand, or you can use fusible tape (double-sided iron-on fabric adhesive) for small extensions, but it’s less durable than sewing. This option works best for lightweight fabrics or temporary fixes.
Most pants can be lengthened by 2 to 4 inches using a fabric cuff. Adding more than that may affect how the pants hang and look.
More Easy Crafts for Kids to Try
If you like this cute refashion by Lengthen Pants, you might also like these other easy crafts for kids too {click on the images}


✂️ Tutorial

How to Lengthen Pants That Are Too Short
Tools
- Sewing Machine
- scissors
- Ruler
- Pins
Supplies
- Pants
- A cute fabric of your choice
- Matching thread
- Fabric marker/pencil
Instructions
Step 1: Measure How Much Length You Need
- Put the pants on and measure how much extra length is needed at the bottom of the pant leg.
- To calculate the fabric height for the cuff:
- Take the extra length needed
- Add 1 inch for seam allowance
- Double that measurement (the cuff is folded)
- Example:
- If you need 1½ inches of extra length:
- 1½ + 1 = 2½ inches
- 2½ × 2 = 5 inches total fabric height
- Measure the width of the pant leg at the hem, double it, and add ½ inch seam allowance on each side.
Step 2: Prepare the Fabric Cuffs
- Cut two fabric rectangles using the measurements from Step 1.
- With wrong sides together, fold each cuff piece lengthwise and press. Open it back up.
- Turn the long edges under ½ inch on both sides and press again.
- Fold each cuff piece in half lengthwise with right sides together, aligning the short edges.
- Sew the short edges using a 1 cm (½ inch) seam allowance to form two fabric tubes. Press seams open.
- Fold the wrong sides together, aligning the hems.
Step 3: Attach the Cuffs to the Pants
- Find the inner leg seam of the pants and match it with the seam of the fabric cuff.
- Insert the pant hem between the two layers of the cuff so the original hem is sandwiched inside. Pin all around.
- Turn the pants to the wrong side and fold the cuff upward along the pressed fold. The folded edge of the cuff should extend about ¼ inch (0.5 cm) past the seam joining the cuff to the pants. Press and pin.
- From the right side of the pants, stitch in the ditch along the seam where the cuff meets the pants, making sure to catch the inner edge of the cuff underneath.
- Fold the extension down to hide the seam and press.
Optional Step: Add a Matching Pocket
- If the pants don’t have any back pockets, this could be a cute way to add a cohesive detail to the overall look.
- Cut a fabric rectangle sized to fit the back of the pants. Leave about ½ inch seam allowance on each side.
- Fold ½ inch to the wrong side and press, then fold again another ½ inch to enclose the raw edge. Stitch the top edge to form the pocket opening.
- Pin the pocket in place and sew around the sides and bottom.
- That’s it — a pair of pants with added length and a finished look. This method helps extend the life of pants that still fit well, whether they’re for kids or adults.
What do you think? Have you extended the life of your kids??? How did you do it???
Other cute clothing refashion ideas from my favorite bloggers
- DIY Upcycled T-Shirt Dress by Infarrantly Creative.
- Girl Dress Upcycled From Men’s Shirt by All Day Chic.
Share and PIN ME!

Til’ next time…


FREE WORKBOOK
Keeping your Sweet Home Organized
Learn how to create intentional habits and simple routines to Keep Your Home Organized. Plus freebies, printables, exclusive content, and tips.
Disclaimer: By clicking on the “Yes” button above you are giving me your consent to collect and use your information according to the law and My Policy Privacy. Zero Spam I promise!
