Memories Wooden Blocks Photo Puzzle
This post may contain affiliate links. Please read our Disclosure Policy.
Don’t you love to keep your most precious memories handy and easy to look at? I definitely do, maybe that explains why I have this obsession for photo frames. If I could, I would change the photos every day but you know how days go and we never really get to do that, right? I thought that with this wooden blocks photo puzzle I would be able to have more than one photo in one single frame. Six actually. I’m telling you; I LOVE it now and I keep changing the photo. I’m even planning on making a second photo puzzle LOL.
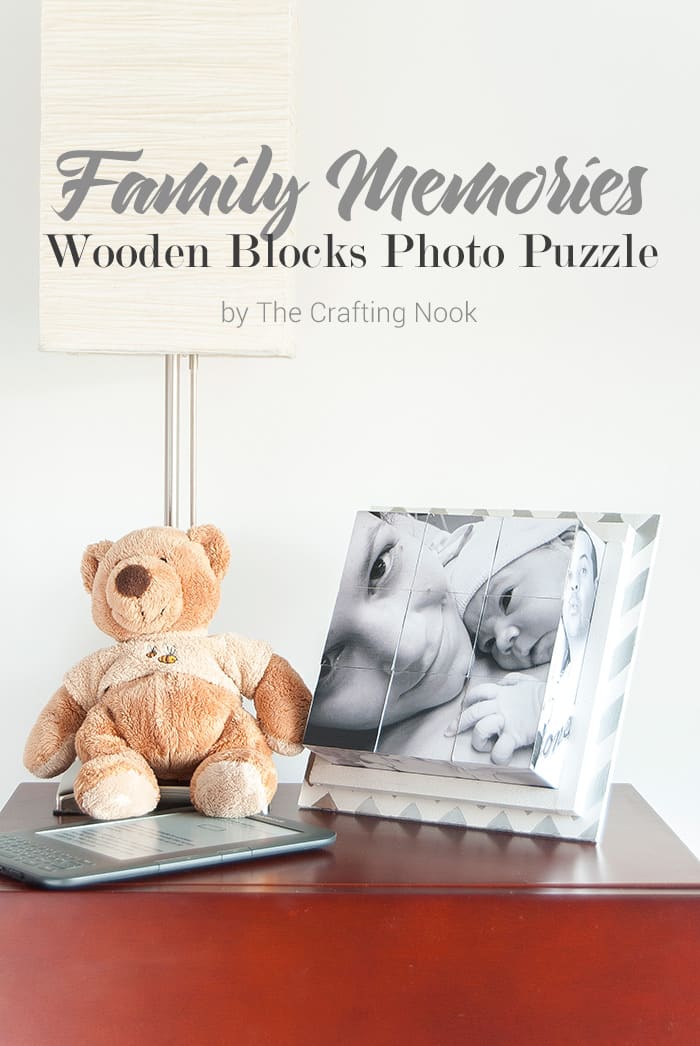
Family Memories Wooden Blocks Photo Puzzle
This cute family memories wooden blocks photo puzzle was inspired by a cute Father’s Day Photo Puzzle gift I saw over at eHow made by Tonia Larson (The original link disappeared). It’s so cute and that gave me the idea of making it with larger blocks and put it in a “kind of” frame.
I wasn’t sure yet how I was going to make the frame but I was certain that I would figure out something… Eventually… LOL. The only thing I was absolutely sure is that I was going to make that wooden blocks photo puzzle.
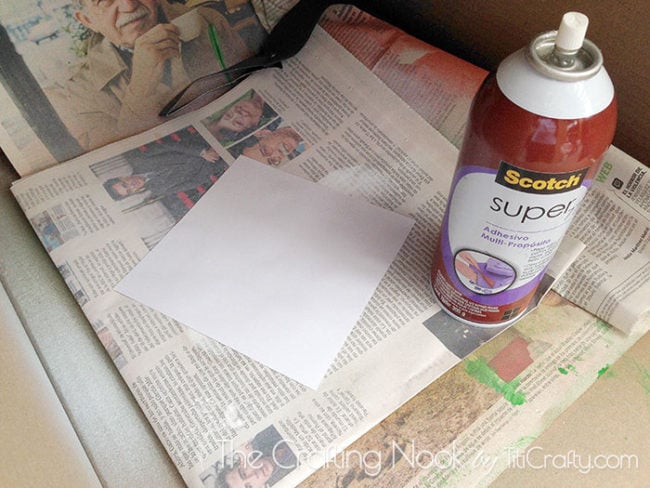
It took me some time to be honest. There were some details I wasn’t sure how to accomplish and I messed it up a couple of times. One of those things was how to glue the photo. I thought mod podge would do, but it didn’t for this specific craft {Although I did use it for finishing purposes}. Then my hubby suggested using adhesive in spray and I went and buy a bottle and yayyyy! It did work! Of course, in the process, I screwed up 9 wooden blocks, Grrrrr
Anyway,
I guess you want to know how to make this cute Family Memories Wooden Blocks Photo Puzzle, right?
Let’s go!
Supplies:
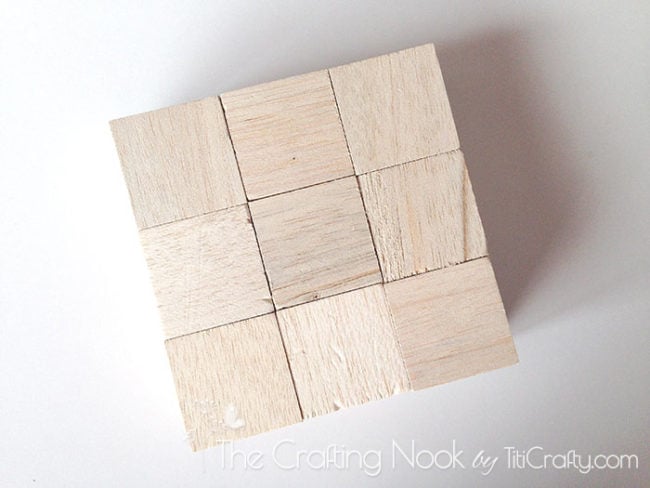
- 9 wooden blocks {I used 5x5x5 cm or 2x2x2 Inches. You can use the ones that fit best}
- Adhesive spray glue.
- 2 strong rubber bands
- Mod podge.
- Foam brush
- X-acto or any thin blade cutter.
- Piece of wood board squared {I used 20X20 cm or 8×8 Inches}
- Piece of wood board cut in a triangle 10x17x18 cm or 4×6.5×7 Inches.
- Wood stick 1×1 cm.
- Wood nails
- Transparent Contact glue {I used UHU}
- Hammer
- White acrylic paint
- Silver paint.
- Brush
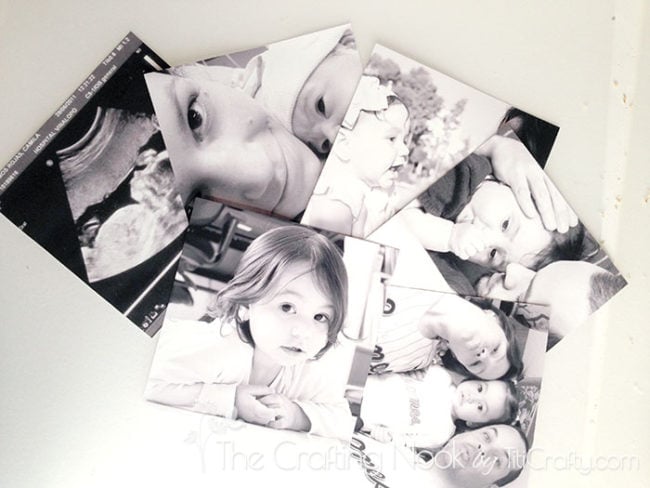
- 6 gorgeous photos squared cut and slightly larger than the 9 blocks together.
Start by cleaning your wooden blocks well. You don’t want any dust in them.

Put them together. 3 blocks per row.
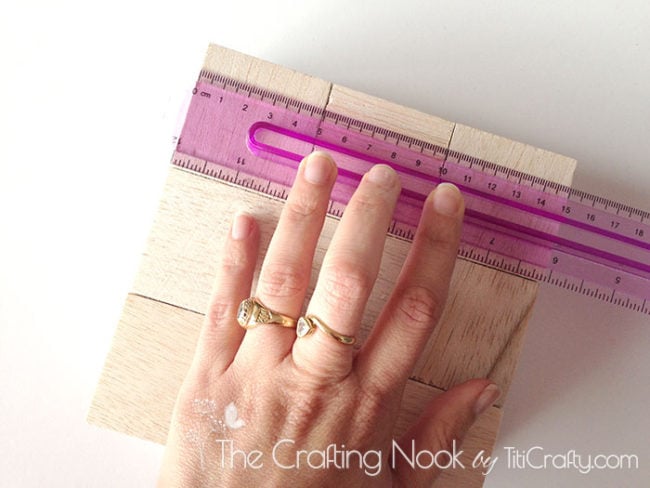
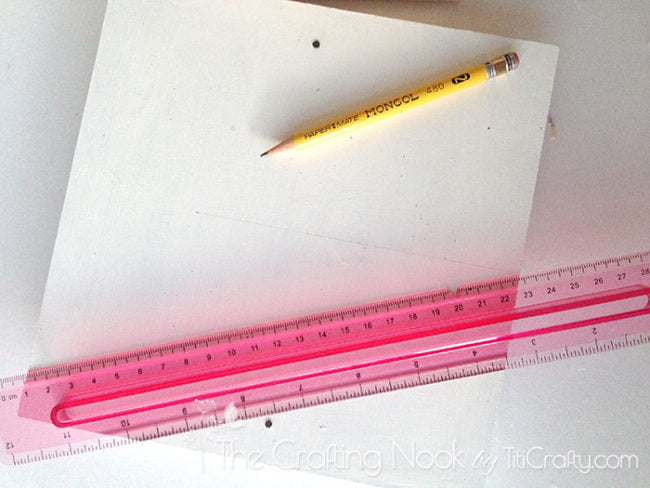
Measure it so you know exactly the size of photo you need.
Choose your photos crop them and print them in the right size.
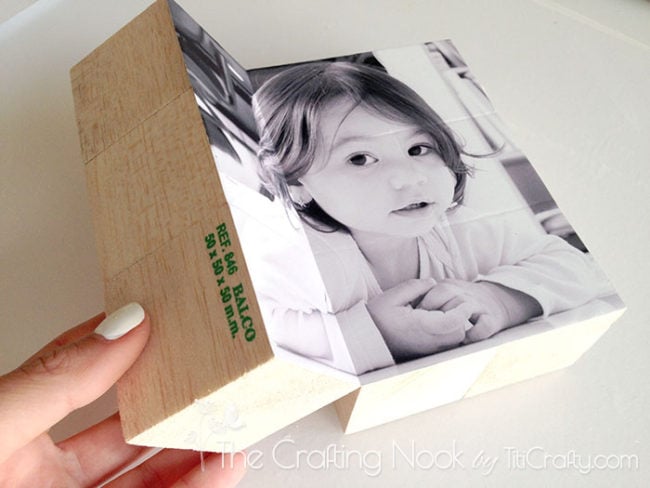
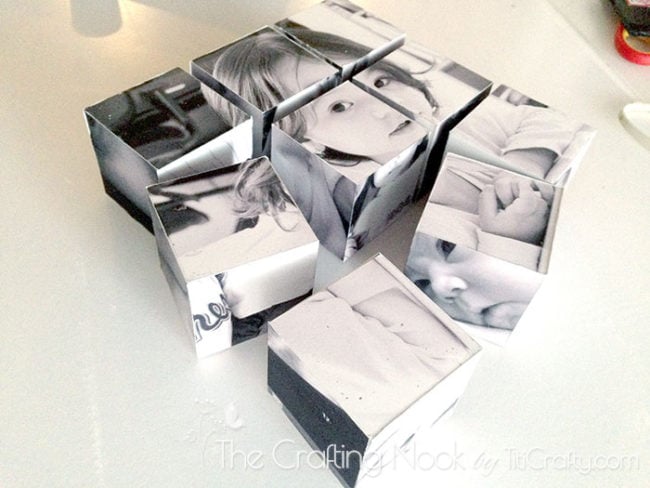
Time to glue photos to blocks.
Tighten the blocks in place with the rubber bands. This ensures that the photo will stick in the right place.

Here is where I screwed it up the first time. When you use a liquid glue, the glue slips between the blocks. That causes that when you already have photos on the sides they stick to the next blocks and that messes the photos. This is what I got:


BUT…
When you use Adhesive spray glue, no glue slips between blocks and you get a clean and pretty adhesion.
So, Spray one photo at a time. Lay it on your blocks and using a scrap, make sure it sticks well and doesn’t leave any bubbles.

Let it dry for a few minutes.
Then lift groups of three blocks and create fold marks. Do this with each different block group until you get all the fold marks.
Here is the tricky part, take a breath and let’s do this.
Lift again a group of blocks and use it as a guide for ruler. You need to be really careful here to not move the ruler once you let go the blocks.
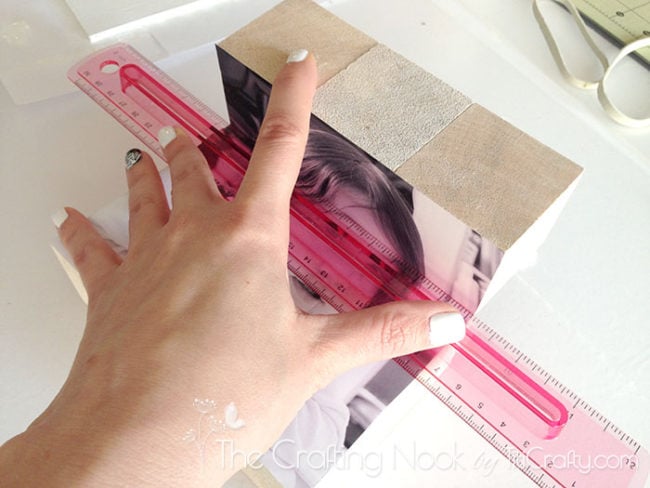
Using an x-acto or cutter, carefully cut the photo between blocks.
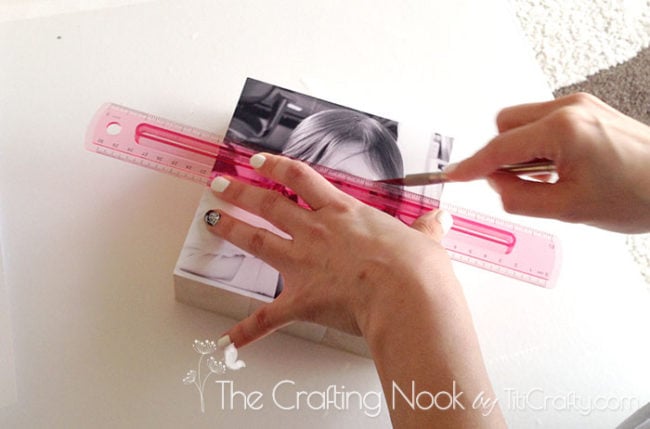
*Side note: Please always be careful when using cutters and knives. Accidents can happen but still, it’s better to be too cautious.
Once you have all the blocks cut, repeat the process with the rest of the photos. Again spray one photo at a time.
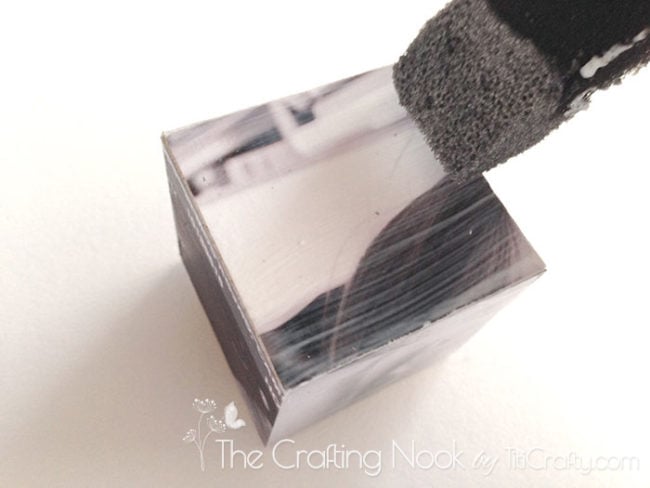
When all the photos were done, I applied one coat of mod podge on top of each side to seal the photos and avoid them getting damaged. Here again, do one side at a time on each block to avoid mess.
While you let dry each side, let’s work on the frame.
Yup, I had figured it out by this point of the process LOL.
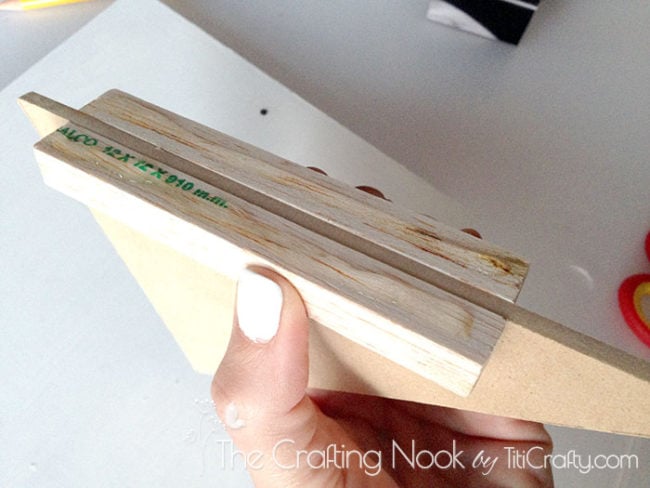
Hubby helped me cut my wooden squared board and the triangle.

I cut my wood stick in 4 sticks 1,5 cm longer than my blocks together.


I painted my board and sticks with white paint and let them dry.

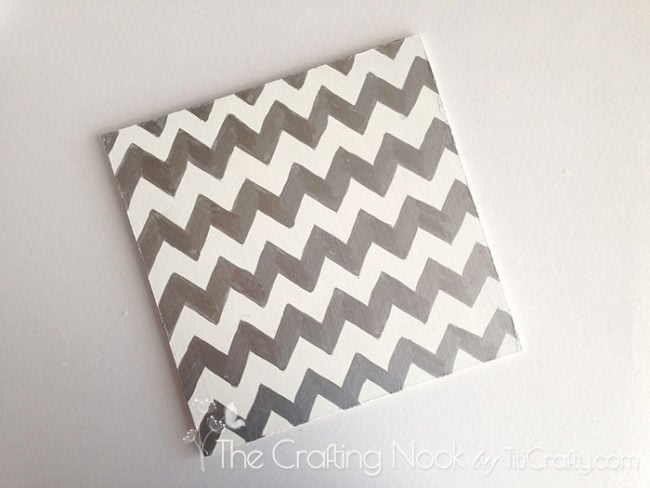
Using cardstock I made a chevron shape and used it as guide to create a chevron design on the white board.
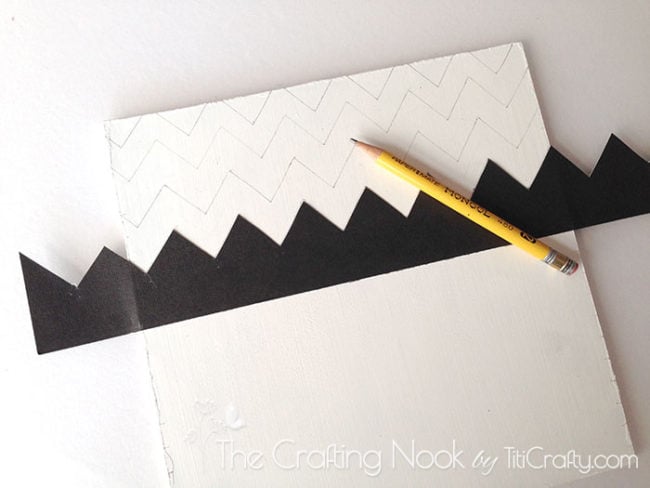
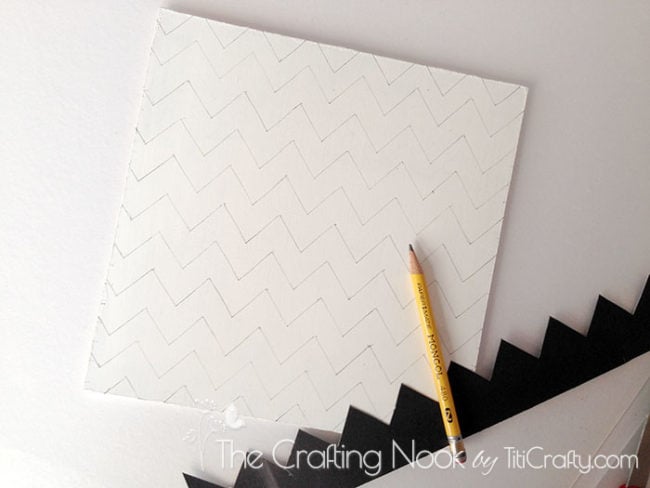
Painted the chevron with Silver. It took me 2 coats to get it even. Let it dry.

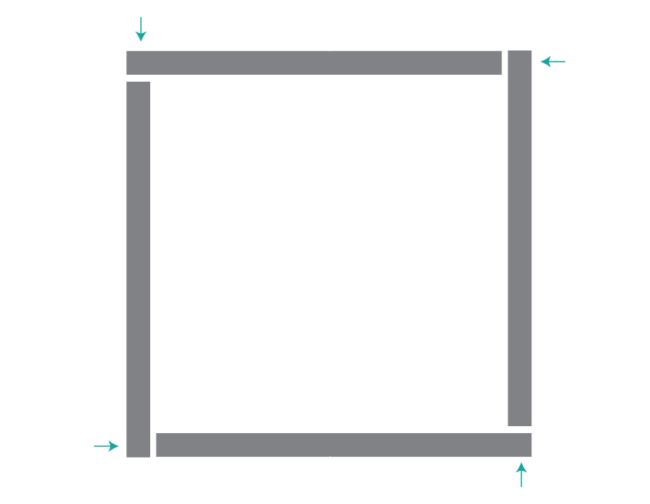
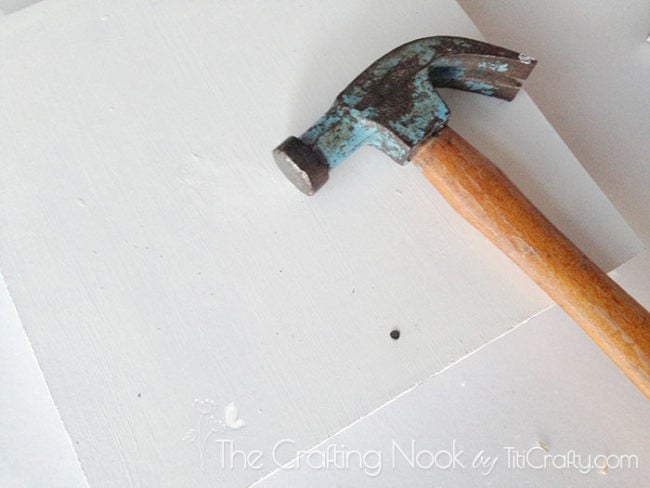
Using a hammer and nails I made a frame with the sticks placing the sticks and nails like this:
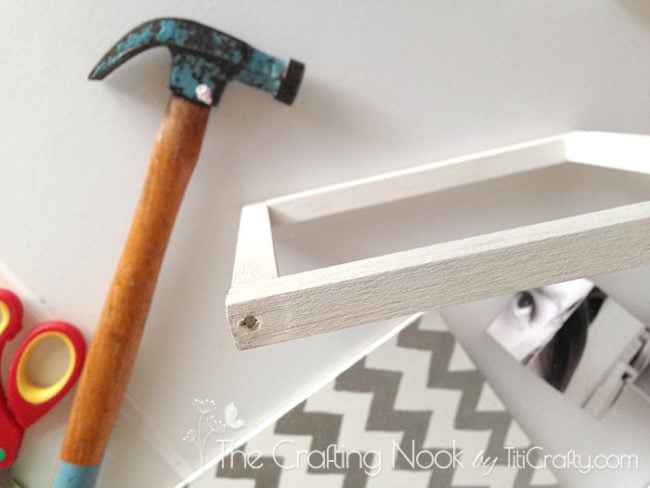
Apply a line of contact glue on the frame and place it as centered as possible on top of the chevron board. Let it dry.
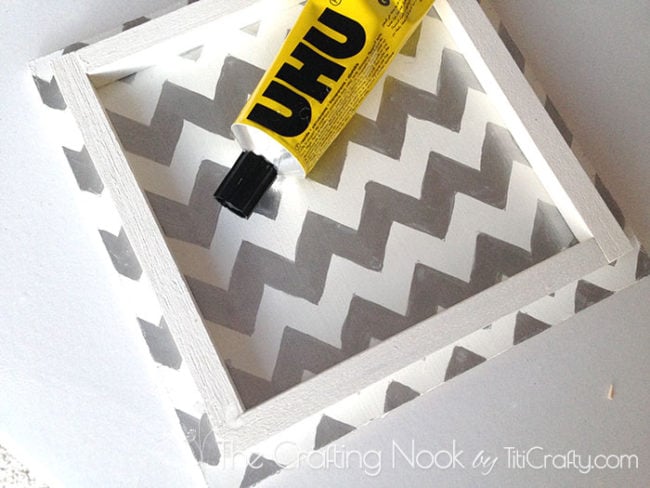
On the back, calculate where the middle of the frame is and nail it so it will never come off.
Now let’s work on the back stand.

I had to get really crafty here because I couldn’t find one done in any store. Here is wen the triangle comes.
Cut 2 extra wood sticks 11 cm or 2 Inches.
On the back of the frame draw a line exactly in the middle.
Place one stick on each side of the triangle. Make sure it’s the longest side of the triangle that will go on the back of the frame.
Apply contact glue on both sticks. Make sure you don’t glue the triangle.
Place the sticks and triangle on the line. The triangle should be perfectly on top of the drawn line and start right by the base of the frame.

Make some pressure for a few minutes, while it dries a bit. Then lift a bit the triangle so it doesn’t stick.
If you have some clamps you can put one on each end so it stays in place.
Now, I added a small piece of wood on the top to break the stand. It was really handcrafted. I just cut a piece from the stick and carved a hole so the triangle point will fit. This can be done in many ways {prettier ways} but I didn’t care much for the back of the frame so…

At this point, all my block sides should be dry. I particularly let it dry overnight. If you get any tiny wet mod podge part, you might damage that piece of photo by putting blocks together.
Once it’s all really, but really dry, make your photo puzzle and place it in your frame.
There you Go!!!!

You can change it any time, place it close enough to cherish those memories and enjoy switching photos!


Hope you like this crafty idea and get inspired enough to make your own family memories wooden blocks photo puzzle.


If you like this post, you might also LOVE these too:

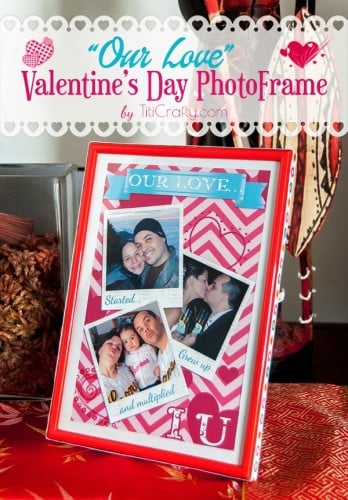
Our Love Valentines Day Photo Frame DIY Tutorial Printable
Til’ next time…


FREE WORKBOOK
Keeping your Sweet Home Organized
Learn how to create intentional habits and simple routines to Keep Your Home Organized. Plus freebies, printables, exclusive content, and tips.
Disclaimer: By clicking on the “Yes” button above you are giving me your consent to collect and use your information according to the law and My Policy Privacy. Zero Spam I promise!
I liked this; however, you lost me a the end with the stand.
1. What’s the deal with NOT gluing triangle to the wood along with the sticks;
2. What is the purpose of the little piece with the slot cut out;
3. Why didn’t you nail ALL four sticks to the back; and
4. It would have been nice to see finished picture(s) of the BACK of the stand in it’s upright position.
And FYI, you really should READ your article BEFORE you post it. Many errors: misspelled words, incomplete sentence structure, etc.
Hi Diana,
Thank you for your feedback. Just FYI in case you didn’t know this, but a blog is like a home, I make things the way I see fit and with crafts, there’s no ONE perfect way to do things. If you think you have a better way to make them, by all means, go ahead and do it, you just don’t need to be rude (at least that’s how I perceived your message).
I didn’t glue it because I wanted it to be removable and the cutout piece was to block the triangle from sliding up. I didn’t nail it to the back because I didn’t see it necessary, I still have it and it is still in perfect shape. I never thought of taking photos of the project from the back which is actually a good point, I’ll take it as an improvement for future projects. Sorry, this craft didn’t check all your boxes of expectation but hey! I bet you will find many other tutorials that might. And most importantly I’m so sorry my writing and unbearable mistakes offended you, I’m sure you will find better blogs to read! I’m working on improving my English since I’m not a native English speaker.
Wishing you all the best!
Regards,
Cami.