Frozen Themed Cake Box and Individual Cake Boxes
This post may contain affiliate links. Please read our Disclosure Policy.
Probably you are wondering why we make a birthday cake as a box. Sounds weird right? Well, you see, my family and I are very attached to Brazilian traditions. My grandma was born there and she as really traditional in many ways. Birthdays was one of them and of course my mom learned all those traditions even though she wasn’t born in Brazil. I grew up with those traditions too despite the fact that I was raised in Venezuela. One of those traditions we love the most is using Individual Cake Boxes with the cakes already cut and stored in each box. I’m loving how our Frozen themed cake box turned out!
Frozen Themed Cake Box and Individual Cake Boxes

I have to say, making the boxes is not as practical to make and if you have a 100 people guest list I would say go for the whole decorated cake. But since our guest lists are always really short I prefer holding on to our tradition.
What makes the individual cake boxes special and practical is the fact that when it’s time to sing happy birthday and share the cake, you only have to open the box and give away each cake. You avoid the mess of cutting and putting it in plates. Specially when those parties are for kids.
Also when we cut the cake, usually people are already full of the snacks, sodas, appetizers, etc. Not sure about your experiences but in mine, most people ask for an extra plate to cover the cake and a bag to put the cake in. So this way it’s easy for anybody to just take the cake home.
If they want to eat it then we usually put inside each cake box a napkin and a spoon, so they are ready to go!

Even if it means more work before the party I definitely prefer making my life during the parties easier so I can enjoy more.
I’s not hard to make these cake boxes, they are just time consuming. In my case, hubby and I cut and assembled them so it was about 20 to 30 minutes to get 20 boxed done! Not so bad, is it?
So, How to make these boxes?
Supplies:
- Letter size Cardstock {opaline, school one, any type you like best that you can print on}
- Tape
- White Cardboard
- Double sided adhesive {if you have cutting machine, if not use snowflakes stencils and glue}
- Ribbon
- Hot glue
I started with individual boxes.
Both lid and base fit in a letter size cardstock. I used white opaline for the lid and a blue school one for the base.
Pint the design using a box pattern. I’m working on recreating the pattern since it was a flat image. I’ll share it here as soon as I have it done.
Print the design and pattern.

Cut each piece.

Fold following the folding lines.

Stick the tabs with either hot glue or tape

The lid is done. Repeat with bases.

Individual boxes ready to go.

Big Frozen Themed Cake Box
For the Cake Box, I measured 2 individual boxes one next to each other to set the width and then 9 boxes for the depth. Then the height was defined by the height of the boxes. It gave a box about 28 X 28 X 15 centimeters.
Following those measures, I created the big box. I made it simple, Top, sides and some tabs to glue.

Then I cut some snowflakes using double sided adhesive. This is where you can use stencil and glue if you don’t have cutting machine.

Then just spread light blue glitter. Let it sit for a couple minutes and then brushed out the excess of glitter, returning it to the bottle.

The result?… Gorgeous glitter snowflakes.
Final step assembling the lid and the base from the tabs I left.
Remember that the lid of a box should always be about 1 or 1.5 millimeters larger than the base.
I decorated the bottom edge of the lid with a cute ribbon {the same I used for the Frozen Invitations} and a ribbon bow.
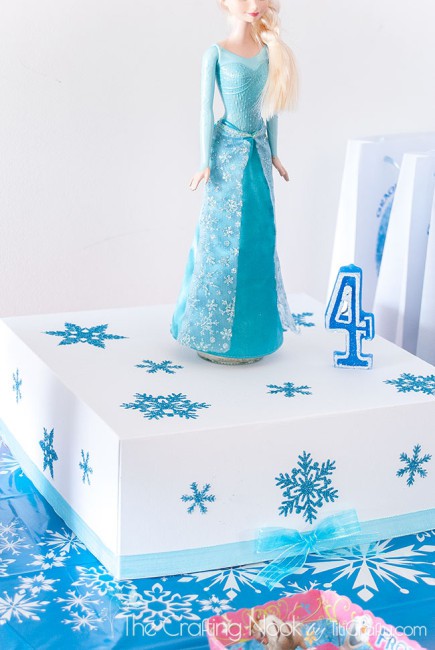
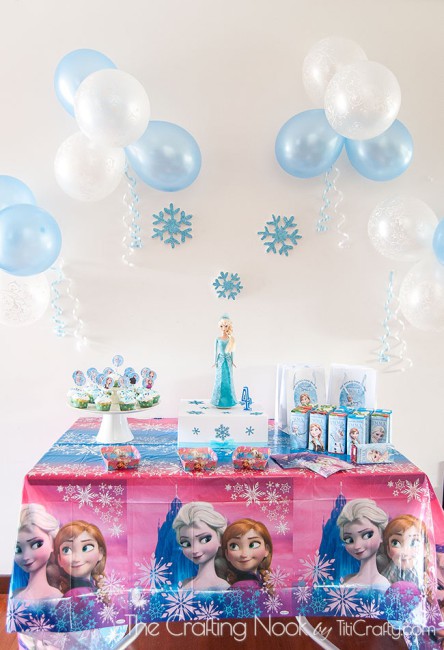
I managed to make Elsa doll stand on top of the box with a cute 4 shaped candle next to it.
There you have it!!! The boxes are ready to be filled.

After I made the cake and filled it with Chocolate cream, I cut the cake, making 20 servings. Using wax or baking paper, I placed each slice of cake into the boxes. Then I placed the individual boxes inside the big box.
That’s it. Easy to carry and transport it, easy to serve and easy to clean after the party!
As I predicted most kids took the cake home and that saved me lots of trouble cleaning up the mess!


So that’s it. Hope you found this idea, useful and that you might want to try it someday soon! Please if you have any new tips on how to make parties easier to handle and enjoy, feel free to share with us in comments!
If you liked this Frozen Themed Cake Box and Individual Cake Boxes project, you might also LOVE these too!


Til’ next time…


FREE WORKBOOK
Keeping your Sweet Home Organized
Learn how to create intentional habits and simple routines to Keep Your Home Organized. Plus freebies, printables, exclusive content, and tips.
Disclaimer: By clicking on the “Yes” button above you are giving me your consent to collect and use your information according to the law and My Policy Privacy. Zero Spam I promise!