DIY Washi Tape Pencil Holder (super easy)
This post may contain affiliate links. Please read our Disclosure Policy.
With a little creativity and some washi tape rolls, you can turn any container in a pretty and fun Washi Tape Pencil Holder.
This Washi Tape Pencil Holder is such an easy project, made with minutes and adds style and personality to your desk.

How to Make a Washi Tape Pencil Holder
Washi tape is one of my favorite craft supply. It’s easy to use, makes anything prettier and the possibilities are endless.
BUT…
What is washi tape?
Washi tape is a decorating tape usually made from natural fibers such as bamboo or hemp or the bark of trees native to Japan such as mulberry, mitsumata shrub or the gampi tree. The texture may somewhat simulate masking tape’s, washi tape is more delicate and comes in gorgeous designs and strong, durable versatility.
What can I use washi tape for?
Imagination is the limit but to give just a few ideas you use washi tape for:
- As tape for wrapping gifts (using plain papers for example)
- Wall arts
- Custom backgrounds for specific crafts (frames, bookmarks, cards)
- Instant Poster Frames
- Colorful Washi Tape Pencils
- Cover boxes, laptops and notebooks
- Buntings
- Envelopes
- and so much more…
Does washi tape last forever?
Short answer, no.
Washi tape is very similar to masking tape, so it adheres well and can stay wherever it’s placed, especially if it’s quality washi tape. At the same time, it can easily be removed. If you’re making a design on the wall with the tape, I’d say yes it can last a year or more.
So, let’s start this fun project, here we go!.
Supplies:
- 1 container that can be used as a pencil holder
- your favorite combination of washi tapes
- Scissors and cutter
Washi Tape Pencil Holder Tutorial
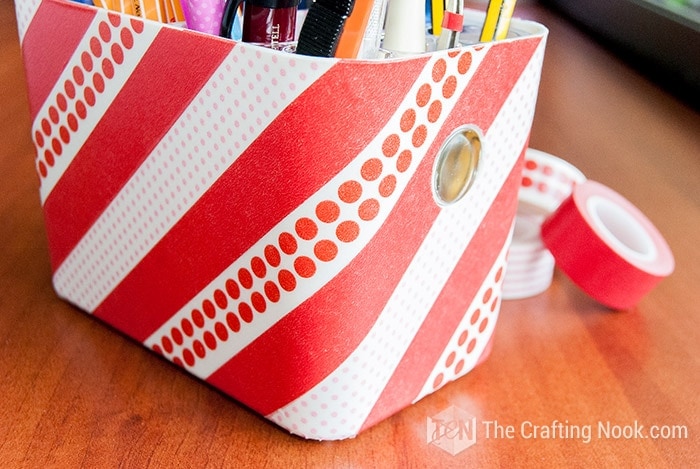
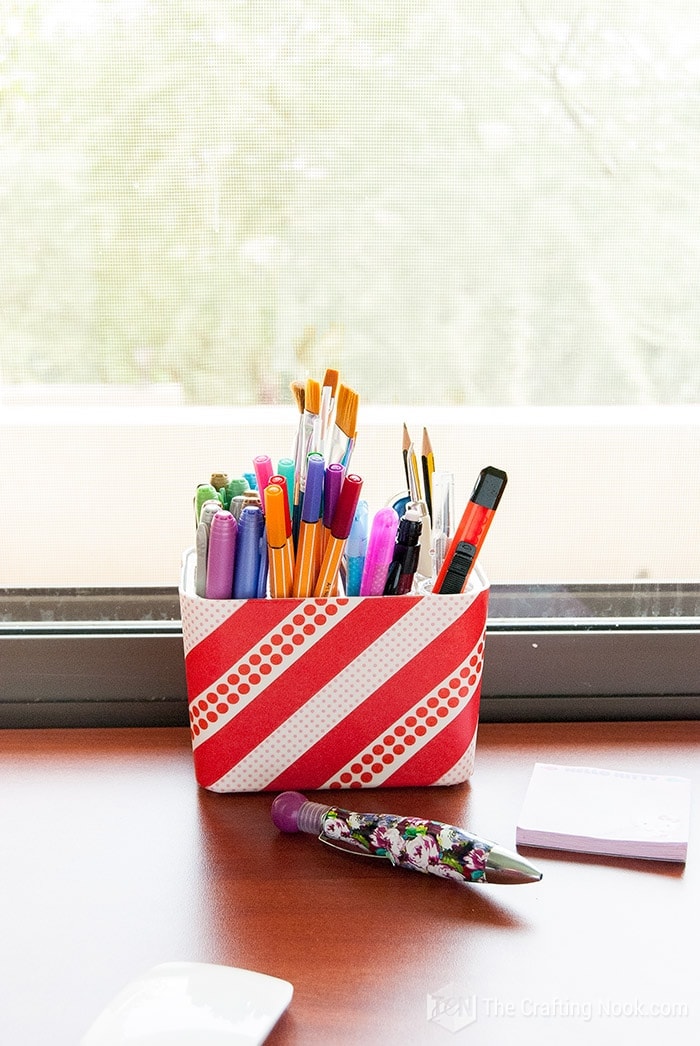
I found this “Remote control Organizer” in a Chinese store and the first thought I had was “This is going to be a perfect Pencil Holder for my desk”. It’s perfect to organize some of my tools such as cutters and brushes there =D. My choice of washi tape was this trio of cute red patterned that would do the magic!
Firstly, clean your container well, so the washi tape will stick properly. Remove dust and any trace of grease.

The decide how your decorating pattern will be.
I decided to place them diagonally on the pencil holder so it would be a bit different. I alternated red, pink dots, red, red dots and so on all over it.

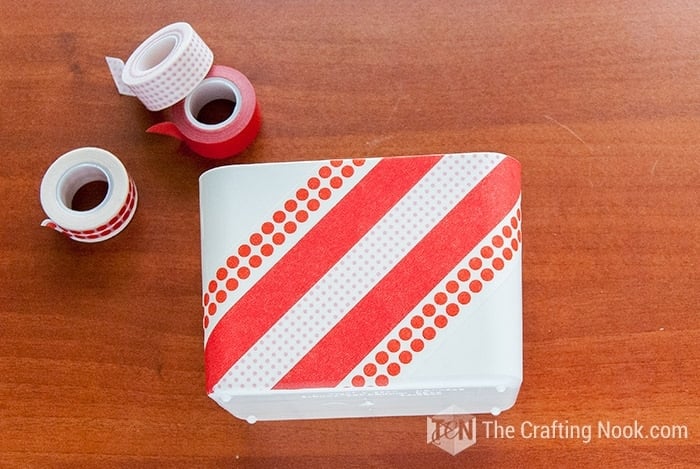
On the wholes I just cut it out with my X-Acto and it looked something like this:
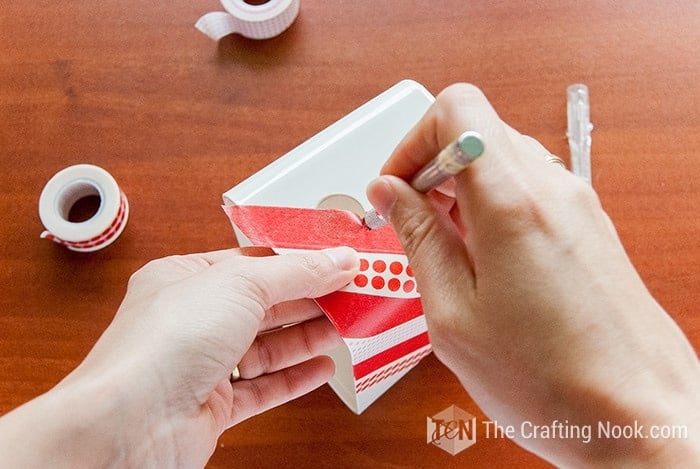

The next step was cutting all the remains out of the edges. It can be done either with a scissor or a cutter.

And here it is. It’s almost done!!!

Finally, I put back the organizer lid and decorated some parts of it too. Silly! but it makes a difference.
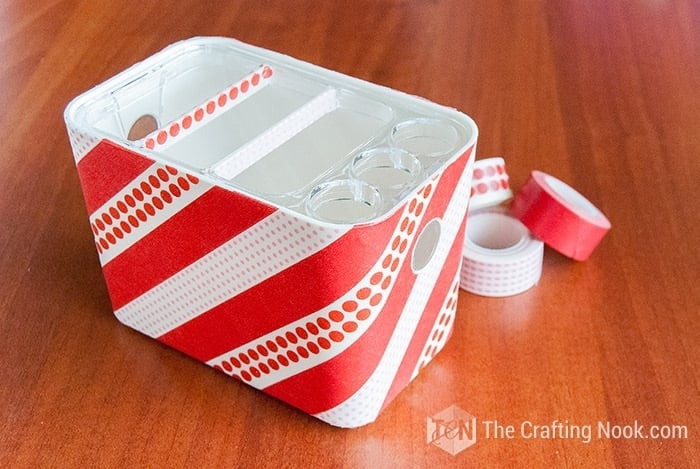

And that’s it! Here you have it! Easy peasy and cute!!!!

I have a temporary desk so it needed some cuteness and love. This helps a lot. Love it!

How about you??? Are you a washi tape fan too???
If you enjoyed this easy and fun project, don’t forget to PIN and share it with Friends!


Washi Tape Projects from my favorite blogger:
- Diy Washi Tape Letters For Sewing Room Decor by Melissa over at Polka Dot Chair.
- DIY Tape Picture Frames by Maxwell over at Design Sponge.
- Washi Tape Your Pencils And Notebooks by Lia Griffith.
If you like this project you can check these other crafty posts for more cute inspirations {click on the images to go to the post}:


What do you think my lovely readers???
Til’ next time…


FREE WORKBOOK
Keeping your Sweet Home Organized
Learn how to create intentional habits and simple routines to Keep Your Home Organized. Plus freebies, printables, exclusive content, and tips.
Disclaimer: By clicking on the “Yes” button above you are giving me your consent to collect and use your information according to the law and My Policy Privacy. Zero Spam I promise!