How to Make a Cute Skirt out of Kids Old Jeans
This post may contain affiliate links. Please read our Disclosure Policy.
Hello everyone! I’m a huge fan of giving a second life to old things. If there is something that I especially love, I always find a way to refashion, repurpose, upcycle, re-use… You get the idea LOL. Of course, when there is no way to do it there are always charity boxes to put them and help other people. Today I’m excited to share with you a cute clothe refashion I made for my little girl as a guest post over at Life After Laudry. I made this cute skirt out of an old 12 month Garanimal jeans {I think they made a mistake on the age in the label LOL but shhh don’t tell}.
How to Make a Cute Skirt out of Kids Old Jeans

My little girl is very thin {believe it or not she eats A LOT}, being 26 months, she can still use 12-18 months pants and skirts because of the elastic on the waist. But some pants just don’t fit anywhere else. That’s the perfect opportunity to turn them into skirts, which means having a new outfit! =P
This is super easy to make, I made it in a couple of hours {even taking pictures}. What you need:
- Jeans
- Some fabric scraps
- Buttons
- Scissors
- Threads
- Pins
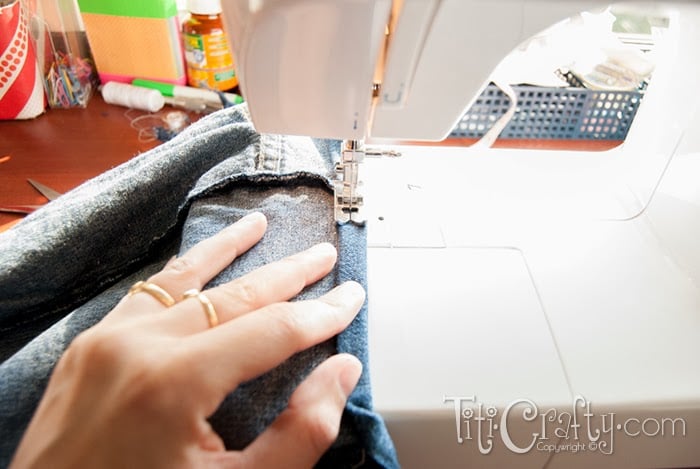
First of all I measured the length I wanted the skirt and cut the excess. Then I unstitched the seam between legs.

Started on the front, by folding over the original stitched crutch piece, and pinned it in place. Since what I had left from the legs wasn’t enough to add a triangle in the front space formed by the legs, I just adjusted the crutch and pinned all the way down. It’s important to make sure it doesn’t malformed the skirt.

I stitched on the right side following the pins.

I cut the remaining fabric on the inside.

For the back I stitched a line from the half way top to the bottom.
For the Hem, with the skirt turned inside out, I turned it under ½ inch, then ironed it, I turned it under another ½ inch to enclose the raw edge, ironed it again and pinned it. I stitch around the edge of the skirt.
There you go! A new skirt!

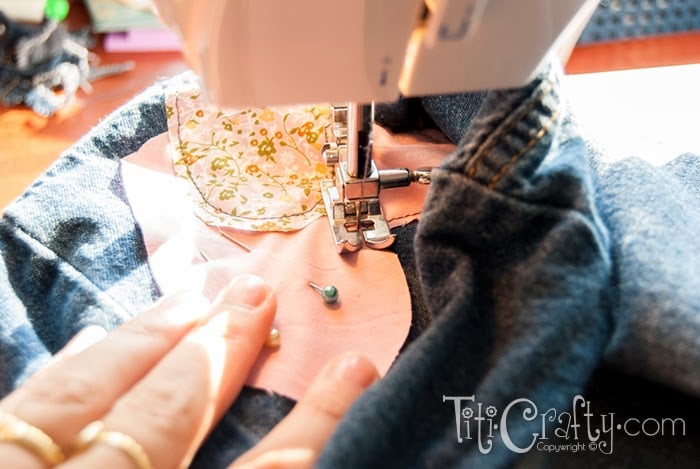
Then I decorated it with a couple of fabric hearts and buttons on the front and a cute pocket on the back.
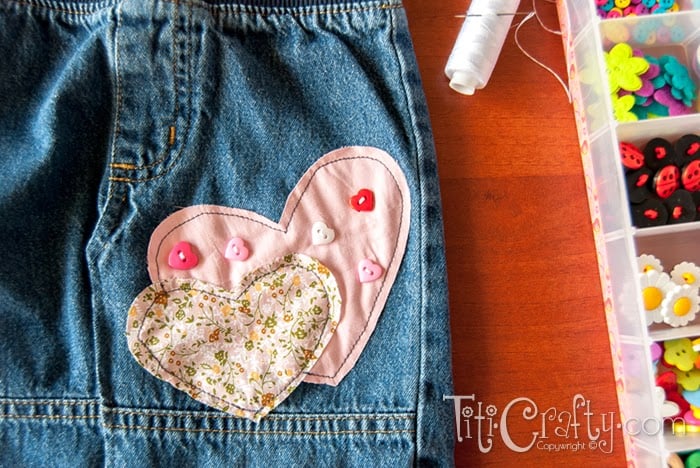
I cut out 2 hearts from 2 different fabrics. I just Folded a piece of fabric draw a half heart against the fold, cut and that’s it, you have a perfect symmetric heart.
I placed them on the skirt and pinned them.

Then I stitched around the edges.
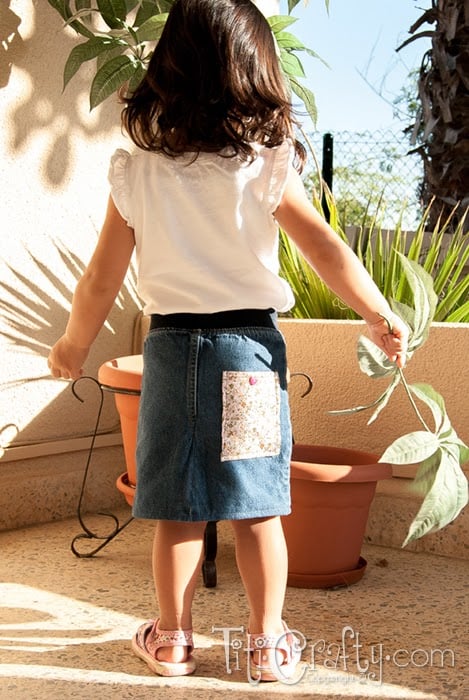
After that, I cut a rectangle from one of the fabrics, made a hem on all 4 sides. I stitched on short side for the opening. Then I pinned it in place on the skirt. I stitched around the other 3 sides.

The final touch was adding some cute heart-shaped buttons on the plain fabric heart and on the pocked.

Tadaaaa! All done!

And my girl loves it!


What do you think???? Easy, isn’t it??? Have done this before????
If you like this project you might also like these too {click on the images}


Til’ next time…


FREE WORKBOOK
Keeping your Sweet Home Organized
Learn how to create intentional habits and simple routines to Keep Your Home Organized. Plus freebies, printables, exclusive content, and tips.
Disclaimer: By clicking on the “Yes” button above you are giving me your consent to collect and use your information according to the law and My Policy Privacy. Zero Spam I promise!
This is a clever way to reuse jeans, especially ones with holes in the knees. Thanks for sharing!
Very cute! I have never made a skirt from the jeans, but I have made jean purses from them!
Making purses is a lot of fun too. I have made them too but long before blogging. I might give it a try again soon. Thanks for the idea and for your sweet visit!
XOXO
Awww that is a cute skirt and I love the little hearts! A nice touch. Thanks for linking up to Snickerdoodle Sunday.
Thanks so much! It was a fun project, I wanted to put more stuff but then I said wait! Let’s keep some ideas for another one LOL. Thanks again for your sweet visit!
XOXO
I love this! I pinned it. I can;t wait until our spare bedroom remodel is done. I need my sewing space back!
Yayyy Glad you like it! Thansk for the pin and your sweet visit!
XOXO