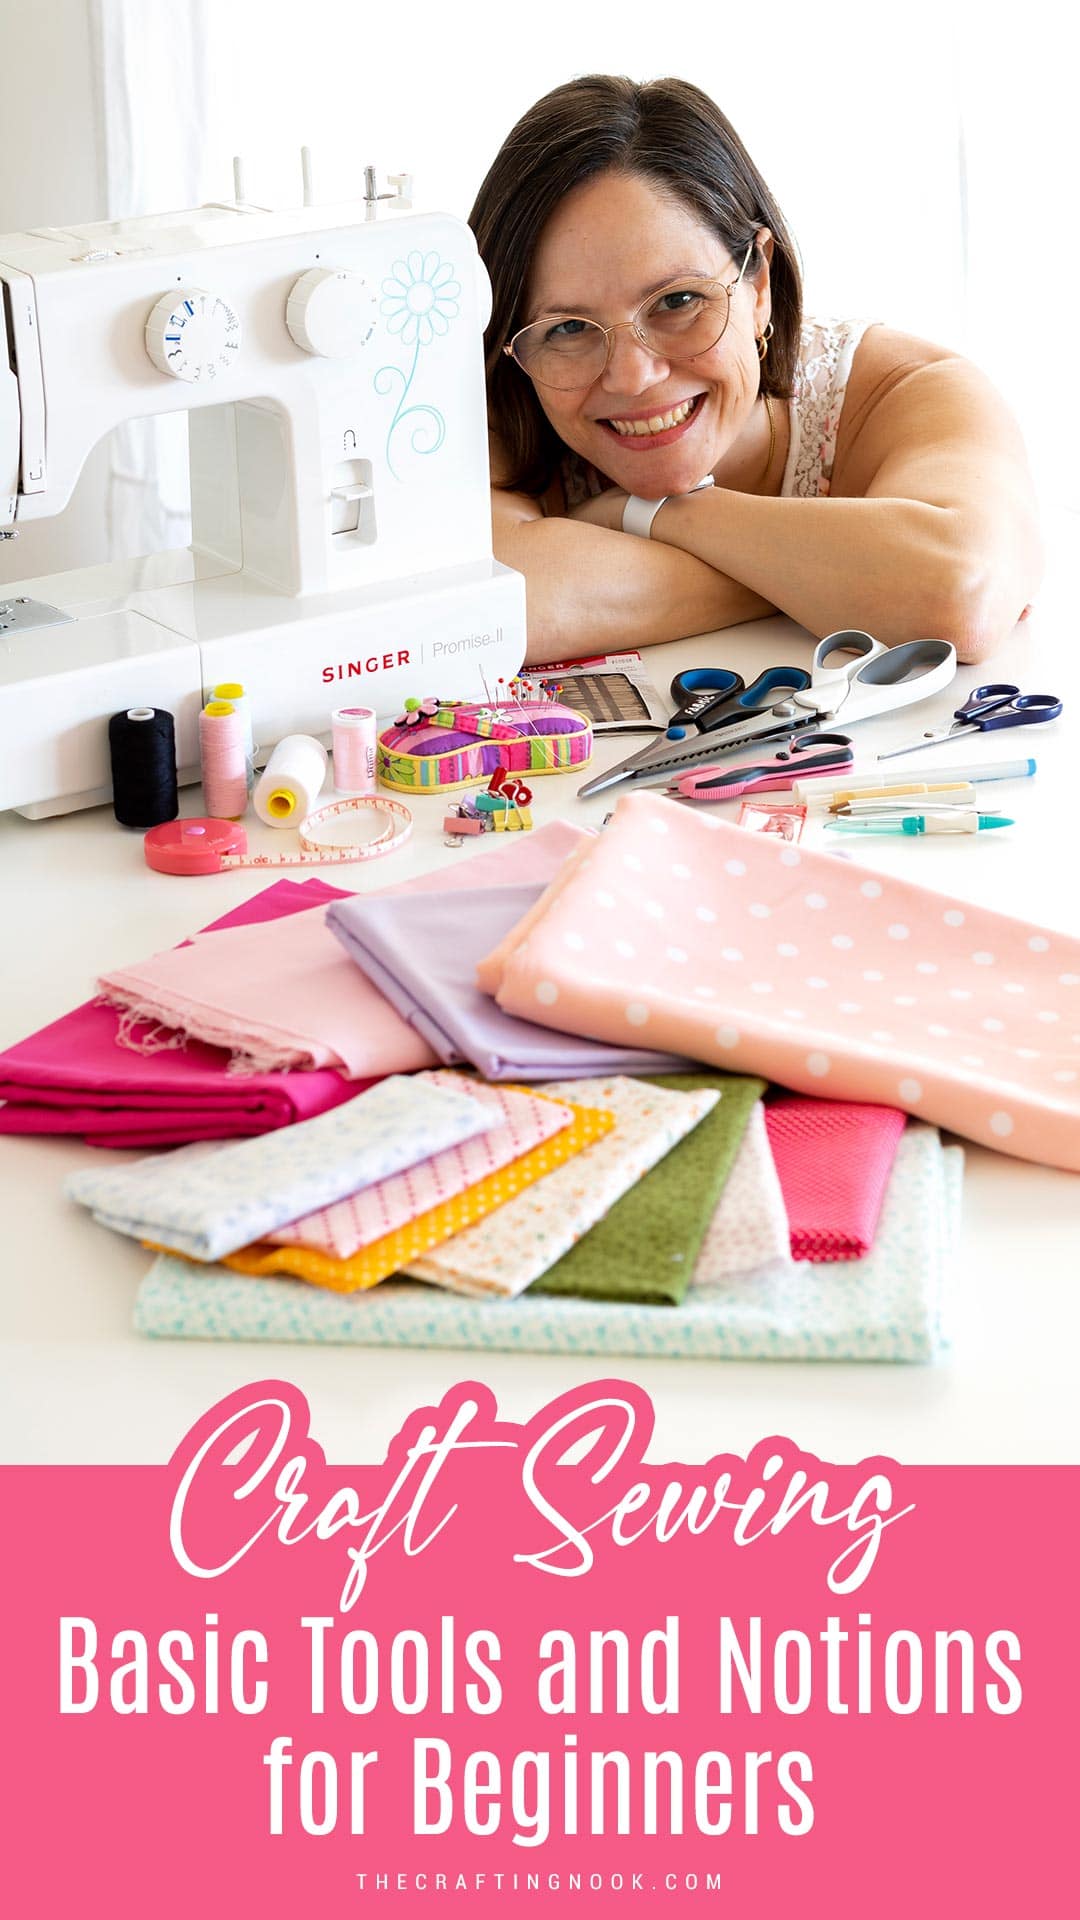
Craft Sewing Basic Tools and Notions for Beginners
This post may contain affiliate links. Please read our Disclosure Policy.
Learn all the craft sewing basic tools and notions every beginner sewist in DIY and crafting needs. Start your sewing journey effortlessly right here!
Today I will explain everything you need to know to begin doing craft sewing. Get ready to enter a fantastic world of imagination and creativity with fabric.
Sewing might seem scary at first, but once you start, you can make all sorts of cool stuff. The first thing to know is that you’ll need basic tools like a sewing machine (can sew by hand if you don’t have one), fabric scissors, pins, thread, and needles.
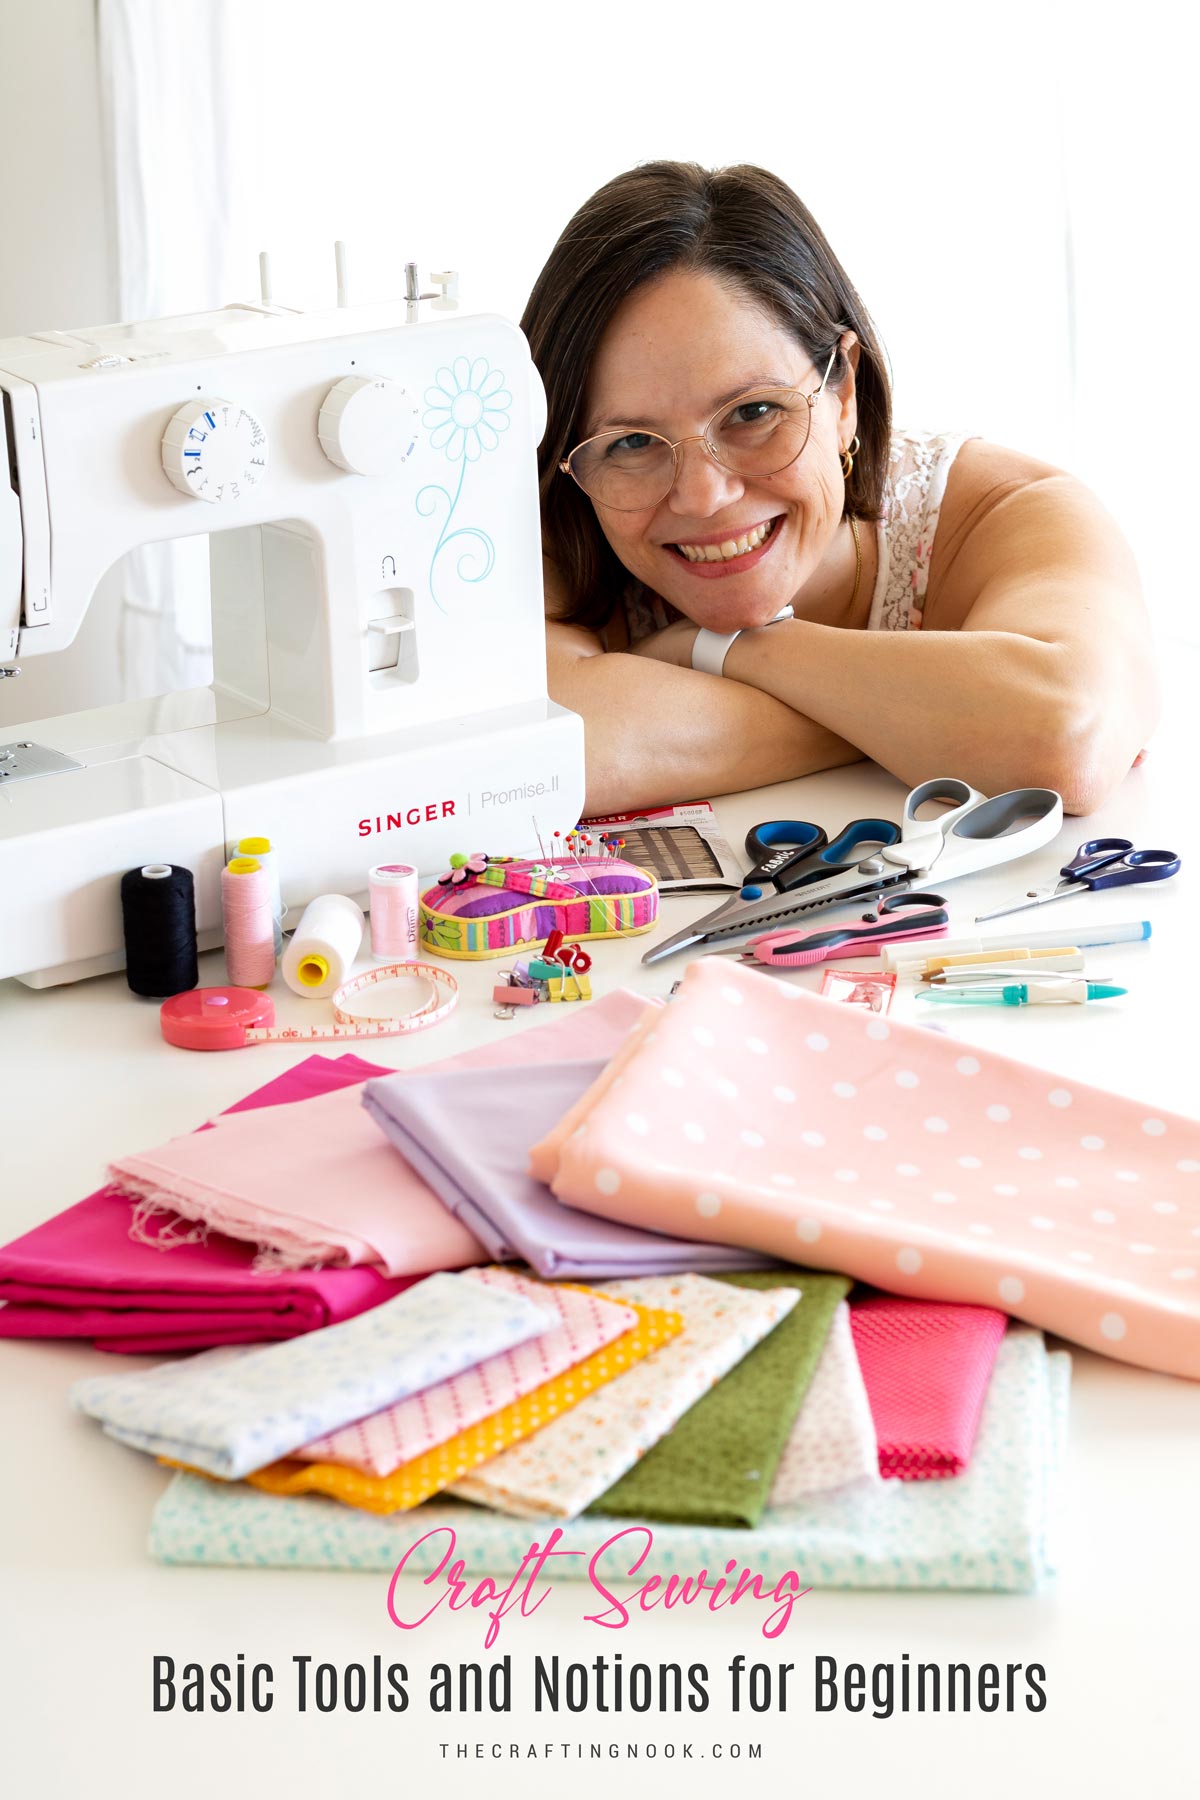
Table of Contents
Sewing Basic Tools and Notions for Crafts
Sewing has always been a part of my life. My early memories about sewing were when I was around 7 years old and my mom had gotten a sewing machine with payment plans so she could make clothing for me and herself.
I remember sitting around watching her sew, making me dresses, shirts, shorts, and even my school uniform. My interest grew by the day but my mom wouldn’t even let me get close to the machine. Oh my, I wanted to use it so badly.
I had tons of Barbies and baby dolls screaming for new outfits and I was determent to make some. I started sewing by hand. My mom helped me create some sort of pattern for the Barbies and baby dolls and I would just pick up some scraps and start creating.
With time my mom started to trust me more with the sewing machine and taught me how to use it. And that was it, I was hooked! I wouldn’t stop at any challenge.
From there I started following outfit patterns, one more advanced than the previous one, and testing materials, and techniques until I dived into the craft sewing.
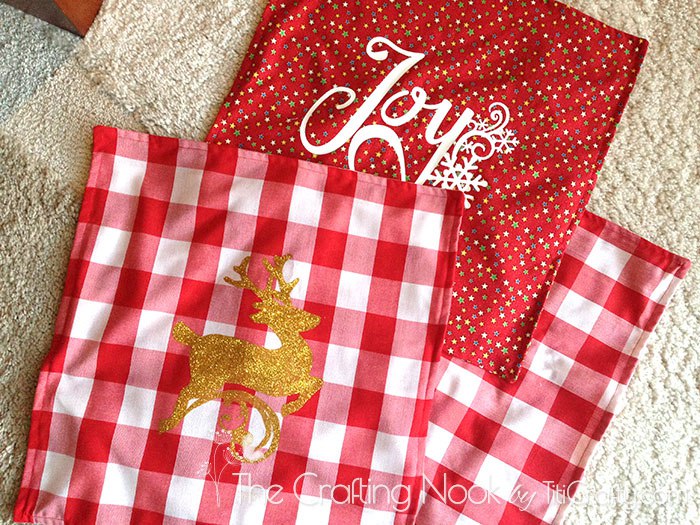
That’s when I found my happy place. I understood that I loved sewing but garments were not my cup of tea, crafting was. So I started creating pillows, baskets, cushions, handbags, and whatever I could think of.
That’s why I wanted to share this article with you. If you are passionate about crafts, sewing can be very helpful and you can start with only the basics and go from there. When you sew for crafts you don’t need as many tools as when sewing for outfits.
Here are some things to think about when starting sewing:
The fabric. There are so many options available that it can be overwhelming. But don’t worry, here are some recommended fabrics for beginners: cotton, linen, and flannel. These are easy to handle and sew, so they are ideal for your first projects.
If you’re new to sewing, before you begin, make sure you have a pattern or a clear idea of what you want to create. The patterns are like that will guide you step by step in creating your project. You can find free patterns on the internet or buy them at fabric stores and haberdashery stores.
Once you have your pattern and your fabric, make sure to carefully read and follow the instructions. Do not miss any steps. It might be tempting to skip them, but every step is important for a successful end result.
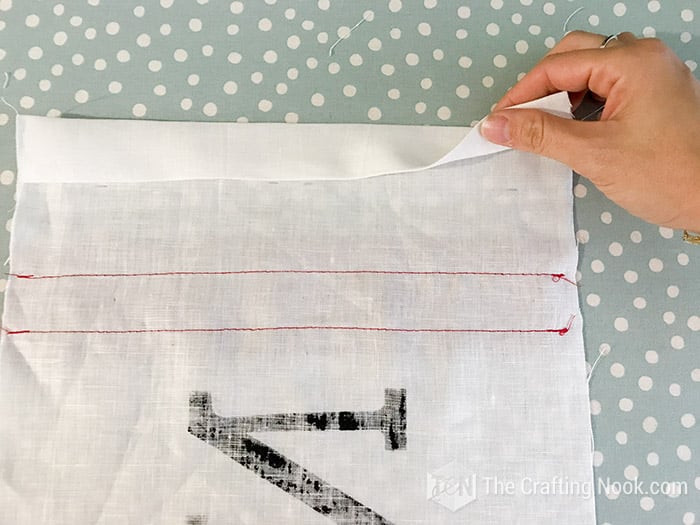
After you have cut the fabric following the pattern, it’s time to sew. Set up your sewing machine by using the right thread and adjusting the tension as the manufacturer suggests. If you are sewing with your hands, put the thread through the needle and make a knot at the end of the thread.
The first few steps
When you begin sewing, make sure you stay comfortable and move at a steady pace. When using a sewing machine, make sure to guide the fabric carefully without yanking it. If you are sewing with your hands, make sure your stitches are strong but not pulled too tightly.
If you make a mistake, don’t worry, it’s okay. When you sew, you learn new things and sometimes make mistakes. If there is a mistake, undo the stitches and try again. Keep practicing because it will make you better, so don’t feel discouraged if you make mistakes.
Once you are done sewing your project, you might have to do some final touches. For instance, you can hem the edges so they look clean and professional. You can also put on buttons, zippers, or other decorations that you like.
Just remember that sewing is a type of art, so don’t be afraid to try new things and enjoy yourself. You can make your projects special with different colors, patterns, and details. Use your imagination to let it fly.
Last but not least, don’t be afraid to ask for help if you need it. There are many online communities and local groups where you can find support and inspiration. Sewing is an activity that brings people together, so don’t hesitate to share your creations and learn from others.
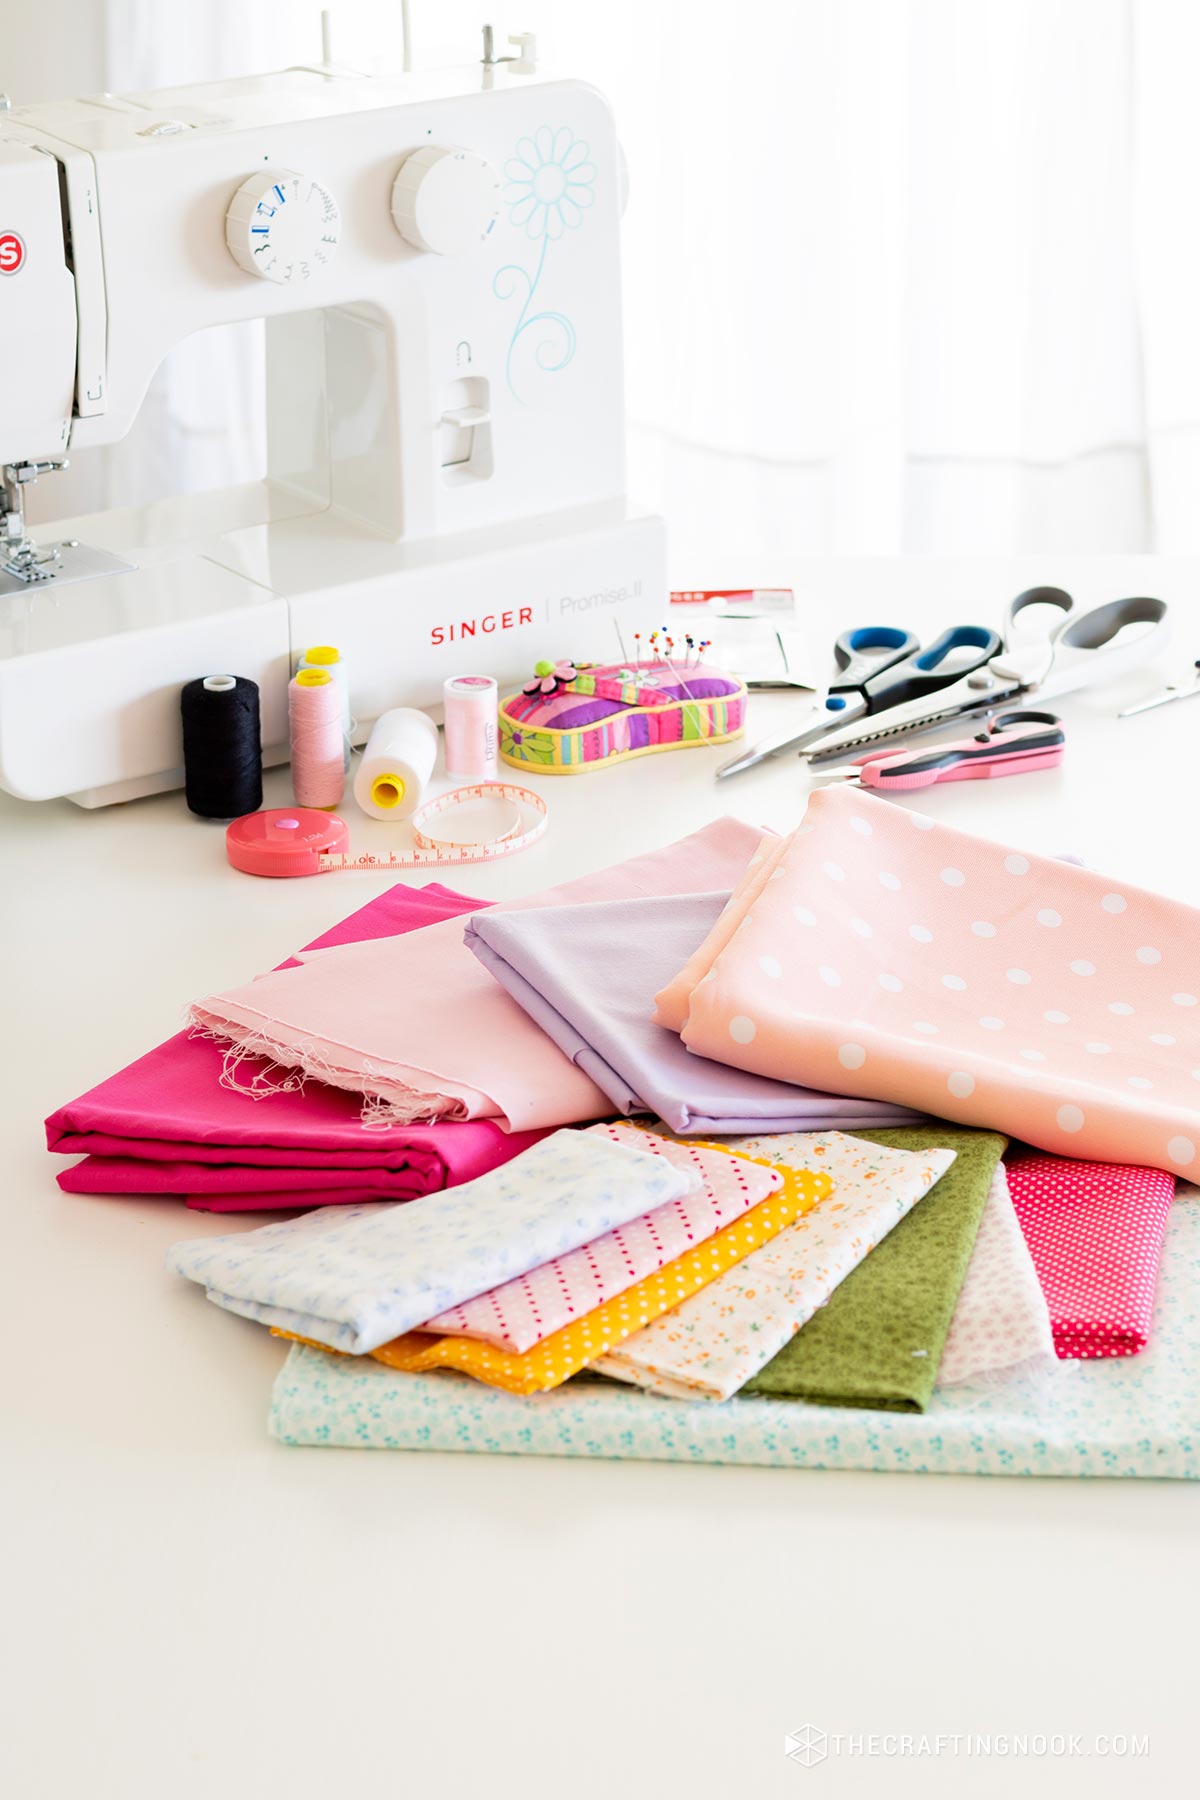
Essential Craft Sewing Tools
These are the basic tools you will need to get started with sewing. As you gain more experience, you’ll be able to explore and add more tools to your collection, such as presser feet, thread cutters, sewing rulers, and more. But don’t worry, these basic tools will get you far on your first craft sewing projects!
Keep in mind that the tools you choose will depend on your personal needs and preferences. As you spend more time practicing sewing, you’ll be able to experiment with different types of machines, scissors, and needles to find the ones that work best for your sewing projects.
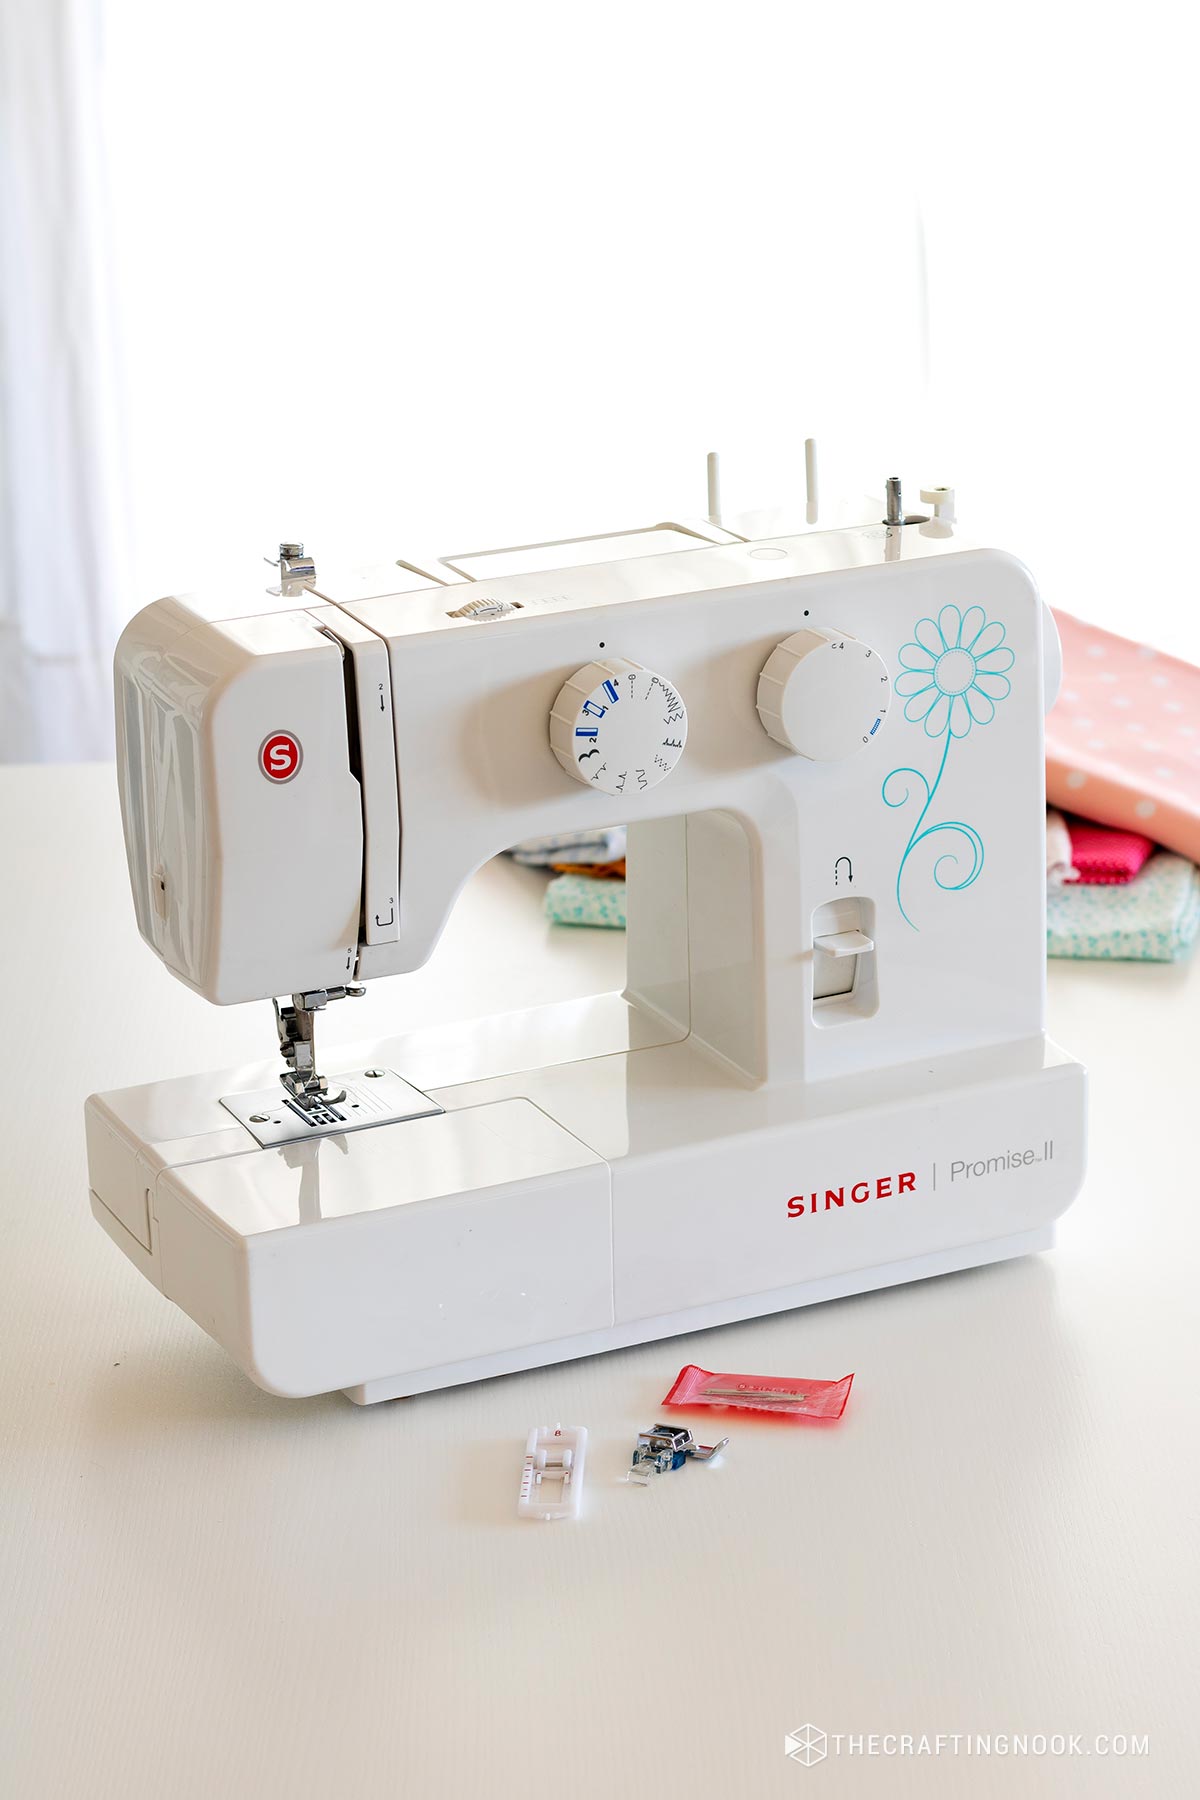
Sewing machine
It is an essential tool for larger and faster sewing projects. It helps you to easily and evenly sew fabrics together. Although you don’t really need it in the beginning, having a sewing machine will make your sewing tasks easier as you get better at sewing.
This one below is the one I have. The most basic one. With that, I have created envelope pillow covers, zippered pillow covers, and even added appliques to pillow covers. I also made my sofa slipcovers and many other projects.
Types of sewing machines:
Mechanical sewing machine: This is the simplest and most commonly used type of sewing machine. It works by using a lever or a pedal to control how fast the sewing machine sews. Mechanical machines usually come with a variety of preset stitches and are great for beginners.
Electronic sewing machine: This is a type of sewing machine that has have additional functions and greater precision. They have electronic controls for adjusting stitch length and width, as well as more advanced stitch selections. Some electronic machines also have digital displays for ease of use.
Overlock or serger sewing machine: This is a type of machine that is mainly used to make the edges of fabrics look neat and professional. You can do cutting, sewing, and overlocking all at once to make strong stitches that stop fabrics from unraveling. Overlock machines are frequently used to make clothes.
Free-arm sewing machine: This is a machine with a special arm-shaped extension that lets you sew in tight or curved places, like the sleeves or hems of pants. The extra arm helps you reach difficult places that are hard to get to, which is very helpful when sewing clothes.
Most common types of stitches on sewing machines
These are only a few of the simple stitches you can see on sewing machines. Additionally, many machines have different types of stitches for various sewing techniques, including decorative stitches, stretch stitches, and specialty stitches. I suggest looking at your sewing machine manual for details about the different stitches and how to use them.
Keep in mind that the type of stitches you pick will vary depending on the project you’re working on. Try out different stitches to get the effect you want and make the most of your sewing machine’s capabilities.
Straight stitch: it’s a basic and most commonly used stitch on sewing machines. This is used to connect fabrics and make straight lines. This is great for regular sewing projects like making clothes, bags, and accessories.
The zigzag stitch: it’s a stitch that goes back and forth in a zigzag pattern. It is used to stop clothes from getting frayed and make the seams stretchy. It’s great for working with fabrics that stretch, sewing knitwear hems, and applying borders on decorating projects.
Overcast stitch, also called embroidery stitch: it’s like a smaller and tighter version of the zigzag stitch. This is used to keep fabrics’ edges safe and stop them from fraying. It is particularly helpful for sewing projects that will not be bent or sewn again.
The satin stitch: it’s a type of sewing stitch that looks like a series of closely spaced stitches. It’s often used to create borders or decorative seams. It can be a small straight stitch or a tight zigzag stitch. It is used to enhance details in clothing, fabric applications and decorating projects.
Automatic Buttonhole Stitch: Some sewing machines have an automatic buttonhole feature that creates perfect buttonholes with the push of a button. This stitch is essential for making buttonholes on clothing and other projects that require button openings.
The presser foot
The presser foot is a part that is a piece found at the bottom of the needle of a sewing machine.
Its main function is to hold the fabric evenly while sewing, allowing the stitches to be precise and regular.
I only have the basic ones for now. I haven’t had the need to buy others. Usually, I get new stuff as a project requires so I don’t get stuffed with tools I don’t use. I forgot to add to the photo the standard presser as it was installed on the machine. You can see it in the photo above.
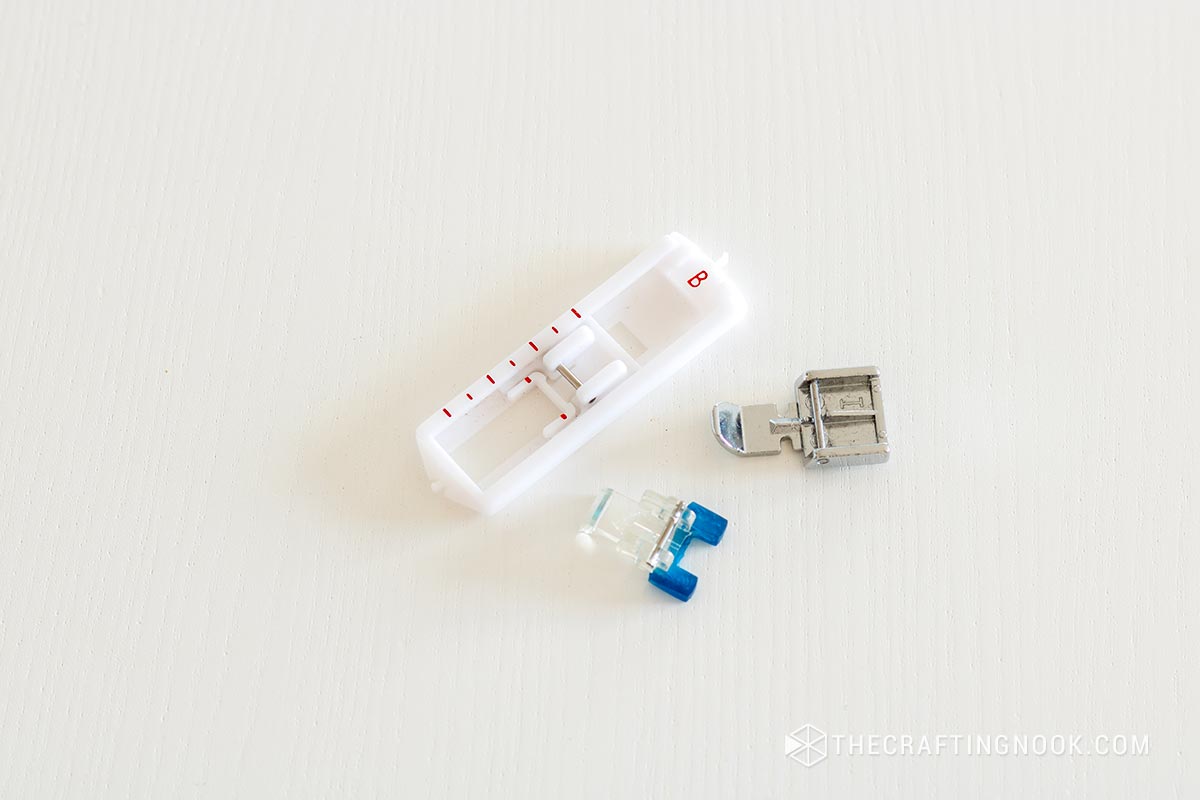
Presser feet come in different shapes and sizes, and each one is designed for a specific purpose.
Types of Presser Feet and When to Use Them:
Standard (General Purpose) Presser Foot: it’s the one that comes with most sewing machines when you buy them. This can be used for sewing straight and zigzag lines on many different types of fabrics. It is the standard choice for simple projects.
Zipper Foot: These presser feet have a slot on the bottom that allows you to sew precisely around zippers. They help put zippers on clothes, bags, and other things that need zippers.
Buttonhole Presser Foot: This presser foot is specifically designed for creating buttonholes on fabrics. It is necessary for projects that require buttonholes, such as shirts and blouses.
Rolled Hem Presser Foot: This presser foot has a groove on the bottom that helps roll the edge of the fabric twice to create a clean, rolled hem. It is ideal for projects that require decorative hems.
Button Sewing Presser Foot: This presser foot is used to sew buttons into place quickly and evenly. Some of them have a built-in buttonhole feature to make holes for buttons.
Blind Stitch Foot: This foot is perfect for blind hemming garments. Conceals stitches on the front of the fabric, creating a clean, professional finish.
Quilting Presser Foot: Quilting presser feet have a guide in the center that helps keep stitches even when quilting. They are ideal for patchwork and quilting projects.
Double Feed Presser Feet: These presser feet have additional feed teeth on top that help feed thicker, more difficult-to-handle fabrics, such as leather or plush fabric.
How to choose the right presser foot:
Choosing a presser foot for sewing will depend on the project you are working on and the kind of sewing you want to do. Check your sewing machine manual for different presser feet that are available and what they are used for.
If you are new to sewing, you might not require a complete set of special presser feet initially. However, as you gain experience, you might consider buying a few of them to enhance your sewing abilities.
Doing lots of practice and trying different things will help you figure out which presser feet work best for your projects.
Fabric scissors or Shears
These scissors are special because they have sharp blades that are made to cut fabric very neatly.
You need them to cut your fabric and thread. I would suggest you buy specific sewing scissors if you can afford them: they last nearly forever and can be sharpened when they start cutting less.
Dimensions matter! To cut fabrics, the longer the better. You should have a little scissor too, just to cut thread tails and avoid cutting fabric too, in the meantime!
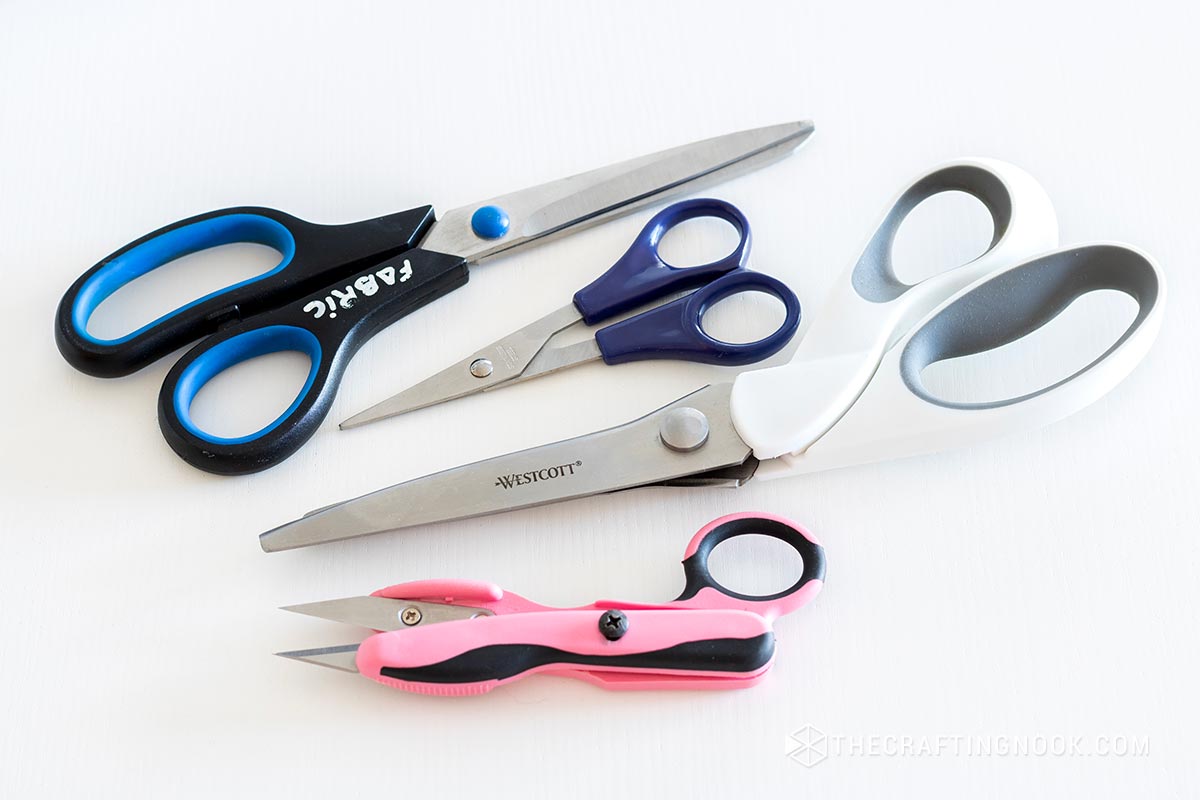
A Warning: Please never use your pair of scissors for anything different from fabric (or thread) do not use these scissors to cut paper (i.e. cutting patterns), plastic or other materials, or anything else, because they will lose their sharpening soon!
You need fabric scissors to cut your projects following the pattern correctly and make sure the edges look neat and tidy.
You can see mine is labeled and everybody in my home knows they cannot touch that scissor if they want a long life!
Types of scissors:
Fabric scissors: These are the most used scissors in sewing. They have sharp, pointed blades that allow you to cut fabrics with precision. Fabric scissors are longer than regular scissors, which helps make straight and smooth cuts.
Sewing Scissors: These are smaller, more manageable scissors that are used to cut threads, make trims, and create more precise details in sewing projects. They are ideal for more delicate and detailed work.
Zigzag scissors: These scissors have serrated blades instead of straight blades. They are used to cut fabrics that tend to fray, such as knitted fabrics or loose fabrics. The zigzag cut helps prevent fraying.
Rotary Cutter and cutting mat:
A Rotary Cutter is a cutting tool for fabrics. It is a sharp blade wheel, with a handle, used to slice through multiple layers of fabric and it looks a lot like a pizza cutter. This tool is great for straight cuts.
This tool is mostly used by patchworkers for cutting fabric with a special quilting ruler on a self-healing mat designed for the purpose. But for me, it’s been a huge help when cutting fabric for pillows, for example. Straight perfect cuts!

There are different sizes for rotary cutters being 45 mm and 60 mm rotary cutter the most common. the 45mm is used for simple projects while the 60mm is used for larger cutting jobs, the larger size means that they can cut up to 8 layers of fabric.
Needles
You’ll need needles for sewing by hand and for domestic sewing machines. You can recognize the sewing machine ones because the eye is near the tip of the needle and the hand sewing kind has it on the other end of the shaft.
Sewing needles come in different sizes and thicknesses. Use thinner needles for thinner fabrics and thicker needles for heavier fabrics. If you’re sewing by hand, make sure you have a selection of needles on hand to suit different projects.
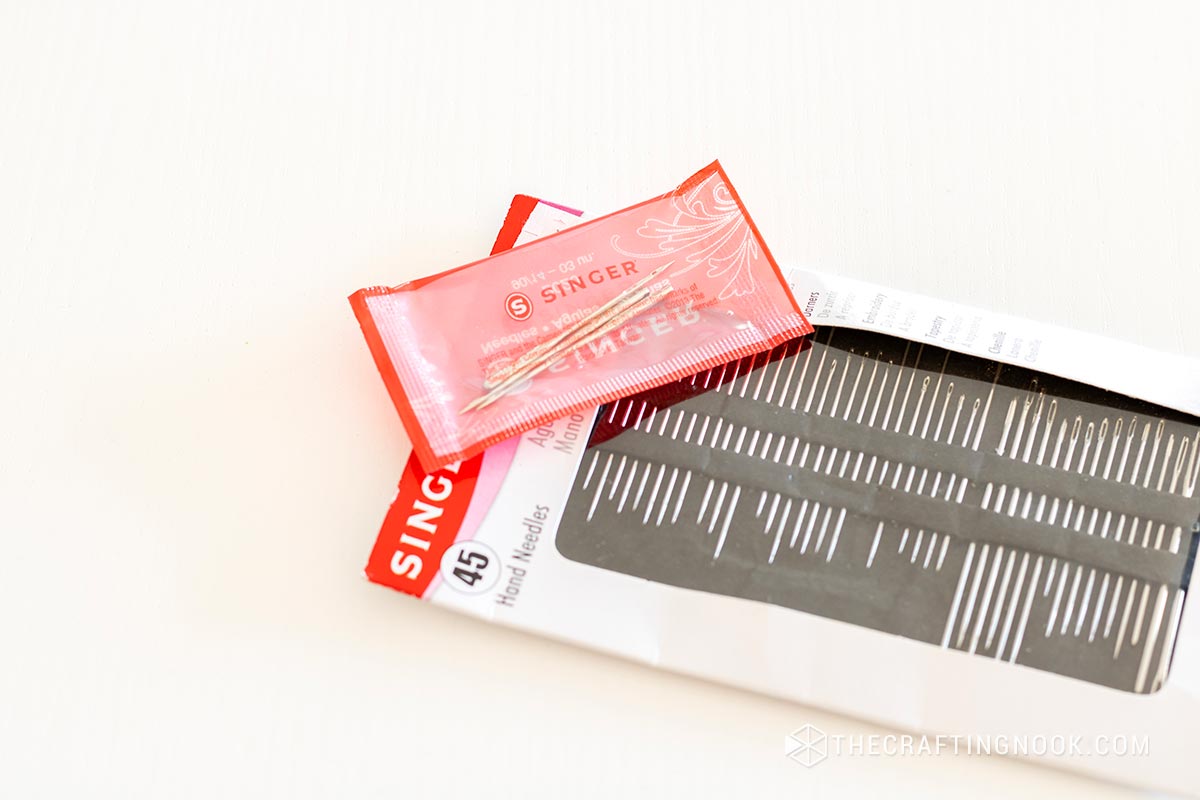
Tip.1: you need to change your sewing machine needle more often than you can think (or actually do), at least every time you start a new project!
Tip.2: use a specific kind of sewing machine needle for every type of fabric: there are denim needles, ballpoint needles for knits/stretch, and double/triple needles; choose a proper size too, based on your fabric thickness.
Types of needles:
Sewing Machine Needles: These needles are specifically designed to be used in sewing machines. They come in different thicknesses and types, such as universal needles, stretch fabric needles, denim needles, etc. Choose the appropriate needle depending on the type of fabric you are using.
Hand sewing needles: These are needles used for hand sewing. Like sewing machine needles, they come in different sizes and thicknesses. You can find embroidery needles, leather sewing needles, knitting needles, among others.
Overlocker Needles: These needles are designed specifically for use on overlock or overlock machines. They are thicker and stronger than regular sewing machine needles due to the additional cutting and overlocking functions.
How to choose the needle according to the type of fabric
Choosing the right needle for the type of fabric is essential to obtain optimal results in your sewing projects. Here are some tips for selecting the correct needle:
Needle size: Needles come in different sizes, identified by a number. A smaller needle number indicates a thinner needle, while a larger number indicates a thicker needle.
As a general rule, use thinner needles for thinner fabrics and thicker needles for heavier fabrics. For example, a size 70/10 needle will work well for lightweight fabrics like cotton, while a size 100/16 needle will be better suited for heavy fabrics like denim.
Needle type: In addition to size, it is also important to consider the type of needle depending on the fabric you are using. Here are some common needle types and the fabrics they are best suited for:
Universal Needle: This is a versatile needle that works well with most medium-weight fabrics, such as cotton, linen, and polyester blends. It is a good option if you are not sure which needle to use.
Stretch Fabric Needle: This needle has a ball or twin ball tip that prevents needle breakage when sewing stretch fabrics, such as lycra or jersey. It allows the needle to slide smoothly between the fibers without damaging the fabric.
Leather Needle: These needles have a sharp, durable tip that can easily penetrate thicker, tougher materials such as leather and suede. They are also suitable for working with vinyl and similar synthetic fabrics.
Delicate Fabric Needle: This needle has a very sharp, thin tip, designed specifically for delicate, lightweight fabrics, such as silk and satin. Helps prevent fiber damage and leaves clean, almost invisible stitches.
Trial and error: It’s always a good idea to do a test on a piece of fabric before sewing on the final project. This will allow you to evaluate how the needle glides through the fabric and how the stitches look.
If you see big holes or the fabric gets really frayed, you might need to use a smaller needle. If the needle doesn’t go through the fabric easily or the stitches look tight, you can use a thicker needle.
Make sure to change the needle often. Using a dull needle can damage the fabric and affect the quality of the stitches you make. Also, if you are working on big or complicated projects, make sure to have multiple needles that are the same size and type ready to use. This will prevent any interruptions or delays during your work if you need to change needles.
Pins
Pins are small needles with heads on one end. They are used to hold fabrics in place before sewing so they don’t move around. Pins are really helpful when working with patterns because they let you put fabric pieces together before sewing them.
Pins are meant to keep the fabric in place while cutting or sewing; you can buy the all-metal kind or the ones with colored heads: just pay attention to choosing the glass head ones versus the plastic head (that will melt on your fabric the first time you’ll press above them with your iron!)
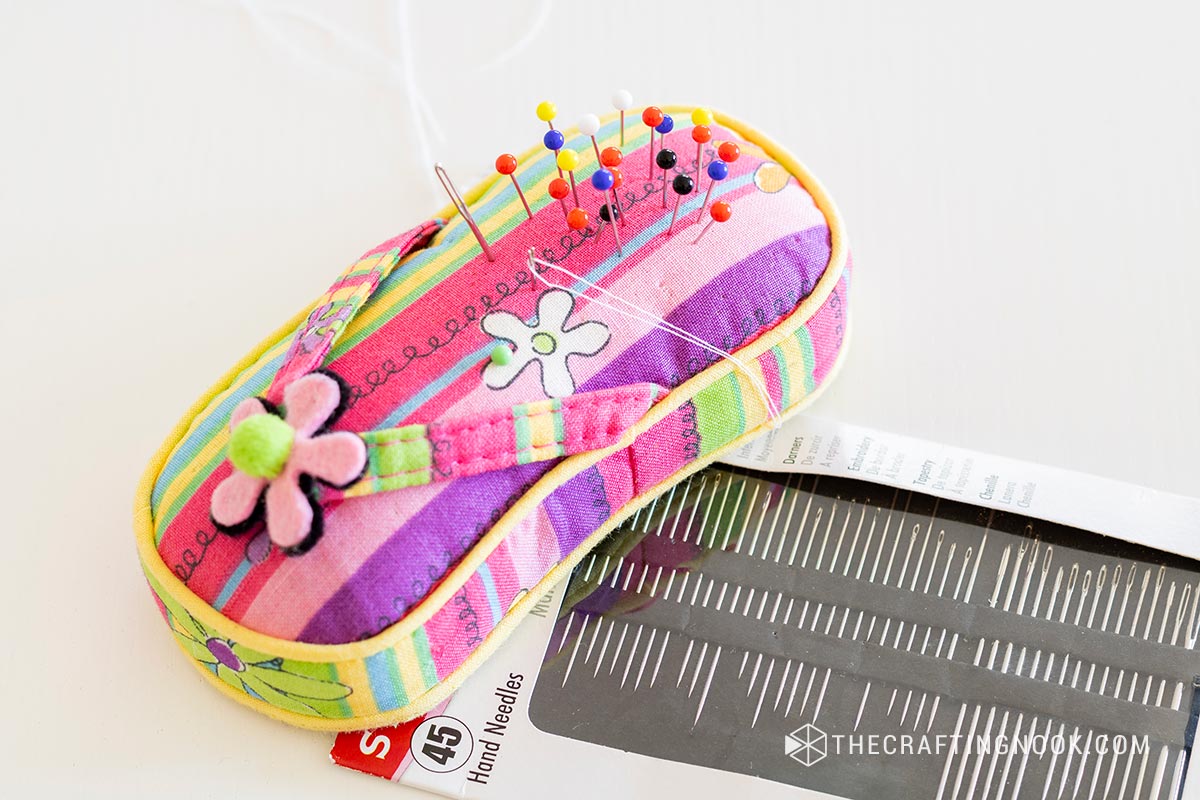
There are different-sized pins both in length and thickness, to start just choose the regular ones!
To collect your pins, you can use a repurposed box/can/jar or create a nice pincushion, better if it has a built-in sharpening feature!
Thread
You can’t sew without threads!
Thread is one of the most basic and essential elements in sewing. It is used to join fabrics using stitches. Make sure you choose the right thread for your project, taking into account the thickness and color. Use quality threads for long-lasting results.
The most used threads are cotton or polyester threads, but you can find also nylon and wooly nylon (used in sergers), metallic, silk, rayon…
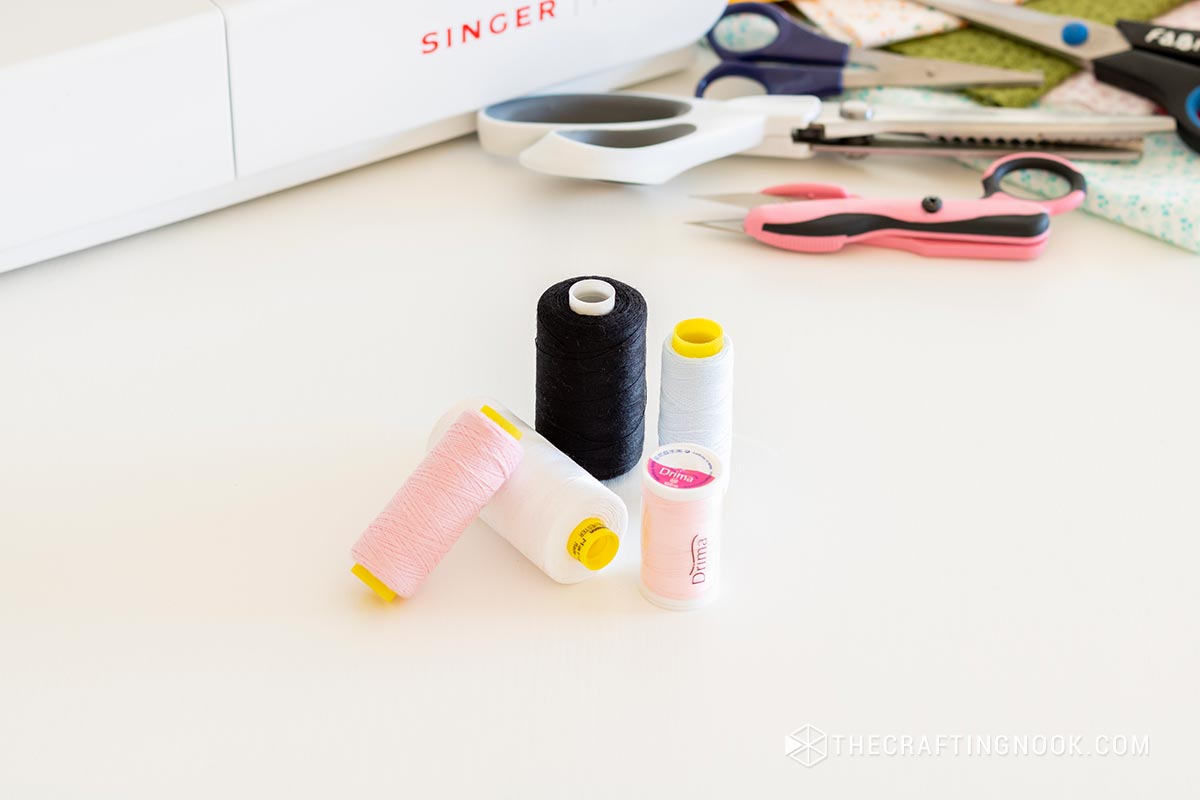
The other thing to look at is the thickness of the thread; the most used is weight n°50, which means that 50 km of this thread weighs 1 Kg.
Tip: Use the same thread kind on both spoon and bobbin, except when using embroidery thread or denim hem thread; this will minimize the hazard of thread breaking.
THIMBLE AND THREADER
While they’re designed for hand sewing, these sewing tools are needful for sewing by machine too.
The thimble goes on your middle fingertip to protect it while you push on your needle. I use it while I am fixing thread tails left from the sewing machine.
The threader is useful for threading any kind of needle (for sewing by hand or by machine). You put it in the eye of the needle, then thread it and pull it back, so it threads your needle.
Measuring tape
You need a flexible tape measure to measure fabric and get the right size. This will help you cut the pieces the right size and keep them accurate in your projects.

Depending on your country, you can use a measuring tape with centimeters or inches (some have both, one on each side, while the others have cm on both sides).
As you can guess, they’re used to take measurements, mostly on curvy lines (like circumferences and anybody’s measure).
RULERS
You can use any rulers you like, they’re useful to take straight measurements (like while adjusting your patterns).
I love transparent so you can look through and see what’s below. I have a metallic one too (this is longer and it’s good to measure fabric from the bolt), this is newer – no need to have one but it’s useful.
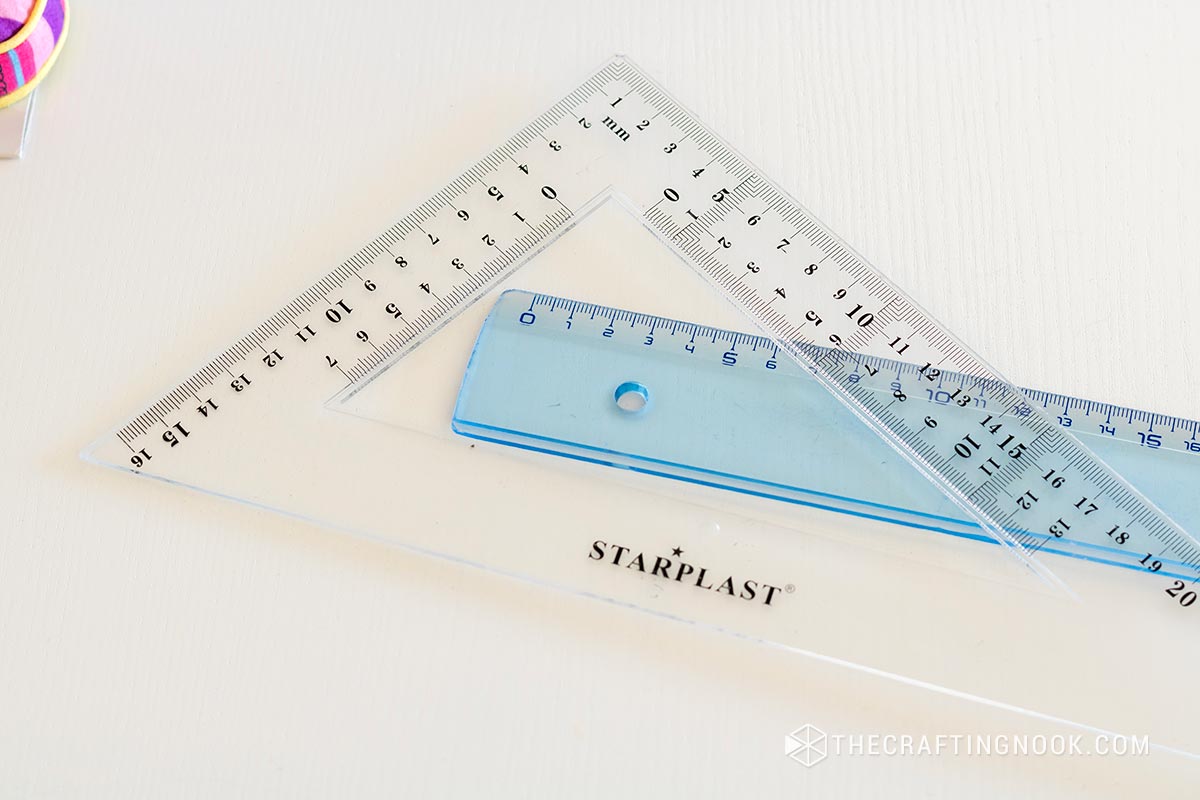
You could desire a squared quilt ruler but be warned: they’re quite costly. I have some triangular squared rulers from school, so I’m using them (one has 45° angles while the other is a 60° – 30°).
seam ripper and Tweezers
Seam ripper is a little tool that has a pointy sharp tip and is used to undo stitches. If you make a mistake when sewing or need to remove a stitch, a seam ripper is a tool that can help you do it carefully without damaging the fabric.
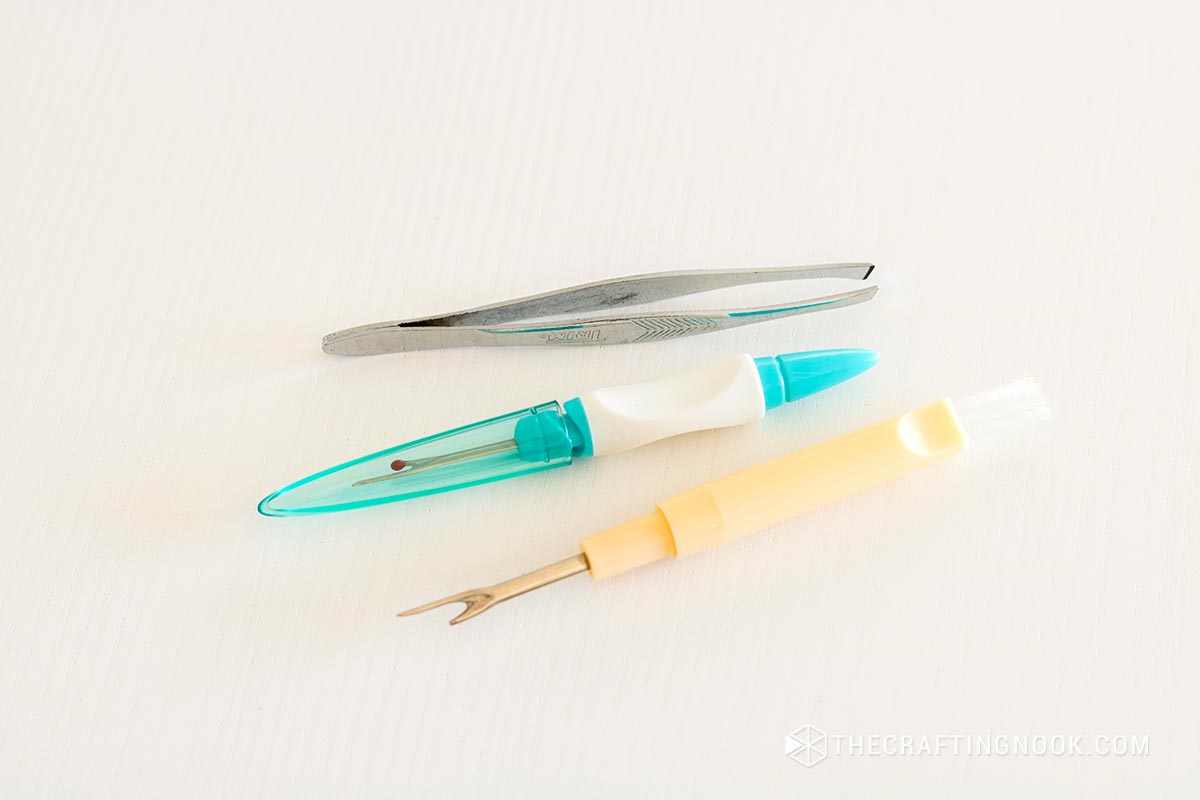
Seam Ripper is your best friend, believe me, or not! His primary purpose is to cut seams, both wrong seams (think when you sew together wrong sides instead of Right Sides Facing… how many times) or existing seams on garments to be refashioned. You’ll find it useful to open your buttonholes if you’ve made them with a sewing machine!
Tweezers come with Sergers for a reason: you’ll find them essential to thread your needles and loopers unless you have really tiny fingers.
Fabric Chalk, Pencil, and Marking pens
There are some really awesome markers that either face with time (really short time) or with the first wash. I love these markers because in my opinion are way more precise than chalk. However, you can alternatively use Frixion Peens. They are useful to transfer pattern notches onto light-colored fabrics. Maybe you can find these ballpoint gel pens on your children’s pencil case. They’re erasable pens that have a side feature: they disappear with heat.
Tip: always check on scraps before using them in a place that you can see from the outside of your garment
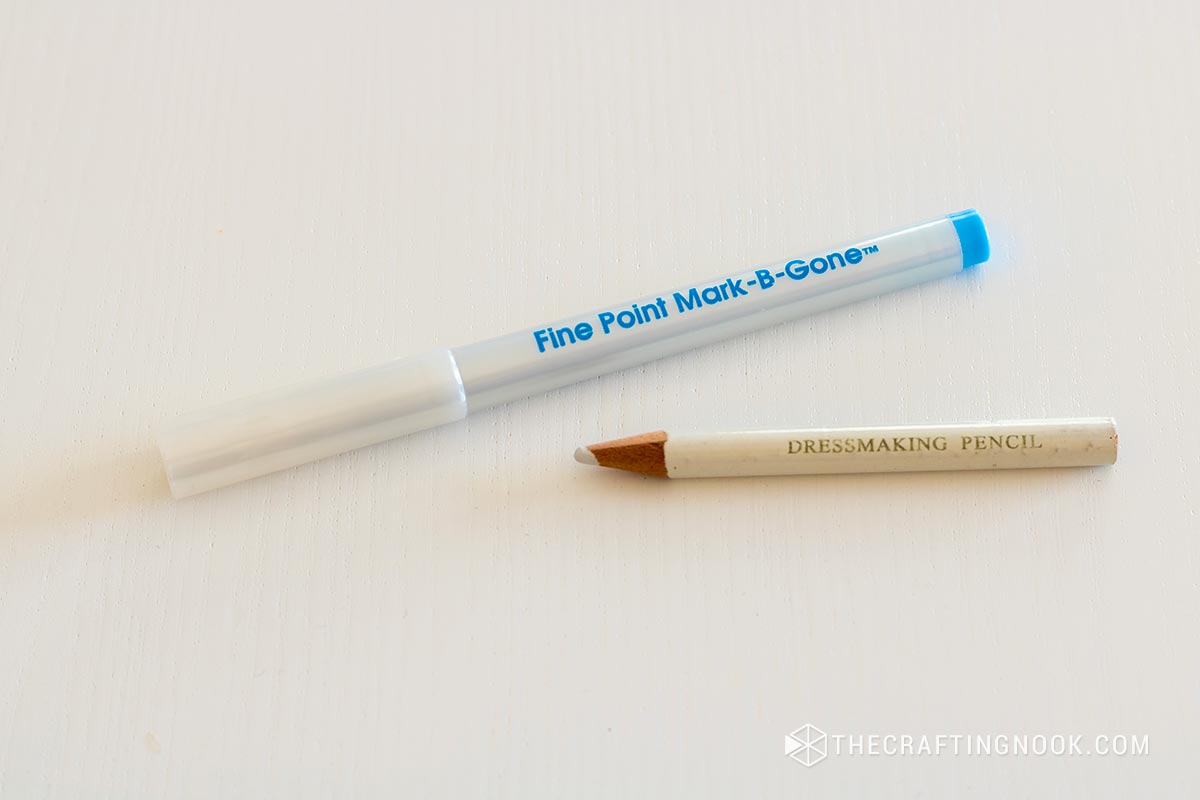
Chalk and Pencil are other marking tools I use a lot. There’s a specific tailor’s chalk you can use but I often run out of it (or break it into one hundred tiny pieces… I hate it), so I usually prefer the pencil and also, I always keep a couple of boxes of plain chalk, the one you can use on the regular chalkboard: it’s cheap, comes in many colors and is good for most situations.
The only fact against it is that its markings won’t last long, so use it when you expect to finish your sewing project within the day, just to be sure! Remember: Check if it leaves traces, trying to brush it out before marking all your fabric.
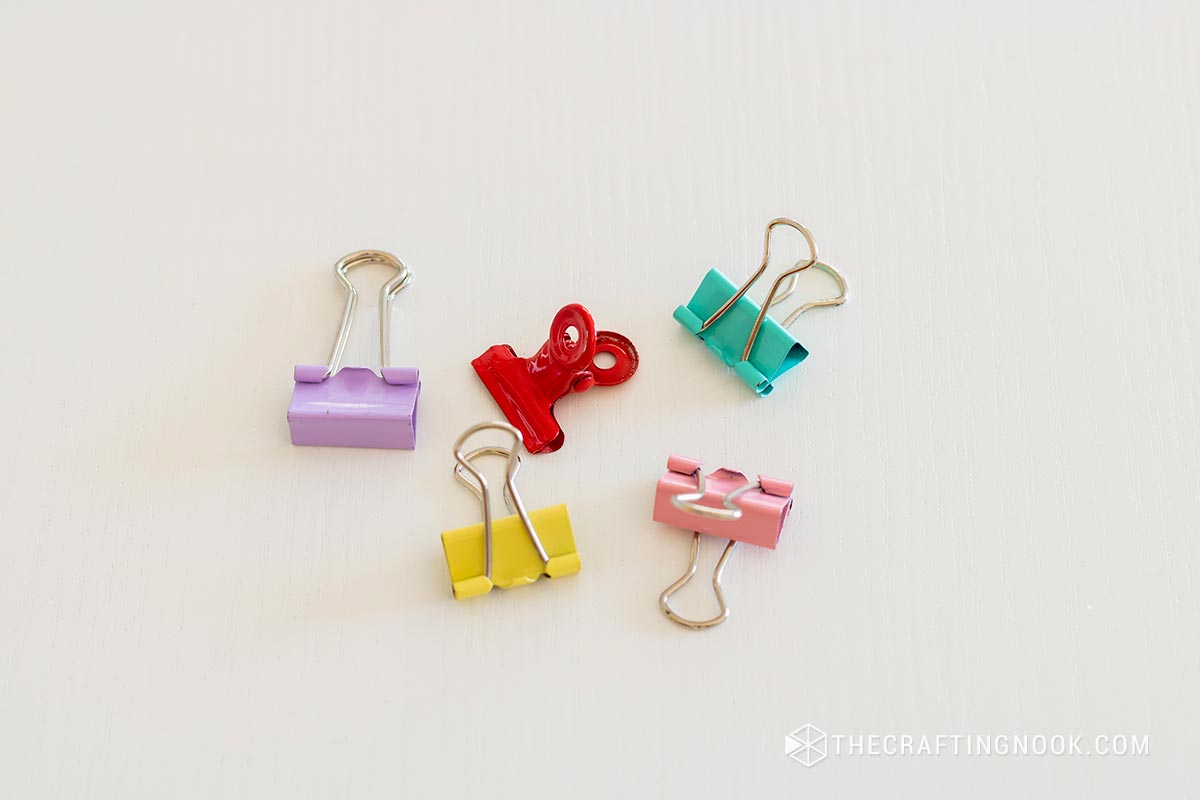
Sewing Seam GAUGE AND BINDER CLIPS
This Sewing Gauge is kind of a new entry in my sewing tools knowledge: it is a multipurpose gadget that helps you:
- measure and mark hem depth
- draw scallops and circles
- evenly space buttonholes, tucks, and pleats
- add seam allowances
I don’t have one yet because I haven’t actually needed it but I have used it a couple of times and it can be very helpful for some projects.
The little binder clips are useful instead of pins for sewing leather/PUL and for keeping together pattern pieces while already cut out.
Steam IRON AND WATER SPRAYER
Pressing while sewing makes the difference between homemade and handmade! I would add to this point: iron cloth (a simple white cotton fabric scrap to put between iron and fabric), iron board, and, as soon as you can, add some Fancy Pressing Tool DIY: Tailor’s Ham, Sausage Roll and Pressing Glove: easy to do, lifesaver and money saver!
PATTERN WEIGHTS
Pattern weights are a huge timesaver when you have to cut your pattern shape, mostly on knits, sheer, or any fabrics you can’t pin (like leather or PUL). You don’t necessarily need to buy them you can handmade them (from hubby – thanks Mr. P), or you can use also: canned food, sandbags, heavyweight mugs… anything you have in hand.
Non-specific Sewing Tools
LINT ROLLER
I love this (unusual) sewing tool! You can use it to keep your project clean from bits of thread wandering after using your seam ripper… or if you don’t have a thread catcher (or you own it but still have to get in the habit of using it, like me – so your project acts as a thread catcher itself).
MASK TAPE
Yes, the one you use when wall painting… You can place it on your sewing machine needle plate to mark the distance from the needle: you’ll only have to align your edge to the masking tape… and voilà: a straight hem is done! Plus: it leaves no traces when you pull it off!
Non-traditional TOOLS TO ADD SEAM ALLOWANCES
Depending on where you live, you can expect to find patterns drawn with or without seam allowances (in Europe we have to add them, while in the rest of the world, you mostly find patterns with included seam allowances).
You can use this Pinterest Wise Tip: tape together two pencils (or pens) and you’ll have a perfect 1,5 cm Seam Allowance, just follow the edges of the pattern without seam allowances to add them.
And it works on the other way too, to find sewing lines: just follow cutting lines to trace a seam line toward the inside, when your pattern s.a. is 1,5 cm!
CHOPSTICKs
They’re perfect sewing tools (as well as eating tools!), used for turning inside-out corners. You can also press fabric while they’re inside, to give shape without burning your fingers!
Hems, zippers, and finishes
Don’t forget that sewing hems, putting in zippers, and finishing touches take time and effort to get good at. Follow the pattern instructions or search for online tutorials for more guidance specific to your project.
Hems
Hems are the folded and sewn edges of garments or fabrics to give them a clean, professional finish. Here are some key points to keep in mind:
- Measurement: Before hemming, measure and mark the desired length on the fabric. You can use a tape measure and pins to mark the hem evenly around the garment.
- Single hem: Single hem is the most common and involves folding the edge of the fabric in once and sewing it in place. You can do straight stitches or zigzag stitches to secure the hem.
- Double hem: Double hem is more durable and is used for fabrics that tend to fray. Fold the edge of the fabric inward twice to hide the raw edges and sew along the fold.
- Rolled hem: This type of hem is more delicate and is used on light, transparent fabrics. Instead of folding the fabric inward, roll the edge inward and sew very close to the fold to secure it in place.
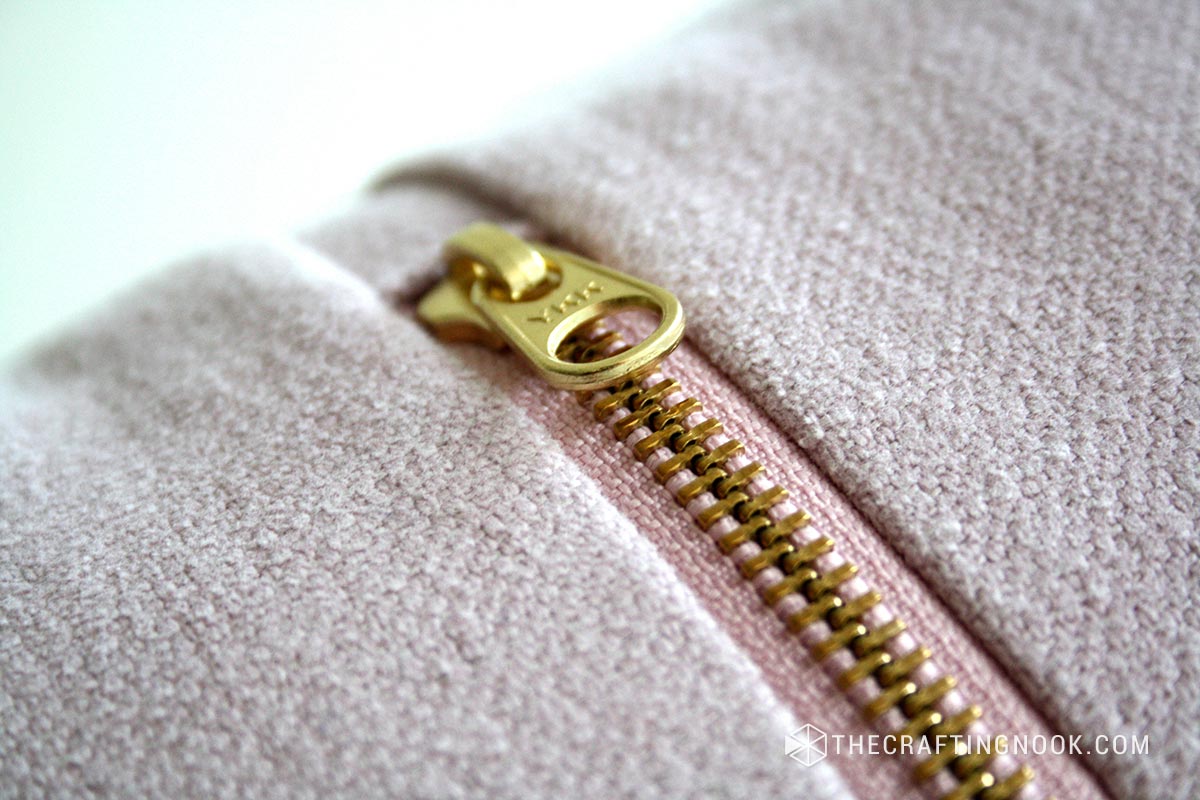
Zippers
Zippers are practical and functional elements used to open and close openings in both clothing and sewing projects. Here are some key concepts about zippers:
Choosing the right zipper:
There are different types of zippers, such as invisible zippers, metal zippers, and plastic zippers. Choose the right zipper for your project, considering the style and weight of the fabric.
Types of zippers:
Invisible Zippers: These zippers are designed to hide in the seams, leaving a discreet and elegant appearance.
Plastic Zippers: They are lightweight and easy to sew, ideal for lightweight fabric projects.
Metal zippers: They are stronger and more durable, suitable for heavier garments and robust sewing projects.
Zipper length:
Zippers come in different lengths. You can find them pre-cut or in rolls that you can cut according to your needs. Measure the opening of your project to determine the length needed and be sure to choose a zipper that fits properly.
Tools needed:
- Zipper: The right size and type of zipper for your project.
- Scissors: To cut the zipper to the proper size if necessary.
- Thread: Choose a thread that matches or contrasts with your fabric.
- Pins: To hold the zipper in place before sewing.
- Unpicker or seam ripper: In case you need to undo any seams.
- Sewing Machine: A basic sewing machine will work perfectly for installing a zipper.
How to install a zipper with a basic sewing machine:
Getting ready:
Lay the garment or fabric project flat on your work area.
Unzip the zipper all the way and place it with the open side facing down on the right side of the fabric. Make sure the top edges are aligned.
Securing:
Use pins to hold the zipper to the fabric, making sure the zipper teeth are lined up with the fabric edge. Use pins to fix the bottom part of the zipper as well.
Sewing the right side of the zipper:
Change the presser foot on your sewing machine to a zipper foot if you have one. If not, use the standard presser foot.
Start sewing from the top of the fabric down, as close to the zipper teeth as possible. Make straight stitches along the edge of the fabric, removing pins as you go.
Turning and sewing the left side of the zipper:
When you get to the end of the zip on the right side, stop the sewing machine and lift the foot.
Turn the fabric and zipper so that the left side of the zipper is now facing up and aligns the top edges of the fabric.
Put the presser foot down and keep sewing from the top to the bottom.
Verification and adjustments:
After sewing both sides of the zipper, close the zipper to check that it is positioned correctly and opens and closes smoothly. If necessary, you can adjust the sewing points to better attach the zipper.
Some tips for working with zippers:
Preparing the opening: Before attaching the zipper, make sure you have a clean, flat opening in the fabric. You can hem the edges or use interlining to reinforce the opening.
Zipper Attachment: There are different techniques for attaching a zipper, but a common way is to sew it to the right edge of the fabric. Secure the zipper with pins or sewing pins before sewing.
Reinforcement stitches: To ensure that the zipper remains secure and does not open, make reinforcement stitches at the top and bottom of the zipper.
Finishes:
Finishes are the final details added to sewing projects to improve appearance and durability. Here are some common types of finishes:
Overcasting: To prevent fabrics from fraying, you can overcast the edges using a zigzag stitch or an overlock machine if you have one.
Bias: Bias is a strip of fabric cut diagonally that is used to cover the edges of fabrics. Apply around openings, such as collars and armholes, for a clean, professional finish.
French seam: This technique is used on fabrics that tend to fray a lot. It involves sewing two layers of fabric together and then turning and sewing again to hide the raw edges.
Ironing and pressing: Proper ironing is essential to obtain polished finishes. Use a hot iron to flatten seams and shape fabrics. Crimping helps fix the folds and creases in place.
Once you have learned all the basic steps by following instructions, examples, and tutorials, you will start to be able to create your own projects and designs. Practice is important.
I hope this post helps and motivates you to start making things with your hands. I will try my best to add more ideas, advice, and techniques to help you improve your skills.

Frequently Asked Questions
For beginners, a basic and affordable sewing machine is recommended. Look for a machine that offers straight and zigzag stitches, as these are the most commonly used in craft sewing projects. It is also important that the machine is easy to thread and operate.
The choice of fabric depends on the project. For beginners, it is advisable to start with fabrics that are easy to handle, such as cotton or canvas. Consult the pattern or project recommendations for guidance on the appropriate type of fabric.
Not necessarily. If you’re just starting out, you can find simple projects that don’t require patterns, like pillows, placemats, or simple bags. However, for clothing and more complex projects, patterns are useful to guide your work.
The choice of needle depends on the type of fabric you are using. Needles come in different sizes and types, such as universal needles, for stretch fabrics, for leather, etc. Check the needle label and choose one that is suitable for your fabric.
Mistakes are normal. If you make a mistake, you can use a seam reaper to undo the stitches. Then correct the mistake and sew again. Practice will help you make fewer mistakes over time.
There are many sources of learning available. You can take classes in person or online, search for tutorials on YouTube or blogs, join sewing groups on social media, or check out sewing books and magazines. Constant practice is the key to improving your skills.
Really Simple And Easy Sewing Projects To Try


Share and PIN ME!!!
Til’ next time…


FREE WORKBOOK
Keeping your Sweet Home Organized
Learn how to create intentional habits and simple routines to Keep Your Home Organized. Plus freebies, printables, exclusive content, and tips.
Disclaimer: By clicking on the “Yes” button above you are giving me your consent to collect and use your information according to the law and My Policy Privacy. Zero Spam I promise!