DIY Burlap Wreath for Fall
This post may contain affiliate links. Please read our Disclosure Policy.
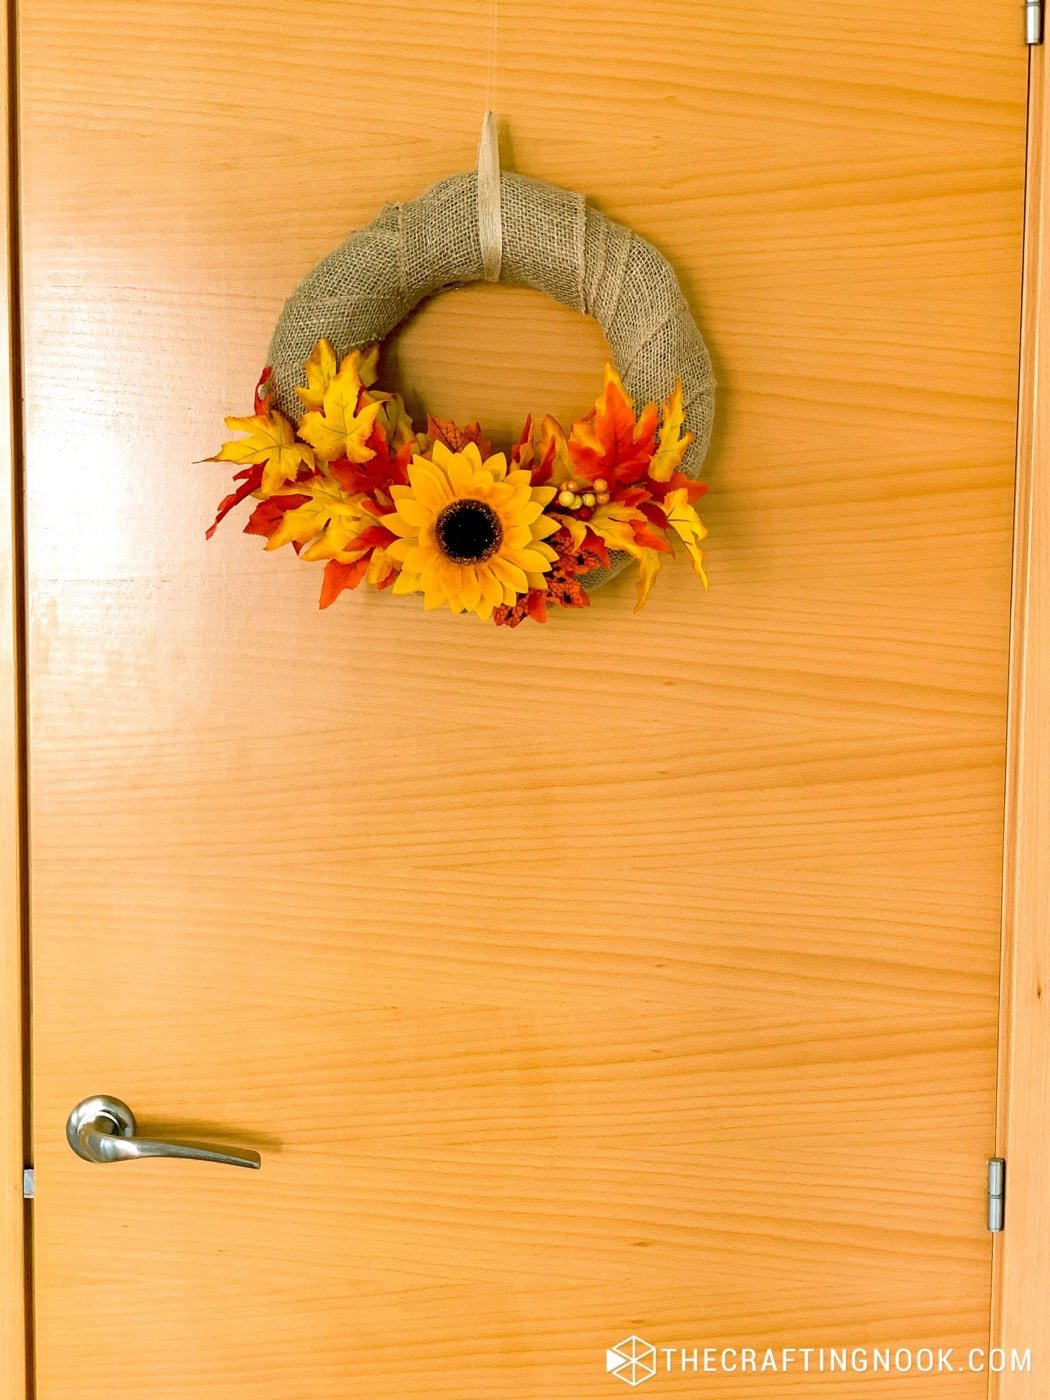
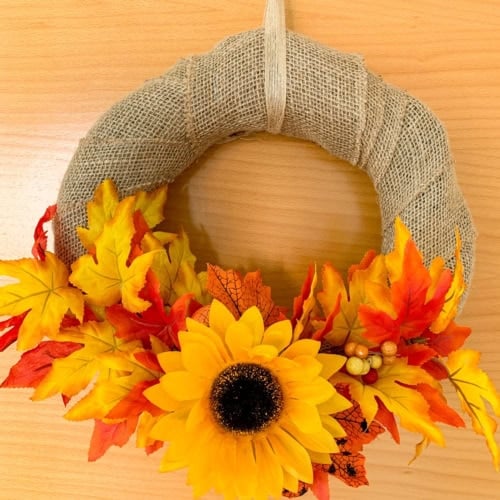
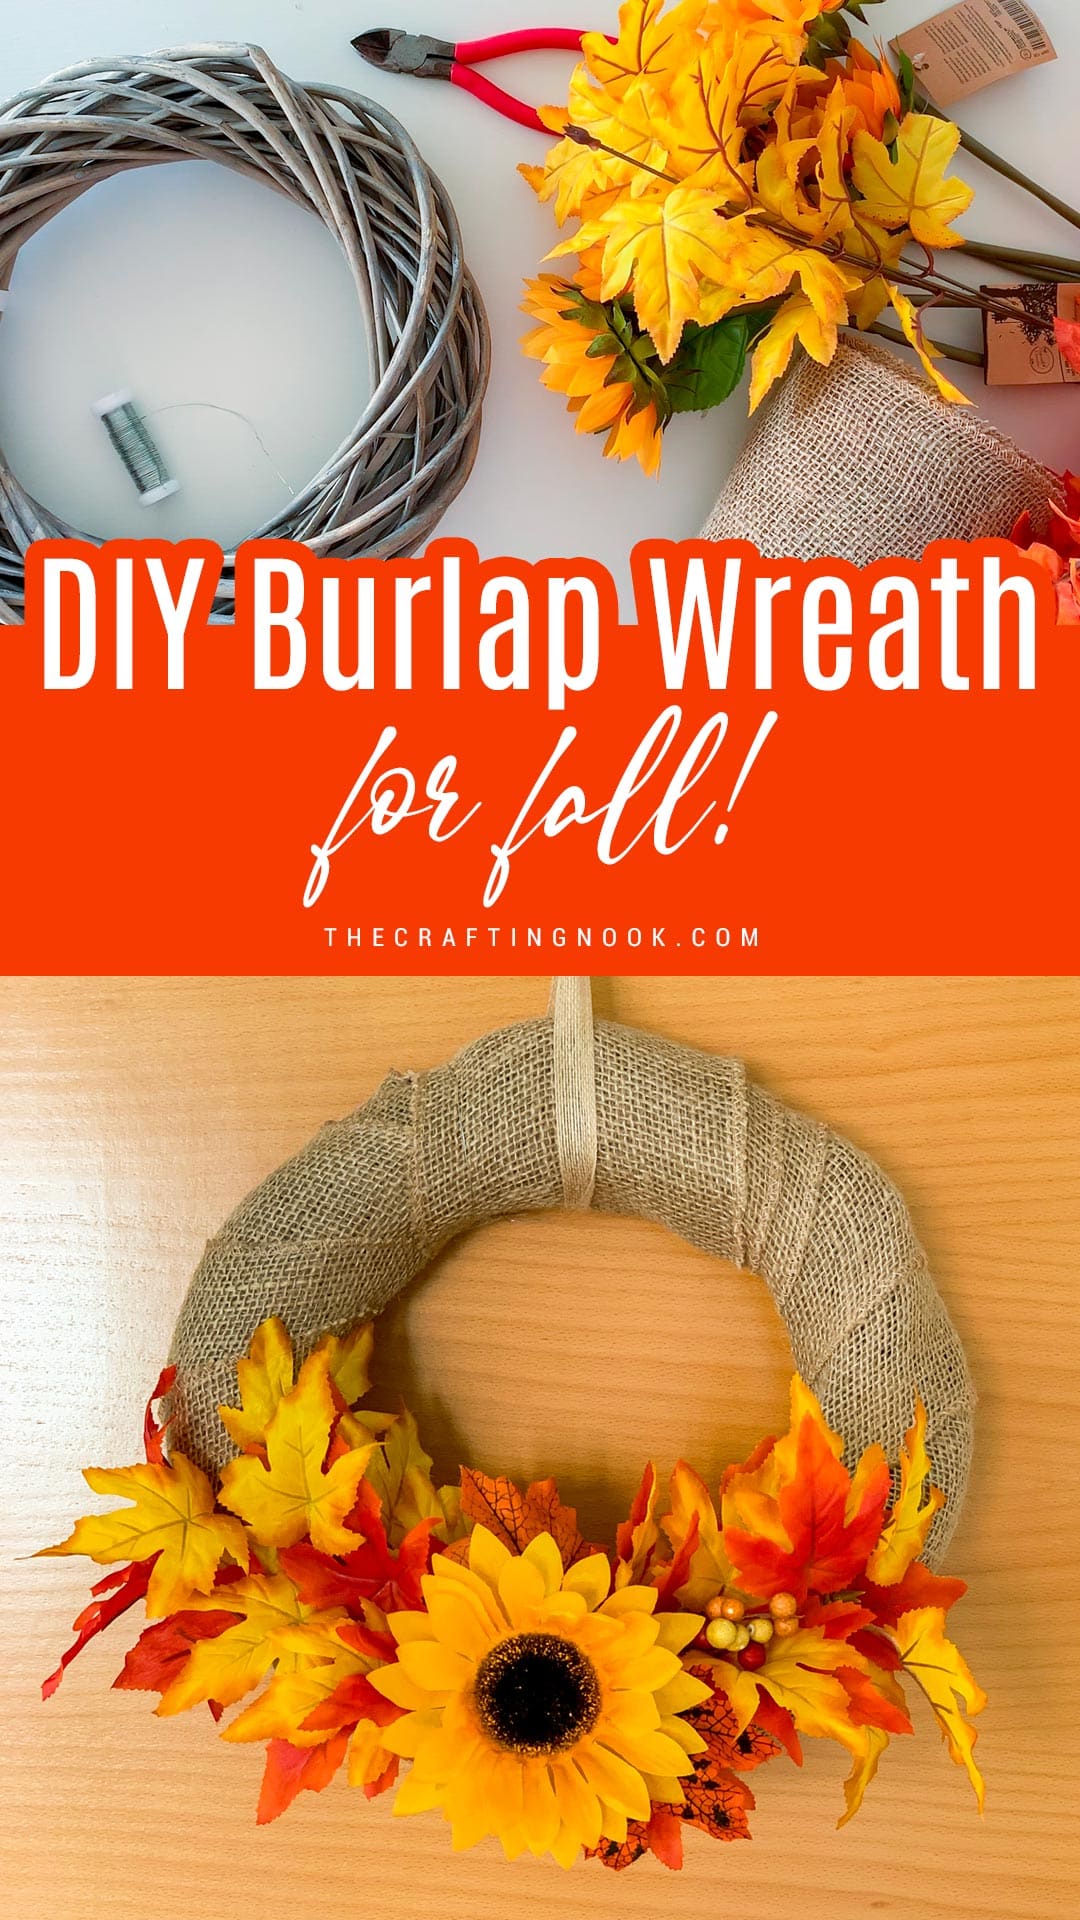
Let’s create a beautiful DIY burlap wreath for fall with simple supplies. No glue is needed, so you can easily reuse everything later! Perfect project for cozy fall decor.
Isn’t there something so special about fall? As the air gets crisp and the trees start showing off their beautiful reds, oranges, and goldish, it just feels like the world is getting cozier. I believe it’s the season that invites you to slow down, snuggle up with a warm drink, and soak in those simple, heartwarming moments.
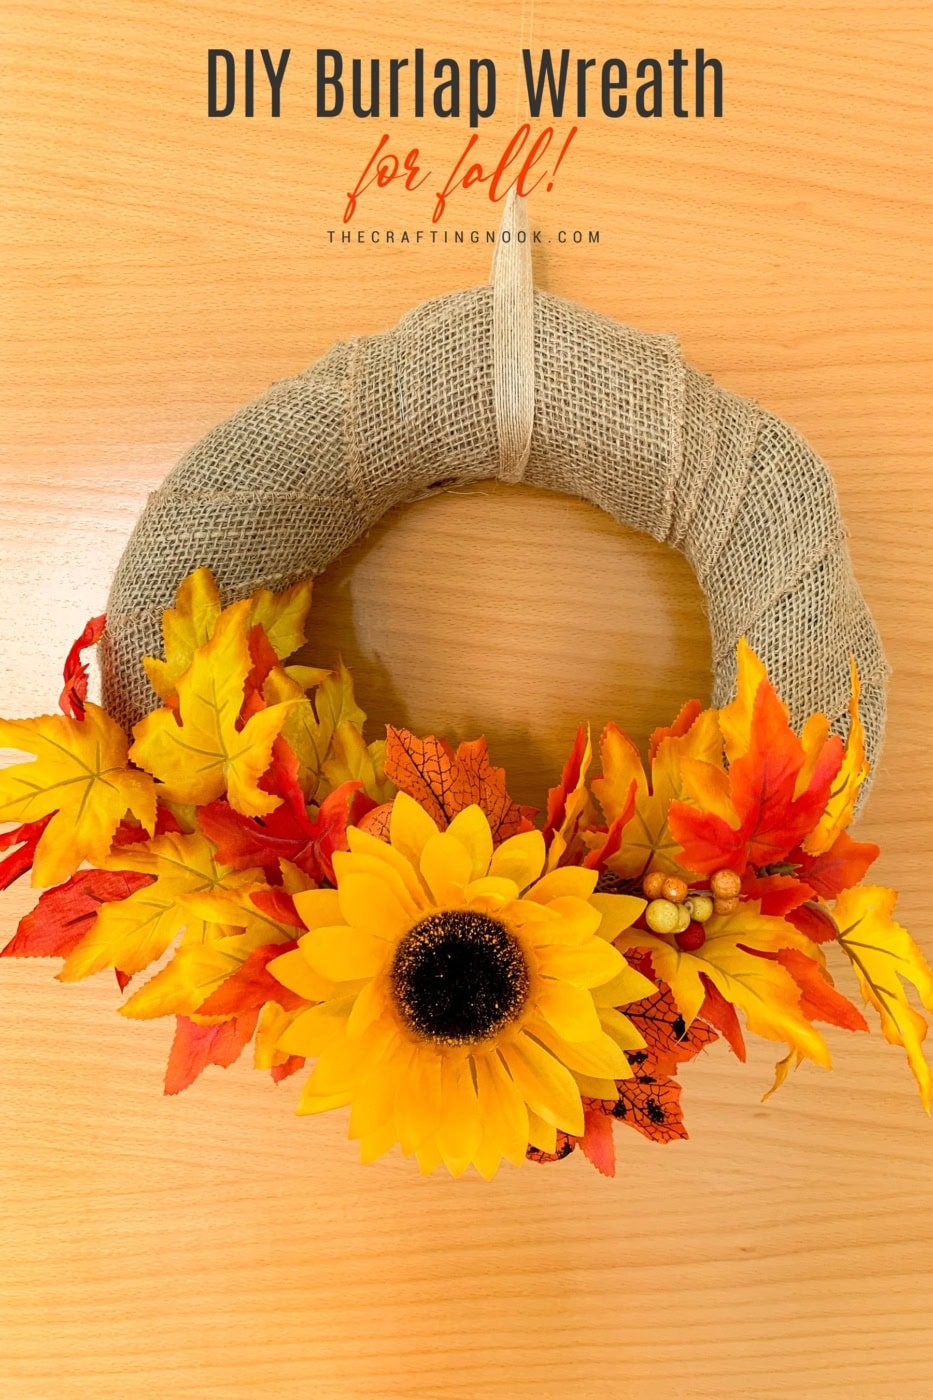
Table of Contents
DIY Rustic Fall Burlap Wreath
This DIY fall wreath is such a sweet way to capture that autumn magic and spread a little seasonal love around your home.
This project is great if you like simple but pretty crafts that you can make yourself. Using a grapevine wreath, burlap ribbon, and vibrant faux fall leaves, you can make a beautiful wreath that will make your home feel warm and inviting.
And the best part? No glue is needed, so you can easily change decorations and use the materials for other projects.
How to Make a DIY Burlap Wreath for Fall
This adorable project is a collaboration with my mom! We both share a love for crafts so we make things together and also publish on each other’s blogs! If you want to read this post in Spanish, go check her fall wreath!
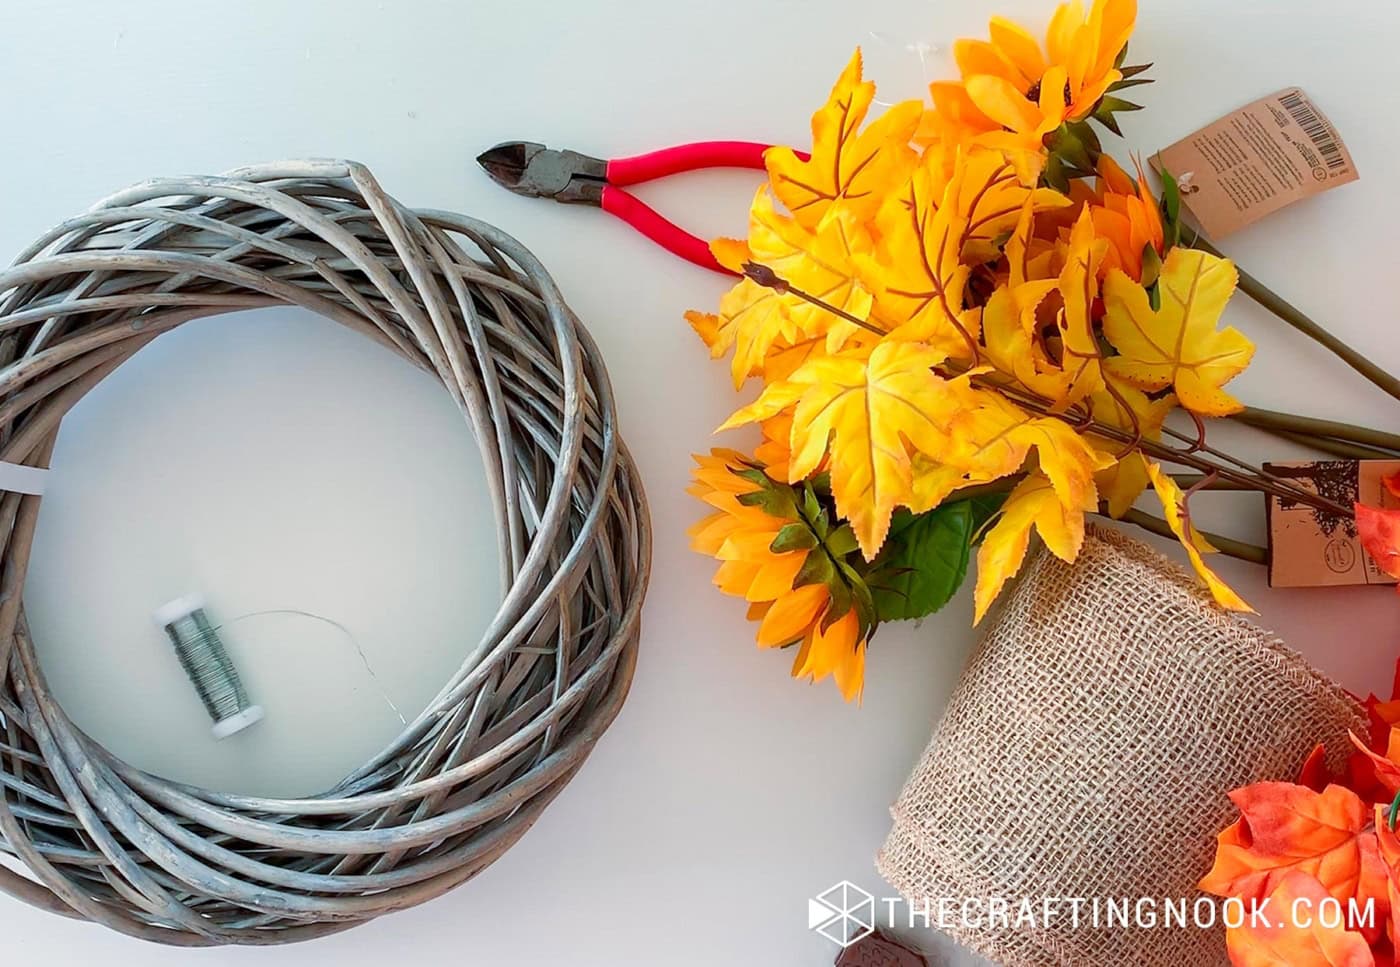
Supplies:
- Grapevine wreath base – mine was about 12 inches, but feel free to go larger or smaller and even a different material.
- Wide burlap ribbon to cover the base – about 4-5 inches wide
- Thin rustic ribbon – for hanging the wreath
- Faux fall leaves – a mix of yellow, orange, and red gives that lovely autumn feel
- Faux sunflowers – optional, but they add such a bright pop of color
- Floral wire – for attaching the decorations
Tools:
- Wire cutters – for trimming the wire.
- Scissors
Instructions:
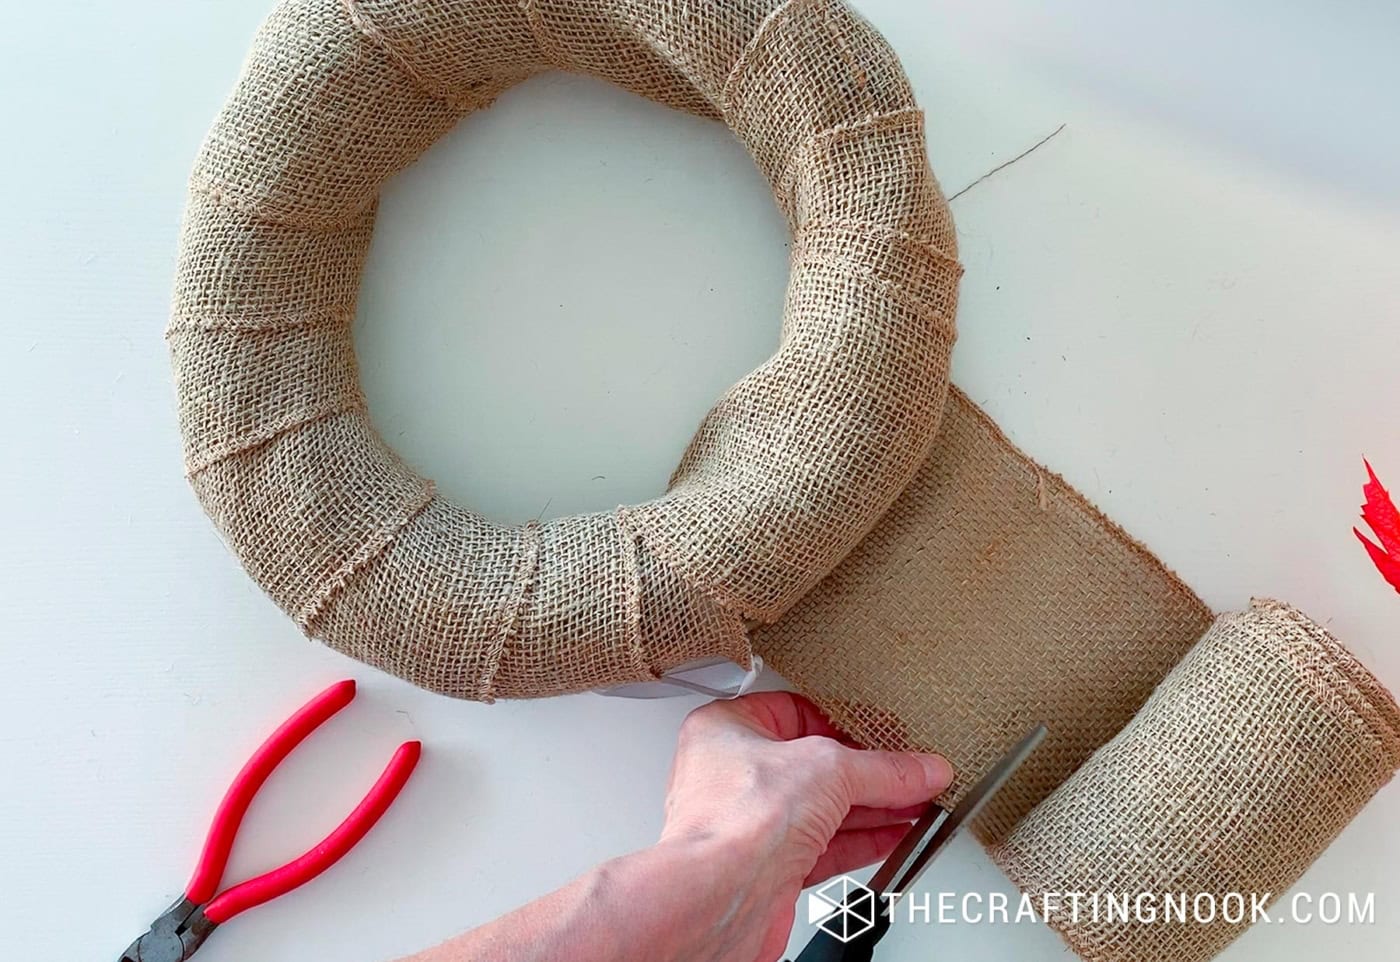
Step 1: Wrap the wreath base with burlap
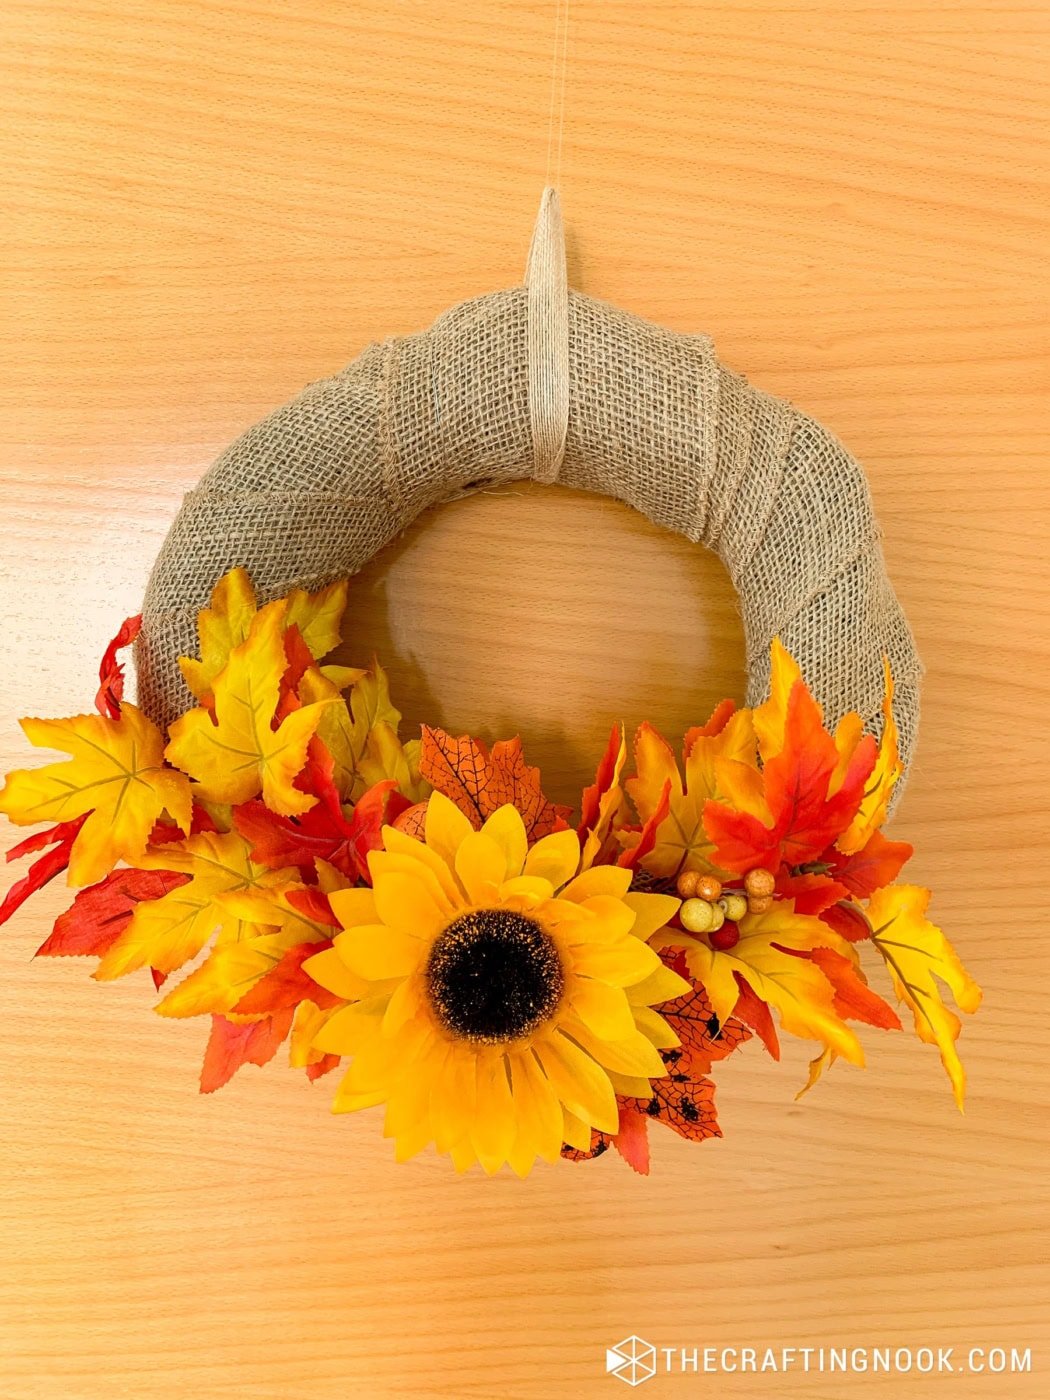
Start by taking your wide burlap ribbon and wrapping it around the grapevine base. You want it to be snug but not too tight. The idea is to cover the wreath, but it’s totally okay if a little bit of the grapevine peeks through.
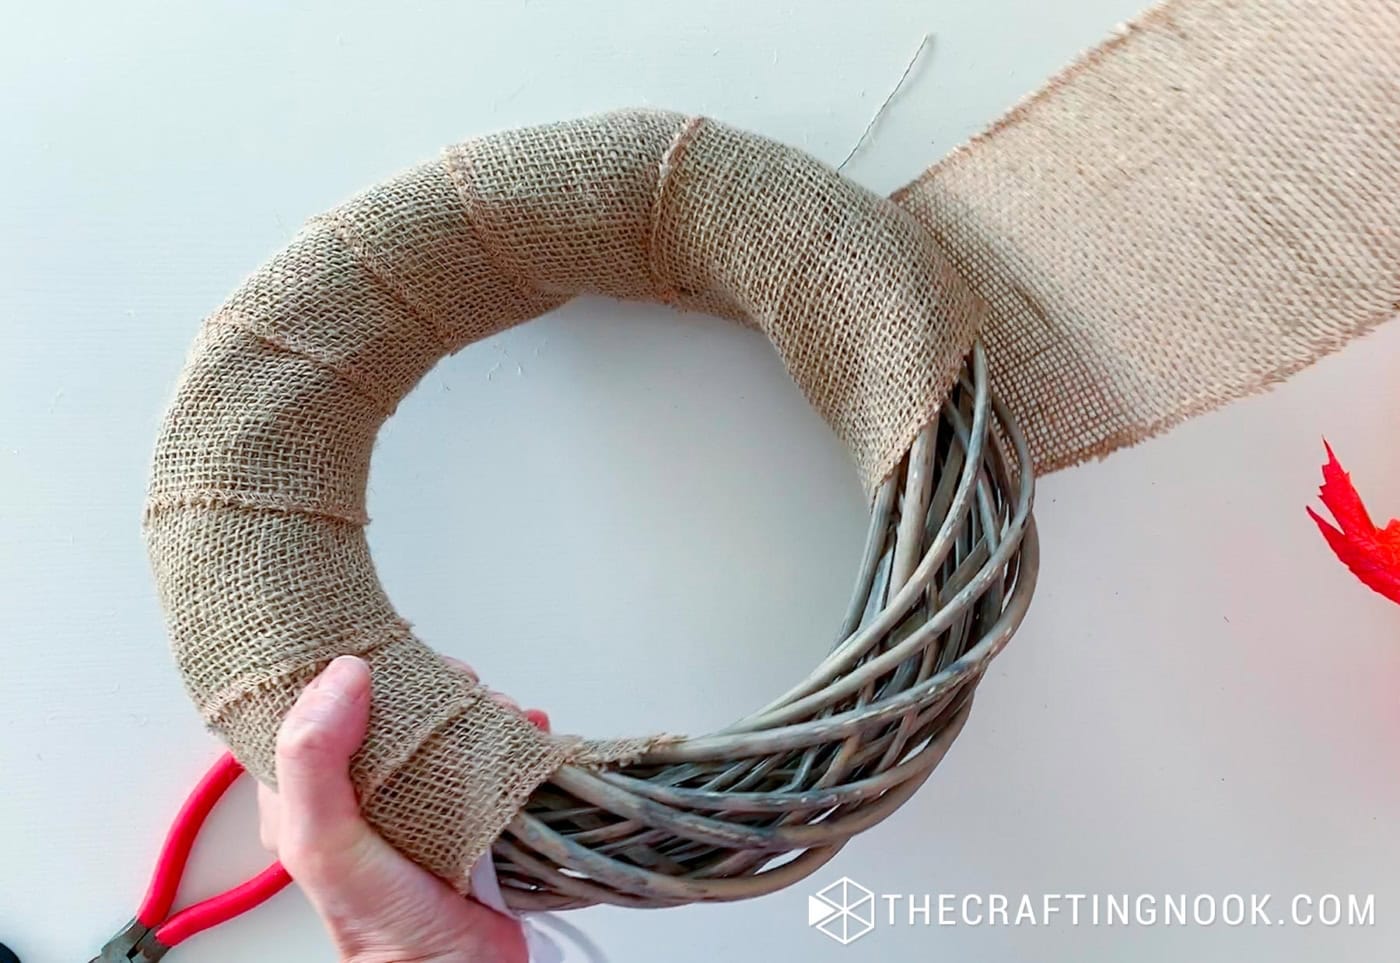
Once wrapped, tuck the end of the burlap ribbon into the back of the wreath. You don’t need glue for this; you will secure it with your floral wire and the burlap’s texture should hold it in place.
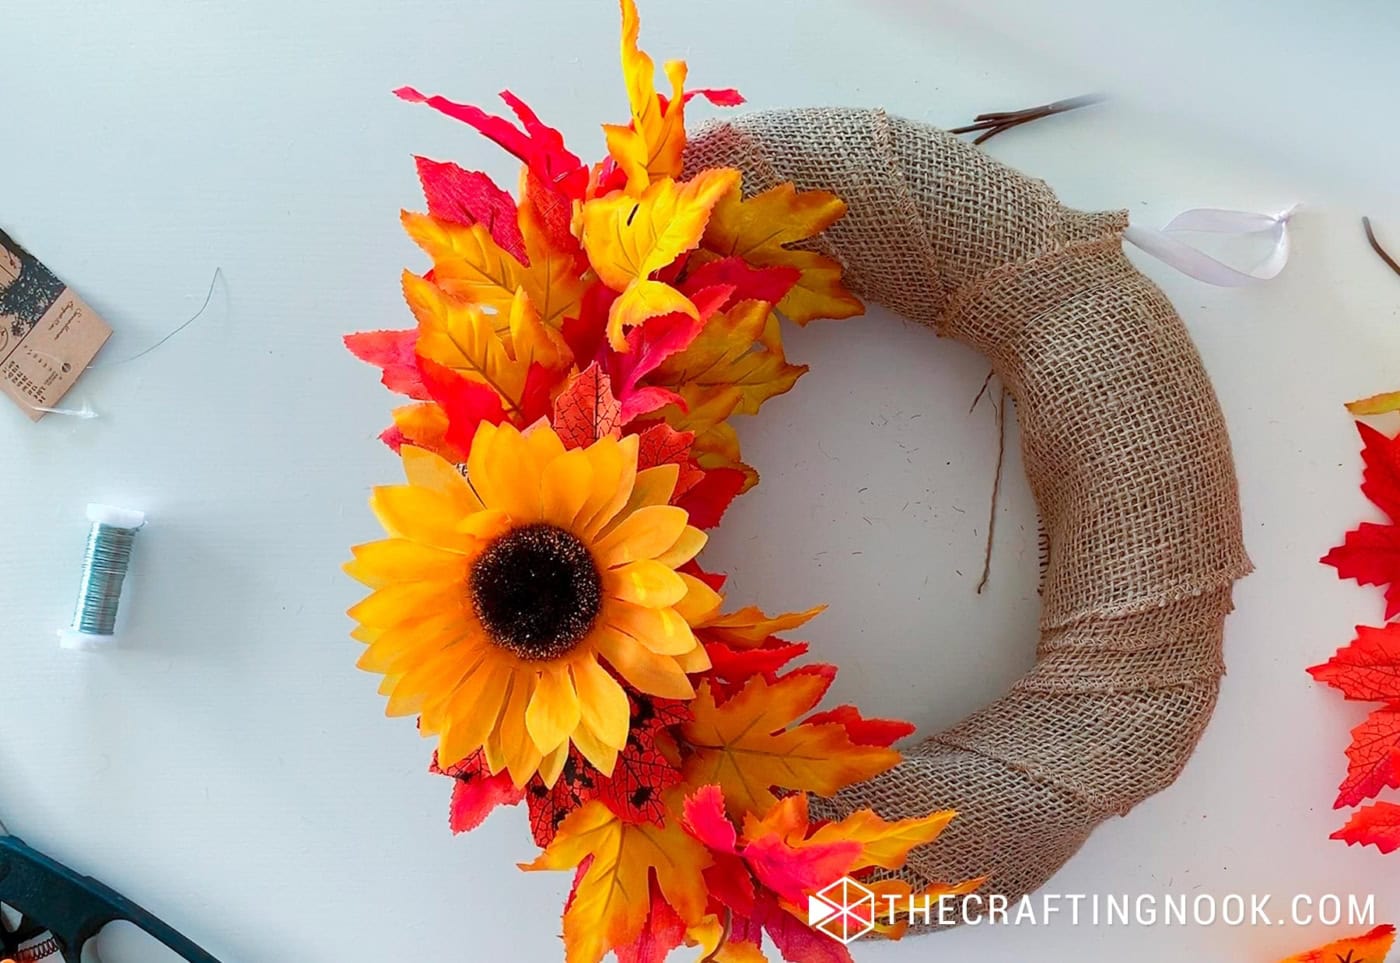
Step 2: Arrange the fall leaves
Now start placing your faux fall leaves around the bottom of the wreath or even slightly to the side.
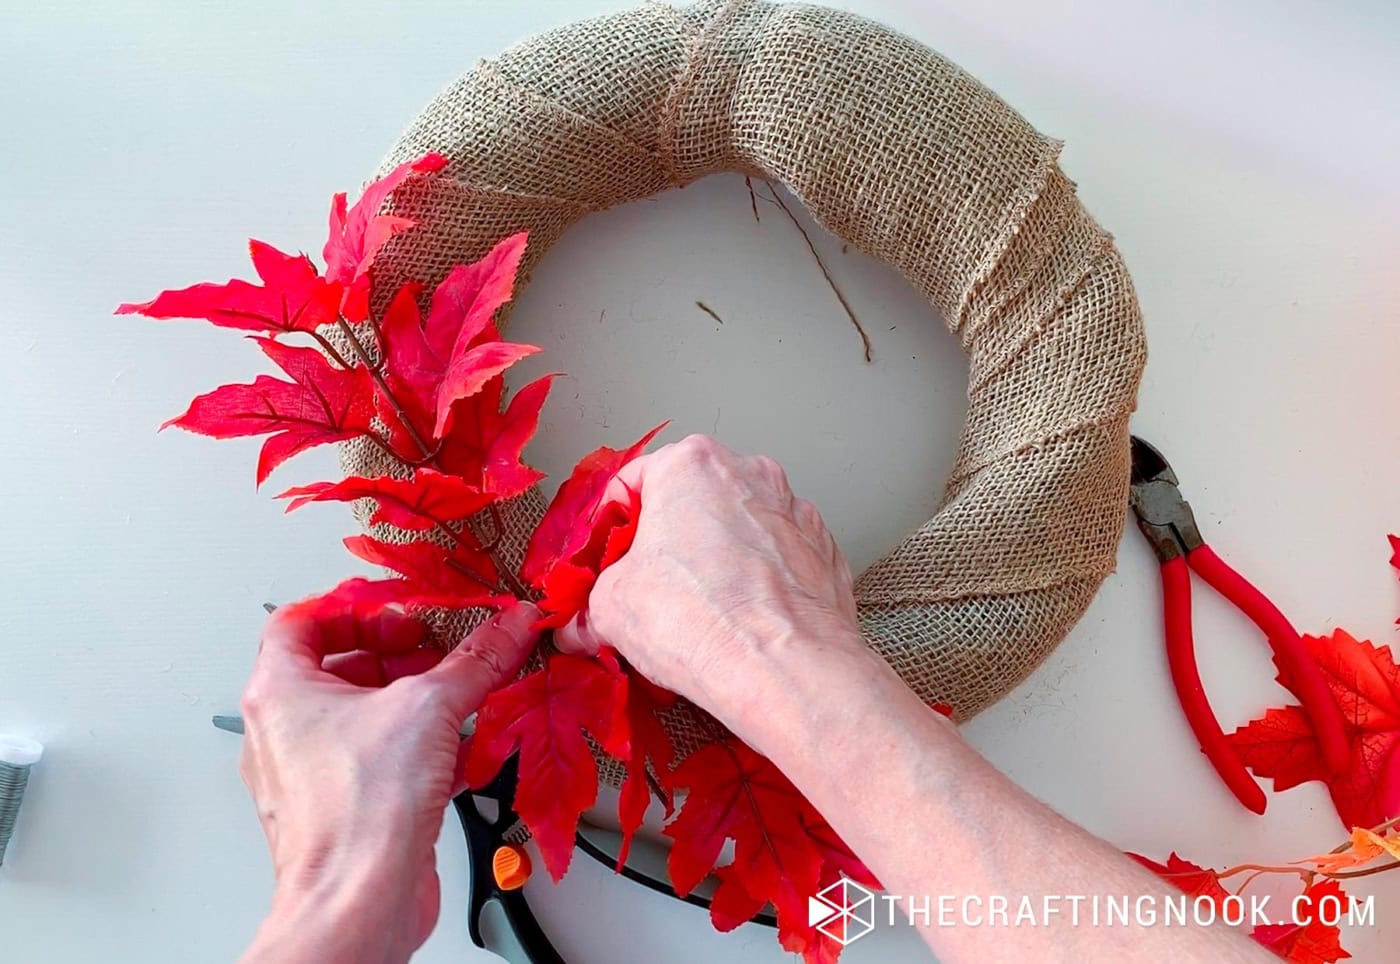
Play around with the foliage, flowers, and accents until you find a combination that makes you smile. I used leaves in different colors, along with a small bunch of berries in earthy tones to add a little extra fall touch.
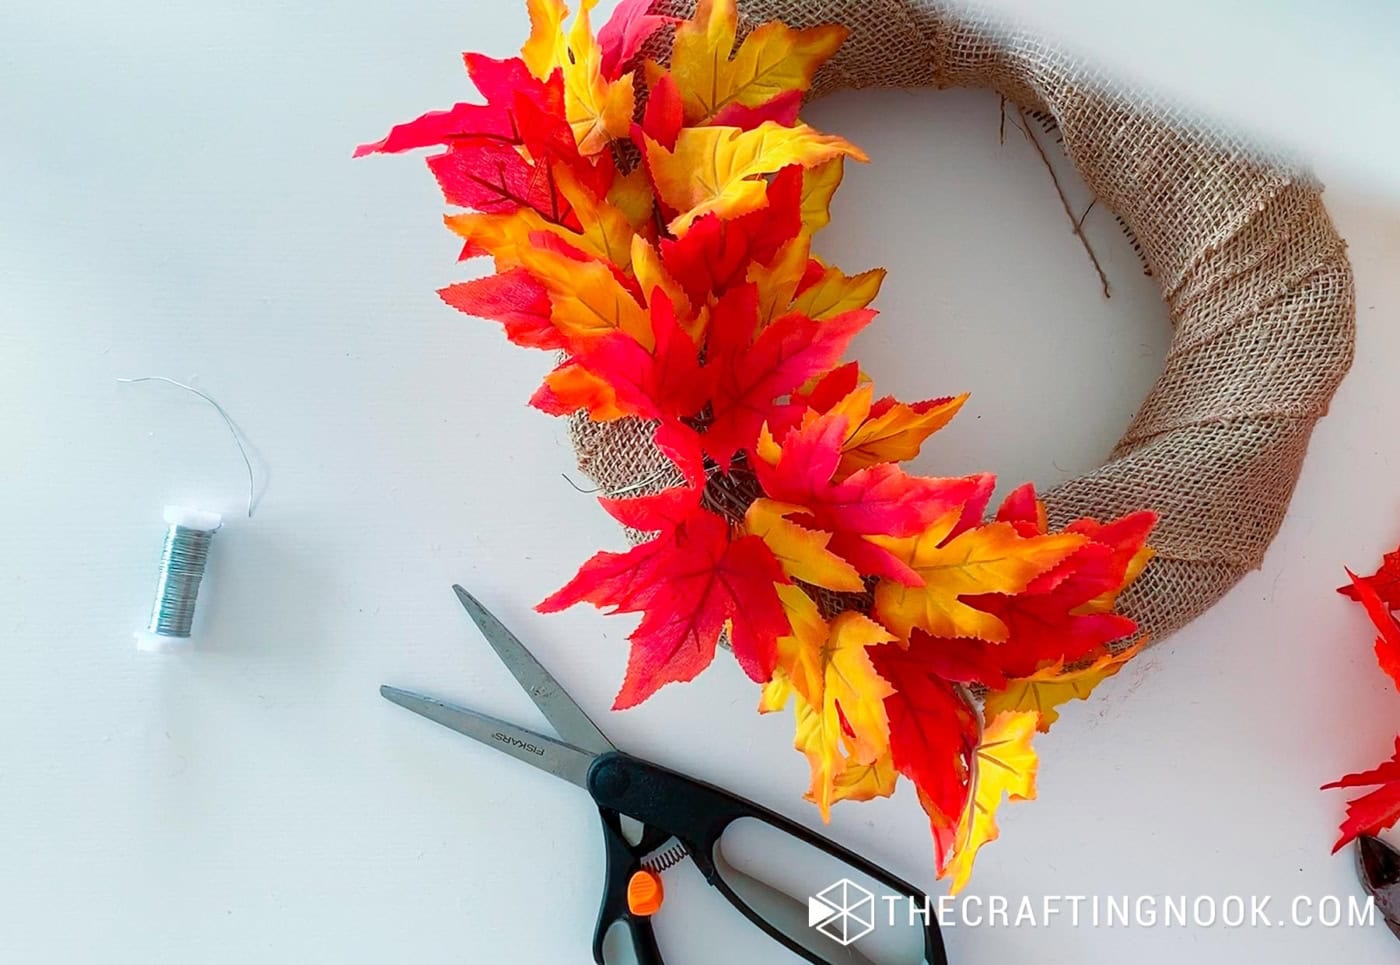
Arrange the leaves carefully and bend them so they sit just right to make sure your wreath looks balanced and beautiful. Don’t be afraid to tweak things until it feels perfect!
Once you’re happy with the arrangement, use the floral wire to attach the leaves to the wreath.
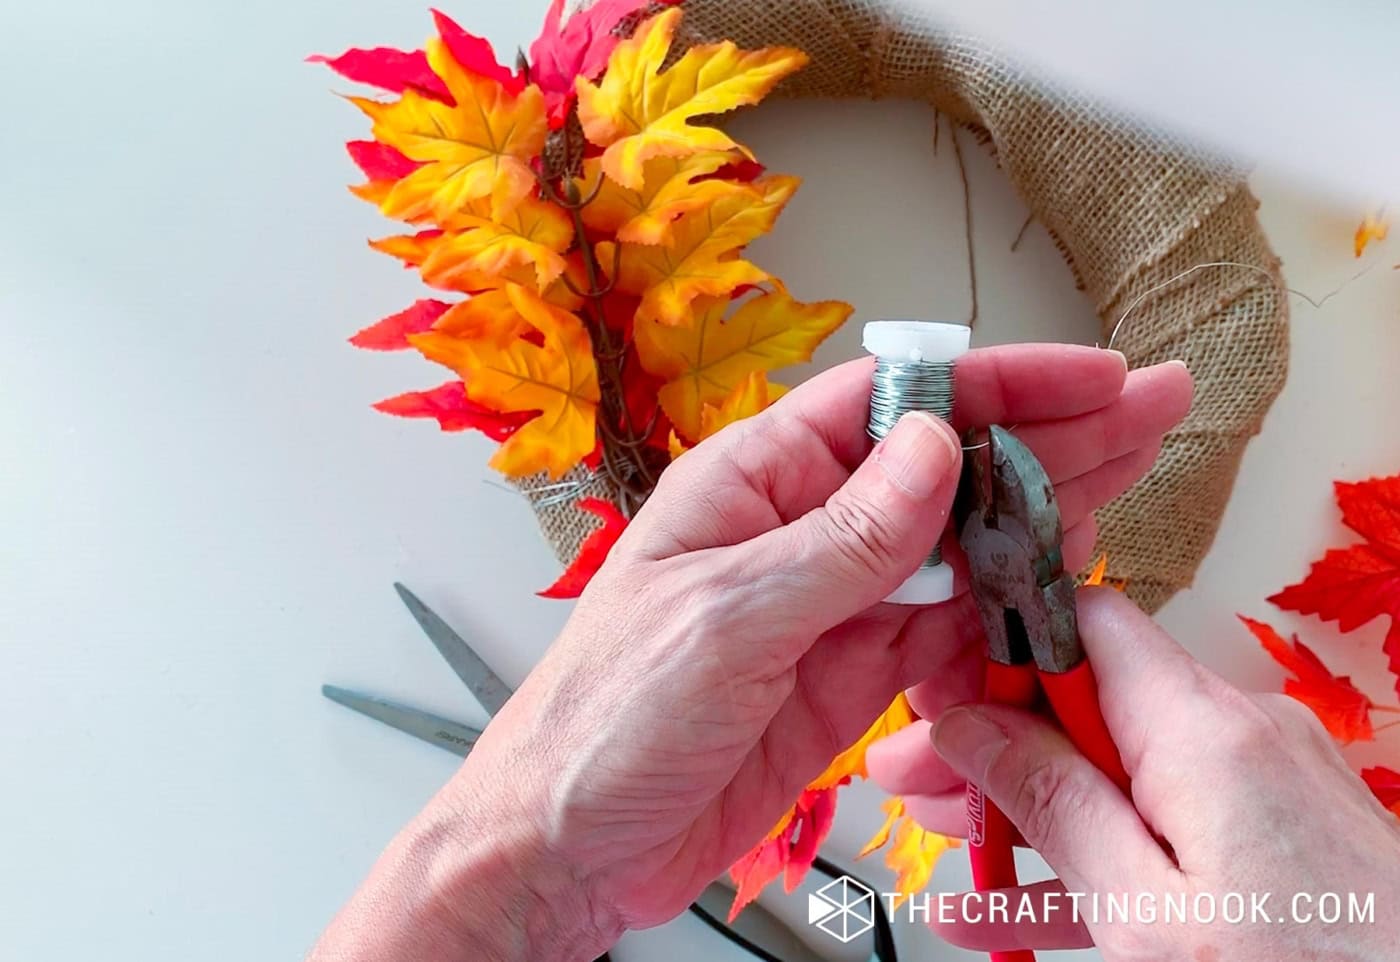
Simply wrap the wire around the stems and the grapevine base, making sure it’s tight enough to hold everything in place then secure the wire on the back of the wreath.
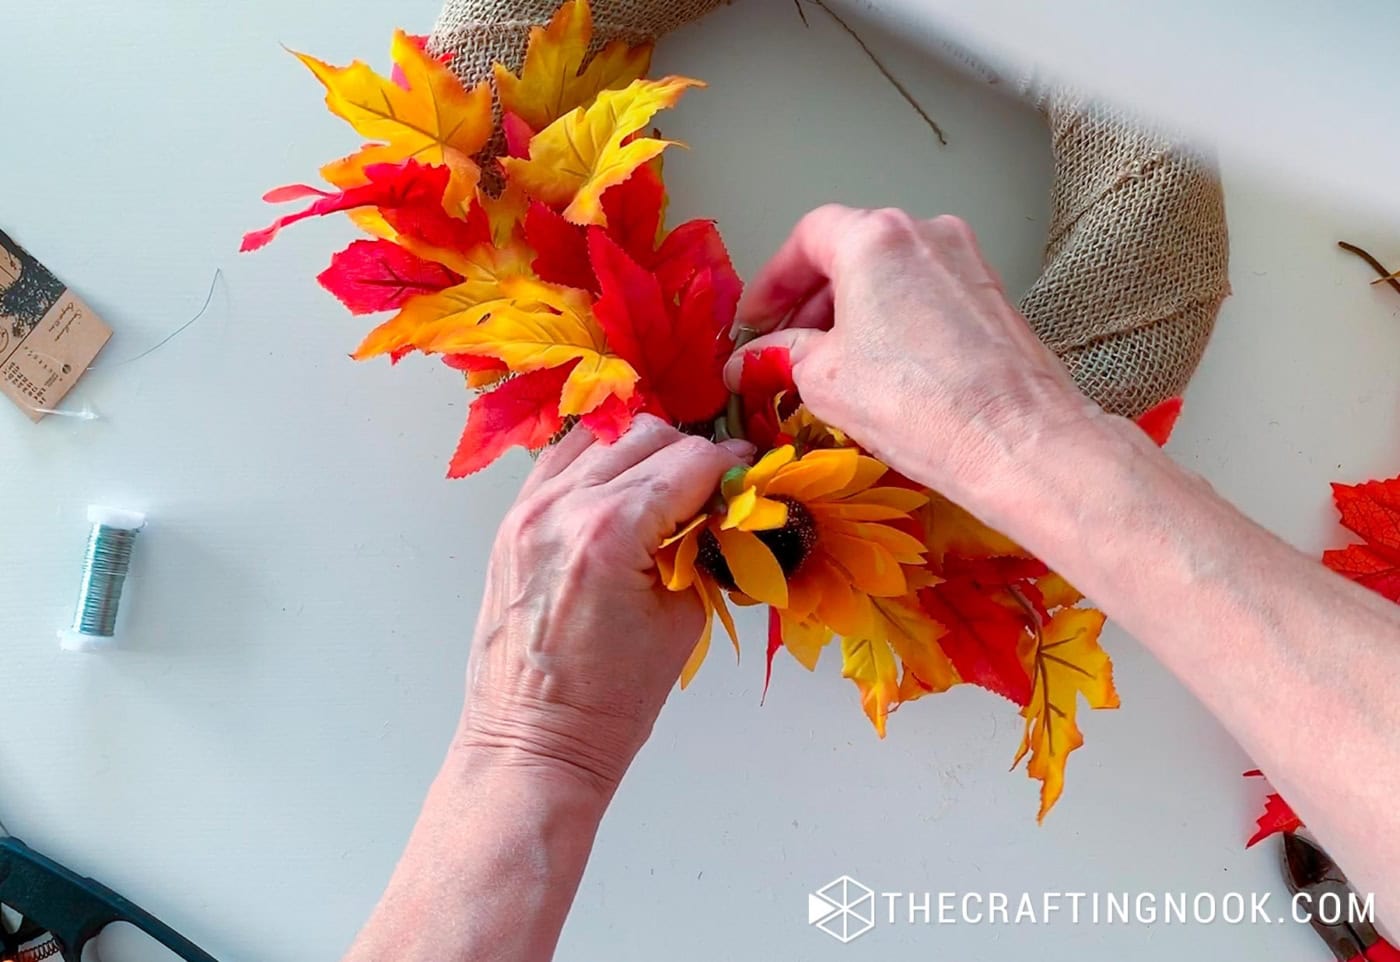
Step 3: Add sunflowers for a pop of color
Take your faux sunflowers and nestle them among the leaves. I love adding a big sunflower as the focal point and you can also add a smaller one for balance.
Use the floral wire again to secure them to the wreath, wrapping it around the stems and the base.
Step 4: Attach the hanging ribbon
Cut a piece of your thin rustic ribbon. I went for about 10 inches, but you can adjust based on where you want it to hang.
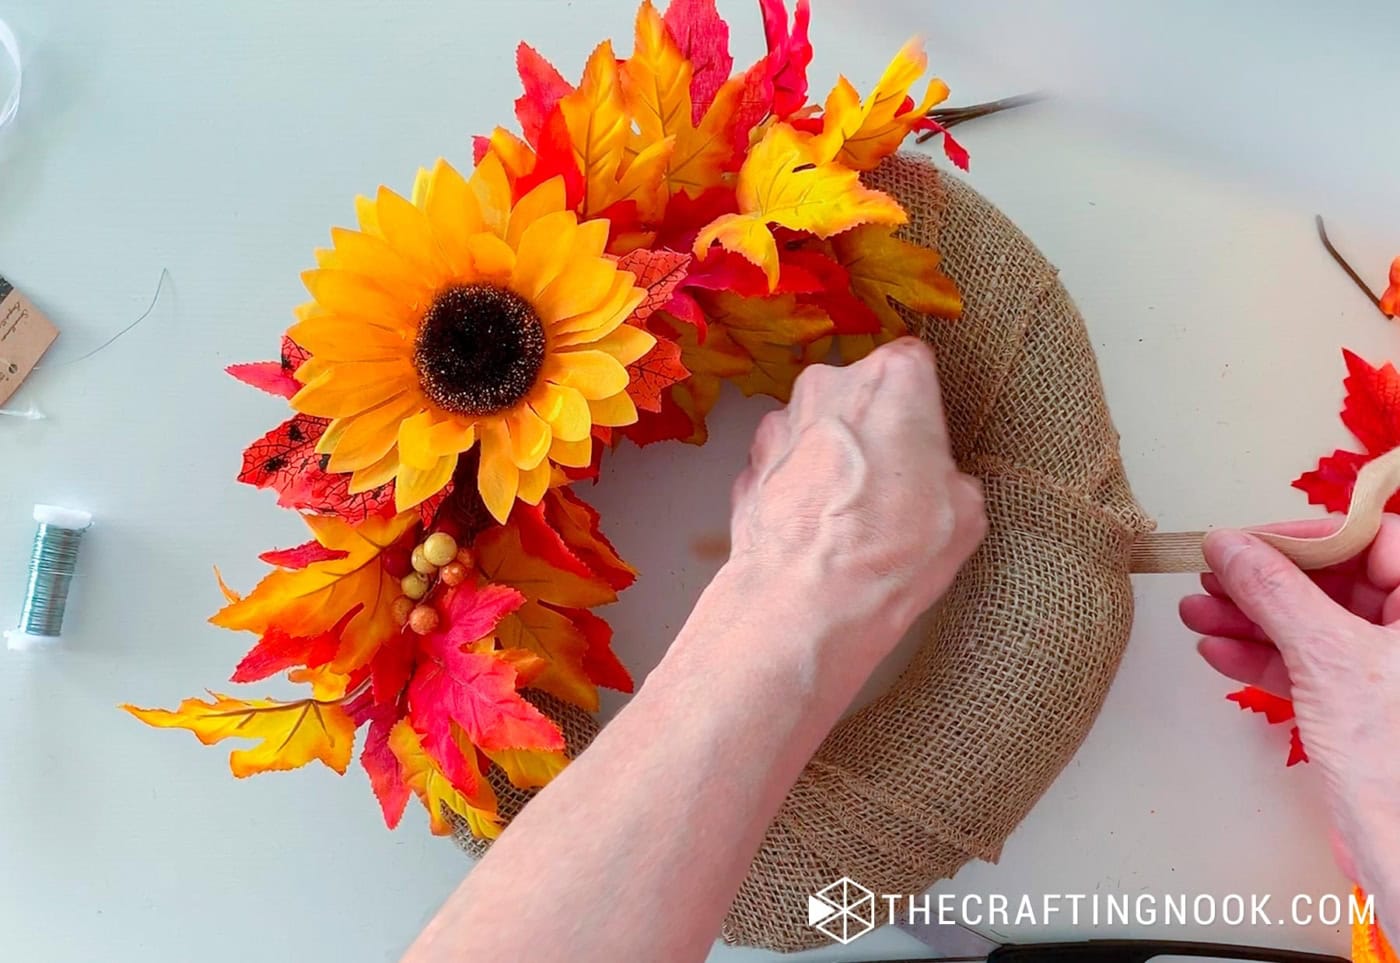
Loop it around the top of the wreath and tie a knot. This ribbon is what you’ll use to hang your wreath, so make sure it’s secure but not too tight.

Step 5: Final touches
Take a step back and adjust anything that feels out of place. The beauty of using wire instead of glue is that you can move things around until it looks perfect.
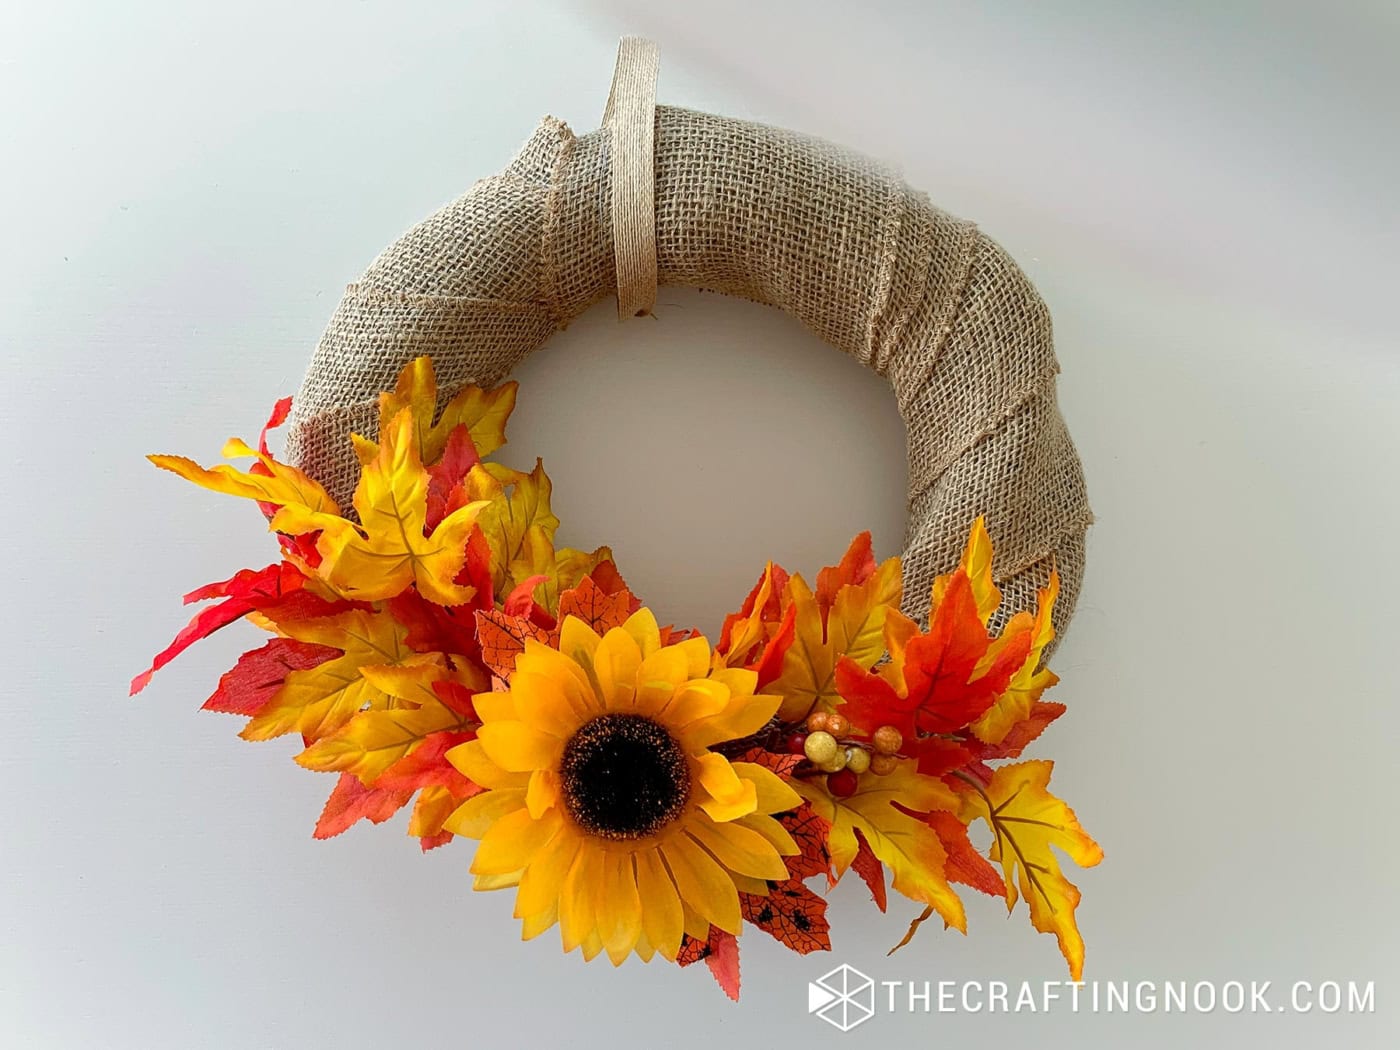
Once you’re satisfied, your wreath is ready to hang!
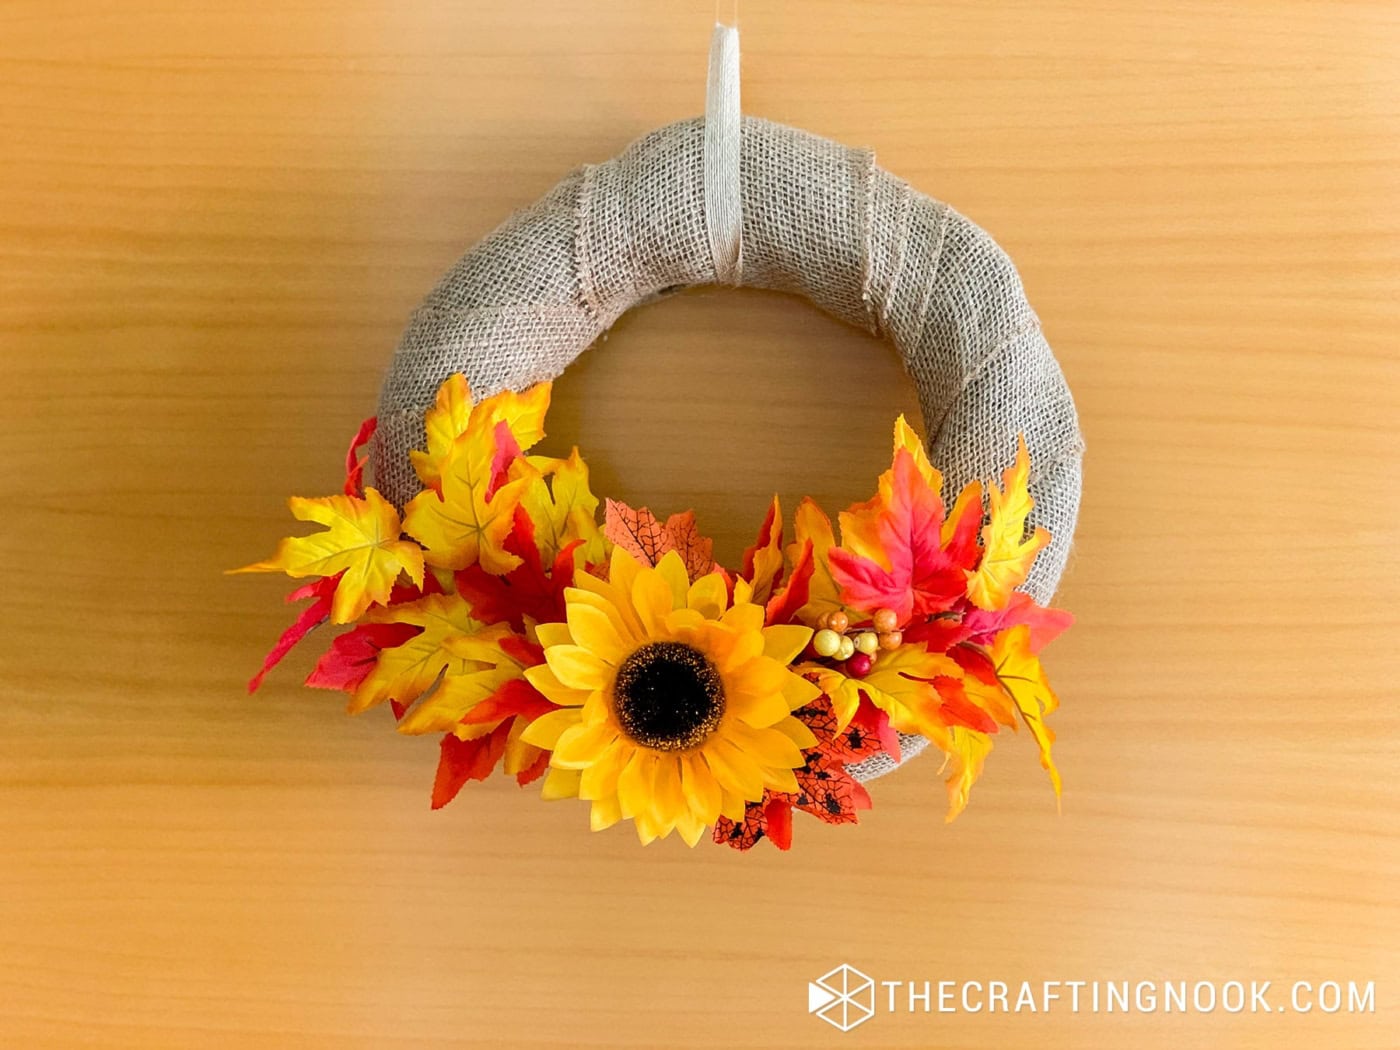
And that’s it!
You’ve just made a beautiful fall wreath with minimal fuss and no mess. Best part? Everything can be taken apart and reused for another project or season!

Crafting Tips
- Before attaching the faux leaves, gently bend and shape them so they have a more natural look when placed on the wreath.
- Slip in a small wooden letter or a mini seasonal sign (like “Hello Fall”) for an extra bit of personality. These are easy to find at craft stores and add a unique touch.
- Hide in a few cinnamon sticks or tie a small scented sachet behind the leaves to give it a subtle fall scent.
- Feel free to add other embellishments such as a few real pinecones, acorns, or small branches to give your wreath an even more authentic, earthy fall feel. Just make sure they’re clean and dry!
- Get the kids involved by letting them help pick out leaves or flowers and arrange them.
- Always visit thrift stores and dollar trees, you might find really good items such as cute ornaments, pinecones, and decor items to help you create an amazing wreath.
Alternatives and Substitutions
You can use a foam wreath or even a wire wreath form instead of the grapevine frame. All of them can be found at a dollar store.
Alternatively, for the floral wire, you can use jute twine that matches your burlap ribbon color so it’s almost invisible.
Instead of a sunflower, you can switch the focal point to a different seasonal item like a small pumpkin, a cute wooden sign, or even a fall-themed bow for variety.
Frequently Asked Questions
You can definitely switch it up! A foam or wire wreath base will work just fine. The grapevine base adds a more rustic look, but feel free to use whatever you have on hand. Just make sure your base is sturdy enough to hold your decorations.
Yes, you can! If you’re looking for a more permanent wreath, hot glue gun with glue sticks is a great option. However, if you want the flexibility to reuse the decorations for another project or swap them out seasonally, wire is the better choice because it allows for easy adjustments and removal.
Once you’ve arranged everything to your liking, make sure to tightly secure each piece with floral wire. For extra stability, wrap the wire around the stems and the grapevine base a few times. This will keep everything in place and prevent your decorations from shifting.
Definitely! This project is kid-friendly as long as they’re supervised with the wire. You can make it even easier for them by using floral pins or twist ties instead of wire, and let them help choose and arrange the decorations.
If you have all your materials ready, this wreath should take about 30-45 minutes to complete, depending on how detailed you get with your decorations. It’s a quick and fun project that doesn’t require a ton of time or effort!
No worries! You can use other fabrics or ribbons to wrap your wreath base. Plaid flannel or even lace can add a different texture and style to your wreath, so get creative with what you have at home!
More Fall Projects To Try
Like this DIY Burlap Wreath tutorial? You might definitely love these other Fall project ideas too:


✂️ Tutorial
DIY Burlap Wreath for Fall
Tools
- Wire cutters – for trimming the wire.
- scissors
Supplies
- Grapevine wreath base – mine was about 12 inches but feel free to go larger or smaller and even a different material.
- Wide burlap ribbon to cover the base – about 4-5 inches wide
- Thin rustic ribbon – for hanging the wreath
- Faux fall leaves – a mix of yellow orange, and red gives that lovely autumn feel
- Faux sunflowers – optional but they add such a bright pop of color
- Floral wire – for attaching the decorations
Instructions
Step 1: Wrap the wreath base with burlap
- Start by taking your wide burlap ribbon and wrapping it around the grapevine base. You want it to be snug but not too tight. The idea is to cover the wreath, but it’s totally okay if a little bit of the grapevine peeks through.
- Once wrapped, tuck the end of the burlap ribbon into the back of the wreath. You don’t need glue for this; you will secure it with your floral wire and the burlap’s texture should hold it in place.
Step 2: Arrange the fall leaves
- Now start placing your faux fall leaves around the bottom of the wreath or even slightly to the side.
- Play around with the foliage, flowers, and accents until you find a combination that makes you smile. I used leaves in different colors, along with a small bunch of berries in earthy tones to add a little extra fall touch.
- Arrange the leaves carefully and bend them so they sit just right to make sure your wreath looks balanced and beautiful. Don’t be afraid to tweak things until it feels perfect!
- Once you’re happy with the arrangement, use the floral wire to attach the leaves to the wreath.
- Simply wrap the wire around the stems and the grapevine base, making sure it’s tight enough to hold everything in place then secure the wire on the back of the wreath.
Step 3: Add sunflowers for a pop of color
- Take your faux sunflowers and nestle them among the leaves. I love adding a big sunflower as the focal point and you can also add a smaller one for balance.
- Use the floral wire again to secure them to the wreath, wrapping it around the stems and the base.
Step 4: Attach the hanging ribbon
- Cut a piece of your thin rustic ribbon. I went for about 10 inches, but you can adjust based on where you want it to hang.
- Loop it around the top of the wreath and tie a knot. This ribbon is what you’ll use to hang your wreath, so make sure it’s secure but not too tight.
Step 5: Final touches
- Take a step back and adjust anything that feels out of place. The beauty of using wire instead of glue is that you can move things around until it looks perfect.
- Once you’re satisfied, your wreath is ready to hang!
- And that’s it!
Share and PIN ME!!!
Til’ next time…


FREE WORKBOOK
Keeping your Sweet Home Organized
Learn how to create intentional habits and simple routines to Keep Your Home Organized. Plus freebies, printables, exclusive content, and tips.
Disclaimer: By clicking on the “Yes” button above you are giving me your consent to collect and use your information according to the law and My Policy Privacy. Zero Spam I promise!