DIY Embellished Shoes with Daisy and Butterfly Buttons
This post may contain affiliate links. Please read our Disclosure Policy.
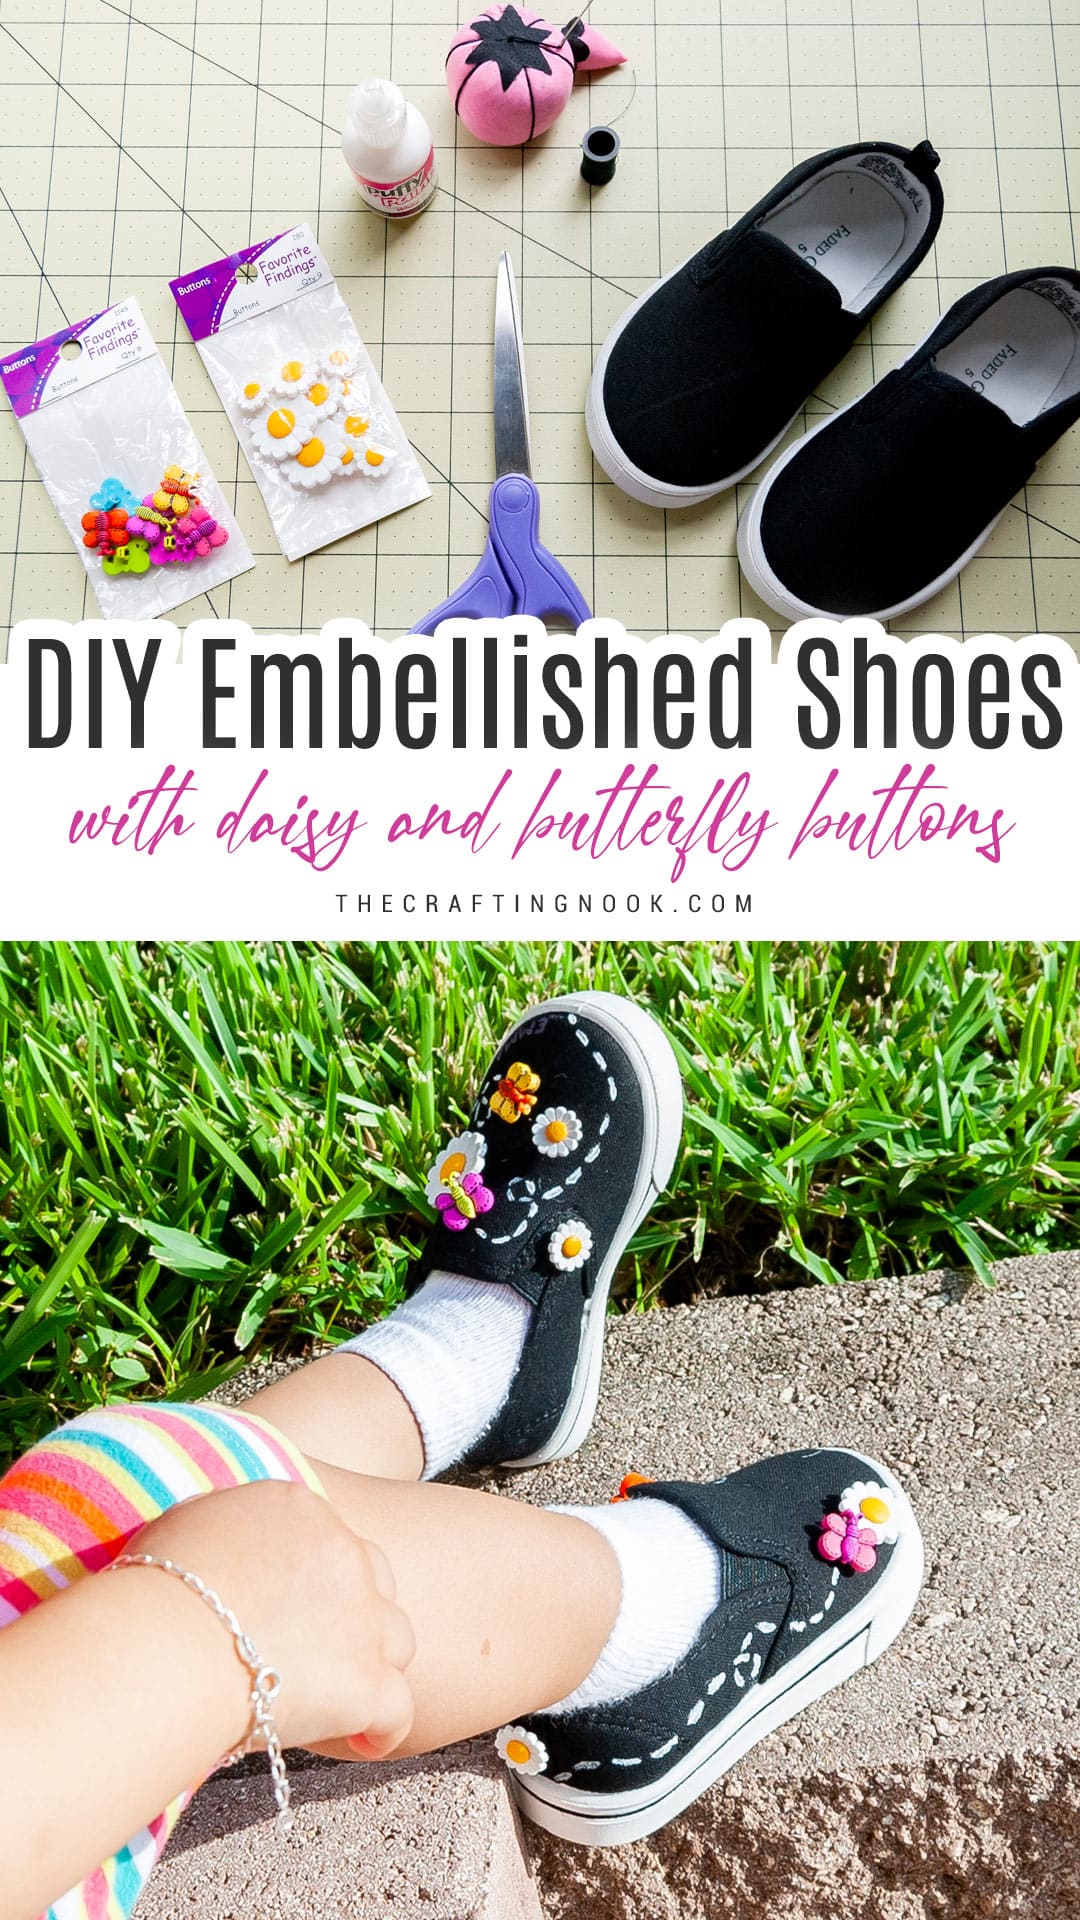
Learn how to transform plain shoes into adorable, unique, and personalized ones with a little bit of paint, daisy, and butterfly buttons! This DIY embellished shoes tutorial is easy, quick, and perfect for your little one’s favorite style.
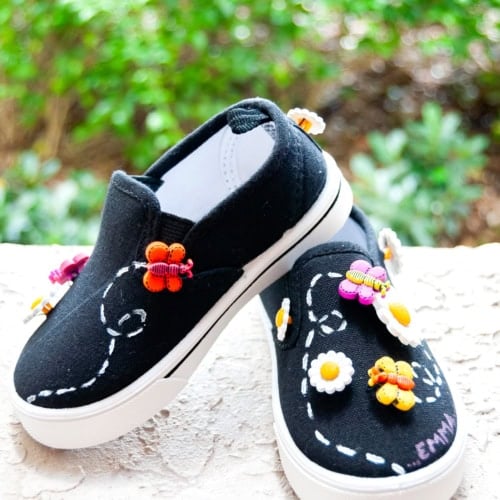
How cute can turn out some simple and plain shoes when you add some decorations to them? I made these adorable DIY embellished shoes with daisy and butterfly buttons for my little girl, and they turned out super cute! Best part? They only took a few minutes!
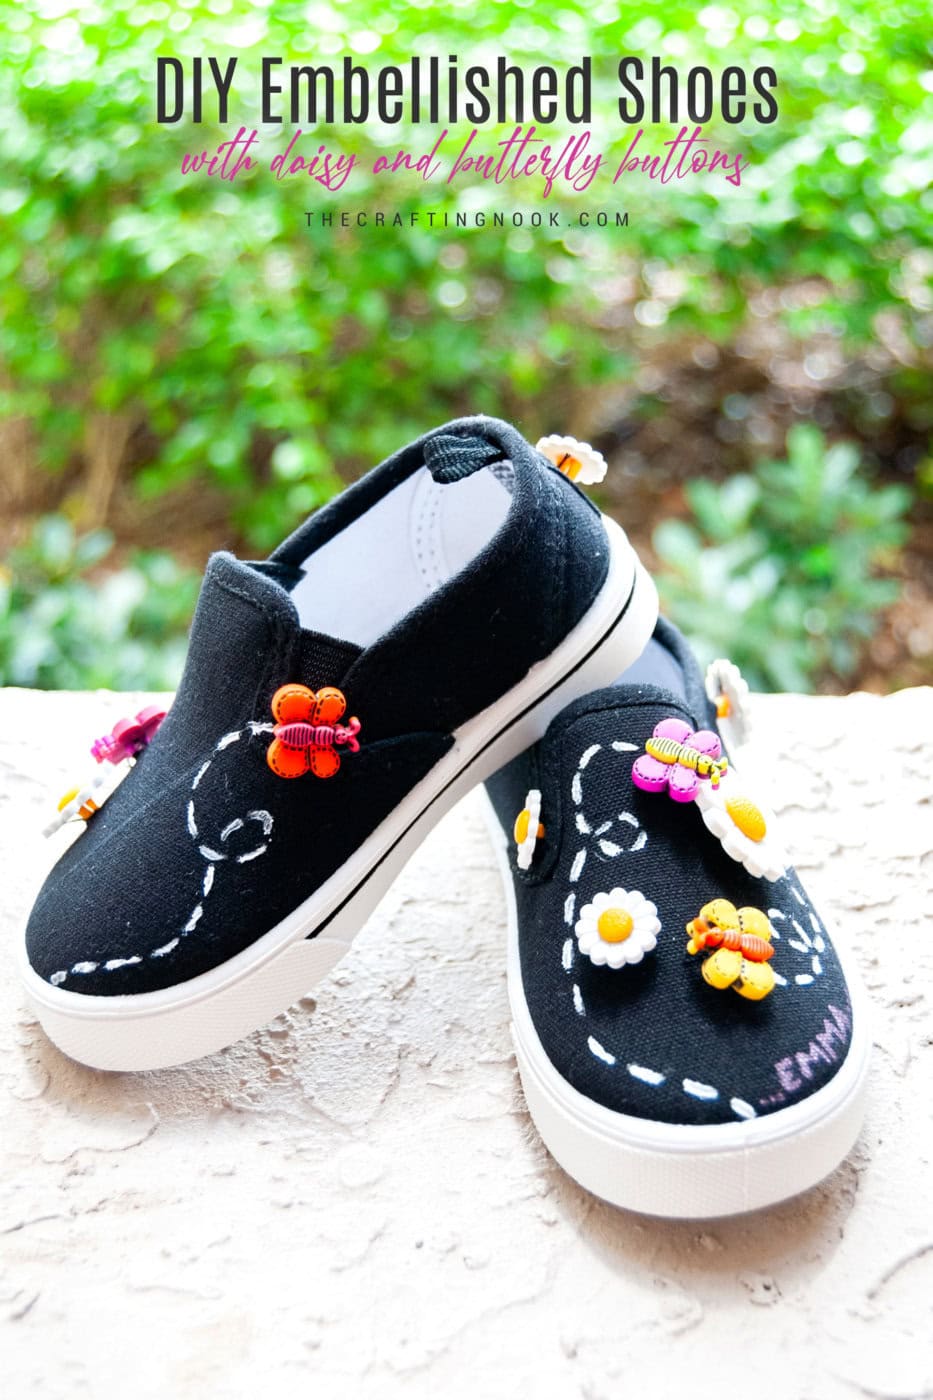
Table of Contents
Daisy and Butterfly Embellished Shoes
I was shopping the other day with my Mom hunting for shoes for Em. when she pointed out some plain black canvas shoes. Honestly, at first, I wasn’t feeling them at all! They seem so for boys. I said to her: Em and I are so girly and these looked way too simple, so bleh!
But then, mom gave me that look and said, “Aren’t you crafty?”
How was I supposed to answer to that?
Of course, I couldn’t argue with that! So, we bought two pairs. As soon as I got home, I started thinking about other pairs of shoes I could embellish, and well, now every plain pair in our house is at risk of a makeover! 😂
Her embellished shoes turned out super cute and people kept asking where I bought them. Little do they know how easy they were to make! Here’s how you can DIY your own.
How to Make these DIY Embellished Shoes
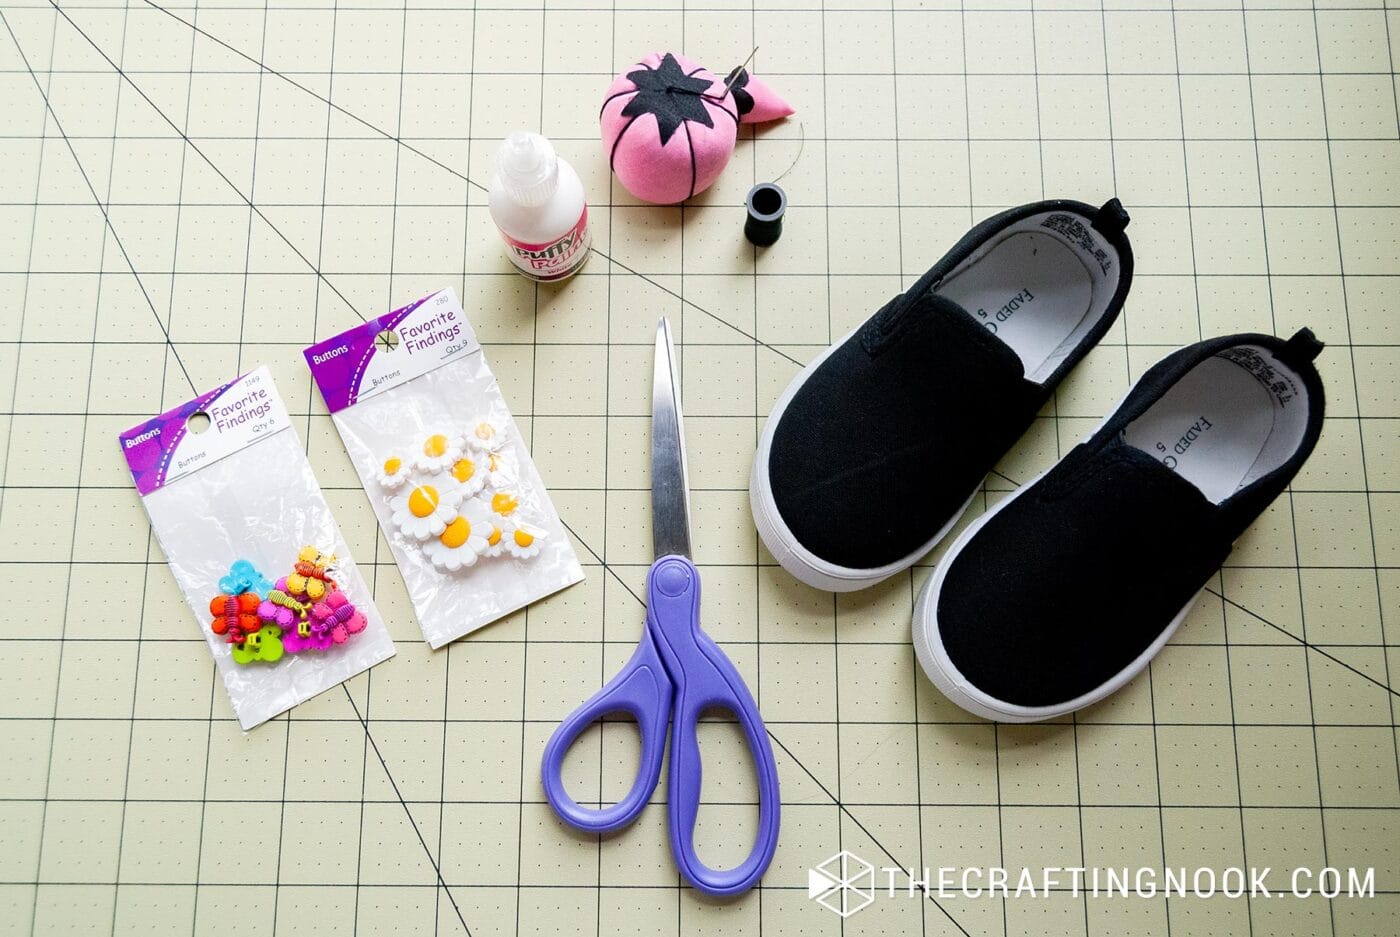
Supplies:
- Plain canvas pair of shoes – any color works, but I love how black makes the decorations pop
- Cute buttons – I used daisies and butterflies, but the possibilities are endless!
- Thread and needle
- White fabric paint – preferably for dark textiles.
- A thin paintbrush
- Scissors
- Sharpie – optional for personalization
Instructions:
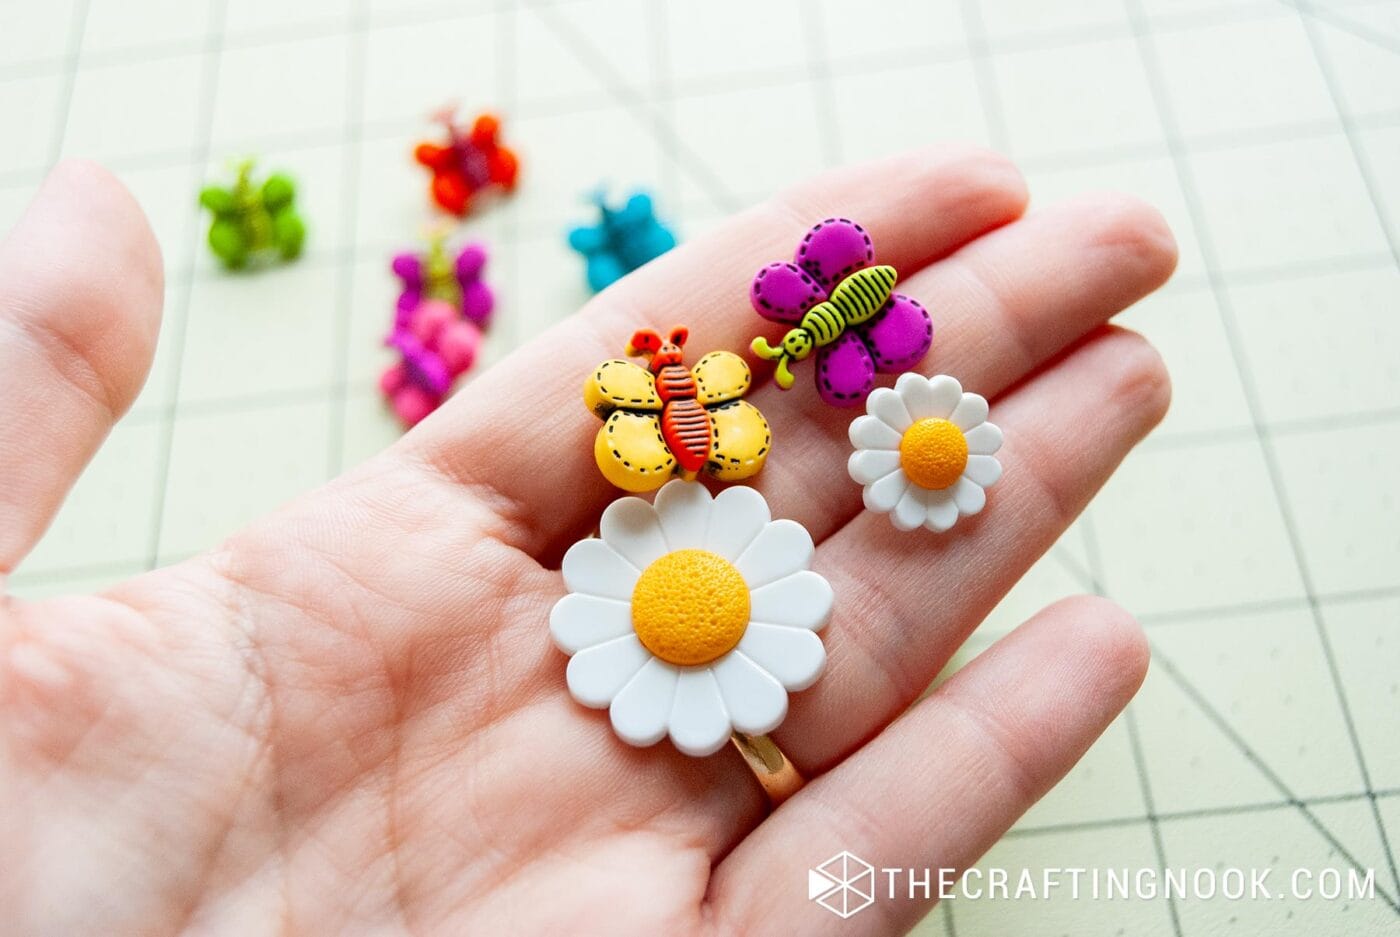
Step 1: Pick Your Buttons
I chose some cute and bright daisy and butterfly buttons to give the shoes a playful vibe. You can find all sorts of cute options at your local craft store or online.
Step 2: Sew on the Buttons
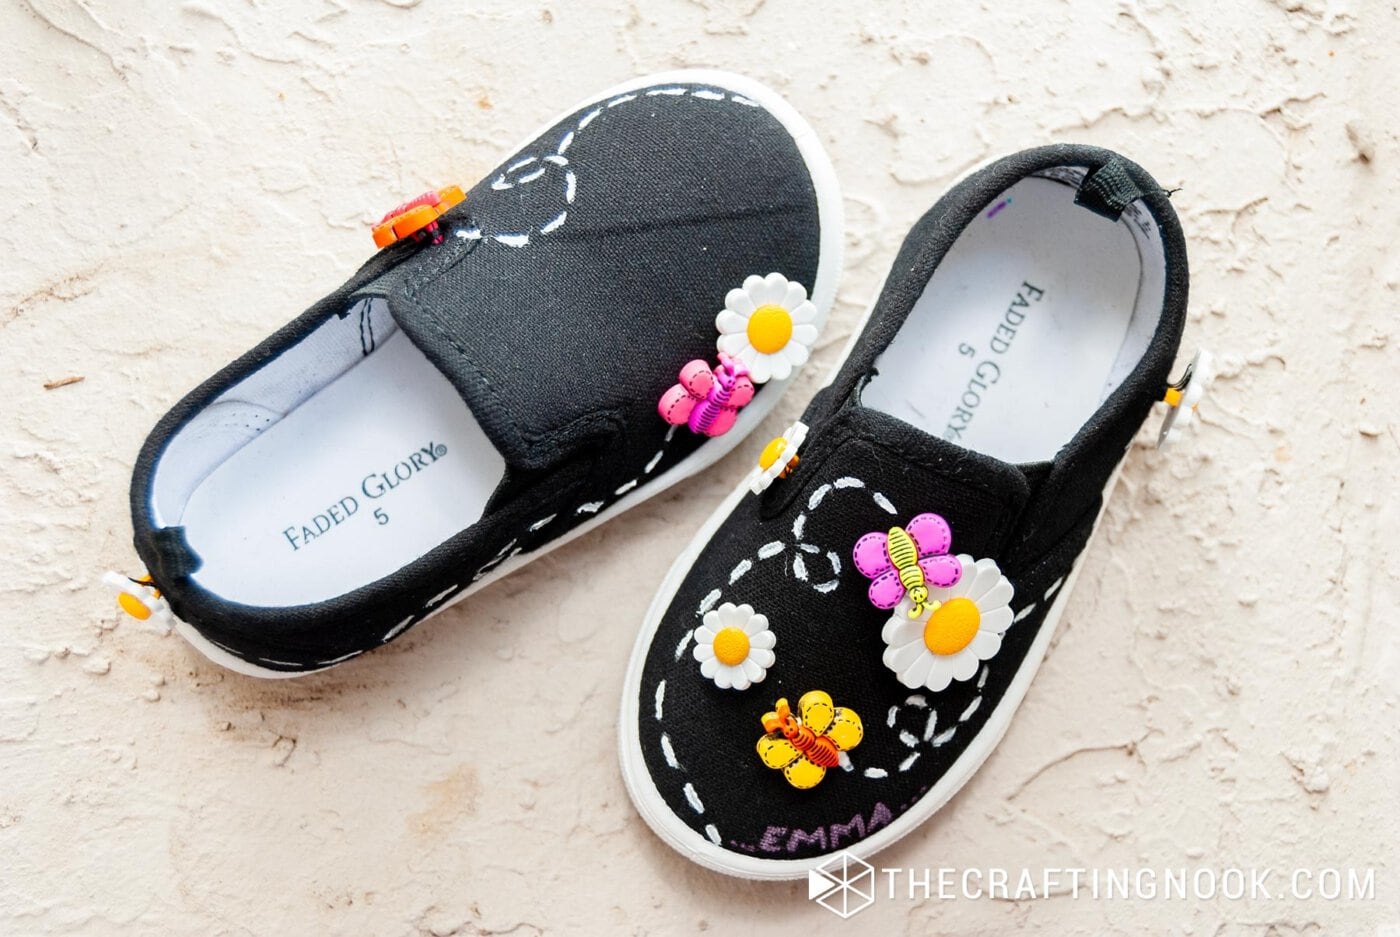
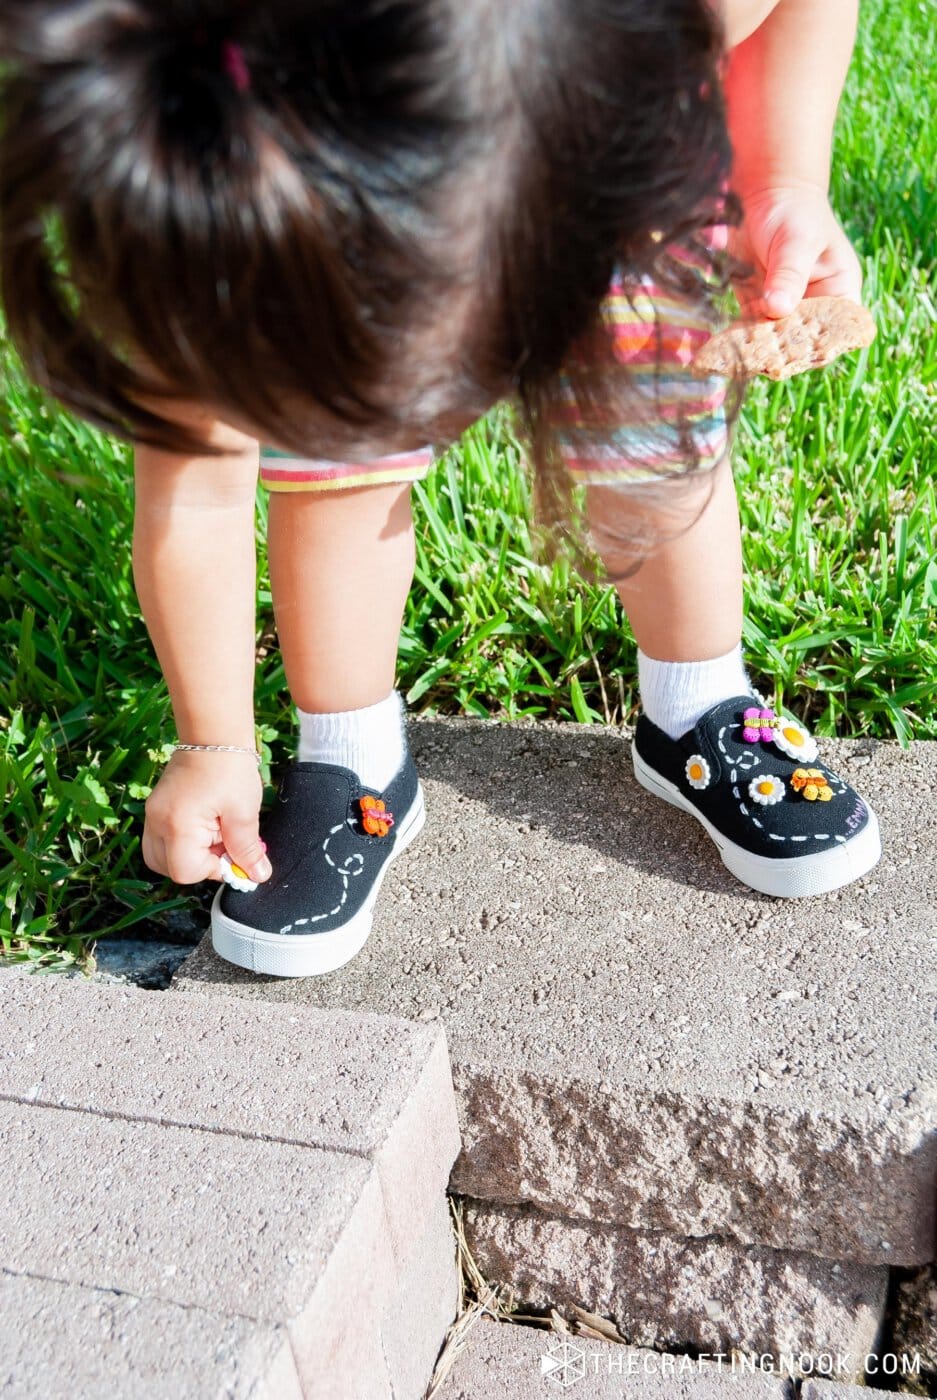
Using a needle and thread, sew the buttons onto the shoes. Spread them in a fun way like telling a story.
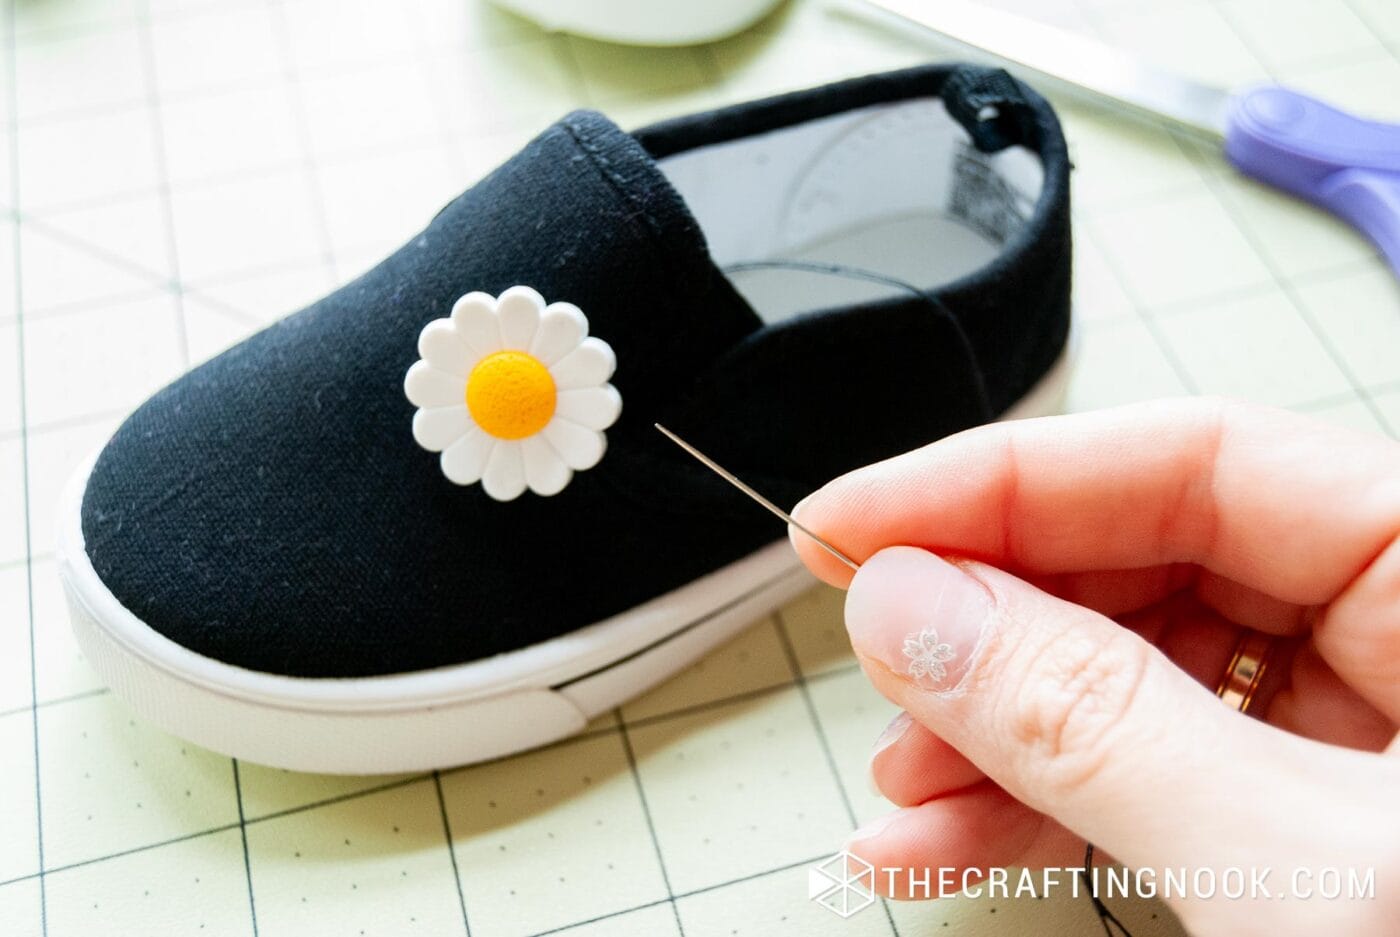
Make sure the thread knot when you finish sits outside the shoes, under the buttons, so it doesn’t rub against your kid’s feet. The button will hide the knot and keep everything comfortable.
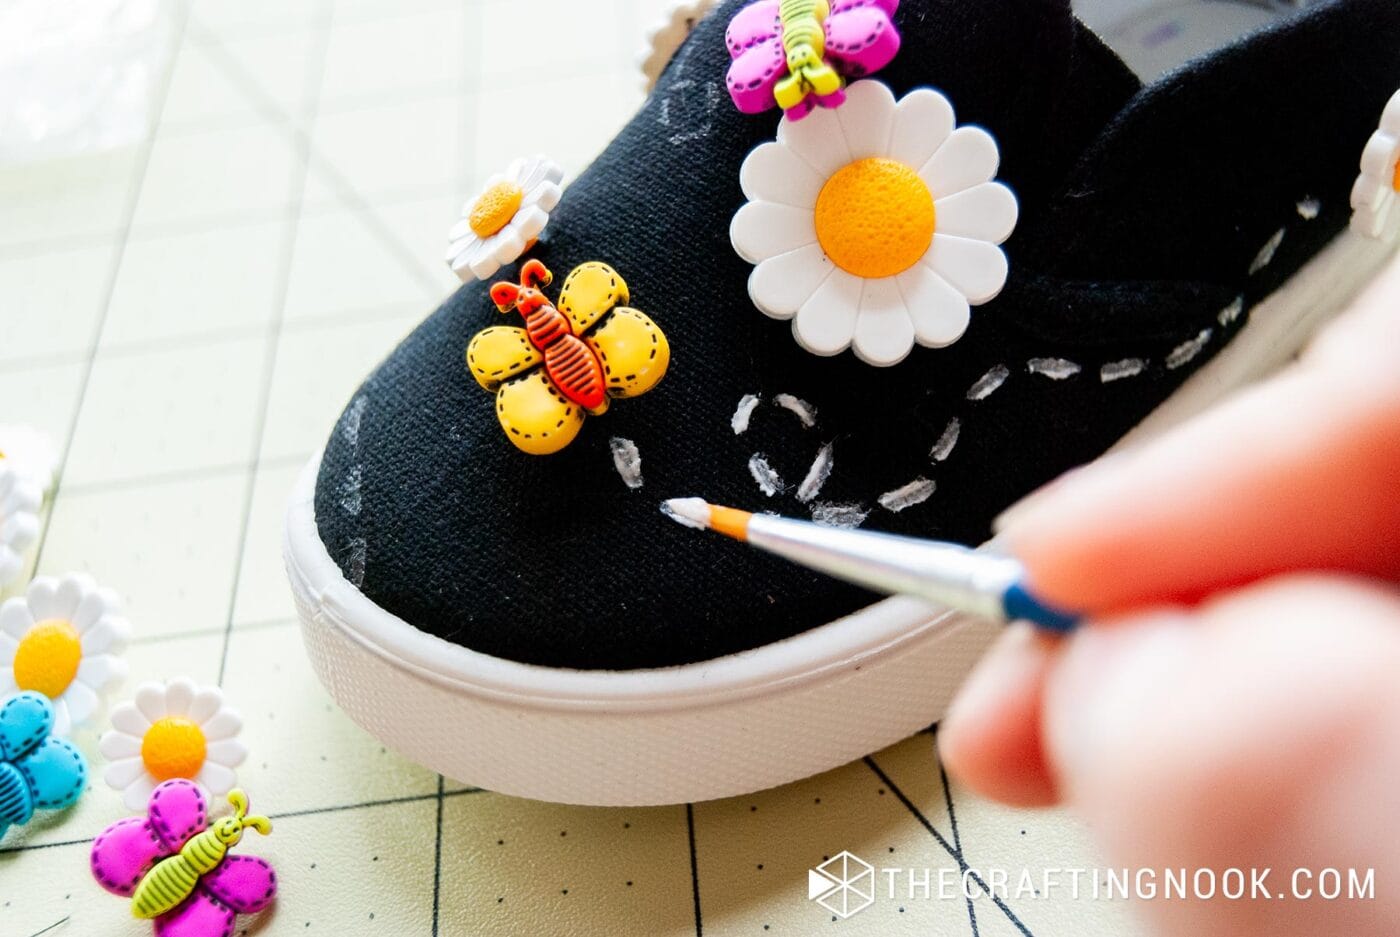
Step 3: Create Butterfly Trails
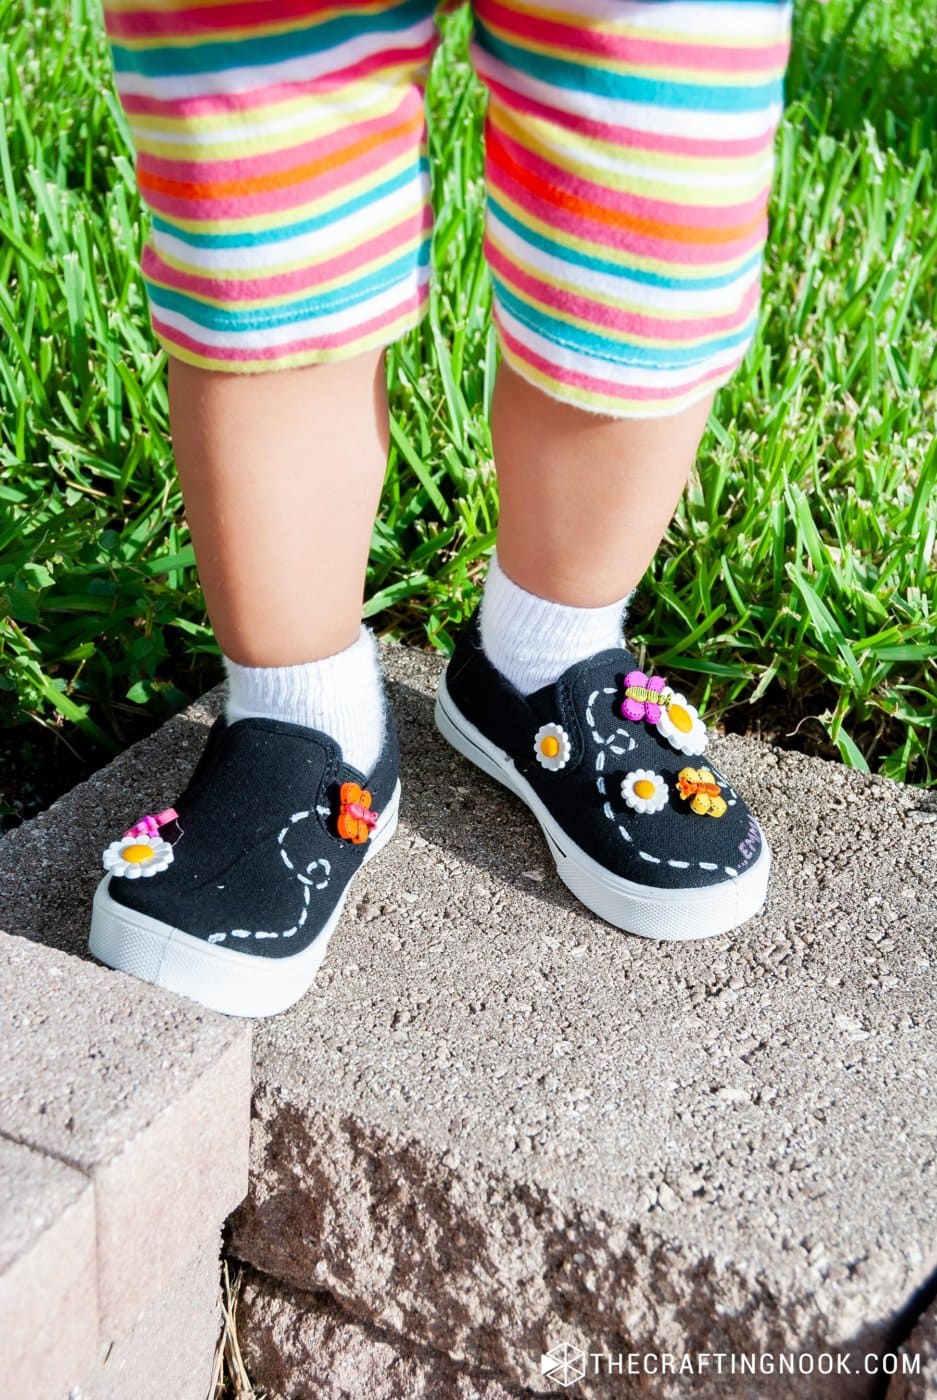
With a fine paintbrush and white fabric paint, paint delicate dashed lines on the shoes to mimic the butterfly’s flight path. It adds such a playful touch!
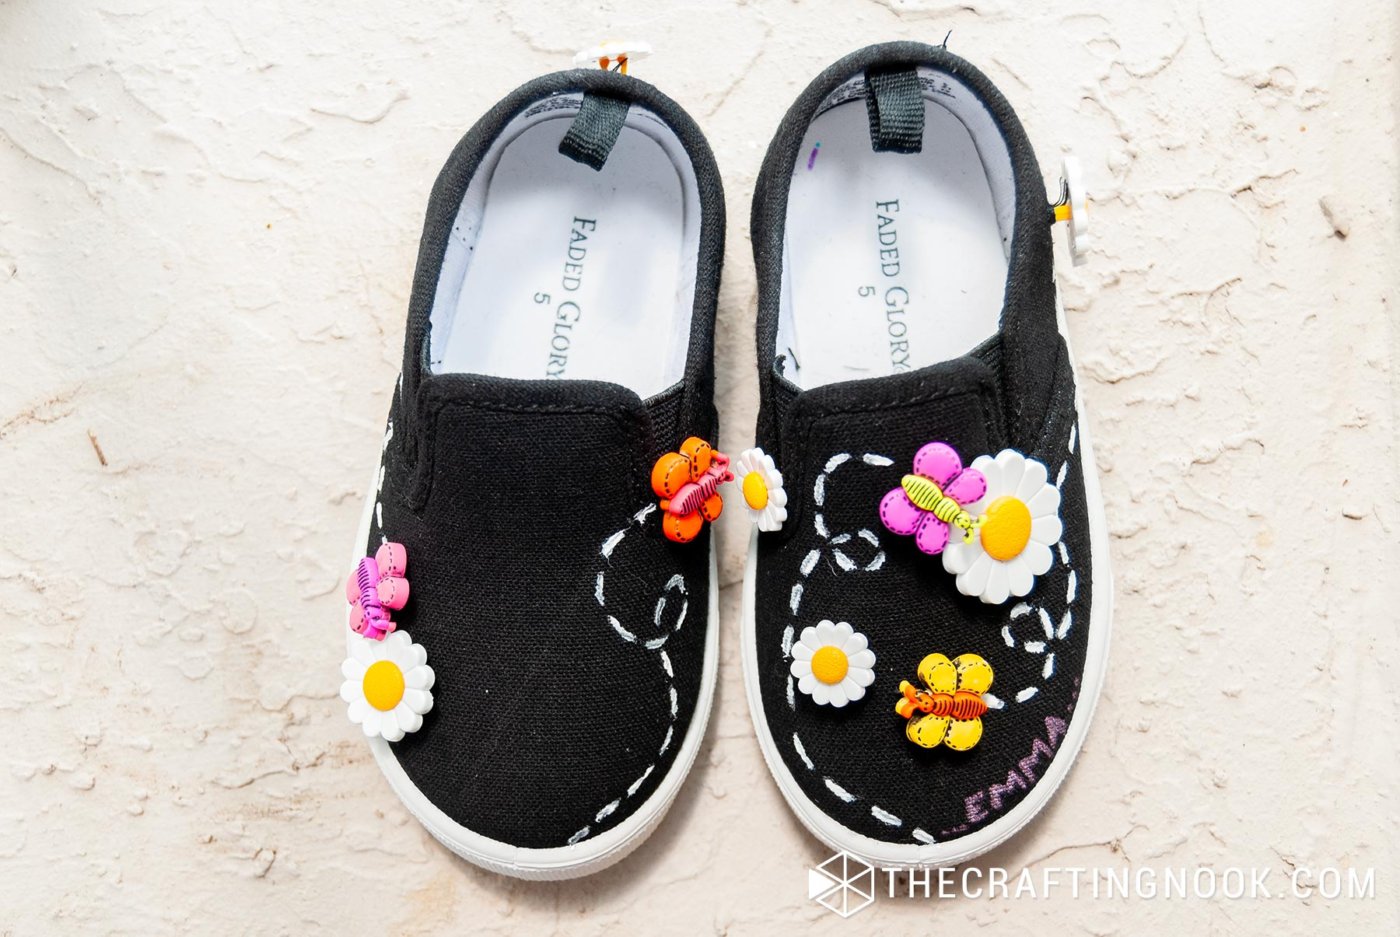
Step 4: Personalize
This step is totally optional.
I decided to add Emma’s name with a Sharpie for that extra special touch and also to quickly recognize them at school.
You could add any word or pattern you like.
This step is totally optional.
Step 5: Let it dry
Let the shoes dry in a cool, well-ventilated space for at least 6 hours (24 hours would be ideal) to ensure the paint is cured.
And that’s it! You’ve now got custom DIY embellished shoes that look store-bought but are truly one-of-a-kind. Easy, right?
Crafting Tips
- Don’t be afraid to experiment with different button styles, colors and different sizes to match your child’s personality. Stars, hearts, animals—there are endless possibilities!
- Make sure the thread knot when you finish sits outside the shoes and under the buttons, so it doesn’t rub against your kid’s feet making them uncomfortable.
- While sewing on buttons, always double-check that there are no sharp edges or tangled stitches inside the shoe that could cause discomfort.
- Fabric paint can be used in so many ways! Add polka dots, stripes, or even your child’s favorite shapes to make the shoes even more unique.
- You can also use glitter paint as long as it’s formulated for fabric.
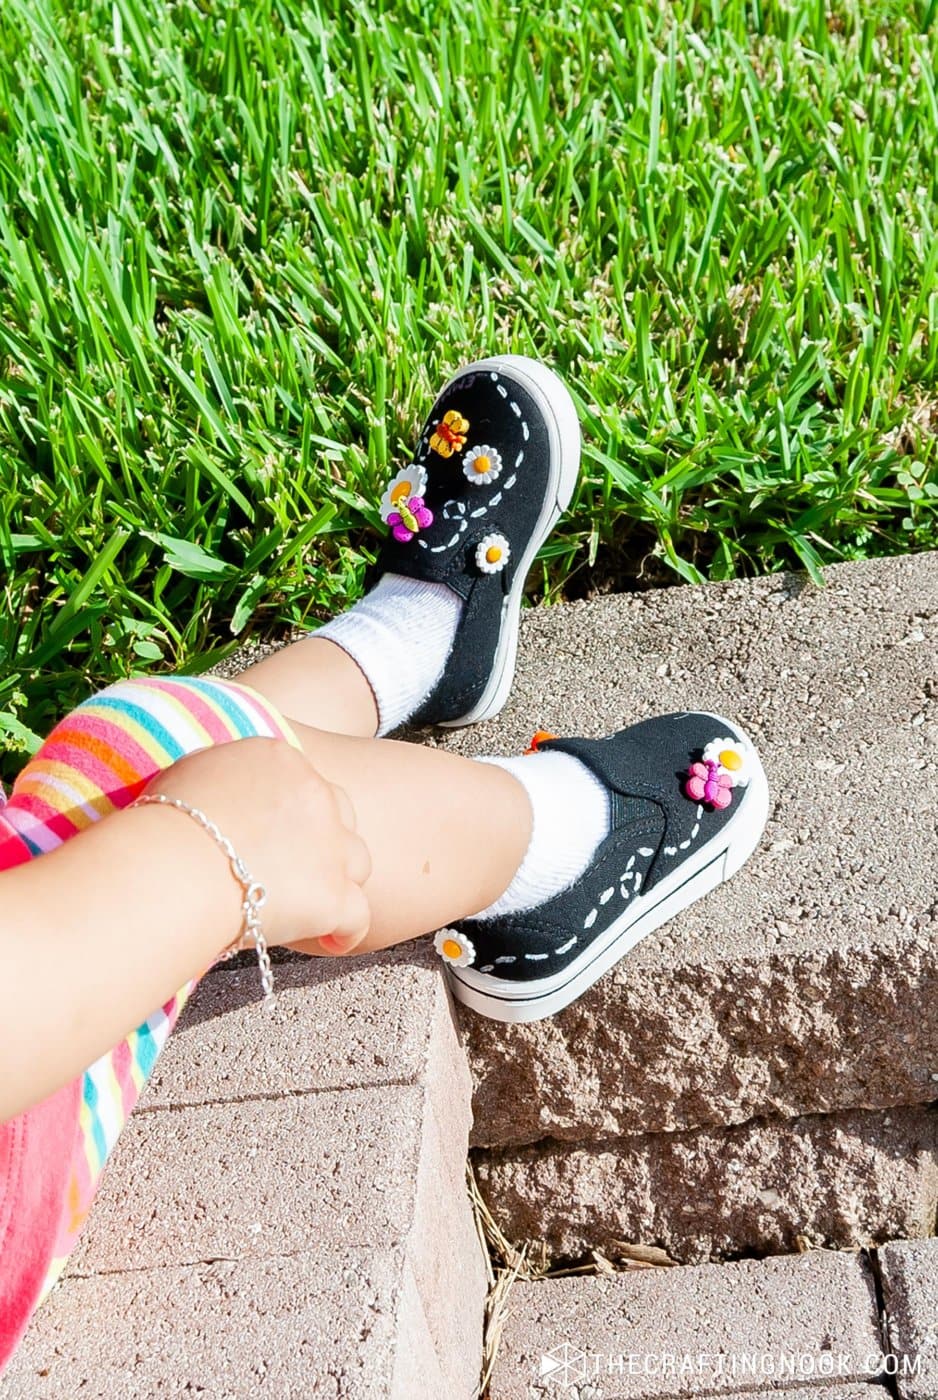
She absolutely loves them! Every time we go out, she runs to the room and gets them!!!
Why You’ll Love These Embellished Shoes
- They are super affordable. You don’t need fancy materials or tools—just some buttons and fabric paint, which you probably already have at home and if not they are not expensive at all.
- This is a quick and easy project. This DIY takes just minutes, but the result looks like you spent hours crafting.
- They are perfect for personalization. These shoes are a fun way to let your kid’s personality shine, whether it’s through colorful designs or their name in bold letters.
Alternatives and Substitutions
Add some sparkle by sewing on beads or small rhinestones. You can create patterns like swirls, flowers, or even your child’s initials.
Use glow-in-the-dark fabric paint and buttons to create designs that light up at night. One perfect way to add a magical element that kids will love!
Use stencils and fabric paint to create uniform shapes and patterns, like stars or stripes. Stamping with fabric-safe ink can also be a fun way to add prints.


Frequently Asked Questions
Plain canvas shoes are ideal because they’re easy to sew through and work well with fabric paint.
Use a strong, durable thread and secure each button or embellishment with multiple stitches. For added security, you can use fabric glue along with stitching. Make sure to double-knot your thread and trim any excess to prevent unraveling.
Yes, but hand washing is recommended to preserve the embellishments. Use a mild detergent and a soft brush to clean the shoes gently. Avoid soaking them in water and let them air dry.
While it’s a fun project for kids, adult supervision is needed, especially for sewing and using fabric paint. You can let kids pick the embellishments and design, but help with attaching them for safety.
Choose fabric paint that is specifically formulated for the material of your shoes (e.g., paint for dark fabrics if using dark-colored shoes). Look for non-toxic, washable options that won’t crack or peel after drying.
Absolutely! And I actually encourage you to. This DIY can be a fun way to personalize your own shoes. Just choose embellishments and designs that suit your style! You can also make matching shoes with your kids.
More Cute Projects for Kids To Try
Like this DIY Embellished shoes tutorial? You might definitely love these other cute project ideas for Kids too:
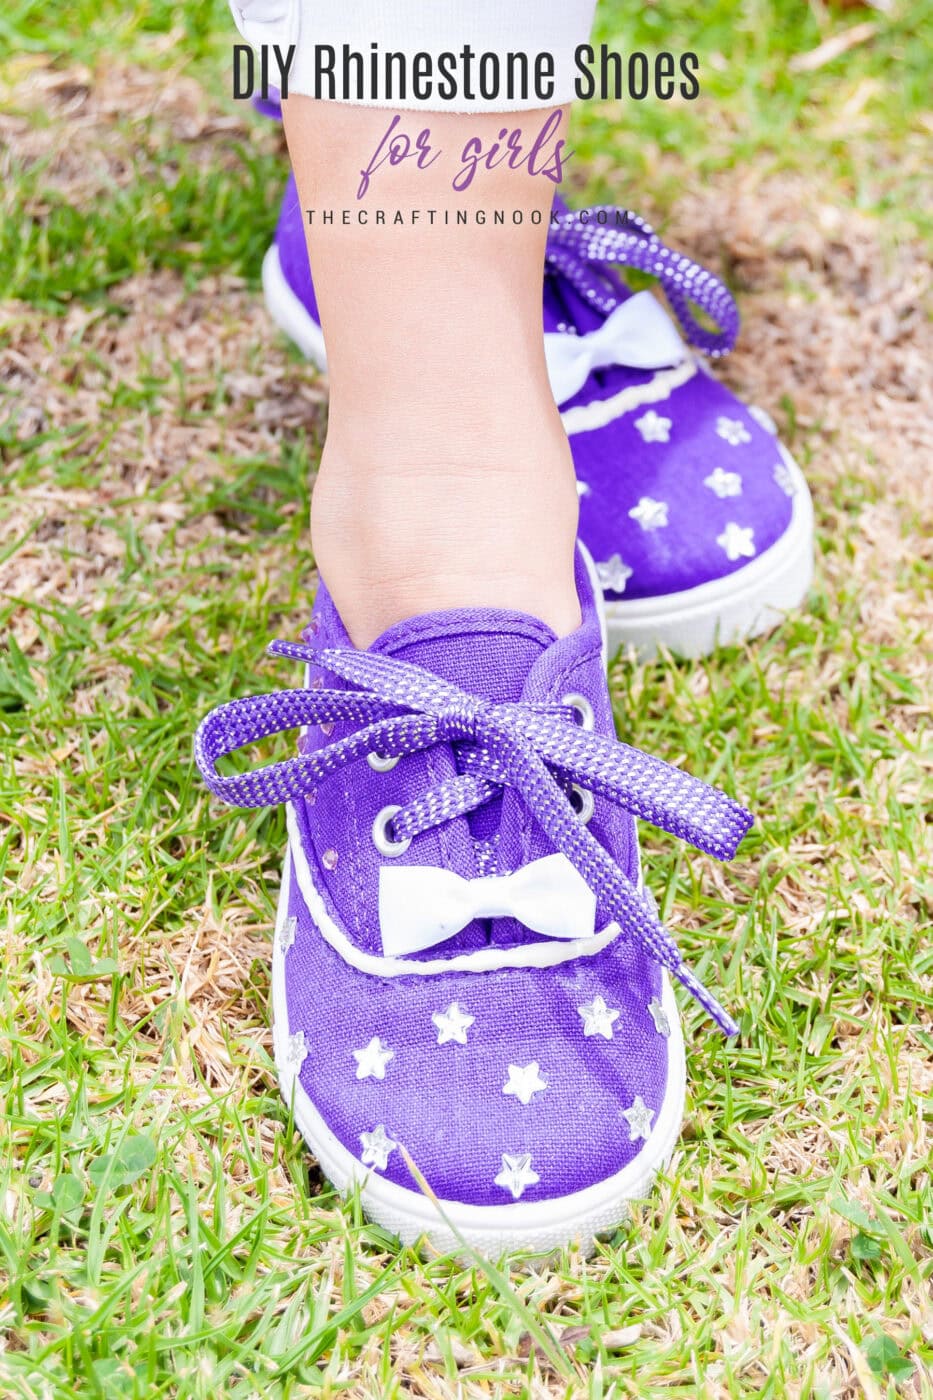

Some other cute Shoe crafts I love from my favorite bloggers:
- Retro Canva Shoe Makeover by Lauren over at The Thinking Closet
- DIY Sharpie Galaxy Shoes by Camille over at Growing up Gabel
- DIY Sprinkle Shoes by Toni over at Stitch & Pink
✂️ Tutorial
DIY Embellished Shoes with Daisy and Butterfly Buttons
Supplies
- Plain canvas pair of shoes – any color works but I love how black makes the decorations pop
- Cute buttons – I used daisies and butterflies but the possibilities are endless!
- Thread and needle
- White fabric paint – preferably for dark textiles.
- A thin paintbrush
- Scissors
- Sharpie – optional for personalization
Instructions
Step 1: Pick Your Buttons
- I chose some cute and bright daisy and butterfly buttons to give the shoes a playful vibe. You can find all sorts of cute options at your local craft store or online.
Step 2: Sew on the Buttons
- Using a needle and thread, sew the buttons onto the shoes. Spread them in a fun way like telling a story.
- Make sure the thread knot when you finish sits outside the shoes, under the buttons, so it doesn’t rub against your kid’s feet. The button will hide the knot and keep everything comfortable.
Step 3: Create Butterfly Trails
- With a fine paintbrush and white fabric paint, paint delicate dashed lines on the shoes to mimic the butterfly’s flight path. It adds such a playful touch!
Step 4: Personalize
- This step is totally optional.
- I decided to add Emma’s name with a Sharpie for that extra special touch and also to quickly recognize them at school.
- You could add any word or pattern you like.
- This step is totally optional.
Step 5: Let it dry
- Let the shoes dry in a cool, well-ventilated space for at least 6 hours (24 hours would be ideal) to ensure the paint is cured.
- And that’s it! You’ve now got custom DIY embellished shoes that look store-bought but are truly one-of-a-kind. Easy, right?
Share and PIN ME!!!
What do you think? How would you decorate shoes like these?
Til’ next time…


FREE WORKBOOK
Keeping your Sweet Home Organized
Learn how to create intentional habits and simple routines to Keep Your Home Organized. Plus freebies, printables, exclusive content, and tips.
Disclaimer: By clicking on the “Yes” button above you are giving me your consent to collect and use your information according to the law and My Policy Privacy. Zero Spam I promise!
adorable!! Thanks for sharing on the #mondayfundayparty !
I’m glad you like it! Thanks for stopping by!
XOXO
These are adorable shoes….what a cute idea!
Awww Thanks Lisa! Glad you like it! =D!
XOXO
Oh my goodness are these the cutest or what? I’m letting my followers know for sure. Thanks so much for sharing this at Wonderful Wednesday Blog Hop!
Thanks so much Sinea! I do love these and guess what? I made some more LOL and are even cuter! I’ll share it soon!
XOXO
So cute…pinned and stumbled!
Thanks so much Patti! Glad you like it!
XOXO
these are super cute!! I would love a pair for myself :)
HAHA me too I must confess! Thanks so much for stopping by!
XOXO
They are adorable! My granddaughter would love them!
You can make so many things with a plain pair of shoes! Your granddaughter can help you make them!
XOXO
You are so good at decorating shoes!! I’m going to try this on MY shoes!!
Truly amazing and totally adorable shoes!! Your little girl is so cute and the shoes are the finishing touch.
Please link-up this adorable post at our rules free Blog Strut Link Party/blog hop, Thursdays at 5:00 PM PST. Our Blog Strut isn’t your average blog hop, it offers many ways to promote and give exposure to your blog and posts. We pin all links, featured posts, as well as offer free co-host spots and button/logo redesign, plus free social network link ups. Join us and show what you’ve got!! http://www.mypersonalaccent.com/linkyparty/
Did you see? You’re highlighted on my Friday Flash Blog party! Thanks for visiting and being a party of The Jenny Evolution Community.
Thanks soooooo much Jennifer how exciting!!!!! YAyyyyyyy!!!!
XOXO
Cami
Cami, these are adorable. Thanks so much for linking up at Project Inspire{d}. I featured your cute project this week: http://yesterdayontuesday.com/2013/08/project-inspired-29/.
These are so cute!Visiting from @DearCreatives
You know cute girly things like this make me wish I’d had a girl too! So, so cute!!
Awwwwwwww LOL Thanks SO much Paula. I have to confess I’m so gratefull God gave me this little princess I enjoy so much making things for her!!!
XOXO
Cami
Adorable shoes! I have some of those butterfly buttons. They are too cute! And I love the dashed lines you painted. Great shoe makeover. I’m pinning these to my Shoe Redo board! Navy Wifey Peters @ Submarine Sunday Link Party
Absolutely darling! I want some for ME! ;-) And congrats on the feature on Someday Crafts. You deserve it girlfriend.Warmly,LaurenThe Thinking Closet
Yayyyyy my friend Lauren! Thanks so much, I was super surprised to be feature without even having link it up yet LOL. I’m happy you like it!
xoxo
Cami
Those are so cute! I’m going to make some for my little cousin. Thanks for the idea!
Barb
http://turtlesandtails.blogspot.ca
I’m happy to inspire!!! Thanks for stopping by!
Hugs
Cami
How cute!! I love turning some plain into something cute! We’ll be featuring these over at Someday Crafts tomorrow :)
Yayyyy how exciting thanks so much Miranda I’m supper happy you liked that much!!!
xoxo
Cami
These are amazingly to cute for words i will have to give this project a go
Thanks so much Helen. It was so fun making them and I even have a couple of extra pairs to make more!!! LOL
Hugs
Cami