How to Make a wrapping paper bag for Valentine’s Day
This post may contain affiliate links. Please read our Disclosure Policy.
Learn how to make a heartfelt, DIY Valentine’s Day gift with a personalized wrapping paper bag with this detailed tutorial. Perfect for adding a personal touch to your presents!
After making awesome gifts {or buying them} there are always creative and crafty ways to wrap them up. I made this cute and easy paper gift bag for Valentine’s Day. Why buy one if you can create them yourself, right?

Table of Contents
How to Make a wrapping paper bag
Love is in the air, and what better way to celebrate the season of romance and friendship than by crafting a personalized, handmade wrapping paper bag for your special someone? Forget store-bought bags; we’re all about infusing your gifts with a personal touch.
With just a simple sheet of craft paper, a splash of imagination, and a whole lot of love, you’ll learn how to create a one-of-a-kind wrapping paper bag that’s perfect for presenting your Valentine’s Day gifts.
Whether you’re surprising your partner, a family member, or a close friend, this DIY project is an opportunity to show your affection in a unique way.
I love making things with my hands, even if I buy a gift I love to present it in a creative, fun, and crafty way. This diy gift bag is easy to make even though the tutorial is long.
So, grab your crafting supplies, get ready to pour your heart into this creation, and let’s dive into the art of making a Valentine’s Day wrapping paper bag that’ll leave your loved ones truly touched.
Supplies:
- Craft Paper
- Glue or double-sided tape
- Acrylic Paint – I used red and white}
- A sponge
- A heart cutout
- 5mm ribbon
Tools:
- Scissors and/or Cutter
- Paper Hole Puch
Instructions:
Firstly, cut a piece of craft paper, I usually use 2 to 3 times the size of the gift.
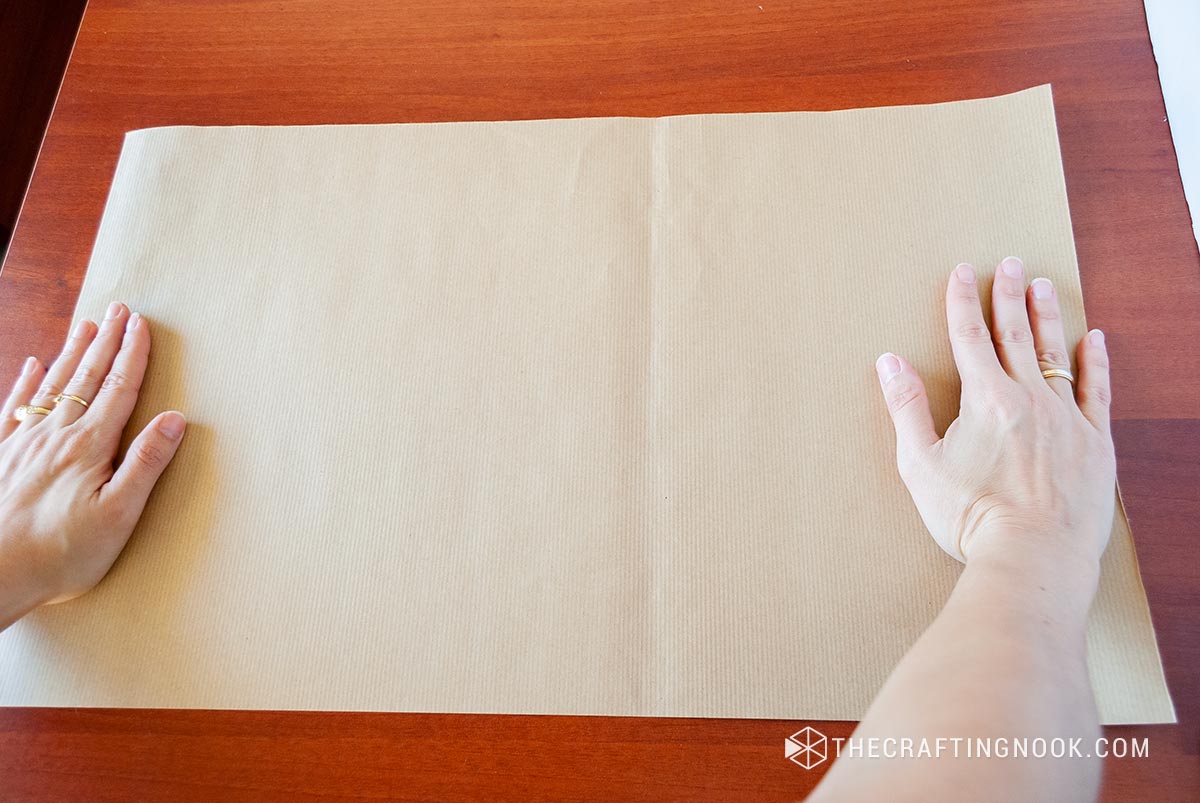
Fold it leaving just half an inch at the end.

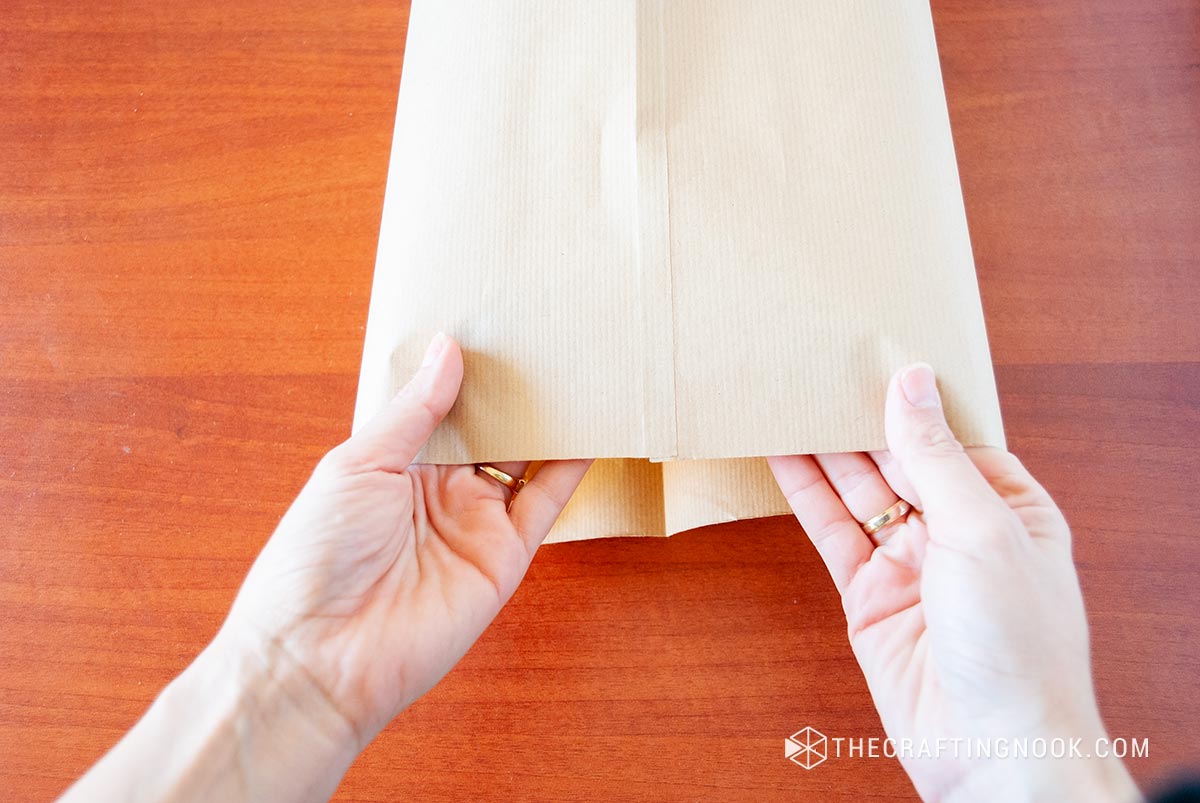
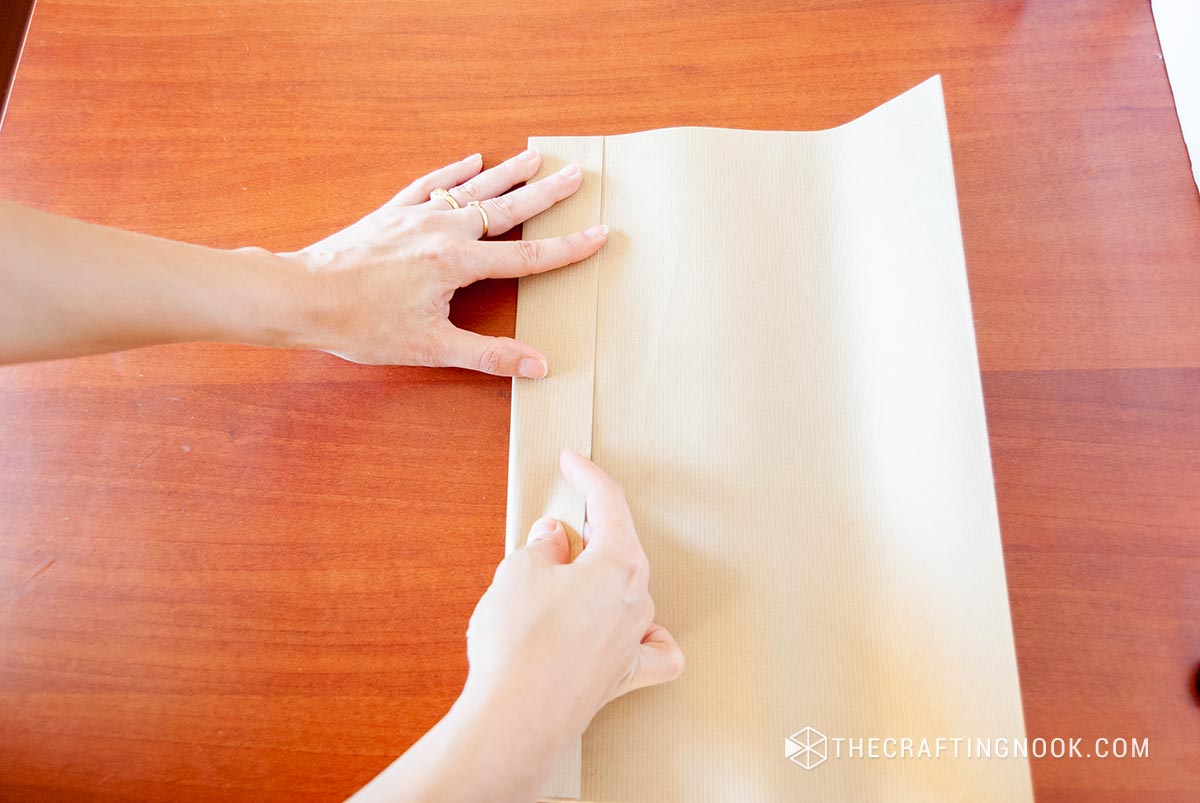
Then fold that half-inch over the previews one and glue them. You can use glue or double sided tape.


Make sure no glue leaks on the inside and let it dry for a few minutes.
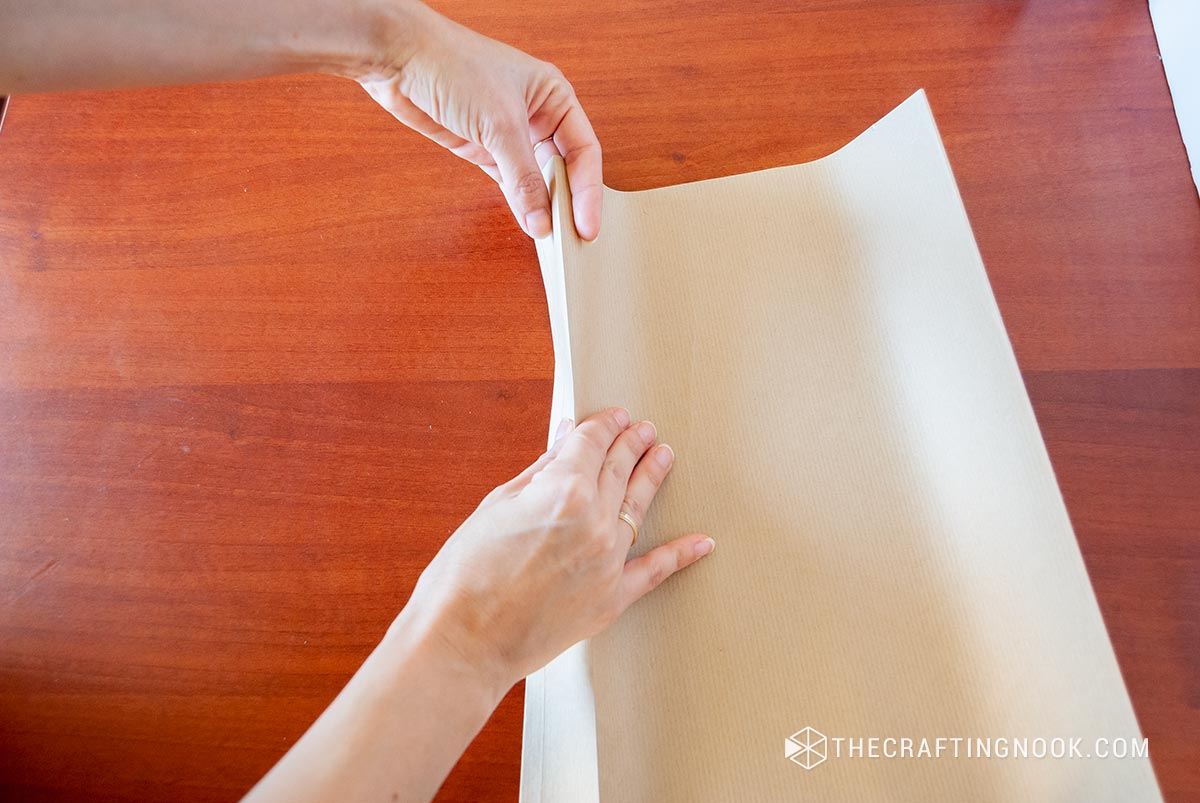
Now fold each side of the bag in the same width. In this case, I folded in 2 inches. A trick I use is I fold it both ways so it is easy to manipulate it in the next step.
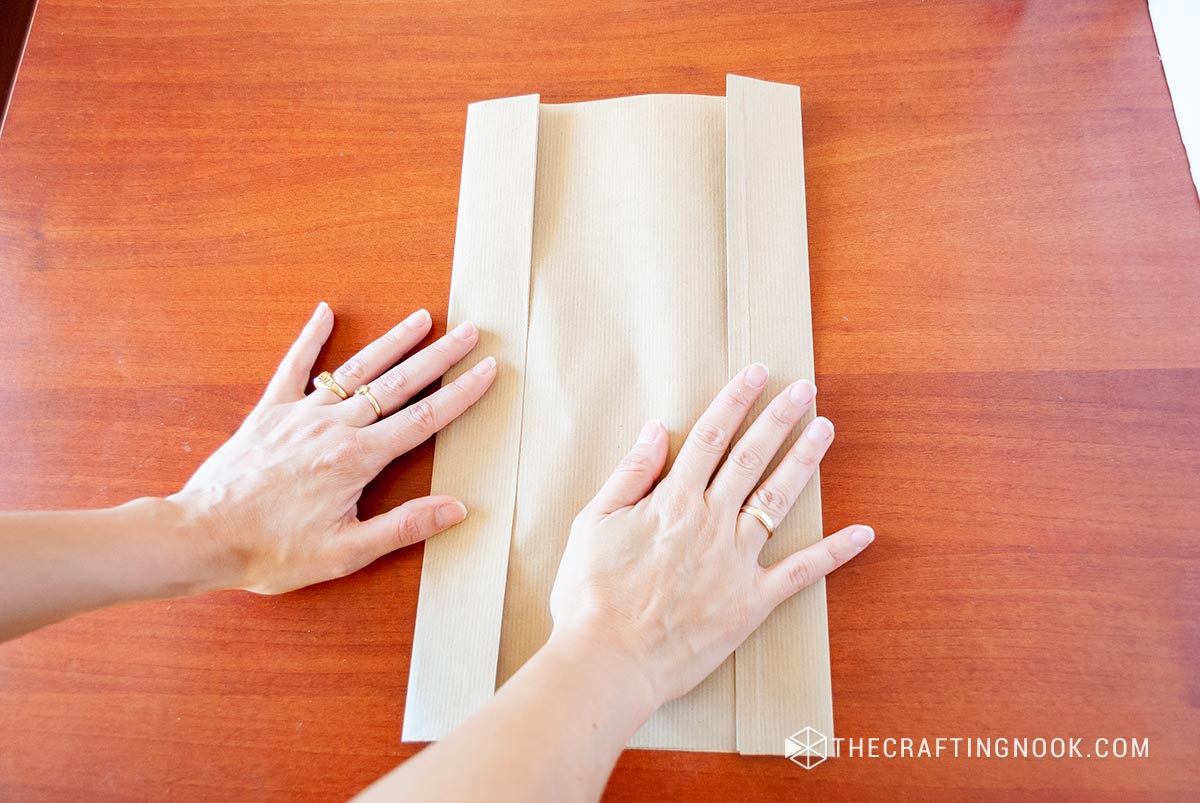
Using the folding lines tuck down each side.

Now, you should have something like this:

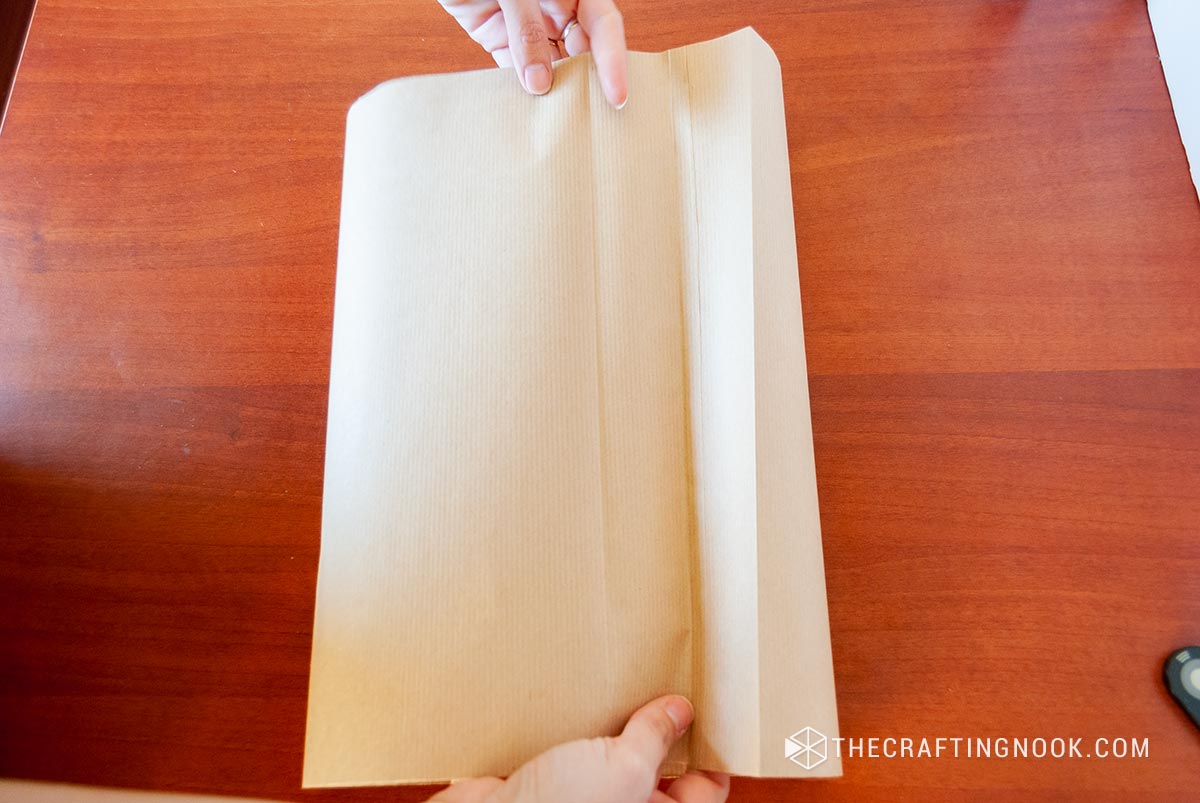
Now fold the bottom of the bag in about 1/3 of the height.

I stopped here to decorate. I did it here so I know the structure of the bag while painting.
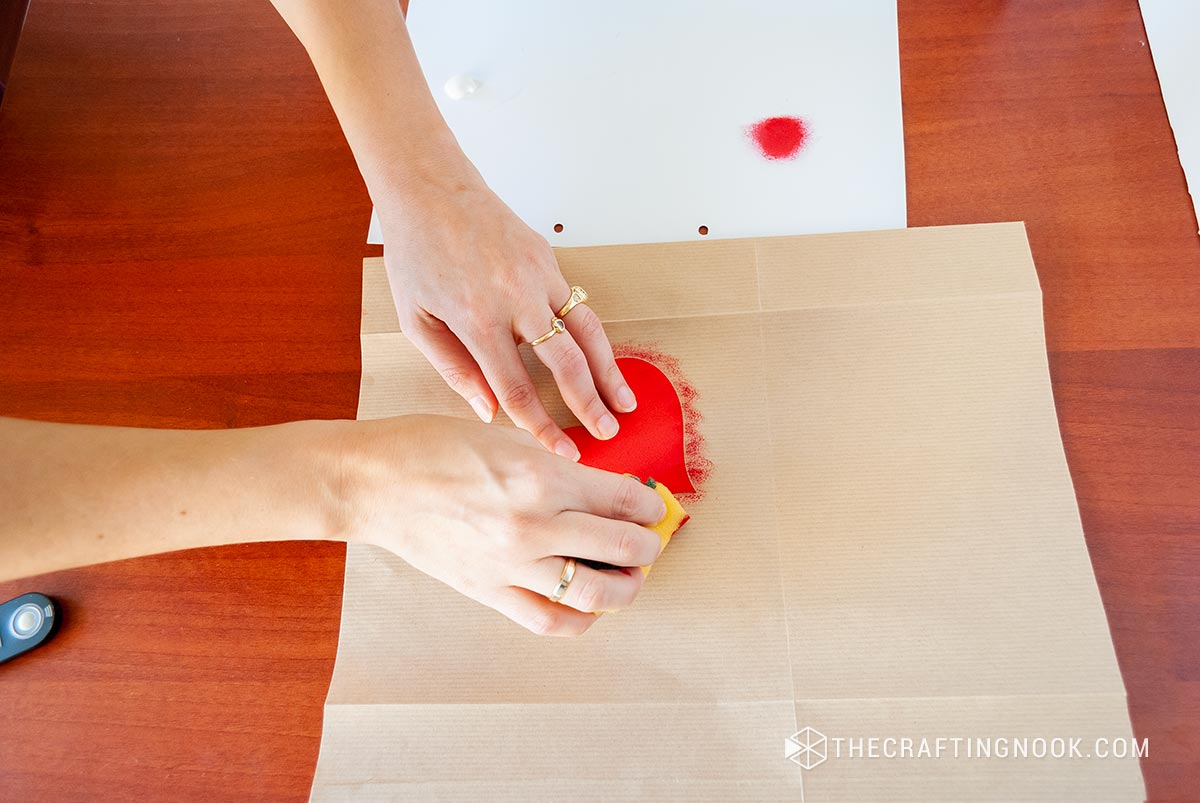
Unfold the bag and get your heart cutout shape, paint, and sponge.
Put some paint on a piece of paper/paper plate.

Touch the paint with the sponge and get rid of the excess tapping on the paper
Using your cutout as your template, tap around the edges on top of your paper bag.
The fun part is that it doesn’t have to be perfect!
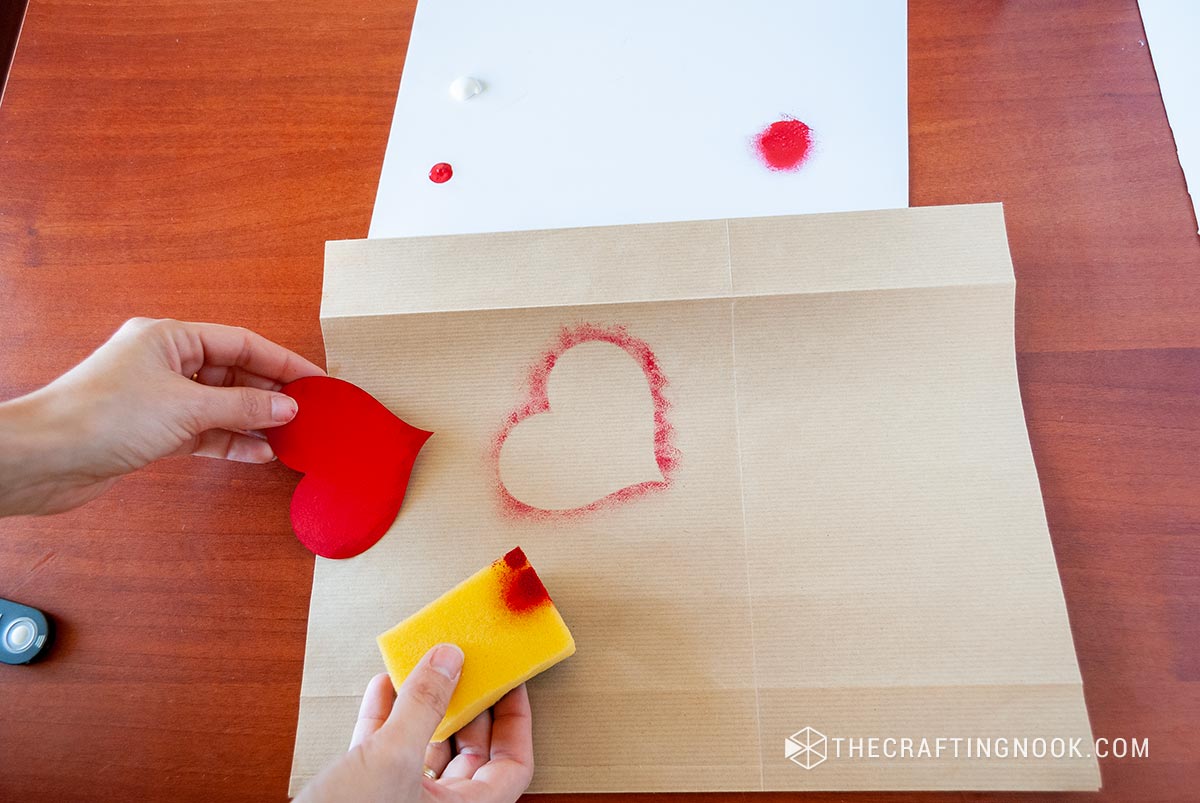
Do it with the red and white paint playing around with positions and overlapping them.
Let it dry for about one hour.

This is a messy work haha. But that’s the best part!

Make sure to wash your hands before continuing though.

Okay Back to the folding part. Remember we left it folding 1/3 of the height of the bag?
Good!
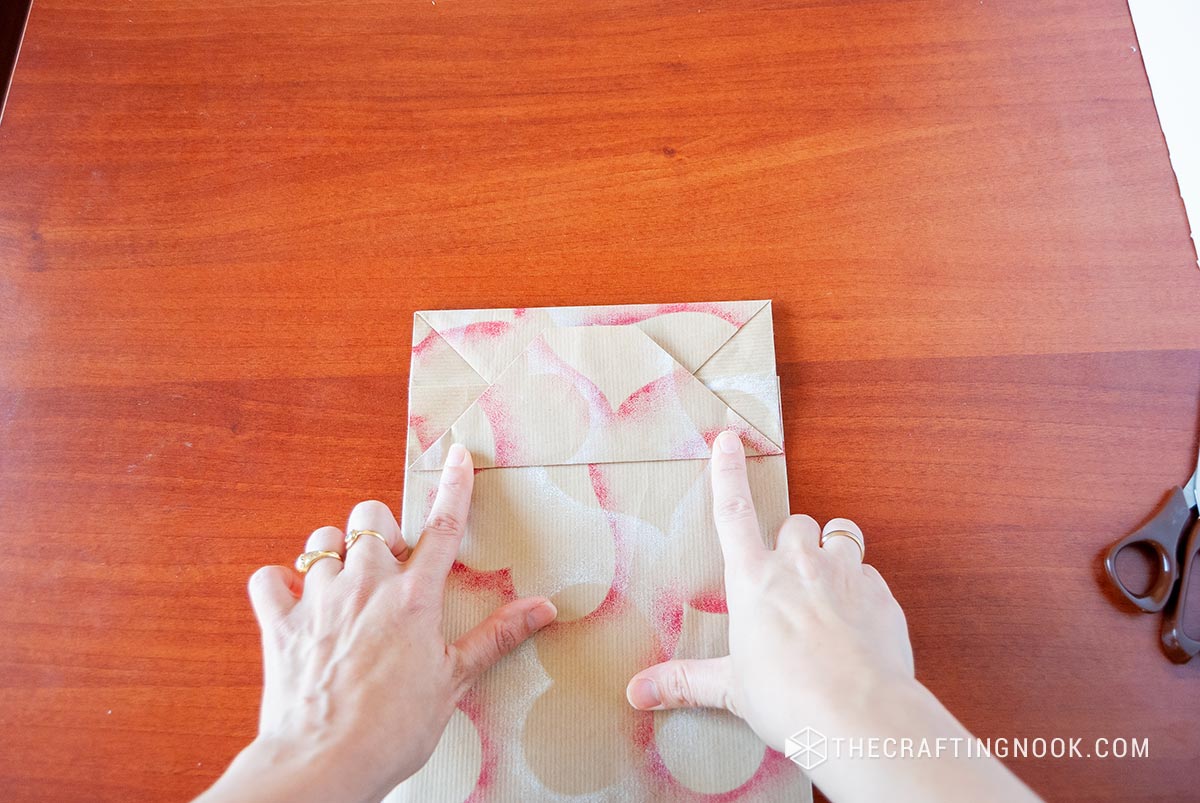
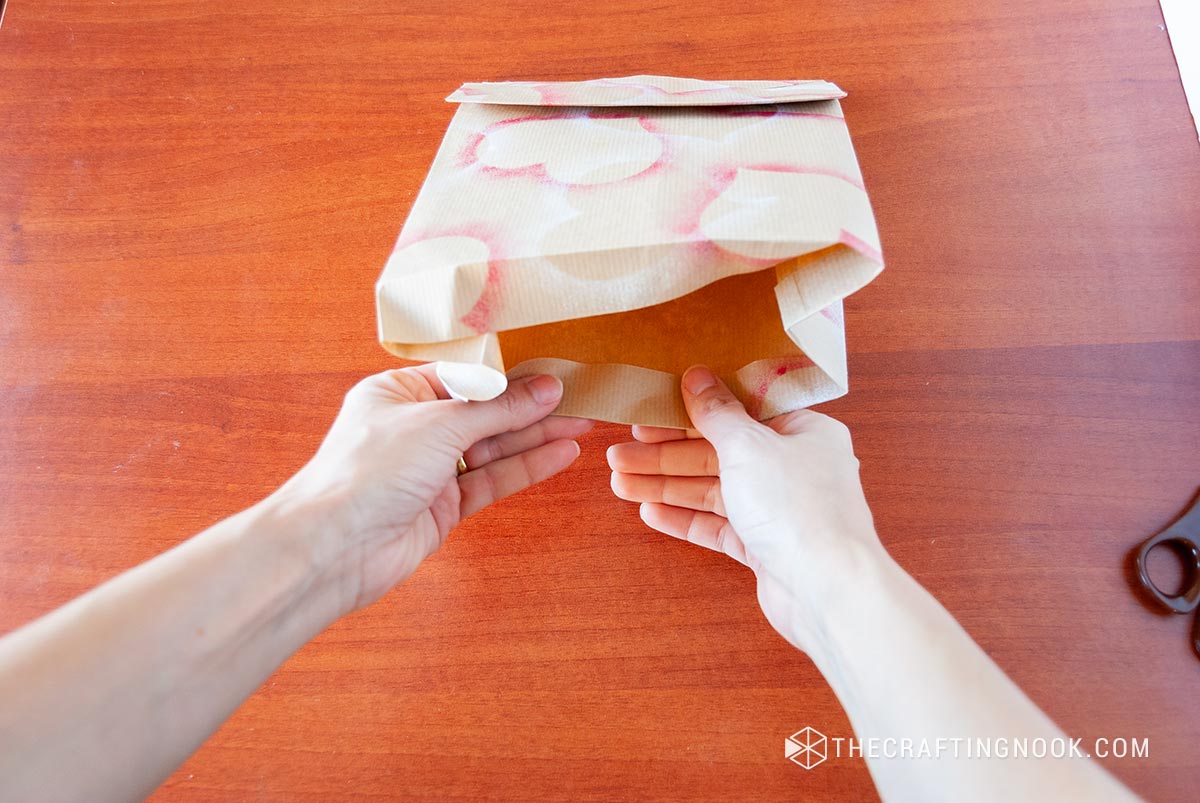
Open the bottom still folded and fold the inner parts like in the pictures.


Make sure the line that goes in the center keeps going straight from end to end along with the folding inner line.

Then fold the lateral sides towards the center again following the folding center line creating a diamond shape like follows:


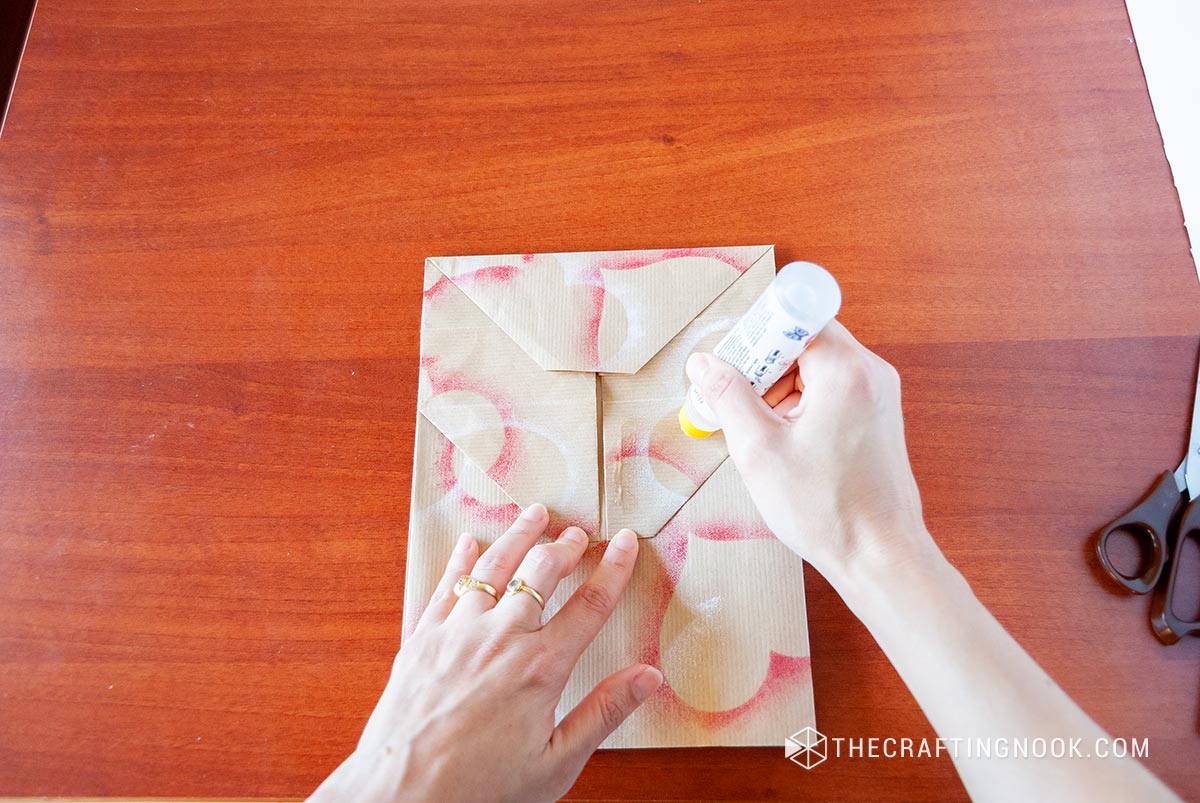
Then fold the flaps inwards one overlapping the other, like this

Glue the flaps making sure not to stick to the inside parts. The bag wouldn’t open.
My trick is I only apply glue to those triangles on the flaps.

Ok, we are almost done!
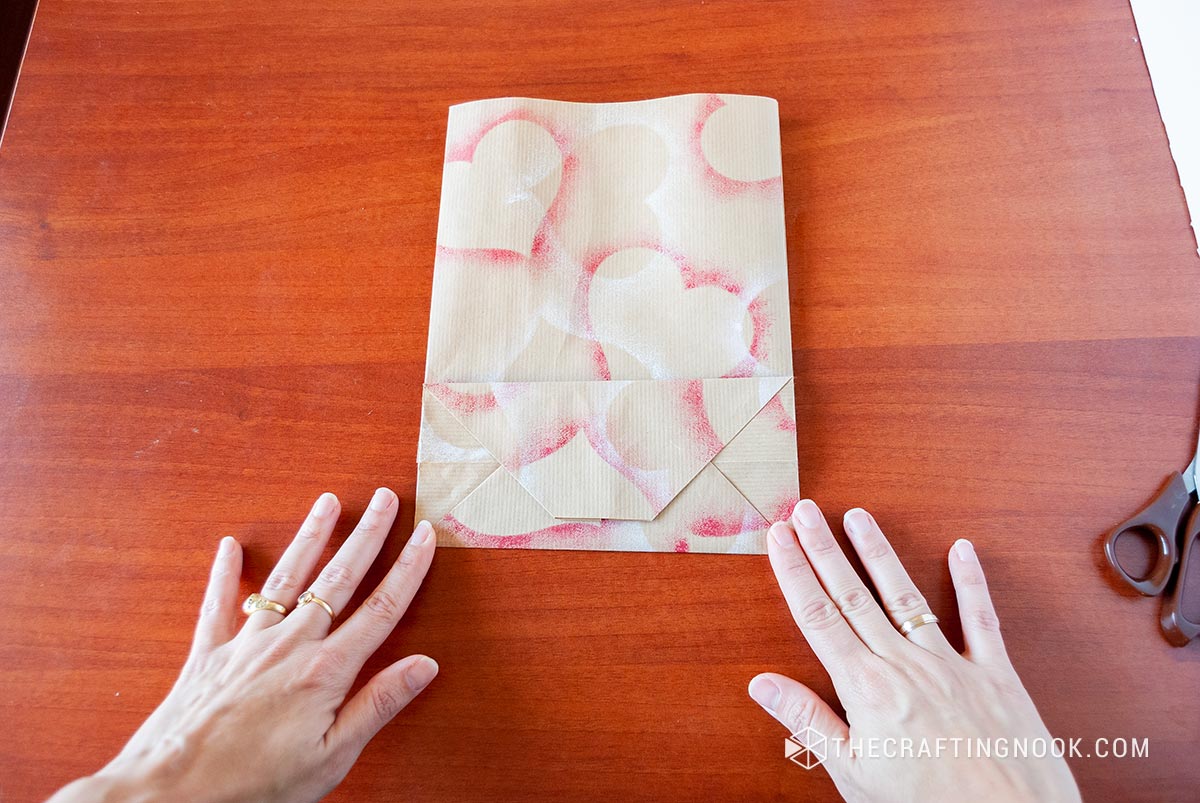
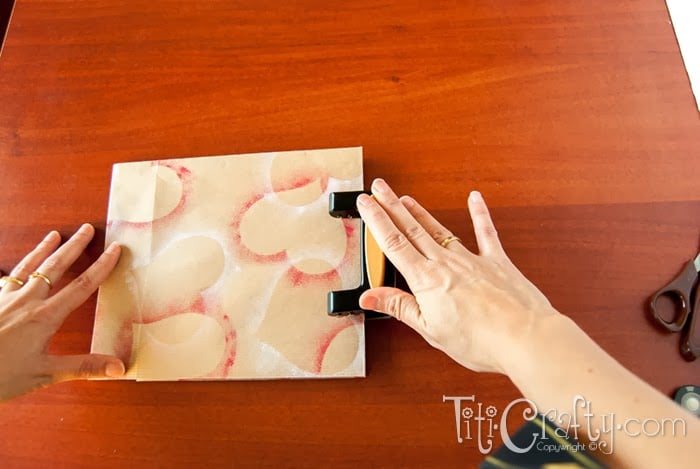
Fold the top opening of the bag at about an inch.
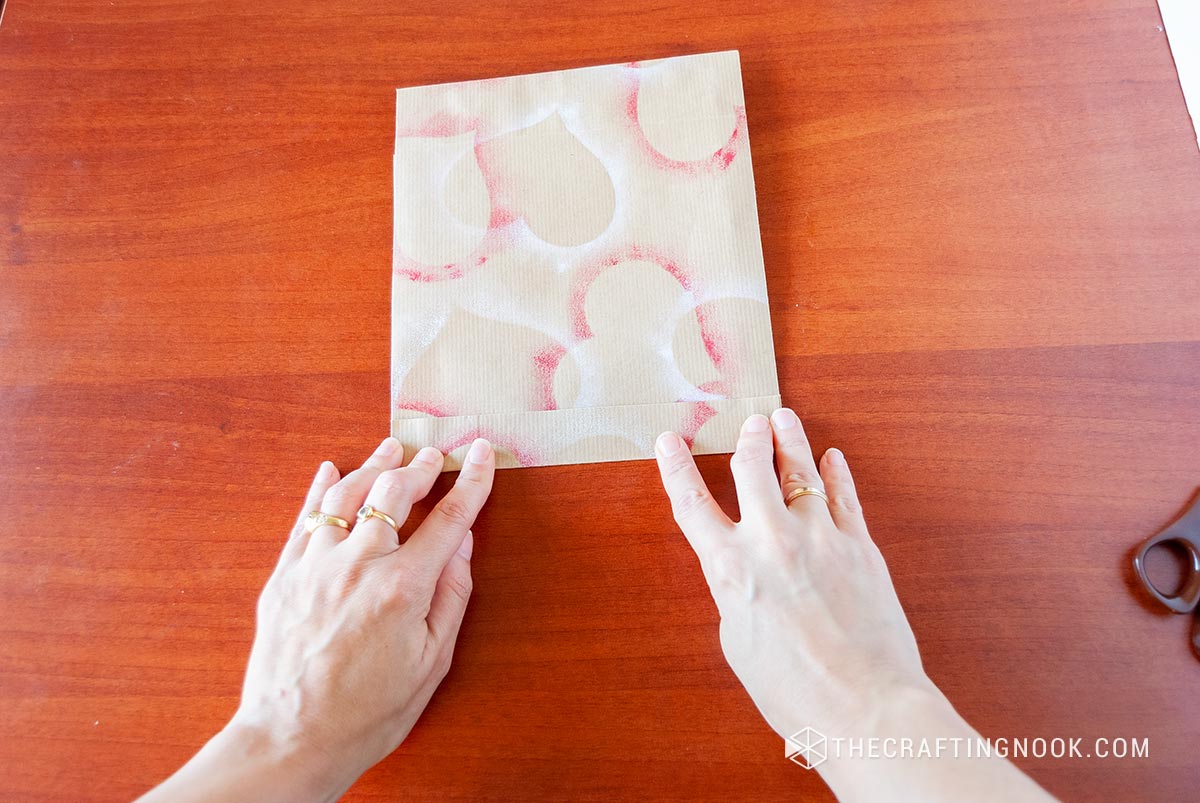
Then open the bag and fold it inwards.
You should have now something like this

Now, using a regular paper hole punch, make the holes for the ribbon handles.

Lastly, for your bag’s handles, cut a strip of your favorite ribbon and pass it through the holes until both ends get together inside the bag

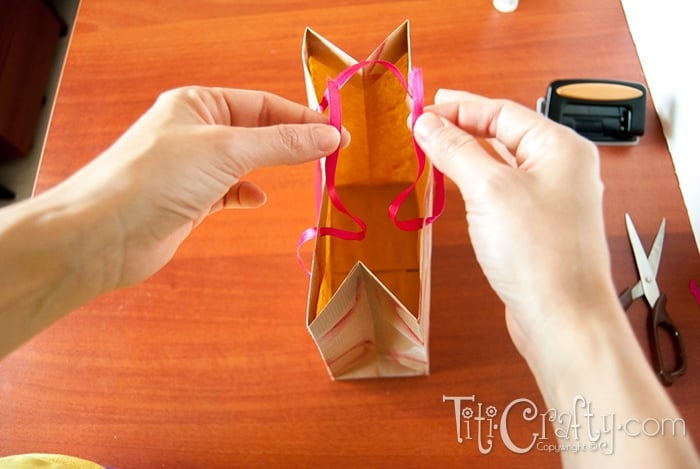
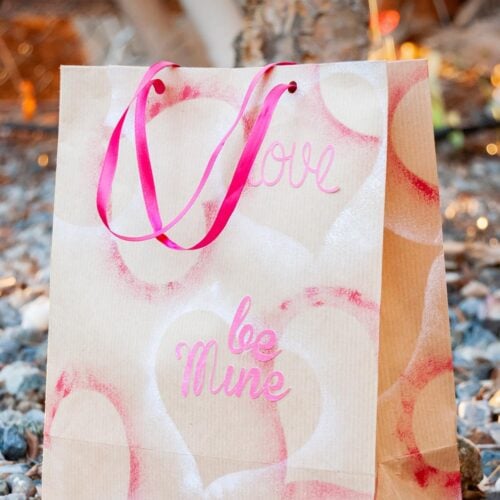
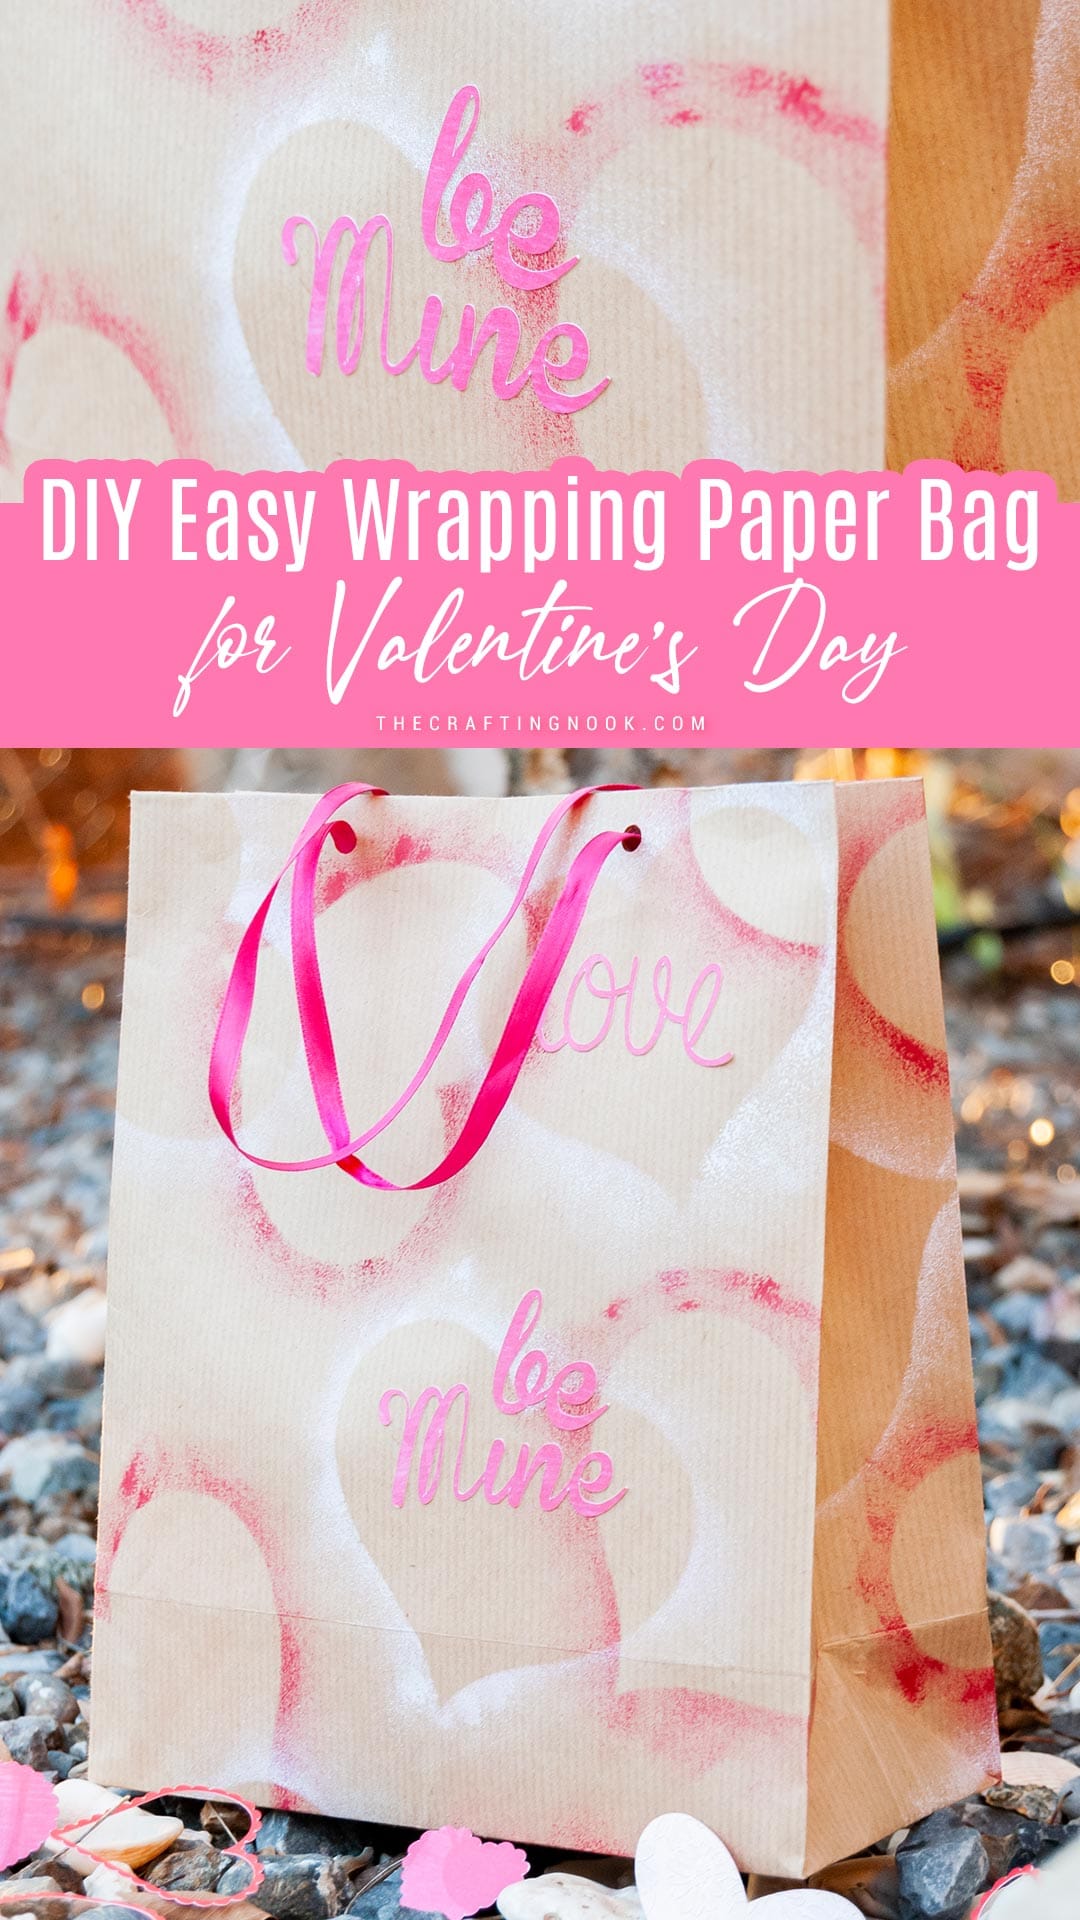
Finally, make a knot and TADAAAAA!!!!!

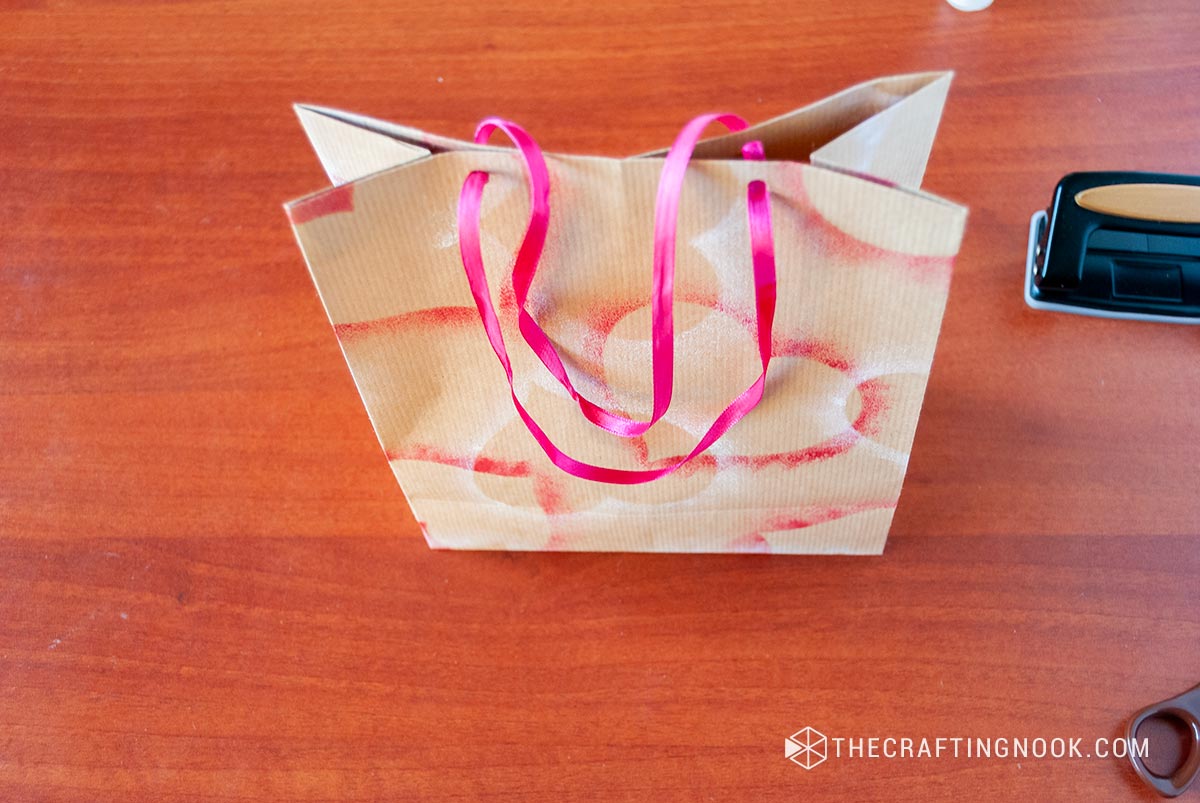
As a final touch, I added some cutout love messages. This is totally optional and you can add anything you want! Imagination is the limit.

There you have it! A cute and full-of-love gift wrapping paper bag!

Crafting Tips
- If you love hand lettering, instead of cutting messages you can write them to add your own touch to the bag.
- Instead of ribbon, you can use twine, or even repurposed fabric strips to create sturdy and charming handles.
- If you need the bag to be sturdier, you can use thicker paper and reinforce the bottom and side edges with extra layers of paper or cardboard for durability.
- Infuse your bag with a sweet fragrance. Add a few drops of essential oil on tissue paper inside for an extra sensory delight.
- Attach small photos from your favorite moments together on the bag, creating a timeline of your relationship.
- Capture your handprints on the bag as a unique and personal design element. It adds a lovely touch of togetherness.

Frequently Asked Questions
Get creative! Write heartfelt messages, draw Valentine’s-themed designs, or add photos to make it unique.
You can reinforce the bottom and side edges with extra layers of paper or cardboard for durability.
Definitely! It’s a fun family activity. Kids can contribute their own artistic flair to the design.
You can use ribbon, twine, or even repurposed fabric strips to create sturdy and charming handles.
Measure your gift first and adjust the bag’s dimensions accordingly for a snug fit.
More Valentine’s Day Gifts to Try
If you enjoyed learning how to make a wrapping paper bag, you might also love these other Valentine’s Day Projects I got for you:


✂️ Tutorial
How to Make a wrapping paper bag for Valentine’s Day
Tools
- Scissors and/or Cutter
- Paper Hole Puch
Supplies
- Craft Paper
- Glue or double-sided tape
- Acrylic Paint – I used red and white}
- A sponge
- A heart cutout
- 5 mm ribbon
Instructions
- Firstly, cut a piece of craft paper, I usually use 2 to 3 times the size of the gift.
- Fold it leaving just half an inch at the end.
- Then fold that half-inch over the previews one and glue them. You can use glue or double sided tape.
- Make sure no glue leaks on the inside and let it dry for a few minutes.
- Now fold each side of the bag in the same width. In this case, I folded in 2 inches. A trick I use is I fold it both ways so it is easy to manipulate it in the next step.
- Using the folding lines tuck down each side.
- Now, you should have something like this:
- Now fold the bottom of the bag in about 1/3 of the height.
- I stopped here to decorate. I did it here so I know the structure of the bag while painting.
- Unfold the bag and get your heart cutout shape, paint, and sponge.
- Put some paint on a piece of paper/paper plate.
- Touch the paint with the sponge and get rid of the excess tapping on the paper
- Using your cutout as your template, tap around the edges on top of your paper bag.
- The fun part is that it doesn’t have to be perfect!
- Do it with the red and white paint playing around with positions and overlapping them.
- Let it dry for about one hour.
- This is a messy work haha. But that’s the best part!
- Make sure to wash your hands before continuing though.
- Okay Back to the folding part. Remember we left it folding 1/3 of the height of the bag?
- Good!
- Open the bottom still folded and fold the inner parts like in the pictures.
- Make sure the line that goes in the center keeps going straight from end to end along with the folding inner line.
- Then fold the lateral sides towards the center again following the folding center line creating a diamond shape like follows:
- Then fold the flaps inwards one overlapping the other, like this
- Glue the flaps making sure not to stick to the inside parts. The bag wouldn’t open.
- My trick is I only apply glue to those triangles on the flaps.
- Ok, we are almost done!
- Fold the top opening of the bag at about an inch.
- Then open the bag and fold it inwards.
- You should have now something like this
- Now, using a regular paper hole punch, make the holes for the ribbon handles.
- Lastly, for your bag’s handles, cut a strip of your favorite ribbon and pass it through the holes until both ends get together inside the bag
- Finally, make a knot and TADAAAAA!!!!!
- Overhead view of the wrapping paper bag
- As a final touch, I added some cutout love messages. This is totally optional and you can add anything you want! Imagination is the limit.
- There you have it! A cute and full-of-love gift wrapping paper bag!
What other paper gift bags I can make myself?
Because there are so many ways to wrap a gift in a creative way. I’ve found some ideas that I love and I’m sure you will love them too.
- Make a Custom Gift Bag out of Scrapbook Paper by Lia Griffith
- How to Make a Gift Bag from Wrapping Paper by Kaleidoscope Living
- Paper present pouches as a holiday gift wrap idea by Paper & Stitch
What do you think??? Like it???
Share and PIN ME!!!
I LOVE your opinion and comments, They totally make my day, and give me a huge motivation to keep making fun stuff and crafts!!!
Til’ next time…


FREE WORKBOOK
Keeping your Sweet Home Organized
Learn how to create intentional habits and simple routines to Keep Your Home Organized. Plus freebies, printables, exclusive content, and tips.
Disclaimer: By clicking on the “Yes” button above you are giving me your consent to collect and use your information according to the law and My Policy Privacy. Zero Spam I promise!
Thank you for providing such useful information about the gift bag. It’s extremely useful information for creating the valentines day paper gift bag. I’m excited to try it!
Thank you so much! Much appreciated the kind words!
Regards,
What a cool idea for any occasion! I already have paper bags but I would love to spruce them up with the same decor ideas.
How cute is this!?! I can’t wait to try my hand at this. Pinning!! Thanks for sharing at Project Inspire{d}~AnExtraordinaryDay.net
Your paper bag is divine.I can only imagine all the goodies one could put inside! I espcially like the heart stencil idea. Visiting via LOBS linkup.
I LOVE this paper bag! Very pretty!
i can not believe you made a bag from scratch. GENIUS
Awesome and thanks for all the detailed photos, that helps a lot! :)
So pretty and you made it look so easy! I never would have thought to make my own bag! Thanks so much for sharing this on Snickerdoodle Sunday
Oh my gosh! I thought this was store bought it looks so professional and beautiful!
You can make your own gift bags? I had no idea! I love this idea….I have spent a fortune on gift bags in my life! I love this….PINNING it NOW!
Thank you for this!! I’m pinning this not just for Valentine’s day, but for all of those “last minute” times when you need a gift bag but it’s too late at night to go out for one!
bags are so expensive now! What a great idea to make your own!
Yessss and the possibilities are endless! You can make almost anything on your bag and you’ll hardly find another one the same! Thanks so much!
XOXO
wonderful tutorial. thank you
ColleenB.
Texas
Thanks so much Coleen. Glad you like it!
XOXO