DIY Halloween Door Hanger
This post may contain affiliate links. Please read our Disclosure Policy.
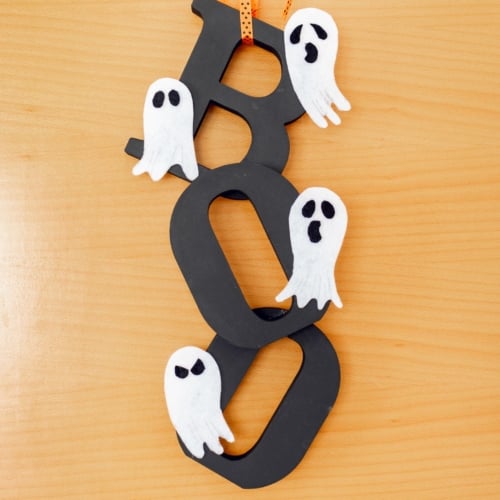
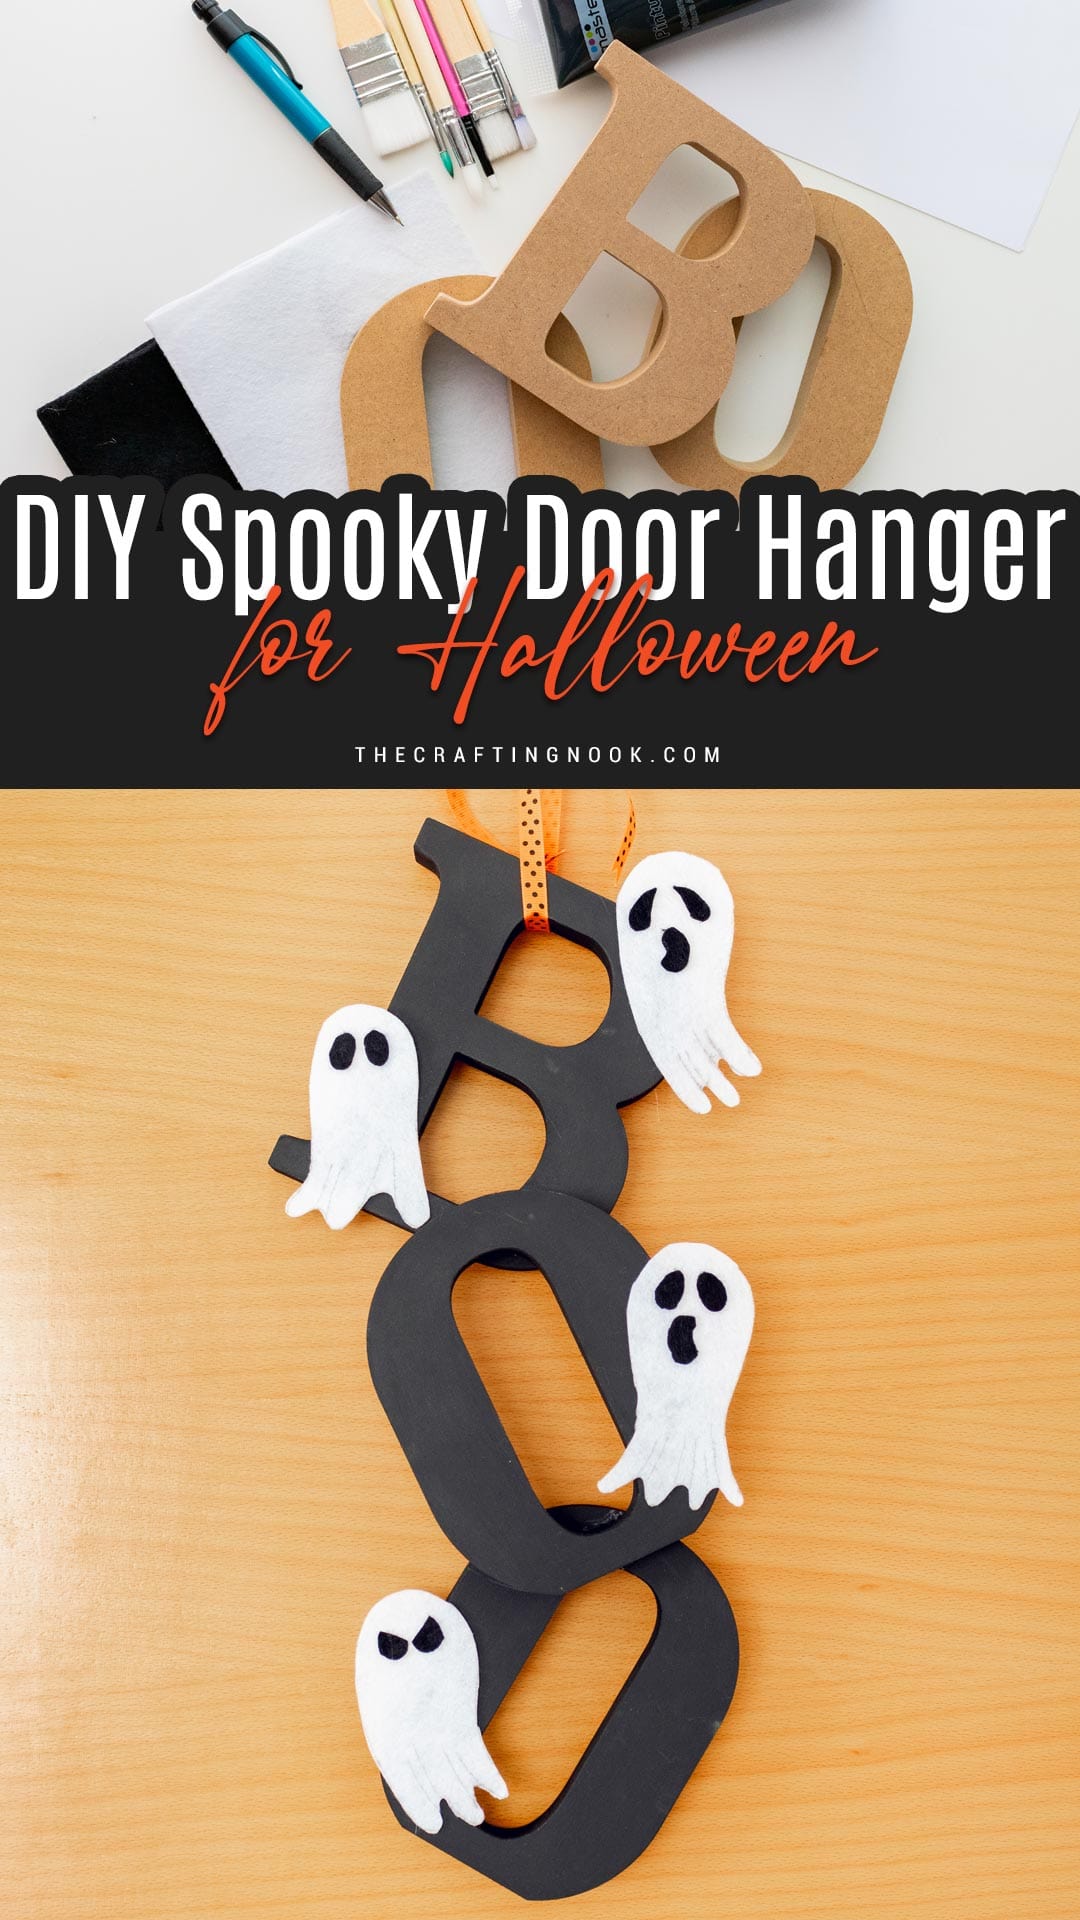
How about crafting a spooky-cute DIY Halloween Door Hanger with wooden letters, paint, felt and ribbon. Easy, fun, and perfect for your Halloween decor!
Halloween for me has always been a fun excuse to get creative with decor, especially when it involves paint and glue. This year, I wanted to make something different to my front door during the spooky season, and that’s when the idea for this DIY Halloween Door Hanger came to life.
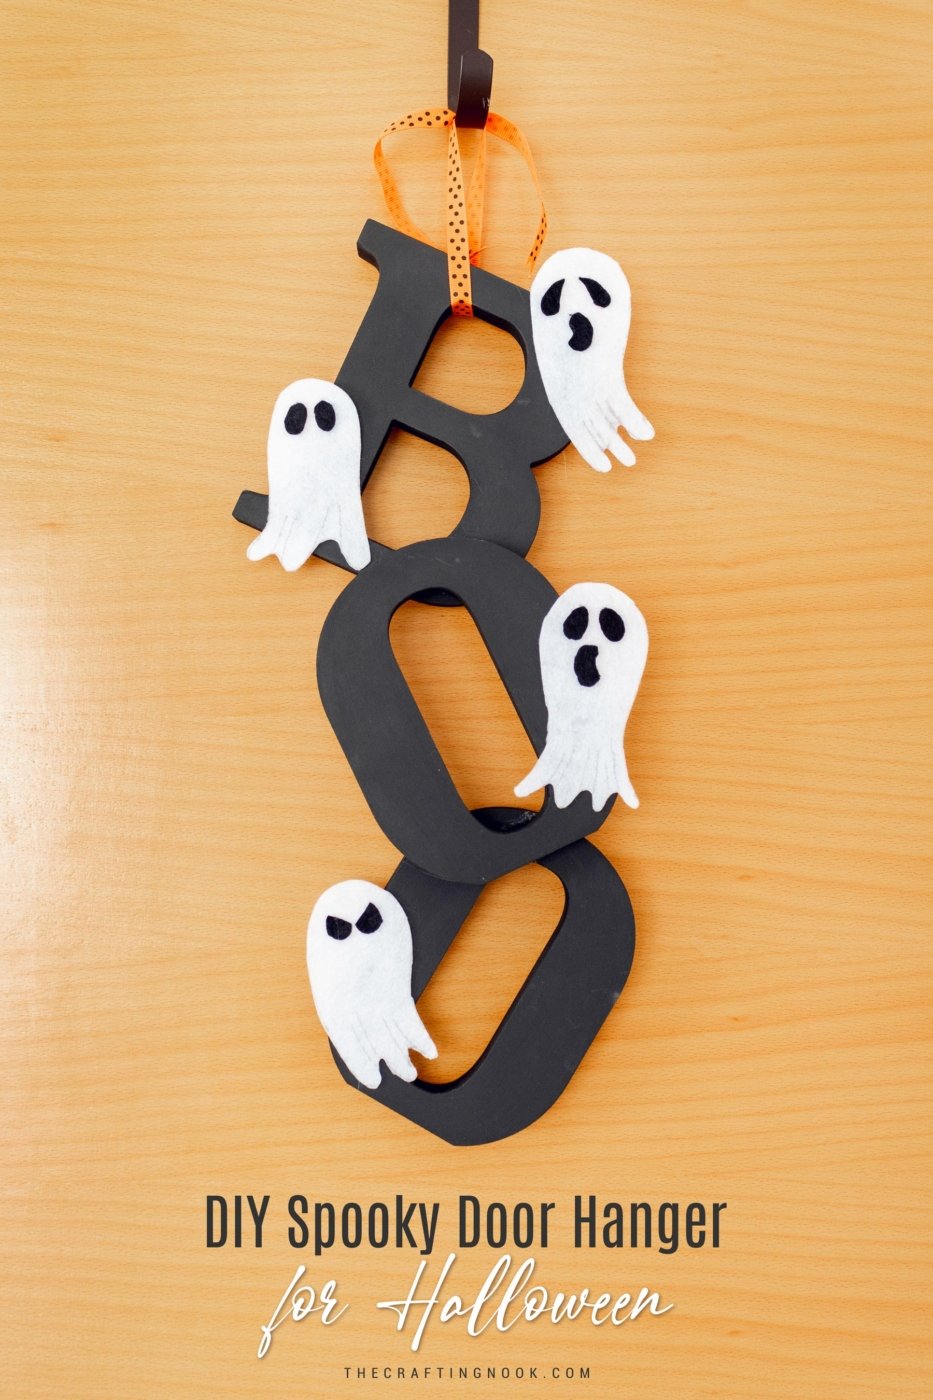
Table of Contents
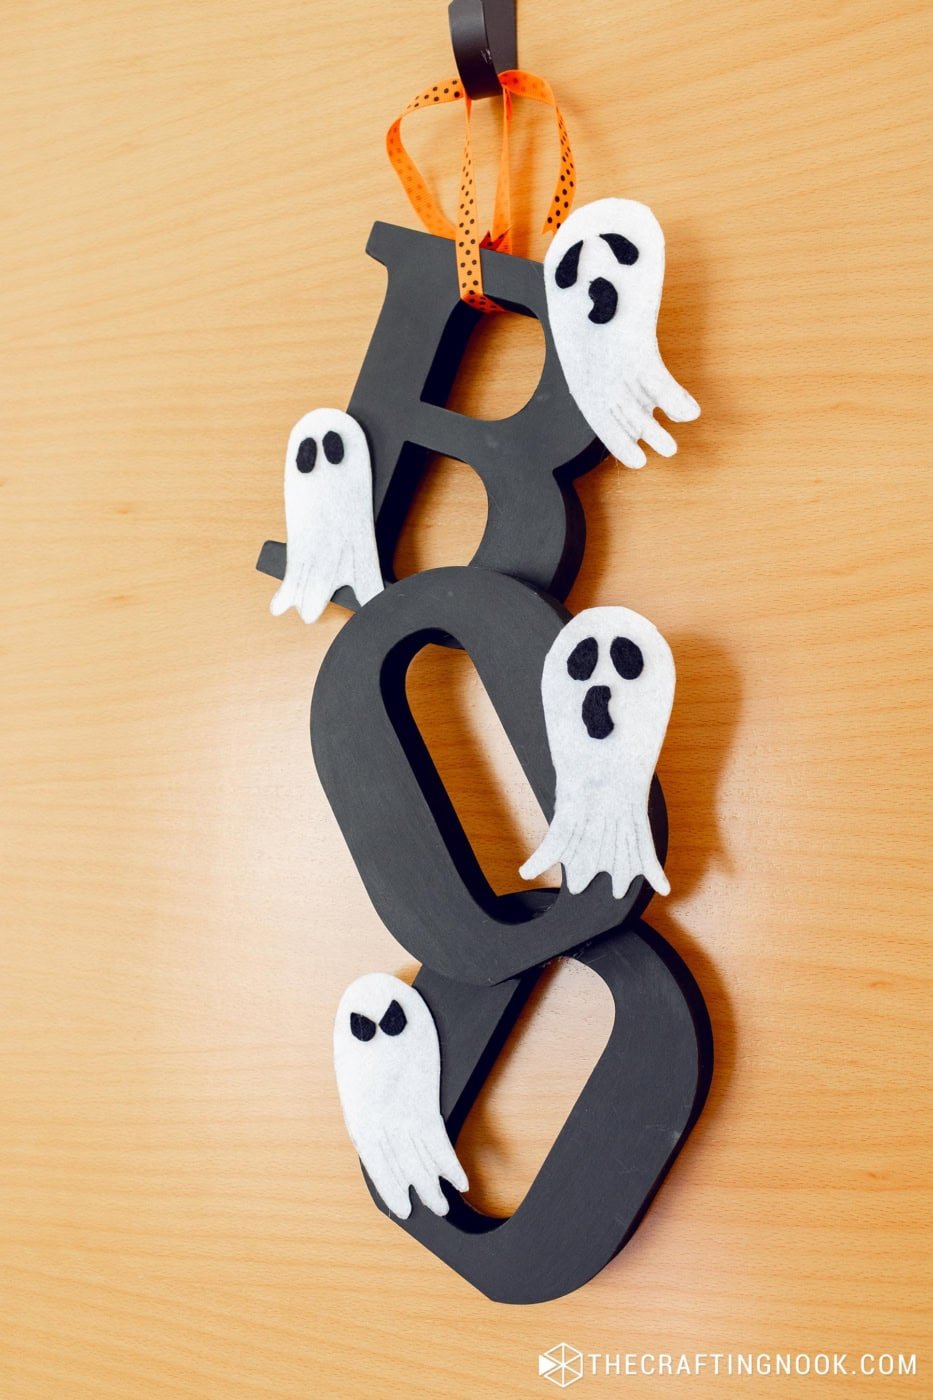
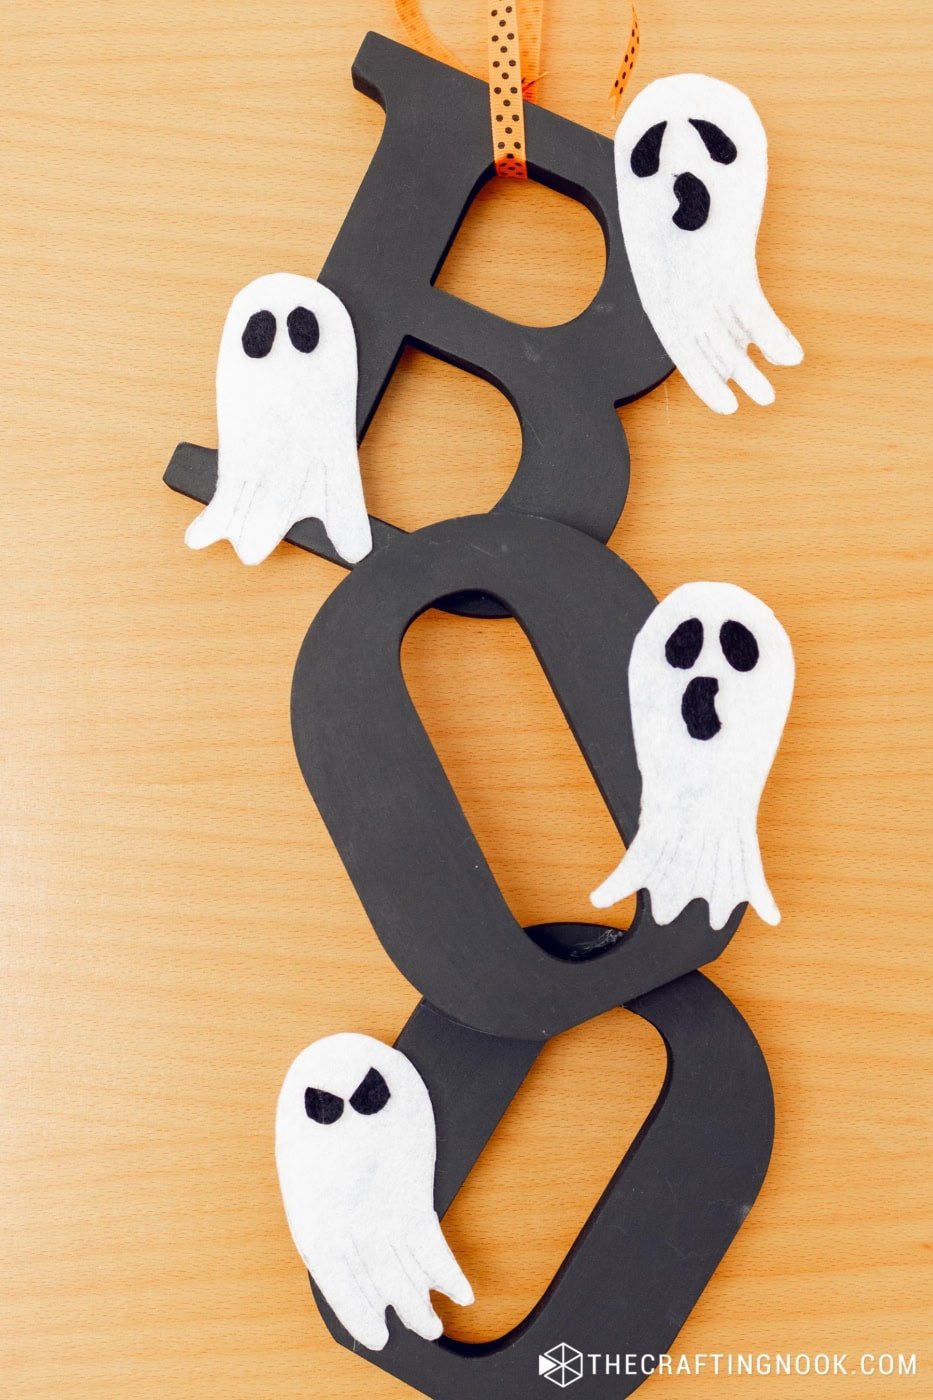
Boo Halloween Door Hanger
I’ve always enjoyed working with simple materials to create something unique, and this project is no exception. With some wooden letters, a bit of paint, and a few floating felt ghosts, this project turned out even better than I imagined.
It was super easy to put together, I had so much fun, and I loved how playful and yet minimalist it looks—perfect for welcoming trick-or-treaters or just getting into the Halloween spirit!
What I love most about this craft is that it’s the perfect mix of spooky and fun without being too time-consuming. Plus, who can resist those adorable little ghosts floating around the letters?
How To make a Boo Halloween Door Hanger
Let’s get started, and I’ll show you how to make one for your own front door decor! Feel free to follow the video tutorial or scroll along for the step-by-step photo tutorial.
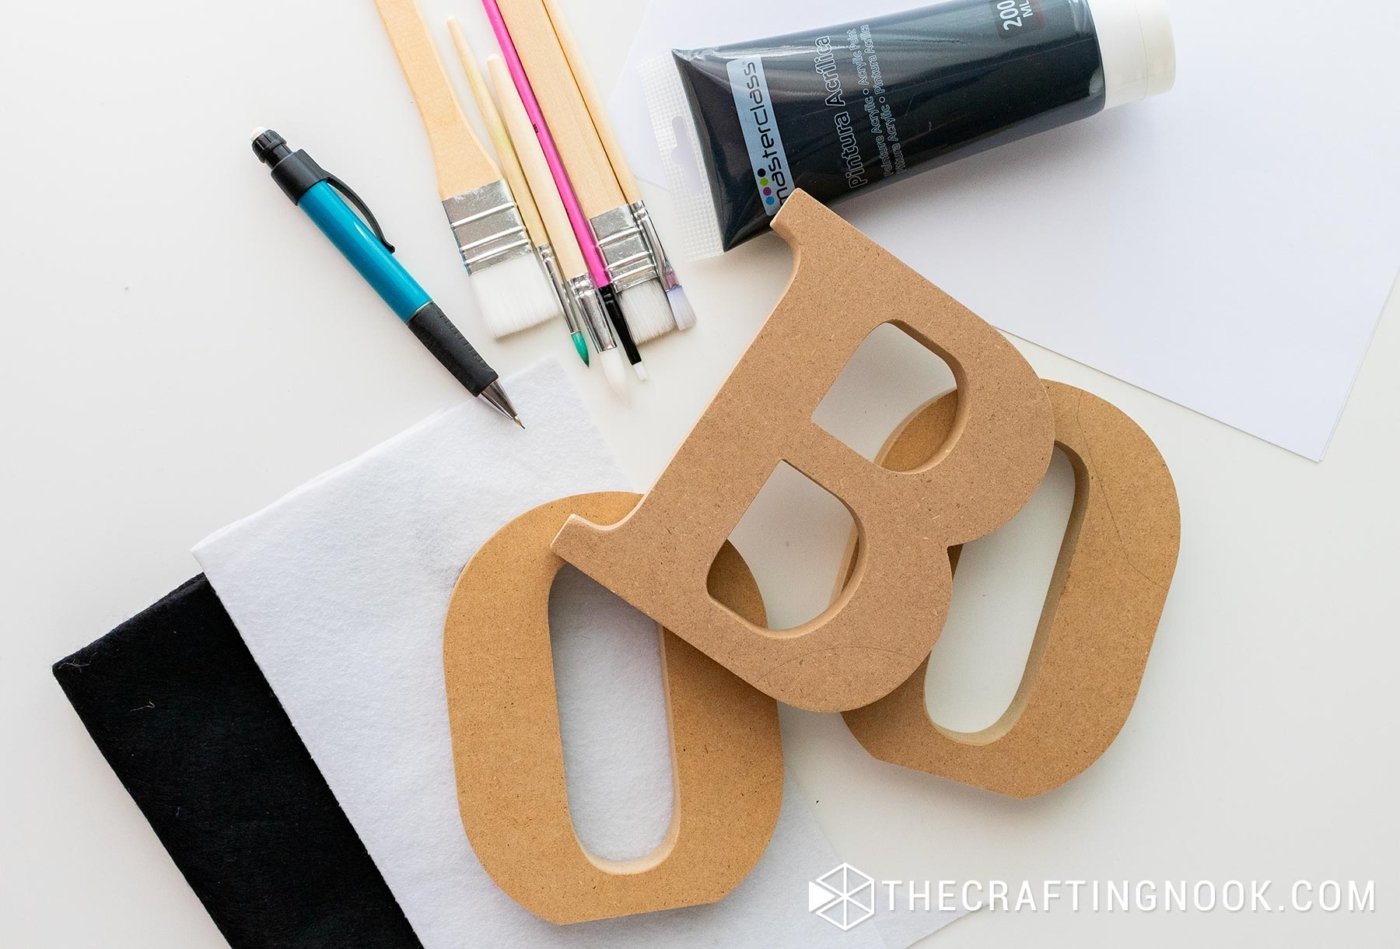
Supplies:
- Wooden letters spelling “BOO”
- Black acrylic paint
- White felt – for ghosts
- Black felt – for eyes and mouth details
- Orange polka dot ribbon – or your favorite spooky one for the hanger
- Liquid glue – Optional for the eyes but you can use hot glue too.
Tools:
- Hot glue gun and glue sticks
- Paintbrush
- Scissors
- Markers, Pen, or pencil for tracing
Instructions:
Step 1: Paint the Letters
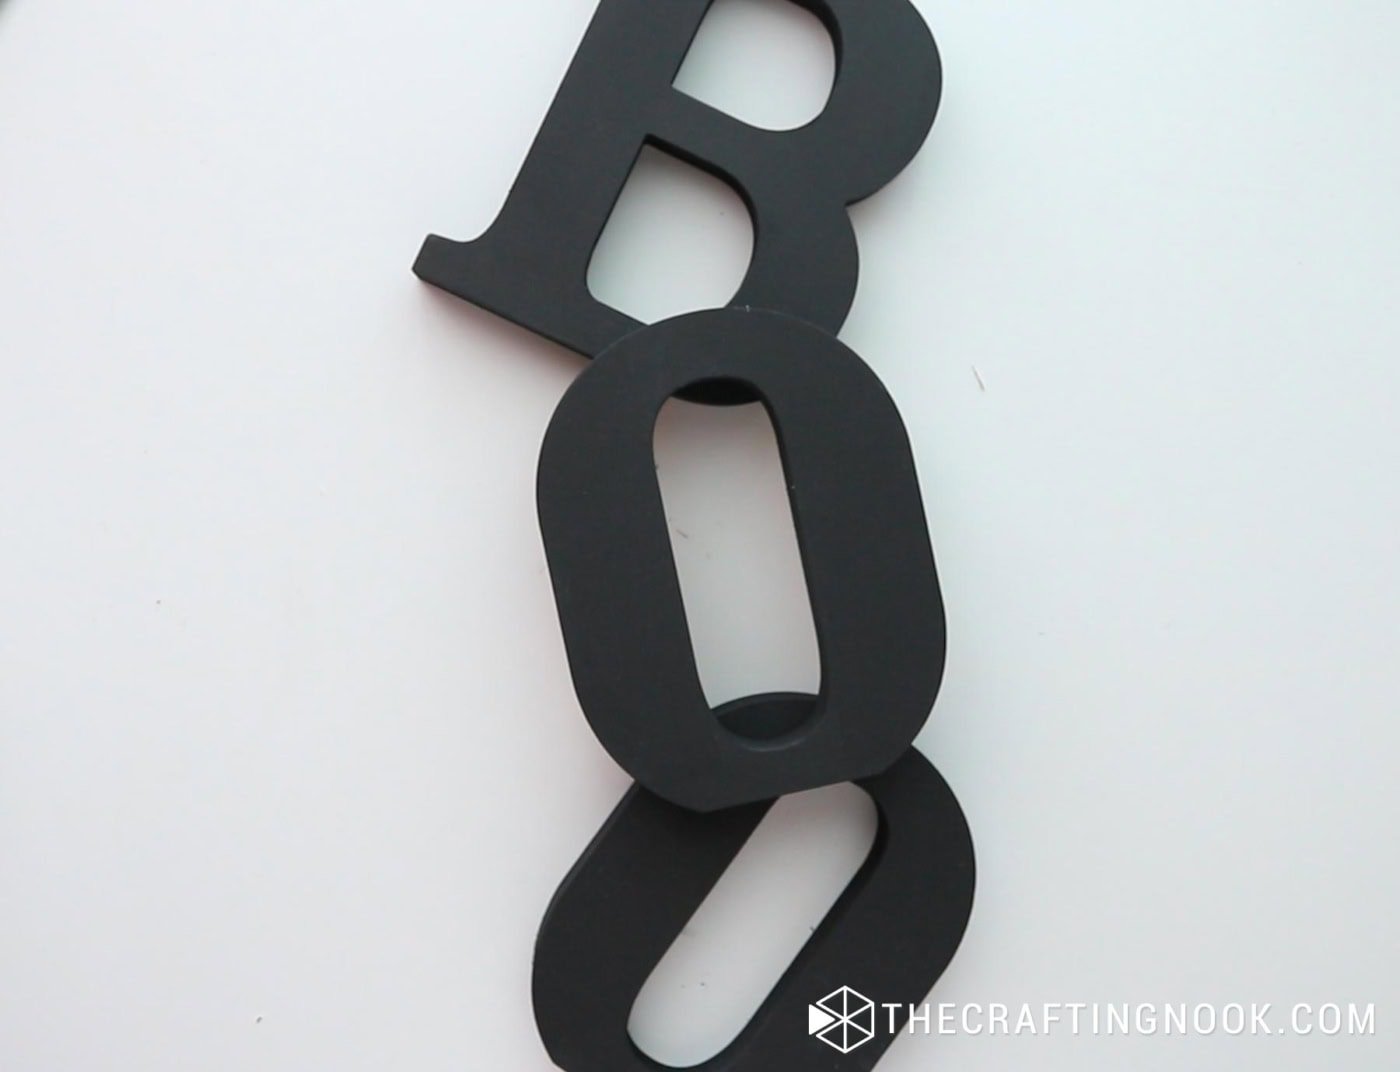
Start by grabbing your wooden letters and giving them a good coat of black acrylic paint.
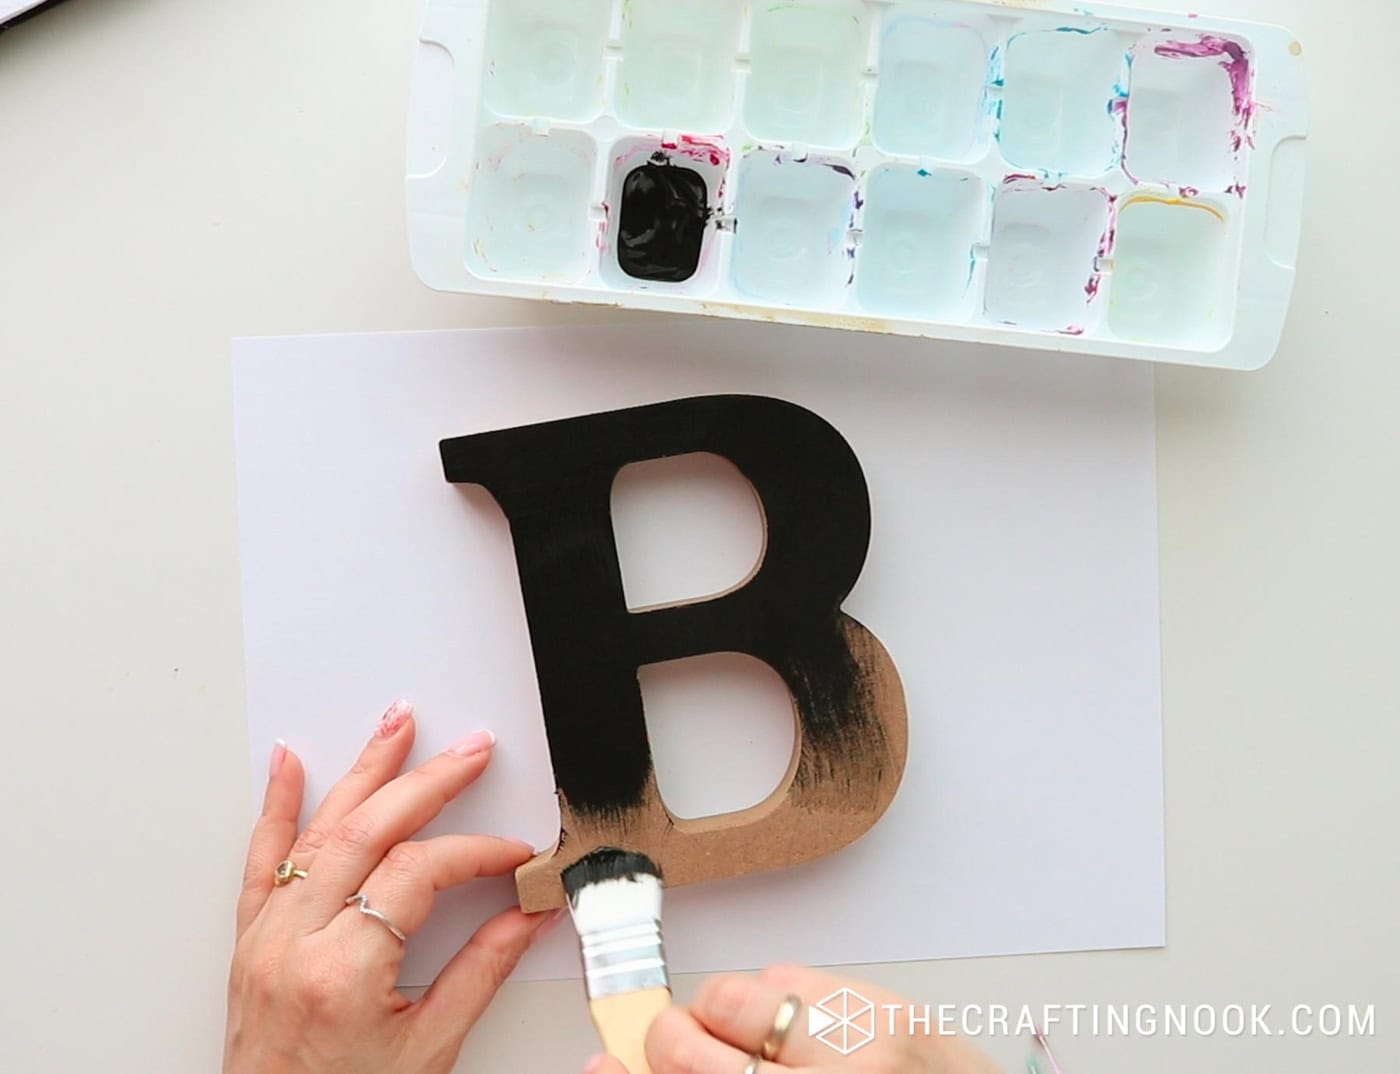
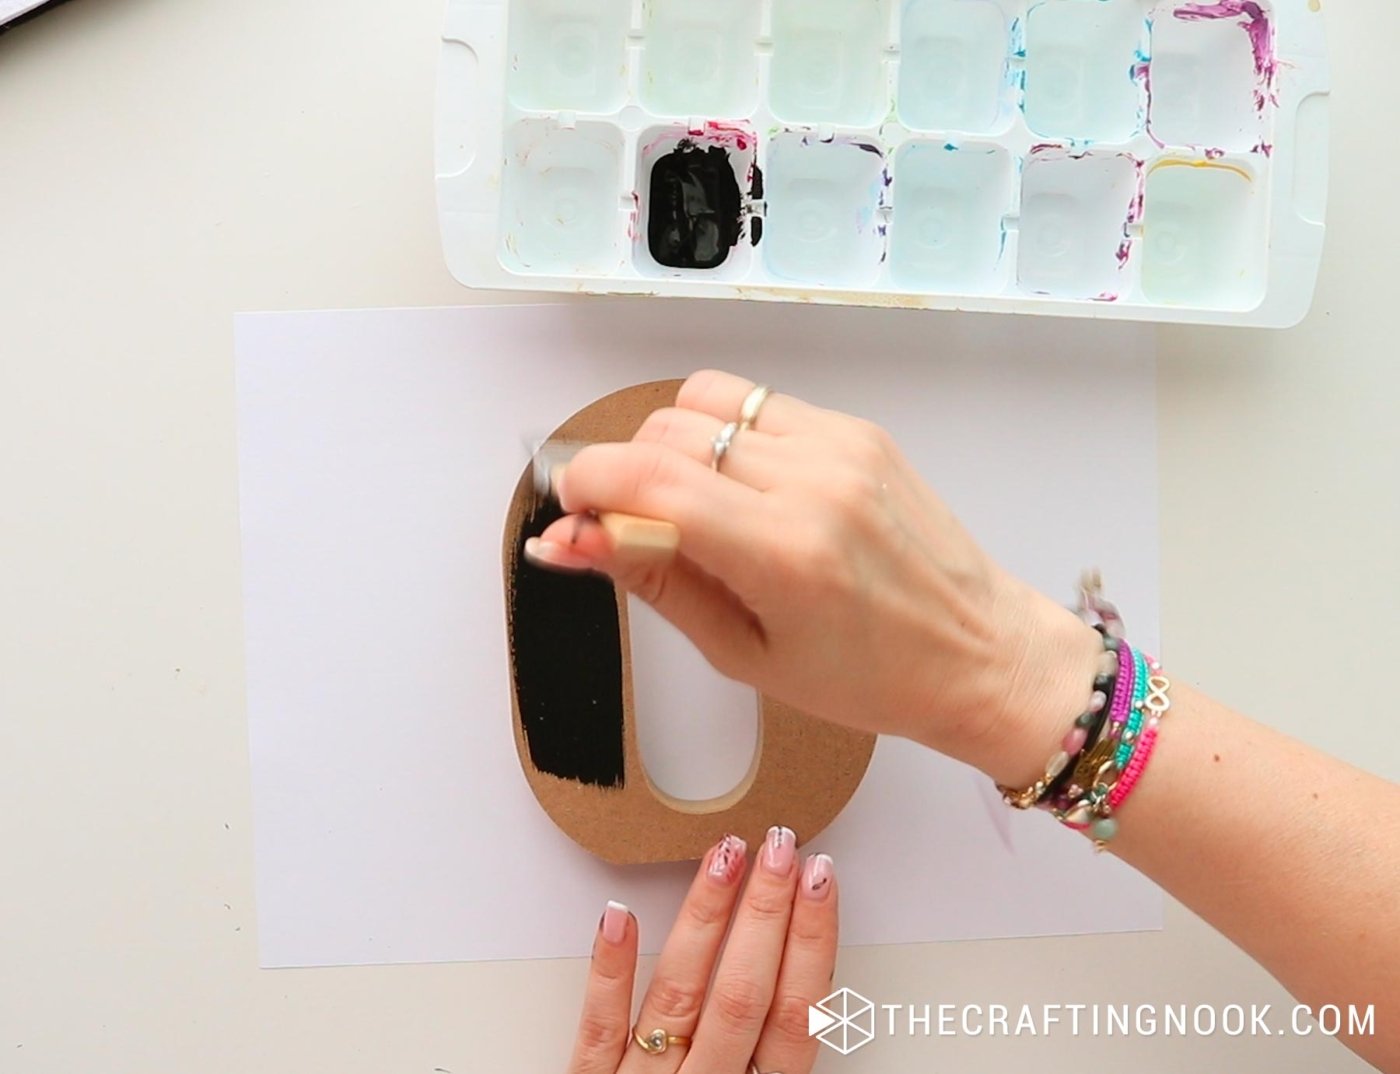
I painted all sides and edges to keep everything nice and sleek.
Let them dry completely before moving on to the next step.
Step 2: Make the Spooky Ghosts
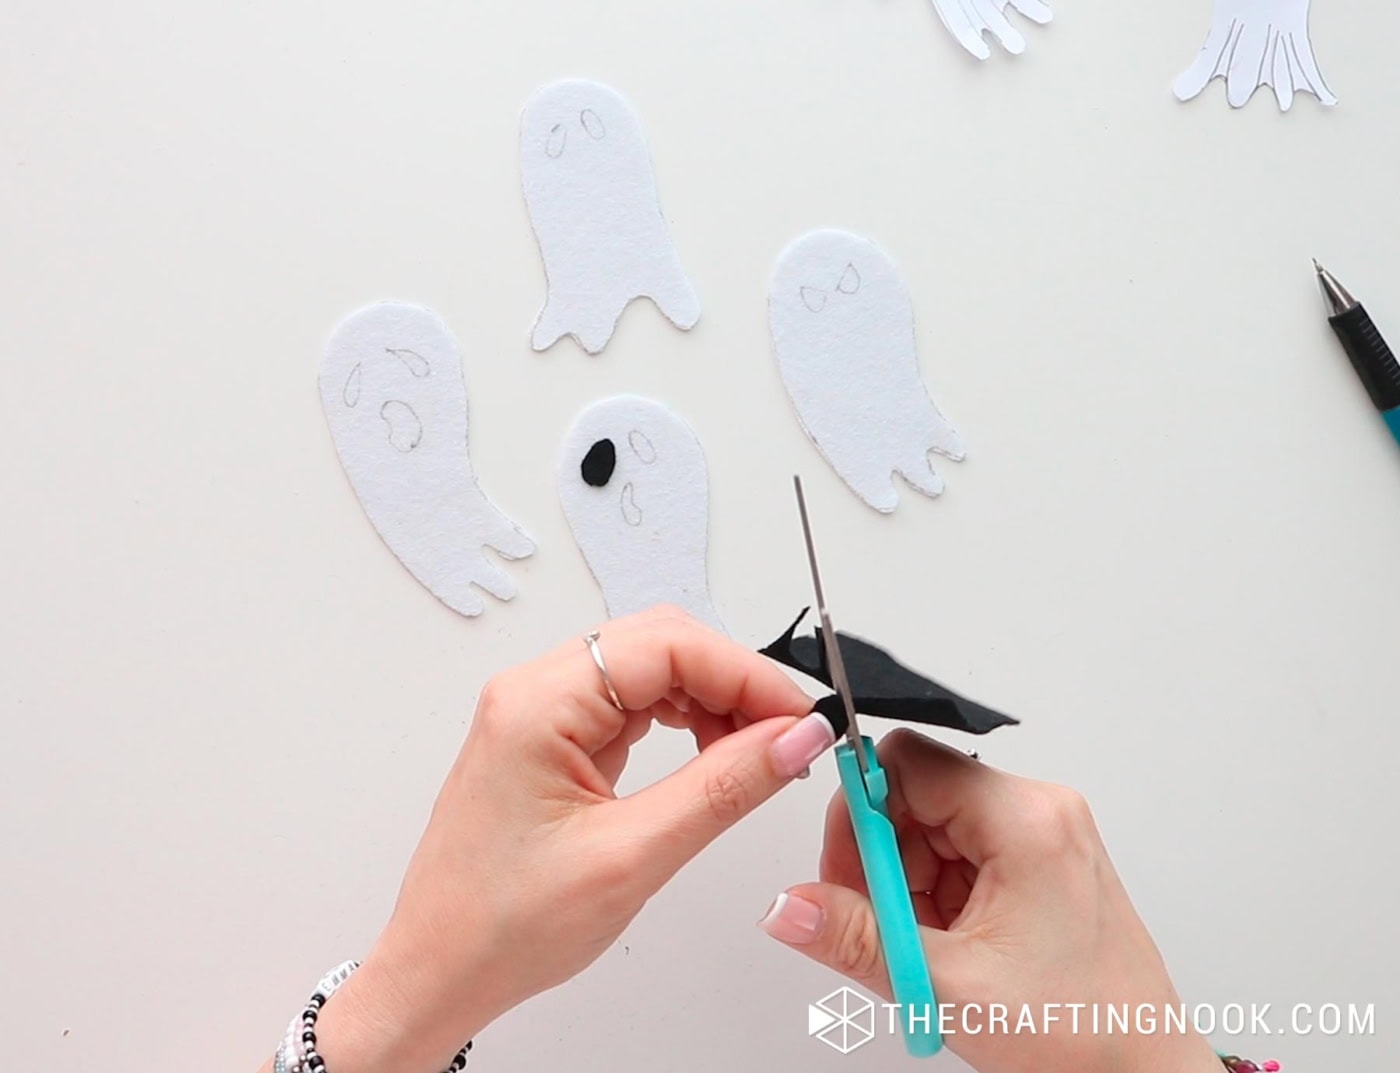
While your letters are drying, it’s time to bring the spooky ghosts to life! I hand-drew a cute little ghost shape on paper first (feel free to get creative with their shapes!), then used that as a stencil.
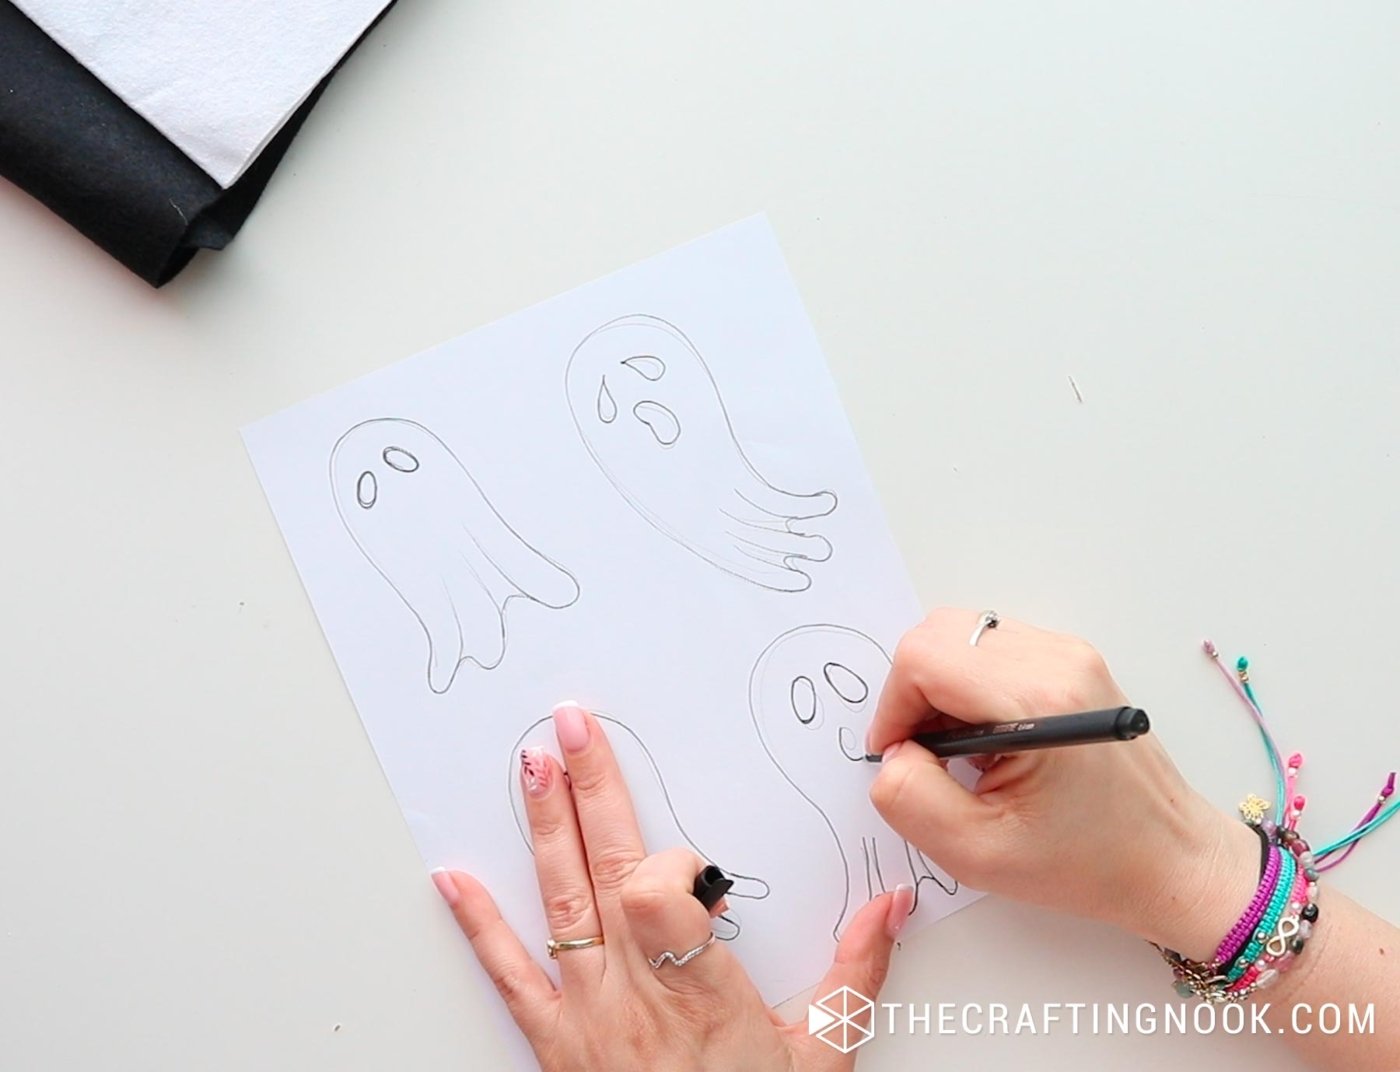
Cut the little ghost with your scissors.
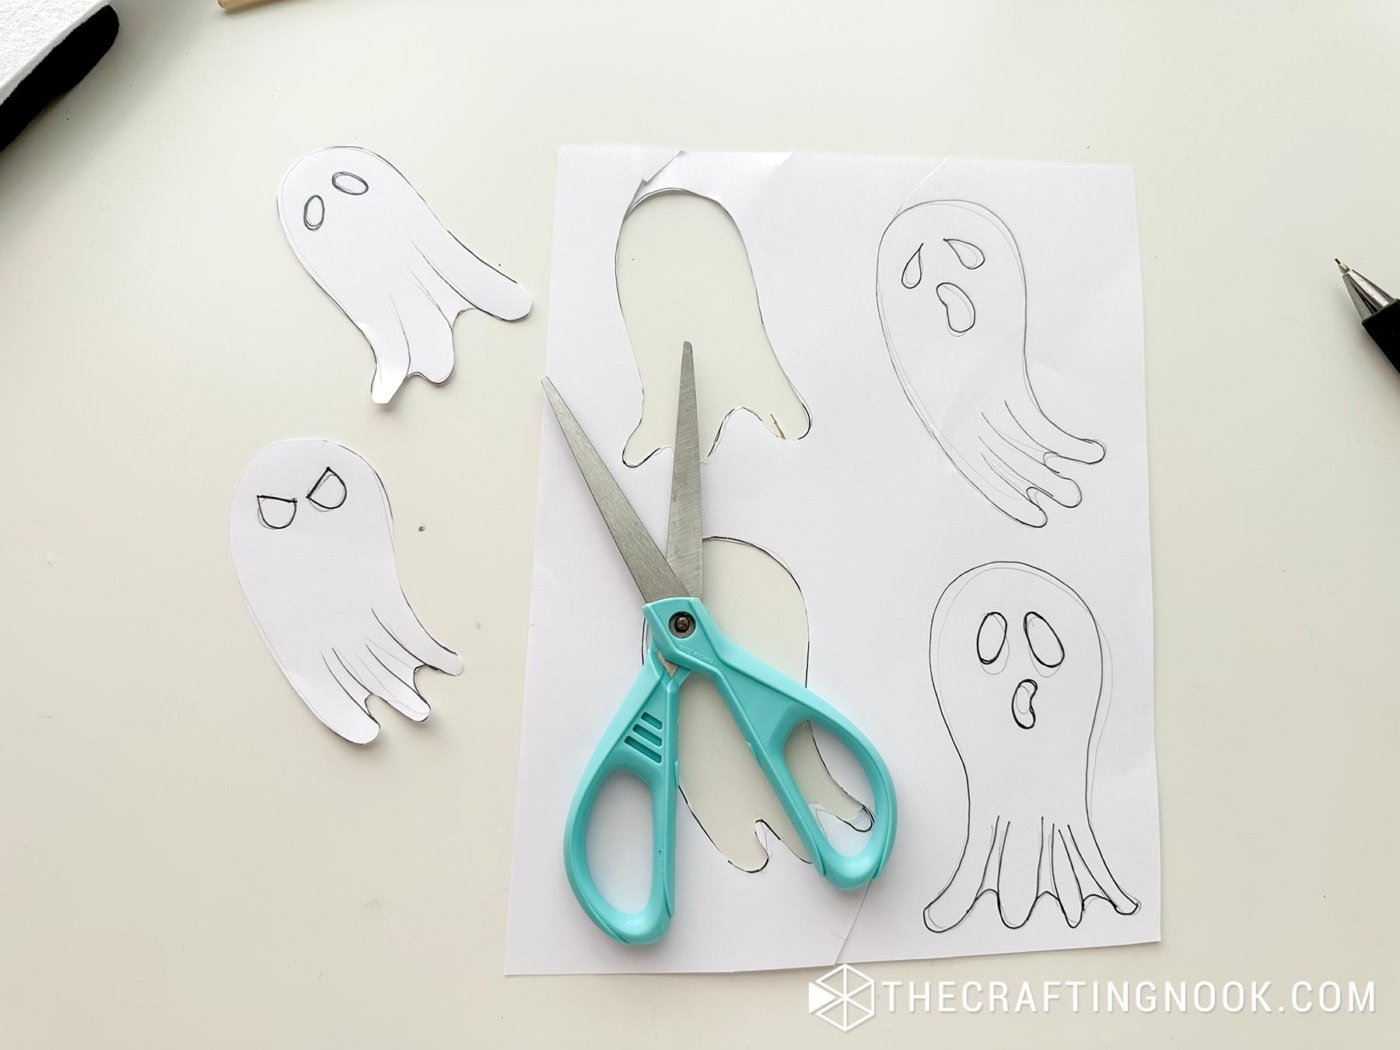
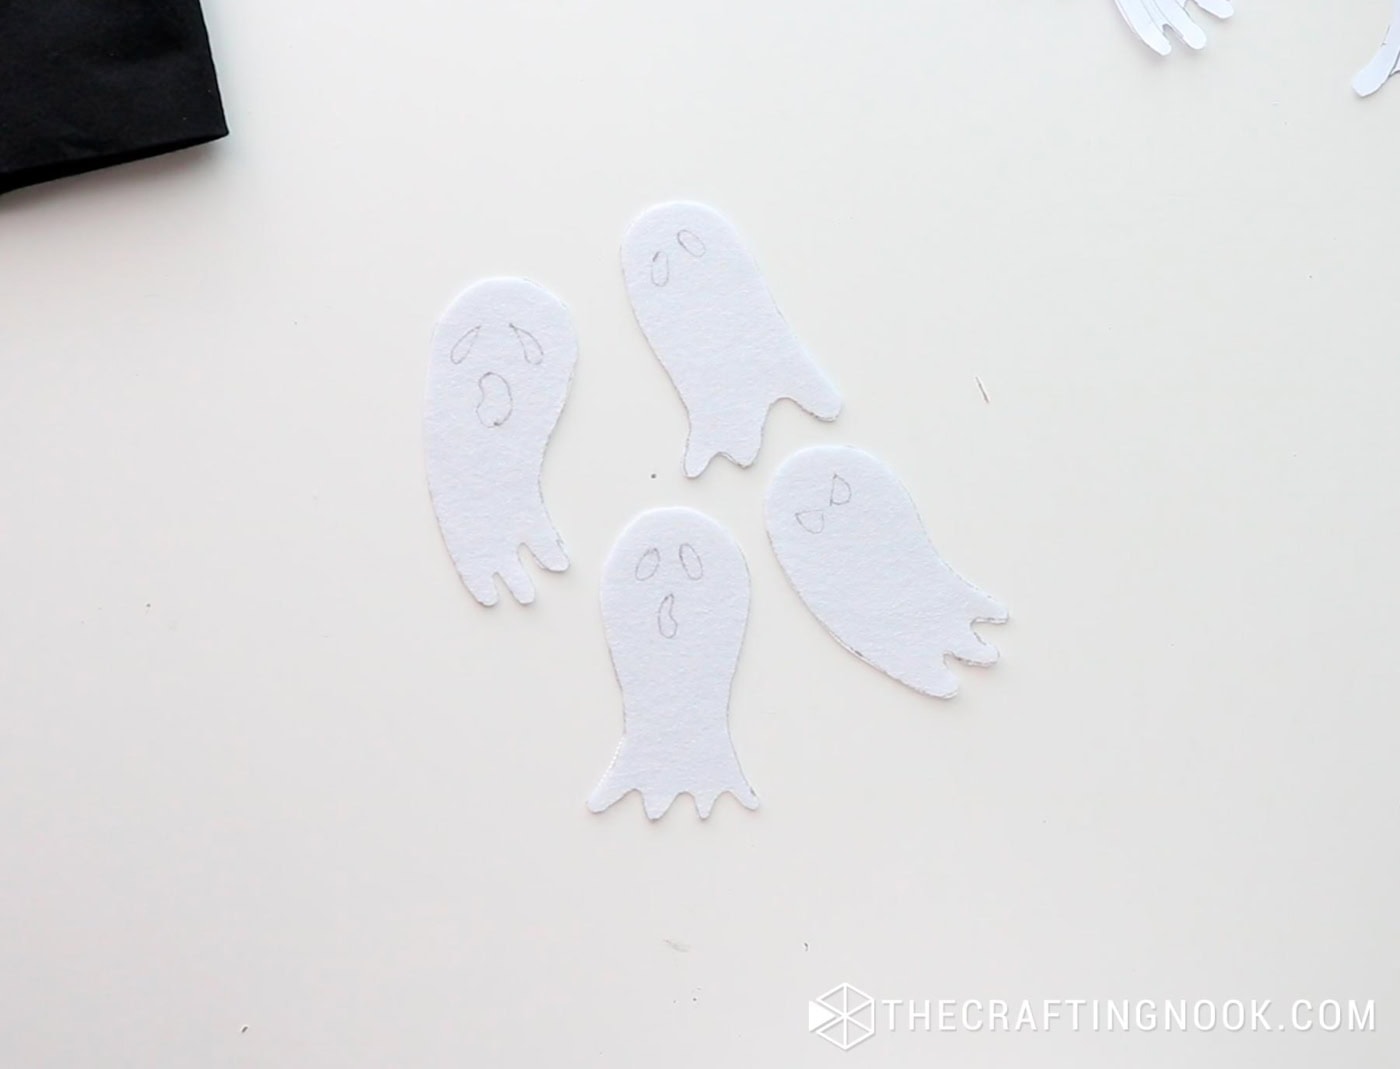
Trace your ghost onto white felt and cut them out.
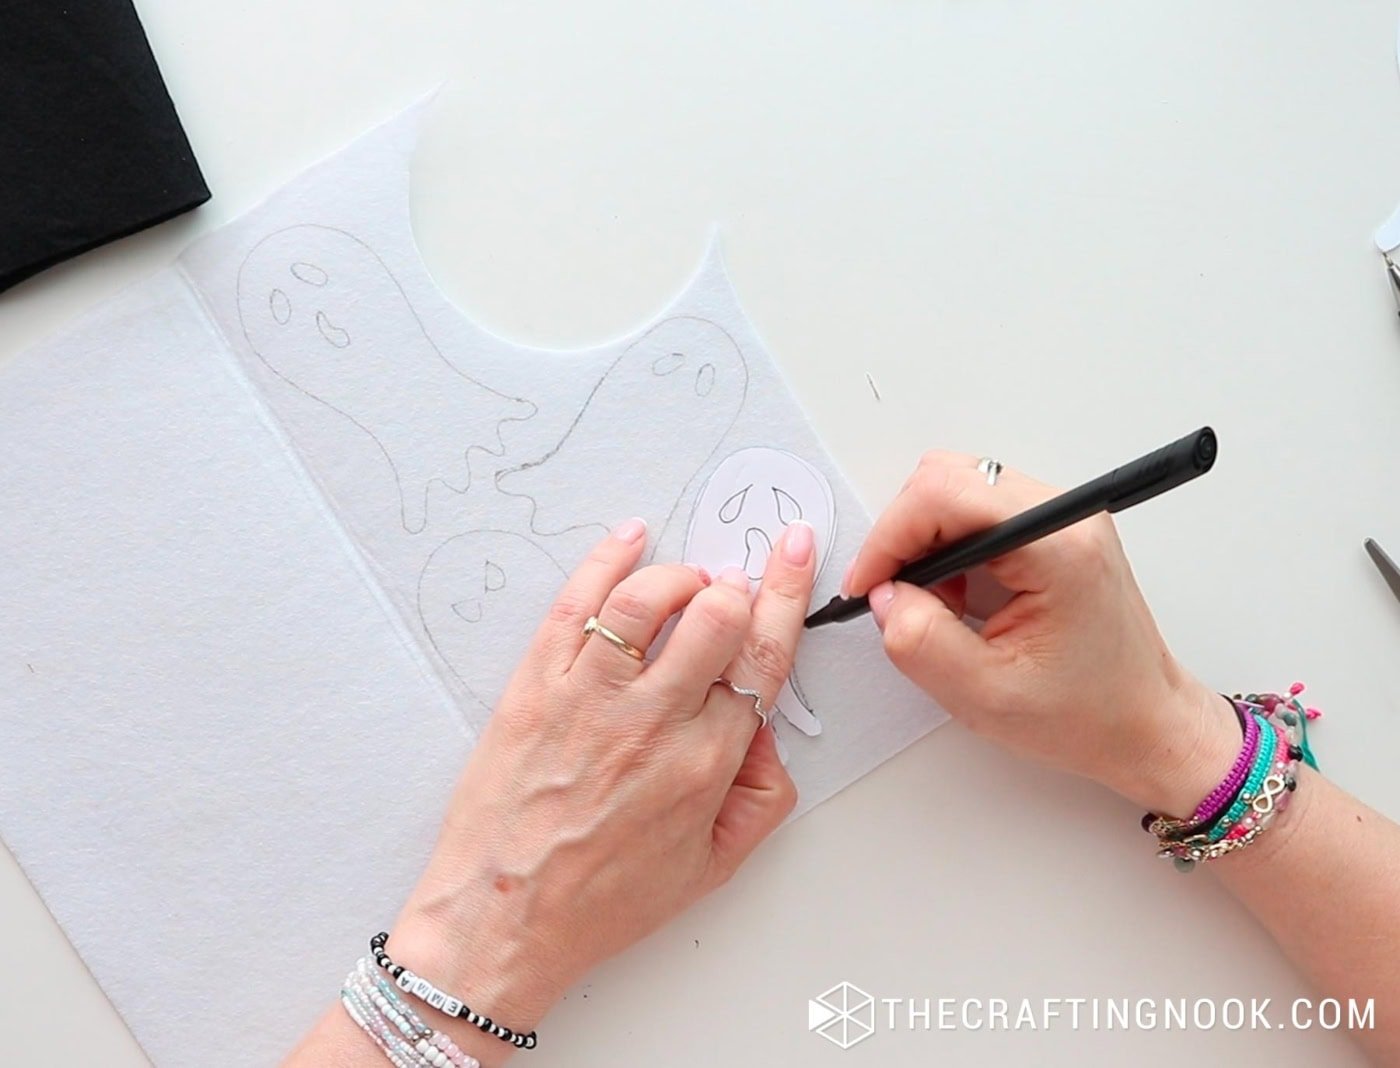
Also, cut out black felt eyes and mouths for each ghost.
Glue those little faces onto your ghosts.
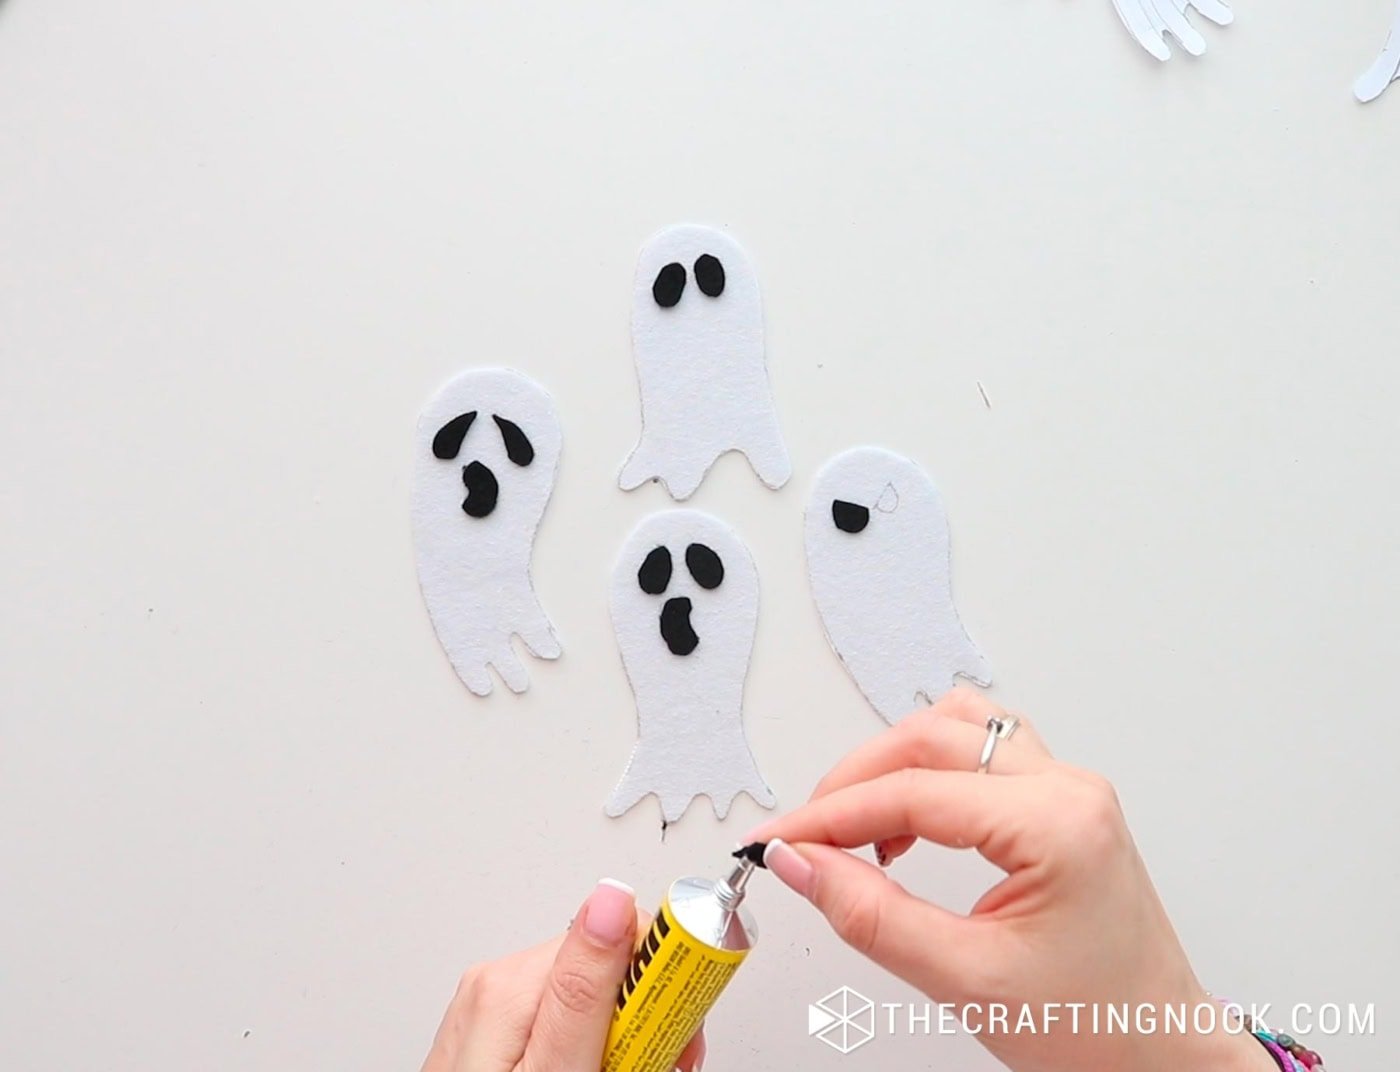
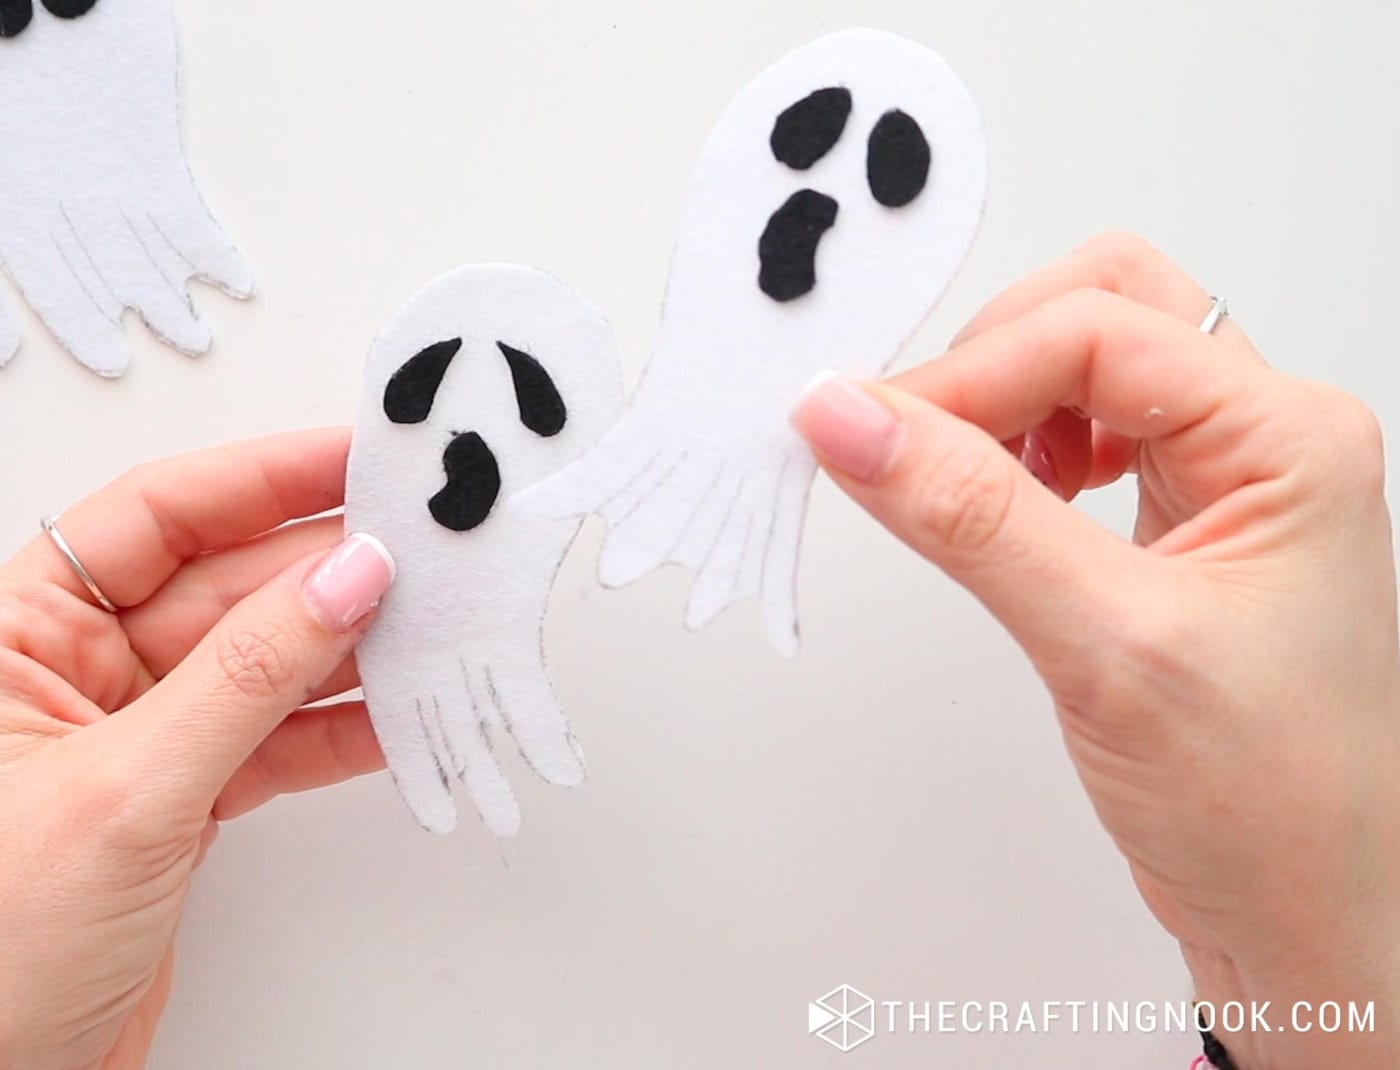
I drew the wavy lines of the flying sheets of the ghosts but this is totally optional.
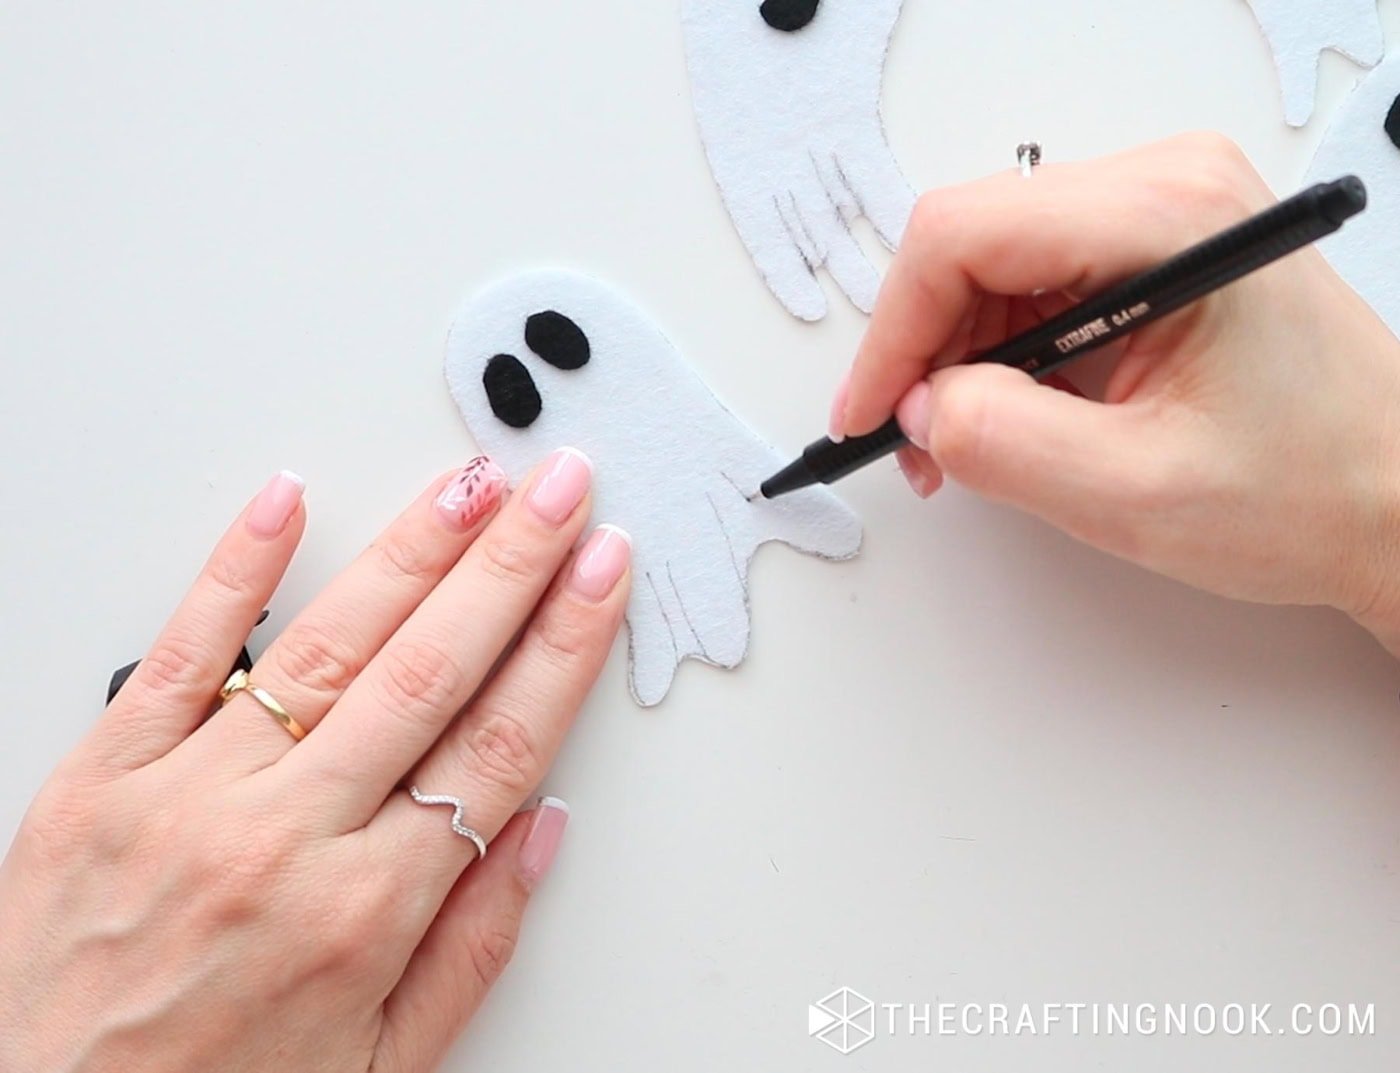
And look at that, they’ve got personality!
Step 3: Assemble the “BOO”
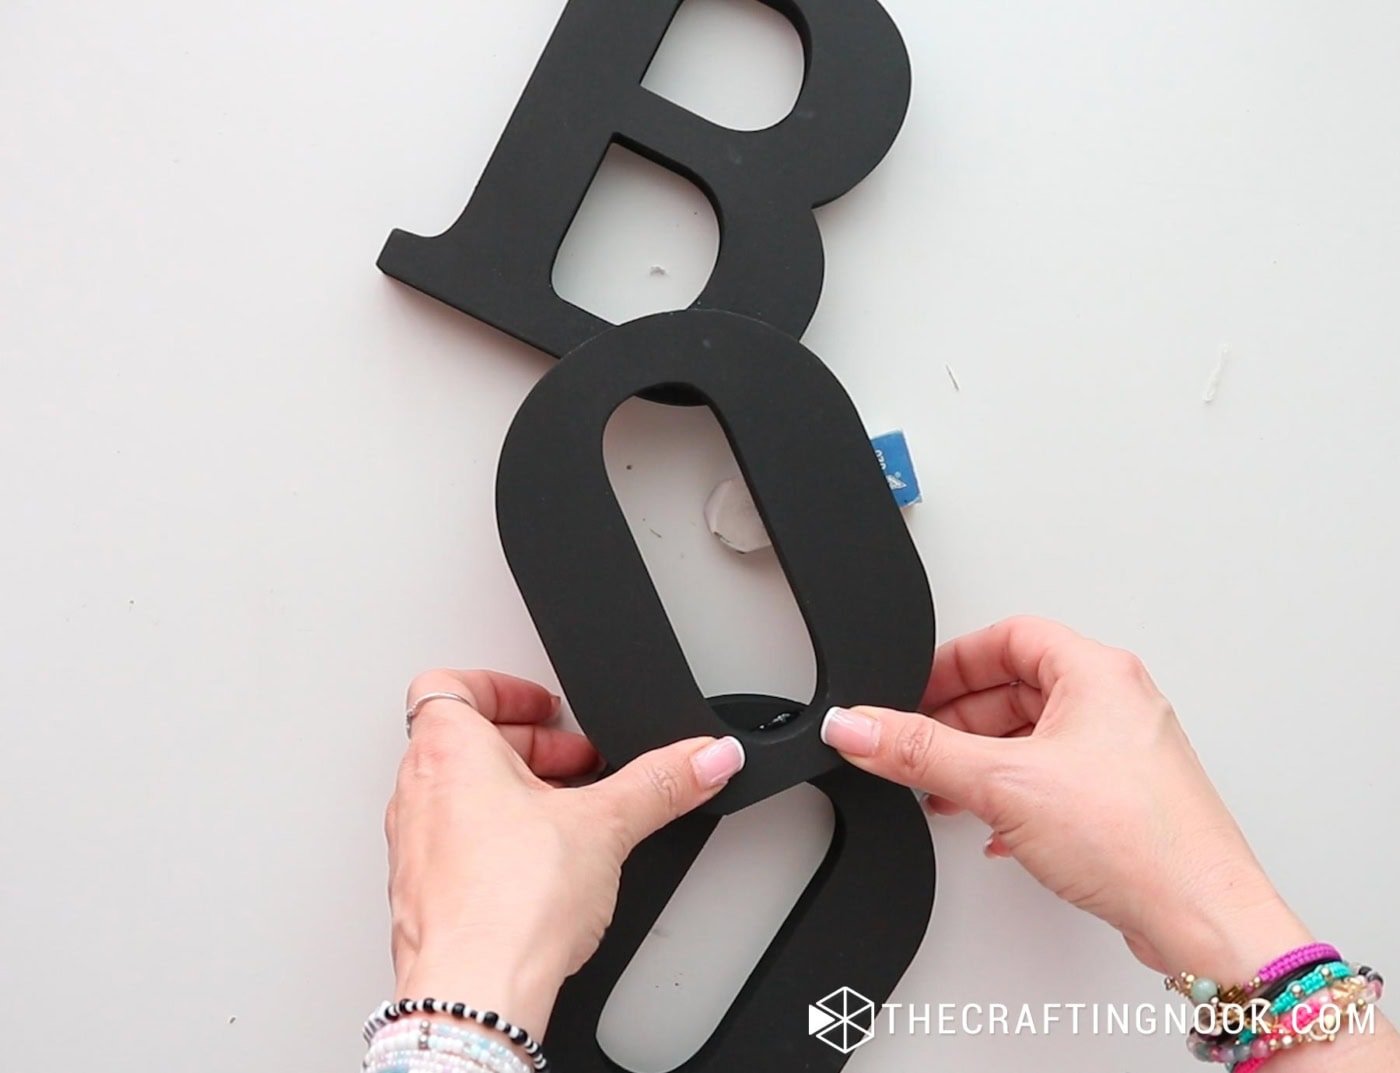
Once your letters are dry, arrange them in a vertical stack. I went for an asymmetric look by slightly overlapping the center “O” over the “B” and the last “O.” This gives it a fun, 3D feel!
Use your hot glue gun to glue the letters together in this vertical formation.
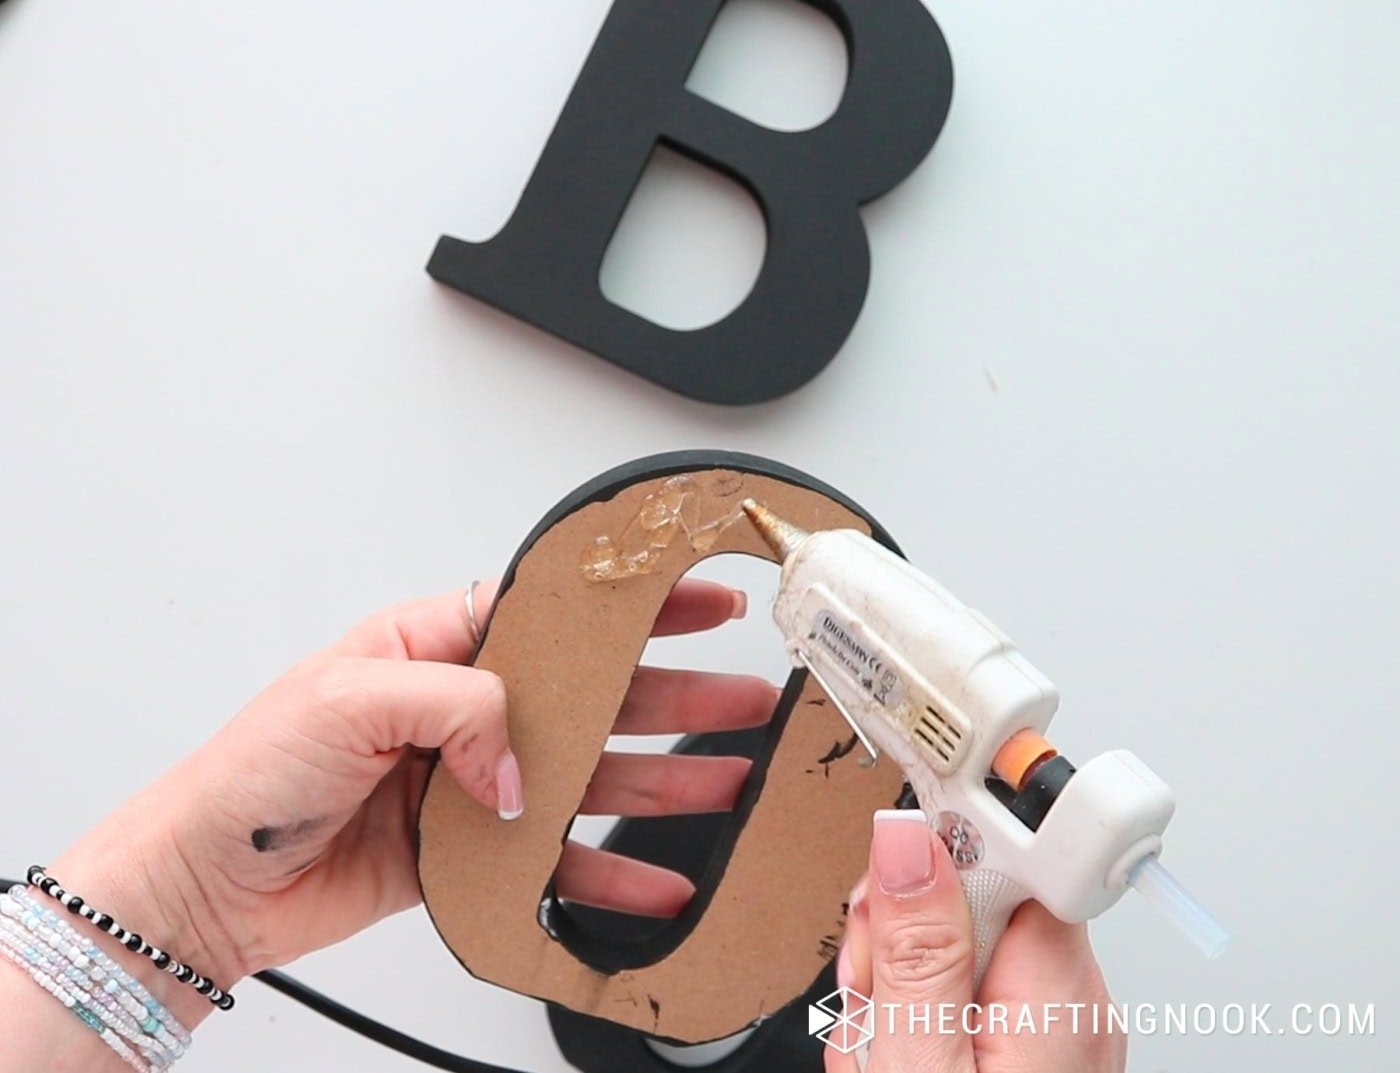
Make sure everything is secure before moving on.
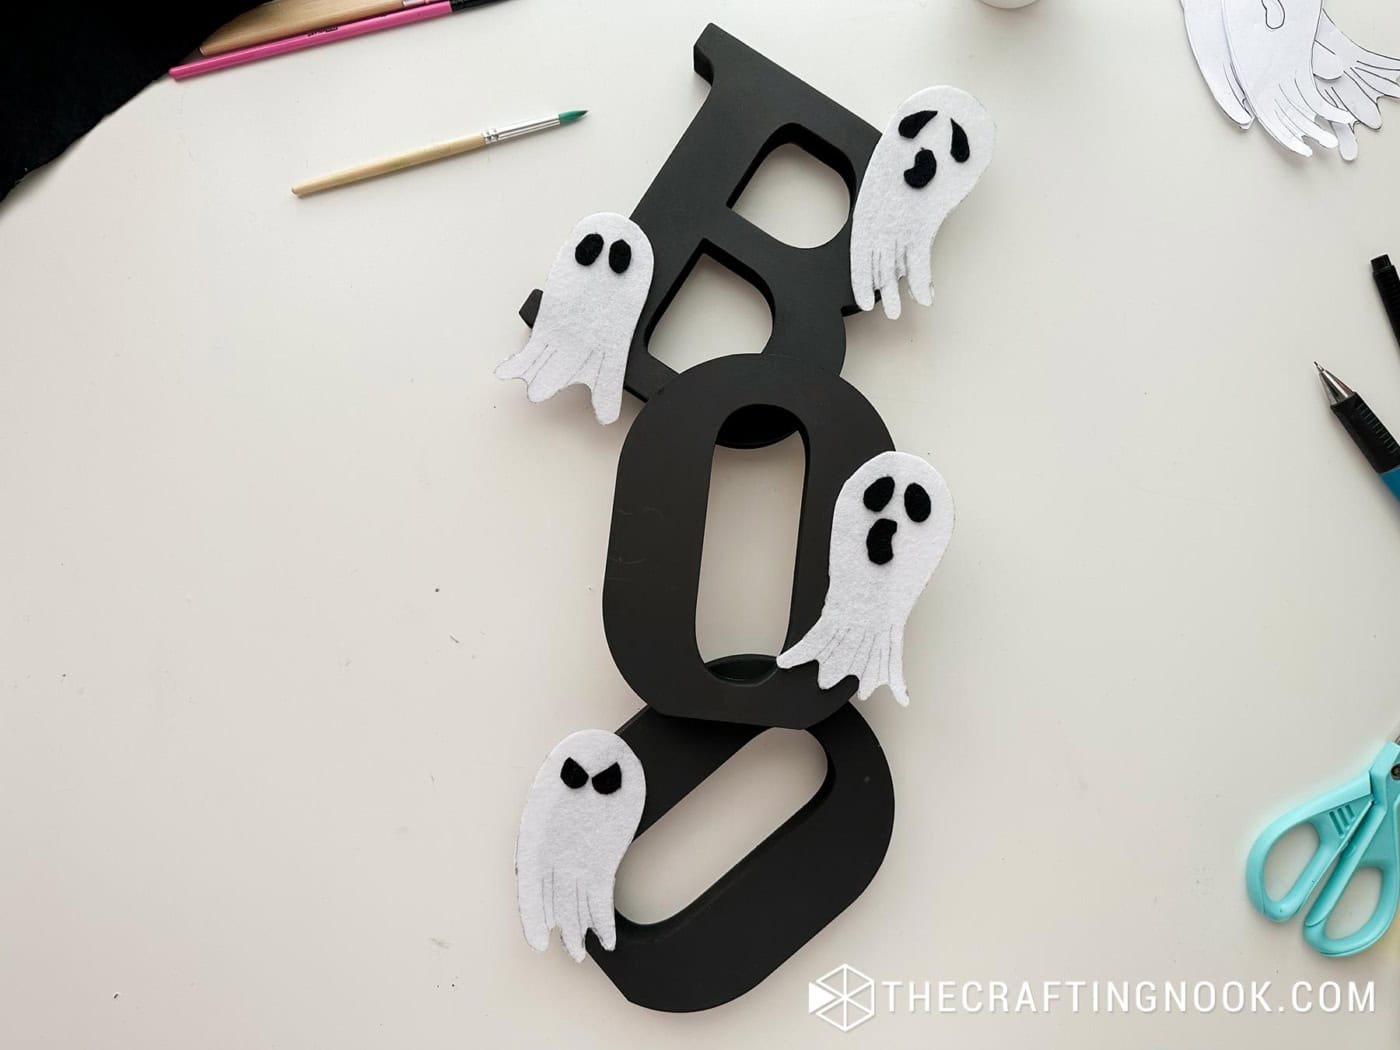
Step 4: Add the Ghosts
I glued mine onto the letters in a way that made them look like they were floating around.
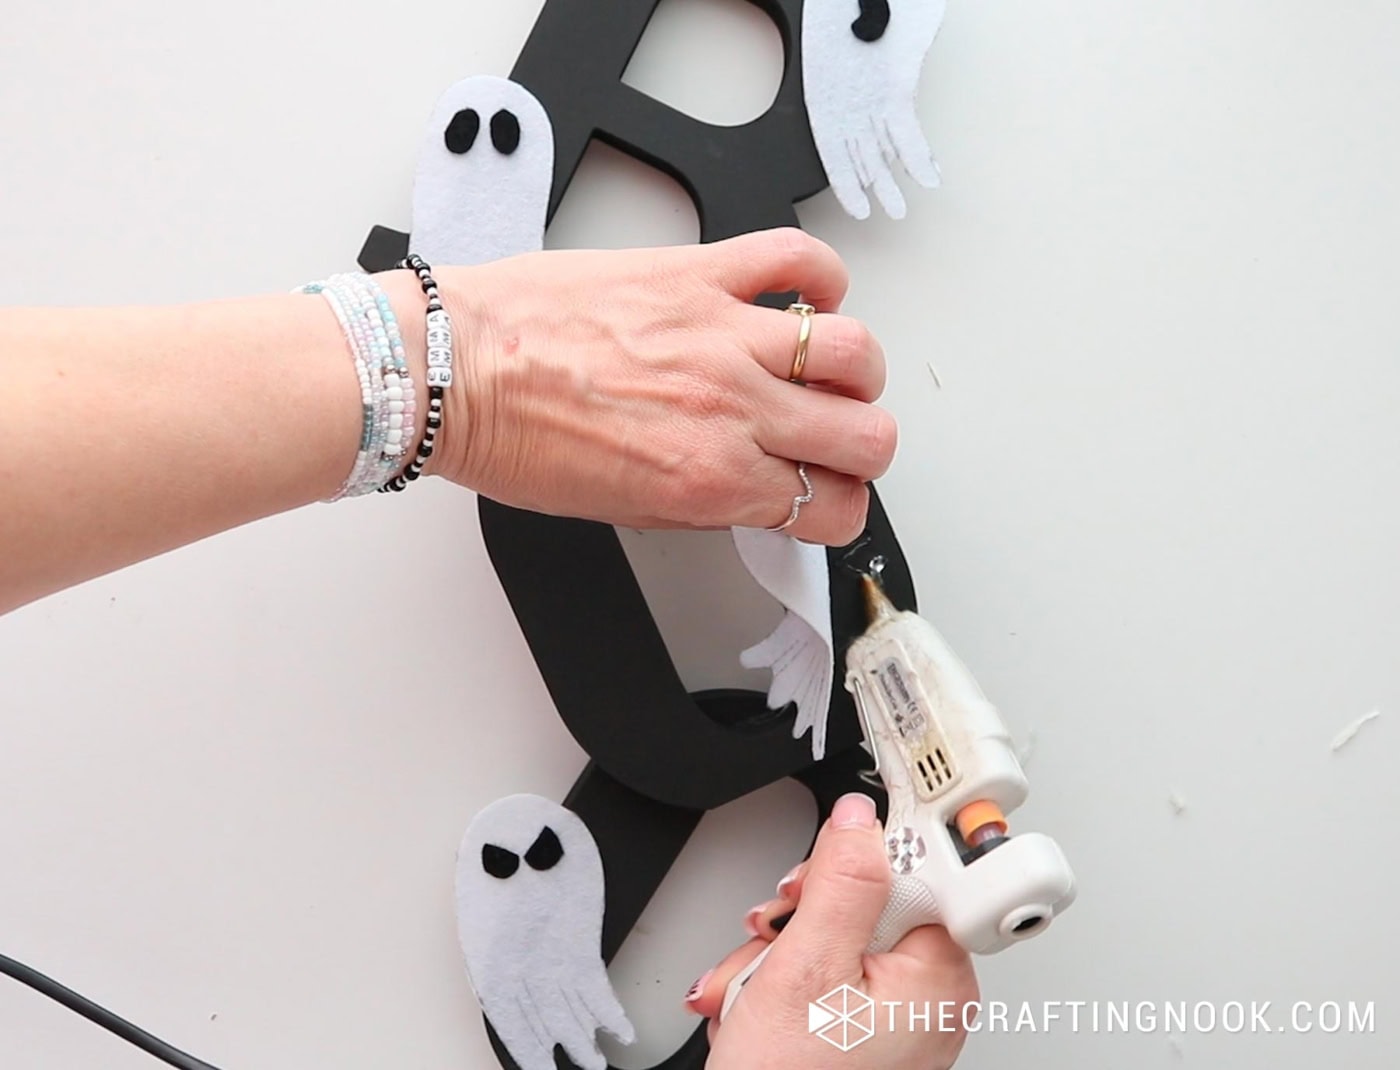
You can play around with their positions to make it your own, but I loved how they looked scattered across the letters.
Step 5: Attach the Ribbon
To finish it off, grab your orange polka dot ribbon. I looped mine through the top of the letter “B” and tied a knot, creating the hanger.

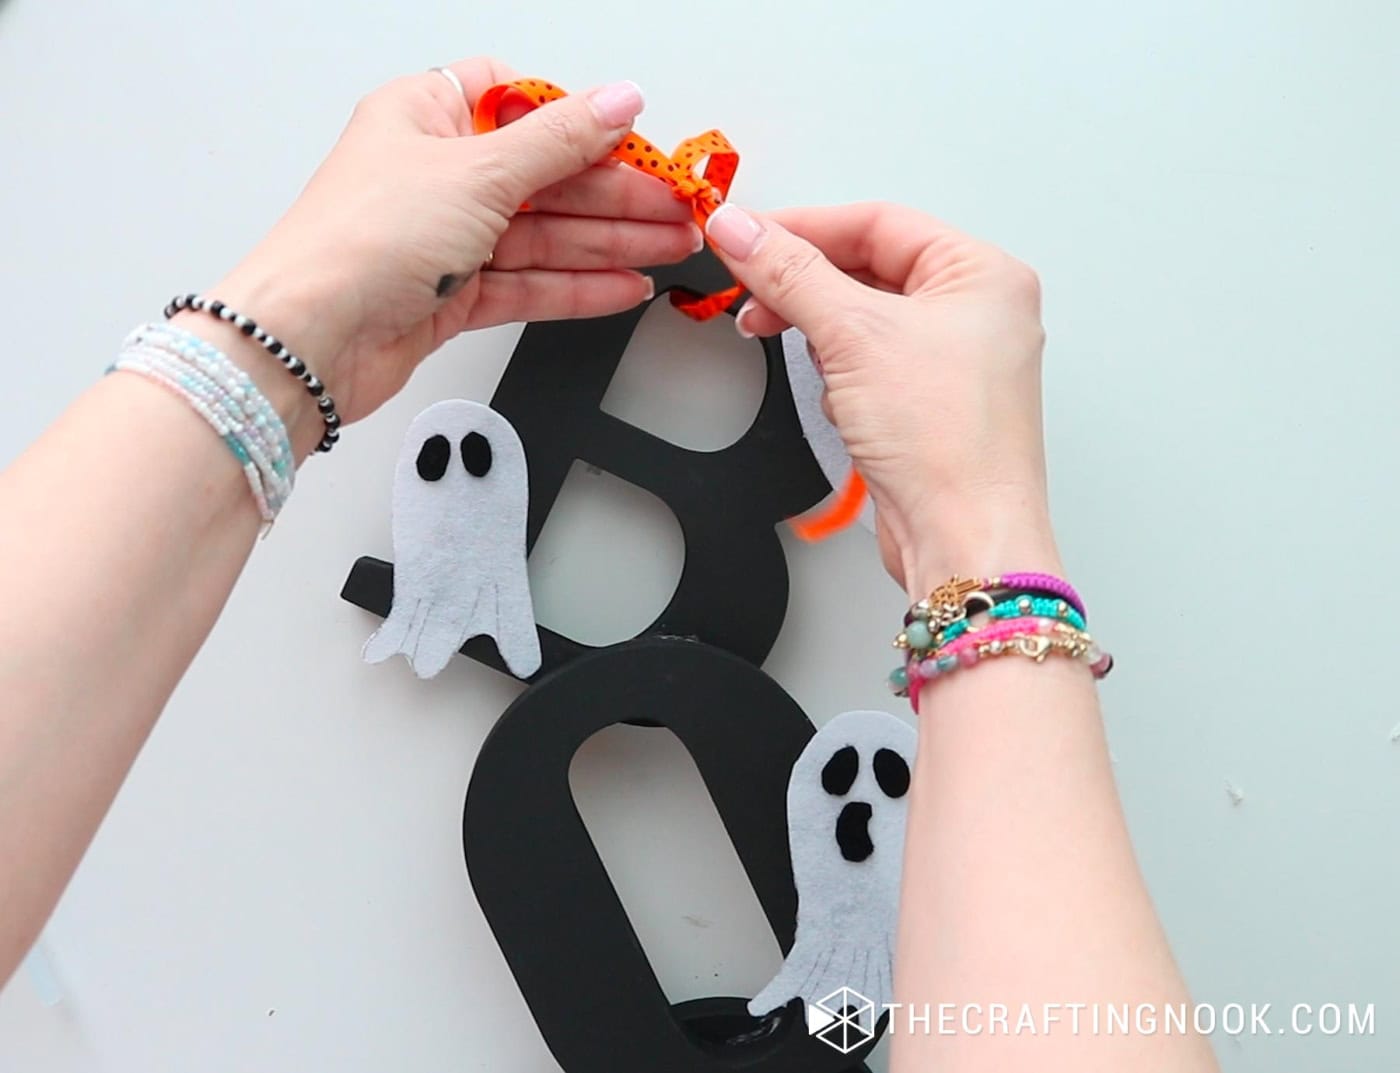
The bright ribbon pops against the black letters and really gives the door hanger a festive feel!
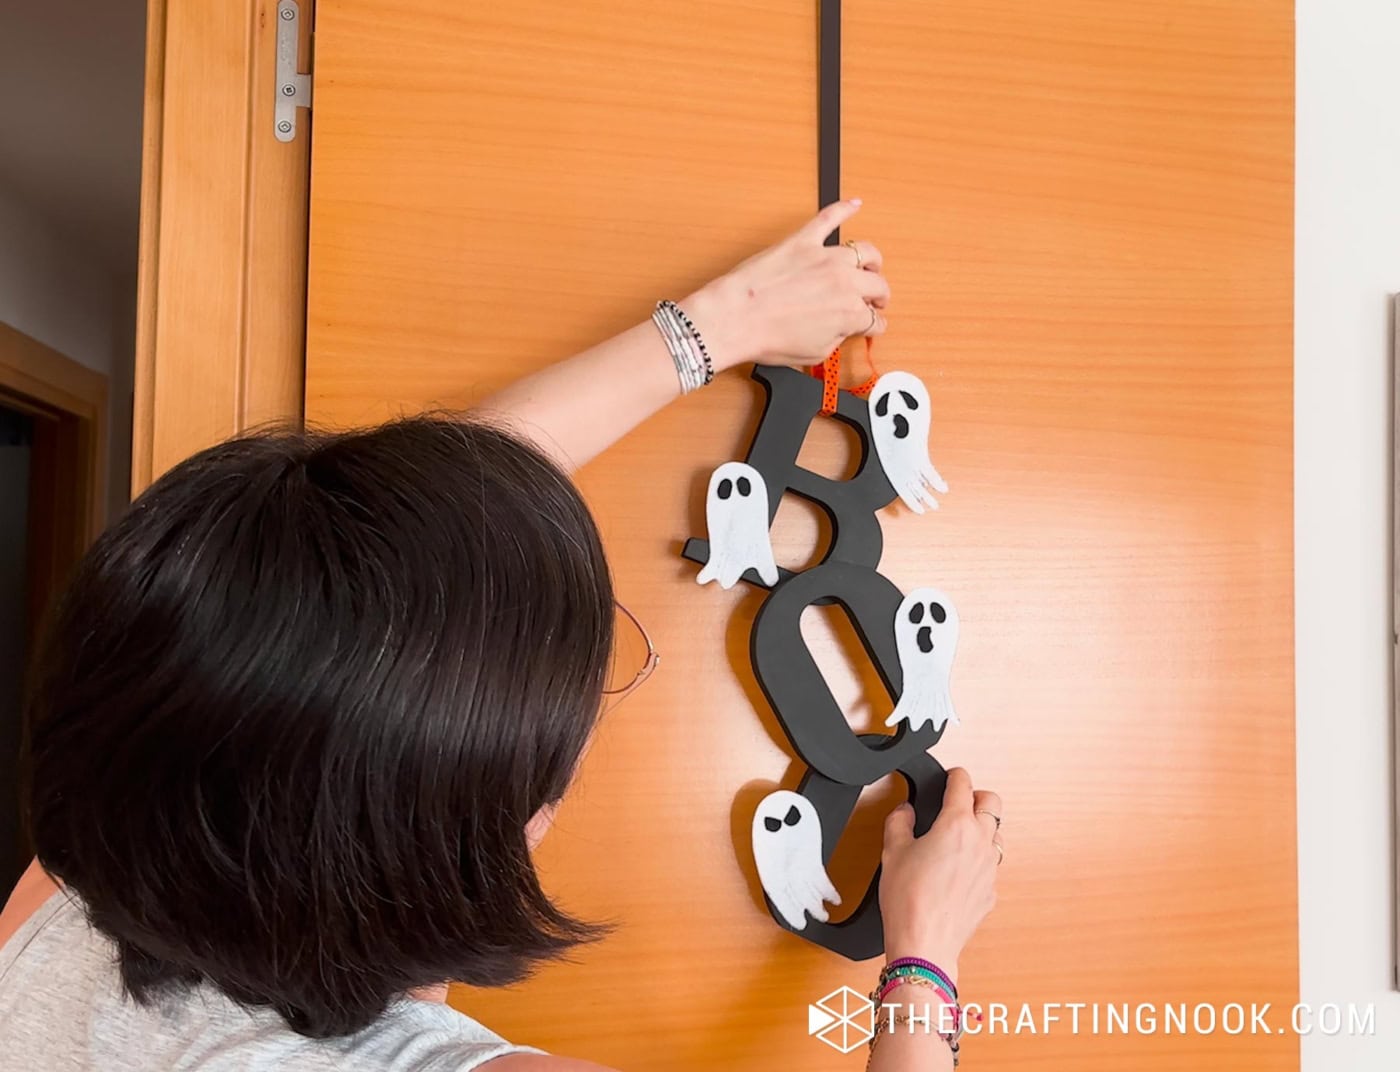
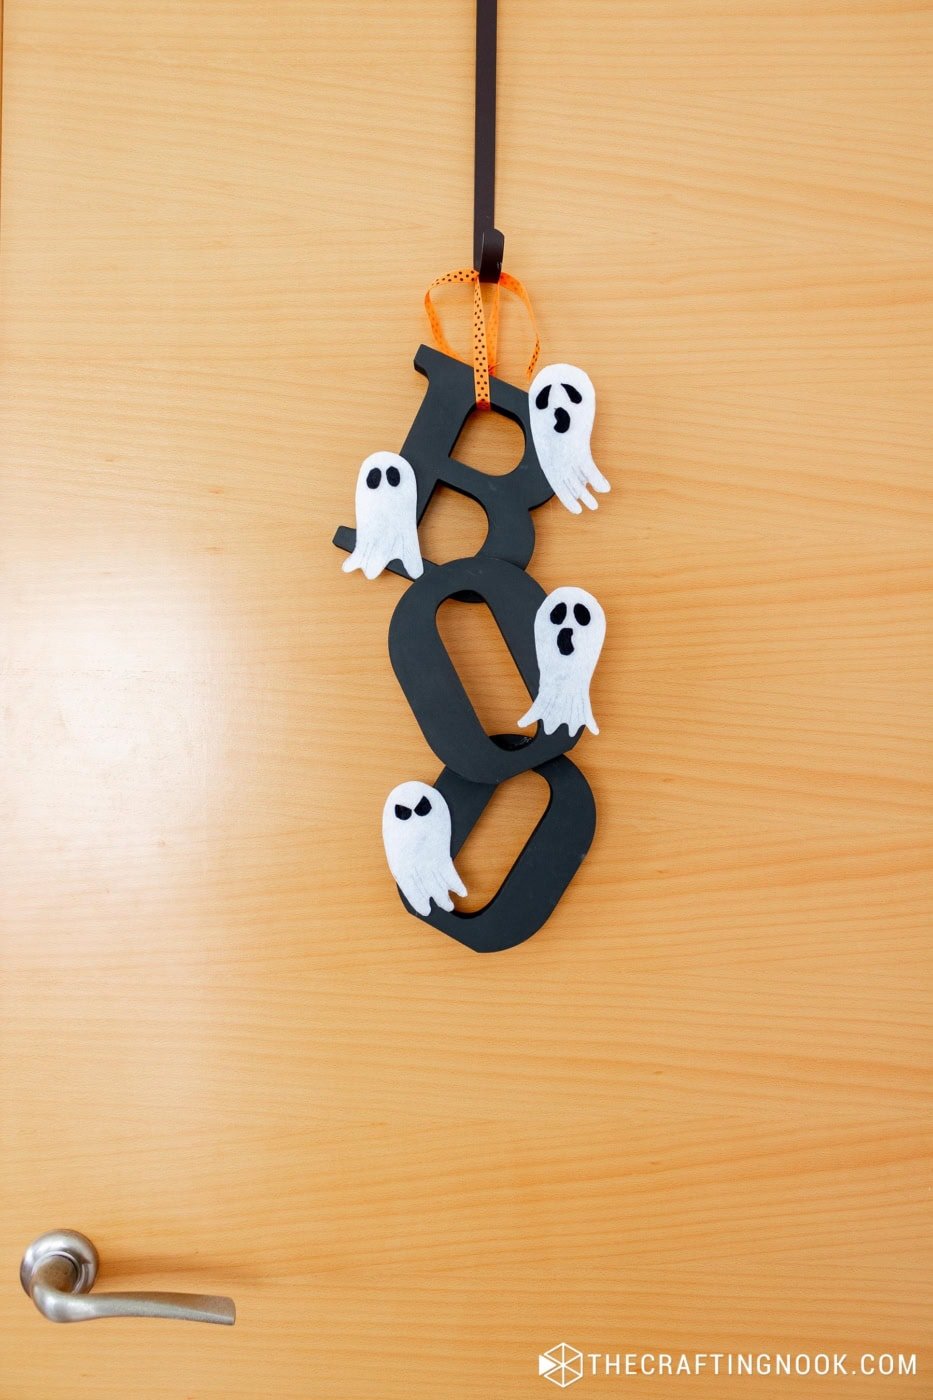
Step 6: Hang It Up
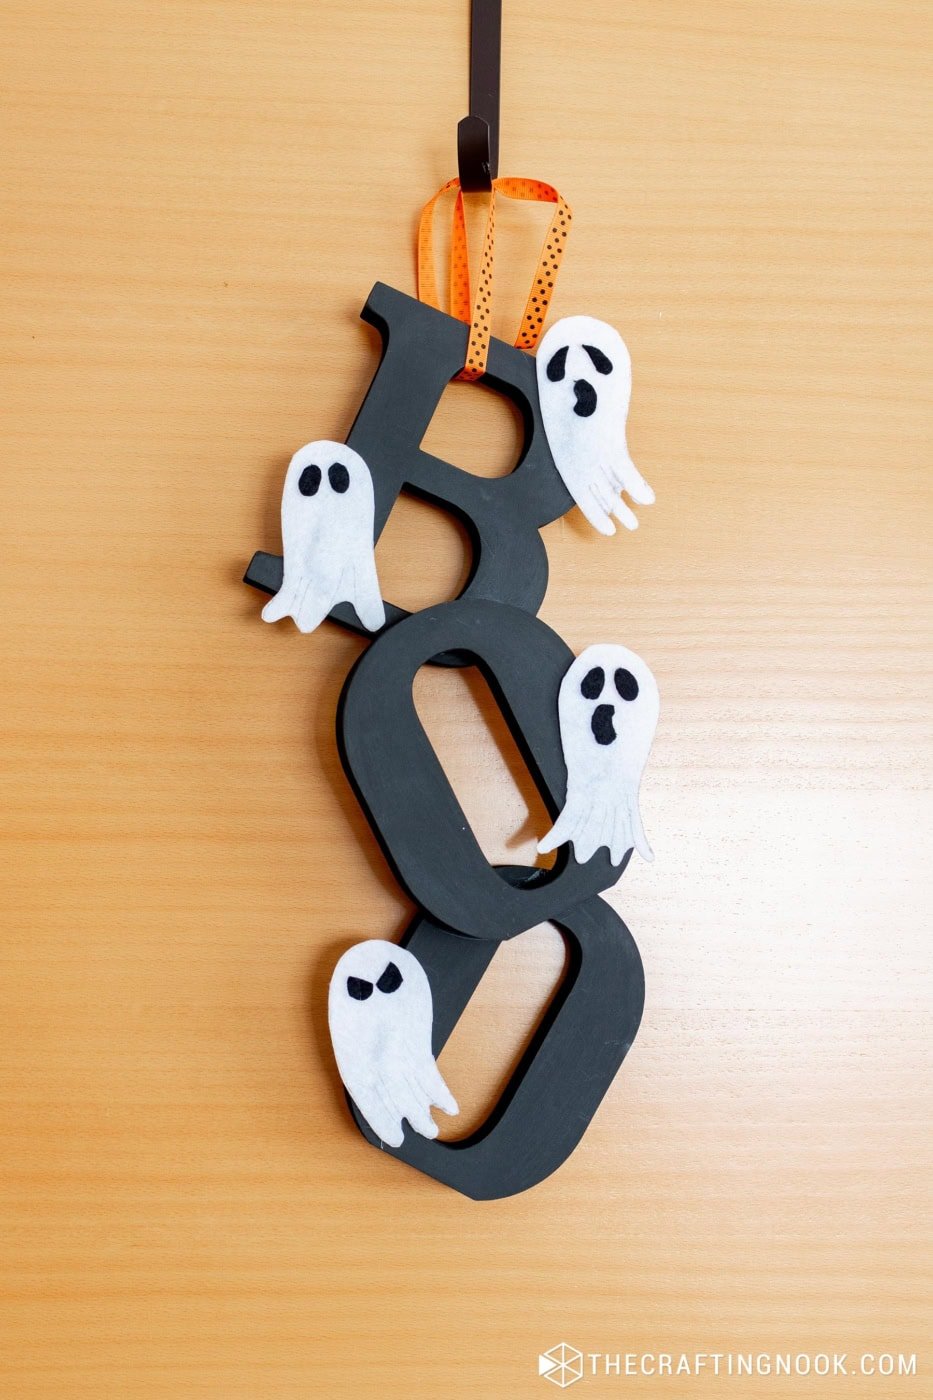
And that’s it! Your DIY Halloween Door Hanger is ready to spook up your front door.
Hang it up, step back, and enjoy your spooky-cute door hanger.
There you go!
This project is such a fun and easy way to add some personality to your Halloween decor. Plus, the ghosts are way too cute to be scary, right?
Crafting Tips
- Try making the ghosts in different shapes or sizes. You can even give them different expressions to add personality. Googly eyes would make them extra crazy too!
- If cutting out felt eyes and mouths is tricky, grab a permanent marker or fabric marker to draw on their faces. It’s faster and less fiddly!
- For a little extra Halloween vibe, sprinkle some glitter onto the ghosts or letters while the paint is still wet.
- You can glue on mini pumpkins, spiders, or bats made from felt or foam to give the door hanger even more Halloween spirit. Layering different shapes can add fun textures and dimension.
Where to Use This Door Hanger
- Front door decoration
- Front Porch
- Classroom decor
- Entryway
- Living room
Alternatives and Substitutions
If you don’t want to use wooden letters or if you want to skip painting altogether, you can use styrofoam, cardboard or craft foam letters which come in a variety of colors, are lightweight, and super easy to glue together.
Instead of “BOO,” you could spell out other fun Halloween words like “EEK,” or “SPOOKY”.
Instead of using black paint, you can opt for black spray paint to cover the wooden letters quickly and evenly. Plus, it dries faster. Or you can buy the letters already black. I chose raw because is cheaper.
For the ghosts, instead of felt, use white foam sheets or even white paper to cut out the ghosts. They’ll be easier to work with, especially if you’re crafting with kids.
If you don’t have a cute ribbon on hand, you can use black or orange twine or even some leftover yarn.
Not so fan of all black and white? you can paint the letters in different colors—maybe purple, orange, and green instead of black. It’s a great option if you want to match a more colorful Halloween theme.
Frequently Asked Questions
Absolutely! If you don’t have felt on hand, you can use materials like foam sheets, white fabric, or even thick cardstock. These will still give you that cute ghostly effect while being just as easy to cut and work with.
Definitely! This is a super kid-friendly craft. Just swap out the hot glue for a safer glue like craft glue or glue dots if younger kids are involved. They can help paint the letters, cut out ghost shapes, and draw faces on the ghosts.
No worries! You can cut out letters from sturdy cardboard or buy pre-cut foam or cardboard letters from a craft store or online. They’re just as easy to paint and glue together.
This project is pretty quick! It usually takes around 1-2 hours, including drying time for the paint. If you’re using spray paint, the drying time might be even shorter.
Acrylic paint works great for this project because it’s fast-drying and easy to work with. You could also use spray paint if you want to cover the letters quickly and get a smooth, even finish.
If you don’t have a hot glue gun, you can use craft glue or even super glue. Just keep in mind that some glues may take a little longer to dry, so give your project some extra time to fully set before hanging. You can also go for nails from the back or use ribbon or twine to attach the letters together.
More Halloween Projects To Try
Like this DIY Halloween Door Hanger tutorial? You might definitely love these other Halloween project ideas too:

✂️ Tutorial
DIY Halloween Door Hanger
Tools
- Hot glue gun and glue sticks
- Paintbrush
- scissors
- Markers, Pen, or pencil for tracing
Supplies
- Wooden letters spelling “BOO”
- Black acrylic paint
- White felt – for ghosts
- Black felt – for eyes and mouth details
- Orange polka dot ribbon – or your favorite spooky one for the hanger
- Liquid glue – Optional for the eyes but you can use hot glue too.
Instructions
Step 1: Paint the Letters
- Start by grabbing your wooden letters and giving them a good coat of black acrylic paint.
- I painted all sides and edges to keep everything nice and sleek.
- Let them dry completely before moving on to the next step.
Step 2: Make the Spooky Ghosts
- While your letters are drying, it’s time to bring the spooky ghosts to life! I hand-drew a cute little ghost shape on paper first (feel free to get creative with their shapes!), then used that as a stencil.
- Cut the little ghost with your scissors.
- Trace your ghost onto white felt and cut them out.
- Also, cut out black felt eyes and mouths for each ghost.
- Glue those little faces onto your ghosts.
- I drew the wavy lines of the flying sheets of the ghosts but this is totally optional.
- And look at that, they’ve got personality!
Step 3: Assemble the “BOO”
- Once your letters are dry, arrange them in a vertical stack. I went for an asymmetric look by slightly overlapping the center “O” over the “B” and the last “O.” This gives it a fun, 3D feel!
- Use your hot glue gun to glue the letters together in this vertical formation.
- Make sure everything is secure before moving on.
Step 4: Add the Ghosts
- I glued mine onto the letters in a way that made them look like they were floating around.
- You can play around with their positions to make it your own, but I loved how they looked scattered across the letters.
Step 5: Attach the Ribbon
- To finish it off, grab your orange polka dot ribbon. I looped mine through the top of the letter “B” and tied a knot, creating the hanger.
- The bright ribbon pops against the black letters and really gives the door hanger a festive feel!
Step 6: Hang It Up
- And that’s it! Your DIY Halloween Door Hanger is ready to spook up your front door.
- Hang it up, step back, and enjoy your spooky-cute door hanger.
- Me hanging the Halloween Door Hanger on my door
- There you go!
Share and PIN ME!!!
Til’ next time…


FREE WORKBOOK
Keeping your Sweet Home Organized
Learn how to create intentional habits and simple routines to Keep Your Home Organized. Plus freebies, printables, exclusive content, and tips.
Disclaimer: By clicking on the “Yes” button above you are giving me your consent to collect and use your information according to the law and My Policy Privacy. Zero Spam I promise!