DIY Macrame Bracelet With Beads
This post may contain affiliate links. Please read our Disclosure Policy.
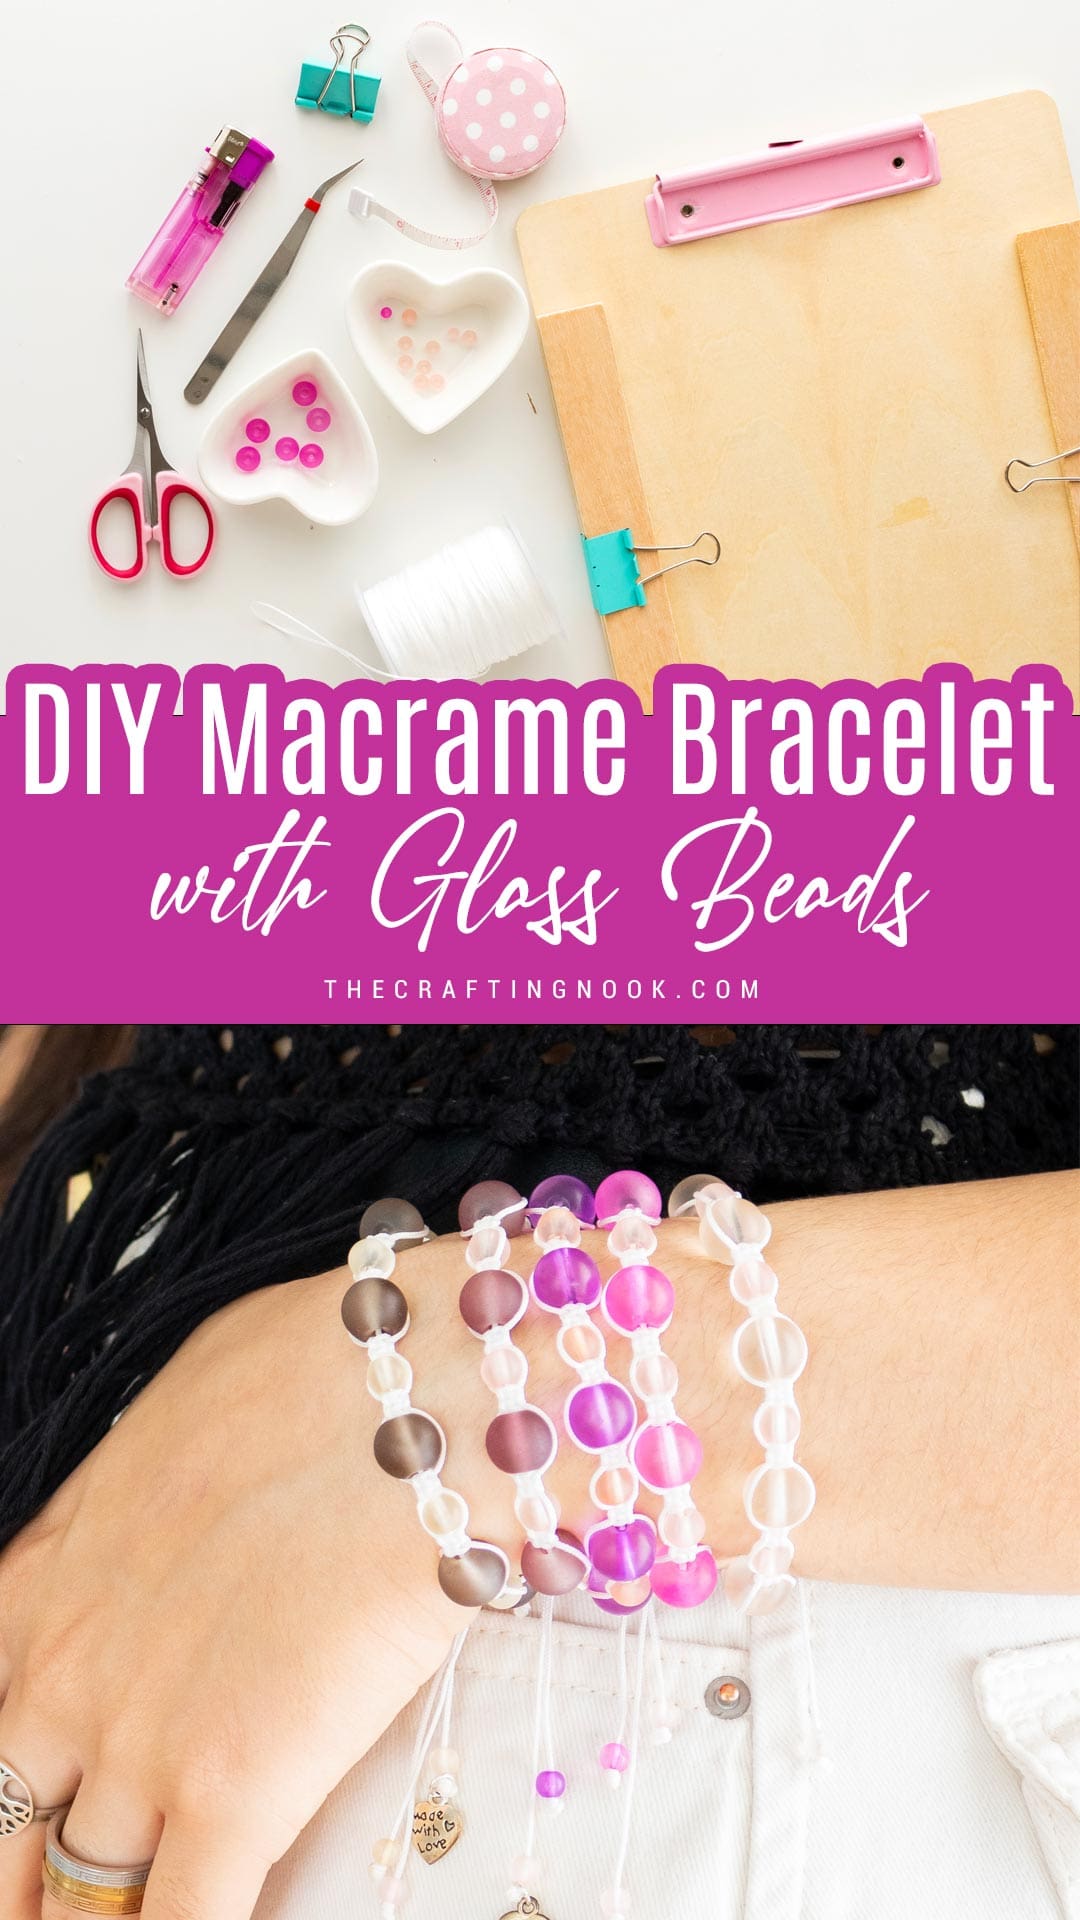
Create a cute macrame bracelet with beads and nylon cord! Easy step-by-step guide for beginners. Perfect DIY project for crafting lovers!
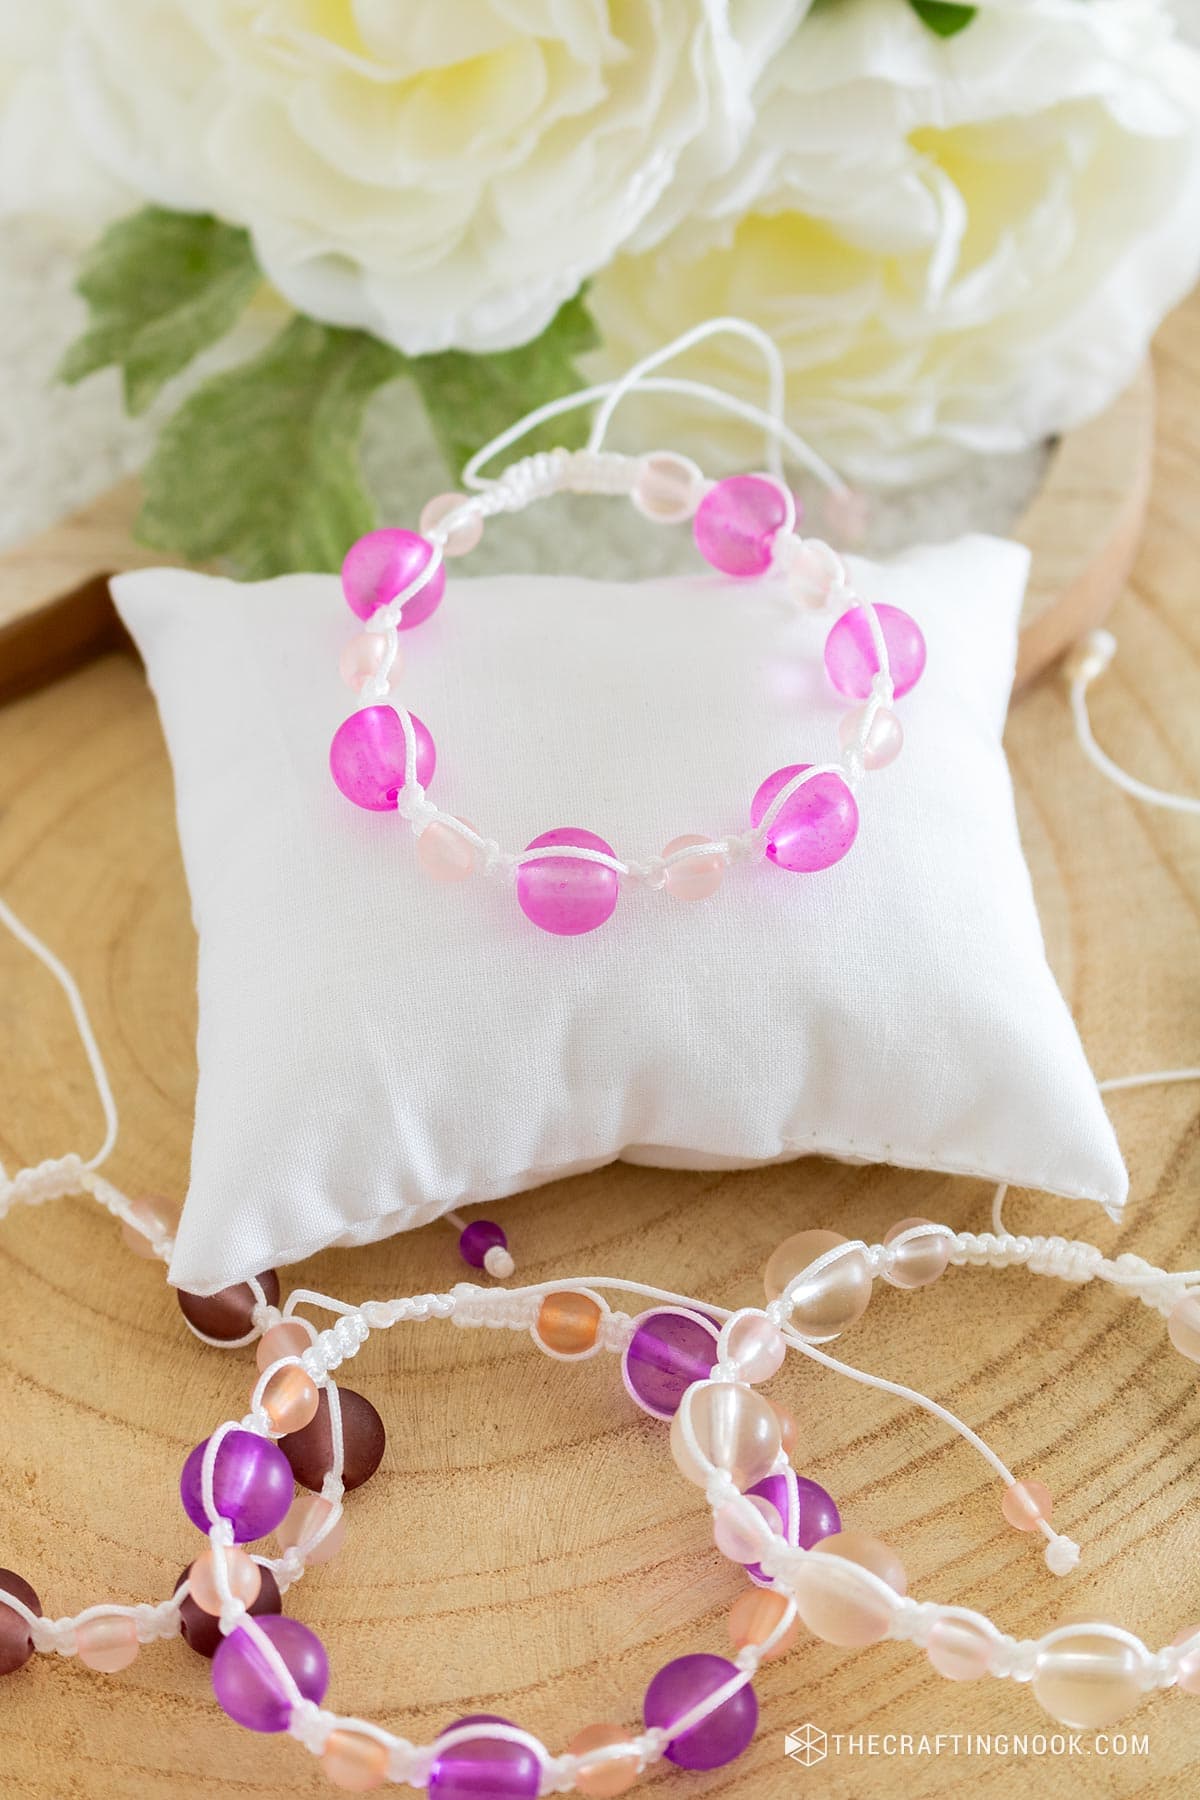
Have you ever looked at a beautiful bracelet and thought, “I want to make one like that.” Well, You’re in luck. In this tutorial, I’ll teach you how to make your own macrame bracelet using nylon Chinese cord and colored glass beads. It’s easy and fun.

Table of Contents
Main Heading
Macrame is making a comeback in the world of DIY crafts. It’s a great way to add some handmade charm to your accessories and home decor. It’s a great way to relax and tap into your creative side.
In this project, you will learn how to make beautiful jewelry using simple square knots and colorful beads. Don’t worry if you’re new to macrame or crafting. This tutorial is easy to follow and will help you get started.
You can make amazing things with just a few things and some time. Get your supplies, find a comfortable place, and start making a beautiful and unique diy bracelet!
How To Make Macrame Bracelets With Beads
Supplies:
- 1mm Nylon Chinese knotting cord – one 15-inch (40 cm) piece and one 60-inch piece (1.5 m). I used white.
- Glass Beads – alternating small and large. I used some cute Tinted glass beads (7x 4mm and 6x 8mm) in shades of pink but you can use any bead you love.
- Extra beads for tail finish – I used 3mm glass beads
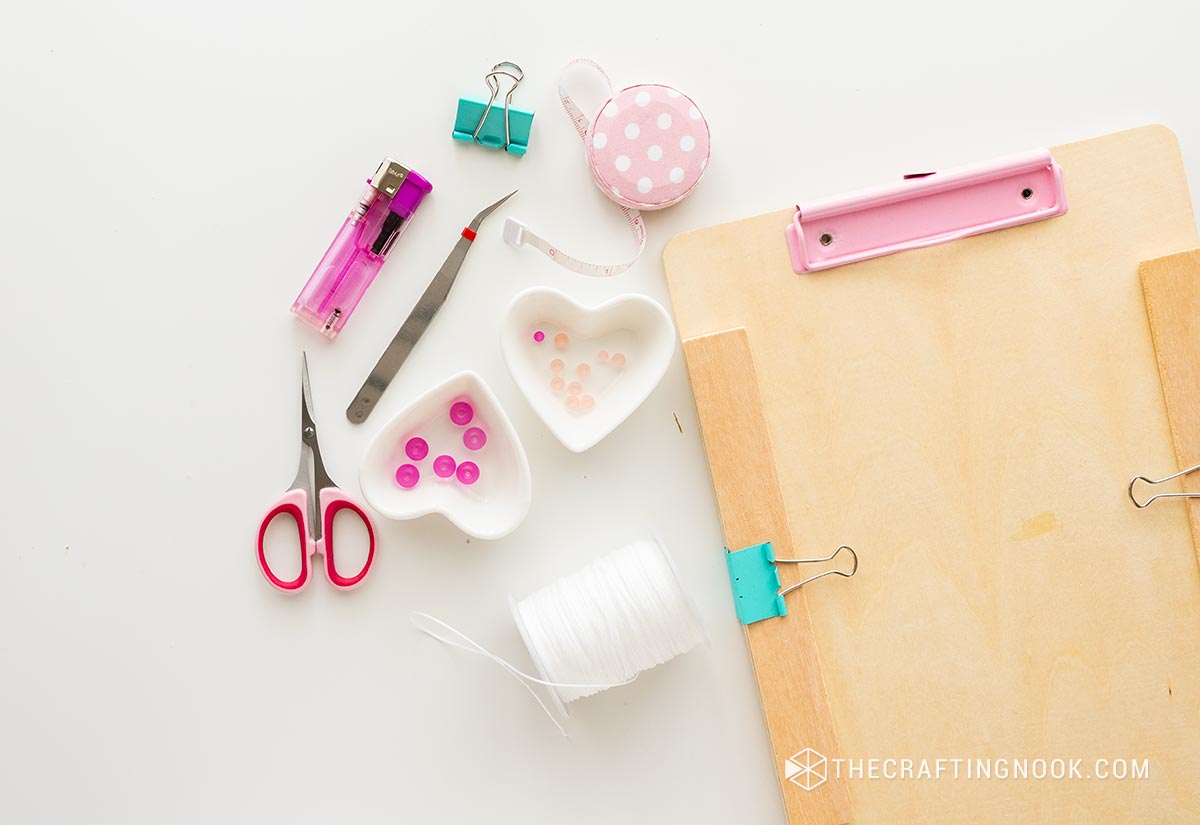
Tools:
- A clipboard and 2 paper clips
- Scissors
- A Lighter
- Measuring tape
- A Twizer just in case to help pull the cord.
Instructions:
You can watch the video tutorial in this post or you can also watch it on Youtube. Or keep scrolling to follow the step-by-step below.
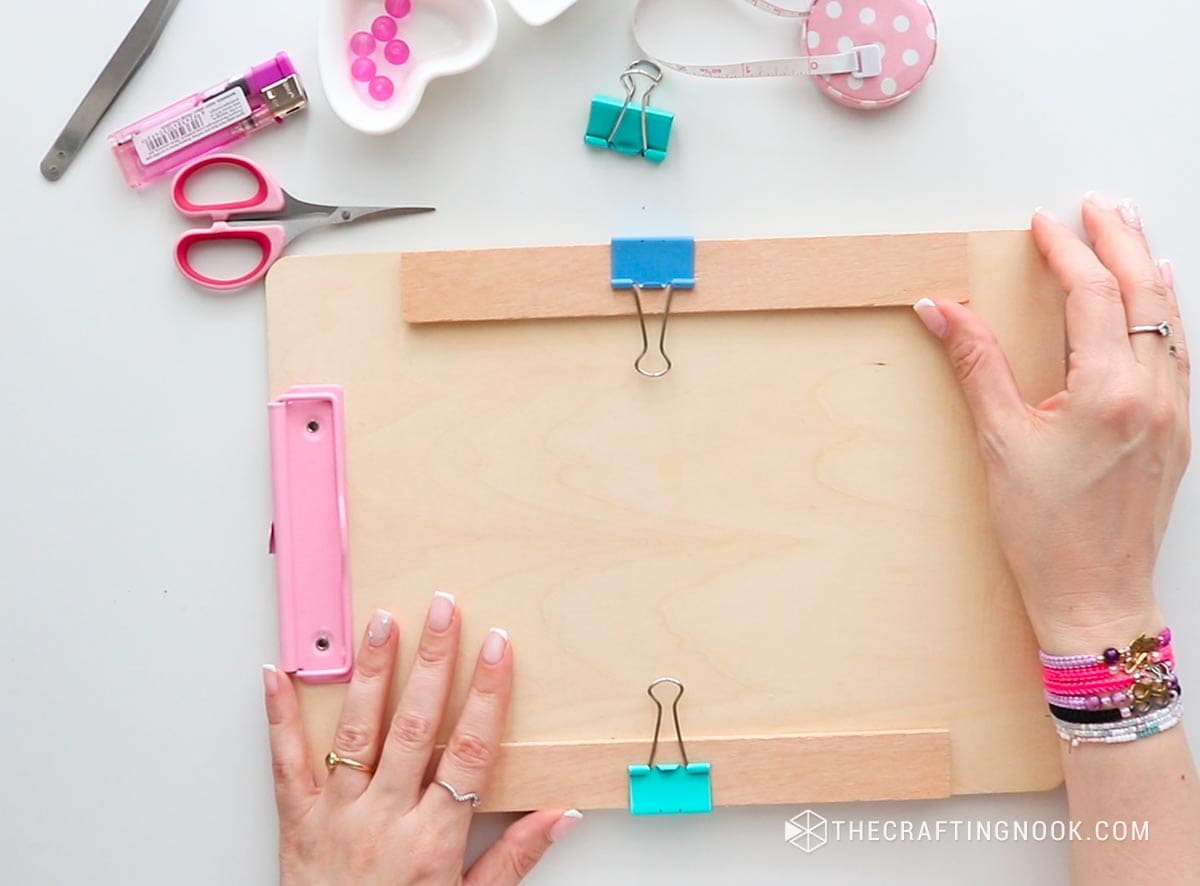
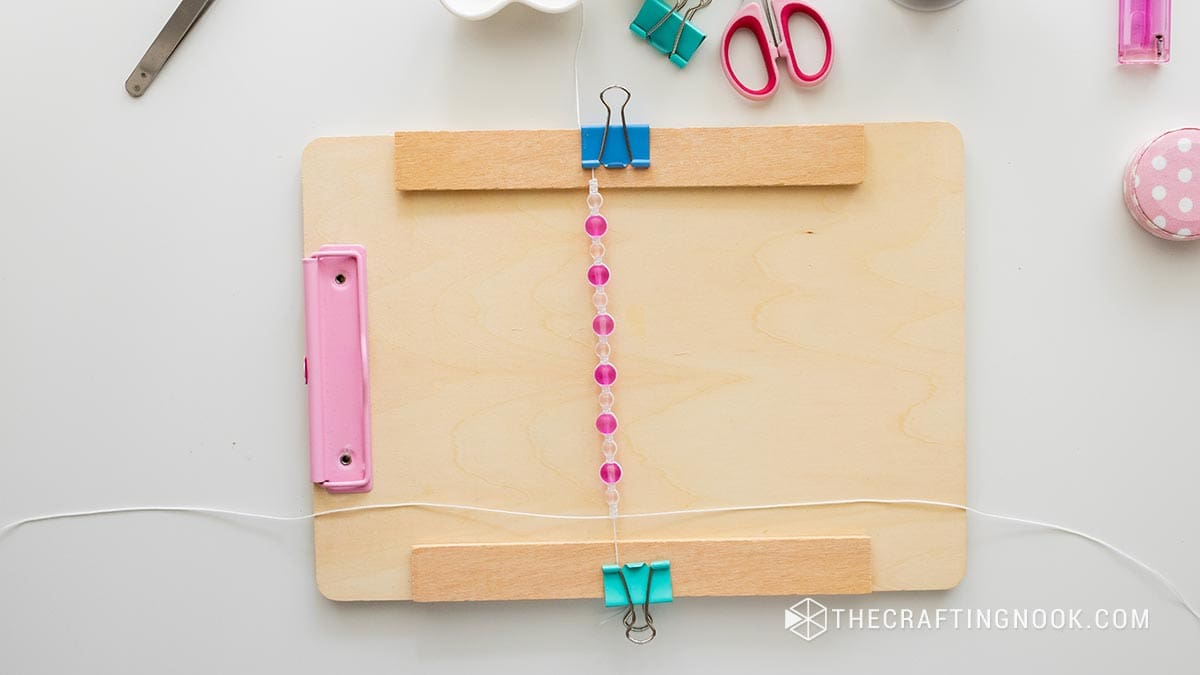
Step 1: Prep Work
Grab your clipboard horizontally and place your paper clips one on the top edge and the other at the bottom edge. If you have a couple of small cardboard or wooden scraps, hold them with the paper clips. This elevates the main cord to make it easier to knot. But it’s not a must.
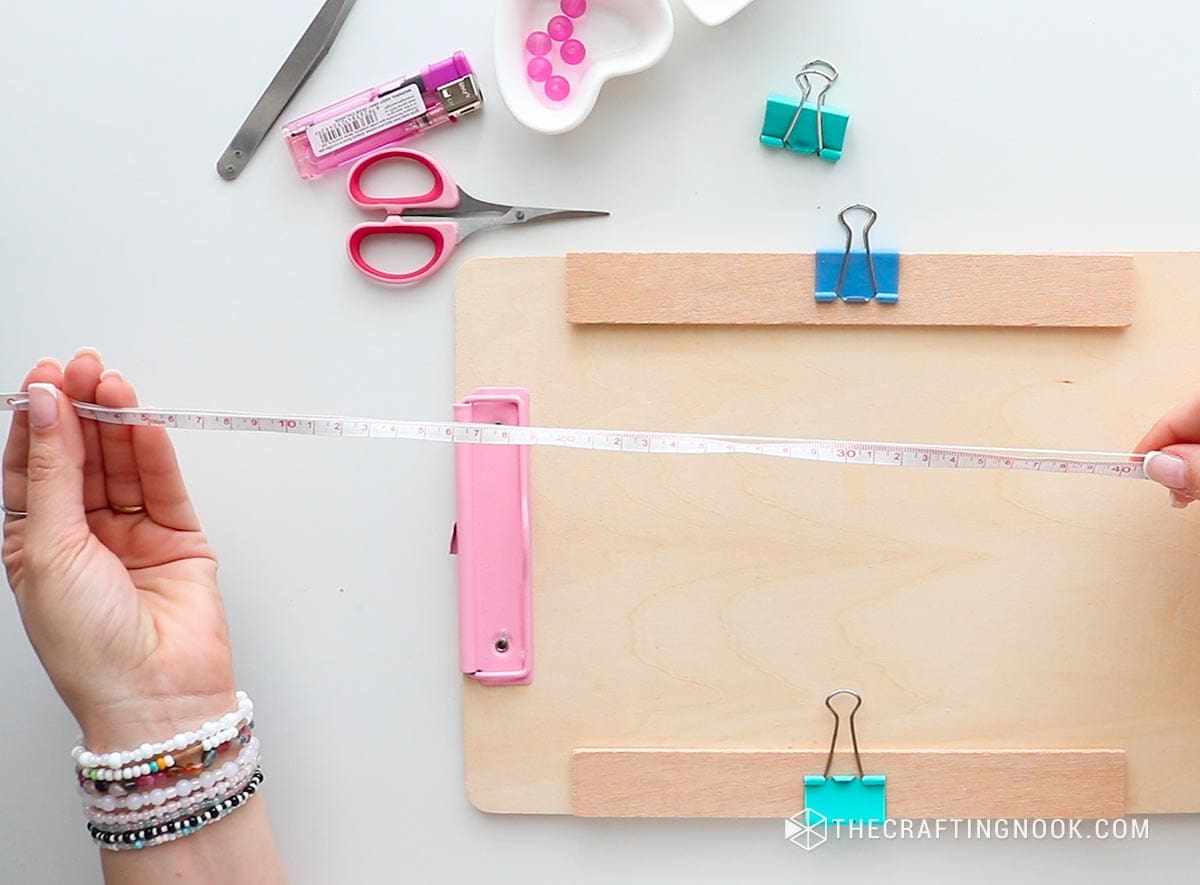
Cut your Strings according to measurements.
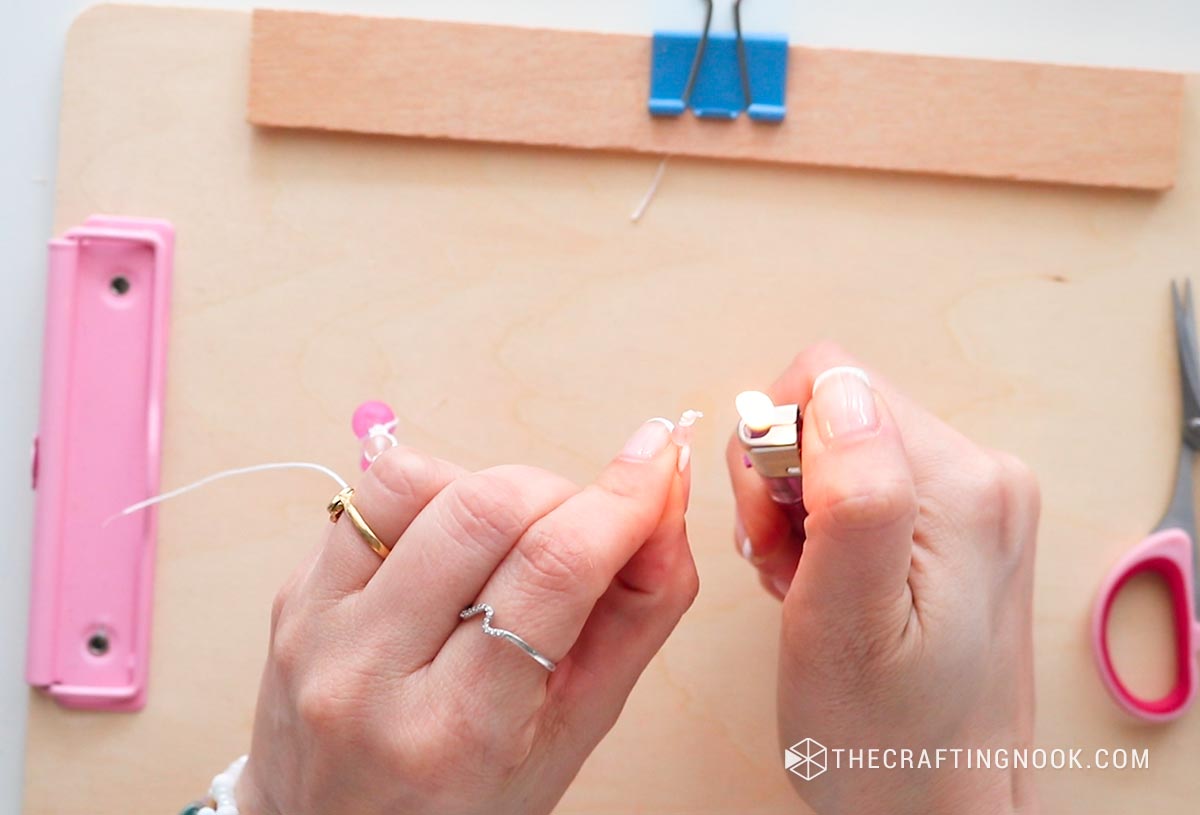
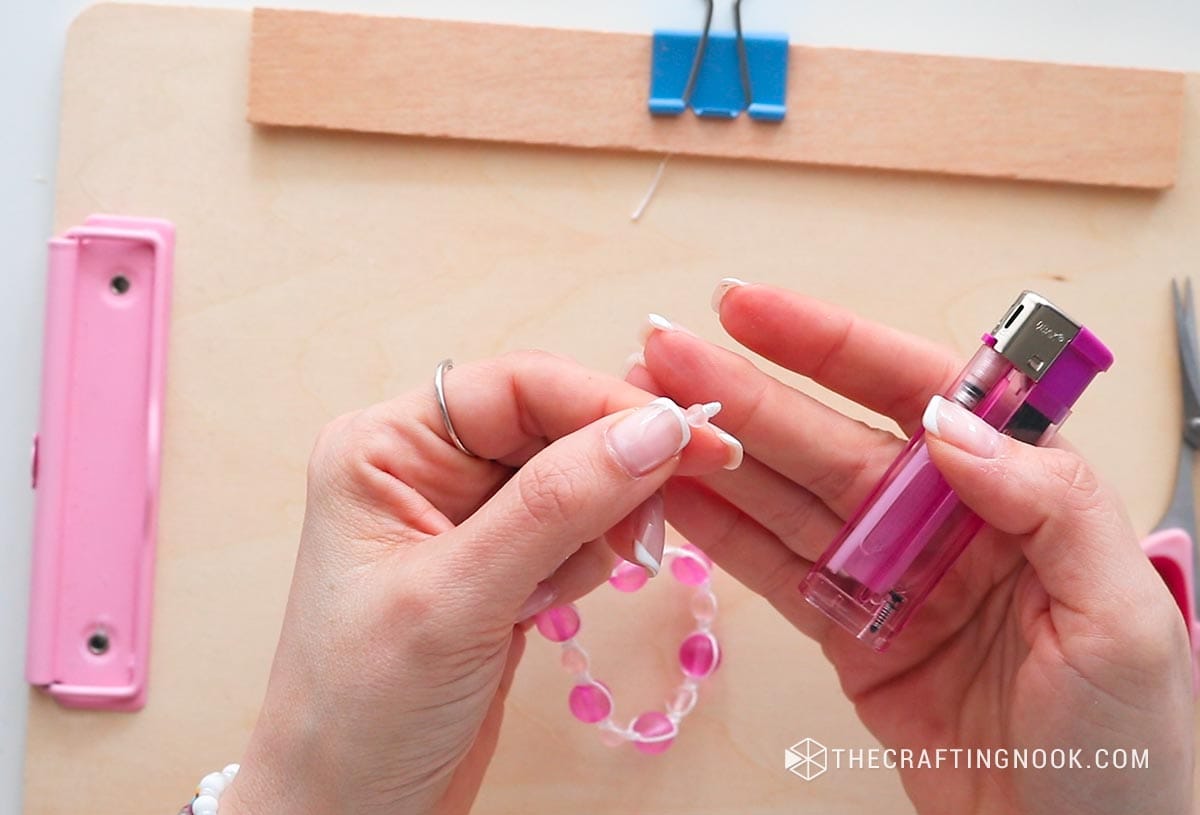
Create a pointy ends on both ends of your cord strand by using a lighter. Use the blue part at the bottom of the flame so the cord won’t get black. Once the cord start melting with slightly humid thumb and forefingers pull it to a tip. trim if needed to make it look like a needle.
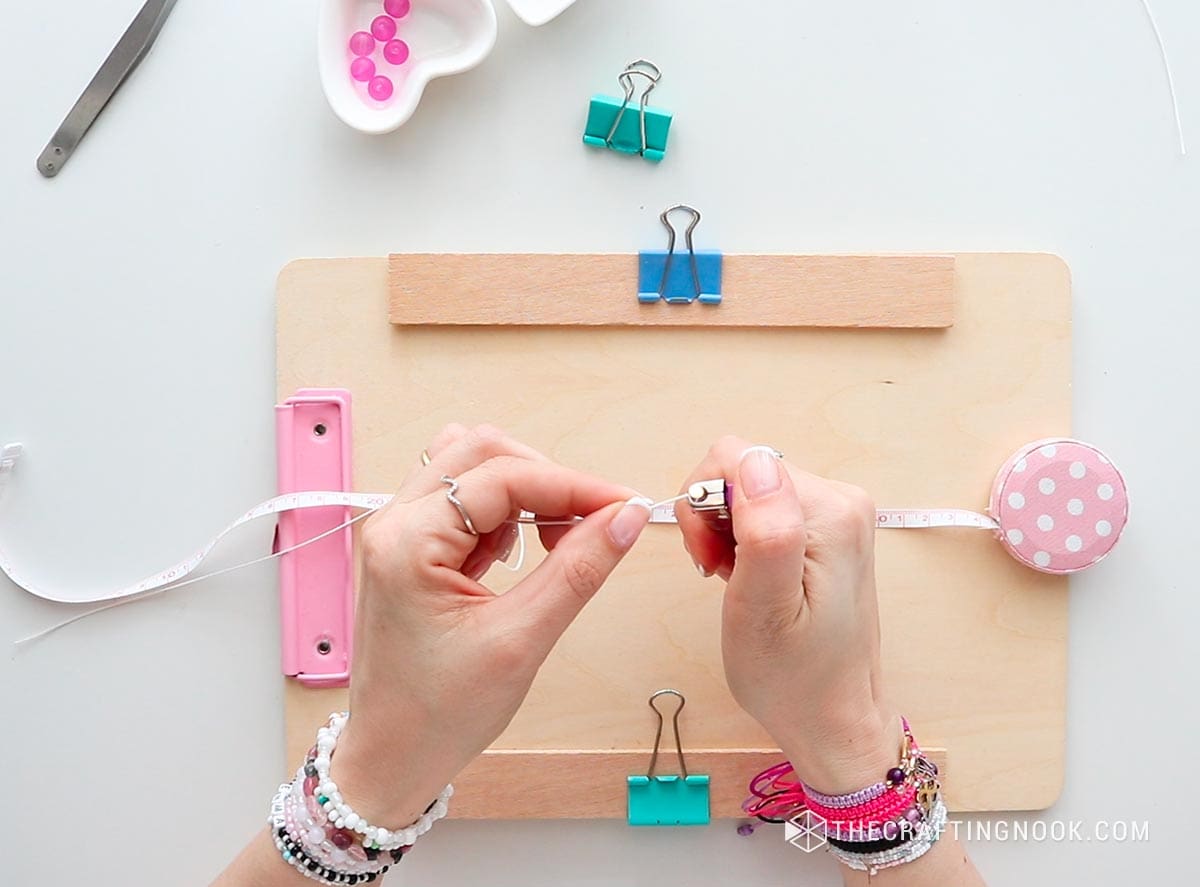
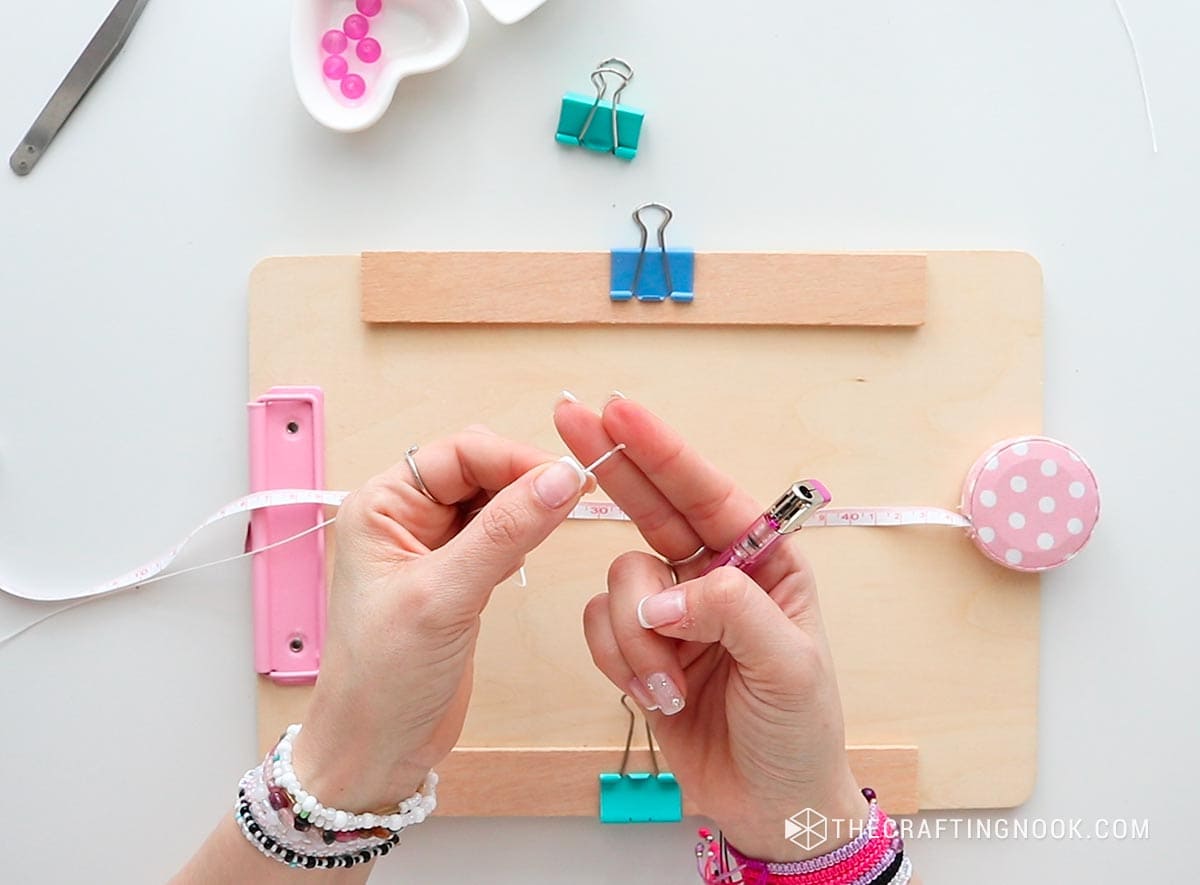
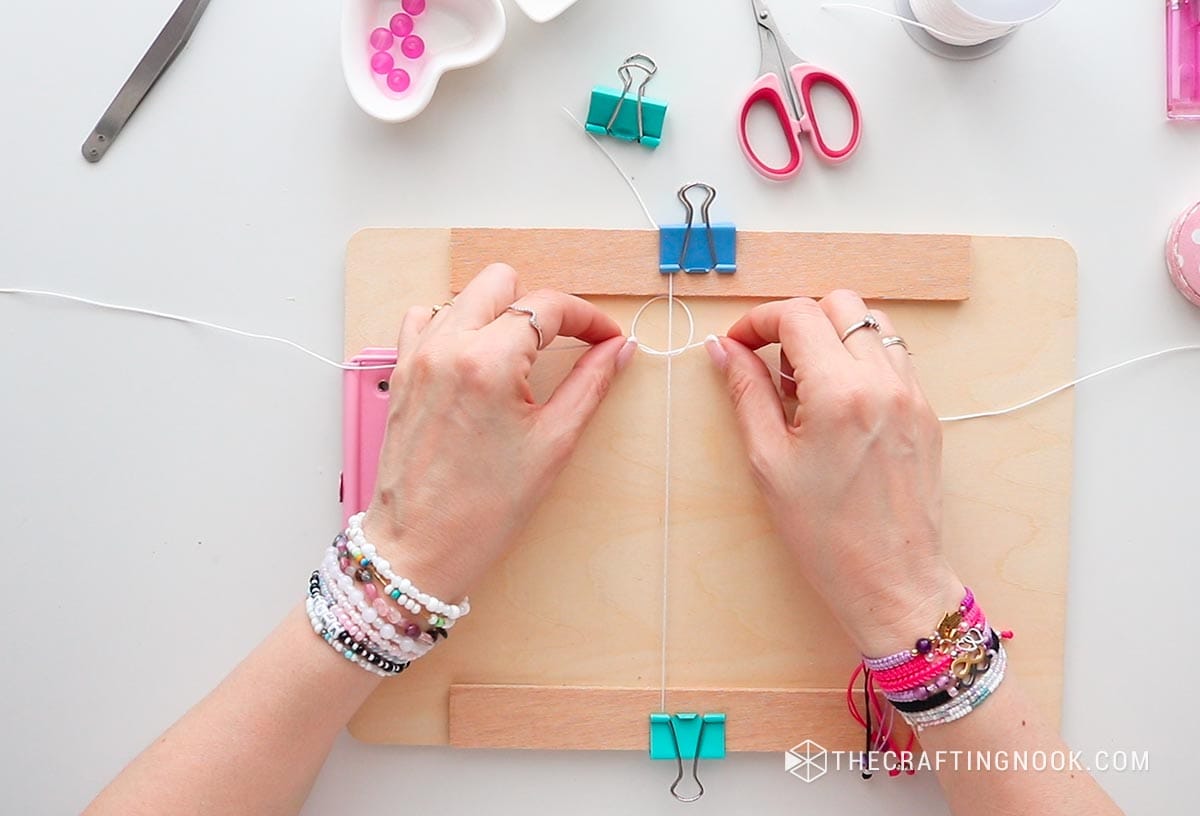
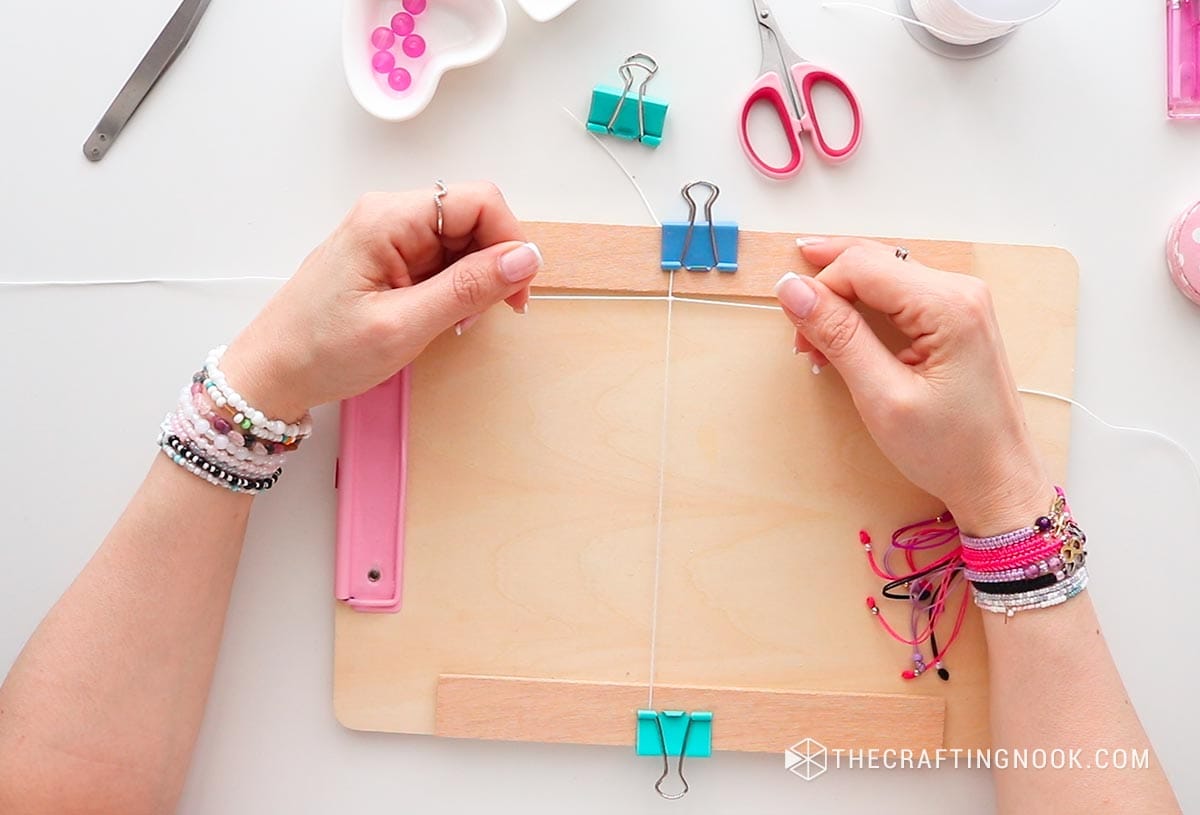
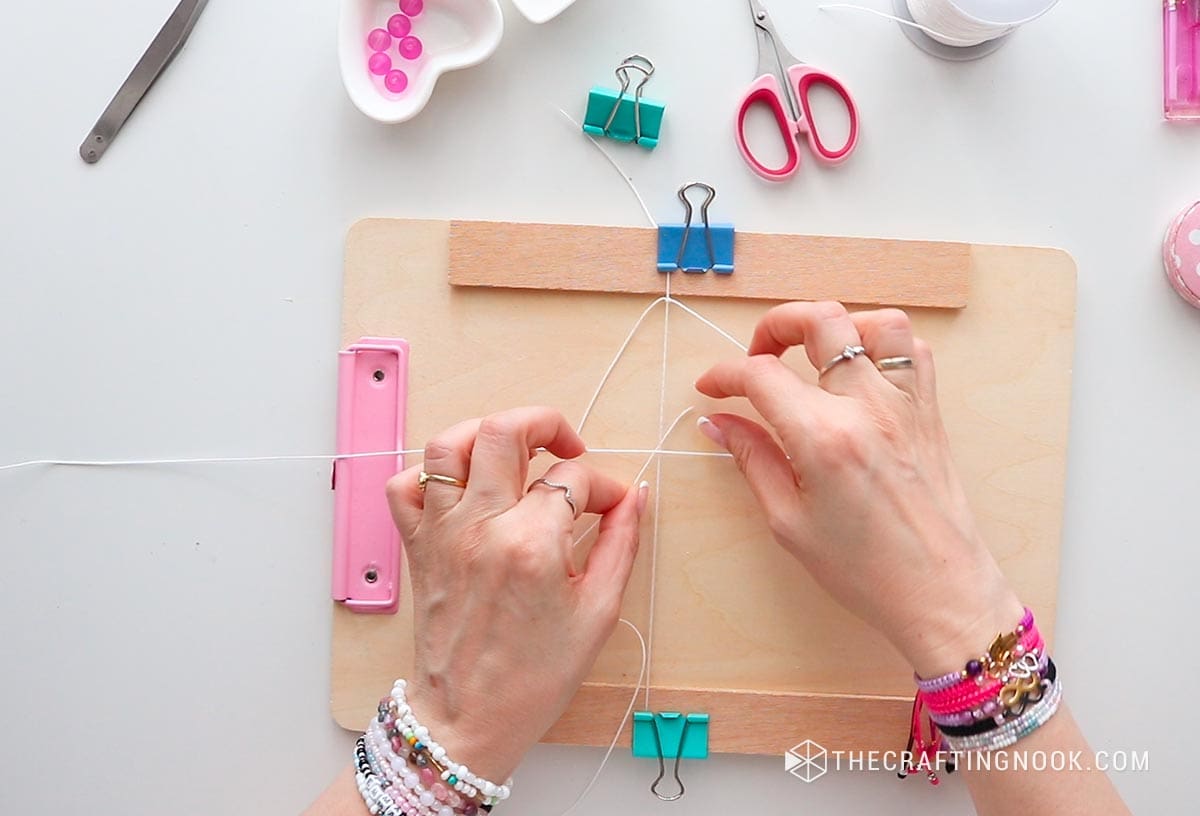
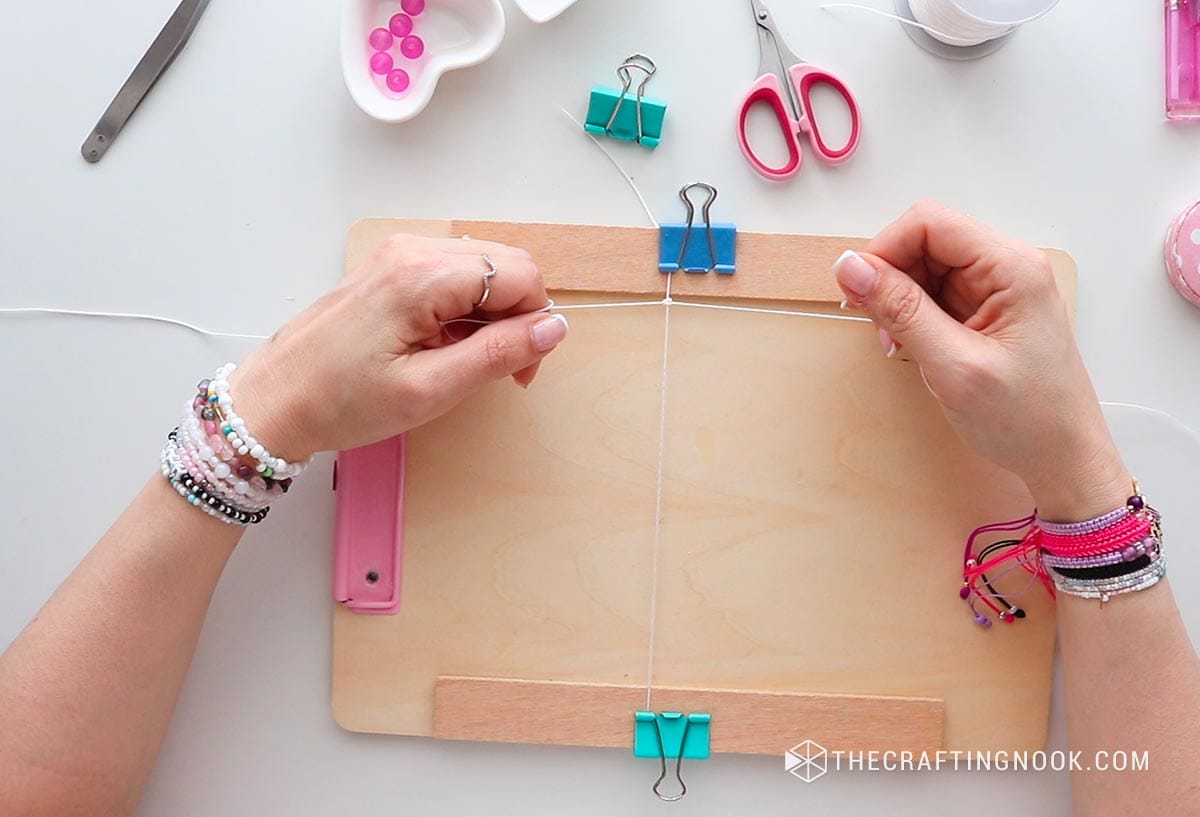
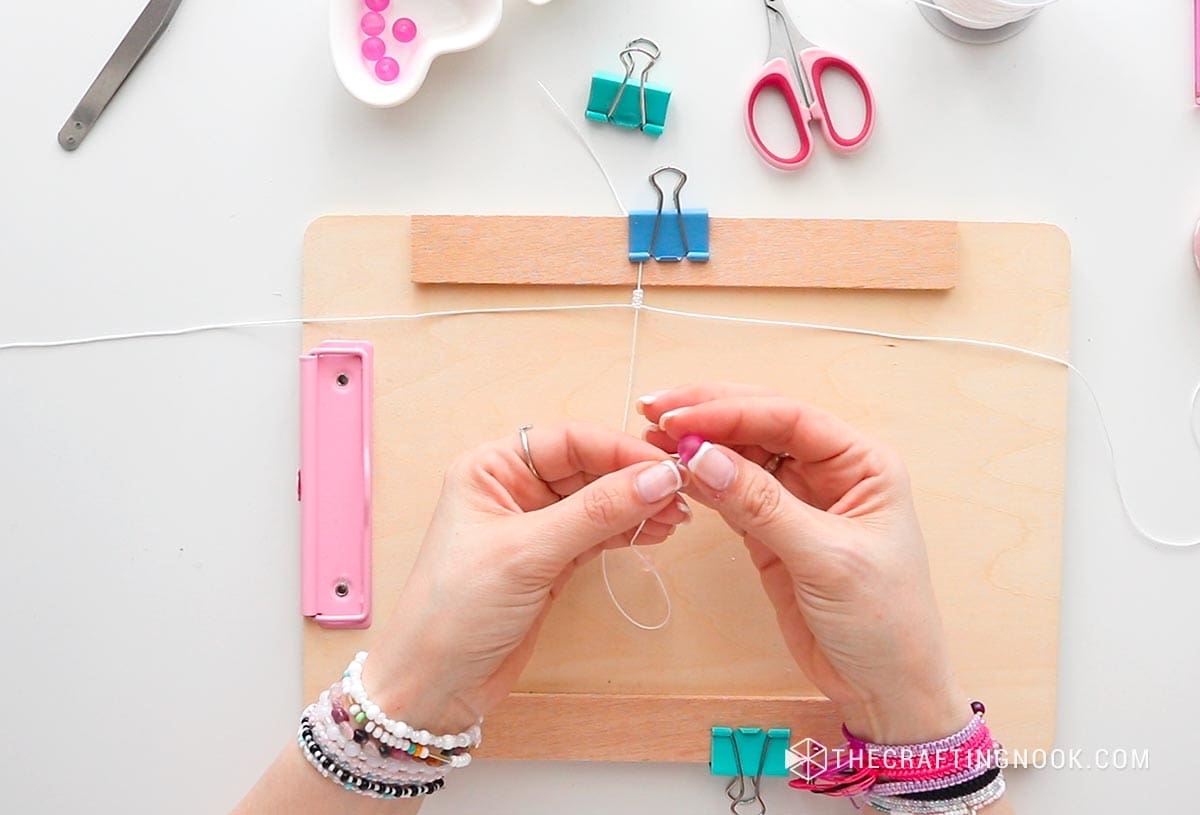
Secure the 15-inch central cord onto the clipboard using the paper clips. Leave out 4 inches of cord at the top clip. This will be your main cord for the bracelet.
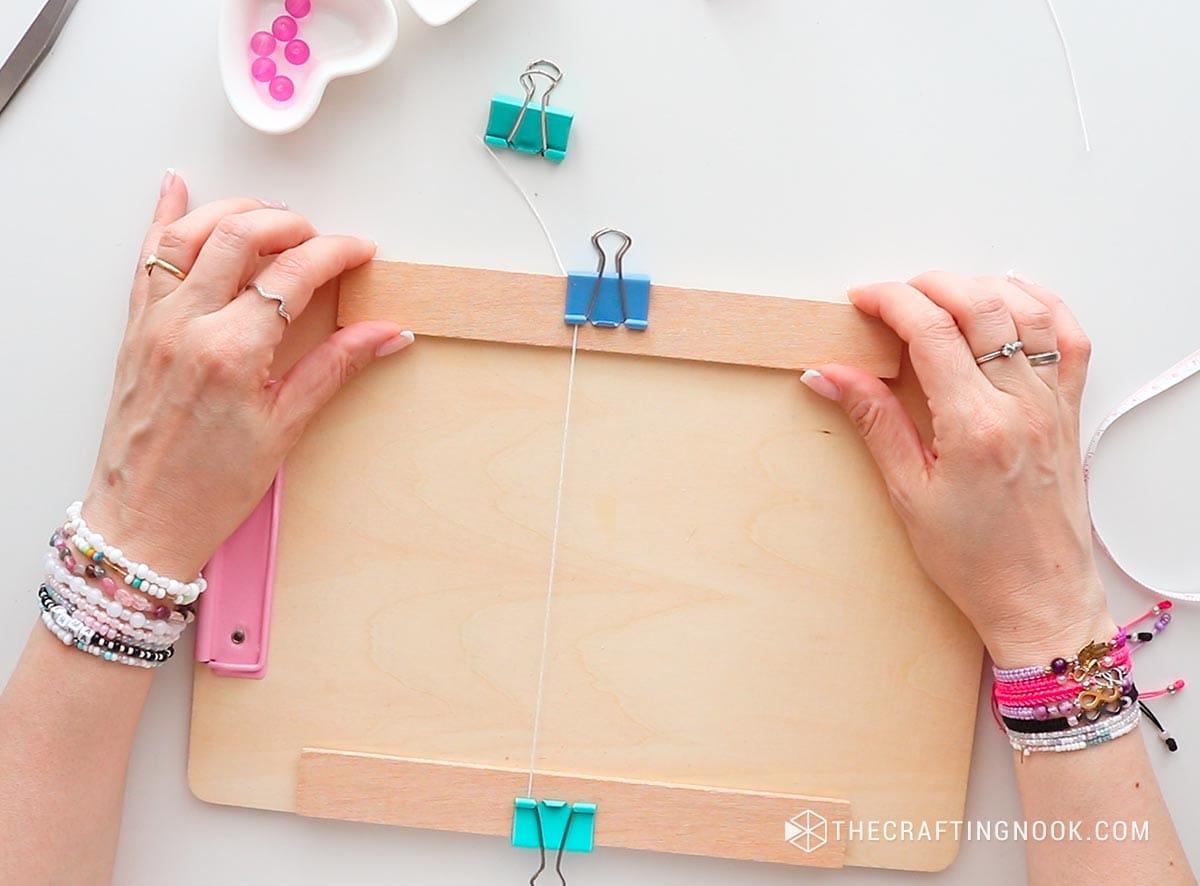
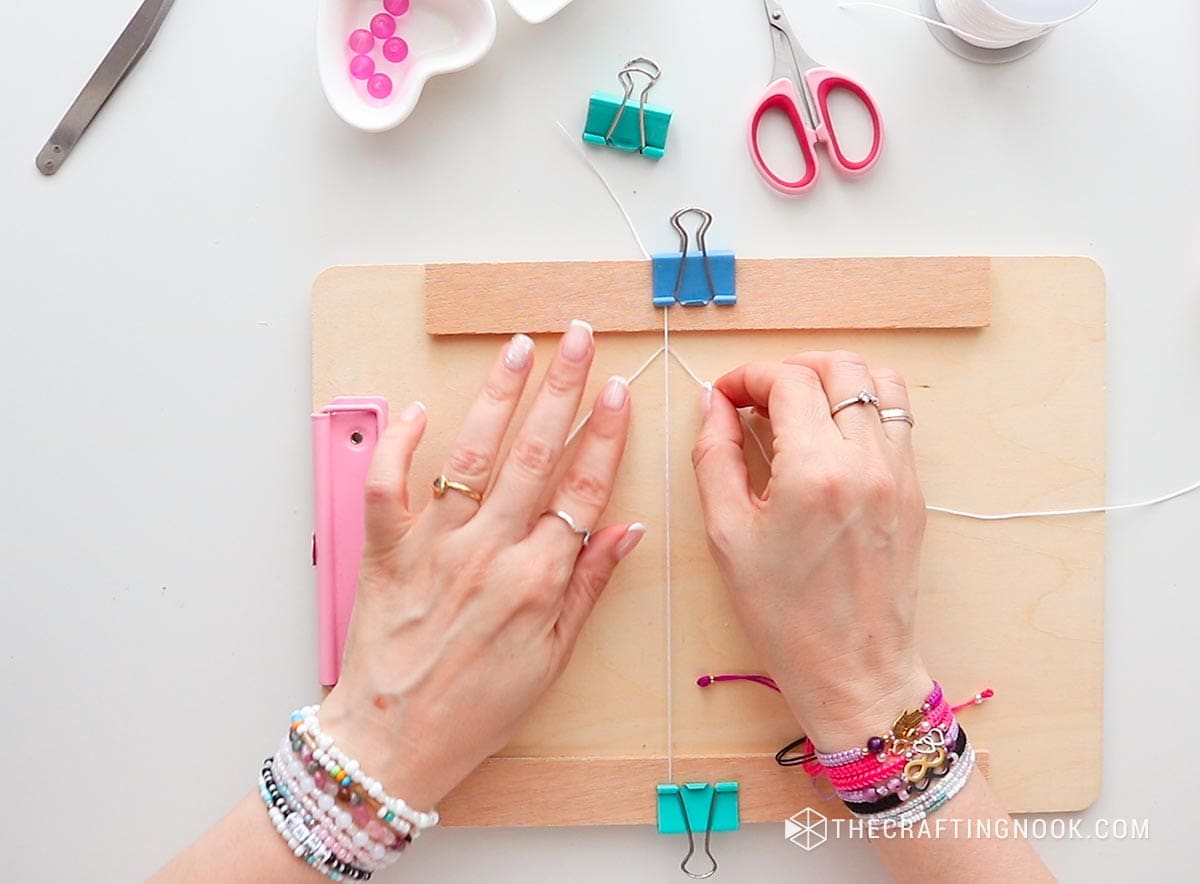
Slightly burn the 60-inch cord ends and fold it in half to find the center.
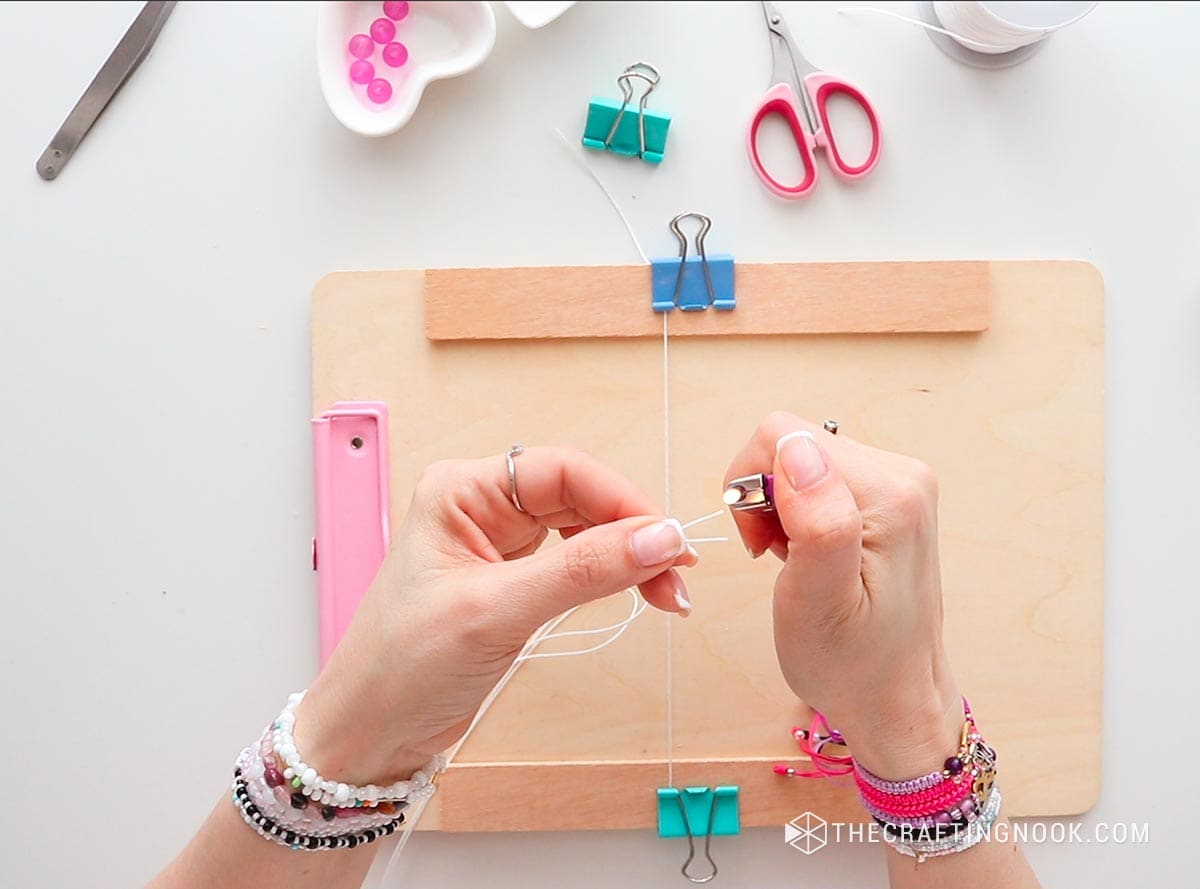
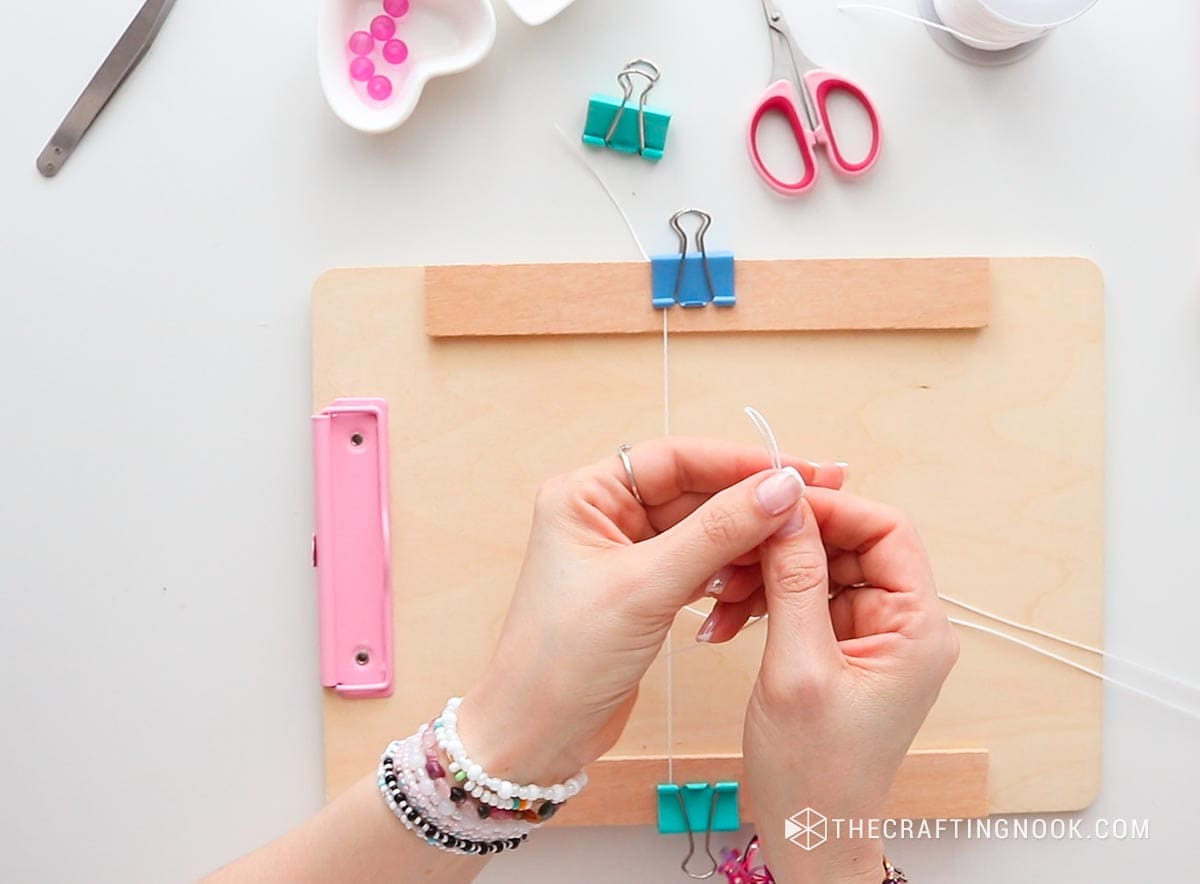
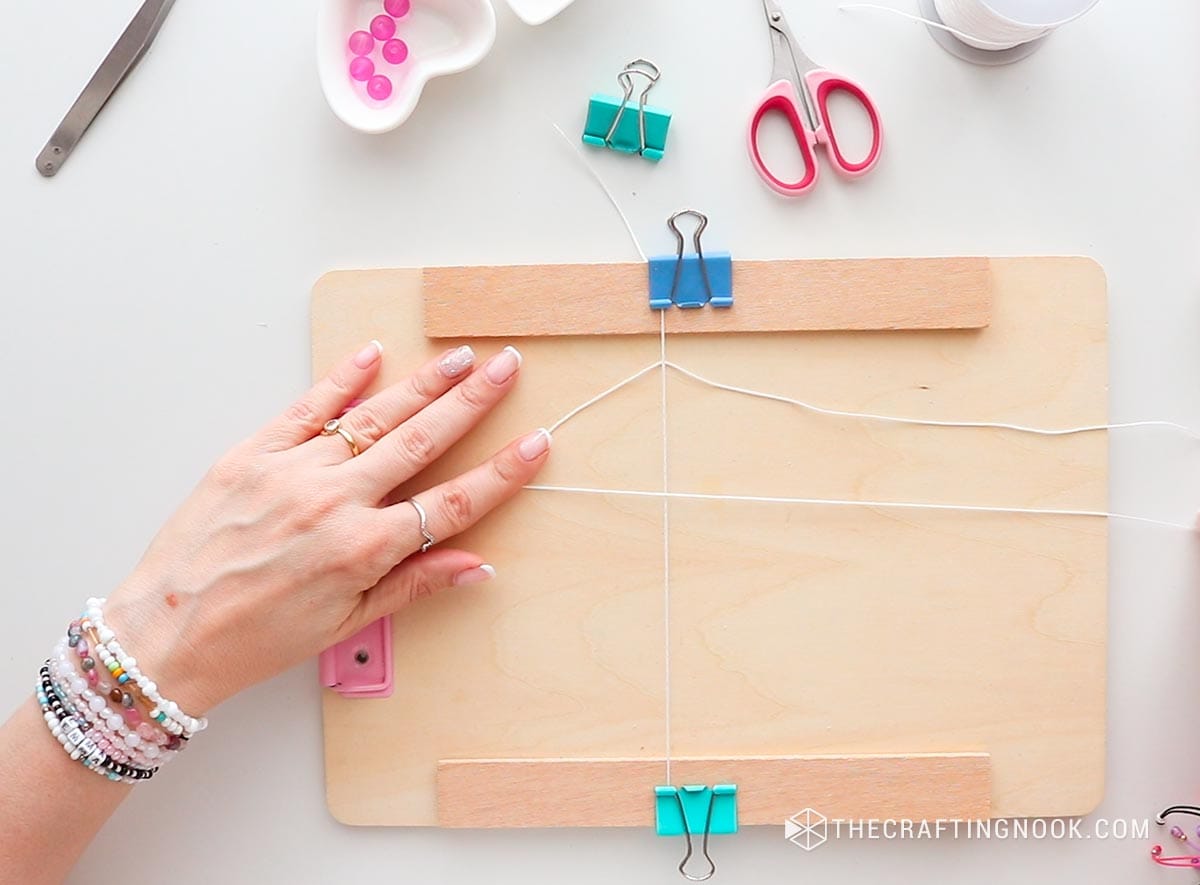
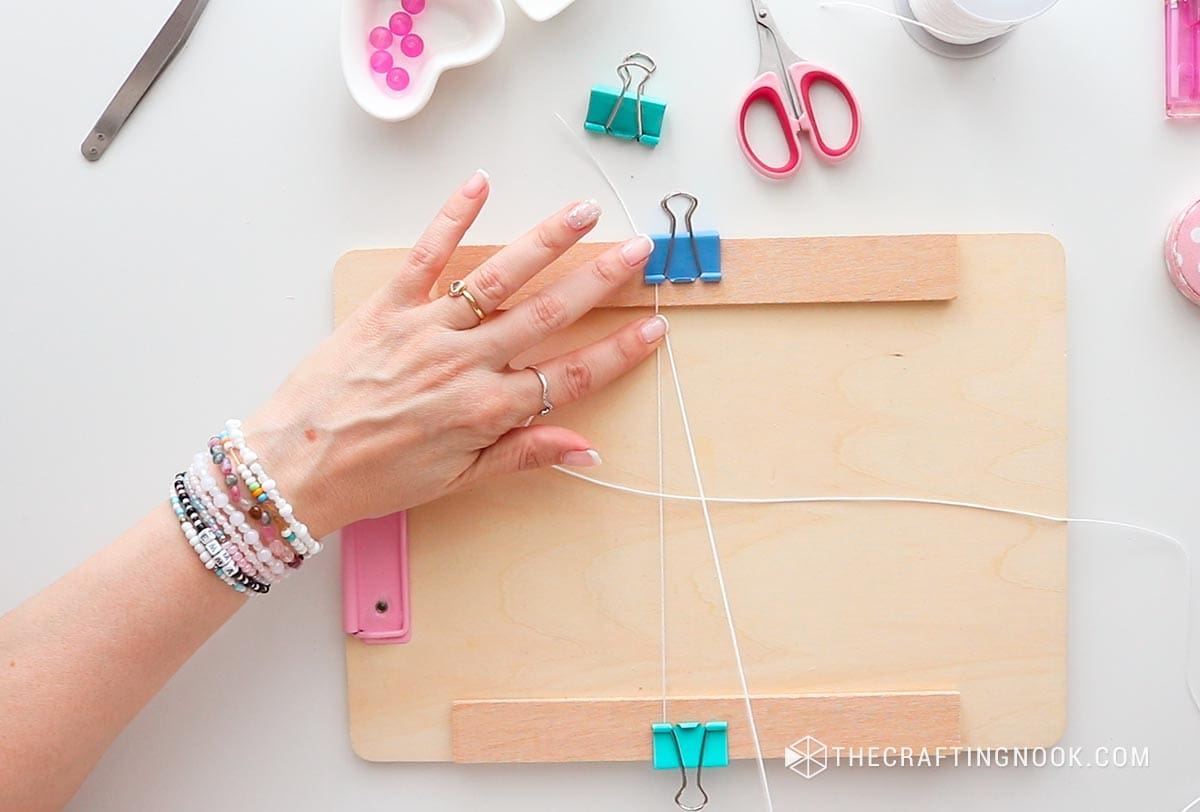
Place the center under the main cord, creating two equal lengths on each side.
Step 2: Start with Square Knots
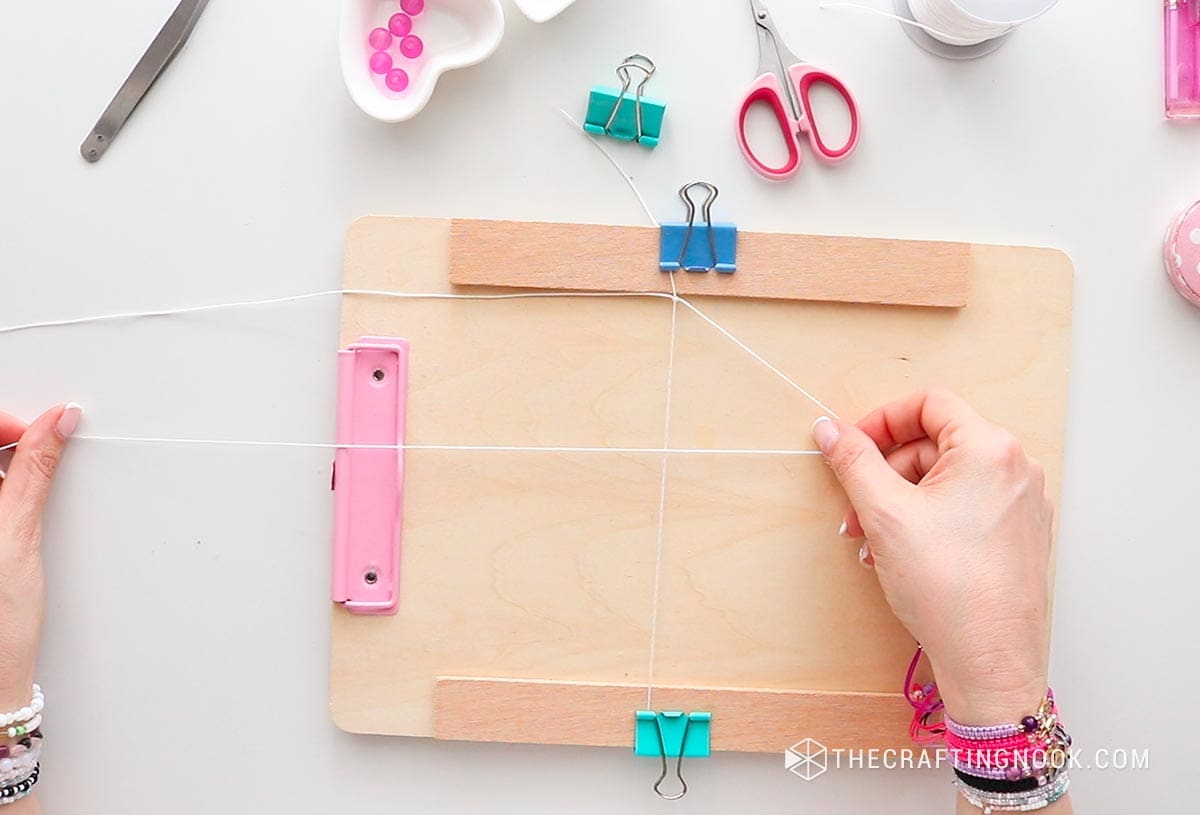
The square knot is one of the most versatile and basic knots in macrame. It’s created by using three or four strands: two outer working cords and one or two inner filler/central cords.
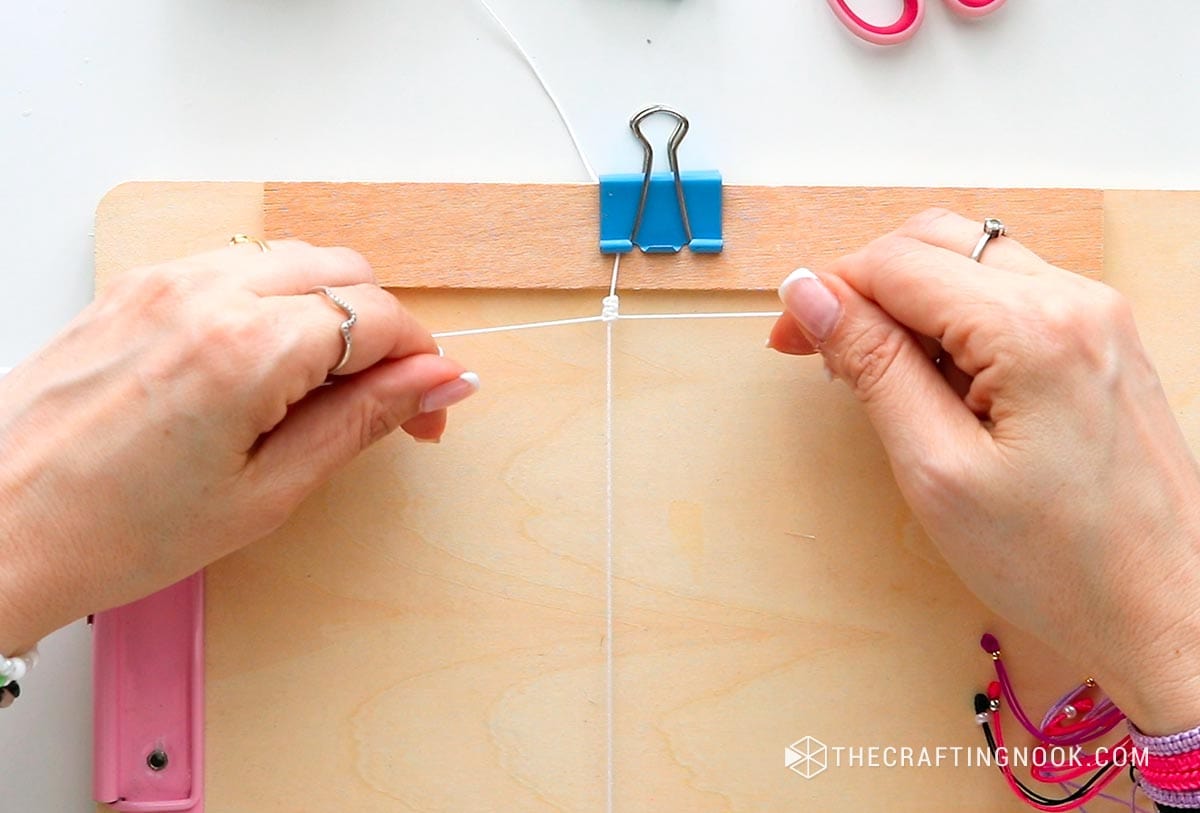
Using the 60-inch cord, create 4 square knots at the beginning of the bracelet. This will be the starting section before adding the beads.
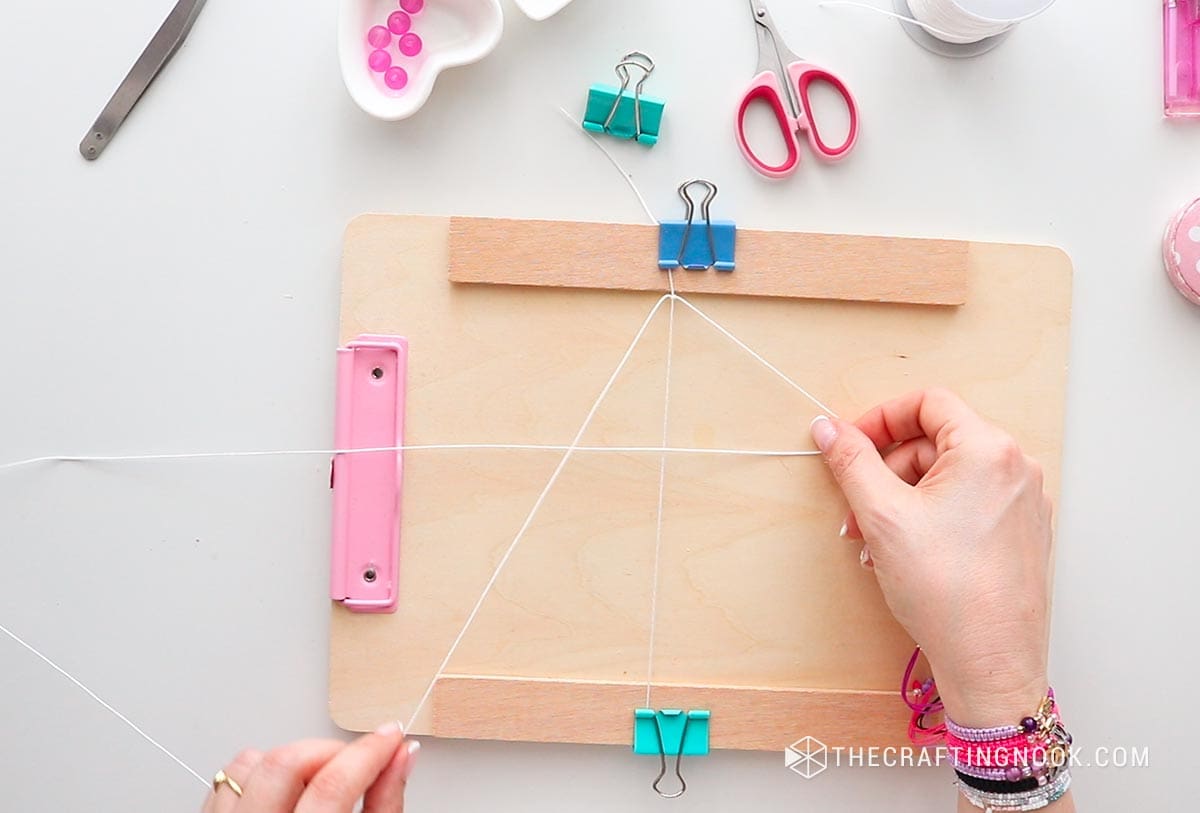
Place the left working cord from the left side and over the central cord.
Pass the right strand of the working cord over the left cord and slide it under the central cord and through the loop created by the left working cord.

Pull tight to complete the first half of the square knot.
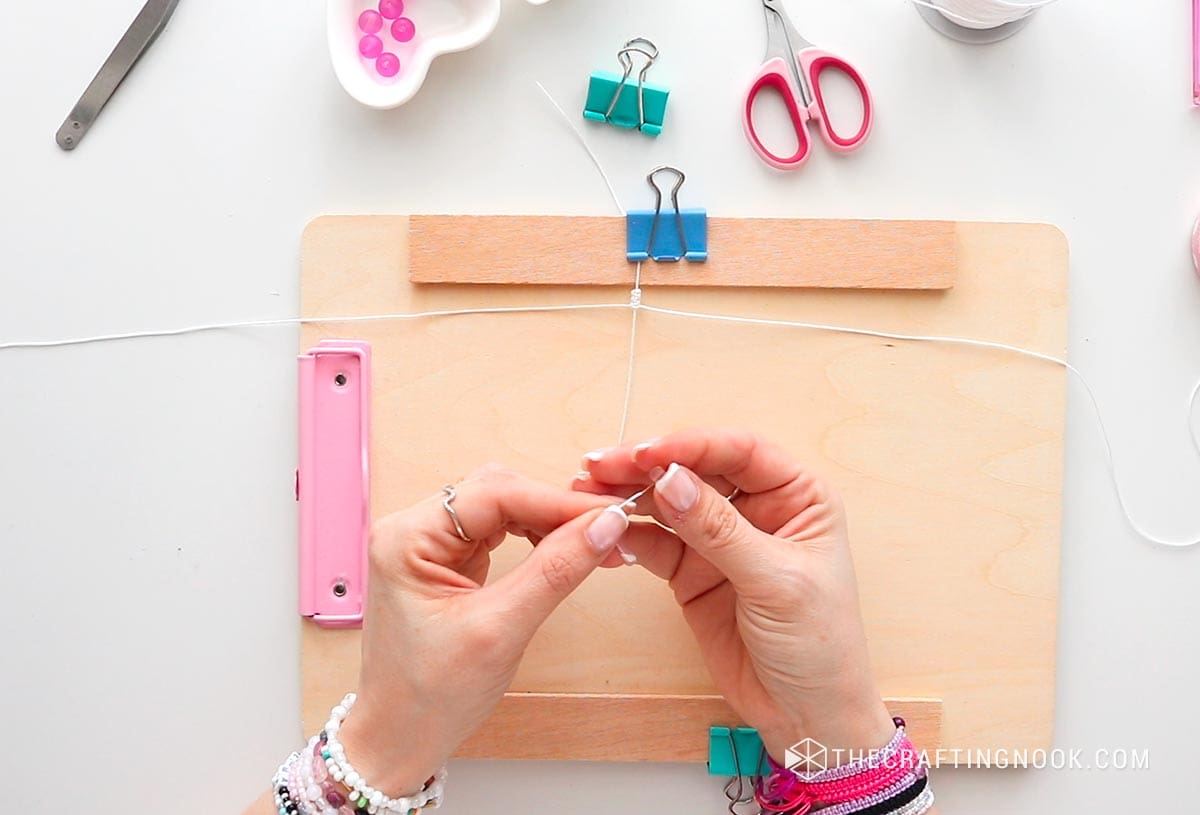
Then repeat the same steps for the other half of the square knot.
Place the right working cord over the central cord.
Pass the left strand of the working cord over the right cord and slide it under the central cord and through the loop created by the right working cord.
Pull tight to complete the second half of the square knot.
Right now you have 1 square knot. Repeat 3 more square knots.
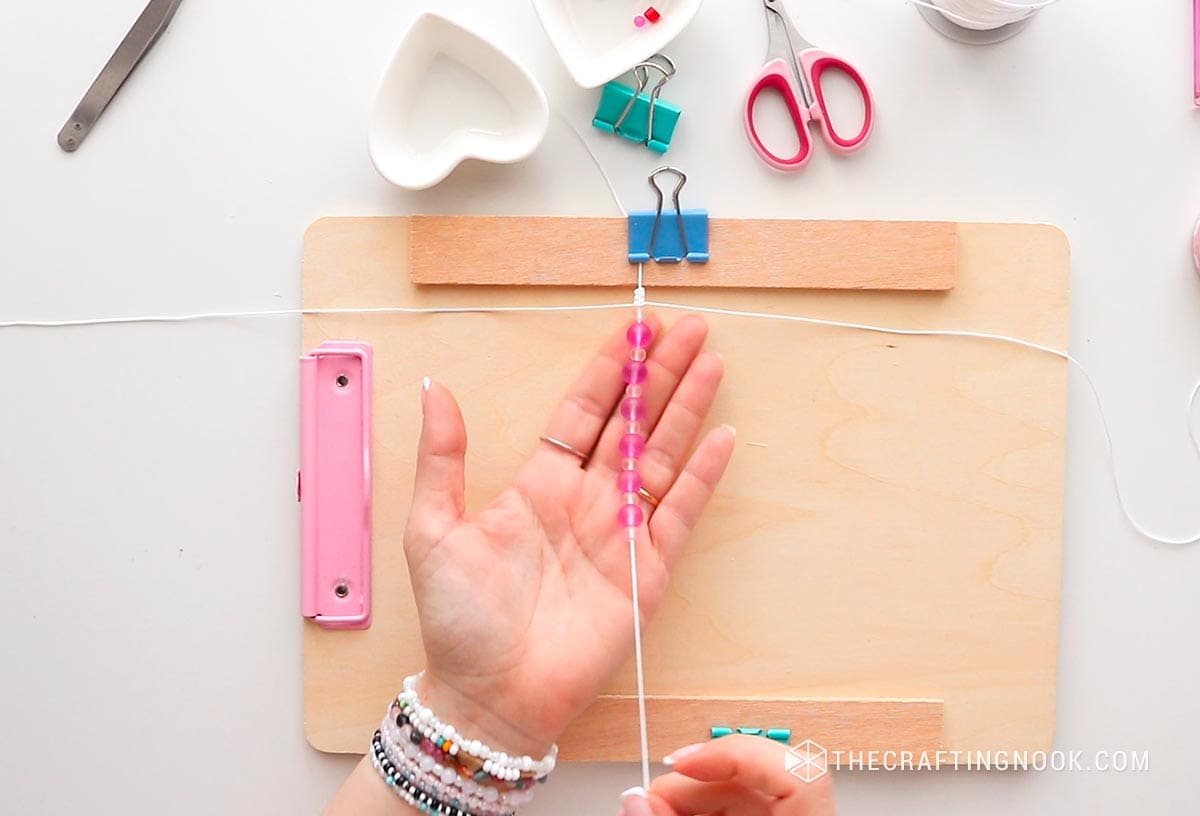
Step 3: Thread all the beads
The easiest way to work a beaded bracelet is threading all the beads at once and the work each as they are needed.
So I like to start and finish with a small bead, you can start with the large one. It’s just a preference.
Then I alternated one small, one large, one small, one large and so on and so forth until if had inserted all the beads except for the tail ones.
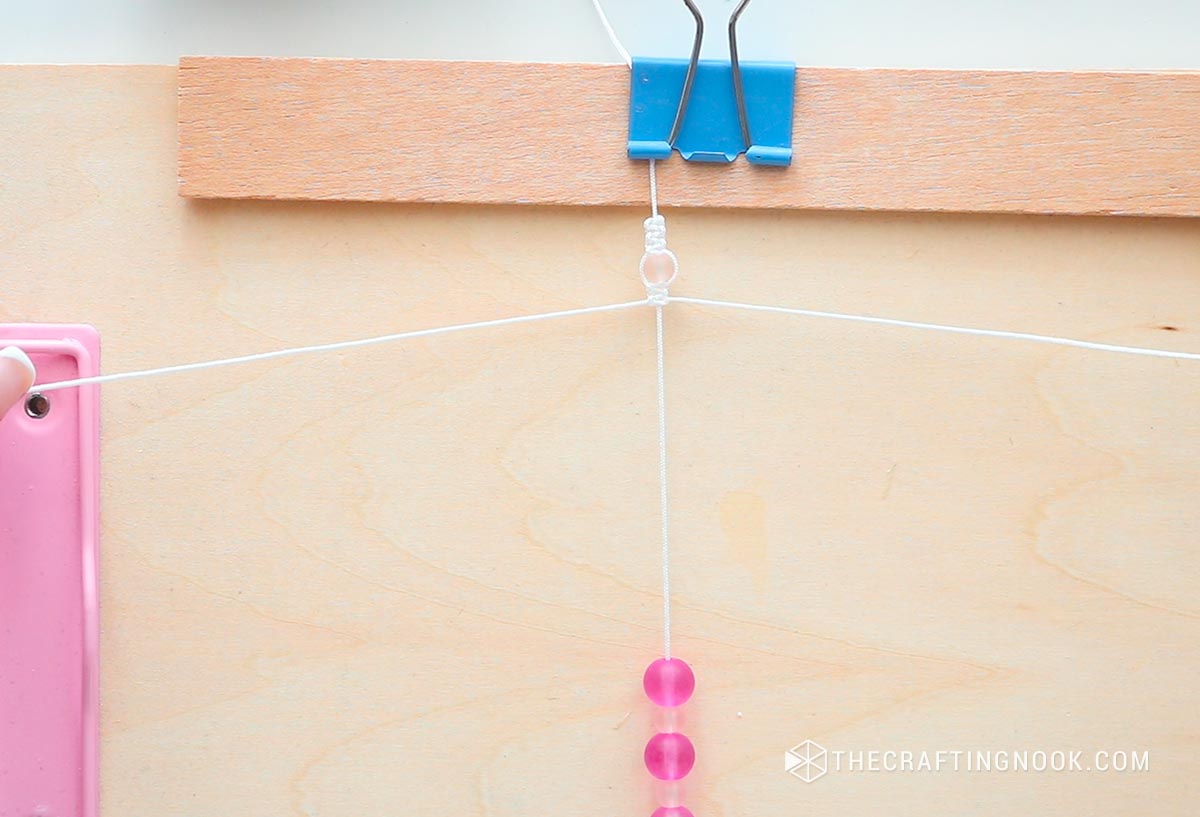
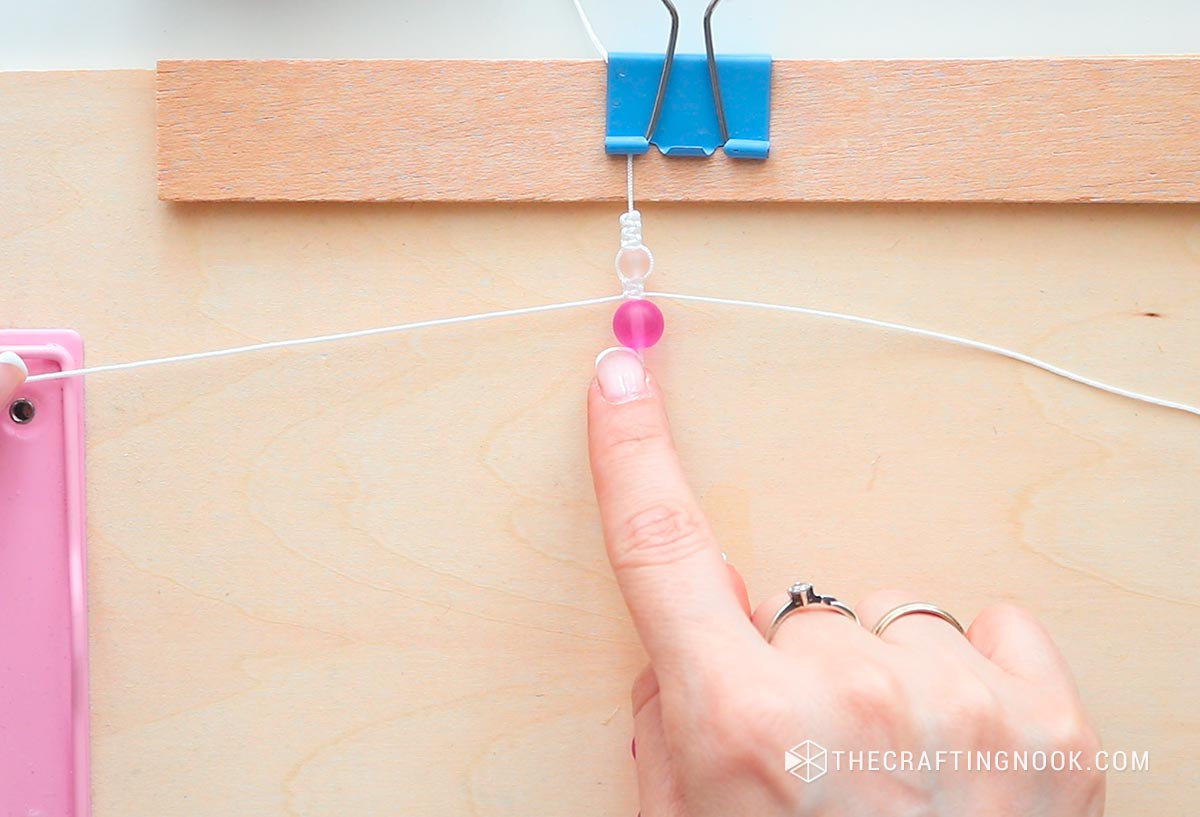
Step 4: Add the First Bead
Push a small bead and slide it up to the last knot you made.
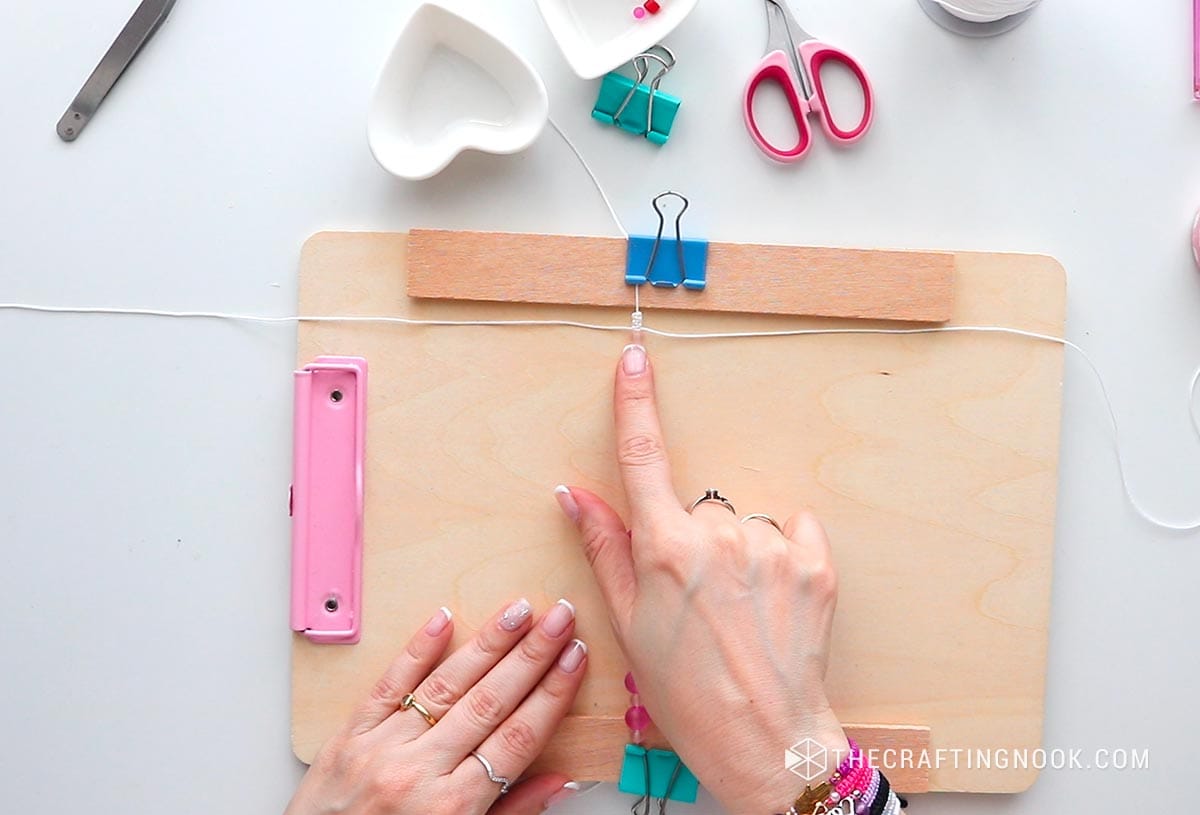
The cords go around the beads on the sides.
Make 2 square knots with the 60-inch cord below the bead to secure it in place.
Step 5: Add the Second Bead
Push a large bead and slide it up to the last set of knots.
Again, make 2 square knots below the bead to secure it.
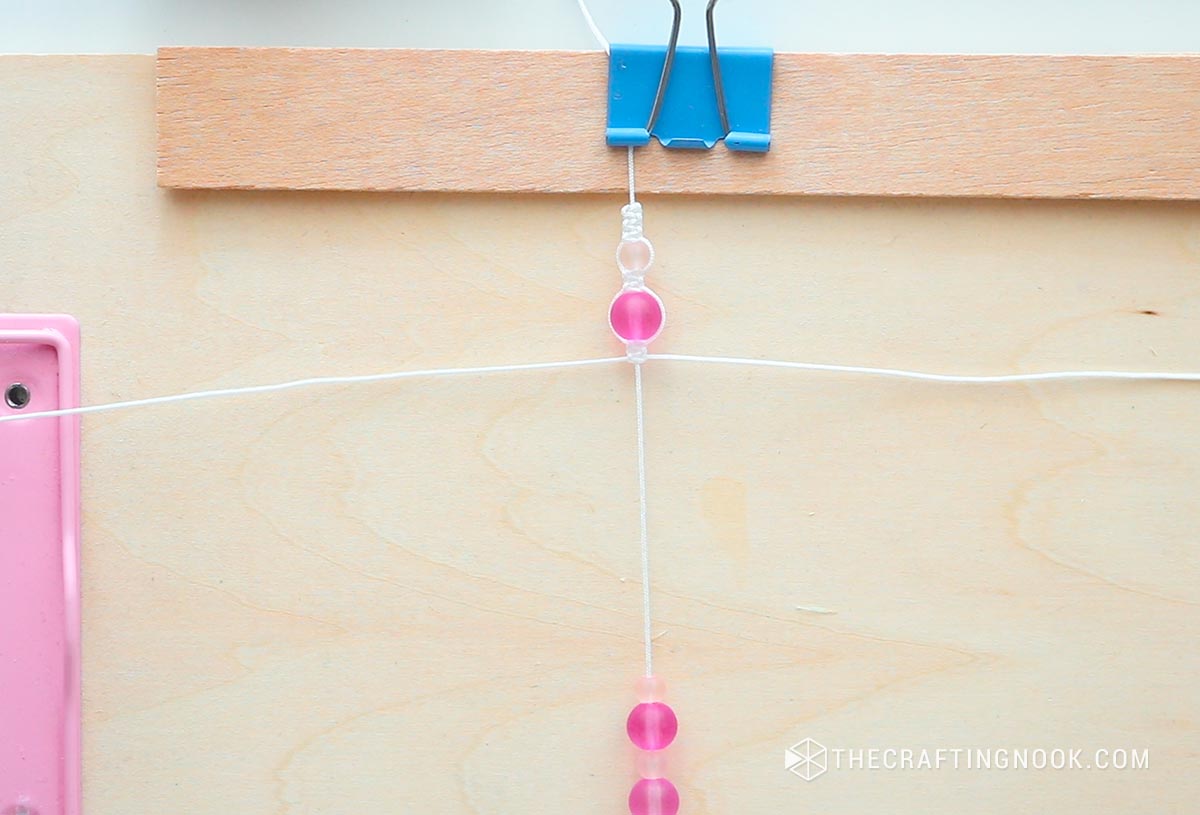
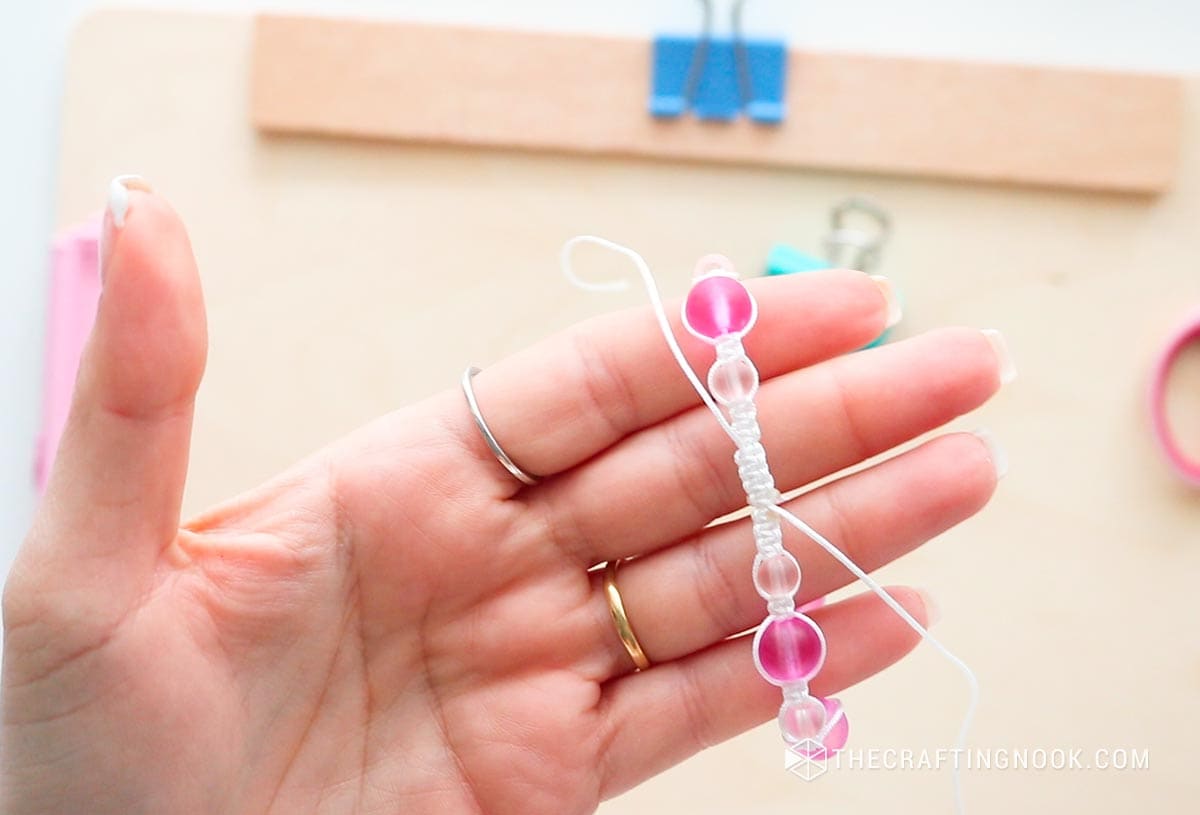
Step 6: Continue Beading and Knotting all the Beads
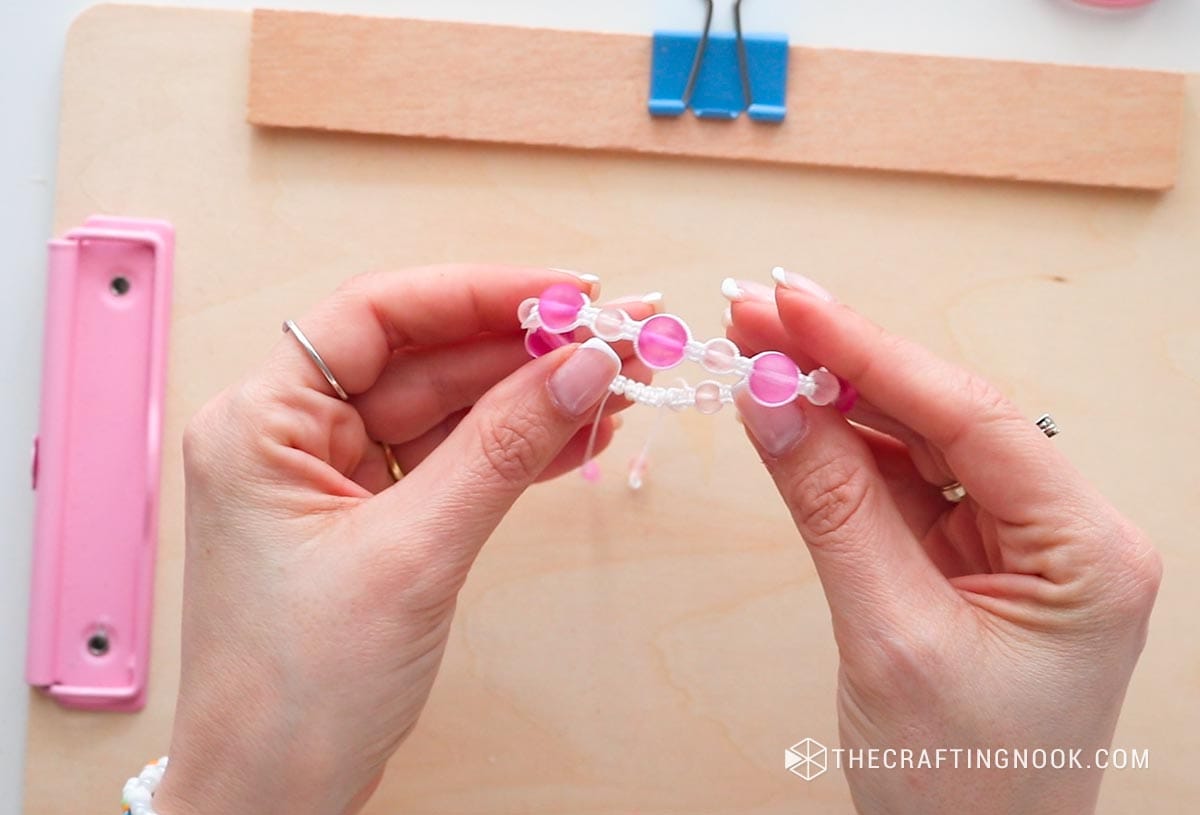
Alternate between small and large beads, securing each bead with 2 square knots. Continue this pattern until you reach the desired length for your bracelet.
You can use more or less beads as you see fit.
Step 7: Finish with Square Knots:
After adding the final bead, create again 4 square knots to finish the main section of the bracelet.
Trim and secure the leftover cords from the 60-inch line.
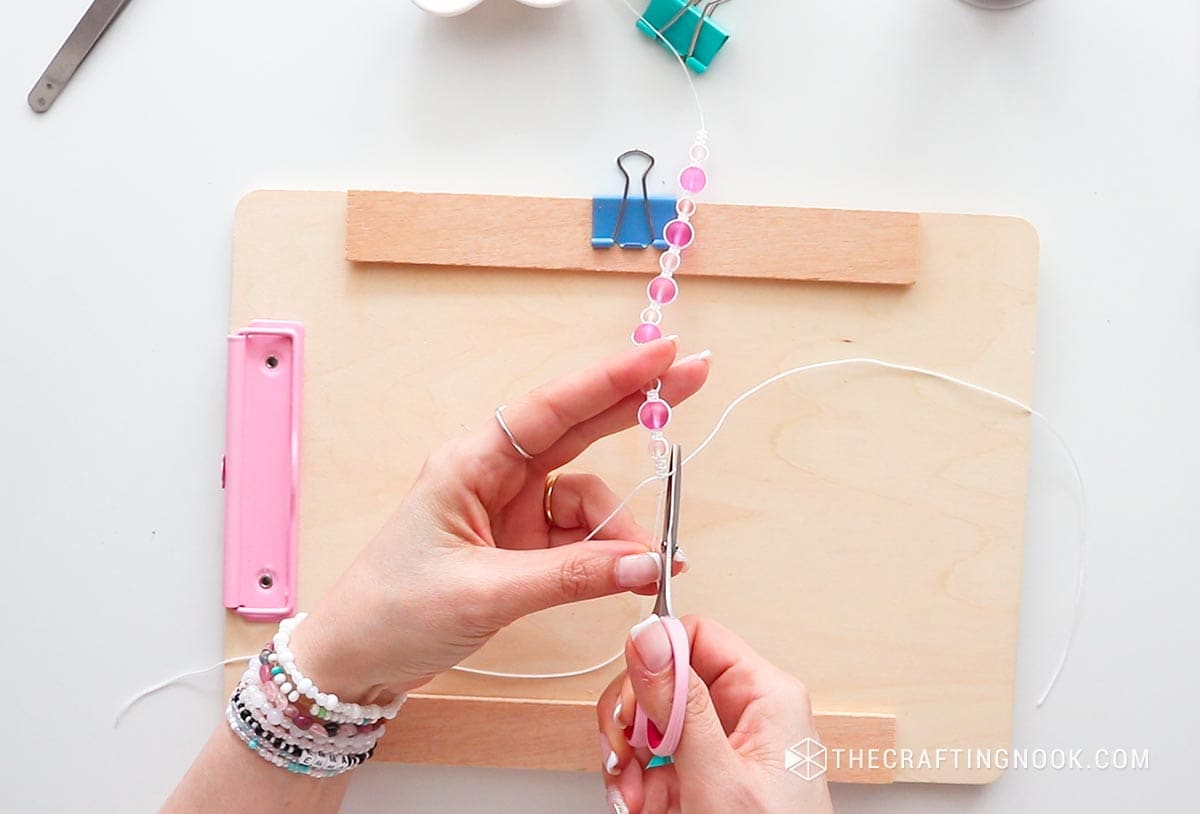
Use a lighter or glue to seal the ends of the nylon cord to prevent the knots from getting undone.
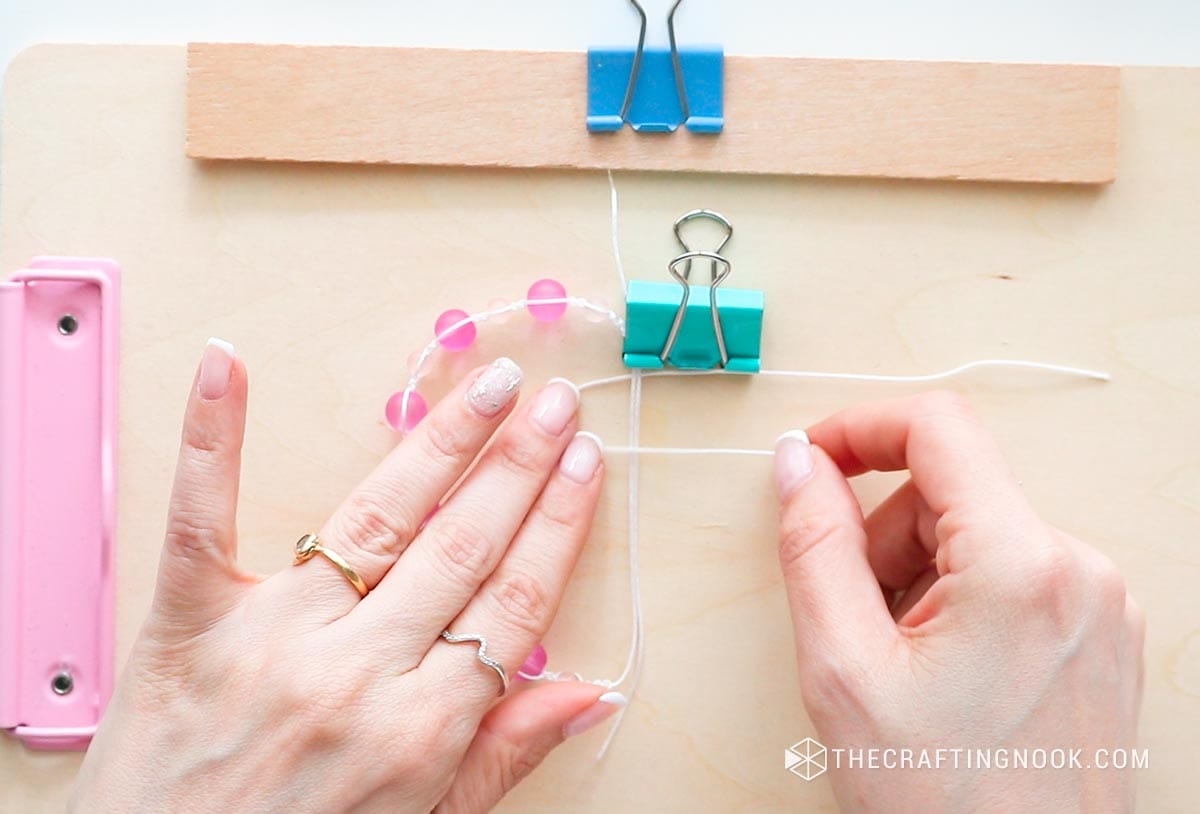
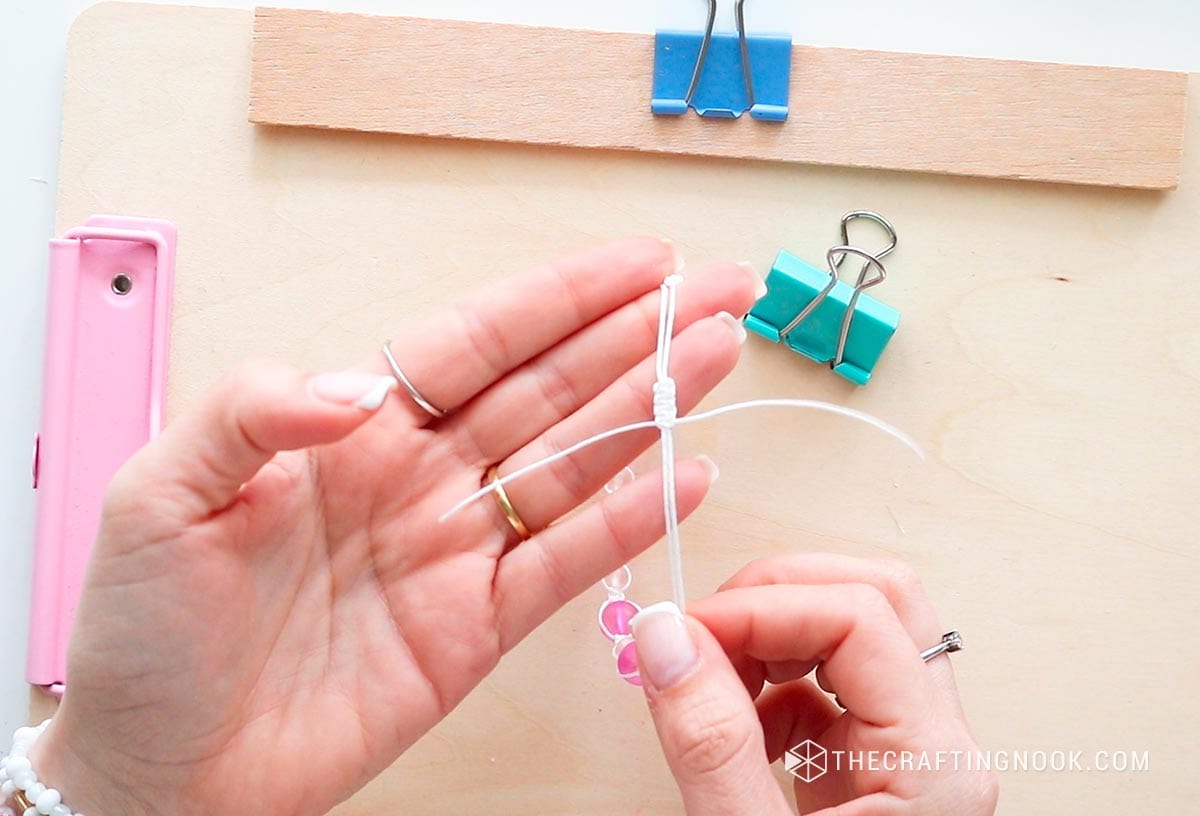
Step 8: Create the Sliding Knot Closure
The sliding knot is a practical knot used for making adjustable closures on bracelets and necklaces. It allows you to adjust the size of your jewelry piece easily.
To make the bracelet adjustable, overlap the ends of the main cord. For easiness to knot it, hold them in place with a paperclip.
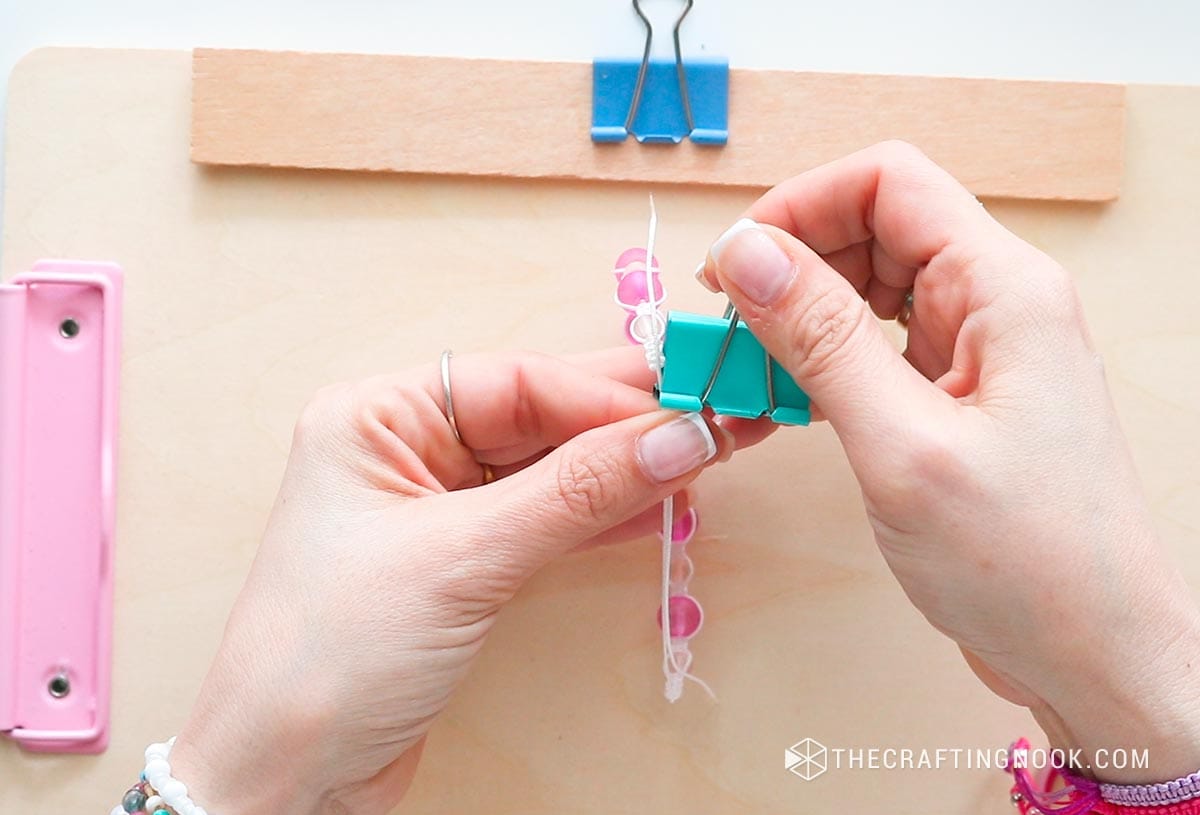
Use a separate piece of cord (around 5-8 inches) to tie square knots around both ends of the bracelet, forming a loop. This will create the sliding mechanism. The steps are the exact same as the main bracelet knots.

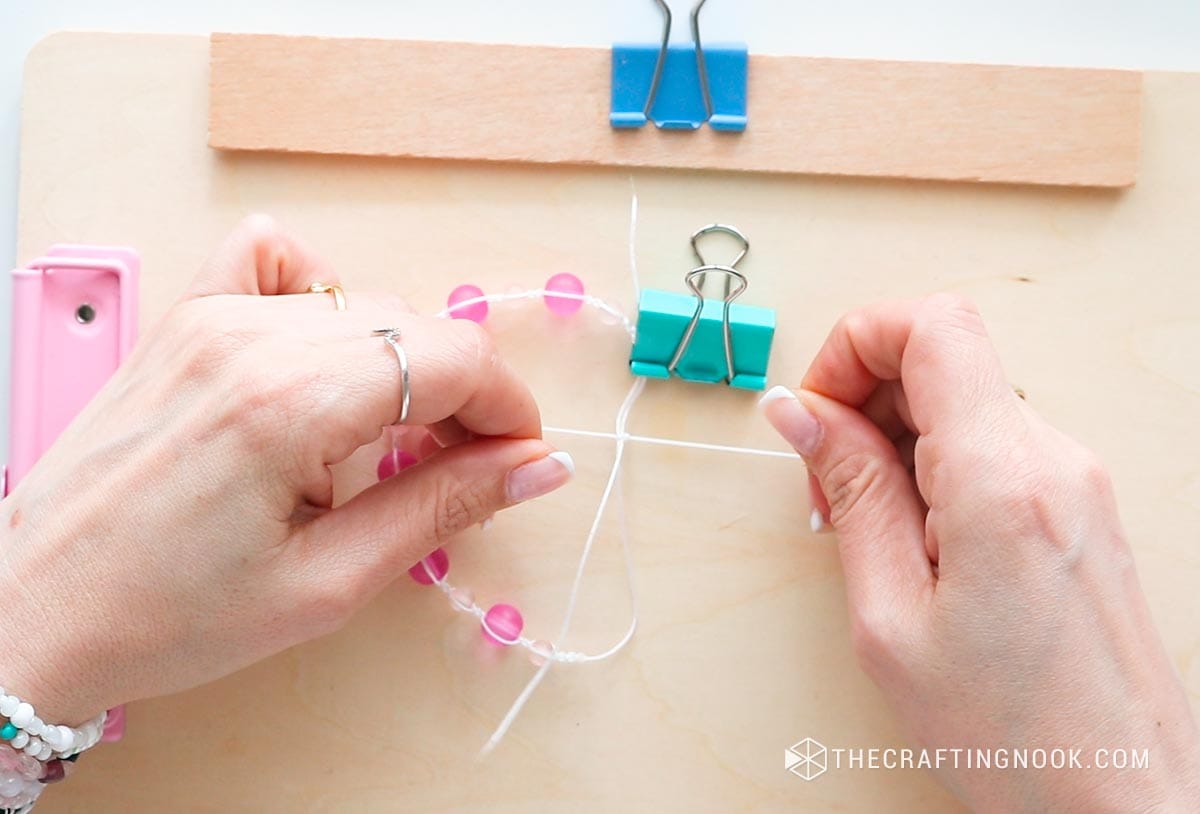
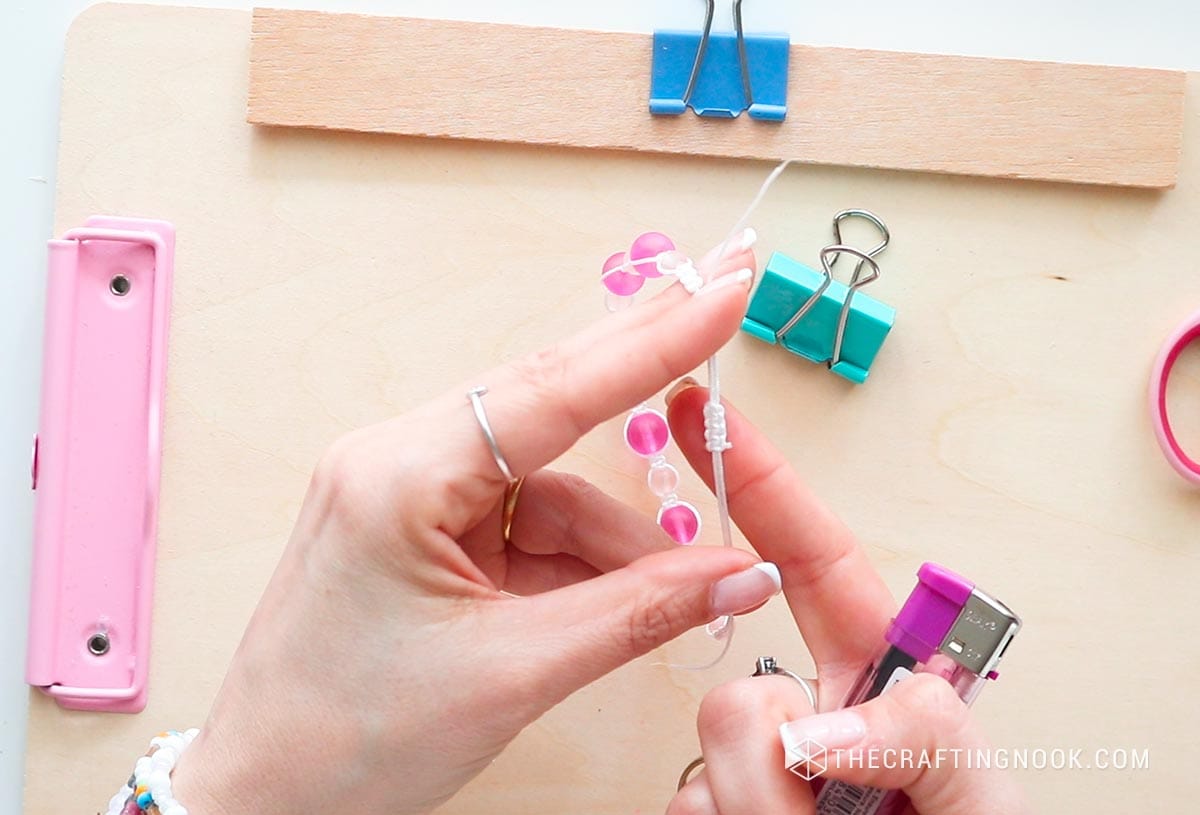
Typically, 6-8 square knots should be enough.
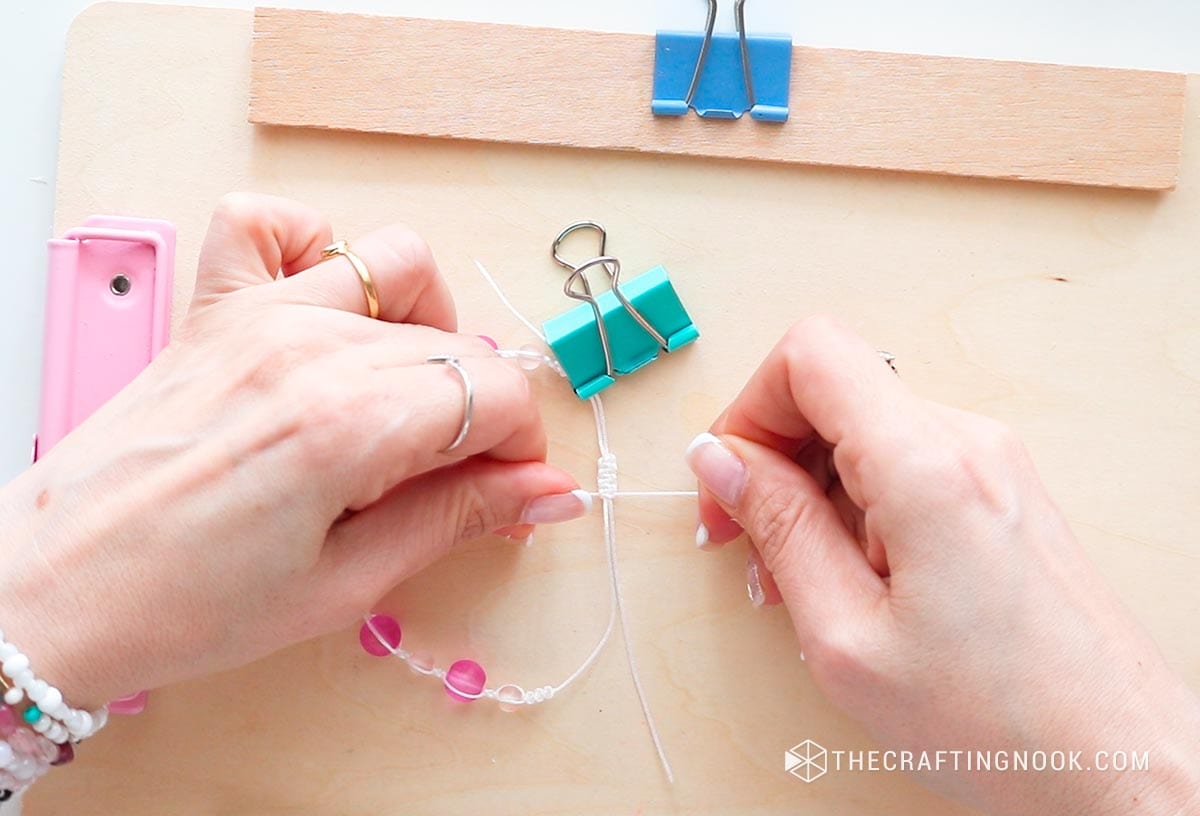
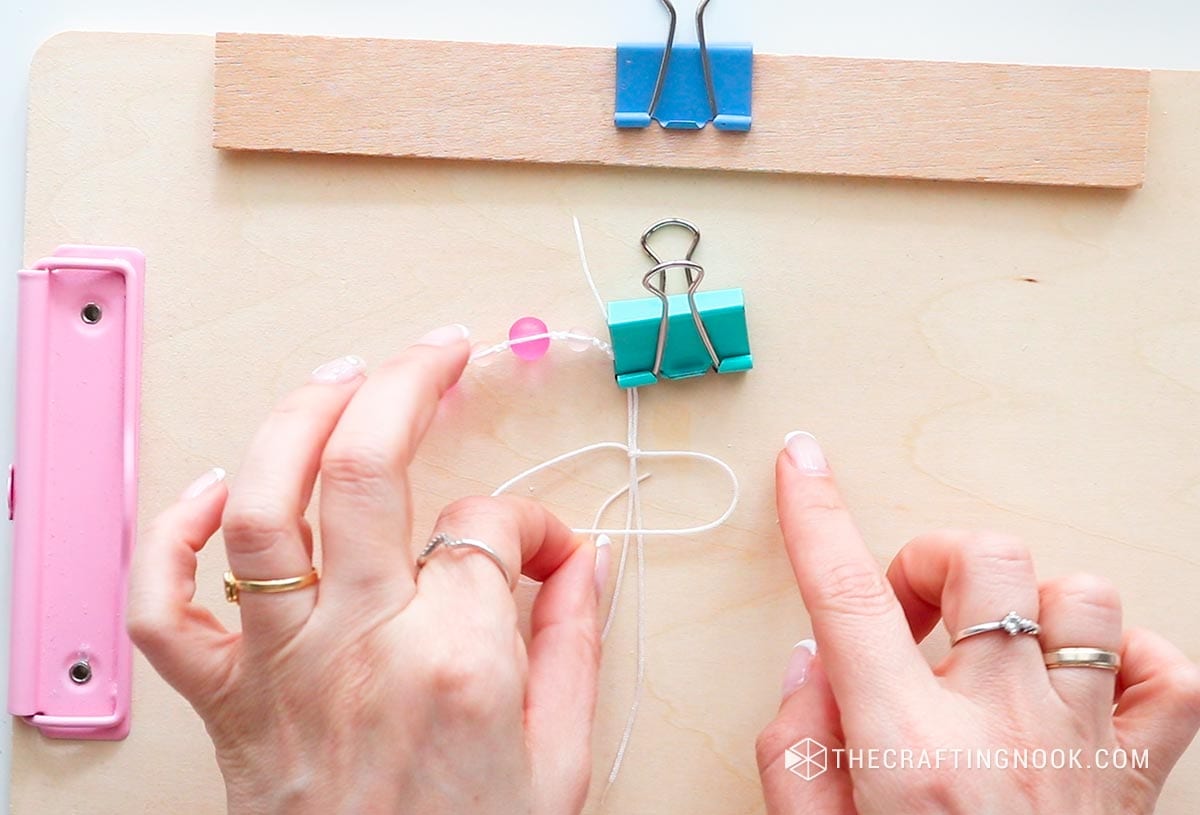
Trim any excess cord, leaving 2 small tails on each side of the sliding knot. Use a lighter or glue to seal the ends of the nylon cord to prevent the knots from getting undone.
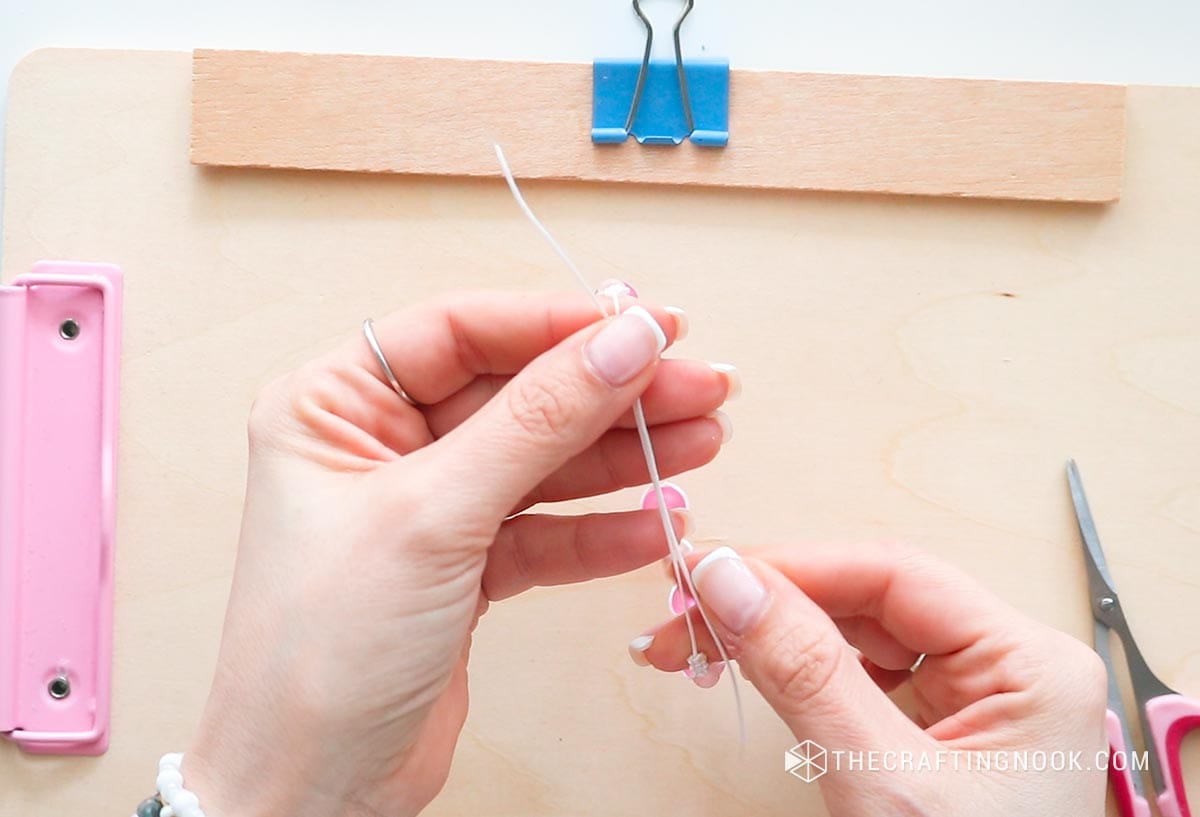
Pull both tails until all the knots meet.
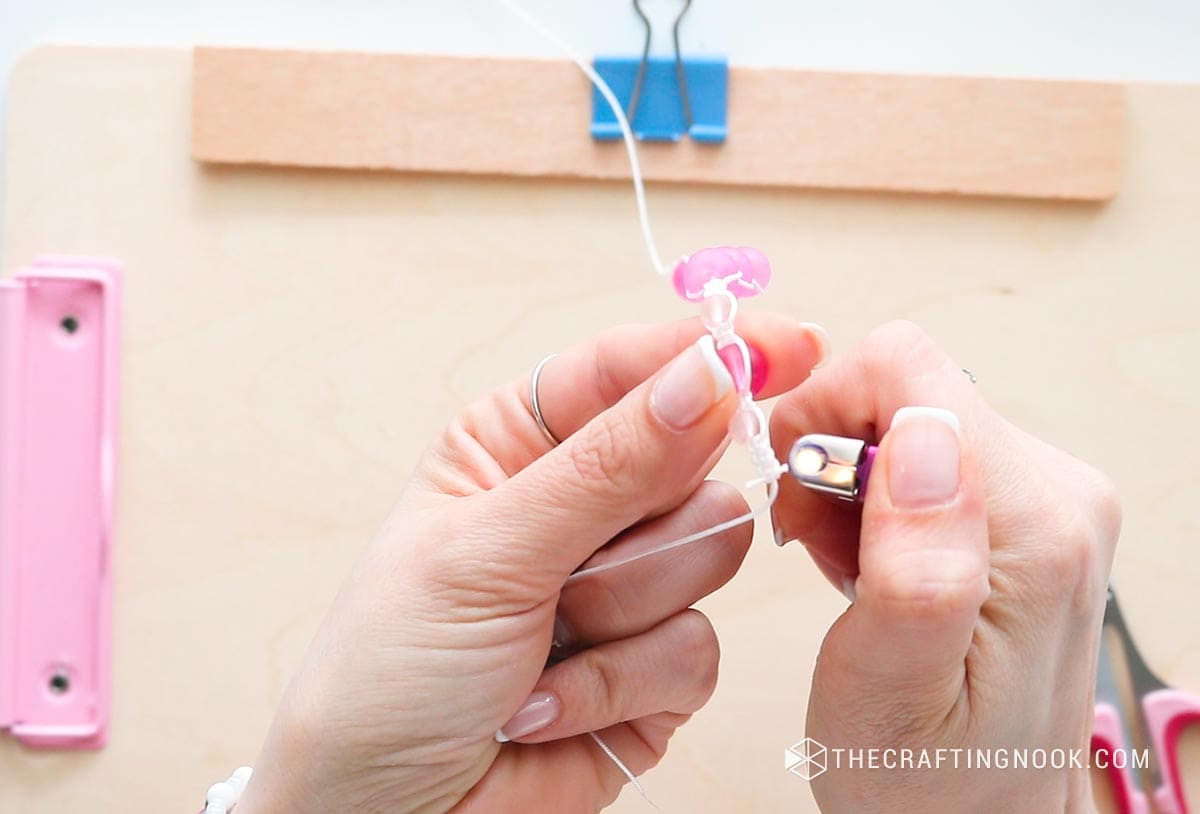
Step 9: Add the Finishing Touches
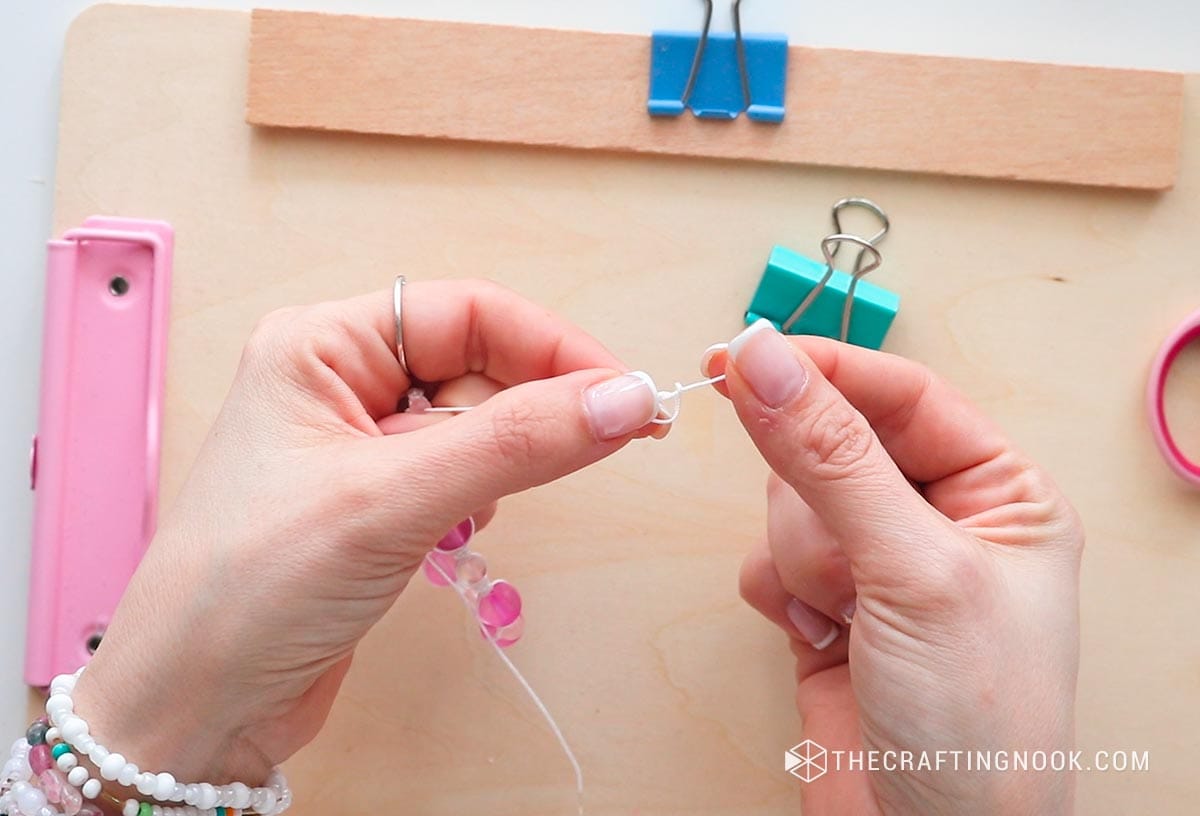
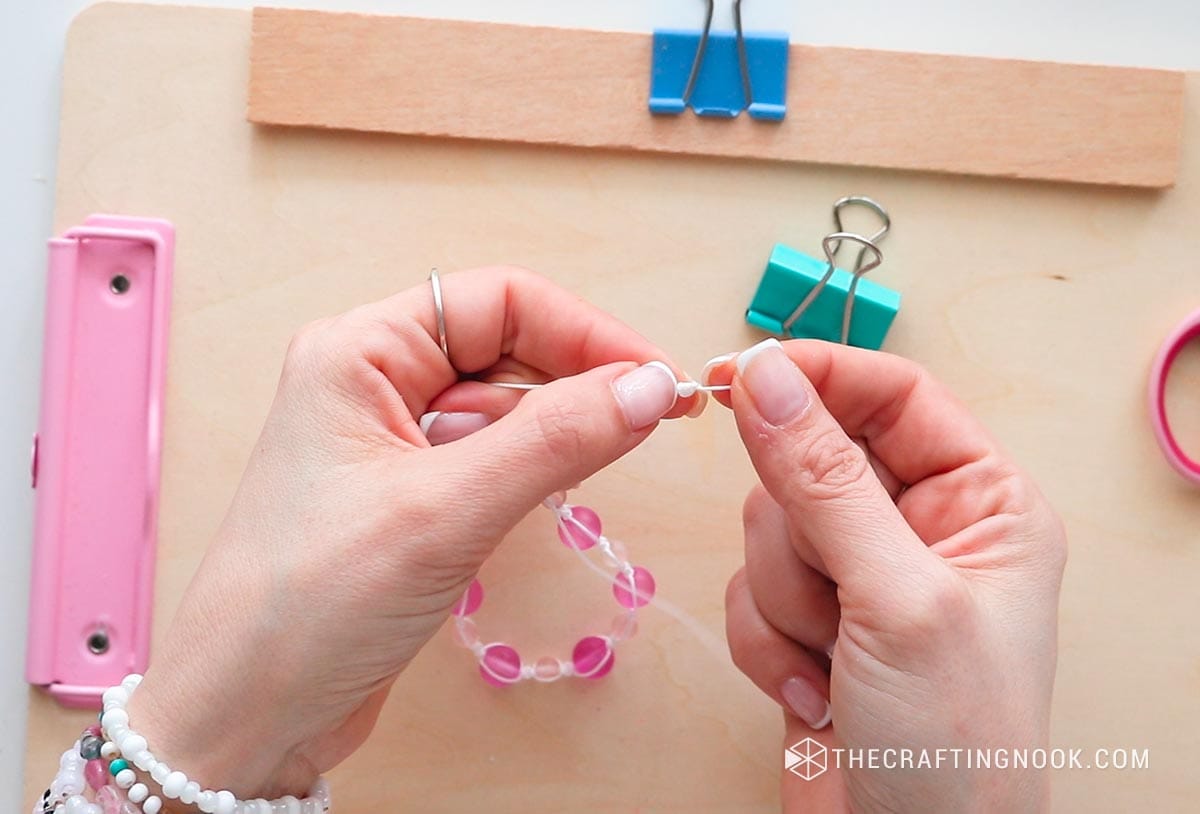
Insert a small bead onto each tail of the bracelet.
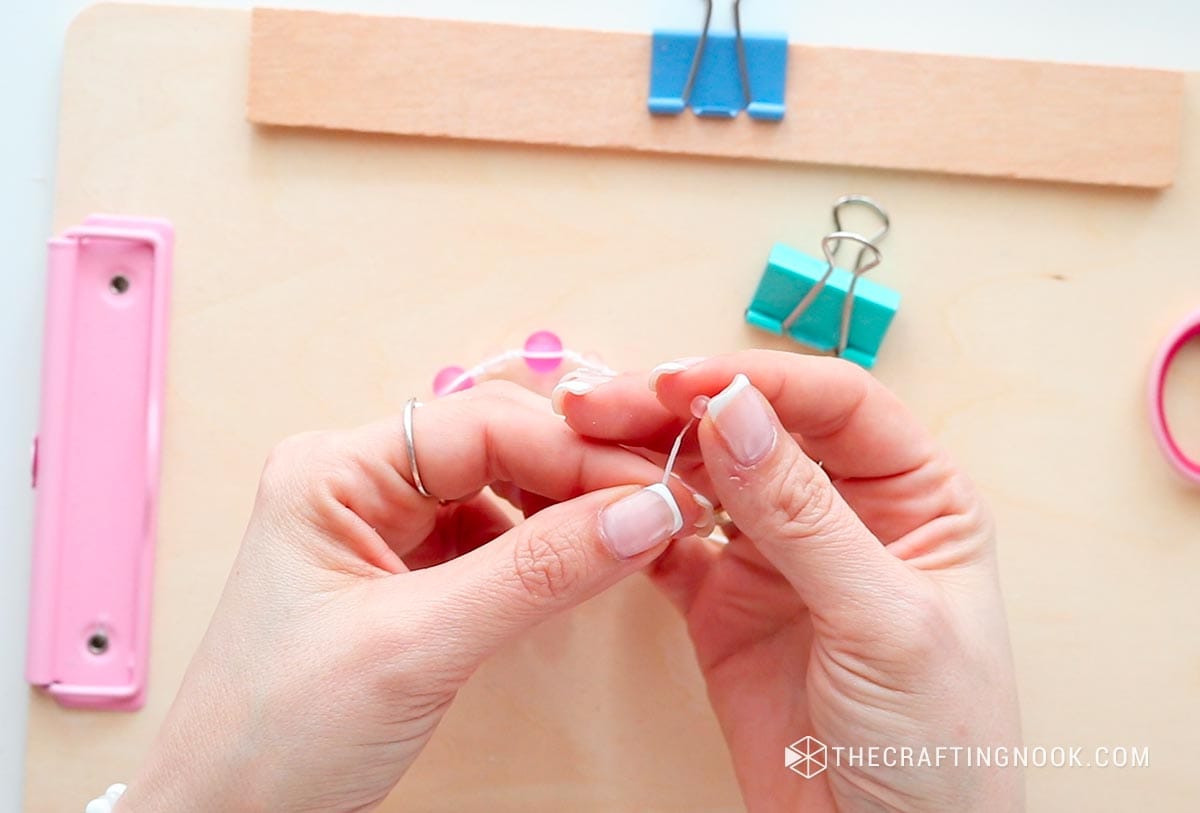
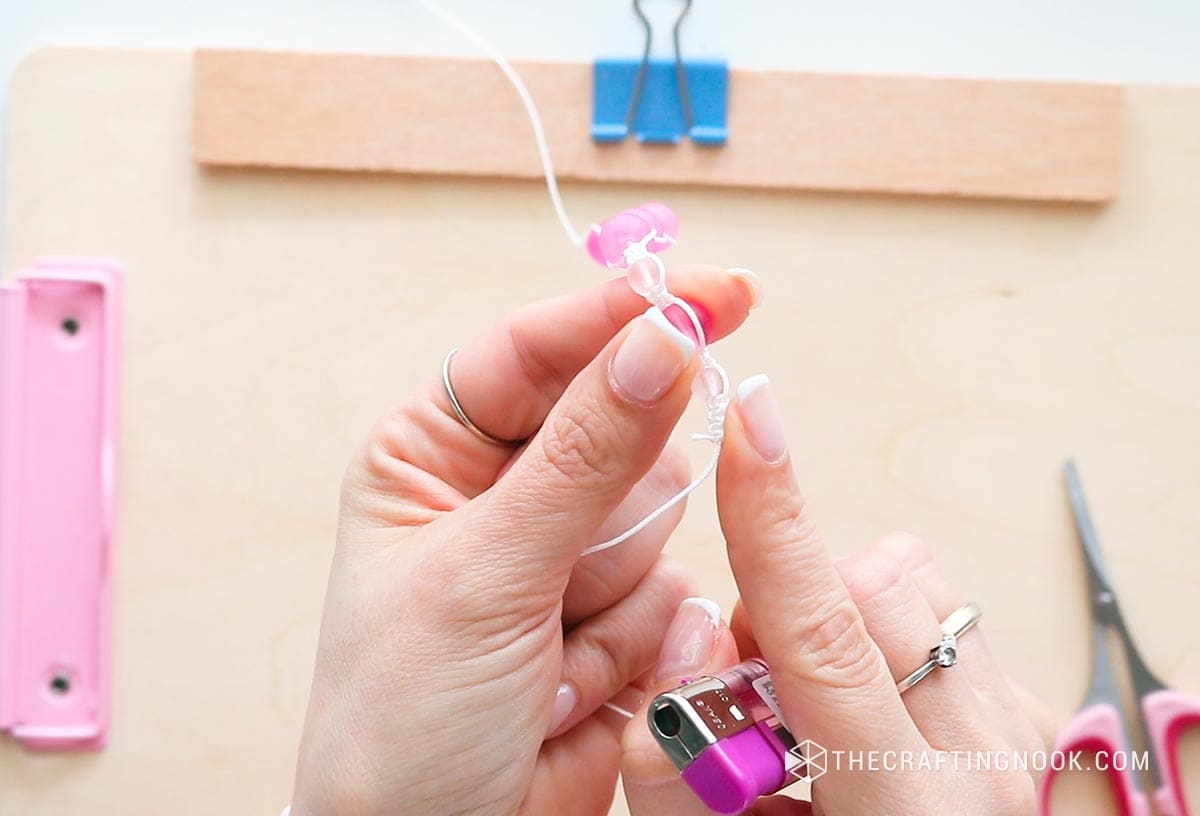
Tie a Franciscan knot right at the end of each tail to secure the bead in place and avoid the tail from sliding out of the closure.
The Franciscan knot, also known as the barrel knot, is simple and decorative:
Loop the cord around your finger or a dowel, creating a loop with a long tail.
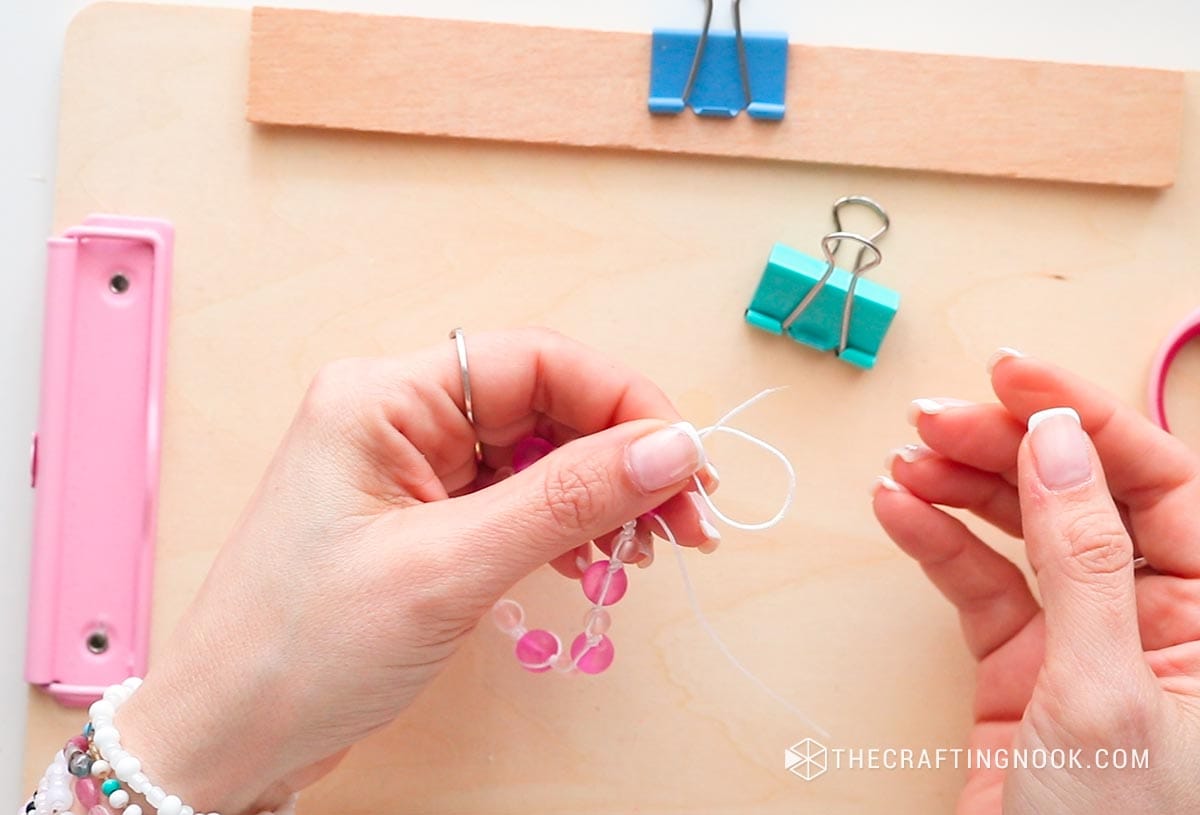
Wrap the tail around the loop and the cord itself several times.
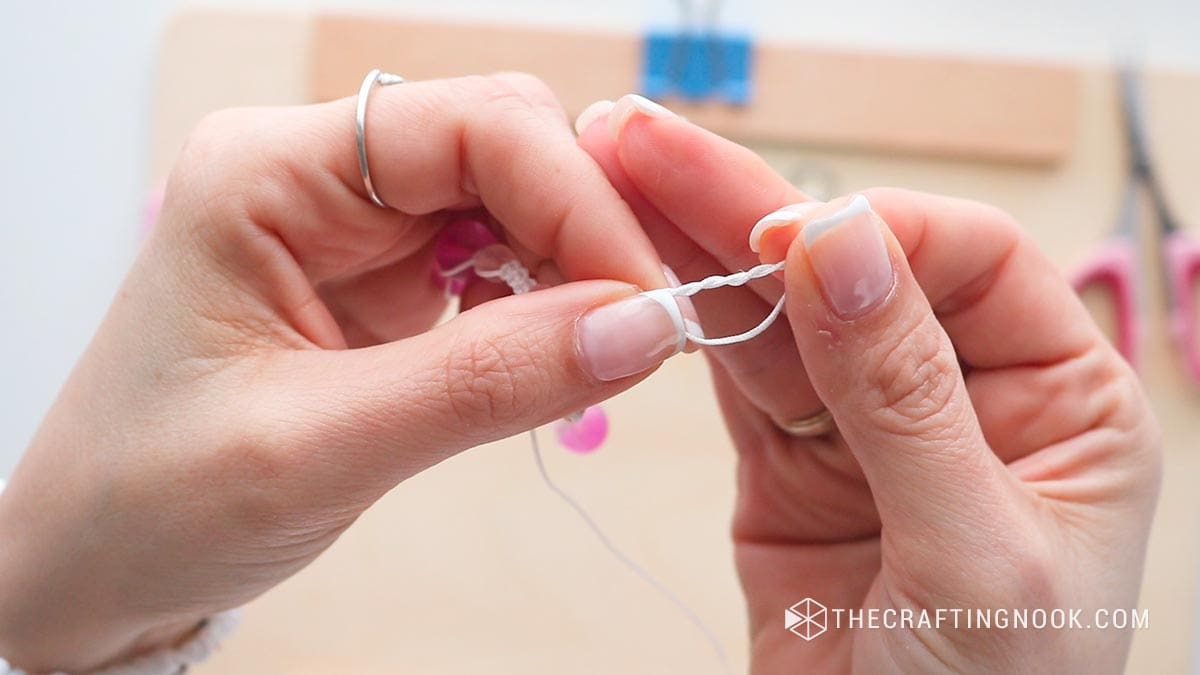
Pull the main cord carefully towards the tip making sure each loop gets closer together while holding the tip tight then finally pull tight to secure the knot.
Trim the excess cord and secure it with the lighter giving small taps to finish it.
Step 10: Adjust and Wear
Slide the closure to adjust the bracelet to your desired size. If you pull both sides of the bracelet you will open it so you can slide your hands.
Then hold one tail between your fingers and your palm and pull the other tail until it fits your wrist.
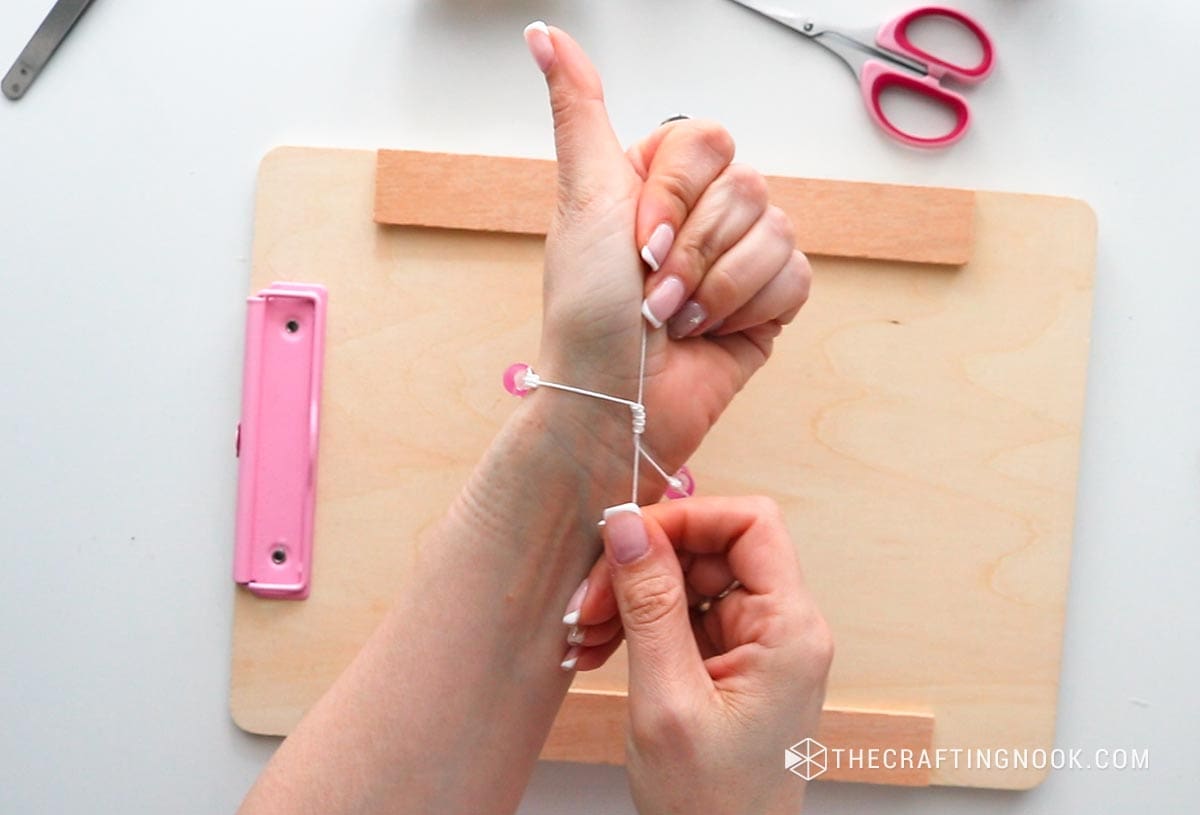
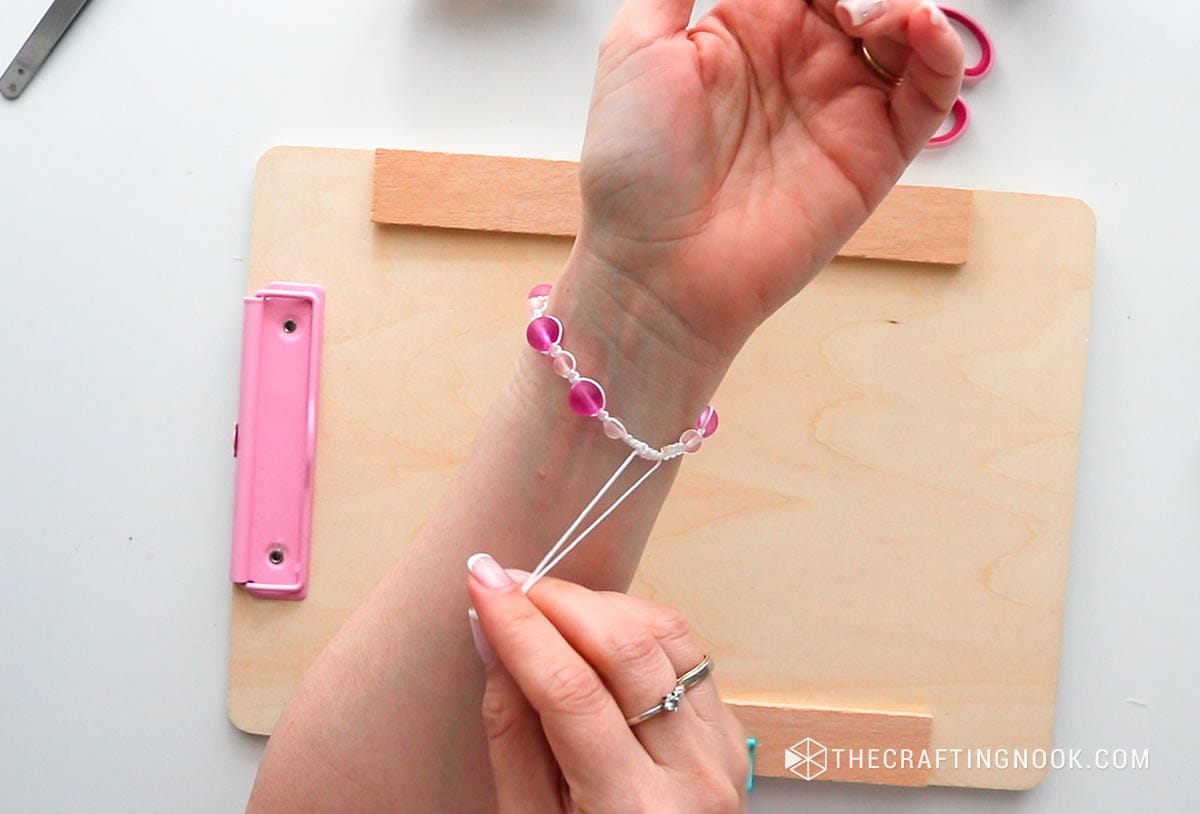
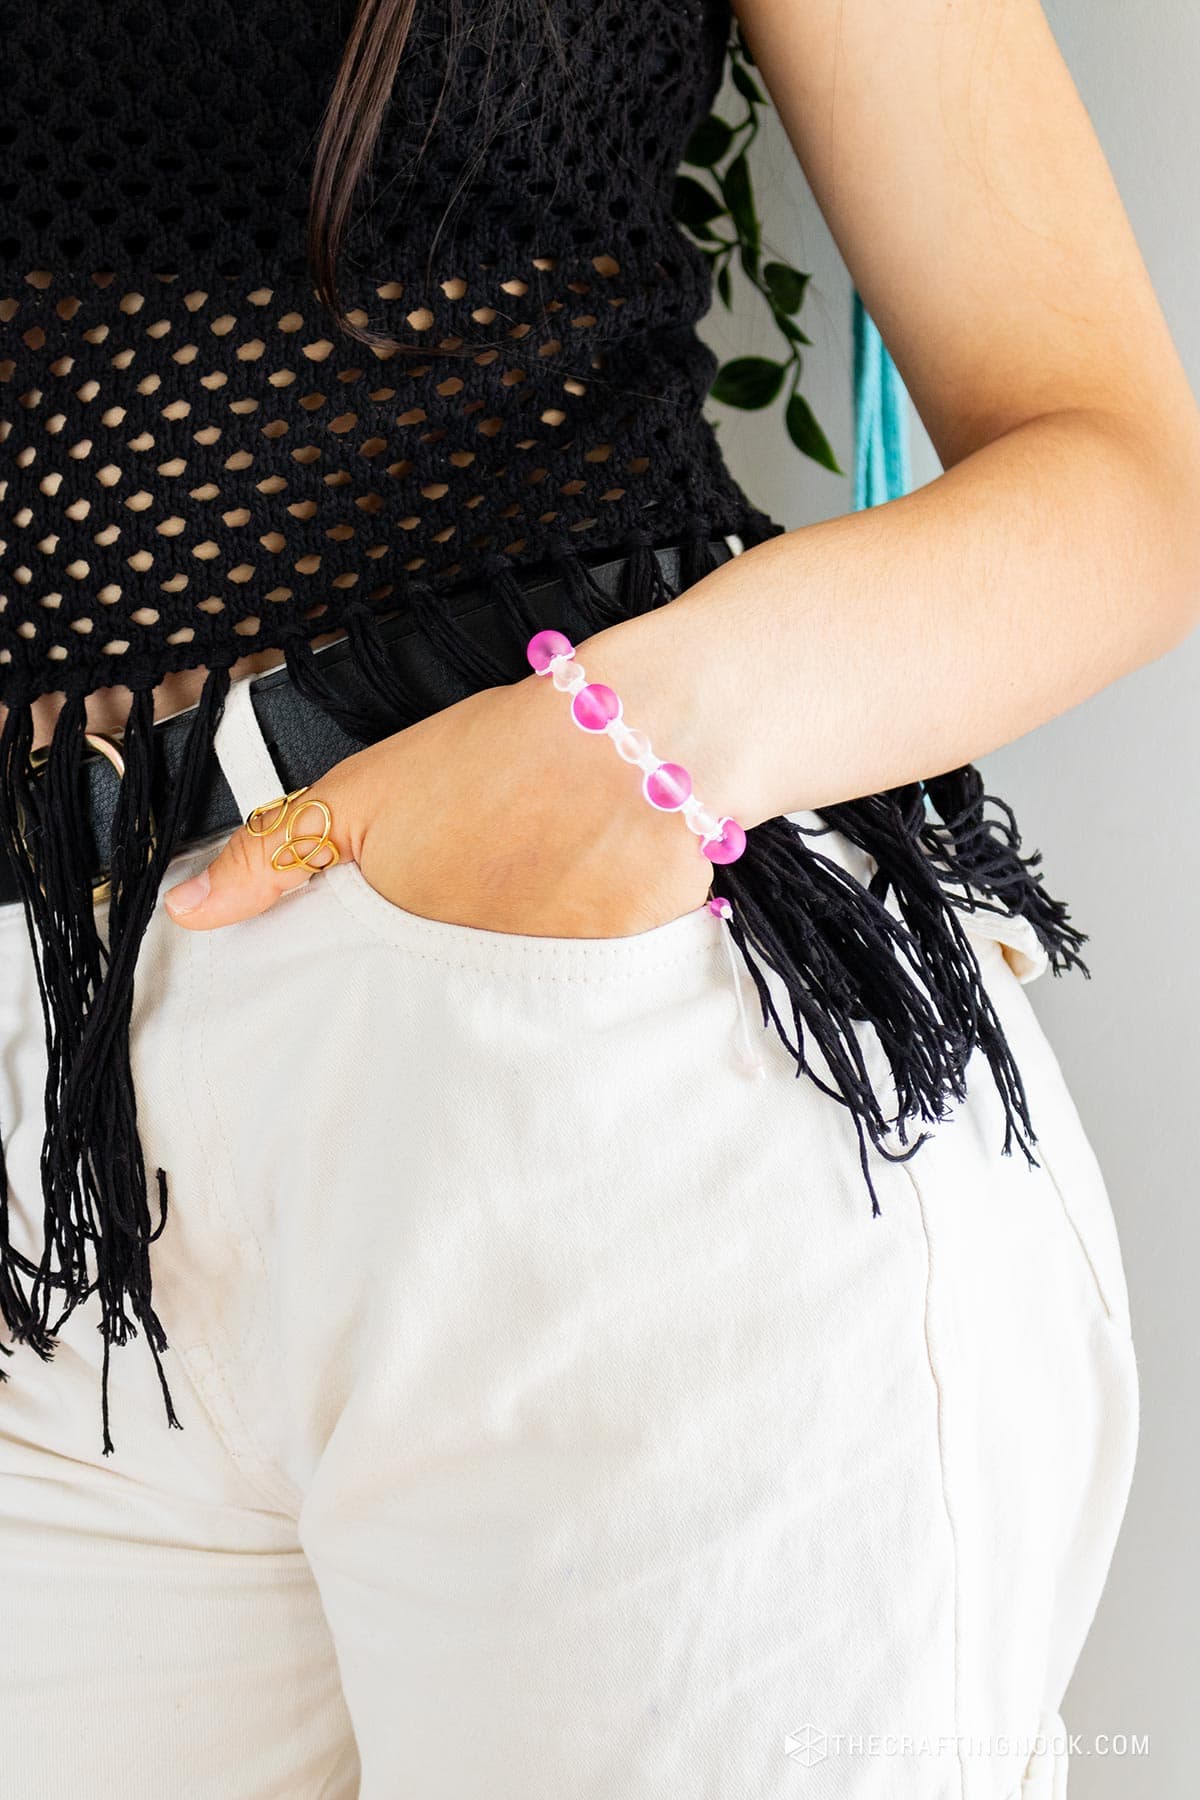
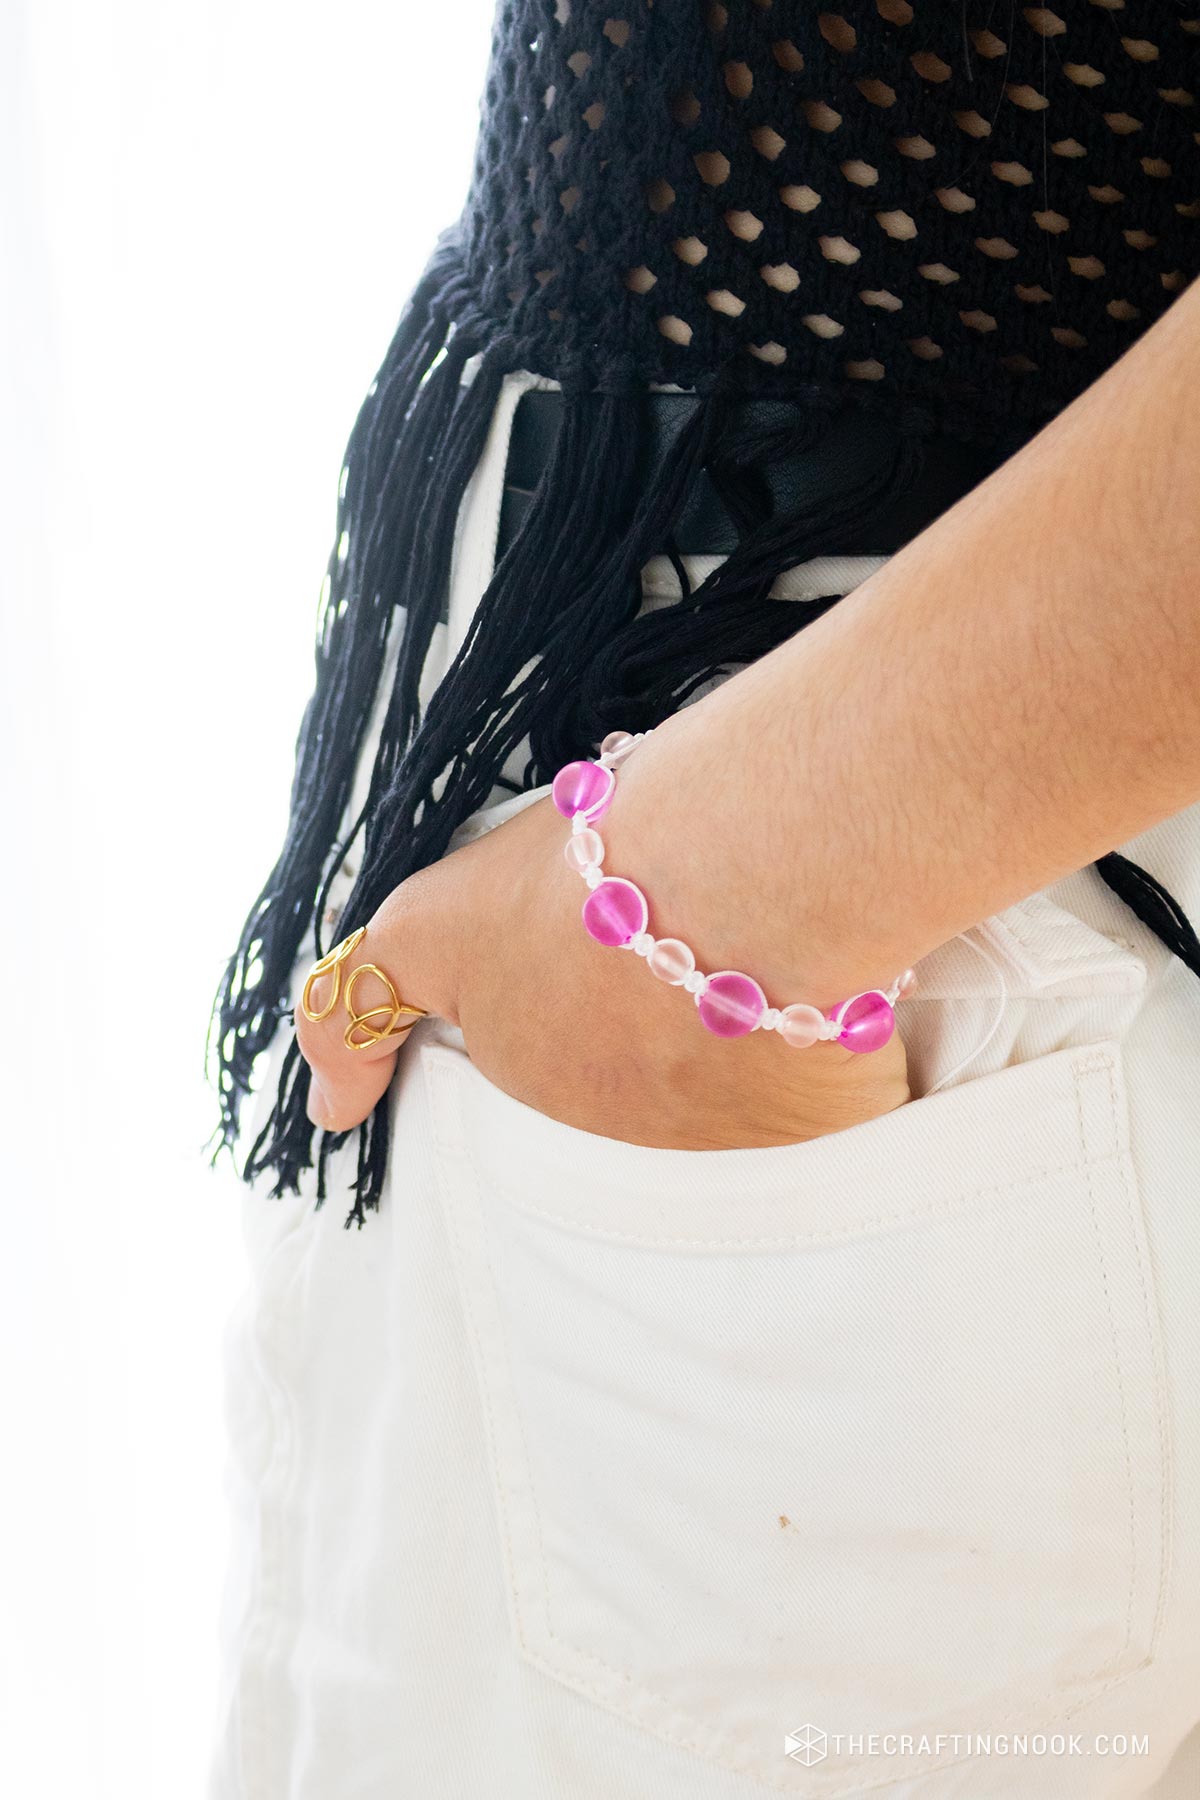
Your macrame bracelet is now ready to wear!
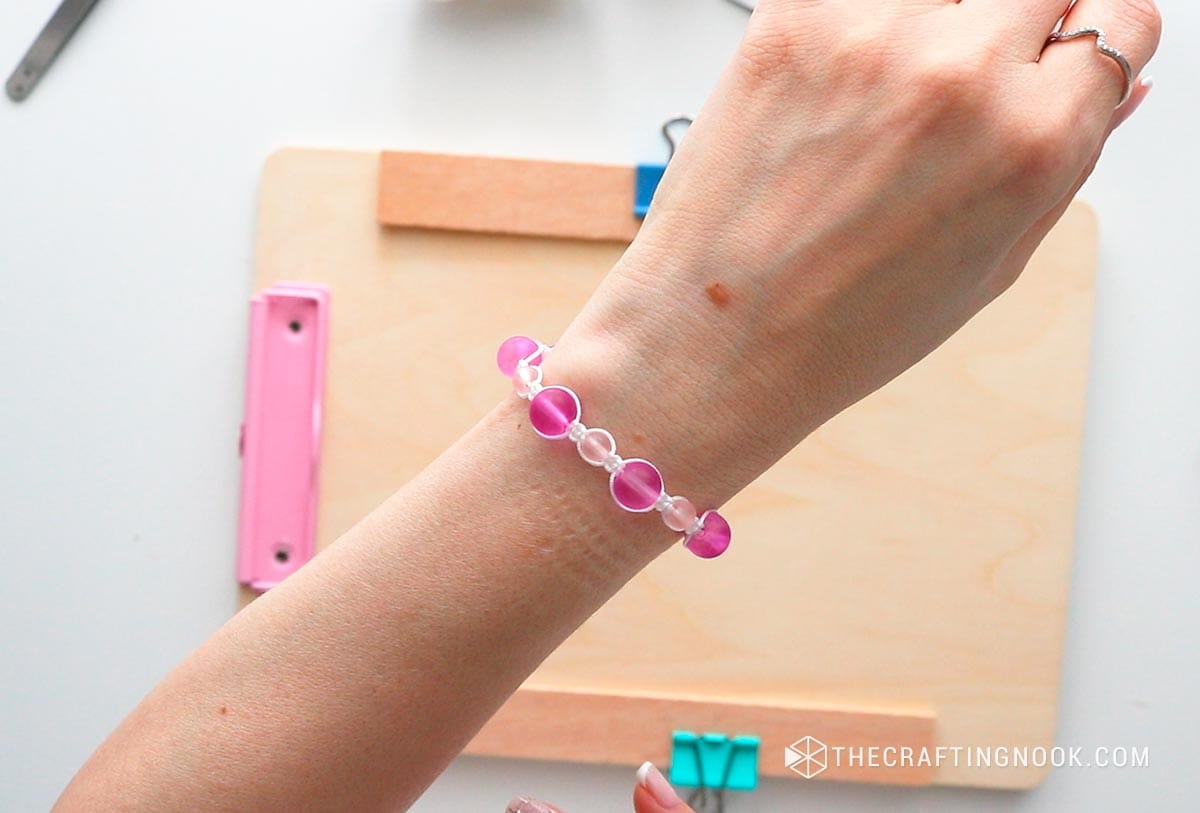
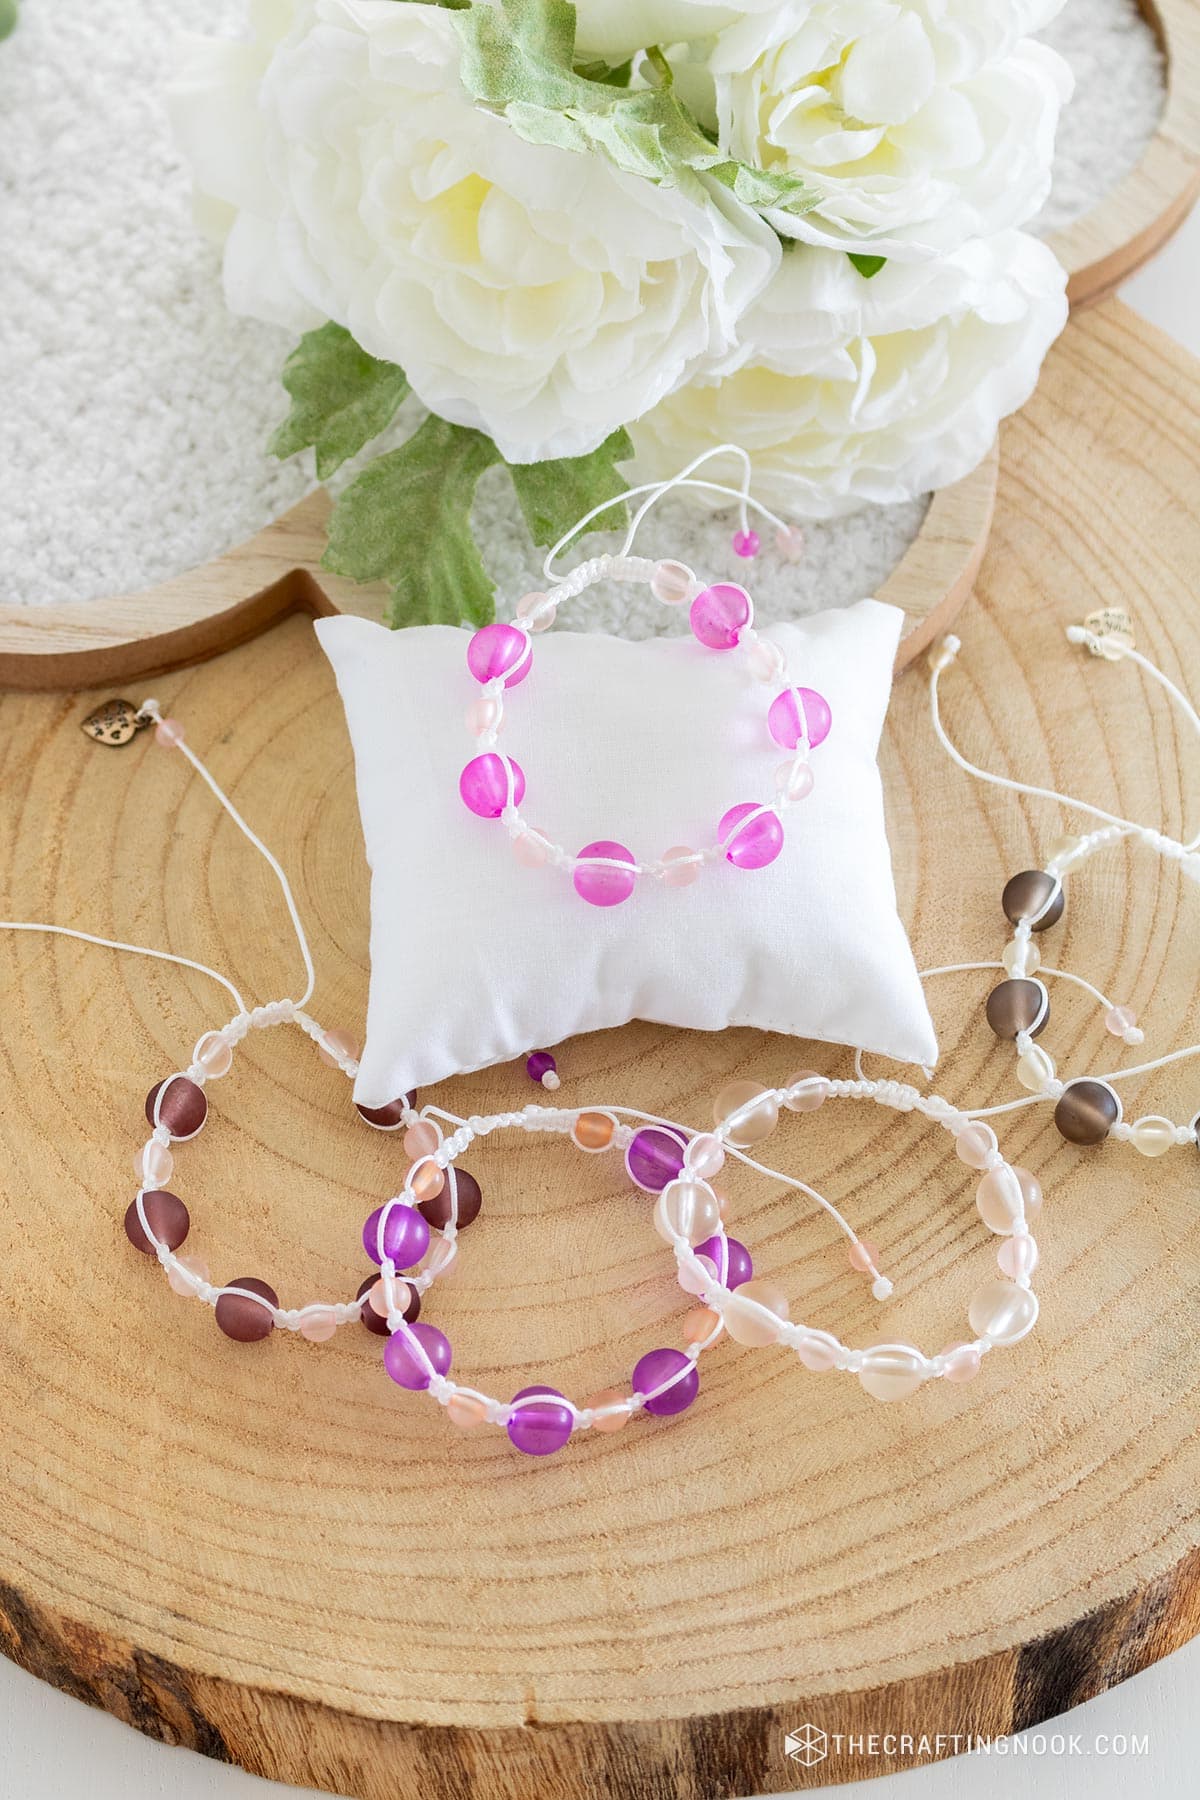
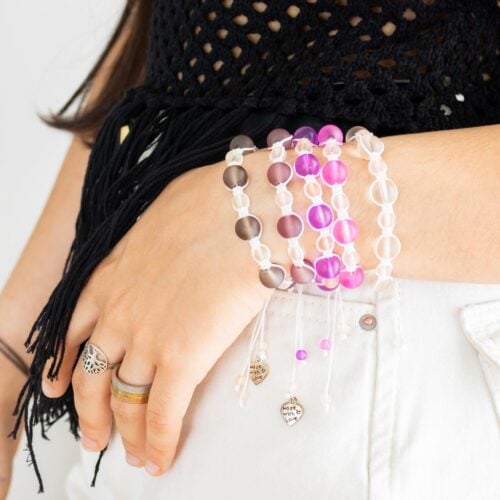
You can make as many as you want to mix and match using different colors and different sizes. I made quite some of them
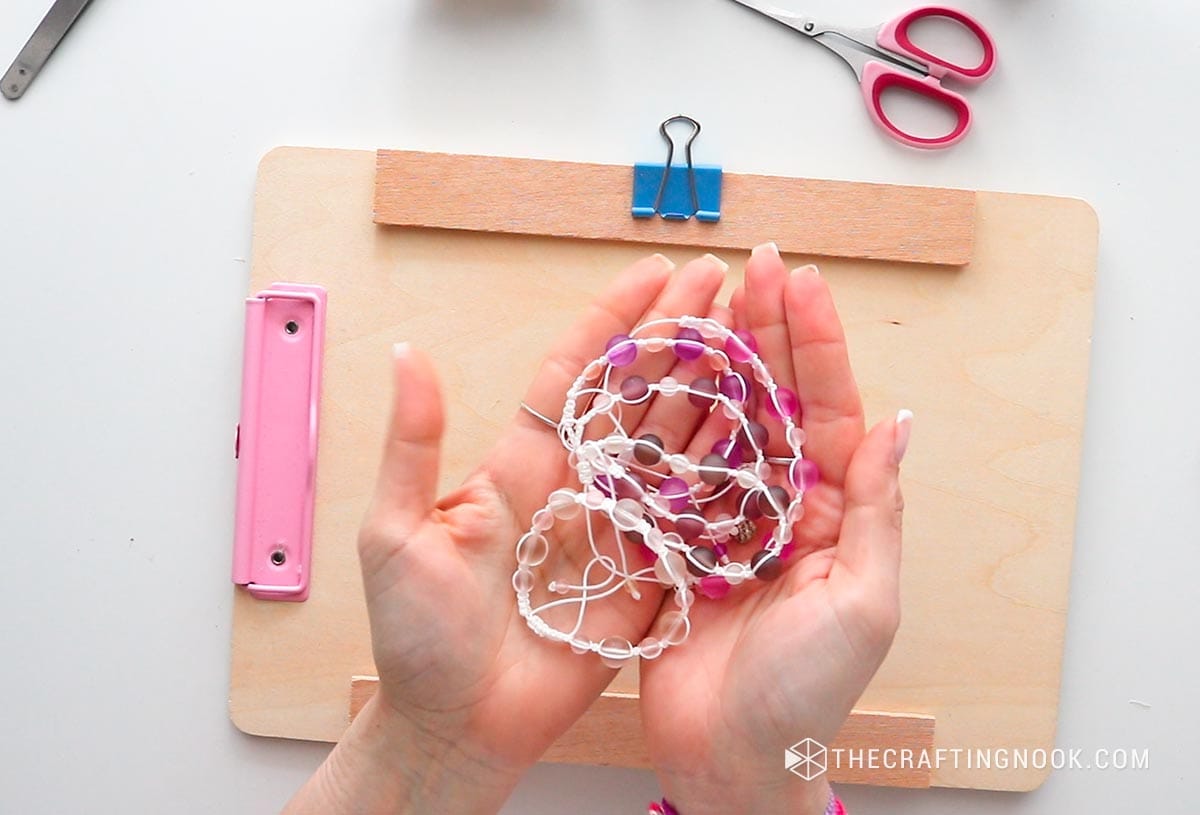
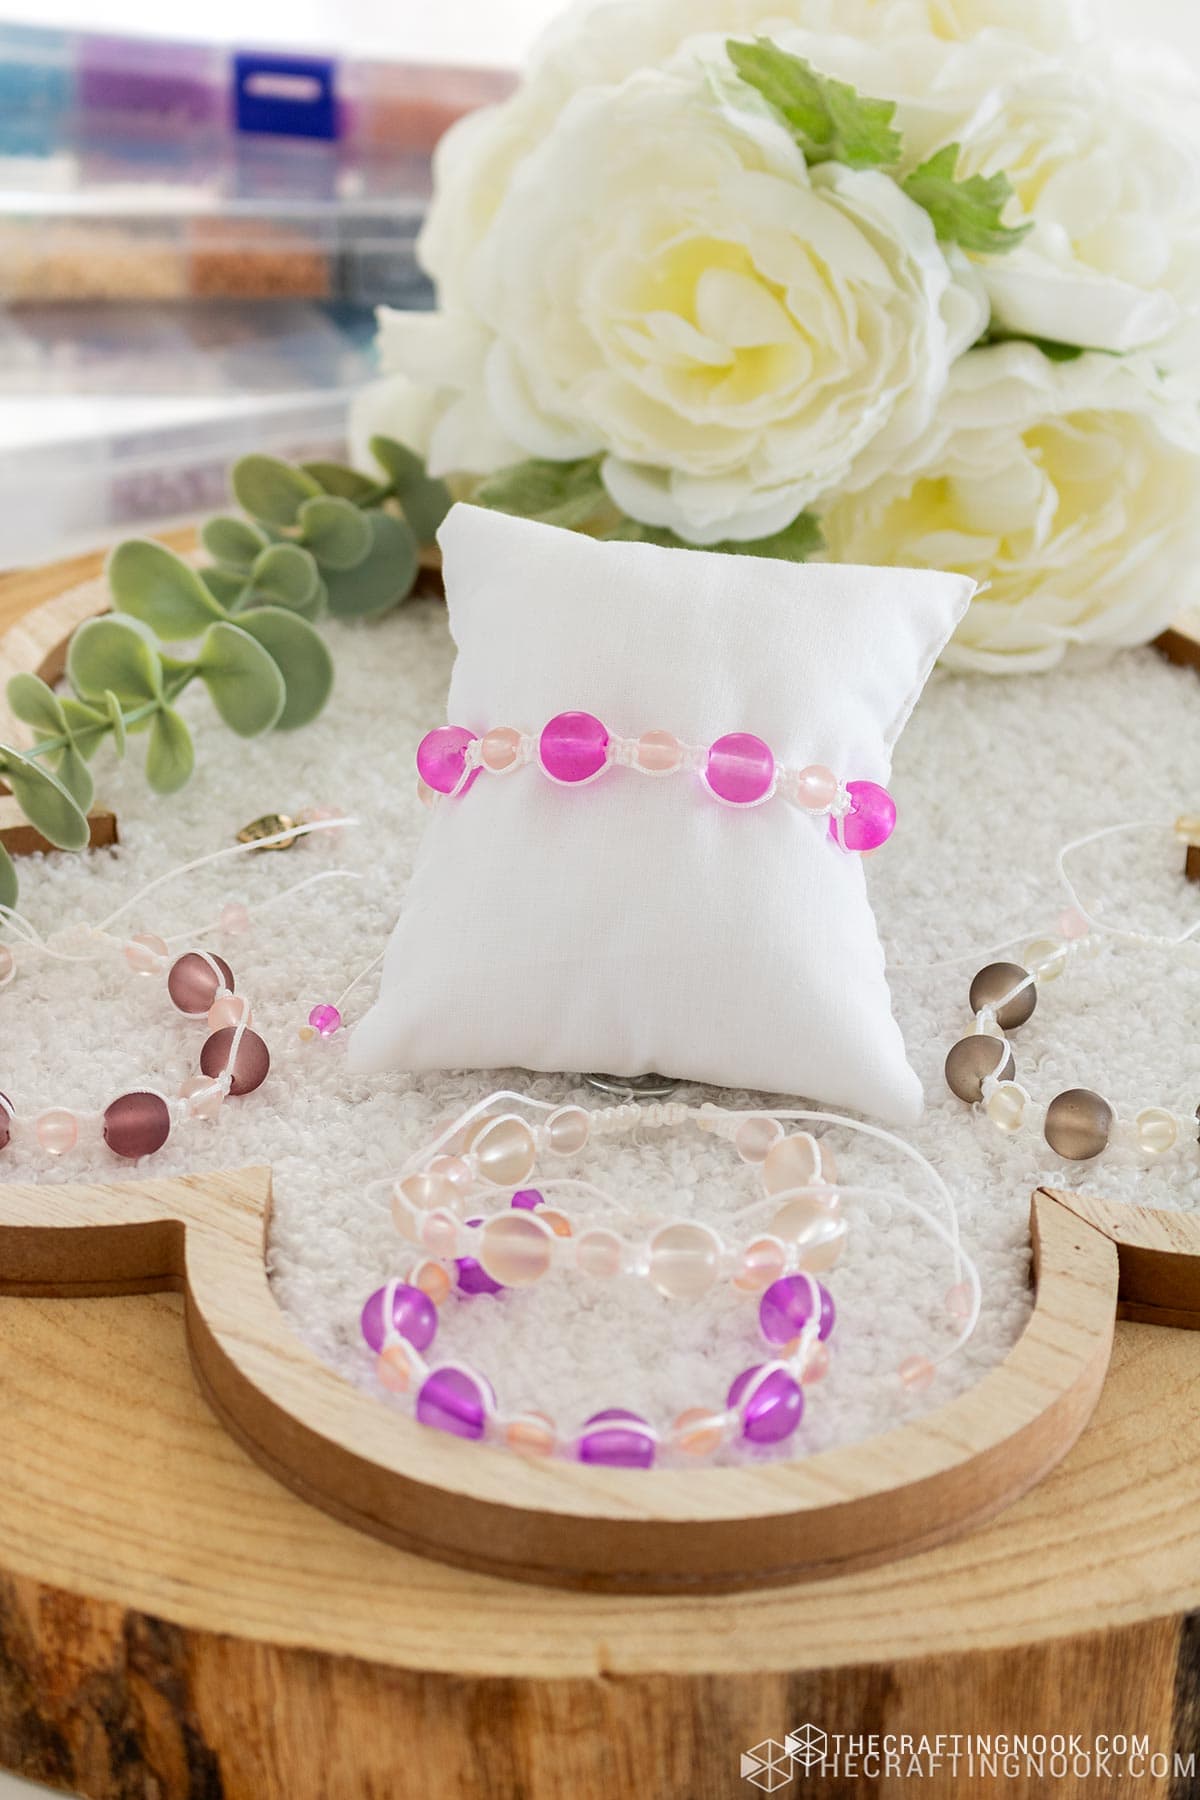
Take a look at how pretty these macrame bracelets with beads are!!!
Crafting Tips
- Keep the tension consistent while making the knots to ensure a uniform look.
- Experiment with different bead sizes and colors for a unique design.
- If you’re new to macrame, practice the knots separately before starting the bracelet.
- Gently stretch the nylon cord before starting to prevent it from stretching out and loosening your knots later.
- If you don’t have a clipboard, you can use painter’s tape to secure the cords to your workspace. It holds well and removes easily without residue.
- Make sample knots on a scrap piece of cord to get a feel for the right tension before starting your actual project.
- Dab a tiny amount of fabric glue on each finished knot to ensure they stay secure over time if you don’t want to use the lighter.
Beads and Cord Variations for Your Macrame Bracelet
Cord Variations:
- Cotton Cord: Soft and natural, great for a rustic or bohemian feel. Easy to work with and knots smoothly.
- Hemp Cord: Strong and eco-friendly, perfect for earthy, natural designs. Adds a bit of texture to your bracelet.
- Leather Cord: Adds a luxurious touch, perfect for a chic and sophisticated look. Requires more tension to knot.
- Waxed Cord: Slightly stiff and holds its shape well. Great for intricate designs and ensures knots stay tight.
Bead Variations:
- Wooden Beads: Lightweight and natural. Perfect for a rustic or boho style.
- Metal Beads: Adds a bit of shine and a modern look. Can be heavy, so use sparingly.
- Ceramic Beads: Handcrafted and unique. Adds an artistic, one-of-a-kind element to your bracelet.
- Plastic Beads: Affordable and versatile. Great for colorful, playful designs.
- Seed Beads. The most common type of bead.
Frequently Asked Questions
Use a beading needle to help thread the beads or try slightly larger-holed beads or thinner cord.
Make sure you’re pulling the knots tight as you go.
Absolutely! Experiment with different materials to create unique designs. Just ensure the cord fits through the bead holes and is sturdy enough for knotting.
Thread a small bead onto each tail and tie a Single or Franciscan knot at the end. Trim any excess cord and seal the ends with clear nail polish or a lighter.
Simply undo the knots carefully and re-knot them. Nylon cord is durable and can withstand being reworked multiple times.
It depends on your skill level and speed. Generally, it could take about 1-2 hours for beginners. As you become more proficient, it may take less time. It takes me around 30 minutes to make this bracelet.
More Handmade Jewelry Projects To Try
DLoving this simple macrame bracelet with beads tutorial? You might also love these other cute handmade jewelry projects too:


Don’t want to make it? You can order it!
Yes, if you love these cute handmade bracelets but rather have them made for you, you can buy them on our Etsy Shop!
✂️ Tutorial
DIY Macrame Bracelet With Beads
Tools
- 1 Clipboard and 2 paper clips
- scissors
- A Lighter
- Measuring tape.
- Twizer just in case to help pull the cord.
Supplies
- 1 mm Nylon Chinese knotting cord – one 15-inch 40 cm piece and one 60-inch piece (1.5 m). I used white.
- Glass Beads – alternating small and large. I used some cute Tinted glass beads 7x 4mm and 6x 8mm in shades of pink but you can use any bead you love.
- Extra beads for tail finish – I used 3mm glass beads
Instructions
STEP 1: PREP WORK
- Secure the 15-inch central cord onto the clipboard using the paper clips. Leave out 4 inches of cord at the top clip. This will be your main cord for the bracelet.
- Fold the 60-inch cord in half to find the center.
- Place the center under the main cord, creating two equal lengths on each side.
STEP 2: START WITH SQUARE KNOTS
- The square knot is one of the most basic and versatile knots in macrame. It’s created by using three or four strands: two outer working cords and one or two inner filler/central cords.
- Using the 60-inch cord, create 4 square knots at the beginning of the bracelet. This will be the starting section before adding the beads.
- Place the left working cord over the central cord.
- Pass the right working cord over the left cord and under the central cord and through the loop created by the left working cord.
- Pull tight to complete the first half of the square knot.
- Then repeat the same steps for the other half of the square knot.
- Place the right working cord over the central cord.
- Pass the left working cord over the right cord and under the central cord and through the loop created by the right working cord.
- Pull tight to complete the second half of the square knot.
- Right now you have 1 square knot. Repeat 3 more square knots.
STEP 3: THREAD ALL THE BEADS
- The easiest way to work a beaded bracelet is threading all the beads at once and the work each as they are needed.
- So I like to start and finish with a small bead, you can start with the large one. It’s just a preference.
- Then I alternated one small, one large, one small, one large and so on and so forth until if had inserted all the beads except for the tail ones.
STEP 4: ADD THE FIRST BEAD
- Push a small bead and slide it up to the last knot you made.
- The cords go around the beads on the sides.
- Make 2 square knots with the 60-inch cord below the bead to secure it in place.
STEP 5: ADD THE SECOND BEAD
- Push a large bead and slide it up to the last set of knots.
- Again, make 2 square knots below the bead to secure it.
STEP 6: CONTINUE BEADING AND KNOTTING ALL THE BEADS
- Alternate between small and large beads, securing each bead with 2 square knots. Continue this pattern until you reach the desired length for your bracelet.
- You can use more or less beads as you see fit.
STEP 7: FINISH WITH SQUARE KNOTS:
- After adding the final bead, create again 4 square knots to finish the main section of the bracelet.
- Trim and secure the leftover cords from the 60-inch line.
- Use a lighter or glue to seal the ends of the nylon cord to prevent the knots from getting undone.
STEP 8: CREATE THE SLIDING KNOT CLOSURE
- The sliding knot is a practical knot used for making adjustable closures on bracelets and necklaces. It allows you to adjust the size of your jewelry piece easily.
- To make the bracelet adjustable, overlap the ends of the main cord.
- Use a separate piece of cord (around 5-8 inches) to tie square knots around both ends of the bracelet, forming a loop. This will create the sliding mechanism.
- Typically, 6-8 square knots should be enough.
- Trim any excess cord, leaving 2 small tails on each side of the sliding knot. Use a lighter or glue to seal the ends of the nylon cord to prevent the knots from getting undone.
STEP 9: ADD THE FINISHING TOUCHES
- Insert a small bead onto each tail of the bracelet.
- Tie a Franciscan knot right at the end of each tail to secure the bead in place and avoid the tail from sliding out of the closure.
- The Franciscan knot, also known as the barrel knot, is simple and decorative:
- Loop the cord around your finger or a dowel, creating a loop with a long tail.
- Wrap the tail around the loop and the cord itself several times.
- Pull the main cord carefully towards the tip making sure each loop gets closer together while holding the tip tight then finally pull tight to secure the knot.
STEP 10: ADJUST AND WEAR
- Slide the closure to adjust the bracelet to your desired size. If you pull both sides of the bracelet you will open it so you can slide your hands.
- Then hold one tail between your fingers and your palm and pull the other tail until it fits your wrist.
- Your macrame bracelet is now ready to wear!
Notes
- Keep the tension consistent while making the knots to ensure a uniform look.
- Experiment with different bead sizes and colors for a unique design.
- If you’re new to macrame, practice the knots separately before starting the bracelet.
- Gently stretch the nylon cord before starting to prevent it from stretching out and loosening your knots later.
- If you don’t have a clipboard, you can use painter’s tape to secure the cords to your workspace. It holds well and removes easily without residue.
- Make sample knots on a scrap piece of cord to get a feel for the right tension before starting your actual project.
- Dab a tiny amount of fabric glue on each finished knot to ensure they stay secure over time if you don’t want to use the lighter.
Share and PIN ME!!!
Til’ next time…


FREE WORKBOOK
Keeping your Sweet Home Organized
Learn how to create intentional habits and simple routines to Keep Your Home Organized. Plus freebies, printables, exclusive content, and tips.
Disclaimer: By clicking on the “Yes” button above you are giving me your consent to collect and use your information according to the law and My Policy Privacy. Zero Spam I promise!