DIY Mod Podge Box for Jewelry Storage
This post may contain affiliate links. Please read our Disclosure Policy.
Ready for some pretty jewelry organization? Here’s a quick way to make a Mod Podge box with an ordinary wooden box for storing your jewelry.
Today I’m sharing how to make these cute and easy wooden jewelry boxes using Mod Podge, scrapbook paper, and fabric.

Many of you probably know by now that I love crafty jewelry, that I make them often, and that I love keeping things organized. This most likely I got from my mom who loves any kind of boxes for any kind of things she can keep organized.
All this said when my mom bought this super cute set of wooden boxes I couldn’t resist putting my hands on them LOL. And here is the result
You might also love these other Mod Podge craft ideas: Mod Podge Monogrammed Wall Art For Girls, Upcycled Mod Podge Box for my Cards, and DIY Mod Podge Door Plaque for kids.
Table of Contents
Mod Podge Box for Jewelry Storage Tutorial
My mom is really obsessed with organization and one of her passions is “boxes”.
She collects them and labels them and organizes everything with boxes. When she bought this set, I knew right away that I NEEDED to mod podge them LOL and turn them into some cute wooden jewelry boxes.
I love the result and luckily my mom did too!
As you can see this is a great project to make for a special gift and to be honest, it’s a fun craft to make with kids too.
It’s also a fun way to makeover boxes that look old, boring, or just outdated.
Let’s start with some basics.

What is Mod Podge?
Mod Podge by Plaid is a decoupage medium used for DIY and craft projects. The product is a glue, sealer, and finish used for crafts and art projects. It is not watered-down school glue. Additionally, it’s non-toxic, water-based, and made in the USA.
Mod Podge products have become more and more popular among crafters because it provides a good quality finish to any decoupage project and to many other types of projects.
Fun fact: Decoupage is a fancy French word for “to cut out.”
Why Mod Podge a Jewelry Box
Well, I would say why not? LOL. What I love about mod podge the most is that it’s a very good quality glue and sealant, so mod podding a cardboard box or wooden box will make it unique (with your design or touch), long-lasting, and soooo pretty!
Your jewelry box will most likely be on your dresser or somewhere visible so, mod podge will give it the protection it needs to stay pretty and last for a long time.
How To Cover A Box With Mod Podge
The process is pretty easy.
- You need to buy the right Mod Podge for your project. Mod Podge has different products for different types of projects. There is mate (original), Satin, Gloss, Fabric, Dishwasher Safe Gloss, Paper, and puzzle among others.
 **Image belongs to Restyled Homes
 - Once you have chosen the type of project and your type of mod podge, clean your surface well and apply mod podge with a foam brush and apply your preferred material.
- Go by sections until you cover it all.
- Let it dry for a while.
- Apply one or two coats of mod podge all over your project and let it dry well.
- You are pretty much done.
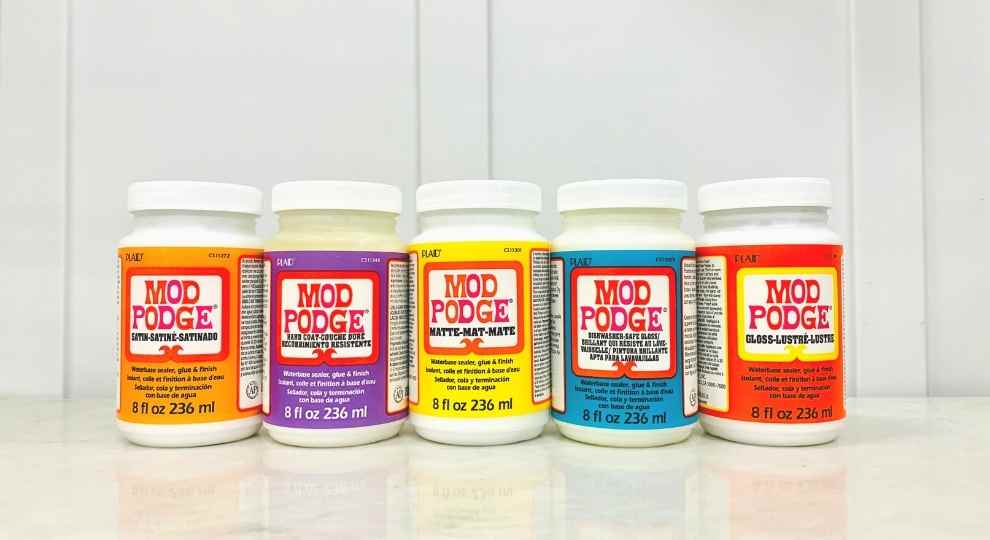 **Image belongs to
 How to make Jewelry organizers
Supplies:
- Wooden boxes {like chests}
- Scrapbook paper (or your favorite paper)
- Matching fabric
- Matching paint.
- Mod podge
- Scissors and/or x-acto knife
- Paint brush
- Foam brush
- Ruler and pencils
- Screwdrivers
What Tool Should I Use to apply Mod Podge?
My favorite go-to is foam brushes, which you can pick up at the dollar store.
If you plan on working on a large project, I would use a paintbrush that has smooth and firm bristles.
Quick tip: you would not want to use brushes that are too stiff since they will leave behind brush strokes.

Instructions:
Before we begin, be sure to follow us on Pinterest, Facebook, Instagram, and YouTube, and also sign up for our email list (at the end of this post), so you’ll never miss a post!
Step 1: Prep Work
First, choose the papers you are going to be working with. In my case, since I was going to decorate 2 boxes, I chose 3 sets of matching papers and matched the paint and fabric.
Cut strips of paper 1/2 inch taller than the sides of your boxes (bottom and lids) and some pieces slightly larger than the lid top (I covered only the top lids but you can cover the bottom too).
Prepare the paints you will use. In my case, with the aqua set, I planned to paint the inside pink, the yellow set with green paint, and the pink set with aqua paint.
I used pink fabric for all 3.
Then, make sure to clean all dust from the boxes.
Remove the hinges and locks and make marks so when you mod podge them you know where to put them back.

Step 2: Painting the Wooden Boxes
Start painting the inside of each box including the lids and edges. The bottom of the box is optional since you will be covering it with fabric.
Let the pieces dry well.

Step 3: Applying Mod Podge to the Wooden Box
Start applying a thin layer of mod podge with your foam brush to the external sides of the box. Go one side at a time.
Place your chosen scrapbook paper aligned with the top edge leaving the half inch extra on the bottom for folding and finishing.
If in your case, the corners of the box are rounded like these ones, I recommend making cuts every few millimeters so you can fold them and overlap them as follows.
It’s almost like would wrap a gift but with some extra steps LOL.
Go around each side carefully removing any air bubbles that might form using your roller or scrapper.

While doing this remember to mark where the screws for the hinges and lock were so you can put them back
Then apply another thin layer of mod podge to the top of the box lid and place a piece of your paper on top, straighten it up and remove bubbles again. Let it dry a bit.
Cut through the edges carefully following the shape.
I recommend doing this with a craft knife, once it’s dry and on a cutting mat. Place it upside down and trace the shape with your knife very carefully so you don’t cut any of your side’s paper.

To give the boxes a clean and long-lasting finish. Apply mod podge all over the scrapbook paper to seal it.
Avoid inner edges because when you close the box they might stick. and damage the edges.

Let it dry well for a few hours.
Don’t close them or pile them up until they are really dry.
step 4: Time to re-assemble the Boxes
Once dry, put back the hinges and locks.

Be very careful because sometimes the screws can get lose if you screw them too tight.

Step 5: Finishing up the DIY jewelry box
The last touch is the fabric inside.
It’s up to you if you want to cover all the inside of the box or only the base.
My mom wanted only the base so I did only the base.
I used double-sided tape to secure it and be able to change it later but you can always use a hot glue gun.

Do the same with all boxes you are treating!
TADAAAAA! Done all my 3 boxes!

Look how they look together…

I’m loving these wooden jewelry boxes and I wish they were mineeeee!
But I’m happy my mom loved it too and is going to use them!


What Else Can I Do With Mod Podge?
The purpose of this product is to decoupage. It was invented by the company Epoxy Polymers.
It is a glue that can be used to adhere things to other objects. This sounds like ordinary glue, but trust me, it’s not. What makes mod podge different is that it creates a sealant coat on top of whatever you are gluing. This layer seals protecting it from the environment.
You can use mod podge on many things including plastic, ceramic, glass, metal, fabric, and painted wood.
To create your design, you will need to cut out shapes from paper or fabric and attach them to a surface. Mod Podge will be used to glue the shape to that surface.
Once that’s dried, add another layer of Mod Podge as a final step. In a craft project, Mod Podge serves as a glue, sealer, and finish.
It’s amazing how many things you can make with a little creativity: handmade gifts, jewelry, home decor, fashion, decoupage projects and so much more.
Frequently Asked Questions
Yes, Mod Podge dries clear. It is a water-based sealer and adhesive that is used to protect and decorate a variety of surfaces. Mod Podge is non-toxic and easy to use, making it a popular choice for crafting projects. When it dries, Mod Podge forms a hard, clear coat that protects your project from scratches and moisture.
I haven’t been able to find the answer to this question from the product company itself and I haven’t done it myself. However, I’ve read many bloggers say that they have done it and it’s safe to thin your mod podge with 4 parts mod podge and 1 part water.
No, not exactly. Mod Podge and PVA glue are not the same as each other. Mod Podge contains PVA glue in its formula, but there is more to it than just PVA glue. Mod Podge is usually thinner than PVA and also has a higher moisture content.
Mod Podge and Elmer’s glue isn’t the same thing, Elmer’s glue is just glue, and while Mod Podge is a type of glue, it’s also a sealant and this has important consequences for durability.
Mod Podge is the glue, sealer, and finish used to decoupage projects. Decoupage is done in order to add cool images, textures, and fun materials to the otherwise boring surfaces. Mod Podge can also be used to seal together puzzle pieces, tiles, etc. in addition to Decoupaging.
No. it is water-based and acrylic, which is great because that means it’s non-toxic. … If you want to make your project waterproof, I definitely recommend a clear, outdoor (or Enamel) acrylic sealer when your project is finished.
If you are new to Mod Podge, I recommend checking out Mod Podge Rocks by Amy. You will learn tons of techniques with her!
So many! From normal print paper, napkins, tissue paper to fabric and even puzzles.
More Mod Podge Projects to Try
Loving this Mod Podge Jewelry Box Organizer? you might also love these other mod podge project ideas too:


Now it’s your turn, how do you organize your jewelry? Have your mod podge wooden boxes???
If you found this project inspiring, don’t forget to PIN and share it with friends

Til’ next time…


FREE WORKBOOK
Keeping your Sweet Home Organized
Learn how to create intentional habits and simple routines to Keep Your Home Organized. Plus freebies, printables, exclusive content, and tips.
Disclaimer: By clicking on the “Yes” button above you are giving me your consent to collect and use your information according to the law and My Policy Privacy. Zero Spam I promise!
These are just stunning! Inspires me to check out Mod Podge for the very first time! I’ve never heard of the product before.
Hi Yusuf, Yes Mod Podge is so cool and you can make so many fun things with it! If you are crafty, you should definitely check it out!!!
Regards,
Cami
That’s cool. Thx for your article.
Thank you!!
These are a beautiful! I’ve never tried Mod Podge but I’m totally inspired to give this one a try!
Oooh Thank you!!!! I’m sure once you try you will get hooked! Mod Podge ROCKS!
XOXO
Beautiful jewelry boxes! They’re being featured at The Pin Junkie this week at http://www.thepinjunkie.com/2014/09/pin-junkie-pin-party-84.html
Oooh wow! Thanks so much Bonnie! I’m so honored thanks so much! I’ll be heading over!
XOXO
Really cute project. I think my nieces would love making these! Or maybe I could make some for a gift for them. Thanks again for sharing at the Be. YOU. tiful link party
Thanks so much Adrienne!!! So glad you like these! You can make great gifts with them! Thanks so much for stopping by! Have a wonderful weekend!
XOXO
These are so pretty! I really like the extra effort you went to by removing all the hardware and painting the insides. I totally would’ve tried to ‘work around’. I’m inspired to make some of my own. If your looking for another place to share your projects, stop by Etcetorize and join our Make it Monday party. (There’s a giveaway this week!)
I’m so glad you like them Tamara! I really had fun making them even with the extra hardware removal LOL. It’s totally worth it!
Thanks so much for your sweet visit and comment!
XOXO
The boxes are so adorable! I love the paper you used. I think the blue one is my fav. I’m pinning these!
Navy Wifey Peters @ Submarine Sunday Link Party!
Thanks so much T’onna, glad you like them!!!
XOXO
Cami, These boxes are smply adorable! I love the paper, fabric and paint that you chose to decorate all of them… beautiful! Thanks for sharing with us this week at Much Ado About Monday. :)
~Emily at Huckleberry Love
Thanks so much Emily, appreciate the sweet comment. Those are fun to make and the combination and possibilities are endless!!! Thanks so much for stopping by!
XOXO
You did such a great job! These are absolutely adorable! I was just starting to think about Christmas and trying to figure out what I was going to do for all of the kids since I know none of them need more toys- these would be perfect for my nieces and foster daughter! They would love them and I can match the paper to their personalities. I love your paper choices and thank you so much for sharing your great idea! I pinned it so I can make these as soon as I get a chance!
-S.L. Payne, uncommongrace.net
Thanks so much for the kind words! so glad you like them! I appreciate you taking the time to stop by. Happy to give some inspiration!!!
HUGS
Lovely! I can’t believe I have yet to use mod podge!
Stopping over from Create It Thursday link party! ;)
These are so cute! I’m pinning these for later…..I think my daughter would love these so much! She could use these to store hair ties and all sorts of things! Thanks for sharing! :-)
These boxes look great! There are countless things to keep organized in them too. Nice work!
Thanks Tracy, I’m glad you found it useful and that you like it! Thanks so much for taking the time to stop by and leaving your thoughts
XOXO
I love these little boxes. I’ve seen them in the craft store but really haven’t known what to do with them. Your’s are adorable. I can see them as great gifts, for the office, jewelry, so many things. I’m definitely going to share your post.
Great boxes, beautiful blog!
Awww Thanks so much. I’m so glad you like my blog and my boxes! Hope you ha have a wonderful week and weekend!!! Love having you visiting!
HUGS
These are just precious! Any little girl, teen, or momma would love them. Thank you for sharing at the Monday Funday party! Pinning and sharing on google plus!
Yayyyyy how cool that you like them. Thanks so much for stopping by and leaving your thoughts! Really glad you like my boxes! Have a wonderful week!
XOXO
Very cute! And wouldn’t these make perfect gift card boxes come holiday time?? Thank you so much for linking up at Snickerdoodle Sunday!! I hope you’ll come back this Saturday with your latest makes!
Sarah (Sadie Seasongoods)
They definitely make a great gift!!! I’m glad you like them! Thanks so much for stopping by. Hope you are having an awesome week!
HUGS
Hi Cami,
Love your poper choices and how nicely they coordinate. This article has inspired me to use some of the collection of papers I just had to have and haven’t used. Thanks.
Yayyyy happy to inspire! I would love to know yours when done! Thanks so much for your sweet visit! Have a wonderful week!
HUGS
These turned out really pretty. Love the paper and colors :)
Thanks so much Amber. I’m so glad you like them!!! Have a wonderful week
HUGS
Love it such cute ideals
Thanks so much!
HUGS
Working around curves with paper and Mod Podge is not easy…but you DIY’d these like a pro. That’s because you ARE! Love them, Camila. Pinning and stumbling right this second. Hugs to you!
No way hahaha Not even close to be a pro but I love to mod podge everything I can LOL. Glad you like my boxes my friend! Appreciate the love!
XOXO
These little boxes are perfection, Cami ♡. So adorable..
Thanks so much Naznin, You are so weet and lovely! Thanks so much for stopping by!!!
XOXO
I’ve always wanted to try mod podge on a box. Yours are stunning…great color/paper combo!
~Kim
Thanks SO much Kim… So glad you like them They turned out very well so you are good to go!!!
XOXO