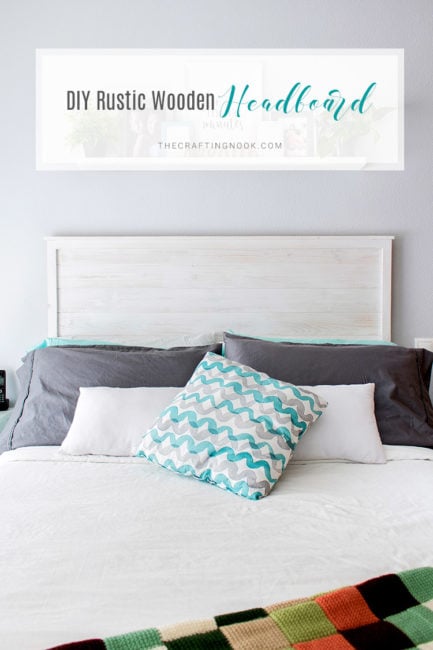
DIY Wood Plank Headboard
This post may contain affiliate links. Please read our Disclosure Policy.
If you love wood and a rustic look and are looking for a new headboard, here’s an idea that’s both easy and inexpensive. Learn how to build a wood plank headboard right here.
I had wanted a wood headboard for the longest time. I never liked the look of just a mattress and box spring with nothing behind it, and for most of my life, that’s exactly what I had.

I’ve always loved the look of pallet-style wood, so I decided to make my own simple wood plank headboard on a budget.
Later on, I even made another version with a slightly fancier look (I’ll link that below if you’re curious).
Table of Contents
A Simple Wood Headboard You Can Make on a Budget
I need to say this. I’m not a pro at woodworking, I work with what I have and under a tight budget. When I made this, I didn’t live in my own home, so I couldn’t really start buying special or fancy tools, So I got resourceful and creative to make this project work.
The inspiration for this project to make my Wood Plank Headboard came from my dear friend Lisa from Recreated Designs. She had this amazing and creative way to make one and that was it! I was hooked! Also, my dear hubby helped me all the way. It was such a fun time together.
I knew I wanted something on a budget, something simple, something pretty, and something WHITE! I’m obsessed with white lately.
I also wanted to be able to easily disassemble it when I had to move out.
Near my home, there’s a home improvement store similar to Home Depot. They sell wood in long strips of wood about 3.9 mt. {156 In.} with a really good price. You can also choose the width and thickness.
What I love the most about that place is that they have a cutting area where they will cut the wood to the correct length we desire for a small fee. I knew that was the place. You might be able to find that too at your local hardware store.
How to Make a Wood Plank Headboard
Supplies:
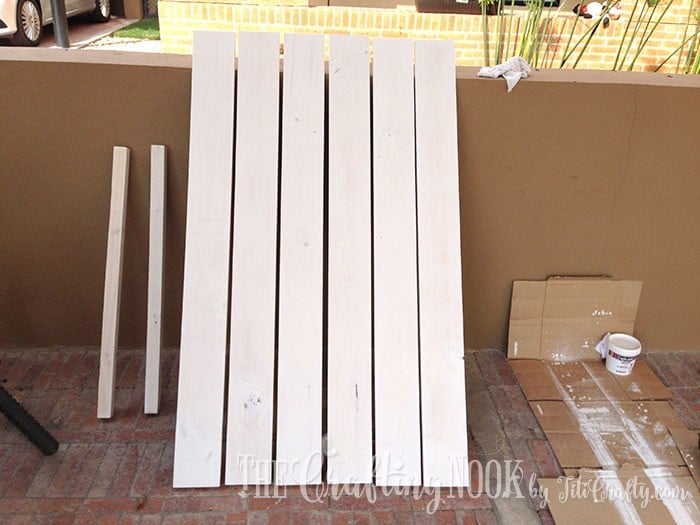
- 6 wood boards 150 X 14 cm X 2 cm – 59 X 5.5 X 0.8 In. I used pinewood because I love the natural wood marks and holes.
- 2 pieces of wood slats 5 cm X 5 cm X 90 cm – 2 x 2 x 35 In. For support on the back
- 6 sets of bed brackets – I used the screw type, not the hook one. Also, the store only had 4 so I had to improvise with the corners.
- Wood Screws – Lots of them. Usually, corners and bed brackets bring their own but just in case
- White mate indoors and outdoors paint.
- Transparent mate sealant spray.
- Thick brush.
- A Towel – one that you can dispose of later.
- Wood 150 grit sandpaper.
- Painting Tray
- Protective plastic or cardboard
Tools:
- Screwdriver
- Drill
- Hammer
Instructions:
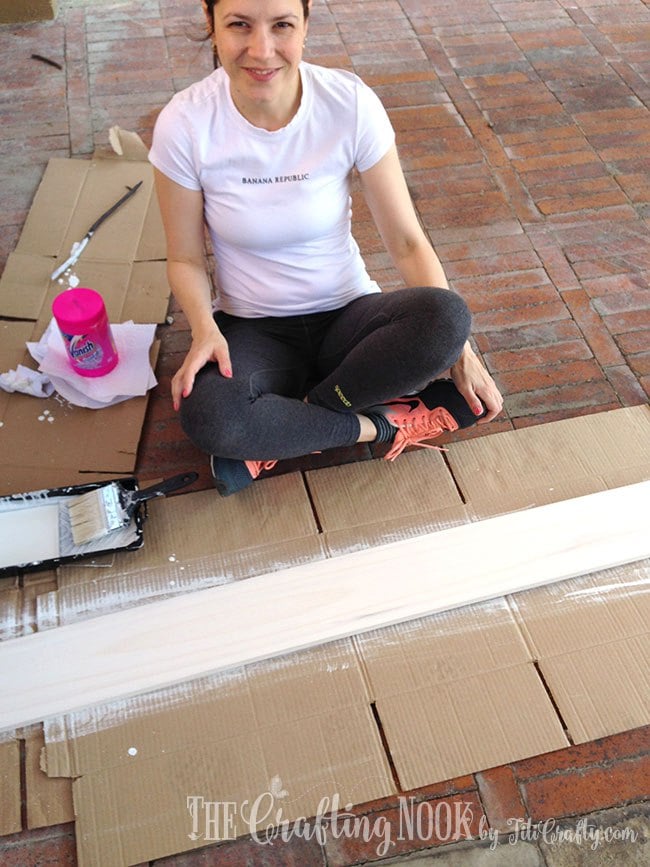
Step1: Prep Work
I got the wood cut at the home improvement store all in the measures I needed them.
*If you a more rustic look, you can check Lisa’s headboard tutorial, she gives you great tips to achieve it. Mine is not so rustic.
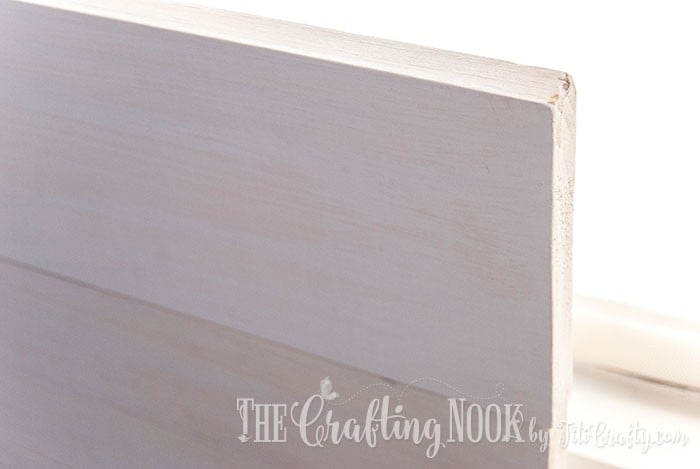
The first step is to sand down the edges and corners of each board so it won’t be so sharp and kind of give a small rustic look.
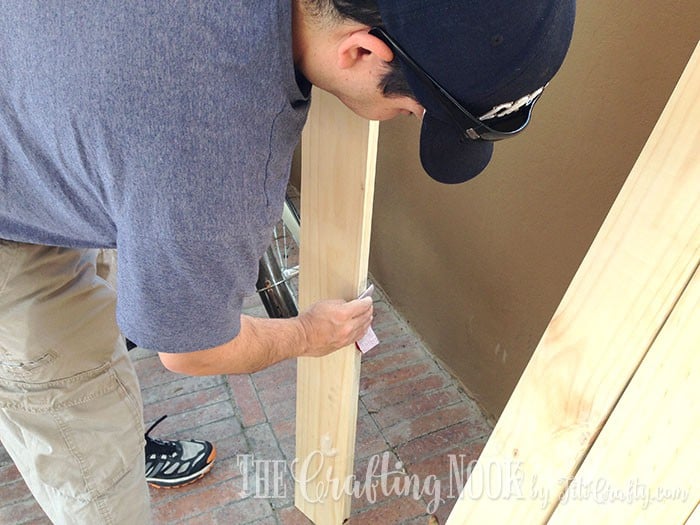
Once each piece has been sanded up, clean each strip to remove all the dust.
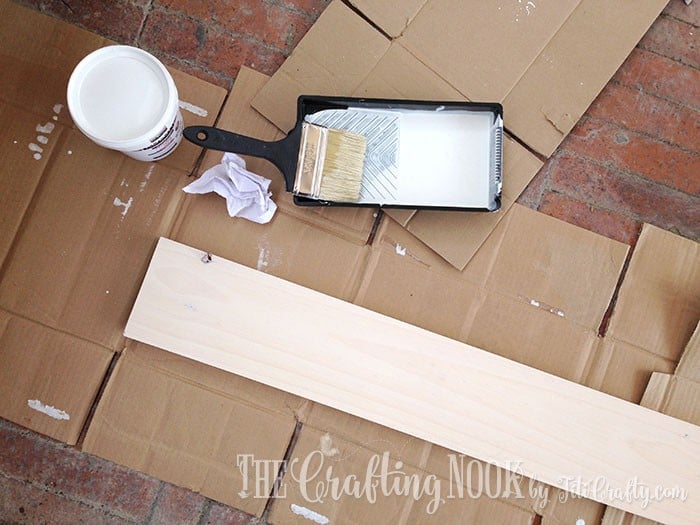
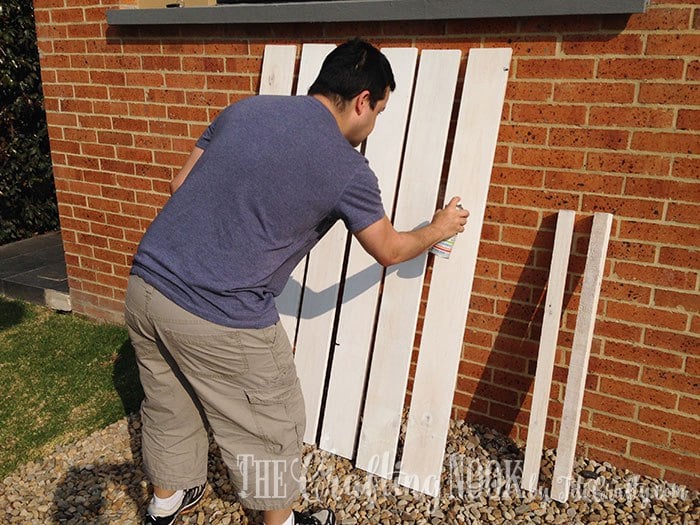
Step 2: Paint the wood planks
I wanted the wood grain marks to be visible and yet a white look So a wood stain is ideal.
You can create this effect by watering down latex paint. I made it a 1:1 proportion of paint and water.

Start painting each board. To get the look I wanted it took 3 coats letting each coat dry for a few minutes.
You might ask why watering the paint down if I’m applying so many coats. Well, the paint as they come is really thick and it would cover completely the wood in one coat. When you water it down, you create a stain, the wood absorbs slowly the paint and water in each coat and reveals the marks.


Also, by doing this you measure how much you want the white to show up.
Let the paint dry for a couple of hours.
Step 3: Wash down the paint
Then with a damp towel rub lightly each board. This makes the paint more evenly and allows you to reveal more wood marks in specific places that might have too much paint.

Let it dry again completely.
Step 4: Seal each wood plank
Spray the transparent sealant. It dries really quickly so this is an easy process.
Just to be sure let it dry for about 30 min so the smell goes away a bit too.
Step 5: Assemble the wood plank headboard
The final step is adding the support pieces.
Lay all the boards together back side up in the order you want them.

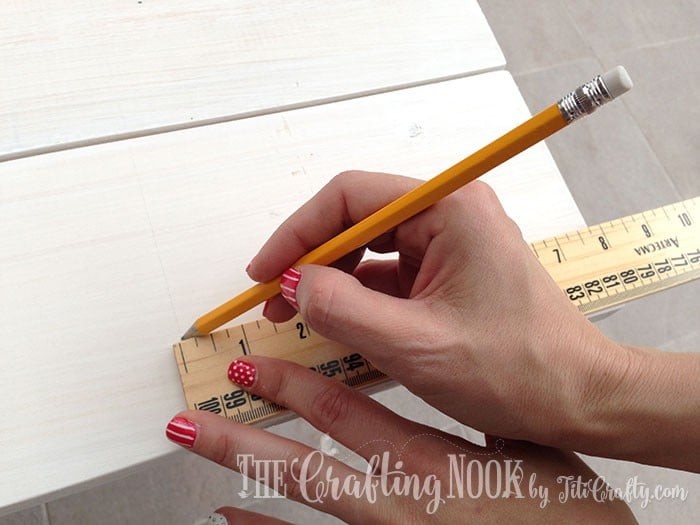
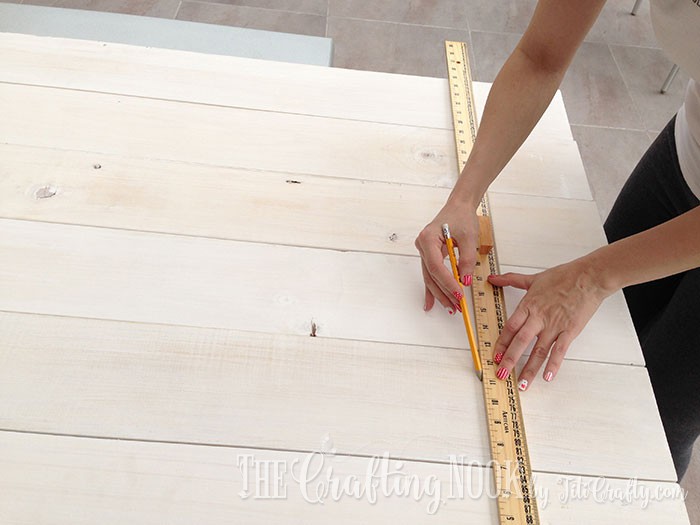
Measure about 20 cm {8 to 10 In.} from the edges toward the center and draw a line along all the boards.
This helps to have a guide to keep boards in place and then to place the support piece.
As I said I wanted a pallet-looking headboard to be easy to dissemble, so we used bed brackets. I also didn’t want screw heads visible and this was the best option. But you can just screw them together.
This part is totally up to you. You can definitely use nails to attach the support slats to the planks and use wood glue to reinforce and make it stronger.
I’ll explain how we did it with the bed brackets.
Place the support piece in place following the line but the line should be visible on the end side.
Place the bed brackets between one support slat and over 2 planks and with a pencil, trace the borders and holes on both: boards and support pieces.
For better results do this process with all the brackets and corners.

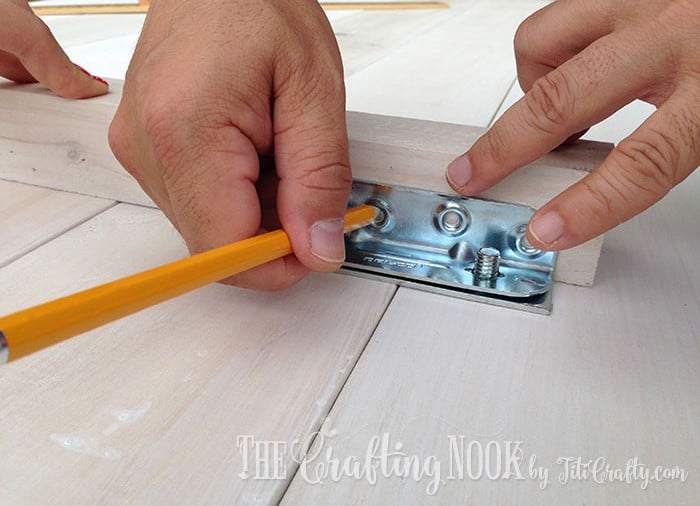
Start screwing on all the pieces.

This is how it should look like:
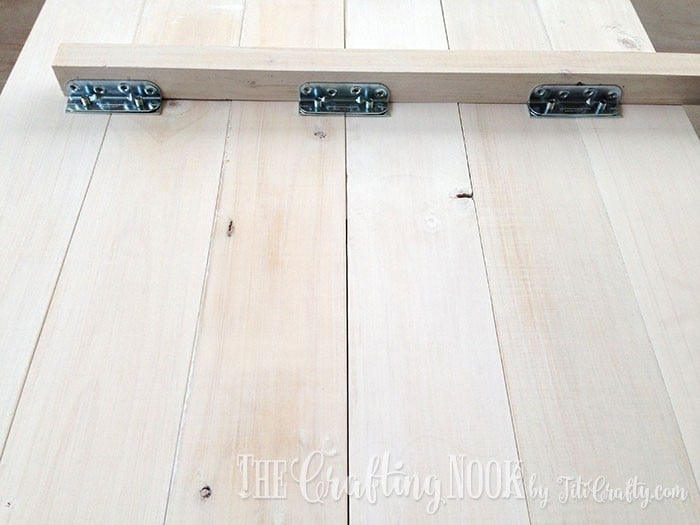
Also, I’m so control freak and paranoid that I even added some extra flat joints between planks in the center just in case LOL. My hubby was like “UGH”.
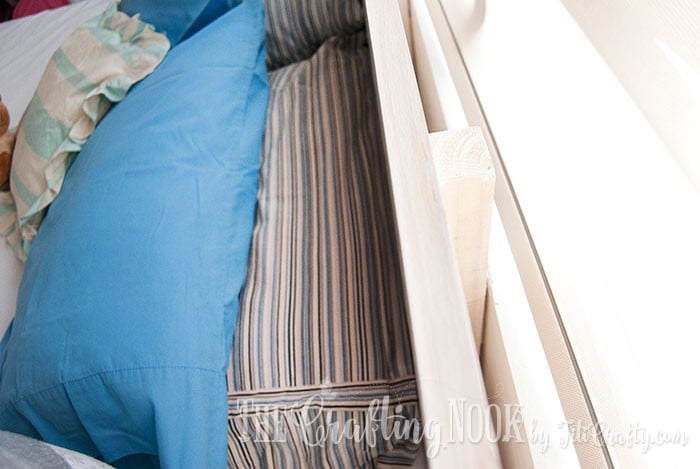
We placed all the joint pieces inside the back of the headboard between the support pieces so from the sides nothing would be visible.
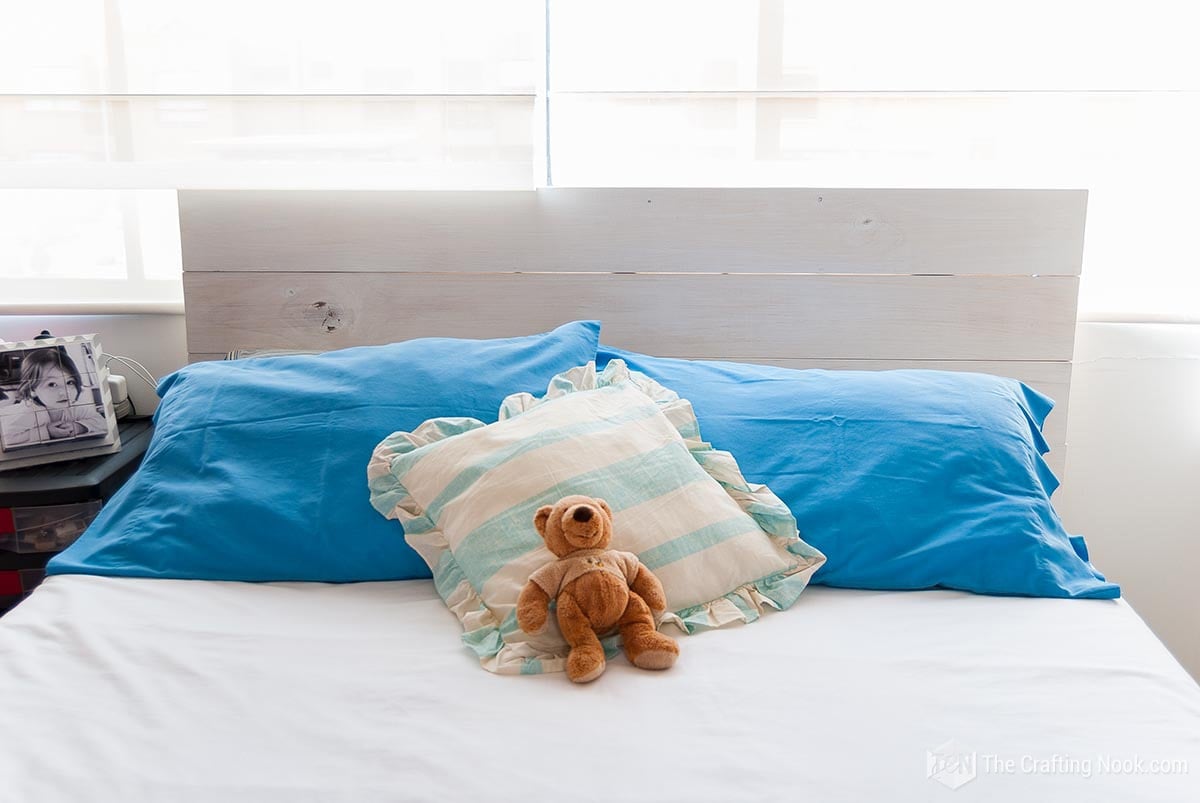
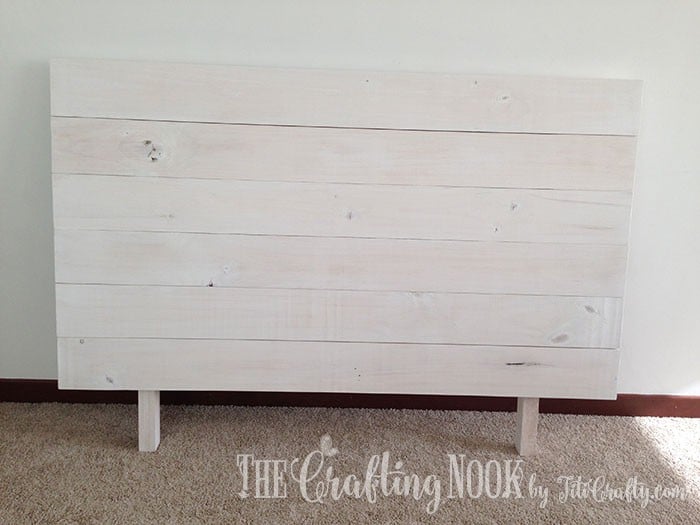
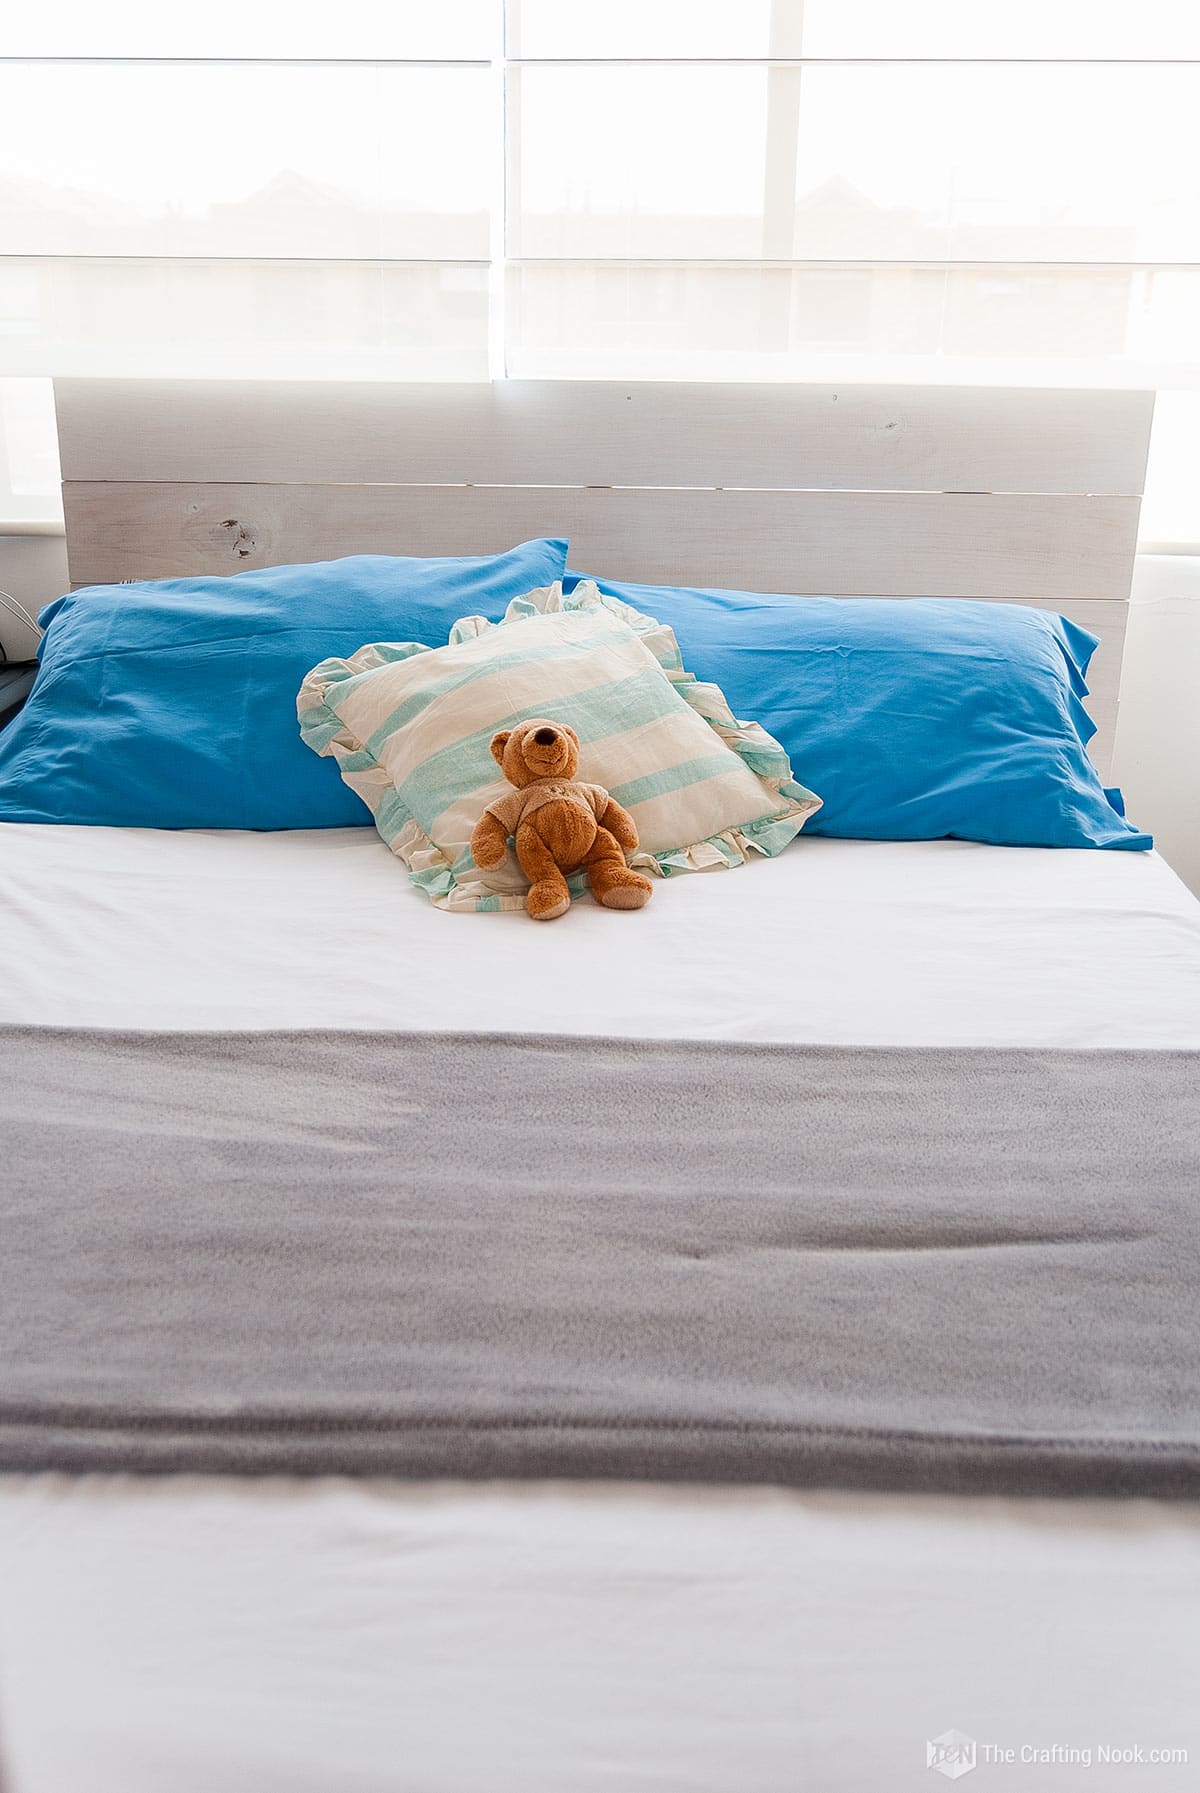
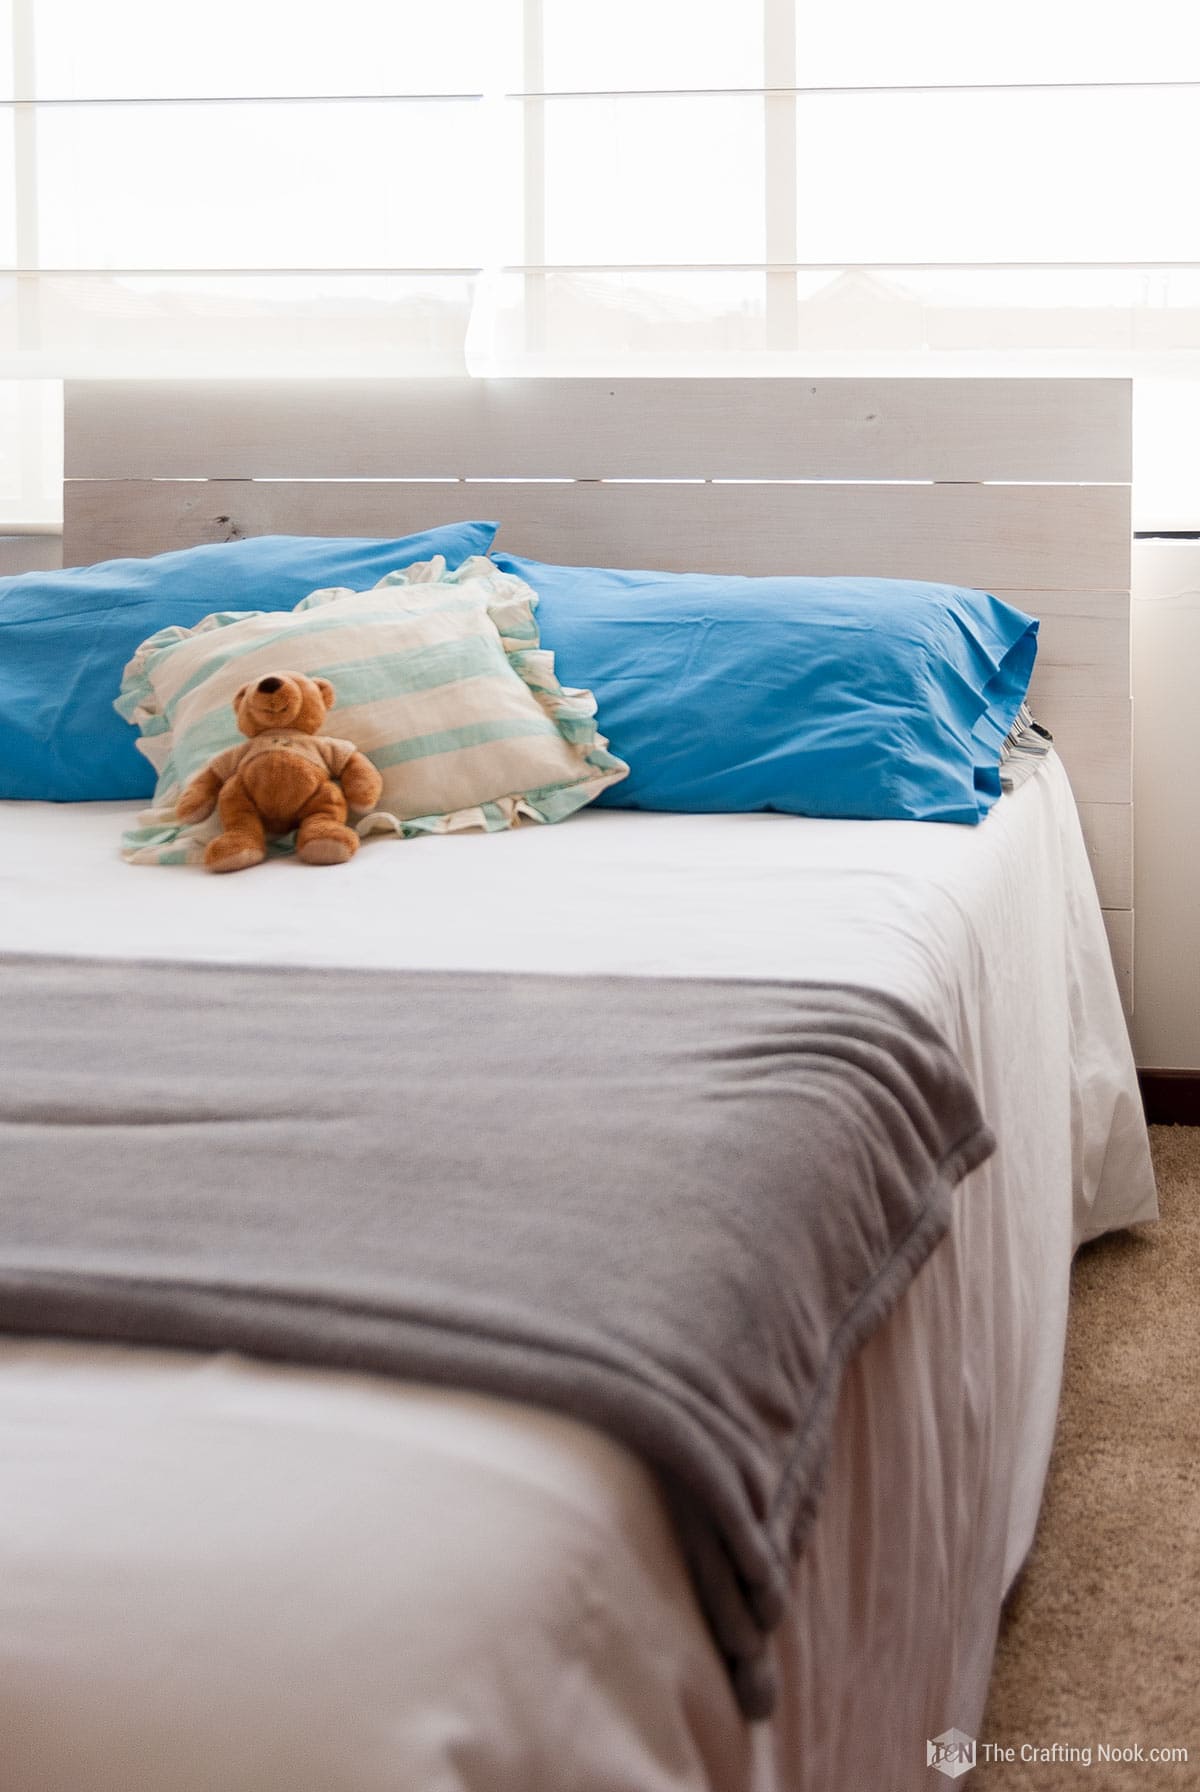
There you go!!!! The painted pallet headboard is ready!!!
… well almost ready.
Step 6: Install your brand new wooden headboard
I didn’t want to damage the wall so I added some felt pads to the back of the support.

Put it against the wall behind your bed and…
Tadaaaaa… Now the headboard is ready to ROCK!!!!!
Crafting Tips
You can use pallet wood planks instead of new wood planks for this project. You will just need ways to keep them together. Pocket holes or brackets are good options.
If you would like more space between planks use a small piece of wood as spacers before screwing down the corner bracket joints.
You can just use natural wood color stains to create a focal point or an accent piece.
To make different bed size headboards you just need the size of the bed and add a few more inches. My bed is full but this can be turned into a twin bed, queen bed, and even king size bed. Just follow the same step-by-step instructions.
I so LOVE LOVE LOVE how my diy wood headboard turned out! It was an awesome addition to our bedroom!!!
I would like to know your thoughts in the comments!
Frequently Asked Questions
It will vary depending on the type of headboard you are aiming for. This one It will take you less than a day and cost less than $50 to make. It could go up or down depending on the details, type of wood, etc.
In general, Pine or Poplar wood are the best choices when you are on a budget. Both are easy to work with and strong enough to build a bed frame. In this case, I used Pinewood planks, you can use new wood boards or pallet wood, or even reclaimed wood. But in some cases, plywood can be used too.
It’s hard to say for sure. Again, it will depend on the headboard you are making. You can just varnish and let the wood color shine, you can stain in other wood shades, you can use oil-based paints, and chalk paint among other ideas.
If you have been wondering if a wood headboard might be too hard when compared to a fabric headboard with foam cushions then I can tell you that, although it feels different than an upholstered headboard, we have found that the wooden headboard is surprisingly comfortable. Also, wood is also easier to clean than upholstery, and more durable too!
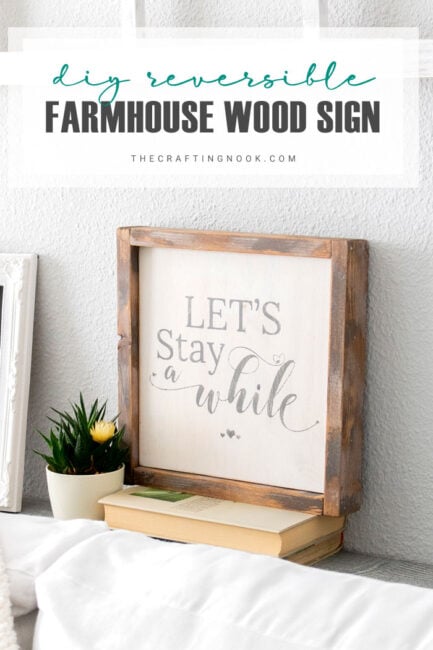
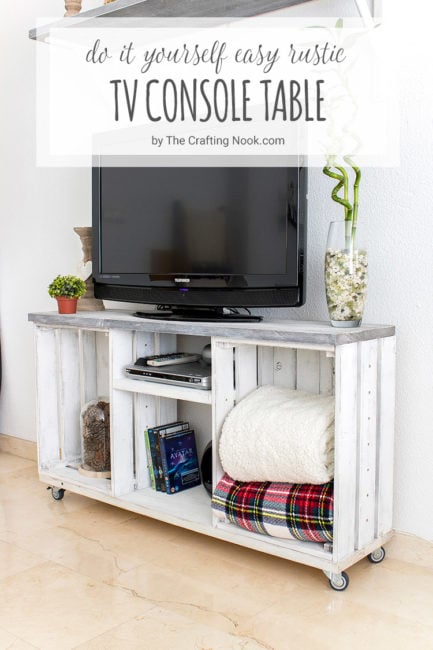
More Woodworking Projects to Try
If you like this wood plank headboard tutorial, you might also love these other woodworking project ideas too:
✂️ Tutorial

DIY Wood Plank Headboard
Tools
- Screwdriver
- Drill
- Hammer
Supplies
- 6 wood boards 150 X 14 cm X 2 cm – 59 X 5.5 X 0.8 In. I used pinewood because I love the natural wood marks and holes.
- 2 pieces of wood 5 cm X 5 cm X 90 cm – 2 x 2 x 35 In. For support on the back
- 6 sets of bed brackets – I used the screw type not the hook one. Also, the store only had 4 so I had to improvise with the corners.
- Wood Screws – Lots of them. Usually corners and bed brackets bring their own but just in case
- White mate indoors and outdoors paint.
- Transparent mate sealant spray.
- Thick brush.
- A Towel – one that you can dispose of later.
- Wood sandpaper.
- Painting Tray
- Protective plastic or cardboard
Instructions
- STEP1: PREP WORK
- I got the wood cut at the home improvement store all in the measures I needed them.
- The first step is to sand down the edges and corners of each board so it won’t be so sharp and kind of give a small rustic look.
- Once each piece has been sanded up, clean each strip to remove all the dust.
- STEP 2: PAINT THE WOOD PLANKS
- I wanted the wood marks to be visible and yet a white look So a wood stain is ideal.
- You can create this effect by watering down latex paint. I made it a 1:1 proportion of paint and water.
- Start painting each board. To get the look I wanted it took 3 coats letting each coat dry for a few minutes.
- You might ask why watering the paint down if I’m applying so many coats. Well, the paint as they come is really thick and it would cover completely the wood in one coat. When you water it down, you create a stain, the wood absorbs slowly the paint and water in each coat and reveals the marks.
- Also, by doing this you measure how much you want the white to show up.
- Let the paint dry for a couple of hours.
- STEP 3: WASH DOWN THE PAINT
- Then with a damp towel rub lightly each board. This makes the paint more evenly and allows you to reveal more wood marks in specific places that might have too much paint.
- Let it dry again completely.
- STEP 4: SEAL EACH WOOD PLANK
- Spray the transparent sealant. It dries really quickly so this is an easy process.
- Just to be sure let it dry for about 30 min so the smell goes away a bit too.
- STEP 5: ASSEMBLE THE WOOD PLANK HEADBOARD
- The final step is adding the support pieces.
- Lay all the boards together back side up in the order you want them.
- Measure about 20 cm {8 to 10 In.} from the edges toward the center and draw a line along all the boards.
- This helps to have a guide to keep boards in place and then to place the support piece.
- As I said I wanted the pallet headboard to be easy to dissemble, so we used bed brackets. I also didn’t want screw heads visible and this was the best option. But you can just screw them together. This part is totally up to you.
- I’ll explain how we did it with the bed brackets.
- Place the support piece in place following the line but the line should be visible on the end side.
- Place the bed brackets between 2 planks and with a pencil, trace the borders and holes on both: boards and support pieces.
- For better results do this process with all the brackets and corners.
- Start screwing on all the pieces.
- Also, I’m so control freak and paranoid that I even added some extra flat joints between planks in the center just in case LOL.
- We placed all the joint pieces inside the back of the headboard between the support pieces so from the sides nothing would be visible.
- There you go!!!! The painted pallet headboard is ready!!!
- … well almost ready.
- STEP 6: INSTALL YOUR BRAND NEW WOODEN HEADBOARD
- I didn’t want to damage the wall so I added some felt pads to the back of the support.
- Put it against the wall behind your bed and…
- Tadaaaaa… Now the headboard is ready to ROCK!!!!!
Share and PIN ME!

Til’ next time…


FREE WORKBOOK
Keeping your Sweet Home Organized
Learn how to create intentional habits and simple routines to Keep Your Home Organized. Plus freebies, printables, exclusive content, and tips.
Disclaimer: By clicking on the “Yes” button above you are giving me your consent to collect and use your information according to the law and My Policy Privacy. Zero Spam I promise!
Thanks for the amazingly detailed tutorial! I love you made something beautiful and stayed in budget. And seems easy enough to do I think. I picked up a couple pallets and have been looking for a cool way to use them and I think I’m going to do this. Do you think it would be more difficult with the pallets verses purchased wood?
Hi Kelly,
To be hones I wouldn’t really know… I wet directly for the new wood and I loved it. I guess it will really depend on what you really like. Also you can always get a vintage/old look following the tutorial of my friend Lisa. The link is in this tutorial.
I have never worked with actual pallet, although I’m crazy about doing it. As soon as I have my own home, I’ll start woking with pallets for sure!
The other side of the story is budget. Where I live some types of wood are not expensive {like the one I used} and since here currency changes I can’t really know how much it could cost with new wood. So I guess you would have to compare where you live.
Not sure if this helps or if I even made sense but I hope so!!!
Thank you so so much for stopping by!!!
XOXO
Absolutely love this, what a cute idea! Totally pinning :) xo
I love that you decided to get creative and work with what was in your budget. The white-washed effect on the boards looks fantastic as well! Would you share you project with us at our weekly furniture-themed link party, Friday’s Furniture Fix? I would love to see you there!
This is really beautiful and it gives the room a kind of coastal vibe because of the blue on the beds. Very nice. To be clear though, this is made from new wood, not an actual palette right – it’s just meant to have that planked look?
Thank you so much. So glad you like it!… Yes that’s right! I didn’t use actual palettes but I definitely wanted a palette-like look or planked look. Find or buying palettes here is not as easy. I would LOVE to have some furniture pieces made with real old palettes. My husband and I love all the things we can make with them.
I just did my first project with a real palette, I will tell you it was a PIA and I don’t relish doing it again. The nails had rusted and fused to the wood and each piece had to be cut off with a circular saw. If you have a timber or lumber store near you, I’ve learned these are places that often have piles of old palettes that have reached the end of their “life” for the store. If you ask around you might be surprised by what is hidden behind a wharehouse.
Love it! This project has been on my to-do list for awhile but I couldn’t decide if I wanted to paint the boards or leave them in their natural color. The white looks great with your decor!
I’m trying to convince my mom to make one for her and hubby and I want to make hers kind of tinted with darker wood color to match her bedroom furniture. I think that it depends on your overall style… If you have some natural wood furniture then you should definitely go for that on your headboard as well, but if most of your furniture is painted then I think that would be the way to go!
Thank you so much for stopping by and I’m so glad you like this project. It was on my to-do list for years LOL.
Your headboard is lovely, I also had the same issue, I went years without a headboard and I hated the bare look and one day hubby and me just went went for it, we drew up our plans spent less than $50 on materials and got to building! Best build ever, we’ve had our headboard for a few years now and even built a platform bed for it a few years after, it’s still our favorite furniture piece in the house. I love it! Enjoy finally having a headboard, it really makes the room!
Thank you so much Carmen, It does make the room and I can’t tell you how much I love it!!!! Thank you for sharing your story and telling me I wasn’t the only one loving the idea of a headboard!!!
Loved having you visiting!!!
Hugs
I love pallette furniture and this one is awesome!
I LOVE palette projects! Definitely bookmarking this one for later. You did a fab job/1!
What a beautiful headboard! This will be a great project for my husband and I.
Thank you Kelly!
I’ve been wanting to make something like this. Thanks for sharing. I love the way yours looks.
Thank you so much Dru… It’s so super easy, you should try!
Hugs
That is absolutely beautiful. Great tutorial!!
Thank you so much!!!
Thank you Diana!!!
This headboard is stunning! And it looks pretty simple to put together too!
This looks so lovely!
I love how this turned out! We recently did a pallet wall in our bonus room and just love the look of it!
OOOH A Palette wall is terrific!!! I would love to make that!!!!
Hugs
This is absolutely beautiful and I love how it came out! And to think, if you purchased a headboard like that, it would have cost you a small fortune!
Oh yeah… At least here, it would have cost me about 4 times more! And besides when you buy, you buy what you can find not what you want… And that’s what I love the most about mine. That exactly how I wanted it!
Thanks so much for stopping by!
Hugs
This looks like a DIY project I could take on myself.
Oh Cami, it turned out fantastically! You did a great job and I am so happy you finally took the plunge and made one :) Hugs, Lisa
Thank you Lisa! You were my inspiration! You gave me the push I needed so you get your credits!!!! XOXO my fiend!
It turned out beautifully! I have 2 beds with no headboards and I always want to make one for them. I just never get around to it. I need to do something simple like this!
You will love how easy it is to make one of these and then how cool it looks in the bedroom! You should definitely try!
Hugs
That turned out to be a fantastic project! We don’t have a headboard either and it looks like college students sleep in our bed (except I make our every morning, ha!) PS I love your manicure! It’s perfect for the season :)
Awwww hhaha thanks…. As incredible as it can be my mani survived the project!!!!! LOL… Love it too
Thanks for your sweet visit
What a fabulous DIY project! This would be perfect for my guest room and much more economical than purchasing new furniture, thanks for the inspiration!