DIY Seashells Jewelry Set
This post may contain affiliate links. Please read our Disclosure Policy.
Hello Everyone! I’m super happy that you are all here today because I’m sharing a fun and crafty seashells jewelry set. It doesn’t take much time to have it done and looks awesome! I just love crafty accessories because they are unique even if you follow the tutorial, it will always have something from you that will make it unique and special!
DIY Seashells Jewelry Set

I’m all about crafty jewelry and these seashells jewelry set made a simple but cute acquisition LOL. I made it within 30 min and I LOVE it! Most of my crafty accessories such as the Mini Clothespin Earrings are quick and easy. I love using it right away!
What you need:

- Pliers {Flat nose with teeth, Round nose, flat bent nose, cut nose and Round nose}
- Beading needles
- Jump rings
- Earring Hooks
- Clasp
- Seashells {I got them at Michael’s}
The jewelry seashells come with the hole made so it’s easy!
First, Using your flat nose pliers, insert jump rings on the seashells holes. In my case I used 9 seashells, 3 on each earrings and 3 on the necklace.

Then insert in the same jump ring a beading needle and close the rump ring.

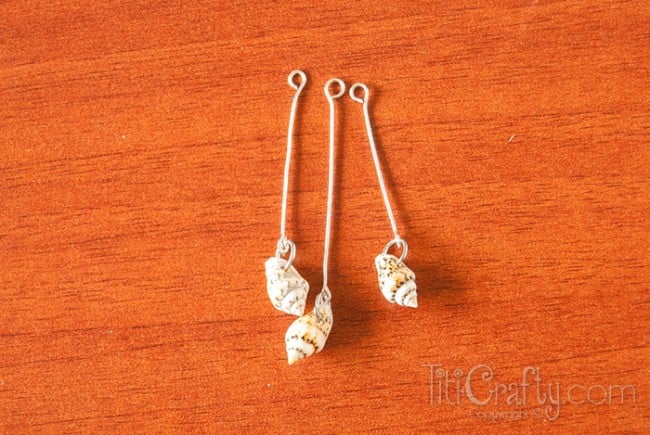
When you have them all ready make groups of 3. Put them together and pull one down so they look like a triangle.

Then cut the remaining wire with the cut nose plier so they all are in the same level.

Now using your round nose pliers make the opposite end of the beading needle rounded trying to make it as similar to the other end as possible.
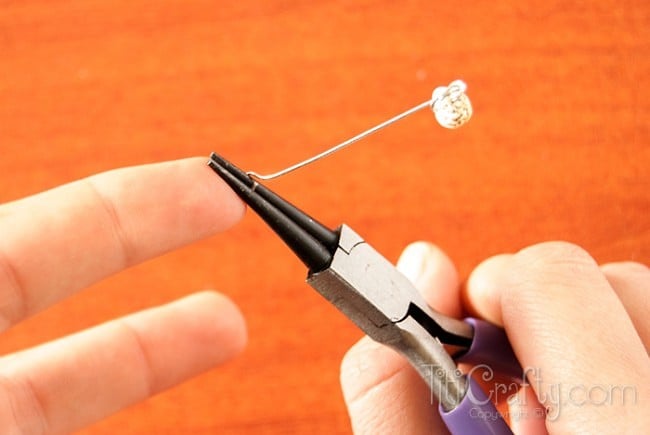
You should have now something like this:
Then Insert in 2 jump rings 3 sheashells-beading needles and an earring hook. And close them. The erd one don’t insert the earring hook since it will go on the necklace.

There you have the earrings! Yayyy!

Now the necklace
Using the round nose pliers I made each straight end of the beading needles rounded leaving a small space to attach them to the next beading needle.

Keep doing this until it gets the size you want it. Keep in mind that the clasp and jump rings will make it a bit longer. Also make sure it always an even number of beading needles because the seashells group will be right in the middle.

Opening just a bit the seashells group jump ring insert it right between beading needles and close it.

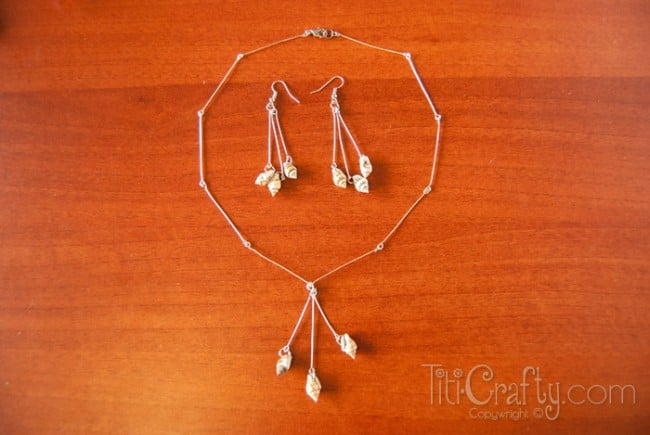
On each end of the chain insert a jump ring and on one end add the clasp.

There you have it! A super cute and fun seashells jewelry set.
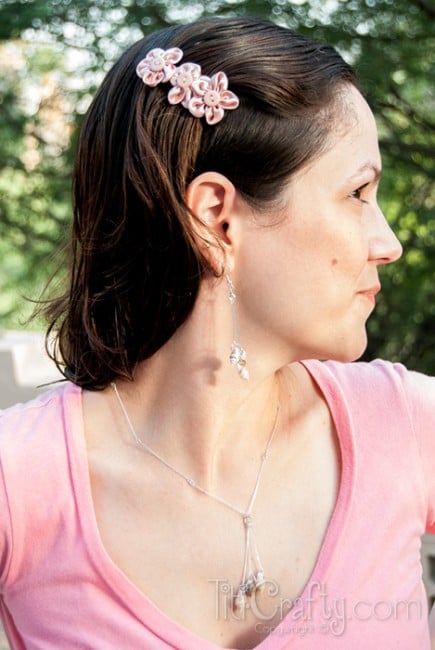
And look how it looks when it’s worn =D


What do you think???? Do you like crafty Jewelry??? Like seashells on your jewelry???
If you like this project you might want to check out these too!


Til’ next time…


FREE WORKBOOK
Keeping your Sweet Home Organized
Learn how to create intentional habits and simple routines to Keep Your Home Organized. Plus freebies, printables, exclusive content, and tips.
Disclaimer: By clicking on the “Yes” button above you are giving me your consent to collect and use your information according to the law and My Policy Privacy. Zero Spam I promise!
I’m having trouble with the step where you make the straight end of the eye pin look like the looped end by curving it around the needle nose pliers. Mine always come out mishapen. Do you have any tips for how to do this effectively? Thanks!
Hi Amy,
Thank you for stopping by and letting me know it was not clear, that way I can update the steps and make it more understandable. For now, you can check out This post with a video dedicated to wire looping. After that, you can follow the rest of my tutorial.
Please if you have any other doubt, don’t hesitate to ask, I’m here to help!
Hugs
Thanks for the tutorial! I was trying to figure something to do with my shells from Michaels. I made the earrings and will be sure to give you credit for the inspiration! Perhaps I will name them The Camila!
Awww Thank you SO much for letting me know you made it. Thank you so so much it’s very thoughtful of you to link back and I’ll be super happy to see it. It’s so cool to have inspired you to make these earrings!
XOXO
Love this idea! I’ll definitely have to stop by Michael’s this weekend to look for those seashells (everything else I already have in my craft box). Such a great idea!
Nice job. I like the look.
They look so elegant and beautiful :)
Thanks so much!!! Glad you like it!!!
HUGS
Very pretty jewelry set and so easy to create! Love it!
I’m so glad you like it Leelo! Thanks so much for stopping by and leaving some love!
Hugs
This is soooo pretty. Will you stop by this to share it on my Wonderful Wednesday Blog Hop? Please do. My readers will LOVE it.
Thanks Sinea, I’ll sure be there! XOXO lots!