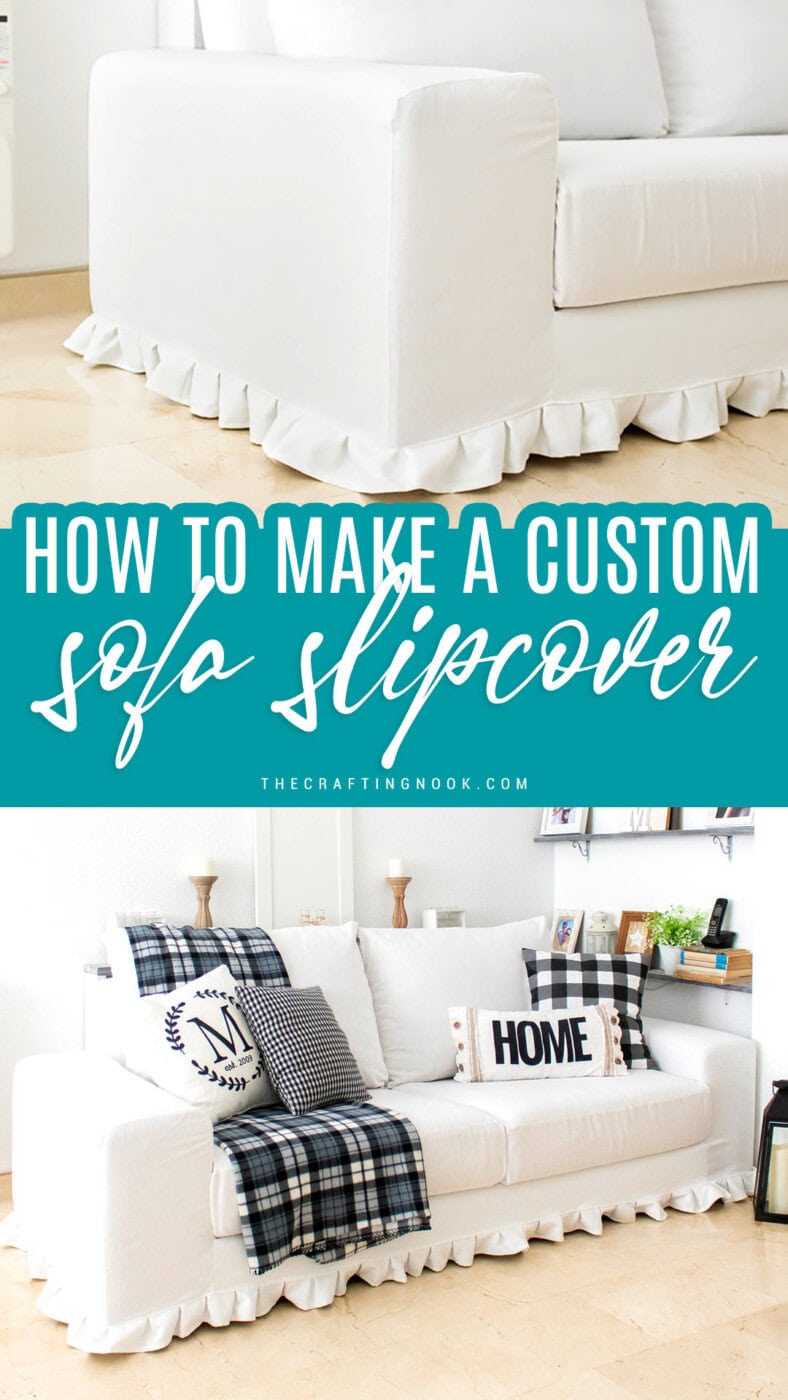
DIY Sofa Slipcover. Update, Refresh, Renew
This post may contain affiliate links. Please read our Disclosure Policy.
Making a DIY sofa slipcover doesn’t have to mean custom upholstery or expensive store-bought covers. In this tutorial, I’m sharing how I made a simple, sewn sofa slipcover that fits a real couch and works for everyday use.
This project is best for confident beginners who can sew straight lines and want a washable, practical way to refresh or protect their sofa.
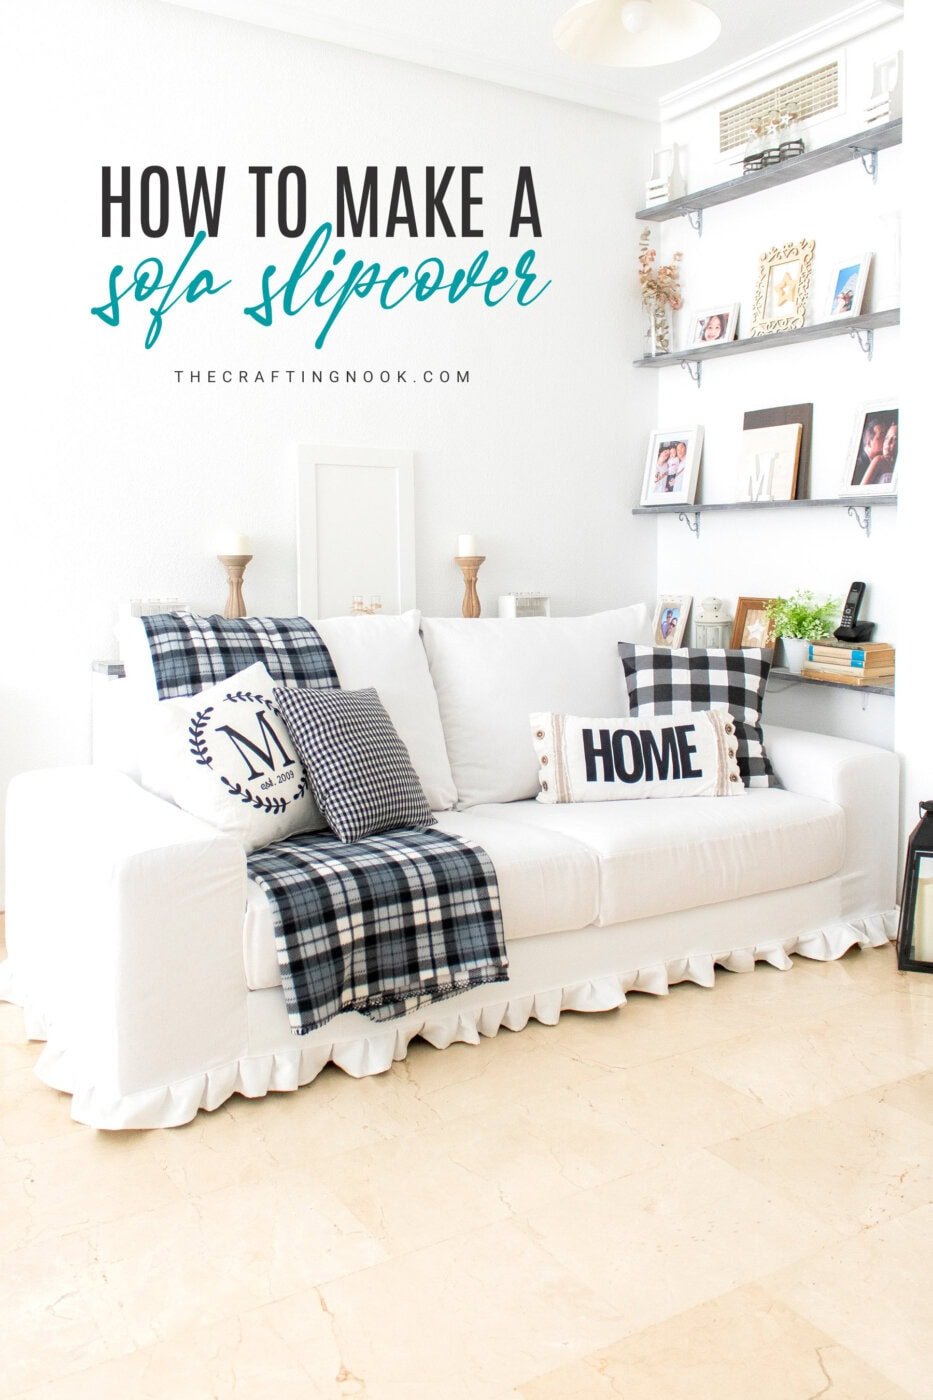
Table of Contents
Sofa Custom Slipcover: What to know before you sew
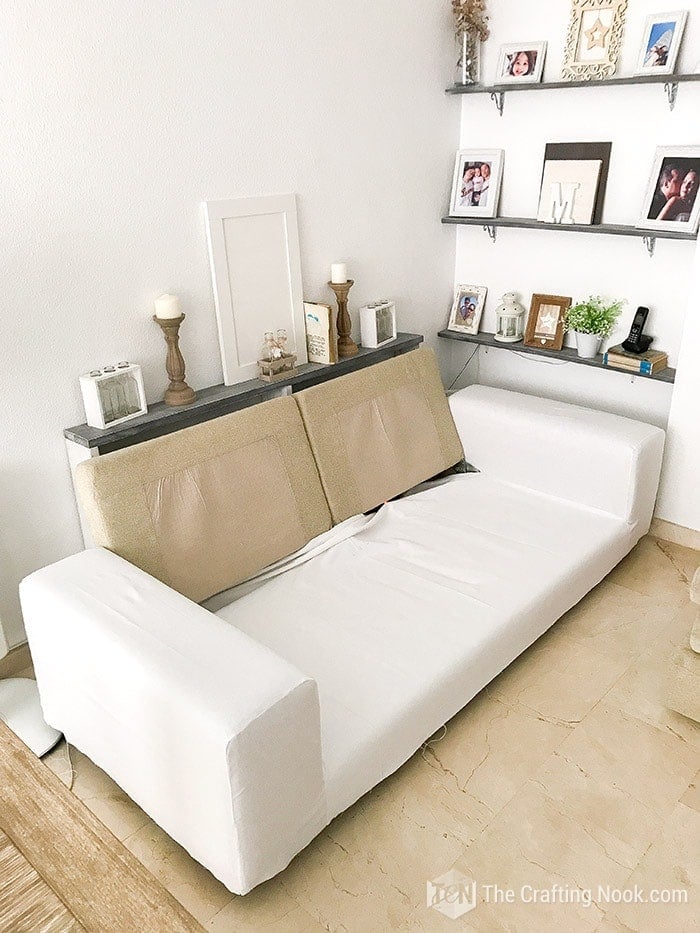
I’ve wanted a white sofa slipcover for years, and I finally made one.
Quick heads-up before we jump in: this is a sewn, fitted slipcover, not a throw-you-lay-on-top. I made separate covers for the main sofa frame and for each cushion (similar to how the Ikea Ektorp style is set up), because I wanted something that stays put when people sit down.
This took me about two weeks working on it little by little. I’m not a professional seamstress, but I’m comfortable sewing straight seams and figuring things out as I go.
One important thing: every sofa is different, so this tutorial won’t be a “cut these exact measurements” type of pattern. Instead, I’m going to show you how I measured each section, how I used the existing cushion covers to create my pieces, and what to watch for so you can adapt the same method to your own couch.
For reference, I used a white canvas. Yes, it needs more maintenance… and yes, I still wanted it anyway.
This fitted slipcover takes more time than store-bought covers, but it stays in place and can be customized to your sofa.
If you prefer watching, I also included a video where I walk through the process and share extra tips along the way.

How to Make A Sofa Slipcover
Project snapshot
- Type of project: Sewing
- Time commitment: +/- 9 hr.
- Customization level: Fully customizable
- Finished result: Removable, washable, functional
- Budget range: Medium
- Skill level: Confident beginner
- Tools required: Sewing machine
- Best for: Boxy/geometric sofas
The way Ikea’s Ektorp sofa inspired the way I approached my sofa: the main frame and each cushion have their own cover.
Want to learn how to make a sofa slipcover? Let me share with you the process.
Supplies:
- Canvas Fabric (drop cloths work too but read that canvas is more durable)
- Felt (for anti-slip)
- Thread
- Upholstery Zipper (for the cushions)
- Velcro
- Fabric Marker
TOOLS:
- Sewing Machine
- Scissors
- Pins
- Measurement tape
- Ruler
Instructions:
I created a quick video tutorial to make it easy for you! However, if you are more of a photo step-by-step kind of person, just scroll down and keep reading for detailed instructions!
Step 1: Prepare the fabric and study your sofa
Before touching the sewing machine, start by washing and drying your fabric. Don’t make the mistake I did and skip this step. With all the excitement of planning, filming, and measuring, I completely forgot to wash mine. Luckily, the fabric didn’t shrink once the covers were finished and washed, but it easily could have.

Once your fabric is ready, take a close look at how your sofa is built. This part matters more than you might think.
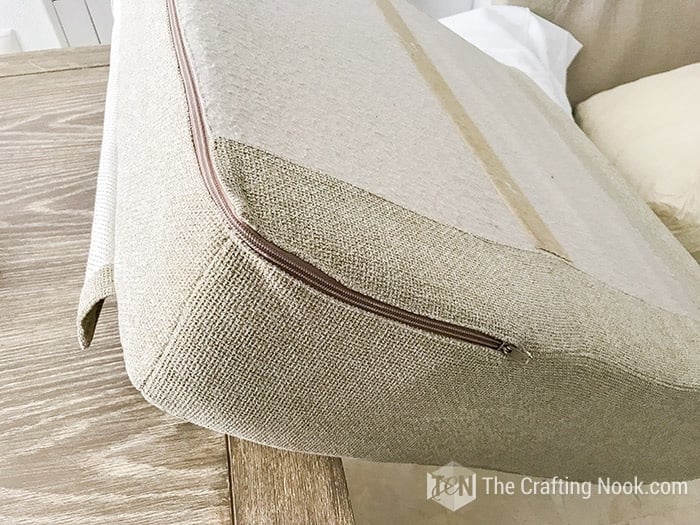
When I removed the cushions, I realized that both the seat and back cushions were attached to each other with a zipper. I found that detail so clever that I decided to replicate it in my new slipcover.

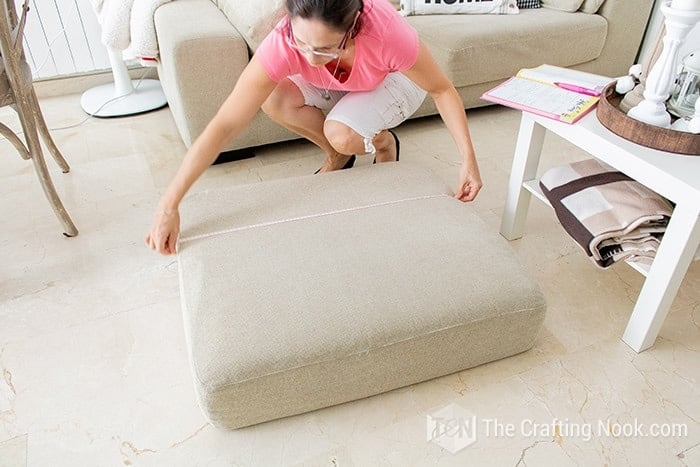
The seat cushion was less fluffy and more structured, so I measured it with the original cover still on. For the back cushion, it was easier to remove the cover completely and measure it flat on the table.
Another detail I wanted to keep was the anti-slip fabric under the seat cushions, which helps prevent them from sliding forward. I recreated that using felt, and it worked perfectly.
Step 2: Measure every sofa piece carefully
Accurate measurements are the foundation of a fitted slipcover, so take your time here.

I measured every piece separately: top, bottom, front, back, and sides. Don’t assume anything is symmetrical. In my case, the front of the seat cushion was actually taller than the back, which could have caused problems later if I hadn’t noticed it early.
I wrote down all the measurements and double-checked them before moving on. Call me paranoid, but this step saved me from wasting fabric.

To allow for seam allowances and a snug fit, I added about 2 cm (½”) to each measurement. This gave me enough room for a clean 1 cm (¼”) seam allowance on all sides.
For zipper placement, I used the original cushion covers as a guide. I marked where the zipper started and ended so I could replicate the same positioning on the new covers.
I followed the same measuring process for the main sofa frame, measuring each section independently instead of trying to treat it as one large piece.
Step 3: Plan the cushion pieces on paper
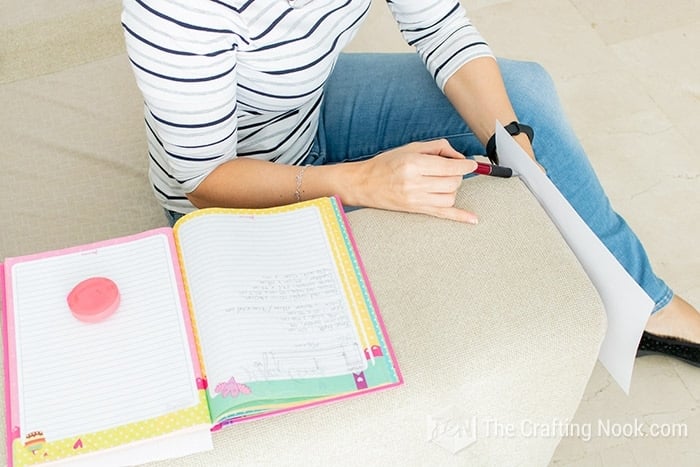
Once all the measurements were done, I sketched each cushion piece on paper with its dimensions. Having everything drawn out made the whole project feel much more manageable.
It’s a lot easier to work through proportions and connections on paper than with bulky cushions spread across the table.

I knew I didn’t want to use the method I’d seen most often, where fabric is draped over the sofa frame and shaped with pins. While that works for many people, my sofa is fairly geometric, which made it a good candidate for creating patterns based on measurements instead.
This approach allowed me to be more precise and, in the end, it worked exactly as I hoped.
Step 4: Draft the main frame pattern
With the plan in place, I moved on to drafting the pattern for the main sofa frame.
Most of the pieces were rectangular, which made things straightforward. The only tricky parts were the arms, since their corners are rounded.
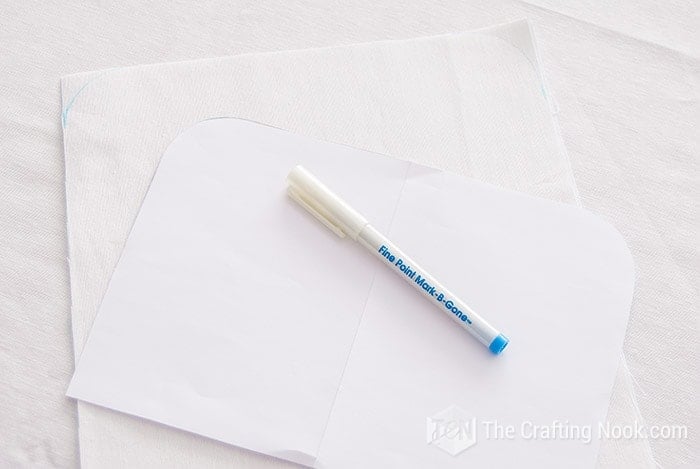
To get those curves just right, I traced the shape of the arm directly onto a piece of paper. Then I folded the paper in half and cut both sides at once so the curves would be perfectly symmetrical.
Once the paper pattern was ready, I transferred it to the fabric and did a quick test fit on the sofa. This step helped me confirm that everything lined up properly before committing to sewing.

Since the sofa arms’ corners are rounded, to get the exact curve I drew its shape on a piece of paper.
Then I folded the paper and cut so both curves would be exactly the same.
Step 5: Creating The Sofa Cushion Patterns
Now it was time to create the patterns for the seat and back cushions.

Since I had two sets of cushions, I used one set to experiment and test before recording and taking photos. I’m very glad I did, because I discovered the hard way that the front side of my seat cushion was taller than the back. Catching that early saved me from wasting fabric.
Each cushion cover is made of five main pieces:
- one top piece
- one bottom piece
- one back piece where the zipper goes
- one continuous band that wraps around the sides
- one optional piece for the anti-slip fabric underneath

*I didn’t include the cushion attachment piece in the graphics because it’s optional, but I explain how to add it later in case you want to replicate that detail.
To make the cushions look cleaner, I chose to cut the front and both sides as one continuous piece instead of sewing several smaller sections together. This is optional, but I liked the finished look better.

I always try to optimize fabric use as much as possible, so with the fabric folded the way it comes from the store, I measured the width and planned how to place each pattern piece to minimize waste.
Step 6: Sew the back cushion covers
I started sewing with the back cushions.
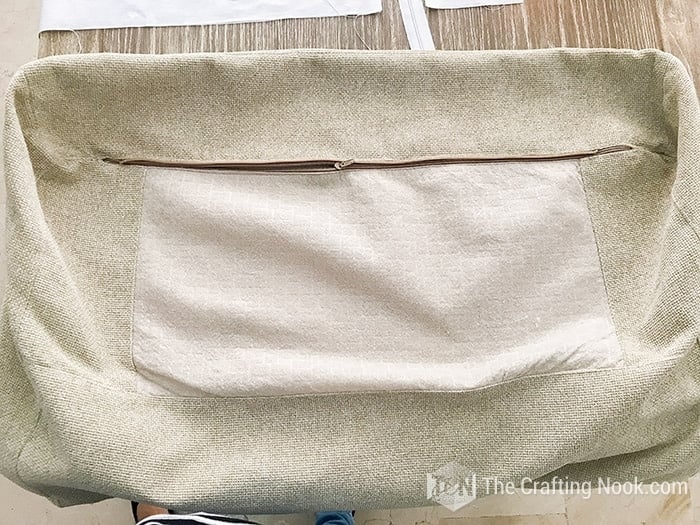
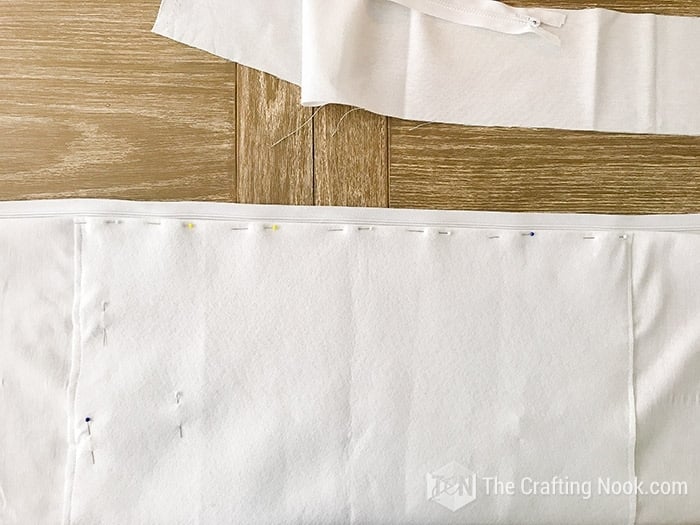
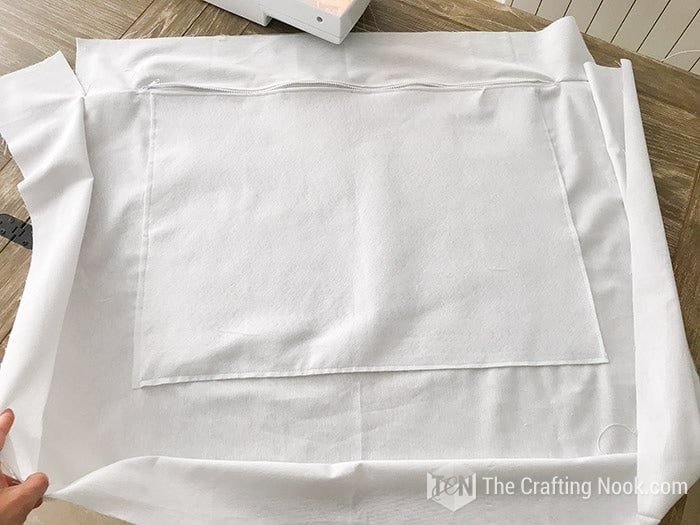
First, I grabbed the back cushion pieces and the felt piece for the anti-slip layer. I folded both widthwise and made small center marks on the fold so I could line them up perfectly. Then I pinned the felt to the fabric with the top edges aligned and stitched around the felt.

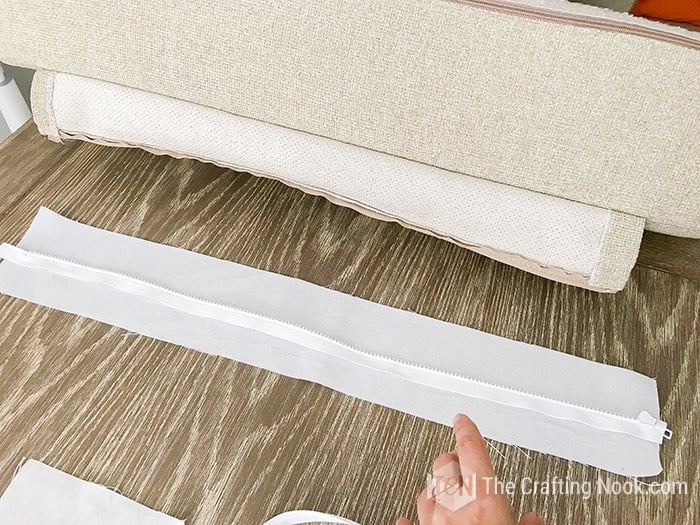
Now, the zipper. Since these are white covers and I knew I’d be washing them often, adding a zipper was a must. I used cut-to-size upholstery zippers, and I cut them to match the length of the original cushion cover zipper (I used the original as my guide for where the zipper should start and end).

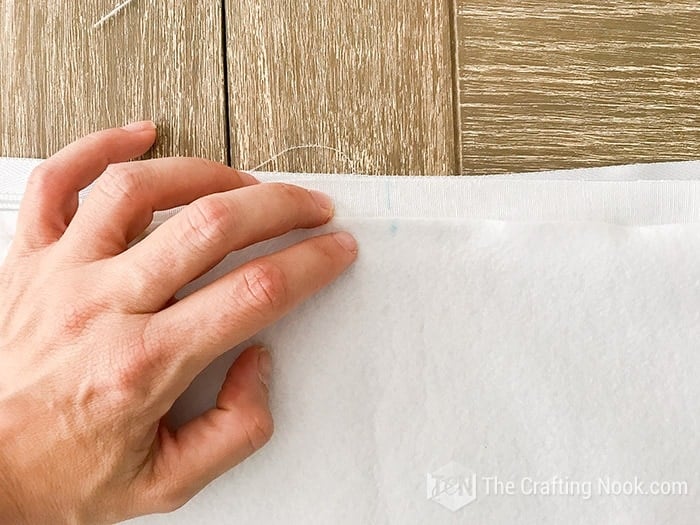
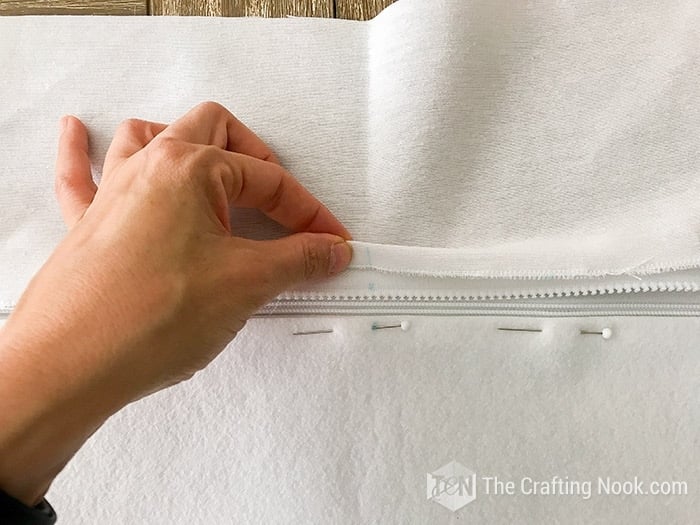
To prep the zipper panel, I folded one edge of the bottom piece and the matching edge of the back piece (the pieces that will sit against the zipper), pressed the fold, and pinned them to the zipper. Because the zipper was shorter than the cushion width, I centered it using center marks on both the zipper and fabric.
Optional attachment detail: to replicate the original cushion connection, I added a jacket-style detachable zipper piece.

I centered it and placed it slightly overlapping the main zipper. The layers (from bottom to top) were: main zipper, jacket zipper, then the folded edge of the back fabric piece. I pinned everything in place and sewed it using a zipper foot.

Since the zipper doesn’t span the full width, I stitched the fabric pieces closed at both ends of the zipper area (basically sewing the bottom piece and side section together as close to the zipper as possible) so the panel becomes one clean strip.
Once the zipper panel was ready, I attached it to the rest of the cushion:
I pinned and sewed the bottom/zipper piece to the long band that wraps around the cushion (right sides together).
Then I pinned and sewed the back/zipper piece to the other end(s) of that band to close the loop.

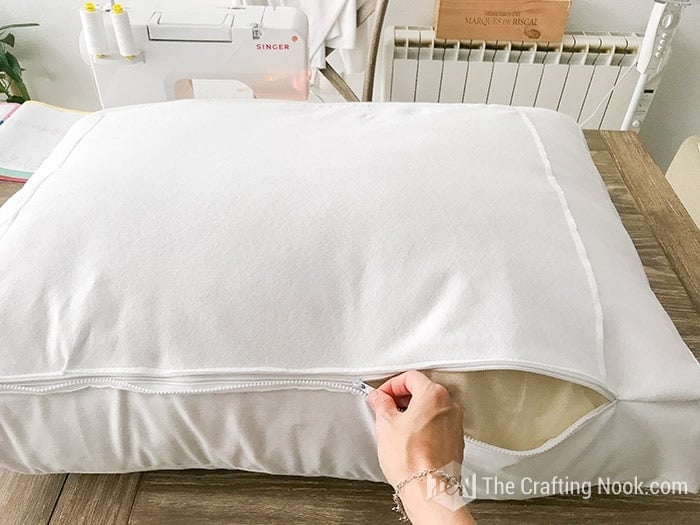
Next, I pinned the top piece on, making sure to open the zipper a little first so I could turn the cover right-side out later. Sewed it all around.


Then I turned the cover right-side out and tested the fit on the cushion.
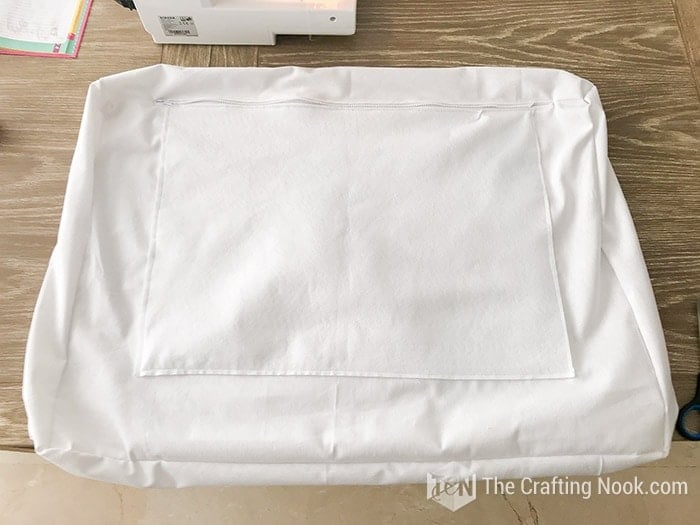
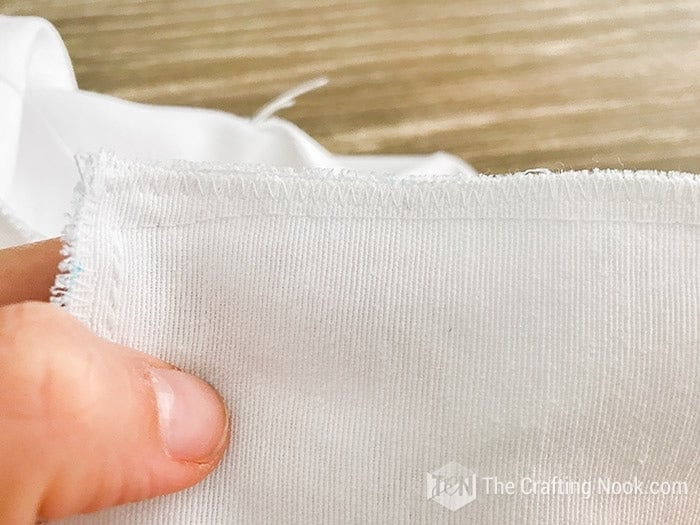
Once I knew it fit correctly, I zig-zagged all raw edges and reinforced the seams from the outside with a top stitch close to the seam for a stronger (and nicer) finish.

Here’s the final cushion!

Step 7: Sew the seat cushion covers
The seat cushions were built using the same construction method as the back cushions, with one main difference: the zipper placement allows the seat cushion to attach directly to the back cushion.
To get the placement right, I worked next to the original cushion, marking center points and aligning the attachment zipper exactly where it needed to go. Both the attachment piece and the back piece were positioned right side up before sewing.

I zig-zagged the raw edges, folded and stitched the zipper edges, and tested the connection to make sure the cushions attached smoothly before sewing everything permanently.
Once the attachment was in place, the rest of the construction followed the exact same steps as the back cushions, including installing the main zipper, assembling the side band, attaching the top piece, and finishing all seams.

To install the Zipper, I just pinned the zipper as before but this time I followed the curve to on both corners to the sides and stitched.
Here, I didn’t bother to hide the zipper because it will not be visible. It will face the back of the sofa.

After repeating the process for the second set of cushions, all pieces fit together neatly and stayed perfectly aligned once installed.

Look how clever the attachments are!
Step 8: Sew the main frame slipcover
This is the most complex part of the project, so take your time and test the fit often.
I started with the sofa arms. Since the arm corners are rounded, tracing was the best way to get an accurate shape.
I placed a piece of paper over the arm, traced the curve carefully, then refined the shape using a ruler where needed. Folding the paper and cutting both sides at once helped keep the curves perfectly symmetrical.
Once the paper pattern was ready, I transferred it to the fabric and pinned it in place on the sofa arm to test the fit.

I adjusted it until it fit smoothly, including the tight areas where the arm meets the seat and back.
After confirming the fit, I sewed the front and back arm pieces to the main arm panel. I tested the cover again directly on the sofa before repeating the exact same process for the other arm.

With both arm covers done, I removed them and moved on to the base of the sofa frame.
I pinned the long base piece (the piece that runs along the bottom of the sofa) to the front edge of one arm cover, right sides together, aligning the seams carefully. I sewed this section until I reached the sofa hardware.

Because my sofa has a reclining back mechanism, I stopped sewing at that point and hemmed the remaining fabric instead of closing it completely. If your sofa doesn’t have this kind of hardware, you can cut the fabric where the original seam is and add seam allowance before sewing.
Next, I placed the partially assembled cover back onto the sofa and folded the fabric wrong side up around the mechanism area. Using a pencil, I marked exactly where the opening needed to be so the fabric wouldn’t interfere with the moving parts.


I removed the cover, cut along the marked lines, and used those cuts as the hem.

This finish isn’t perfect, but it’s completely hidden once the cover is on.
Once everything fit properly, I zig-zagged all raw edges and reinforced the seams just like I did with the cushions.
As a final detail for this section, I sewed a strip of felt along the base of the slipcover. This aligns with the felt on the bottom of the seat cushions and helps prevent shifting.
The last step was hemming the back pieces and installing the velcro that will keep the cover in place on the back of the sofa.

Step 9: Cover the sofa back supports
To finish the structure of the sofa, I created covers for the back supports.
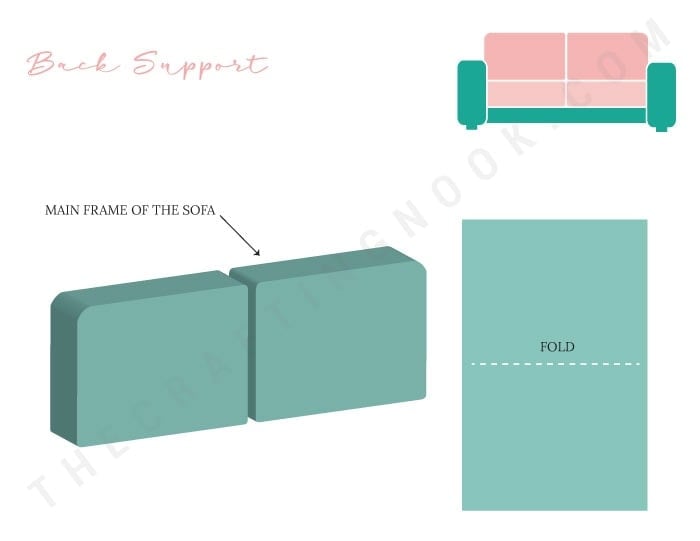
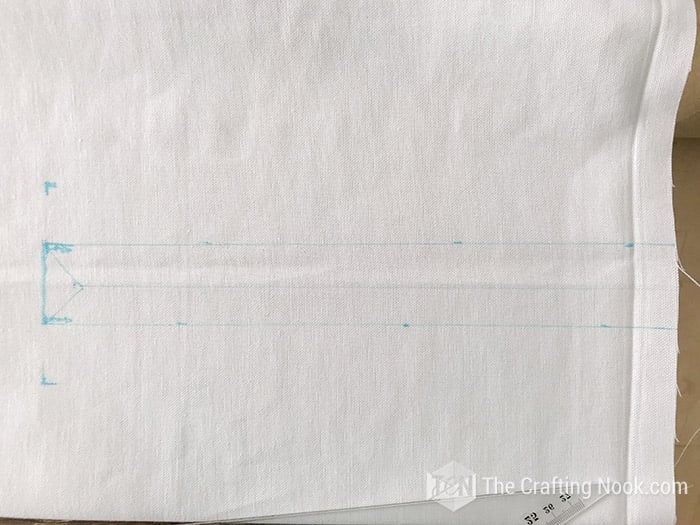
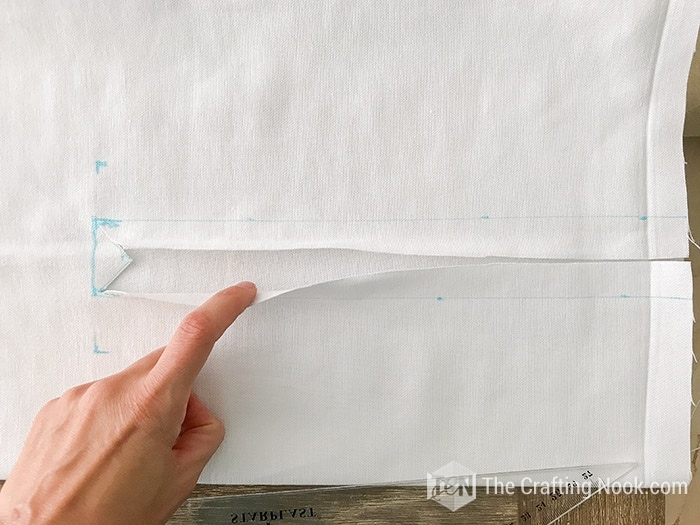
I cut two fabric pieces following the shape shown in the pattern. Each piece was folded right sides together and stitched along both sides until reaching the area where the hardware begins. The remaining edge was hemmed at a slight angle toward the center so it wouldn’t interfere with the mechanism.

I placed the cover on the sofa and used a pin to mark the top corner on each side. After removing the cover, I stitched along that mark to create a small triangular seam, which helps the cover fit snugly around the support.
I turned the cover right side out, tested the fit again, and made any small adjustments needed.

Once I was happy with the fit, I zig-zagged the raw edges, hemmed both ends, and added velcro to close the cover securely.

I repeated the same process for the second back support.

Step 10: Add the finishing details
For the final touch, I wanted the slipcover to look soft and polished, so I added a cute ruffle or pleats along the bottom edge.
I placed the ruffle strip and the bottom edge of the slipcover right sides together, starting from the back of one arm. I stitched all the way around the sofa until reaching the back of the opposite arm.

As with the rest of the project, I zig-zagged the raw edges and reinforced the seam by stitching close to the edge on the right side. This made the finish stronger and cleaner.
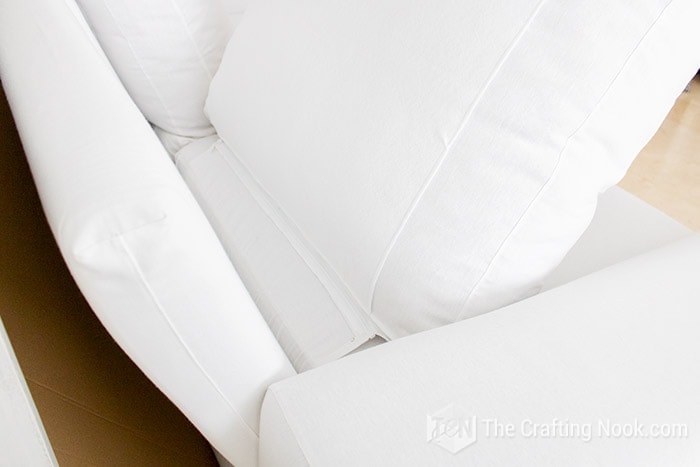
Once everything was assembled, it was time to put the slipcover on the sofa.
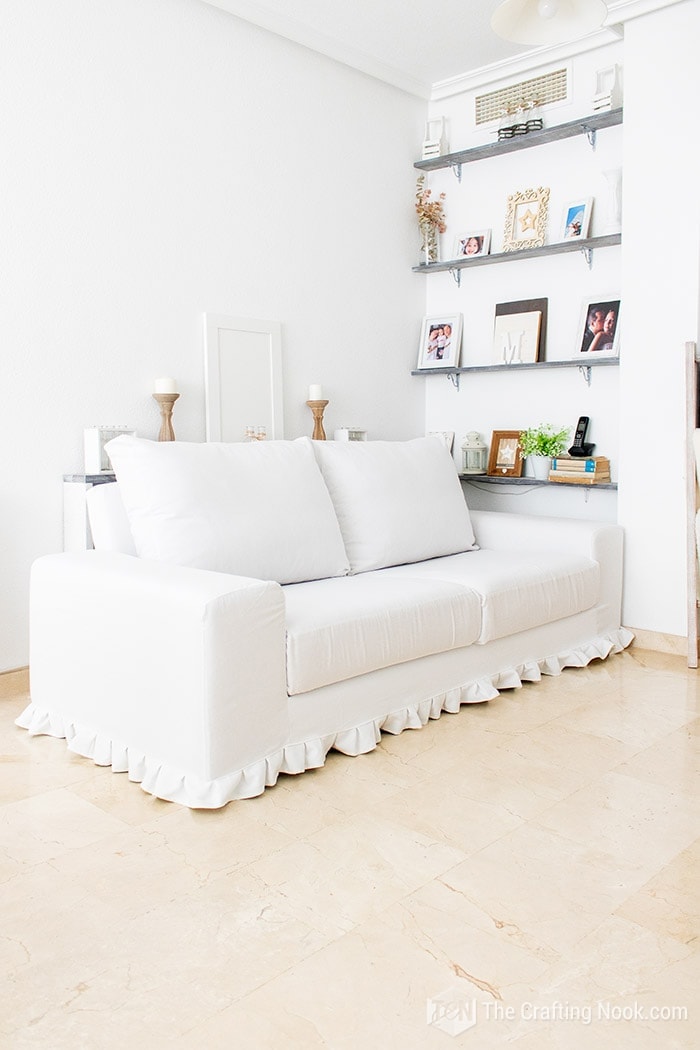
And just like that, the slipcover was finished. The sofa had a completely new look, and all the pieces fit together exactly as planned.
Sewing Tips
- Prewash and dry your fabric before cutting. Even fabrics labeled “pre-shrunk” can change slightly after washing.
- Measure every sofa piece independently. Don’t assume both sides or edges are identical.
- Test-fit often, especially on the sofa arms and around any hardware or moving parts.
- Use heavier fabric (like canvas or duck cloth) for better structure and durability.
- Add zippers whenever possible. They make washing and re-installing the covers much easier.
- Take photos or notes as you go. This helps if you ever want to remake or adjust the slipcover later.
¡Voila! The Sofa Slipcover is on and rocking!
My sofa has a brand-new look! Now it looks gorgeous and like a brand new one!

I just LOOOVE it.

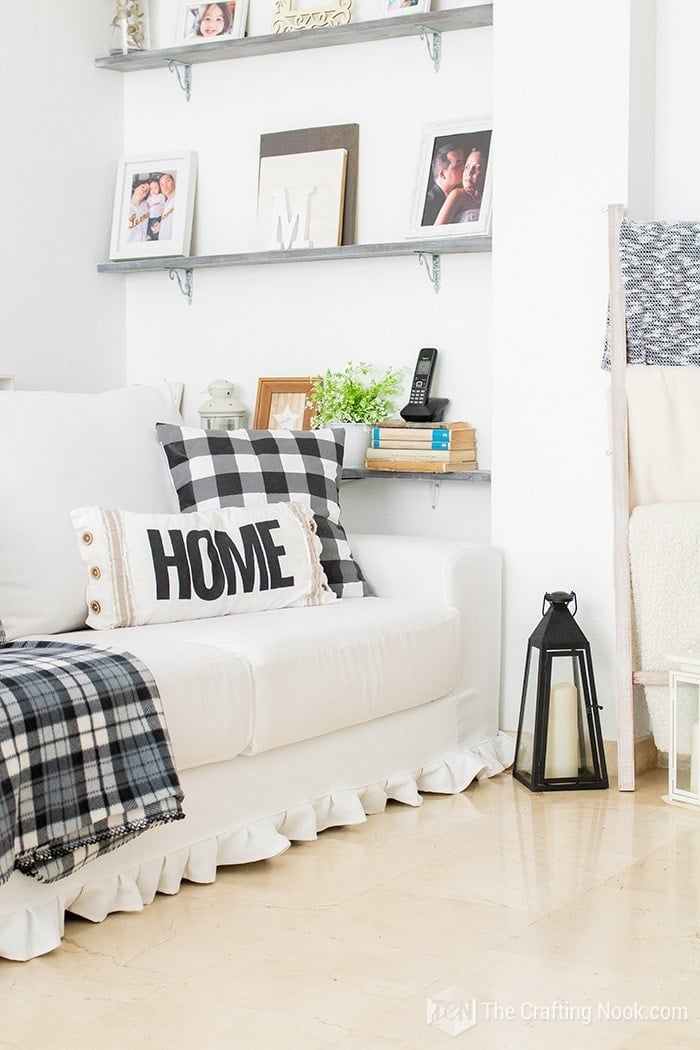
Now I can play with throw pillows, cushions, and blankets to match the season and holidays!
When I was about halfway through the process, I discovered Megan’s slipcover tutorial from Two Feet First. Her strategy confirmed I was not that far from the right path.
I’m so excited!
Alternatives and variations
Different sofa shapes:
This method works best for boxy or geometric sofas. Sofas with very curved arms or tufted backs may require additional pattern adjustments.
No cushion attachments:
If your cushions are not attached to each other, you can skip the attachment zipper and make each cushion cover separately.
No ruffle finish:
You can leave the bottom edge straight or add a simple hem if you prefer a cleaner, more modern look.
Different fabrics:
Linen blends, twill, or upholstery-weight cotton can work well, but lighter fabrics may wrinkle or shift more with use.
Simpler approach:
If drafting patterns feels overwhelming, you can drape fabric directly on the sofa and pin it in place, though this usually requires more trial and error.
Frequently Asked Questions
No. This is a sewn, fitted slipcover designed for a more tailored and durable result.
You don’t need to be a professional, but you do need some expertise and should be comfortable sewing straight seams, installing zippers, and adjusting patterns as needed.
This method works best for boxy or geometric sofas. Sofas with very rounded or complex shapes may require additional adjustments.
Fabric requirements vary depending on sofa size and design. Measure your sofa carefully and add extra fabric for seam allowances and testing.
Yes. That’s one of the benefits of making a removable slipcover. Washing instructions depend on the fabric you choose.
This project took me about two weeks working on it little by little. Timing will vary depending on your schedule and experience level.
More Sewing Projects to Try
If you found this Sofa Slipcover tutorial useful, you might love these other sewing project ideas too:

✂️ Tutorial

DIY Sofa slipcover Tutorial
Tools
- Sewing Machine
- scissors
- Pins
- Measurement tape
- Ruler
Supplies
- Canvas Fabric drop cloths work too but read that canvas is more durable
- Felt for anti-slip
- Thread
- Upholstery Zipper for the cushions
- Velcro
- Fabric Marker
Instructions
Step 1: Prepare the fabric and study your sofa
- Before touching the sewing machine, start by washing and drying your fabric. Don’t make the mistake I did and skip this step. With all the excitement of planning, filming, and measuring, I completely forgot to wash mine. Luckily, the fabric didn’t shrink once the covers were finished and washed, but it easily could have.
- Once your fabric is ready, take a close look at how your sofa is built. This part matters more than you might think.
- When I removed the cushions, I realized that both the seat and back cushions were attached to each other with a zipper. I found that detail so clever that I decided to replicate it in my new slipcover.
- The seat cushion was less fluffy and more structured, so I measured it with the original cover still on. For the back cushion, it was easier to remove the cover completely and measure it flat on the table.
- Another detail I wanted to keep was the anti-slip fabric under the seat cushions, which helps prevent them from sliding forward. I recreated that using felt, and it worked perfectly.
Step 2: Measure every sofa piece carefully
- Accurate measurements are the foundation of a fitted slipcover, so take your time here.
- I measured every piece separately: top, bottom, front, back, and sides. Don’t assume anything is symmetrical. In my case, the front of the seat cushion was actually taller than the back, which could have caused problems later if I hadn’t noticed it early.
- I wrote down all the measurements and double-checked them before moving on. Call me paranoid, but this step saved me from wasting fabric.
- To allow for seam allowances and a snug fit, I added about 2 cm (½”) to each measurement. This gave me enough room for a clean 1 cm (¼”) seam allowance on all sides.
- For zipper placement, I used the original cushion covers as a guide. I marked where the zipper started and ended so I could replicate the same positioning on the new covers.
- I followed the same measuring process for the main sofa frame, measuring each section independently instead of trying to treat it as one large piece.
Step 3: Plan the cushion pieces on paper
- Once all the measurements were done, I sketched each cushion piece on paper with its dimensions. Having everything drawn out made the whole project feel much more manageable.
- It’s a lot easier to work through proportions and connections on paper than with bulky cushions spread across the table.
- I knew I didn’t want to use the method I’d seen most often, where fabric is draped over the sofa frame and shaped with pins. While that works for many people, my sofa is fairly geometric, which made it a good candidate for creating patterns based on measurements instead.
- This approach allowed me to be more precise and, in the end, it worked exactly as I hoped.
Step 4: Draft the main frame pattern
- With the plan in place, I moved on to drafting the pattern for the main sofa frame.
- Most of the pieces were rectangular, which made things straightforward. The only tricky parts were the arms, since their corners are rounded.
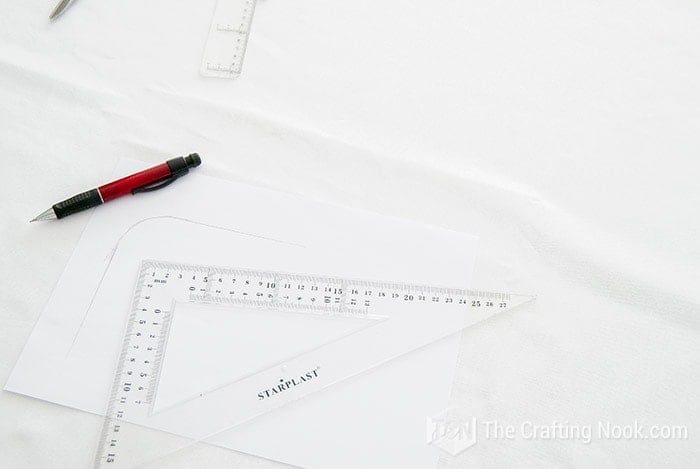
- To get those curves just right, I traced the shape of the arm directly onto a piece of paper. Then I folded the paper in half and cut both sides at once so the curves would be perfectly symmetrical.
- Once the paper pattern was ready, I transferred it to the fabric and did a quick test fit on the sofa. This step helped me confirm that everything lined up properly before committing to sewing.
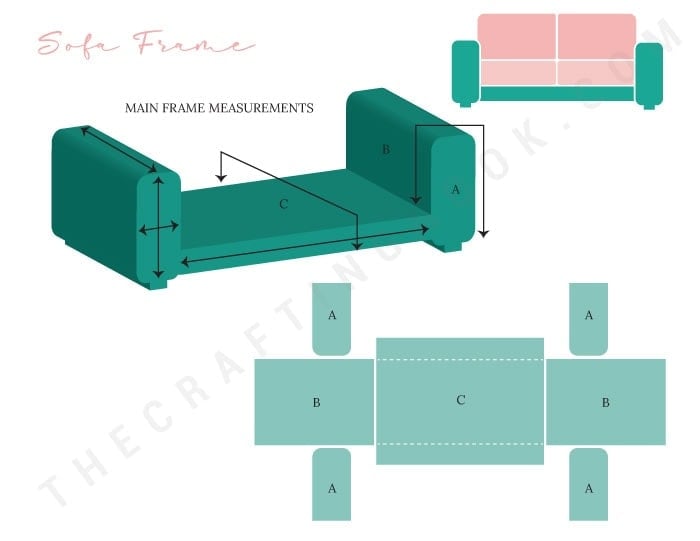
- Sofa frame pattern diagram showing main frame measurements and fabric layout pieces labeled A, B, and C for a DIY sofa slipcover.
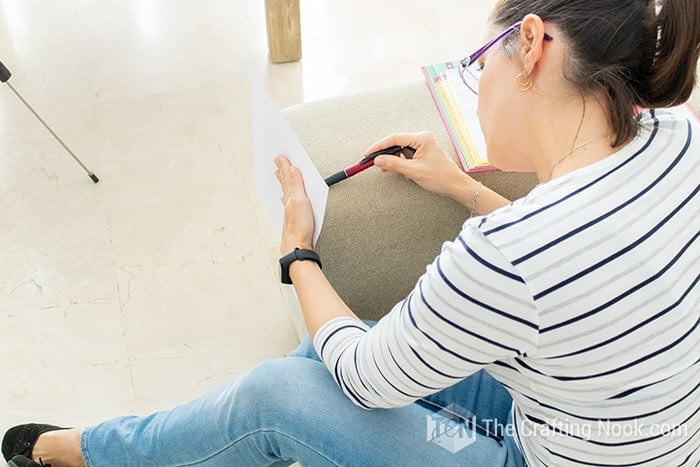
- Since the sofa arms’ corners are rounded, to get the exact curve I drew its shape on a piece of paper.
- Tracing a curved sofa arm pattern onto paper and fabric for the sofa slipcover.
- Then I folded the paper and cut so both curves would be exactly the same.
Step 5: Creating The Sofa Cushion Patterns
- Now it was time to create the patterns for the seat and back cushions.
- Diagram showing pattern pieces for a back cushion slipcover, including top, back, sides, and zipper placement.
- Since I had two sets of cushions, I used one set to experiment and test before recording and taking photos. I’m very glad I did, because I discovered the hard way that the front side of my seat cushion was taller than the back. Catching that early saved me from wasting fabric.
- Each cushion cover is made of five main pieces: one top piece, one bottom piece, one back piece where the zipper goes, one continuous band that wraps around the sides, one optional piece for the anti-slip fabric underneath
- I didn’t include the cushion attachment piece in the graphics because it’s optional, but I explain how to add it later in case you want to replicate that detail.
- To make the cushions look cleaner, I chose to cut the front and both sides as one continuous piece instead of sewing several smaller sections together. This is optional, but I liked the finished look better.
- I always try to optimize fabric use as much as possible, so with the fabric folded the way it comes from the store, I measured the width and planned how to place each pattern piece to minimize waste.
Step 6: Sew the back cushion covers
- I started sewing with the back cushions.
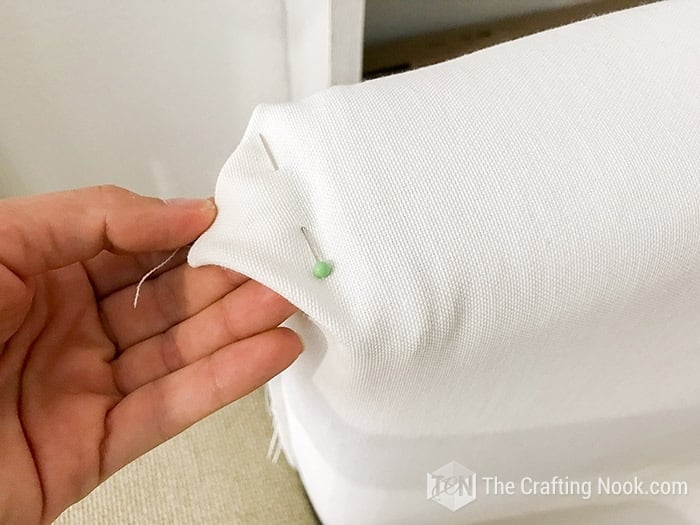
- First, I grabbed the back cushion pieces and the felt piece for the anti-slip layer. I folded both widthwise and made small center marks on the fold so I could line them up perfectly. Then I pinned the felt to the fabric with the top edges aligned and stitched around the felt.
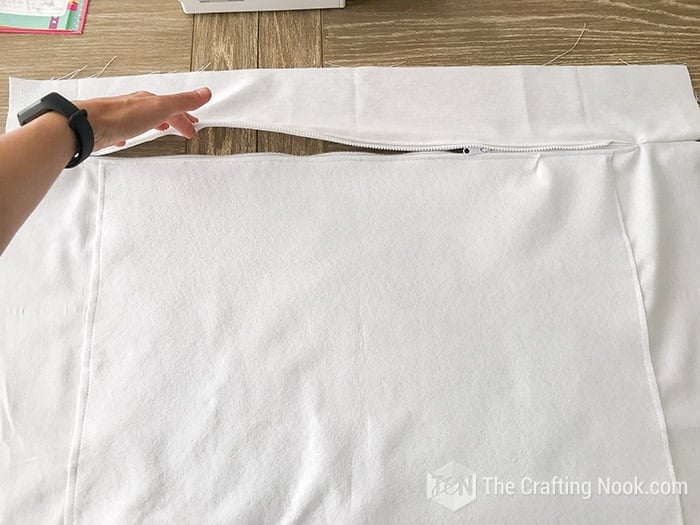
- Now, the zipper. Since these are white covers and I knew I’d be washing them often, adding a zipper was a must. I used cut-to-size upholstery zippers, and I cut them to match the length of the original cushion cover zipper (I used the original as my guide for where the zipper should start and end).
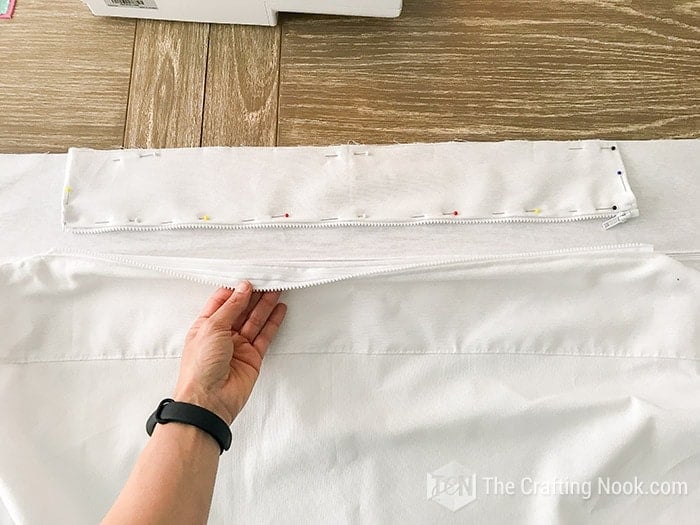
- To prep the zipper panel, I folded one edge of the bottom piece and the matching edge of the back piece (the pieces that will sit against the zipper), pressed the fold, and pinned them to the zipper. Because the zipper was shorter than the cushion width, I centered it using center marks on both the zipper and fabric.
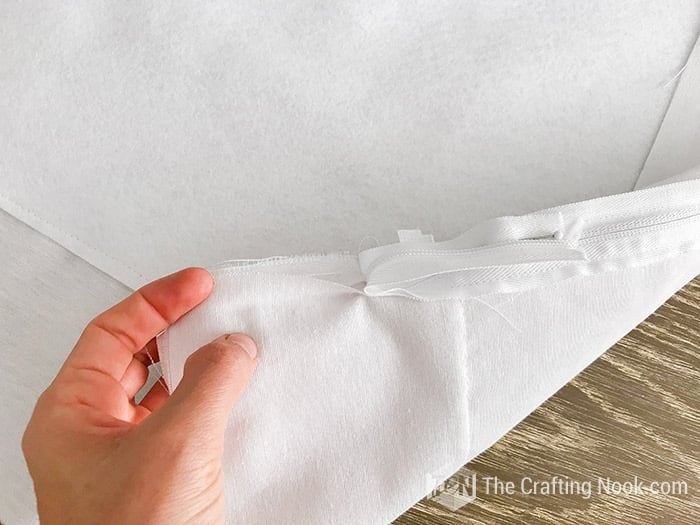
- Optional attachment detail: to replicate the original cushion connection, I added a jacket-style detachable zipper piece.
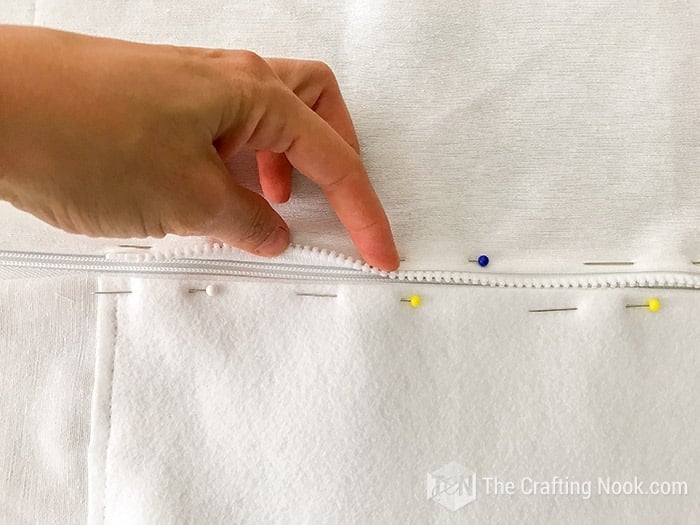
- I centered it and placed it slightly overlapping the main zipper. The layers (from bottom to top) were: main zipper, jacket zipper, then the folded edge of the back fabric piece. I pinned everything in place and sewed it using a zipper foot.
- Pinned everything in place
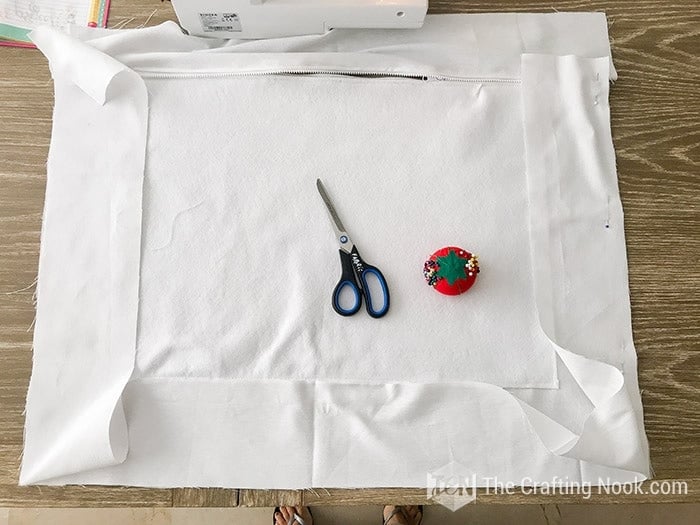
- Since the zipper doesn’t span the full width, I stitched the fabric pieces closed at both ends of the zipper area (basically sewing the bottom piece and side section together as close to the zipper as possible) so the panel becomes one clean strip.
- Once the zipper panel was ready, I attached it to the rest of the cushion:
- I pinned and sewed the bottom/zipper piece to the long band that wraps around the cushion (right sides together).
- Then I pinned and sewed the back/zipper piece to the other end(s) of that band to close the loop.
- Next, I pinned the top piece on, making sure to open the zipper a little first so I could turn the cover right-side out later. Sewed it all around.
- Then I turned the cover right-side out and tested the fit on the cushion.
- Once I knew it fit correctly, I zig-zagged all raw edges and reinforced the seams from the outside with a top stitch close to the seam for a stronger (and nicer) finish.
Step 7: Sew the seat cushion covers
- The seat cushions were built using the same construction method as the back cushions, with one main difference: the zipper placement allows the seat cushion to attach directly to the back cushion.
- To get the placement right, I worked next to the original cushion, marking center points and aligning the attachment zipper exactly where it needed to go. Both the attachment piece and the back piece were positioned right side up before sewing.
- I zig-zagged the raw edges, folded and stitched the zipper edges, and tested the connection to make sure the cushions attached smoothly before sewing everything permanently.
- Once the attachment was in place, the rest of the construction followed the exact same steps as the back cushions, including installing the main zipper, assembling the side band, attaching the top piece, and finishing all seams.
- To install the Zipper, I just pinned the zipper as before but this time I followed the curve to on both corners to the sides and stitched.
- Here, I didn’t bother to hide the zipper because it will not be visible. It will face the back of the sofa.
- After repeating the process for the second set of cushions, all pieces fit together neatly and stayed perfectly aligned once installed.
Step 8: Sew the main frame slipcover
- This is the most complex part of the project, so take your time and test the fit often.
- I started with the sofa arms. Since the arm corners are rounded, tracing was the best way to get an accurate shape.
- I placed a piece of paper over the arm, traced the curve carefully, then refined the shape using a ruler where needed. Folding the paper and cutting both sides at once helped keep the curves perfectly symmetrical.
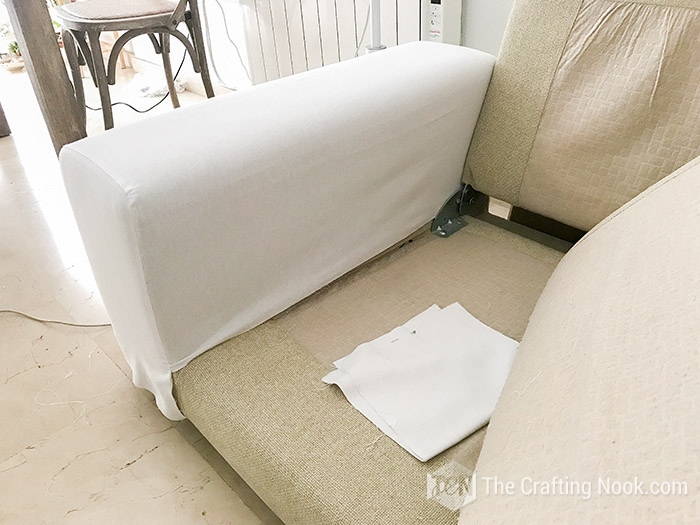
- Once the paper pattern was ready, I transferred it to the fabric and pinned it in place on the sofa arm to test the fit.
- I adjusted it until it fit smoothly, including the tight areas where the arm meets the seat and back.
- After confirming the fit, I sewed the front and back arm pieces to the main arm panel. I tested the cover again directly on the sofa before repeating the exact same process for the other arm.
- With both arm covers done, I removed them and moved on to the base of the sofa frame.
- I pinned the long base piece (the piece that runs along the bottom of the sofa) to the front edge of one arm cover, right sides together, aligning the seams carefully. I sewed this section until I reached the sofa hardware.
- Because my sofa has a reclining back mechanism, I stopped sewing at that point and hemmed the remaining fabric instead of closing it completely. If your sofa doesn’t have this kind of hardware, you can cut the fabric where the original seam is and add seam allowance before sewing.
- Next, I placed the partially assembled cover back onto the sofa and folded the fabric wrong side up around the mechanism area. Using a pencil, I marked exactly where the opening needed to be so the fabric wouldn’t interfere with the moving parts.
- I removed the cover, cut along the marked lines, and used those cuts as the hem.
- joining with pins and then sewing
- This finish isn’t perfect, but it’s completely hidden once the cover is on.
- Once everything fit properly, I zig-zagged all raw edges and reinforced the seams just like I did with the cushions.
- As a final detail for this section, I sewed a strip of felt along the base of the slipcover. This aligns with the felt on the bottom of the seat cushions and helps prevent shifting.
- The last step was hemming the back pieces and installing the velcro that will keep the cover in place on the back of the sofa.
Step 9: Cover the sofa back supports
- To finish the structure of the sofa, I created covers for the back supports.
- I cut two fabric pieces following the shape shown in the pattern. Each piece was folded right sides together and stitched along both sides until reaching the area where the hardware begins. The remaining edge was hemmed at a slight angle toward the center so it wouldn’t interfere with the mechanism.
- I placed the cover on the sofa and used a pin to mark the top corner on each side. After removing the cover, I stitched along that mark to create a small triangular seam, which helps the cover fit snugly around the support.
- I turned the cover right side out, tested the fit again, and made any small adjustments needed.
- Once I was happy with the fit, I zig-zagged the raw edges, hemmed both ends, and added velcro to close the cover securely.
- I repeated the same process for the second back support.
Step 10: Add the finishing details
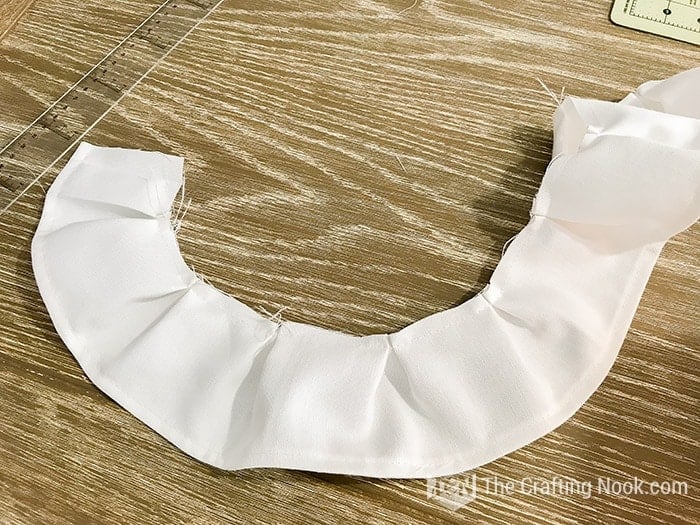
- For the final touch, I wanted the slipcover to look soft and polished, so I added a cute ruffle or pleats along the bottom edge.
- I placed the ruffle strip and the bottom edge of the slipcover right sides together, starting from the back of one arm. I stitched all the way around the sofa until reaching the back of the opposite arm.
- As with the rest of the project, I zig-zagged the raw edges and reinforced the seam by stitching close to the edge on the right side. This made the finish stronger and cleaner.
- Once everything was assembled, it was time to put the slipcover on the sofa.
- And just like that, the slipcover was finished. The sofa had a completely new look, and all the pieces fit together exactly as planned.
Share and PIN ME!!!!

Til’ next time…


FREE WORKBOOK
Keeping your Sweet Home Organized
Learn how to create intentional habits and simple routines to Keep Your Home Organized. Plus freebies, printables, exclusive content, and tips.
Disclaimer: By clicking on the “Yes” button above you are giving me your consent to collect and use your information according to the law and My Policy Privacy. Zero Spam I promise!
