DIY Rustic Valentine Wreath with Yarn and hearts
This post may contain affiliate links. Please read our Disclosure Policy.
Valentine’s Day is right around the corner and this DIY Rustic Valentine Wreath with Yarn, hearts, and burlap is the perfect decoration. Making this wreath is an easy and inexpensive way to welcome love into your home.
OMG, Are you getting ready for Valentine’s Day yet? Oh my goodness! It’s been so crazy lately, so much going on but I admit I want to get ready this year ahead of time.

Table of Contents
Valentine’s Day Rustic Yarn Wreath Tutorial
Am I too crazy? Hope not! But anyway, I’m super excited to be sharing my cute Valentine’s Day Rustic Yarn Wreath I’ve made with a pool noodle, lots and lots of love… and yarn… and burlap… LOL.
Yes, you heard that right! A pool noodle was used for the wreath form. I had already created it for my DIY Rustic Christmas Burlap Wreath and of course, why wouldn’t I use it again!
I saved over $10 by not buying it online and buying that pool noodle that cost me around $1,50.
The best part?
I can just take off Valentine’s Day decor and cover it with Spring, Easter, summer, Christmas… You name it!
For this Wreath, I didn’t use any pin, glue, or anything that would damage the foam form or any parts of the decoration. I used twine or yarn to secure everything and it turned out so pretty. So in short, this DIY project is so budget-friendly!
So, this is also a cute craft perfect to even use as an excuse for a family, mommy, and daughters, mommy or grandmas and kids to enjoy together. Imagination is the limit and you can have so many variations.
I got inspired to make this wreath by two awesome blogger that is so love and admire: Valentine’s Day Craft- Yarn Wrapped Hearts by Fynes Designs and Hearts and Lovebirds – Valentine’s Day Wreath by Flamingo Toes. Their wreaths are so, SO adorable and I kind of mixed the things I loved the most from each with a touch rustic to make mine. Hope you like them.
You can use this adorable wreath to decorate your front door, your mantel, a room door, or why not? even a window!
How to Make a Rustic Valentine Wreath with Yarn pom poms
Supplies:
- Wreath foam
- Yarn – white, pink and red, I used thick fleece looking yarn, loop yarn might look cute too
- Twine
- Burlap ribbon {light color}
- Wooden hearts
- Cardboard
- Chalk Paint – white and Pink, I made my pink mixing magenta and white
- Letter stencils
- Brushes
- Mini Clothespins {I used pink and red}
Tools:
- Scissors or knife
- Pencil
- Pompom makers
- Hot glue gun and glue sticks
Instructions:
Before we begin, be sure to follow us on Pinterest, Facebook, Instagram, and YouTube, and also sign up for our email list (at the end of this post), so you’ll never miss a post!
Step 1: Prepping the wreath.
Like I mentioned earlier, my wreath foam was homemade, I made it for my Rustic Christmas Wreath and you can find the tutorial to make one there if you want to save some money too!
Start wrapping the wreath foam with the burlap ribbon.
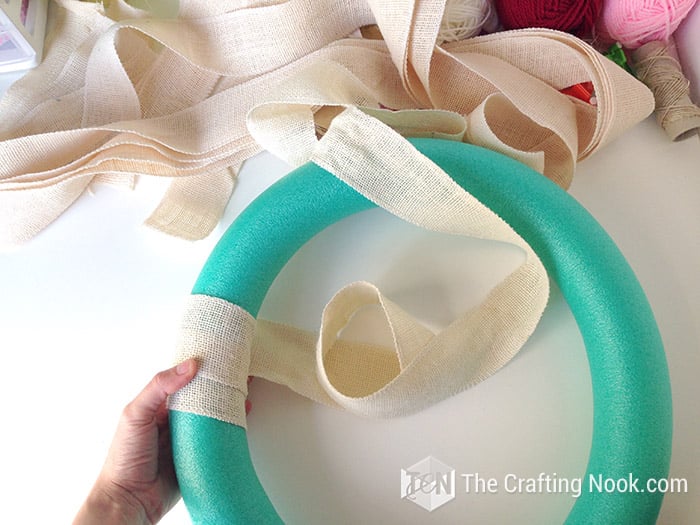
Secure the ends with twine. I do it like this because I will be using the wreath foam and the burlap in the future so I don’t want to damage either of them.
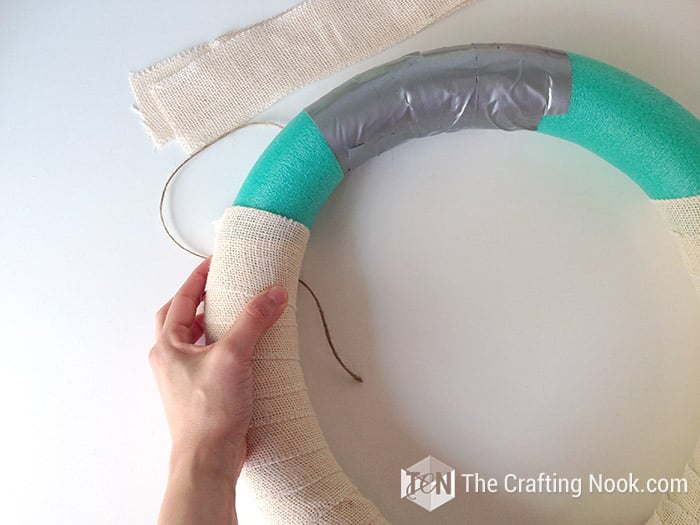

Cover about 70% of the wreath.

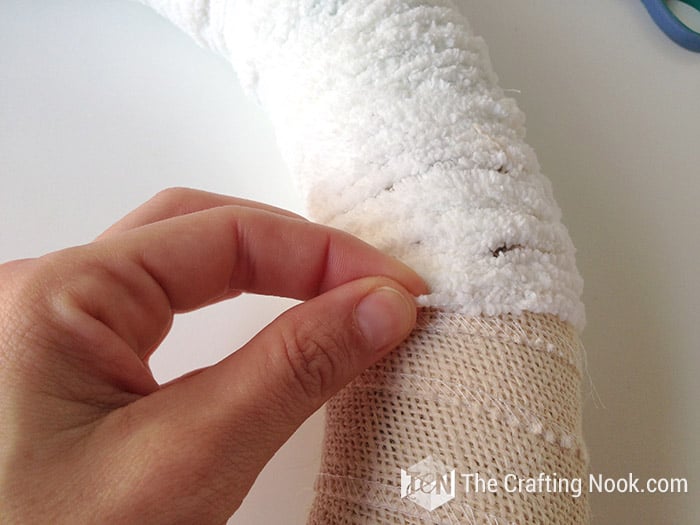
Then I wrapped the other 30% with yarn overlapping the burlap on both ends.

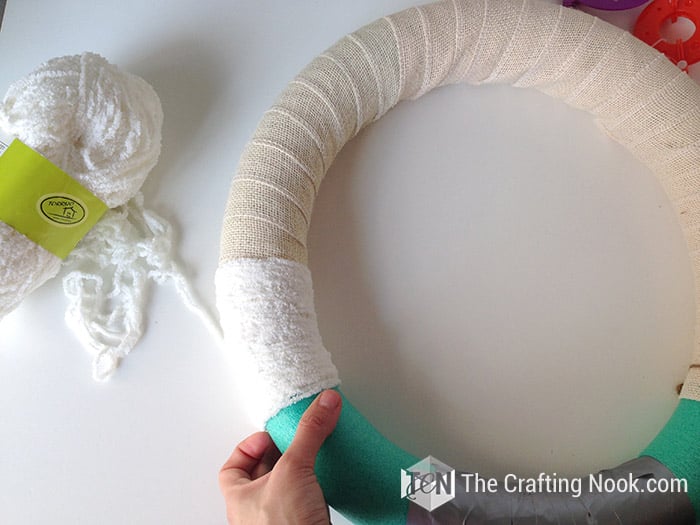
When I reached the other end of the yarn, I cut my yarn and tucked the yarn end into the loops.
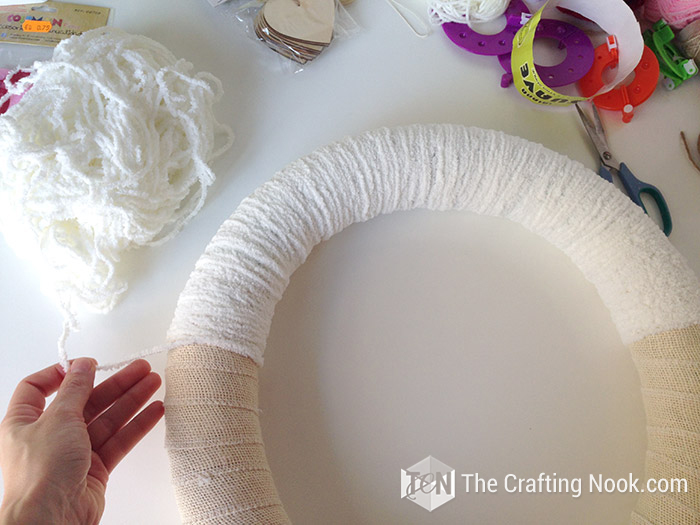
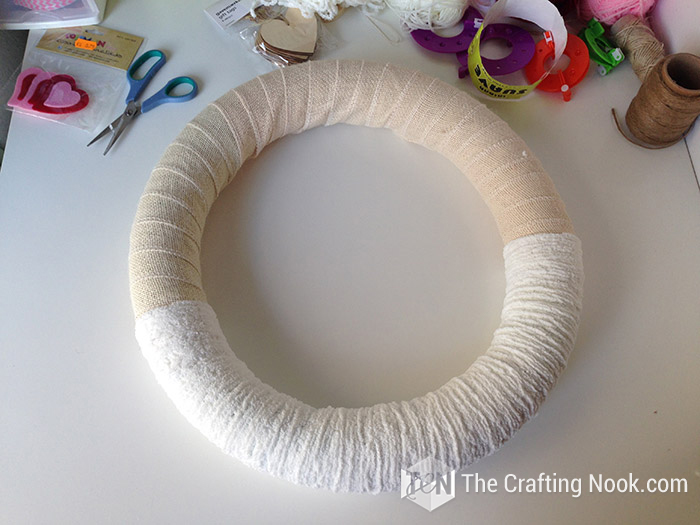
My wreath base is ready!
Step 2: Making the pom poms and yarn hearts
Then I moved on to the fun part.
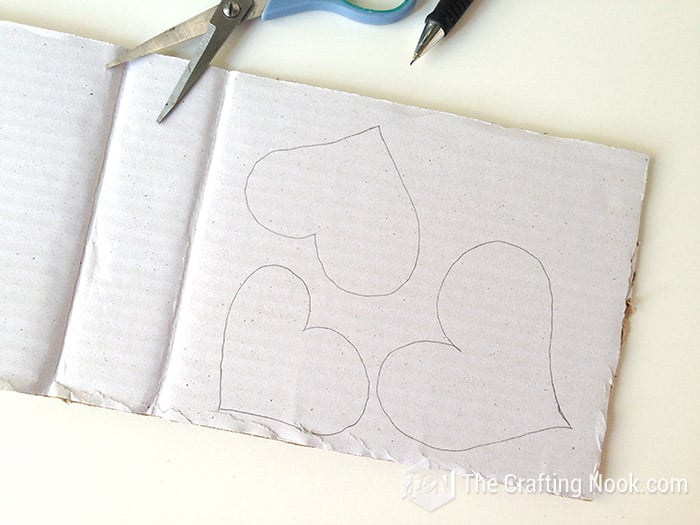
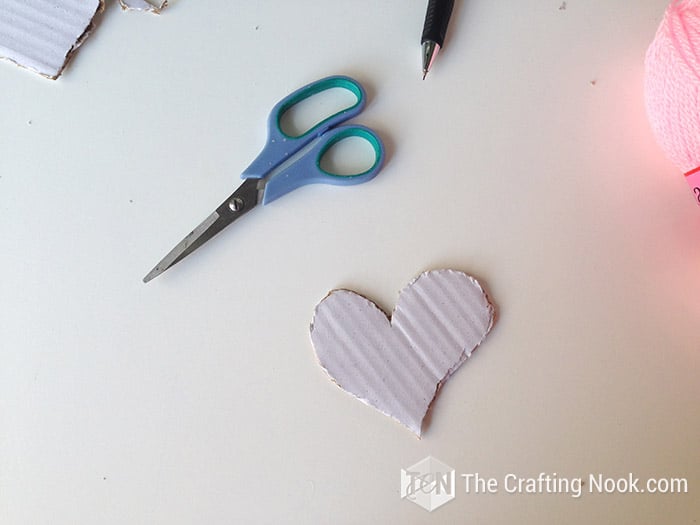
I made some hand-drawn Hearts in different sizes all over my piece of cardboard. I cut them the best I could.
Alternatively, you can use foam hearts and skip this step.
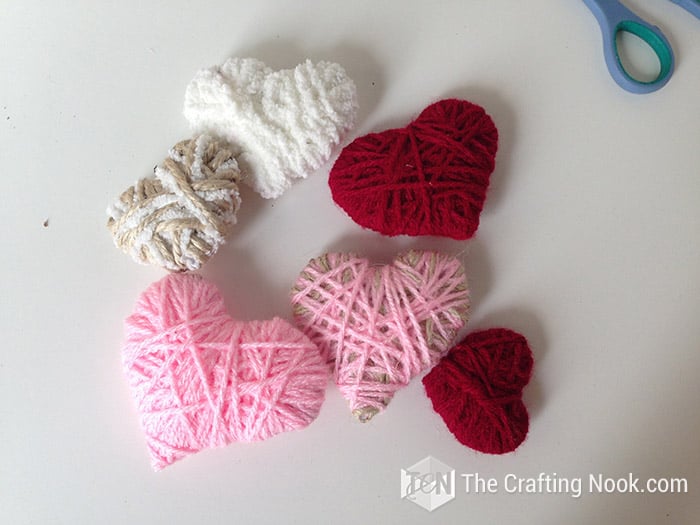
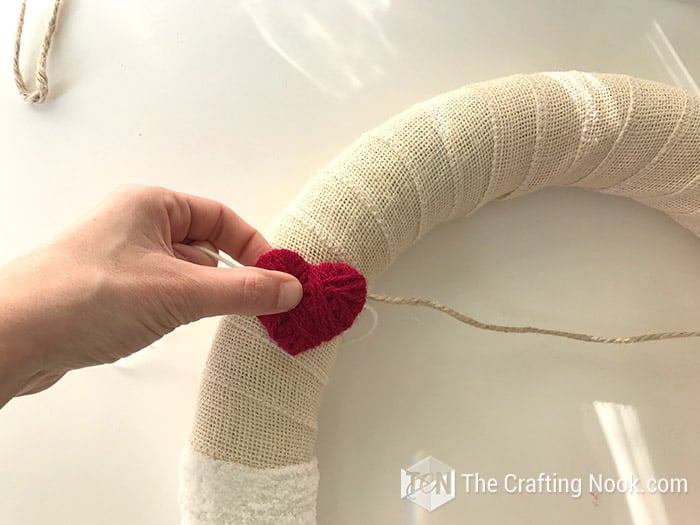
Using my pink, white and red yarn I wrapped each heart. Some in one color and some I mixed twine and yarn. I end up using one mixed.

Just make loops in random directions until you cover the entire heart and make it look puffy.


When you finish, cut the yarn and tuck it underneath other tarn strings.

Keep wrapping Hearts and you will get something like this:
Then using the same technique I used for my Christmas Pompom Garland, I made some pompoms with those same yarns, white, pink and red.
This time I just made the tie string a lot longer so I could use it to tie each pompom to the wreath.

Once I had enough hearts and pompoms, I made my LOVE word with the wood hearts.
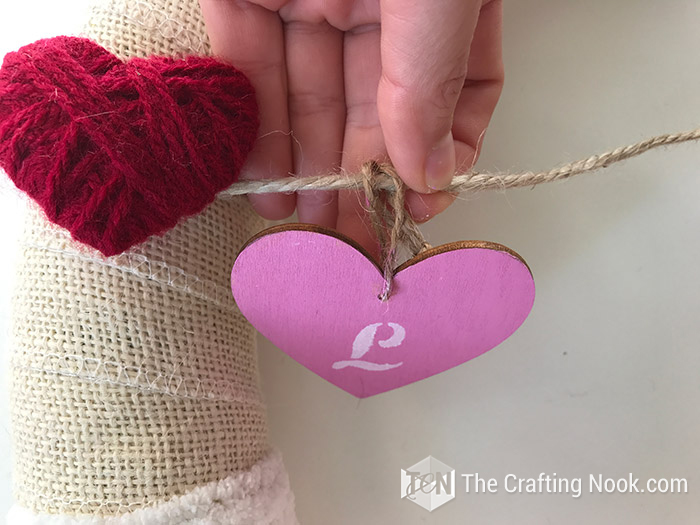
Step 3: Painting Wooden heart signs

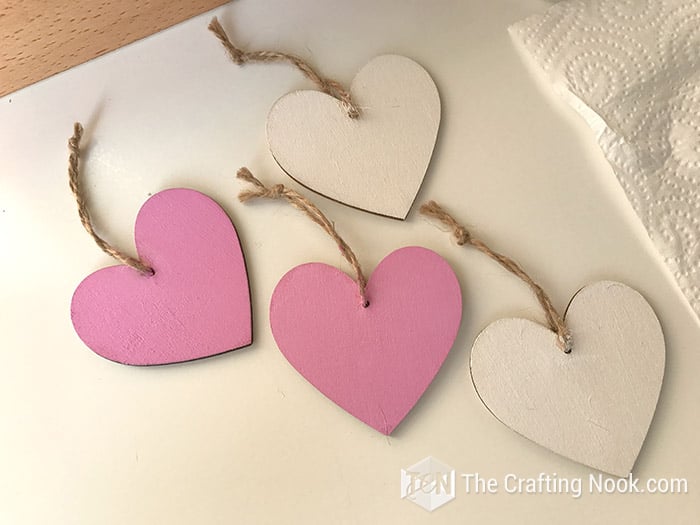
I prepared my pink chalk paint color and painted 2 hearts with pink and 2 hearts with white.

Let it dry.
In the meantime, I prepared the stencil.
Since the letters were so close one to the other I isolated the letters L, O, V and E using masking tape.
If you have pieces of vinyl is good too.

Once the hearts were dry, I put my stencil on top of the heart as centered as I could and painted them.

Removed the stencil and placed it on the next heart. On white hearts I used my pink paint and vice-versa.
Let them dry.
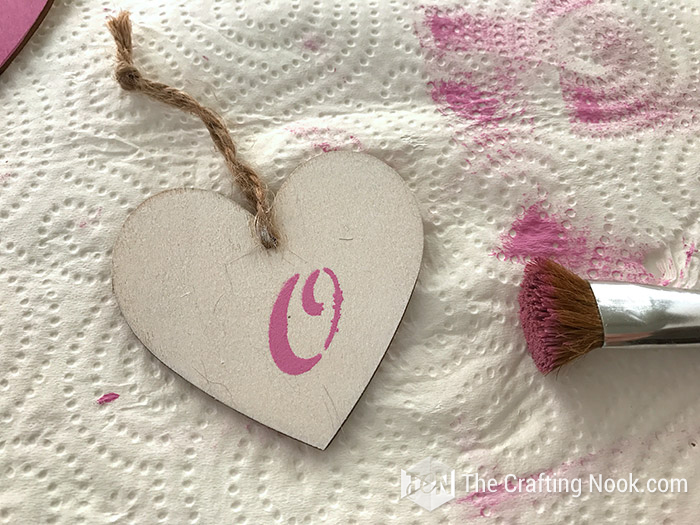
I LOVE how they turned out! LOL :P

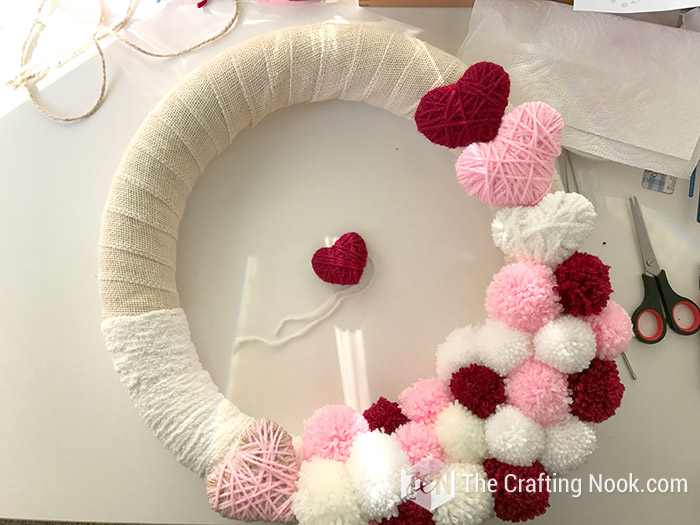
So, now that I have all the pieces done, I started the fun decoration.
Step 4: Assembling the Rustic Valentine Wreath
This part is completely up to each person. You might want it all at the bottom or on the side like me, even on top. But I wanted the decor mostly on the side.
I put my first pompom about in the middle of the white yarn part.

I placed each pompom where I wanted them to be and then using the ties I made a knot and a bow on the back. Later I would adjust the size and cut any excess.
{Side Note: Use only yarn with the same color as your wreath base for pompom ties… learned the hard way and too late!}

I made my trial and error about how much of the wreath would be covered with pompoms so I eventually removed some at the end.
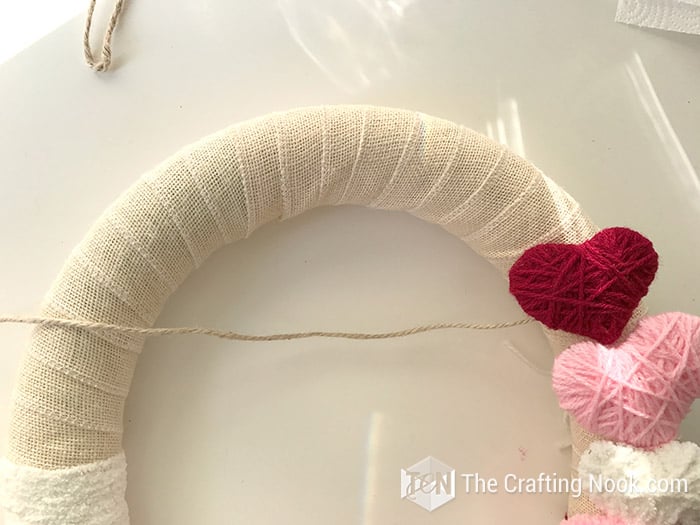
I wanted the hearts to follow both ends of pompoms so using a bodkin {or a safety pin}. So, I inserted one end of a string of yarn and inserted it through some strings from the back of my heart to have something to tie them to the wreath.
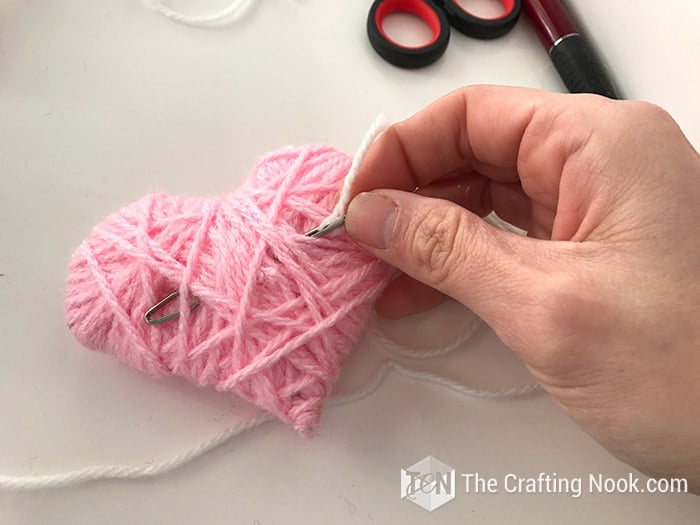

Just like I did with the pompoms I tied 3 hearts to the right towards the top of the wreath and only one on the other side of the pompoms.
For the heart garland, I cut a long string of twine, about 40 cm, and tied it right behind the last heart.

Again, if you don’t plan on using the materials again you can just use a hot glue gun. I just tied it to the wreath behind the heart.
Did the same on the other side. I decided where to finish my banner and using a smaller heart I tied the twine and the heart to the wreath.

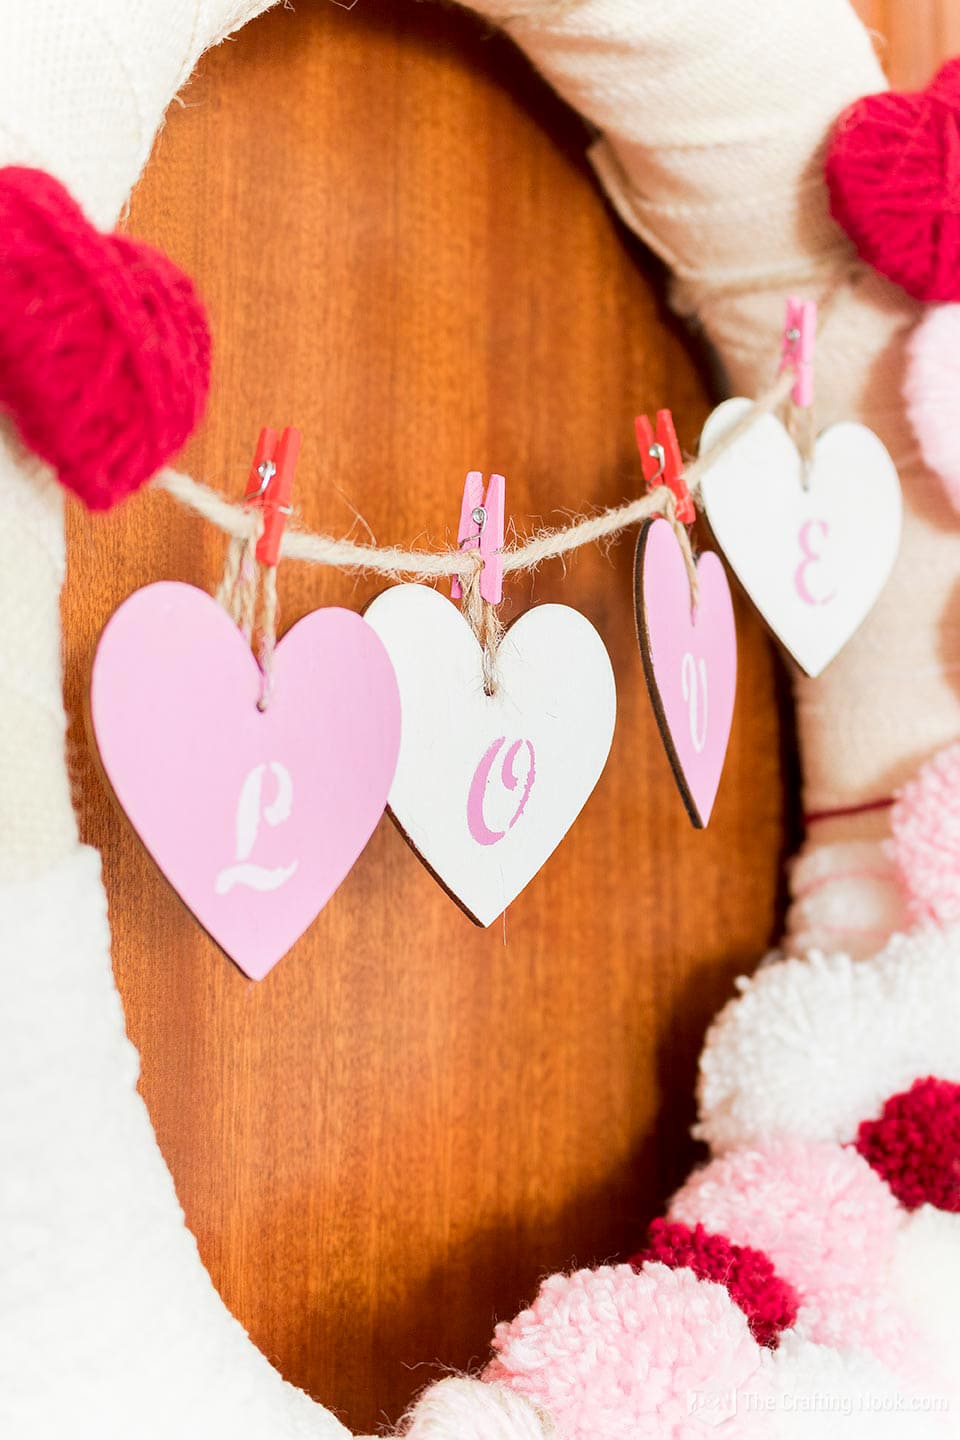
The final touch was hanging my cute LOVE hearts! I used pink and red mini clothespins. Folding the heart strings I secure each heart to the twine with clothespins.

There you go! A super cute Valentine’s Day Rustic Yarn Wreath!

Finally, with a twine strip, I hang it the door using a wreath door hanger.


I must confess as a side note that putting the decor on a side, as would be expected the wreath tended to slide a little bit looking weird.
Crafting Tips
- Before you start, lay out all your materials and plan the design. This helps you visualize the final product and ensures you have everything you need within arm’s reach.
- As you work, periodically step back and rotate the wreath. This helps you view it from different angles, ensuring a balanced design.
- When it comes to your tools, Invest in good-quality ones, for example, sharp scissors. They’ll make cutting through materials like felt, fabric, burlap, and yarn a breeze, saving you time and frustration.
- Keep a small trash bin nearby for easy disposal of scraps. It keeps your workspace tidy and saves you from a big cleanup at the end.
Also, I found that by wrapping a couple of stones on the back of the wreath using the same white yarn. I found some almost flat so it wouldn’t bump the wreath too much.

Well, my friend, this is how my doors look now! So festive and lovely, right? I love making beautiful wreaths for each season and holiday!
Variations and alternatives
Burlap: If you are not so into rustic or don’t want to use only burlap, you can always use your favorite ribbon and also fabric.
Pool Noodle: If you already have a foam wreath form, by all means, use it. I definitely would! I don’t recommend a wreath frame, wire frame, grapevine wreath, or embroidery hoop because you won’t have the 3D rounded volume you get with foam. For this Valentine’s wreath project, you can even use a heart wreath form.
Twine: You can use instead, the same yarn to secure sections and the ornaments. Just make sure it’s wrapped in a color that would match your wreath.
Pom pom makers: If you don’t have a pom pom maker you can use cardboard. You can follow the instructions on my pom pom spiders here
Chalk Paint: If you don’t have this already around, you can use any acrylic paint.
Frequently Asked Questions
Absolutely! You can try a wire wreath frame for a lighter alternative. It’s sturdy and provides a different texture to your wreath.
Involve the little ones by taking care of the cutting when they are too young to use scissors and let them make the pom poms and wrap the cardboard hearts.
Stick to a cohesive color scheme and distribute the elements evenly. Step back periodically to assess the overall balance and make adjustments as needed.
Consider using small decorative clothespins to attach the bunting. It adds a cute detail and allows for easy removal or rearrangement.
Absolutely! Swap out elements and colors to match different seasons or holidays. It’s a versatile project that can adapt to various themes such as earthy colors and pumpkins for fall, or greens and shamrocks for St. Patrick’s Day. Imagination is the limit.
Your local crafts store, dollar store, online, thrift stores. dollar section at target sometimes. It’s about keeping your eyes wide open whenever there are sales on big department stores.
More Valentine’s Day Projects to Try
If you like this DIY Yarn Rustic Valentine Wreath tutorial, you might also love these other Valentine’s Day projects too:


✂️ Tutorial

DIY Rustic Valentine Wreath with Yarn and hearts
Tools
- Pencil
- Pompom makers
- Hot glue gun and glue sticks
Supplies
- Wreath foam
- Yarn – white pink and red, I used thick fleece looking yarn, loop yarn might look cute too
- Twine
- Burlap ribbon {light color}
- Wooden hearts
- Cardboard
- Chalk Paint – white and Pink I made my pink mixing magenta and white
- Letter stencils
- Brushes
- Mini Clothespins {I used pink and red}
Instructions
STEP 1: PREPPING THE WREATH.
- Like I mentioned earlier, my wreath foam was homemade, I made it for my Rustic Christmas Wreath and you can find the tutorial to make one there if you want to save some money too!
- Start wrapping the wreath foam with the burlap ribbon.
- Secure the ends with twine. I do it like this because I will be using the wreath foam and the burlap in the future so I don’t want to damage either of them.
- Cover about 70% of the wreath.
- Then I wrapped the other 30% with yarn overlapping the burlap on both ends.
- A few loops later wrapping the wreath form
- When I reached the other end of the yarn, I cut my yarn and tucked the yarn end into the loops.
- My wreath base is ready!
STEP 2: MAKING THE POM POMS AND YARN HEARTS
- Then I moved on to the fun part.
- I made some hand-drawn Hearts in different sizes all over my piece of cardboard. I cut them the best I could.
- Alternatively, you can use foam hearts and skip this step.
- Using my pink, white and red yarn I wrapped each heart. Some in one color and some I mixed twine and yarn. I end up using one mixed.
- Just make loops in random directions until you cover the entire heart and make it look puffy.
- When you finish, cut the yarn and tuck it underneath other tarn strings.
- Keep wrapping Hearts and you will get something like this:
- Then using the same technique I used for my Christmas Pompom Garland, I made some pompoms with those same yarns, white, pink and red.
- This time I just made the tie string a lot longer so I could use it to tie each pompom to the wreath.
- Once I had enough hearts and pompoms, I made my LOVE word with the wood hearts.
STEP 3: PAINTING WOODEN HEART SIGNS
- I prepared my pink chalk paint color and painted 2 hearts with pink and 2 hearts with white.
- Let it dry.
- In the meantime, I prepared the stencil.
- Since the letters were so close one to the other I isolated the letters L, O, V and E using masking tape.
- If you have pieces of vinyl is good too.
- Once the hearts were dry, I put my stencil on top of the heart as centered as I could and painted them.
- Removed the stencil and placed it on the next heart. On white hearts I used my pink paint and vice-versa.
- Let them dry.
- So, now that I have all the pieces done, I started the fun decoration.
STEP 4: ASSEMBLING THE RUSTIC VALENTINE WREATH
- This part is completely up to each person. You might want it all at the bottom or on the side like me, even on top. But I wanted the decor mostly on the side.
- I put my first pompom about in the middle of the white yarn part.
- I placed each pompom where I wanted them to be and then using the ties I made a knot and a bow on the back. Later I would adjust the size and cut any excess.
- {Side Note: Use only yarn with the same color as your wreath base for pompom ties… learned the hard way and too late!}
- I made my trial and error about how much of the wreath would be covered with pompoms so I eventually removed some at the end.
- I wanted the hearts to follow both ends of pompoms so using a bodkin {or a safety pin}. So, I inserted one end of a string of yarn and inserted it through some strings from the back of my heart to have something to tie them to the wreath.
- Just like I did with the pompoms I tied 3 hearts to the right towards the top of the wreath and only one on the other side of the pompoms.
- For the heart garland, I cut a long string of twine, about 40 cm, and tied it right behind the last heart.
- Again, if you don’t plan on using the materials again you can just use a hot glue gun. I just tied it to the wreath behind the heart.
- Did the same on the other side. I decided where to finish my banner and using a smaller heart I tied the twine and the heart to the wreath.
- The final touch was hanging my cute LOVE hearts! I used pink and red mini clothespins. Folding the heart strings I secure each heart to the twine with clothespins.
- There you go! A super cute Valentine’s Day Rustic Yarn Wreath!
- Finally, with a twine strip, I hang it the door using a wreath door hanger.
Share and PIN ME!!!

Til’ next time…


FREE WORKBOOK
Keeping your Sweet Home Organized
Learn how to create intentional habits and simple routines to Keep Your Home Organized. Plus freebies, printables, exclusive content, and tips.
Disclaimer: By clicking on the “Yes” button above you are giving me your consent to collect and use your information according to the law and My Policy Privacy. Zero Spam I promise!