Diy Pom Pom Christmas Garland for Your Tree
This post may contain affiliate links. Please read our Disclosure Policy.
Make a cute DIY Pom Pom Christmas Garland for your tree! Enjoy the festive spirit as you create this easy and fun project, adding a touch of whimsy to your holiday decorations. Learn how to make it here!
Aren’t you in the whole Christmas Holiday mood yet? I can’t even believe how excited I am. You would not believe what time is it here while I’m writing this post. I’m still up, crafting and sharing this super cute tutorial with y’all.

Table of Contents
Pom Pom Christmas Garland Tutorial
This Christmas Pompom Garland is something I’ve seen many times in different Christmas decorations around the internet and I just LOVE it. I had to make one and I had to use it for my Christmas tree.
Pom poms are one of my weaknesses. If you don’t believe me just check my easy Halloween spider posts. I always somehow end up making pom poms and let’s face it, they are so stinkin’ cute!

These cuties are super easy to make. The problem is that most times is time-consuming if you need to make many of them.
There are many ways to make pom poms. I have made them in 3 different ways so far but the way I have made these is by far the easiest and quickest.
Still, if you need to make over 30 of them, it will take a couple of hours or a couple of nights on your comfy couch while watching tv.
If you want to know my past ways to make pompoms you can check my Spooky Pompom spiders, pompom bunny tail onesie and my Easter pompom butt Bunny.
This Christmas Pompom Garland turned out so cute that I plan on using it after Christmas in my girl’s bedroom. It’s too cute to put in a box!
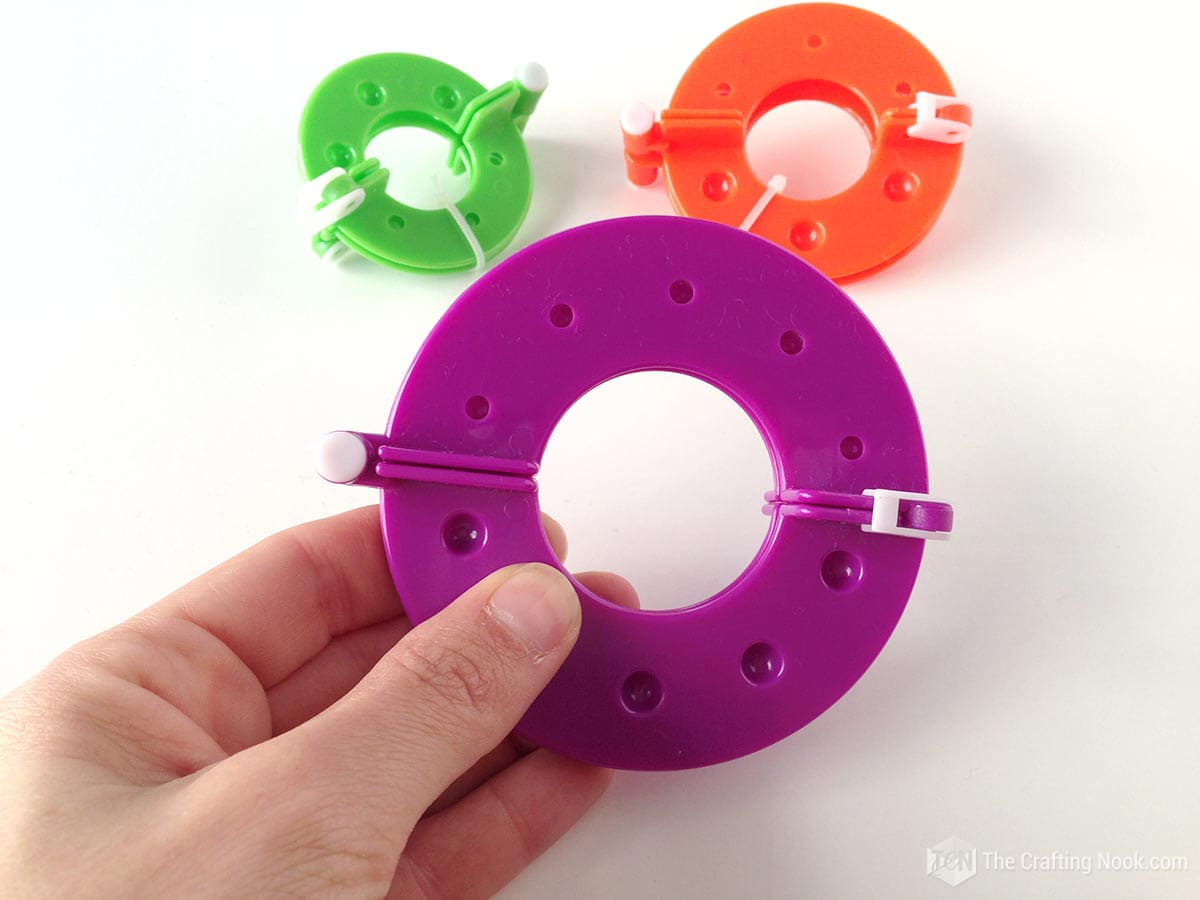
I made these pom poms using a pompom maker I got in a craft store. You can buy them on Amazon and I’m pretty sure you might find them in Michael’s or any local craft store.
I don’t live in the USA but if I could find them here, you can too. LOL. It’s not too expensive either, so why not, right?
This tool is pretty simple to use and straightforward. The first time you might get intimidated but then you get the hang of it and you can make many pompoms in minutes.
How To Make a Pom Pom Christmas Garland
Let’s do this!
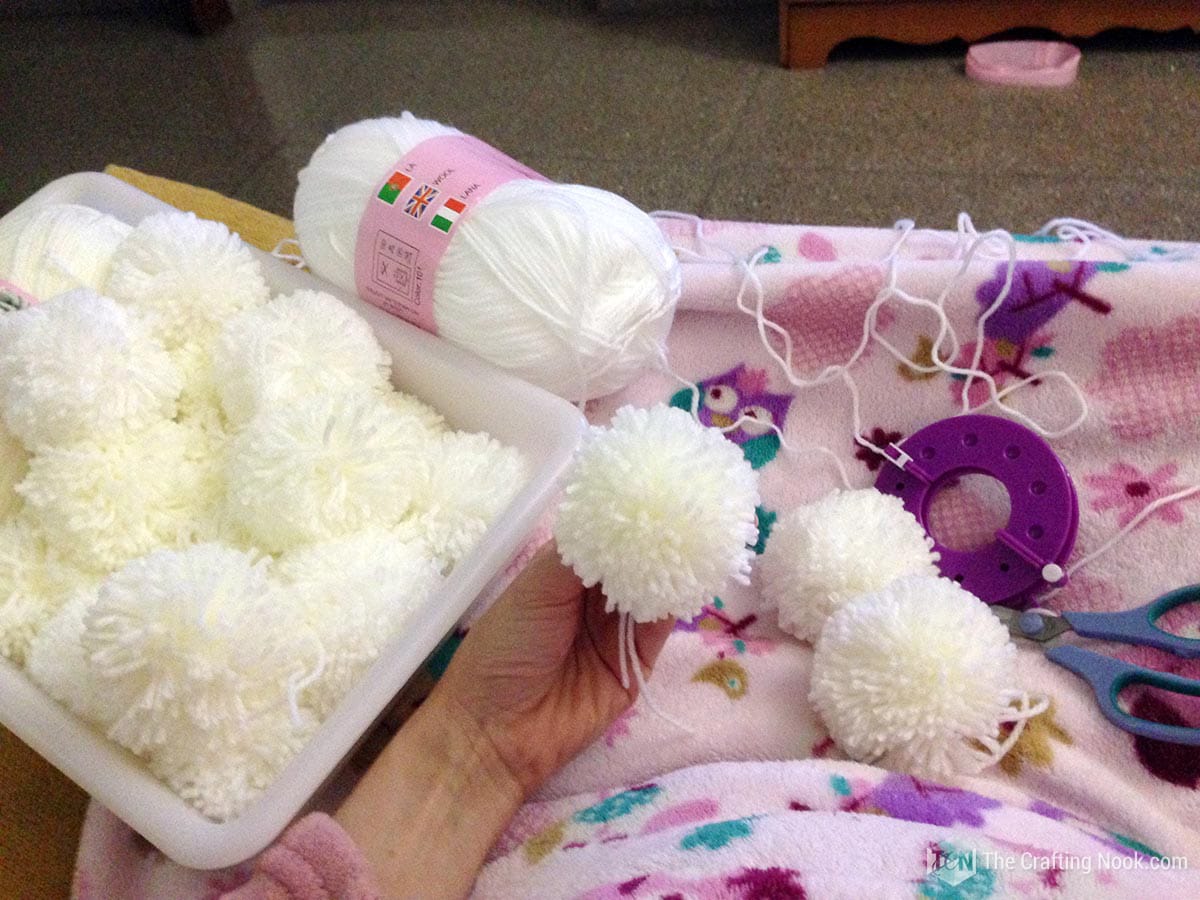
Supplies:
- Yarn – I used 4 packs 2 white, 2 light cream. The size is up to you, how fluffy you want the pom poms
Tools:
- Pom pom maker – I used the largest. These can be found in craft stores.
- Scissors.
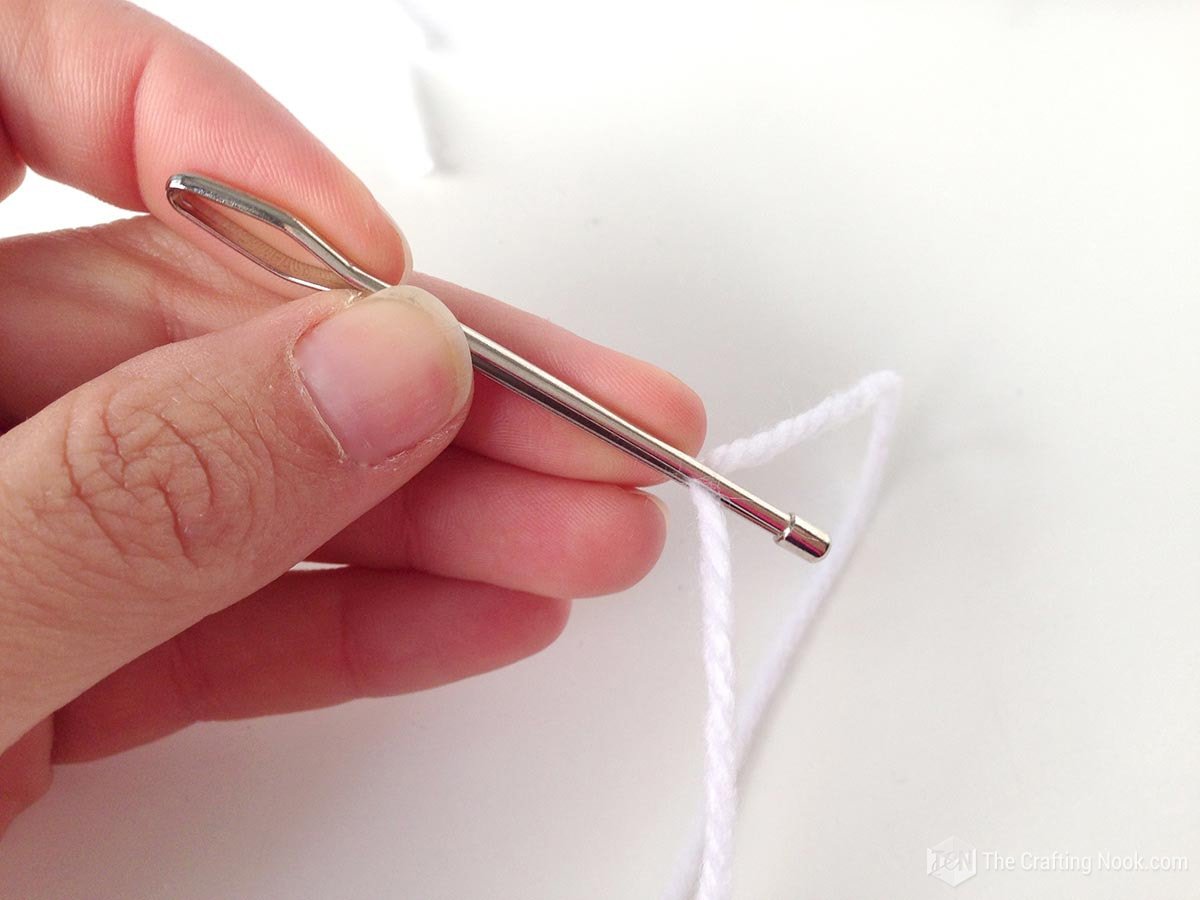
- A Bodkin
Instructions:
Creating the Pom Poms
This pom pom maker comes in two pieces. The same but inverted.
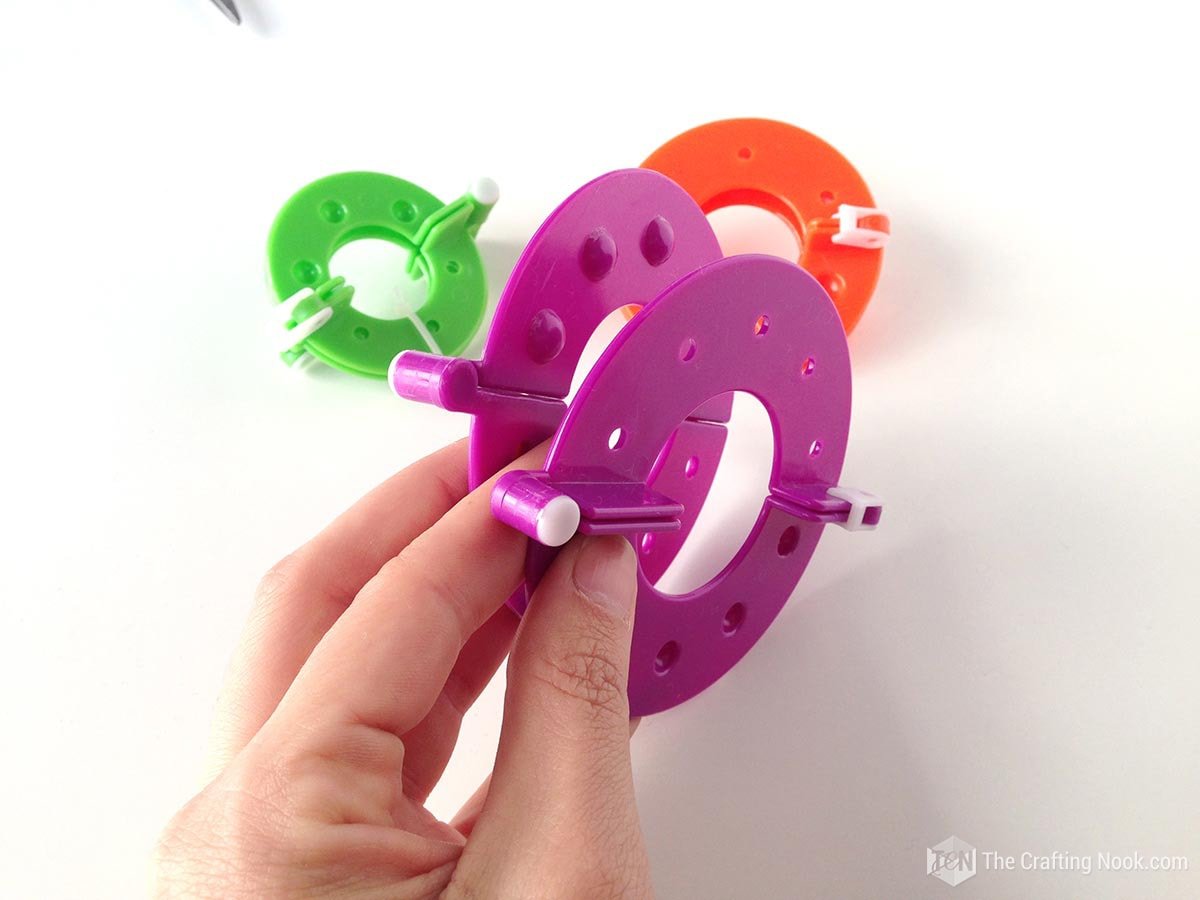
1. Keeping them together with locks on, open the locks and keep both pieces on the same side together. We will work on each half separately.

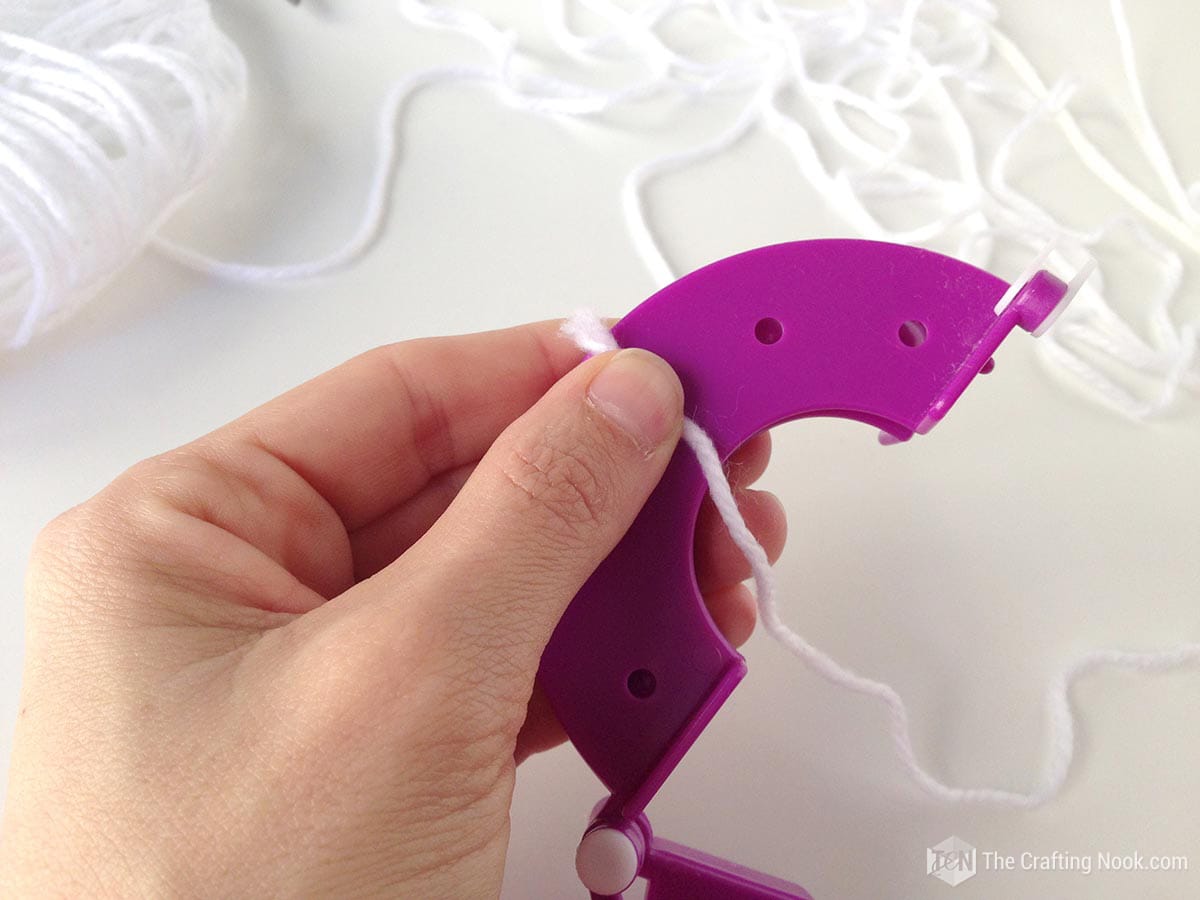
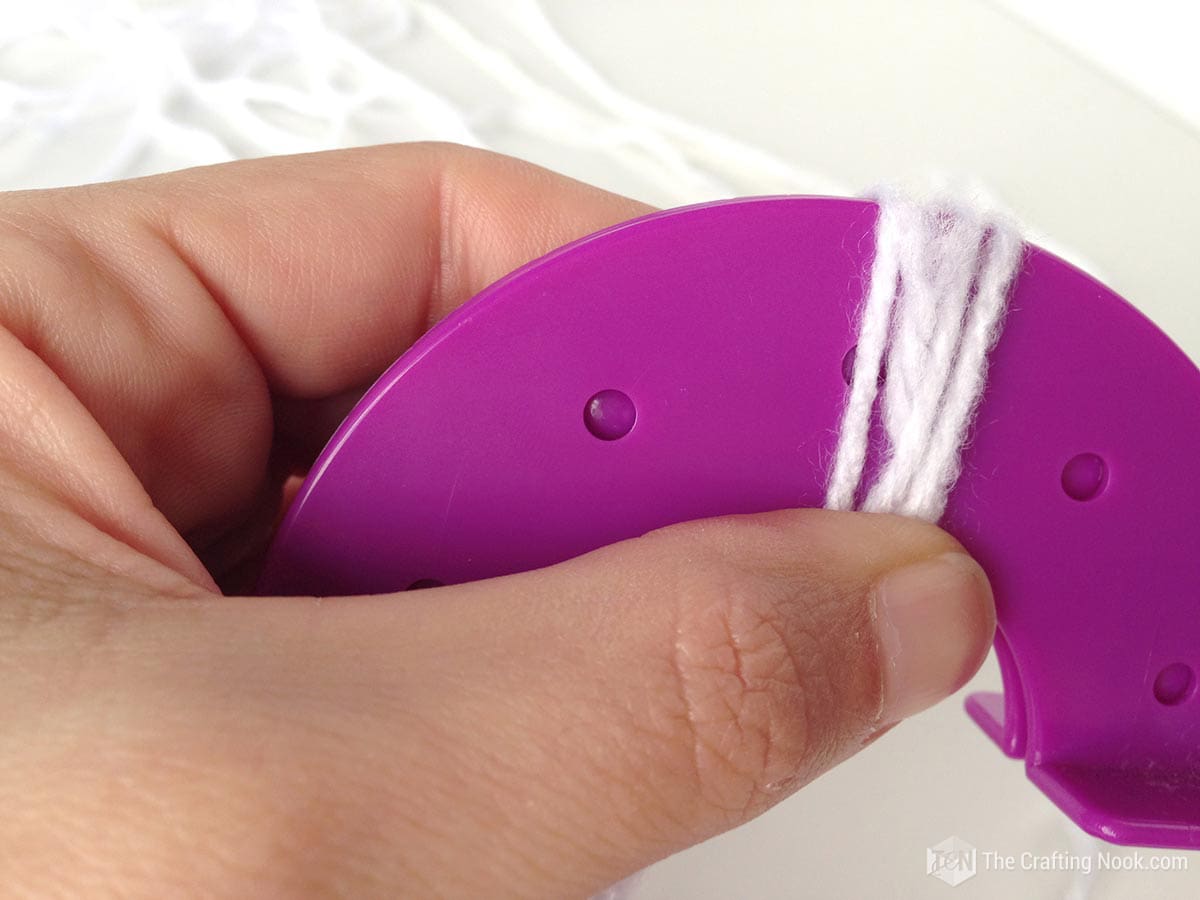
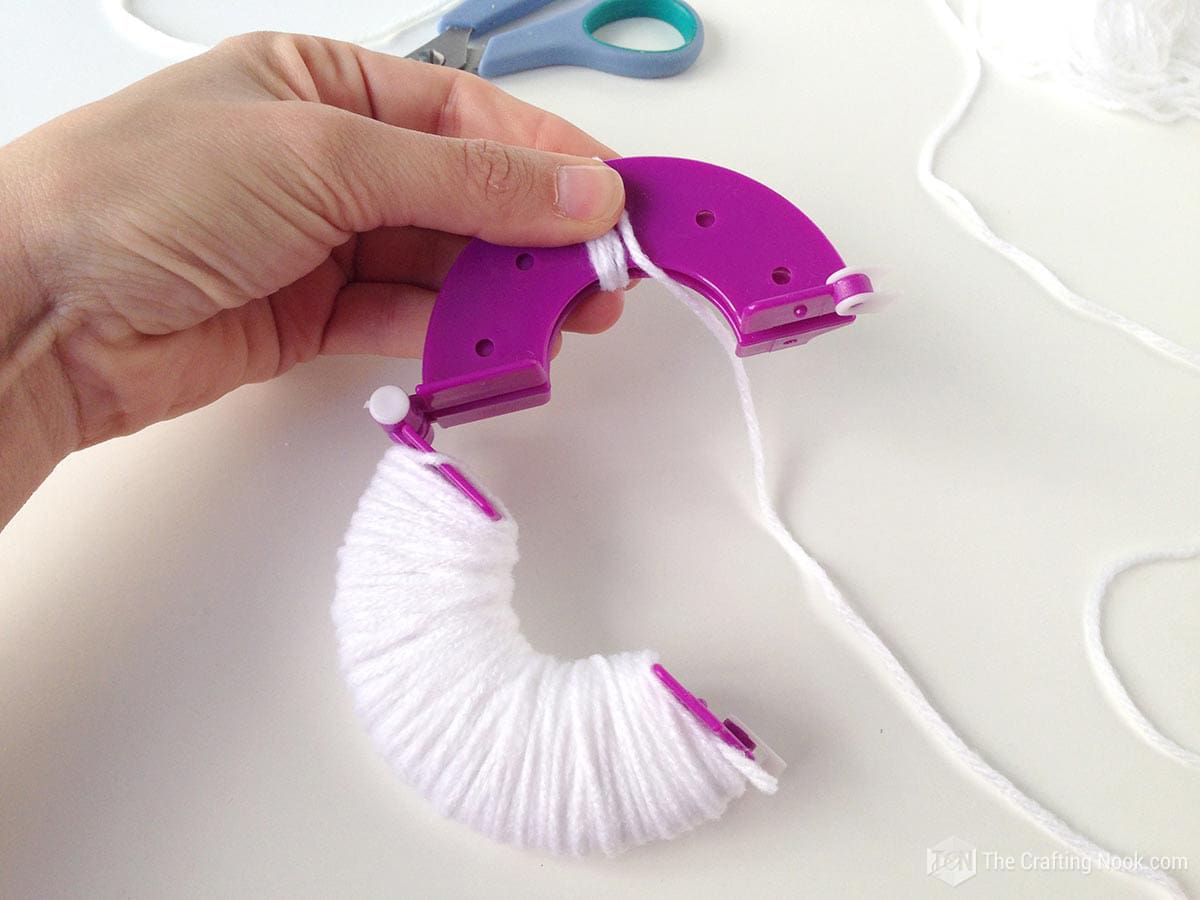
2. With your thumbnail secure one end of our yarn more or less in the middle of your pompom maker.
3. Start wrapping going over the end of the yarn so it stays in place.

4. If you see between both pieces, you will notice there are like half balls in there.

5. Those get stuck on some holes on the other piece so you know you are making the pom poms right.
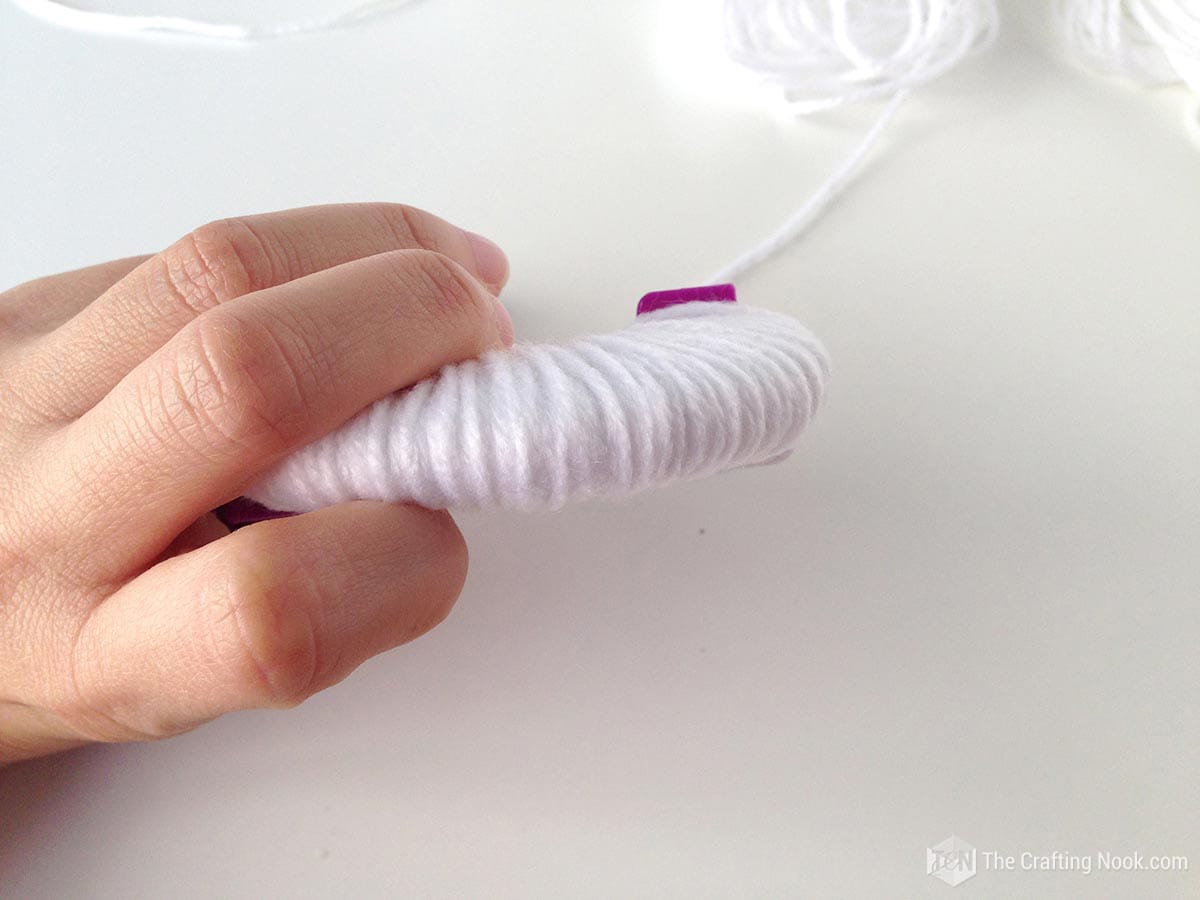
6. Keep wrapping until you cover well the pom pom maker.

7. The more you wrap the thickest and fluffiest the pom pom will be so I go for the thickest.
8. This step is totally up to you. You can try different amounts and see how you like best.
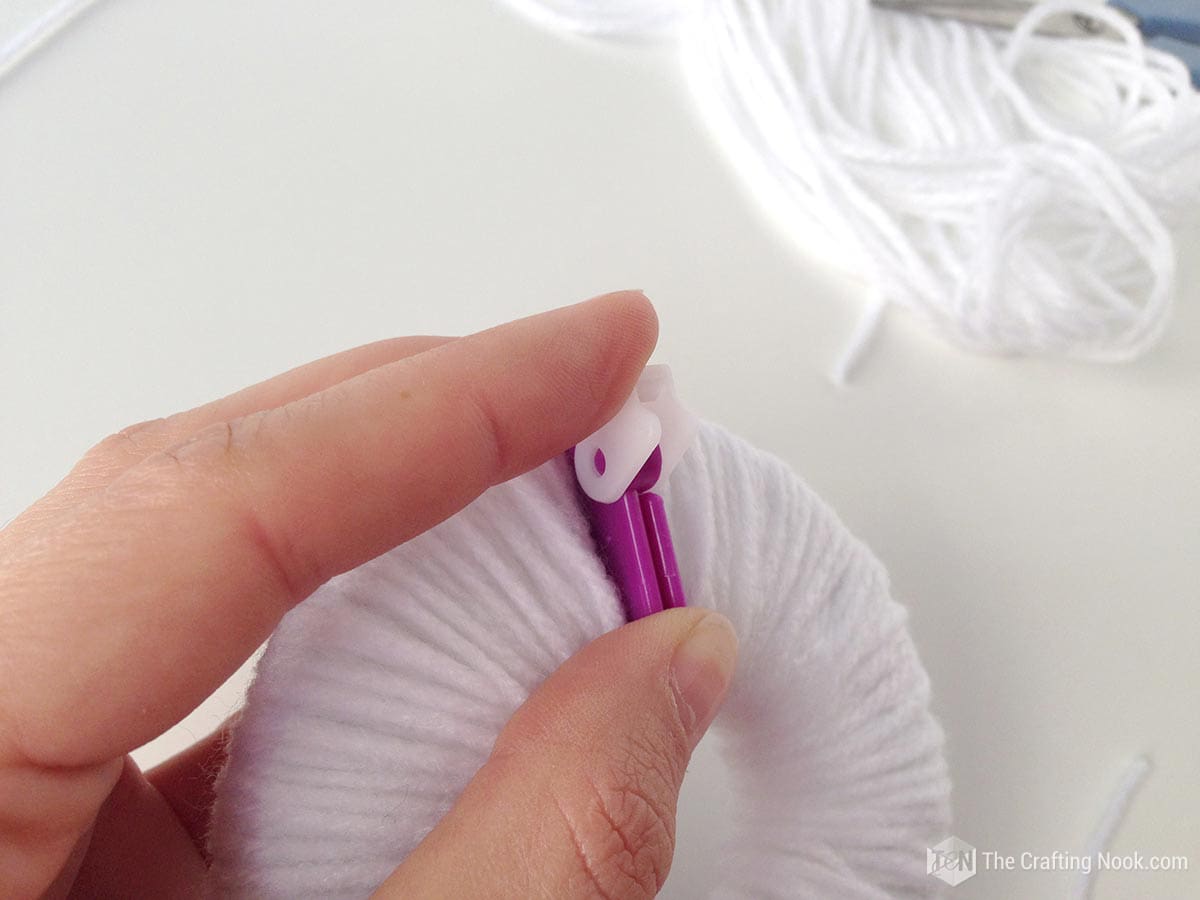
9. When you think it’s enough, wrap until you get to the pom pom maker end.
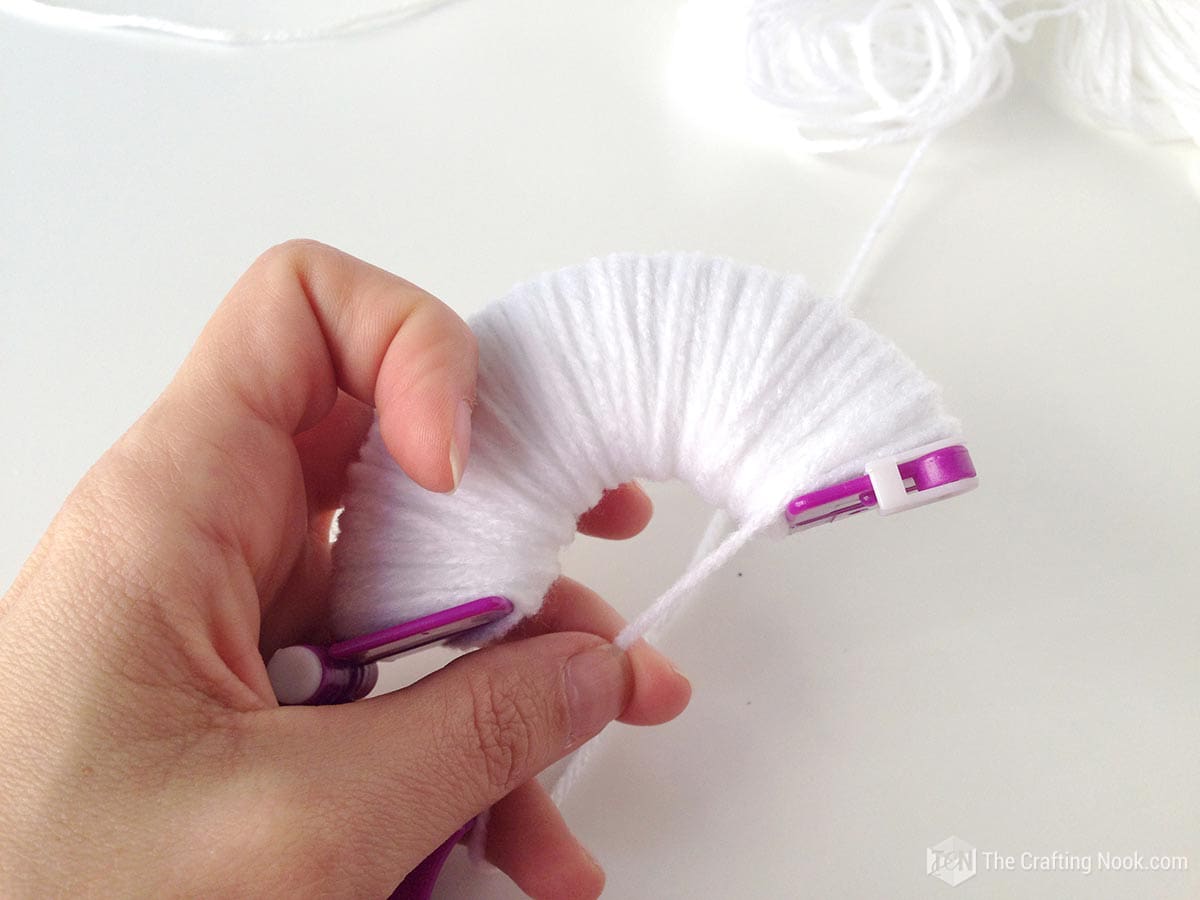
10. Pull the yarn tight so it gets secured.
11. Cut the yarn close to the tool.

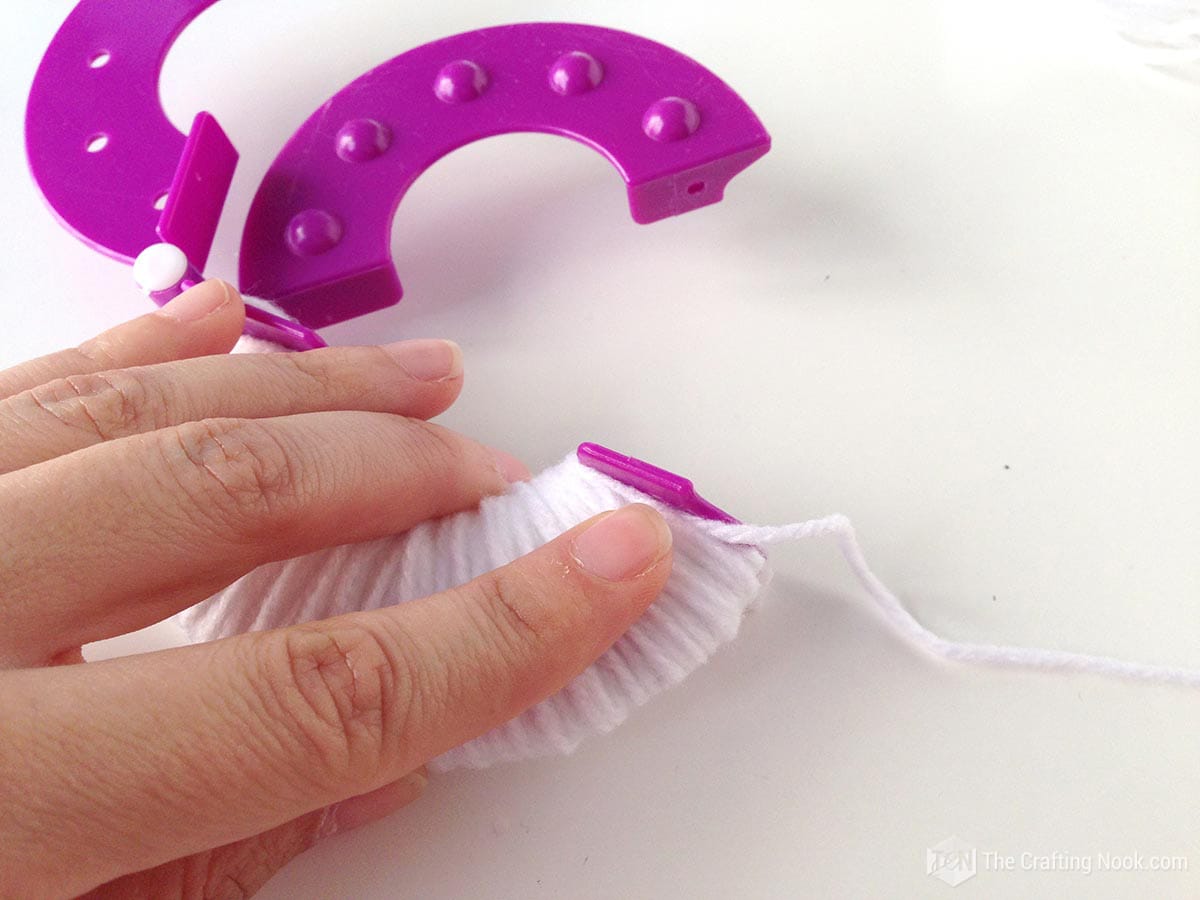
12. Turn it over and repeat the process with the other side of the pom pom maker.
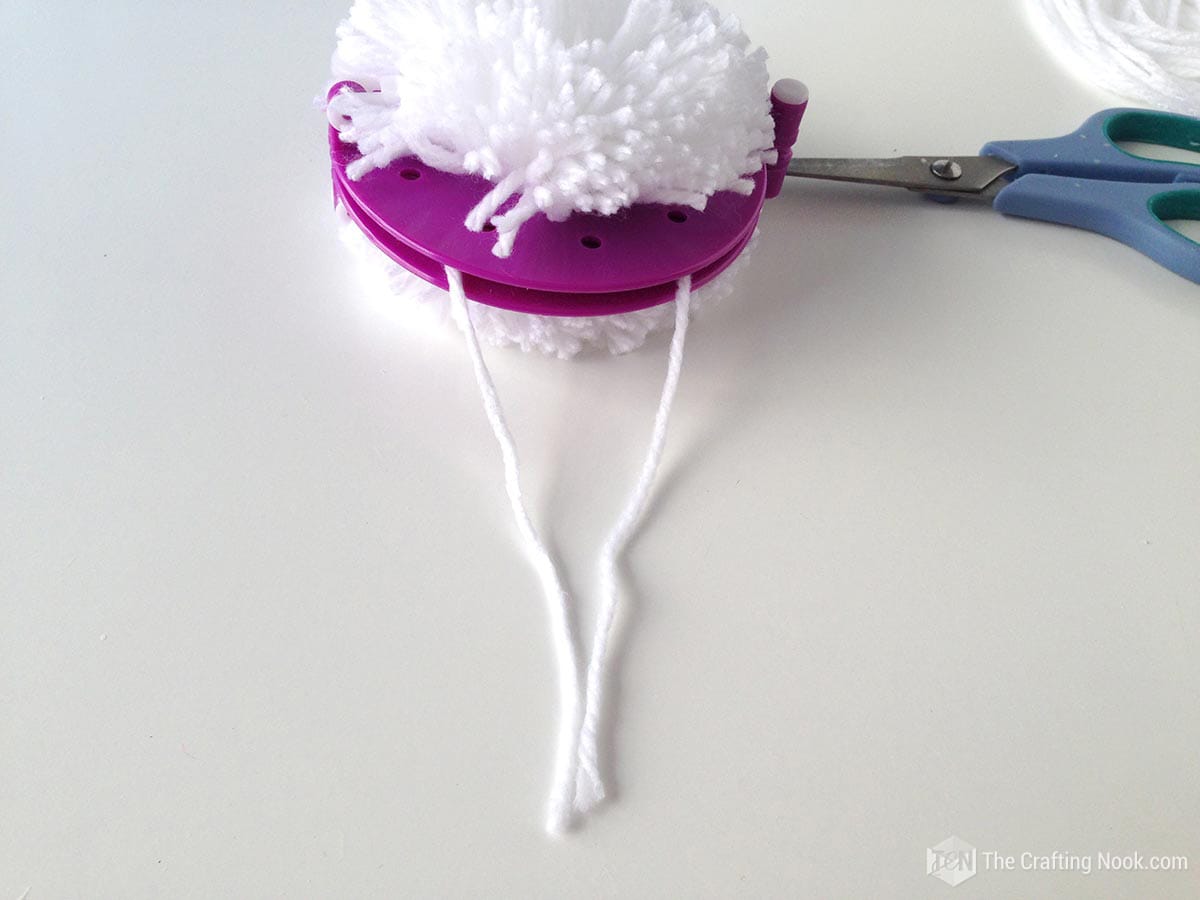
13. When you are done, cut a strip of yarn long enough to tie up your pom pom and get a couple of long tails left. Mine was about 8 to 10 inches.
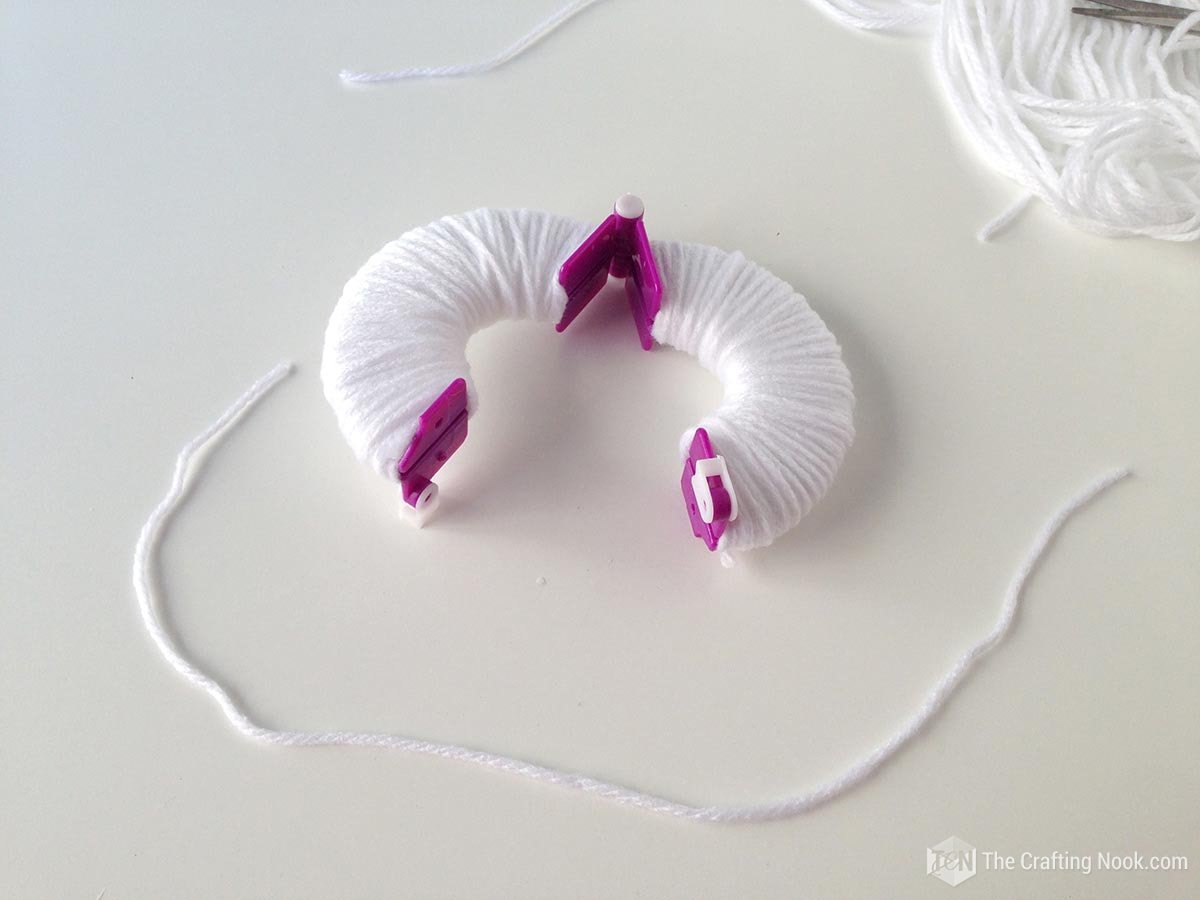
14. Make your pom pom maker ends meet and lock both sides.
15. You will get something like this:

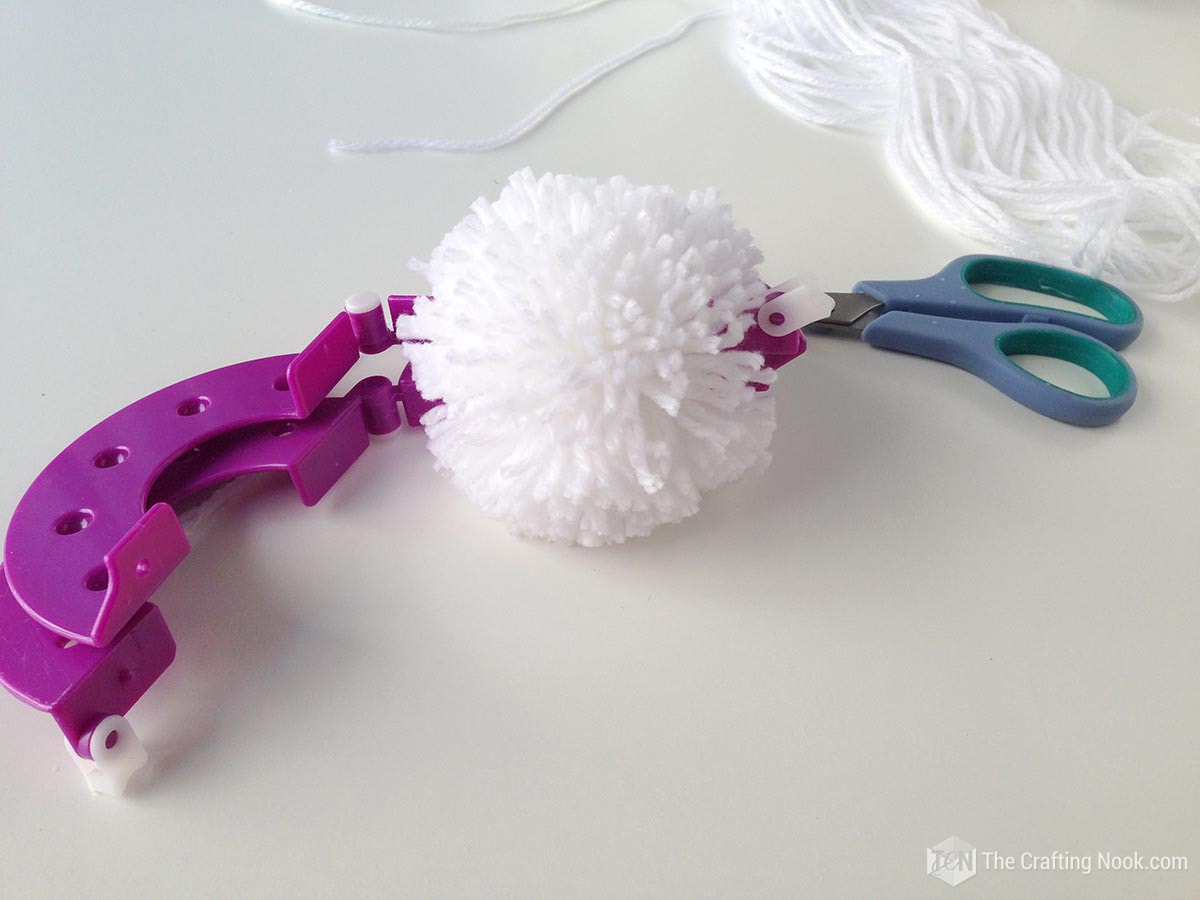
16. Now using your scissors, cut very carefully between the two pieces of your pom pom maker like in the photo below:

17. Try to keep the strings in the center in place with your fingers as you cut around. Be very gentle and careful here, don’t rush it.
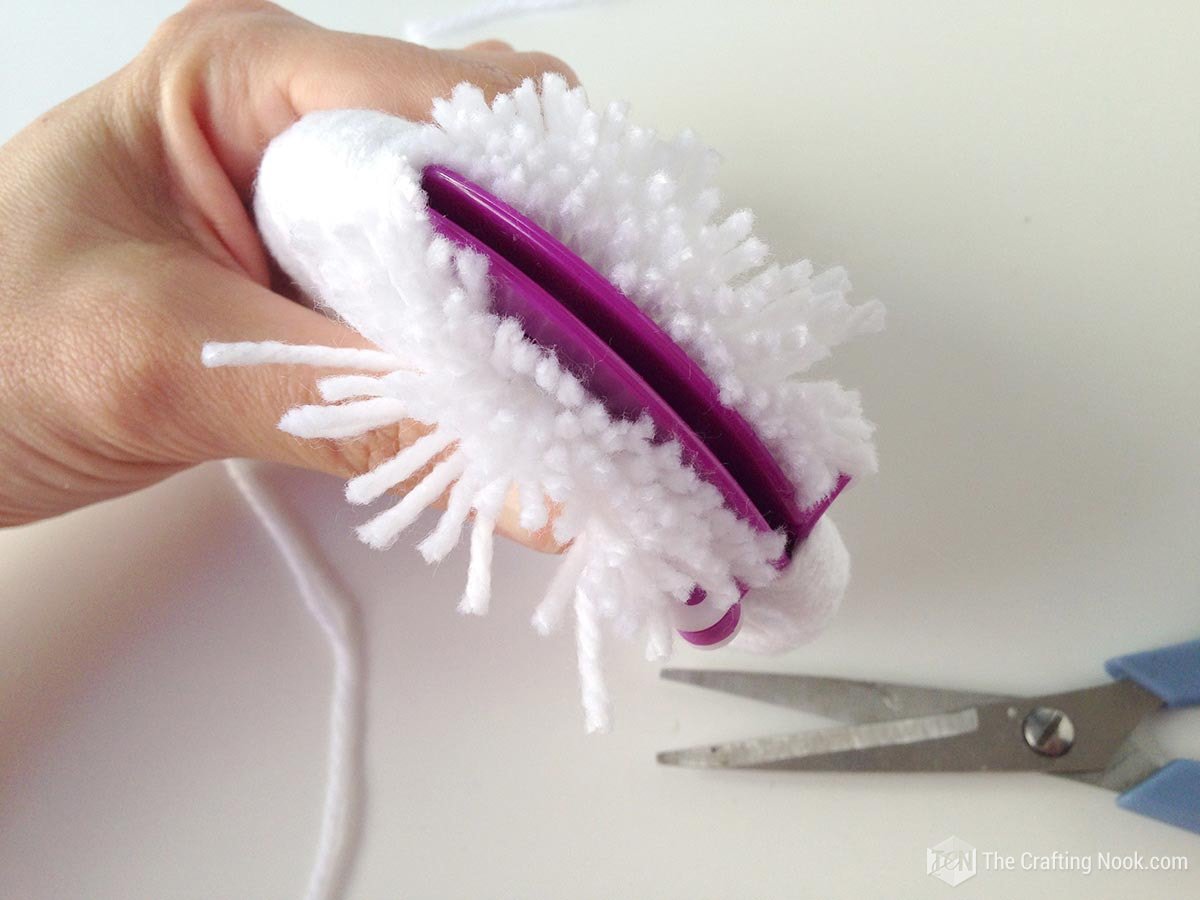
18. Once you are done, you will have something like this:

19. Still holding both pieces, pass your yarn strip between both maker sides like follows:
20. Make both ends meet and pull carefully.
21. Tie it up with a knot. I usually make a knot here then go back with each end and tie up again. Double knot, triple know, secure it well.

22. It can get a bit tricky tying up between the two pieces but you can do it.

23. Open your pom pom maker and remove them from your pom pom. DO NOT CUT your long tails just yet.
Woot, there you go! You have your first of many large pom poms.
Easy peasy, right?
24. Now go for 33 more LOL…

LOL, yup that many I’ve made.
25. So, Once you have made all your pompoms, remember to reserve 2 or 3 yards of yarn for the garland string.
Assembling the garland.
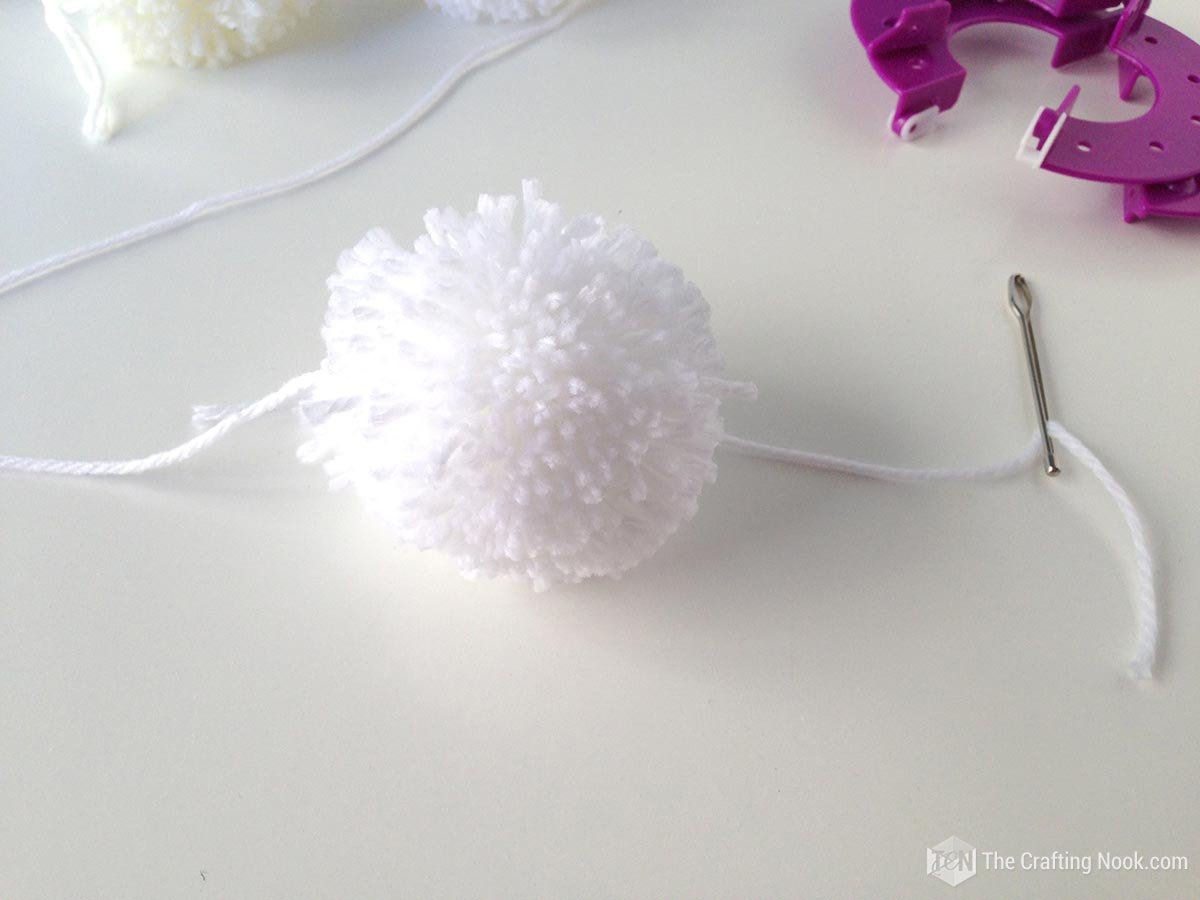
26. Using your bodkin, Insert one end of your yarn and pull it down towards the tight part.


27. Take your pompoms from the tail you left in the previous steps and find your knot.
28. That will tell you where you should insert your bodkin with the string of yarn.

29. Insert your bodkin right perpendicularly very close to your knot loop.
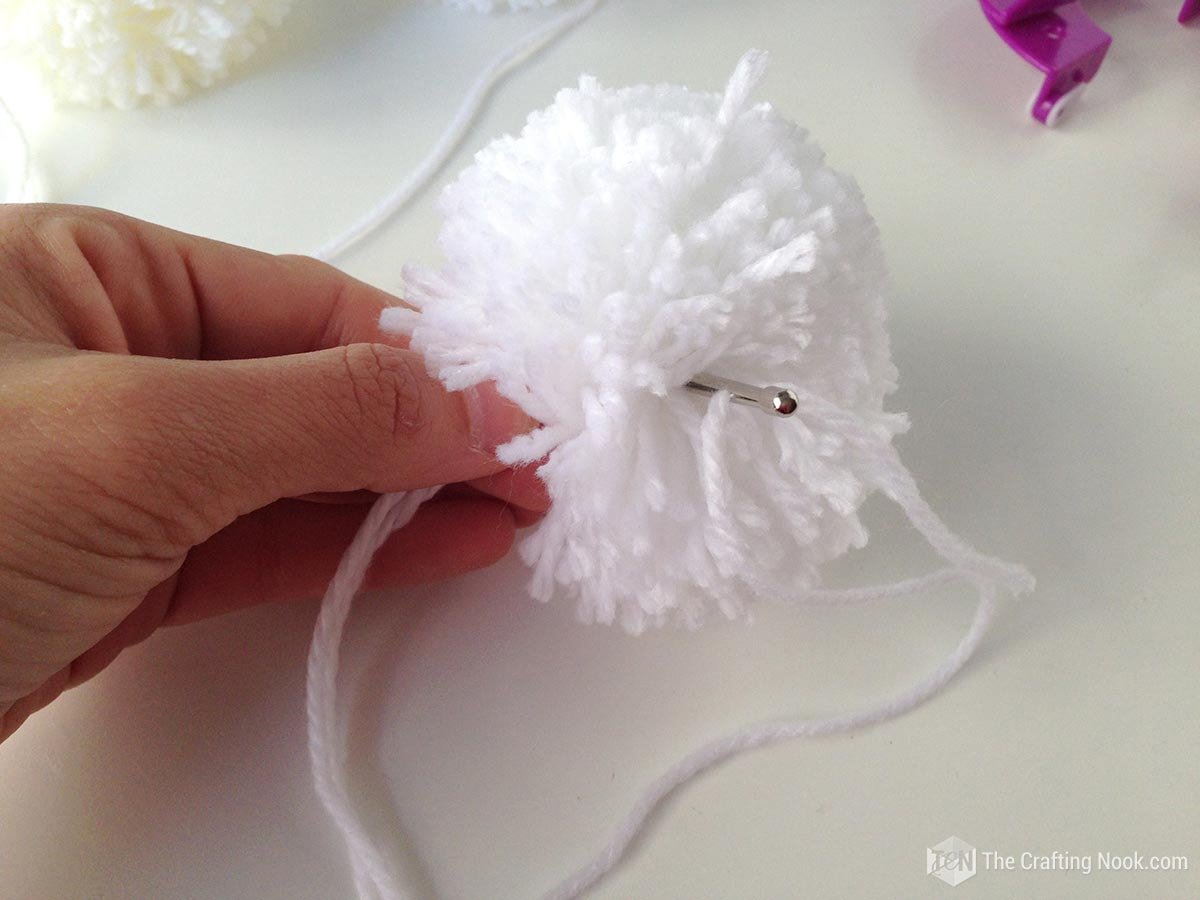
30. Pull the bodkin on the other side and push the pom pom down the string.
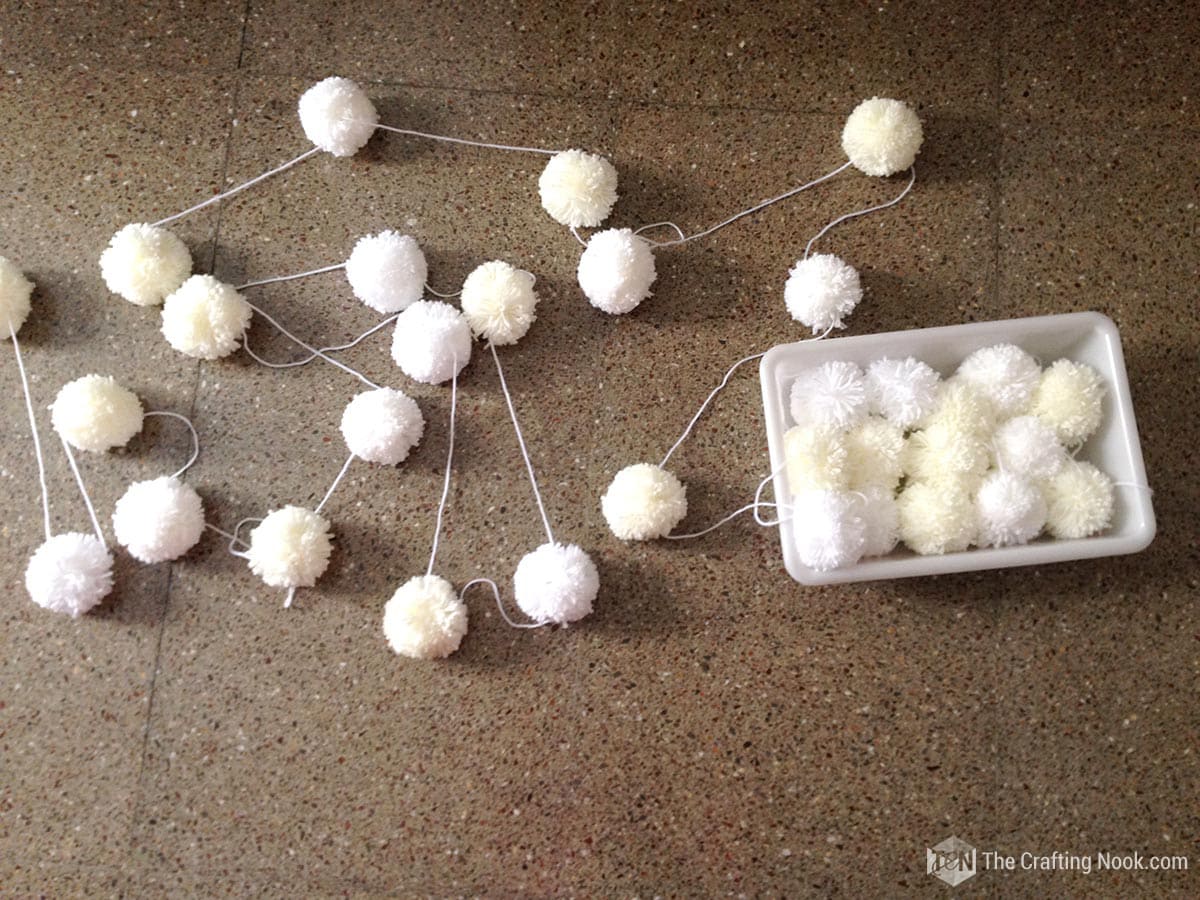
31. Repeat this process with all your pom poms.


Don’t glue the pompoms or make knots because when you are putting it on the tree you want the freedom to move the pompoms through the string to position them where fits best.
32. Once your pom pons are all in your garland, you can cut all your pompom tails.

33. There you go!!! Your Christmas Pompom Garland is finished and ready to be placed on your Christmas tree, staircase, mantel, or wherever you want it to be.
It’s so pretty that you might want to put it anywhere! Am I right???
Crafting Tips
- Try using different types of yarn with different textures to make your pom poms look more interesting and stand out. You can use yarn that is fluffy, shiny, or sparkly to add different looks and make them look bigger.
- To make the pom poms jingle, you can add small bells to some of them. Your garland will sound nice when the tree moves or when the air goes around it.
- Make your garland look interesting by using yarn in different shades of the same color to create a gradient effect. Begin with a pale color on one side and slowly change to a darker color to create a beautiful ombre effect.
- Use different size pom poms in your garland to make it look fun and exciting. Put together big, medium, and small pom poms to make a pattern that looks cool.
- Use a tool called a pom pom trimmer or small scissors with a curved blade to work with pom poms. It helps make your pom poms look nice and neat by trimming and shaping them well. It gives them a smooth and finished look.
- Don’t just hang your garland on the Christmas tree, try hanging it in other surprising places. Put it on the railings of stairs, mantels, or even use it as a background for taking pictures in a holiday photo booth. Be as creative as you want.
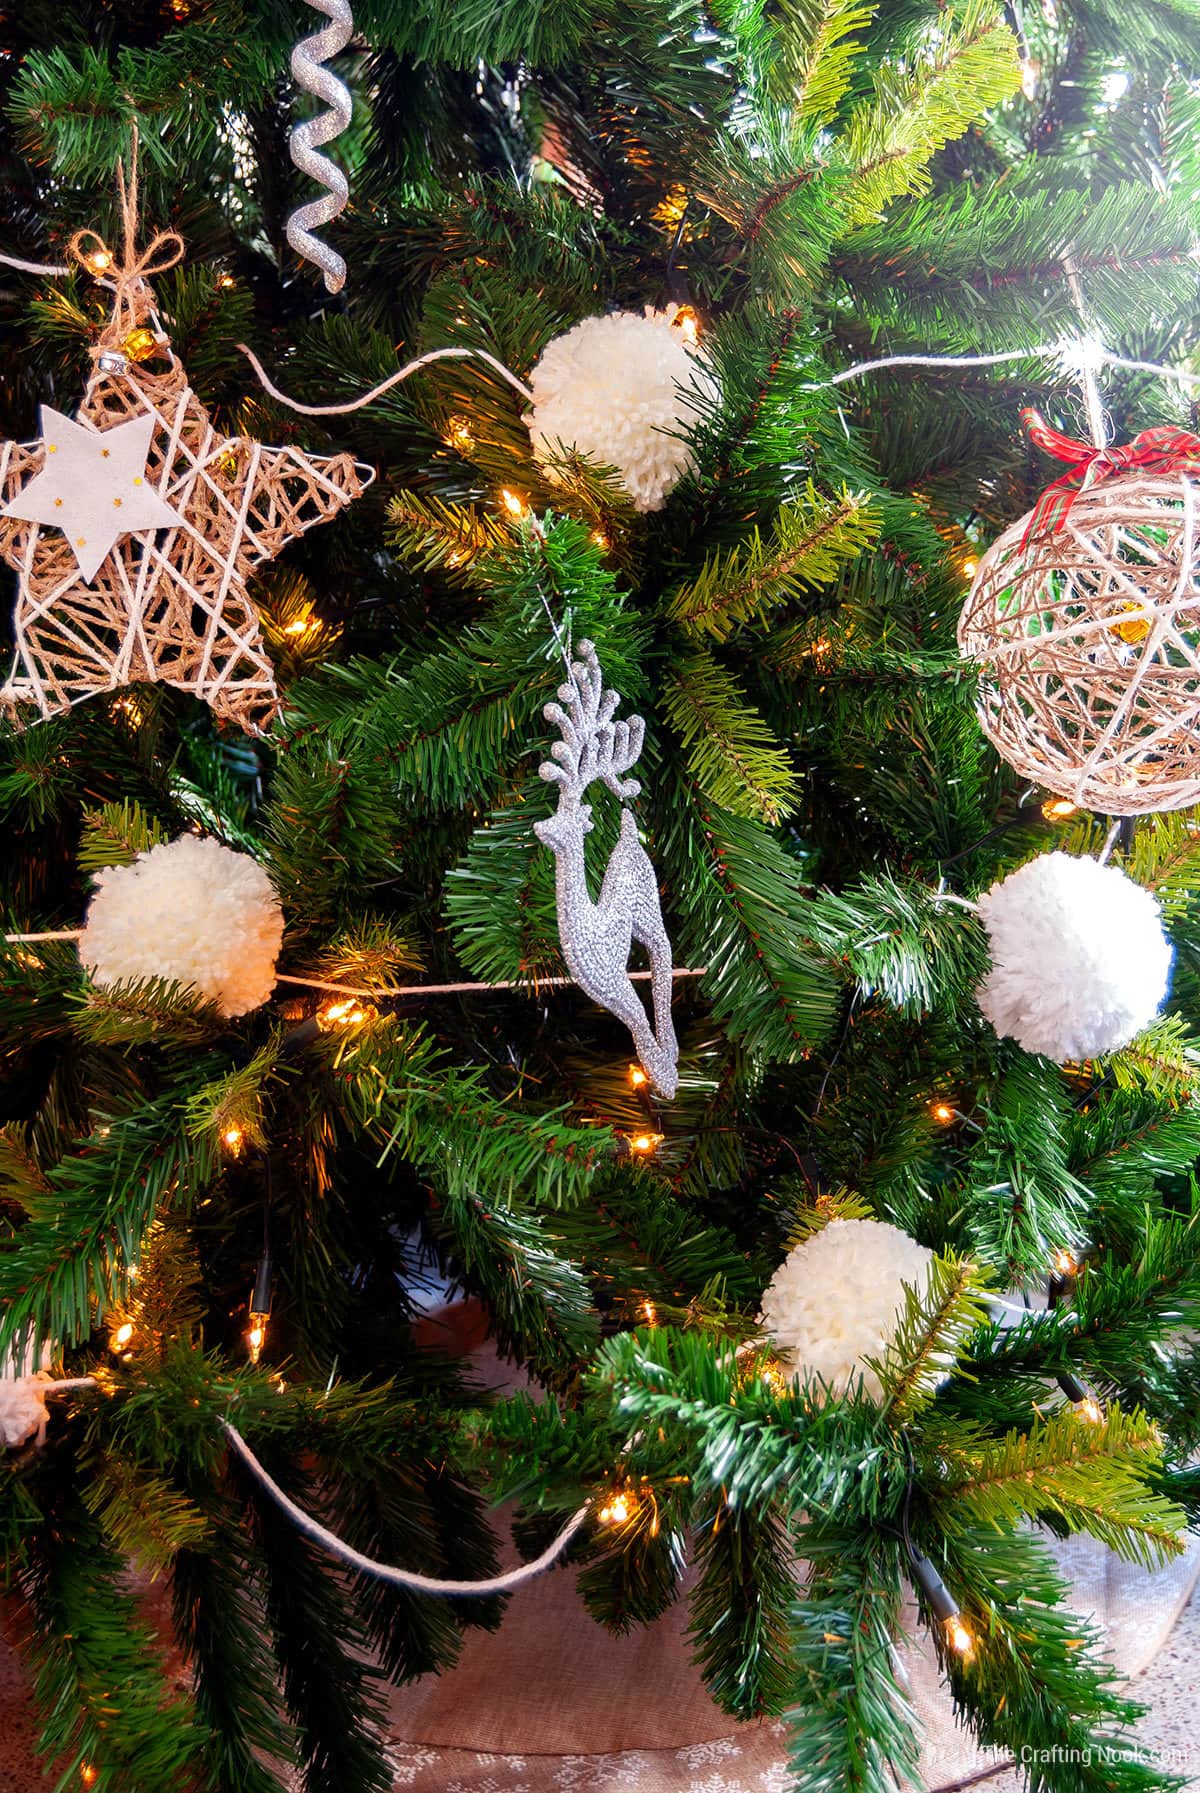
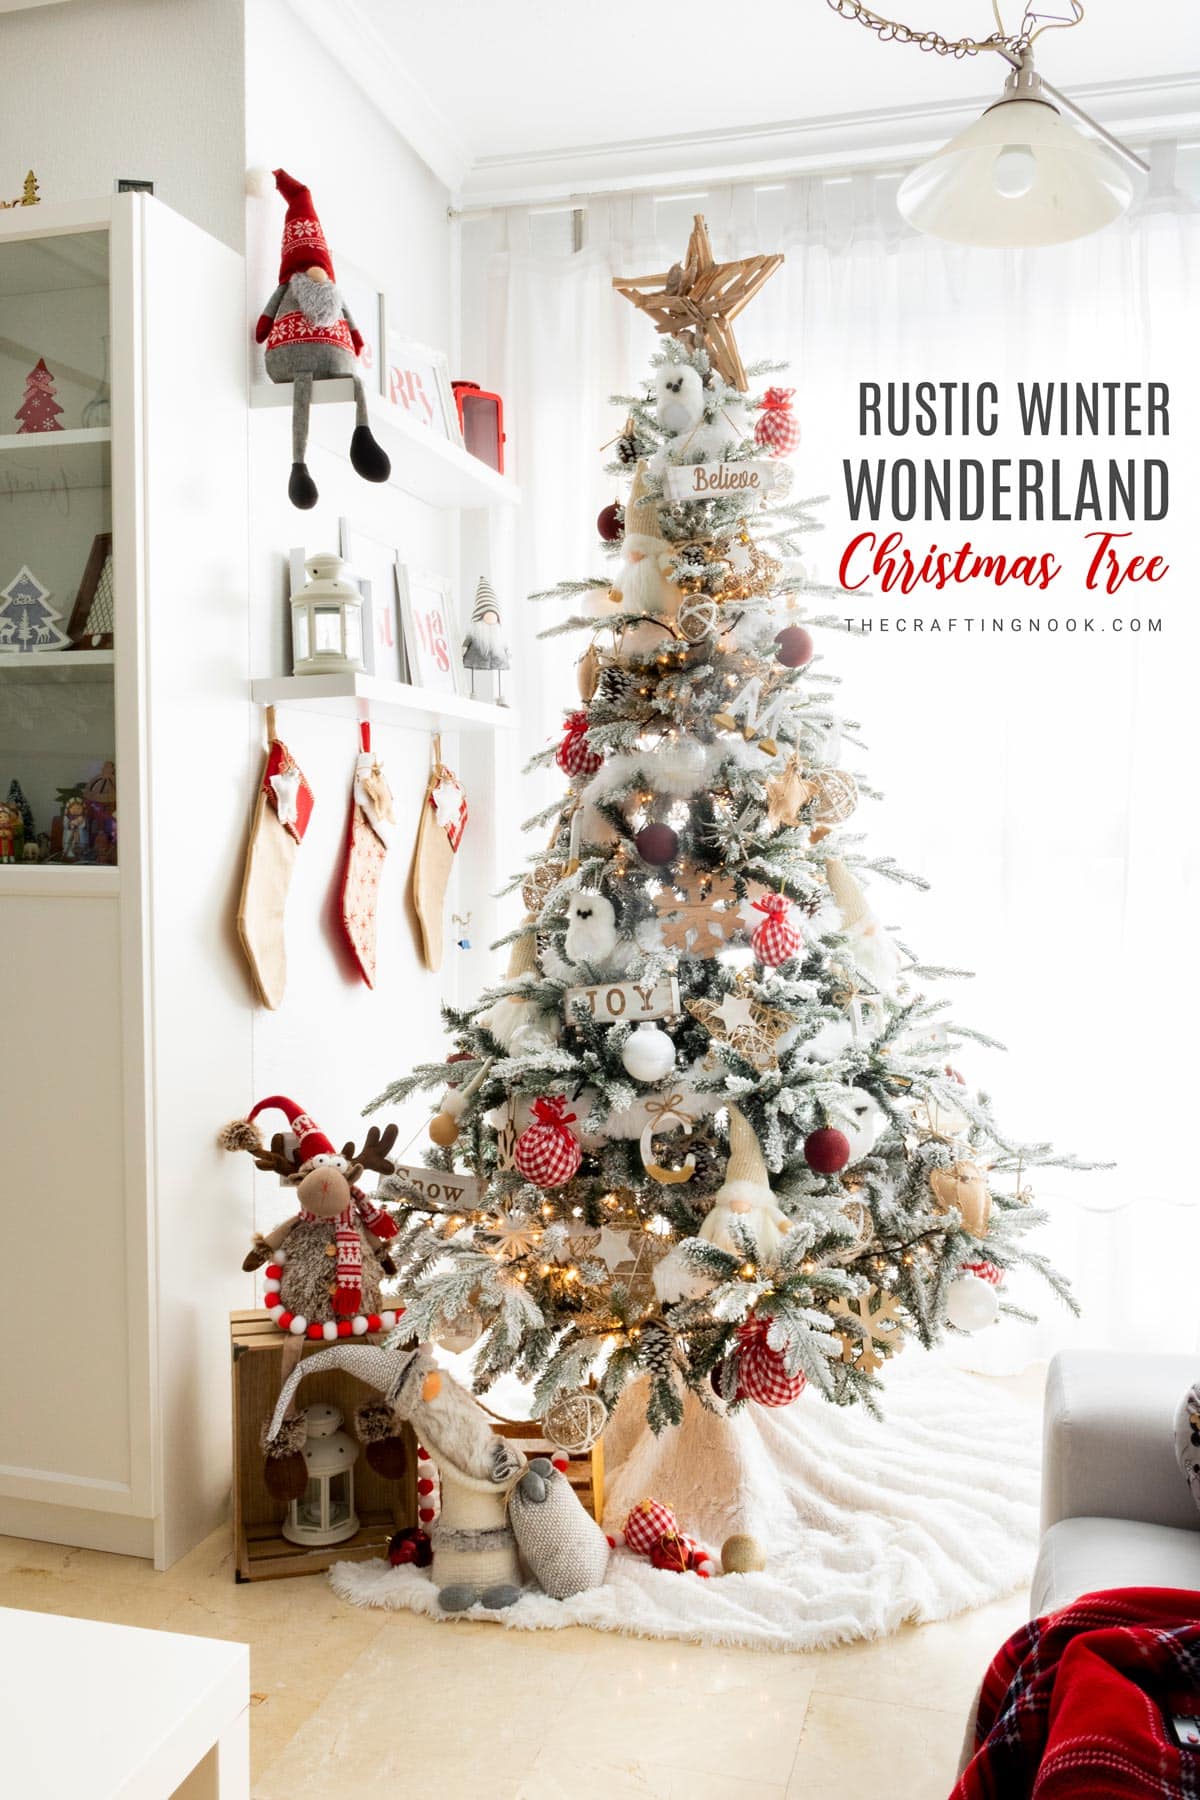
This is how my Christmas Pom pom Garland diy looks on my tree!!!!


Frequently Asked Questions
To create a pom pom Christmas garland, you need a tool called a pom pom maker, different colored and textured yarn, scissors, a needle or a hot glue gun to attach the pom poms, and if you like, you can also add small ornaments or ribbons to decorate it.
That will depends on how long and thick you want it to be. As a basic rule, try to have around 10 to 15 pom poms for every foot of garland. Since mine was for my tree I used 34.
You can put pom poms on the garland using a needle and thread, a bodkin, or you can use a hot glue gun for a fast and safe way to attach them. You need to make sure there is enough space between the pom poms and spread them out evenly on the garland.
To make sure your pom pom garland stays nice, puffy up the pom poms if they get squished or knotted. If necessary, gently clean any spots on the yarn using mild soap and water. To avoid any harm, do not put in the washing machine or handle too much.
More Christmas Projects To Try
If you liked this cute DIY Pom Pom Christmas Garland tutorial, you might also love these other Christmas Projects ideas too:
✂️ Tutorial

Diy Pom Pom Christmas Garland for Your Tree
Tools
- Pom pom maker – I used the largest. These can be found in craft stores.
- scissors
- A Bodkin
Supplies
- Yarn – I used 4 packs 2 white 2 light cream. The size is up to you, how fluffy you want the pom poms
Instructions
CREATING THE POM POMS
- This pom pom maker comes in two pieces. The same but inverted.
- Keeping them together with locks on, open the locks and keep both pieces on the same side together. We will work on each half separately.
- With your thumbnail secure one end of our yarn more or less in the middle of your pompom maker.
- Start wrapping going over the end of the yarn so it stays in place.
- If you see between both pieces, you will notice there are like half balls in there.
- Those get stuck on some holes on the other piece so you know you are making the pom poms right.
- Keep wrapping until you cover well the pom pom maker.
- The more you wrap the thickest and fluffiest the pom pom will be so I go for the thickest.
- This step is totally up to you. You can try different amounts and see how you like best.
- superior view of half of the tool full wrapped
- When you think it’s enough, wrap until you get to the pom pom maker end.
- Pull the yarn tight so it gets secured.
- Cut the yarn close to the tool.
- Turn it over and repeat the process with the other side of the pom pom maker.
- When you are done, cut a strip of yarn long enough to tie up your pom pom and get a couple of long tails left. Mine was about 8 to 10 inches.
- Make your pom pom maker ends meet and lock both sides.
- Now using your scissors, cut very carefully between the two pieces of your pom pom maker.
- Try to keep the strings in the center in place with your fingers as you cut around. Be very gentle and careful here, don’t rush it.
- Once you are done, you will have something like this:
- Still holding both pieces, pass your yarn strip between both maker sides like follows:
- Make both ends meet and pull carefully.
- Tie it up with a knot. I usually make a knot here then go back with each end and tie up again. Double knot, triple know, secure it well.
- It can get a bit tricky tying up between the two pieces but you can do it.
- Open your pom pom maker and remove them from your pom pom. DO NOT CUT your long tails just yet.
- Woot, there you go! You have your first pompom.
- Easy peasy, right?
- Now go for 33 more LOL…
- So, Once you have made all your pompoms, remember to reserve 2 or 3 yards of yarn for the garland string.
ASSEMBLING THE GARLAND.
- Using your bodkin, Insert one end of your yarn and pull it down towards the tight part.
- Take your pompoms from the tail you left in the previous steps and find your knot.
- That will tell you where you should insert your bodkin with the string of yarn.
- Insert your bodkin right perpendicularly very close to your knot loop.
- Pull the bodkin on the other side and push the pom pom down the string.
- Repeat this process with all your pom poms.
- Don’t glue the pompoms or make knots because when you are putting it on the tree you want the freedom to move the pompoms through the string to position them where fits best.
- Once your pom pons are all in your garland, you can cut all your pompom tails.
- There you go!!! Your Christmas Pompom Garland is finished and ready to be placed on your Christmas tree or wherever you want it to be.
Share and PIN ME!!!

Hope you enjoyed it and want to make your own garland!!! I’m in love and can’t wait to finish my Christmas tree!
I would love to hear your thoughts, let me know what you think in the comments!
Til’ next time…


FREE WORKBOOK
Keeping your Sweet Home Organized
Learn how to create intentional habits and simple routines to Keep Your Home Organized. Plus freebies, printables, exclusive content, and tips.
Disclaimer: By clicking on the “Yes” button above you are giving me your consent to collect and use your information according to the law and My Policy Privacy. Zero Spam I promise!