How to Use Inkjet Printable Heat Transfer On T-Shirts
This post may contain affiliate links. Please read our Disclosure Policy.
Get ready to unleash your creativity with our guide on using inkjet printable heat transfer material on a kid’s t-shirt using a fun Tigger design. Learn step-by-step how to create custom designs that will make your little one the trendiest kid on the block. Let the fun begin!
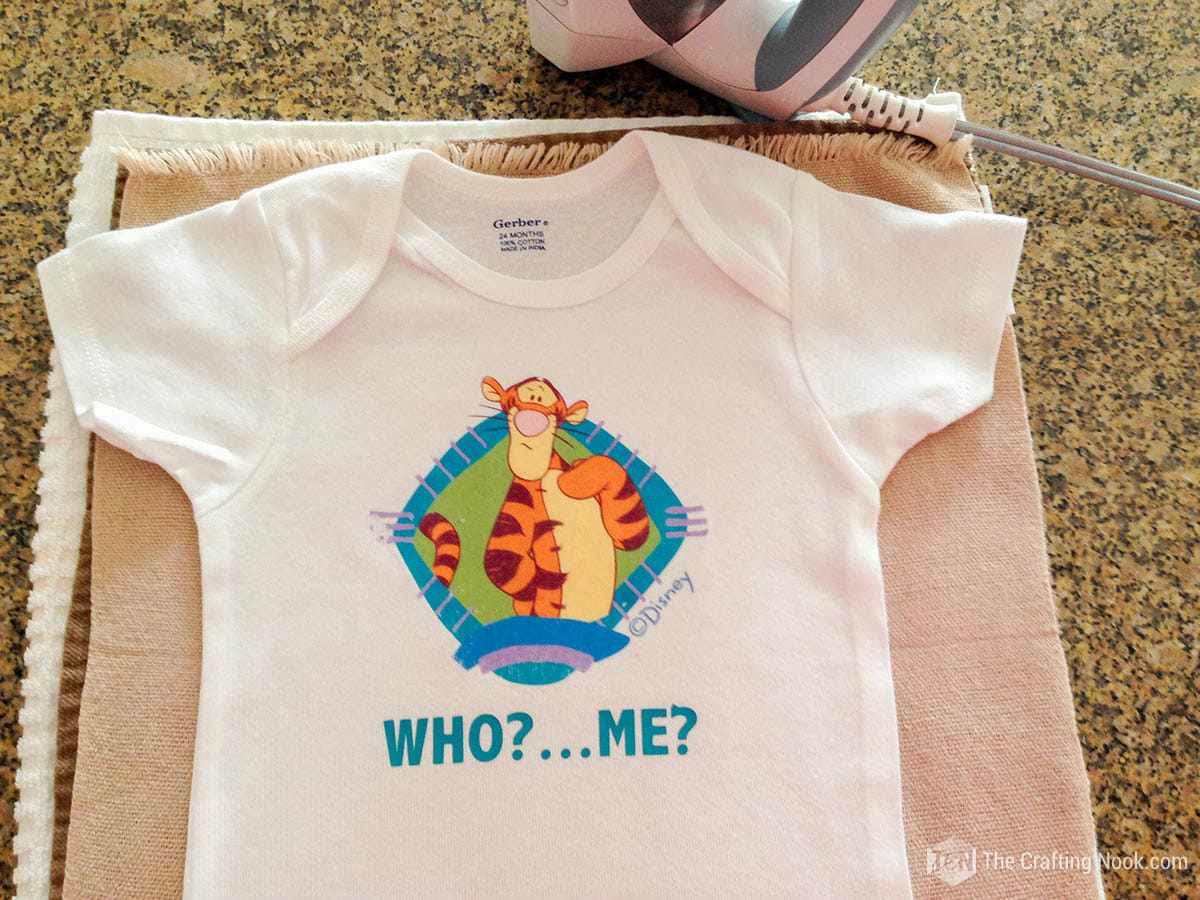
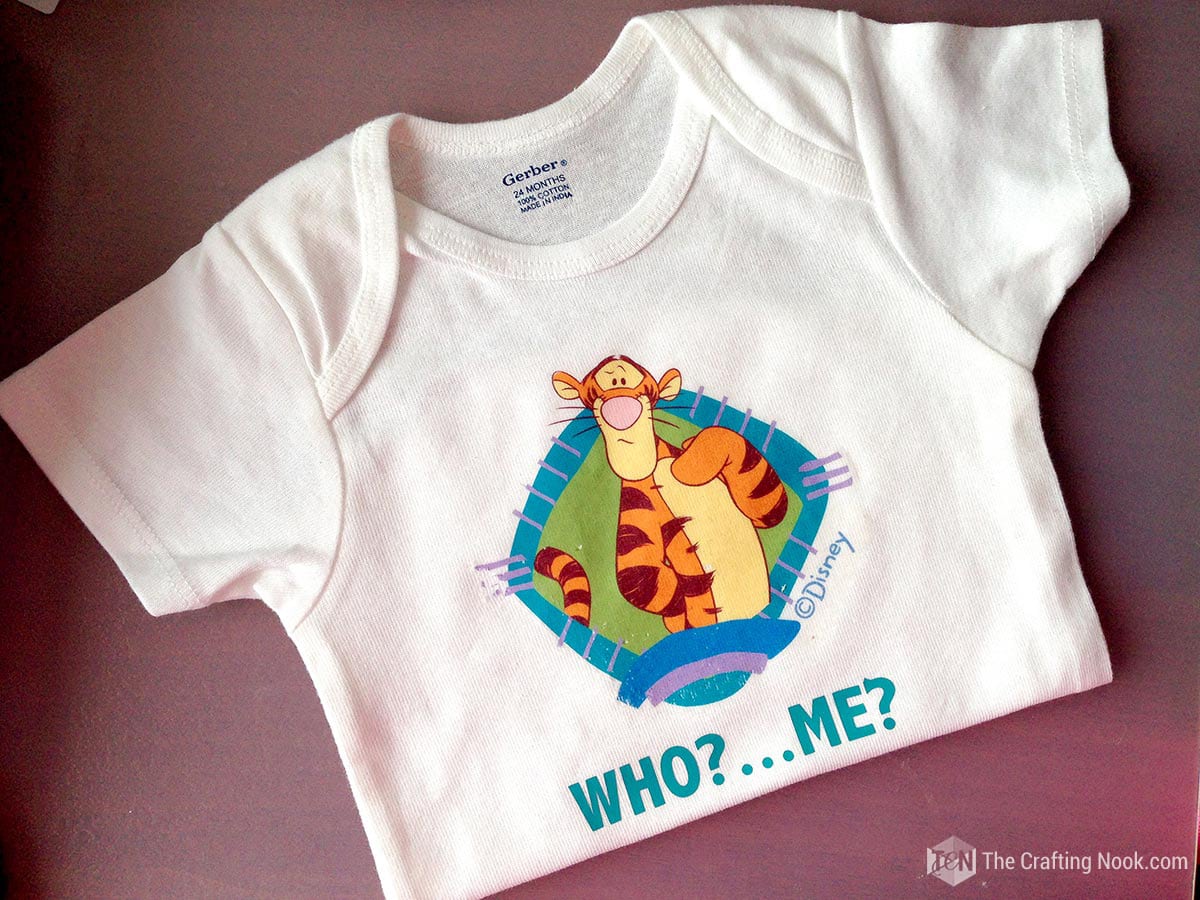
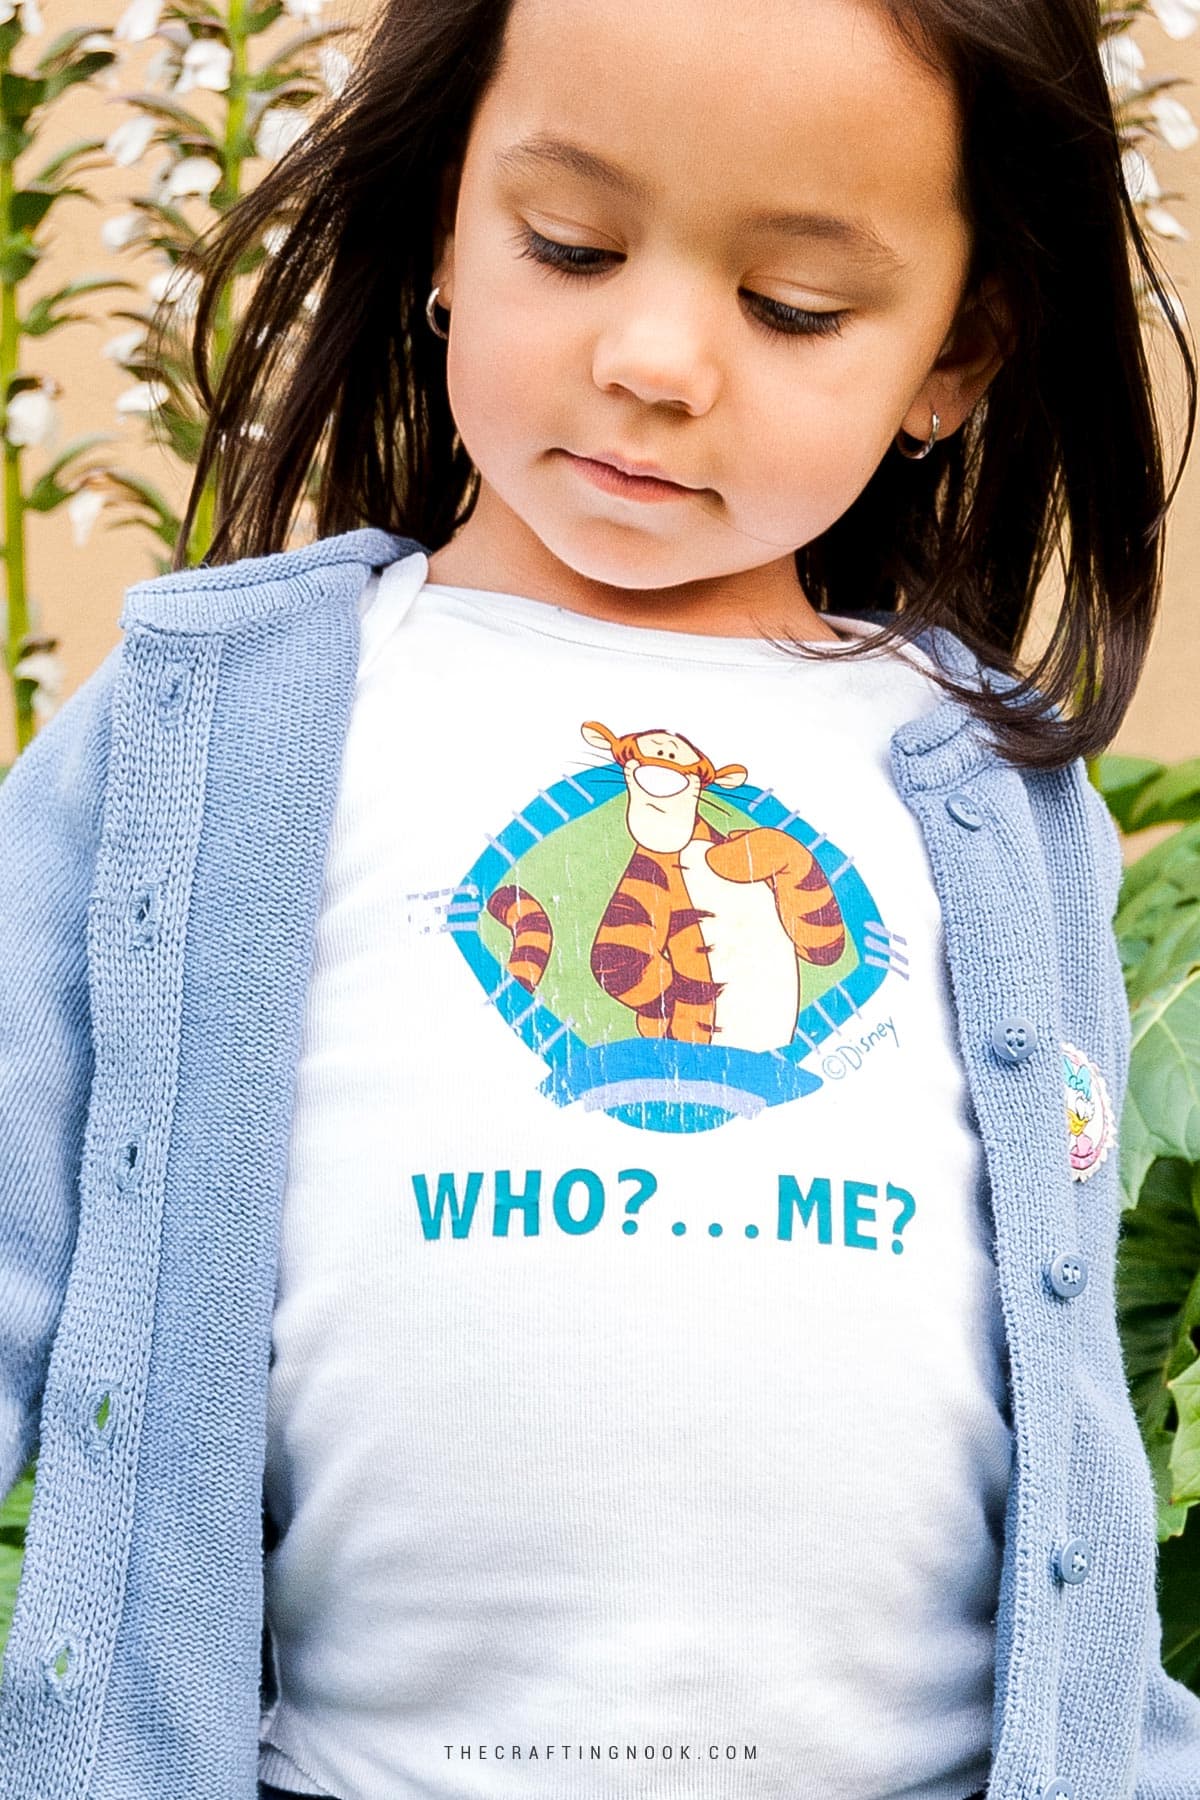
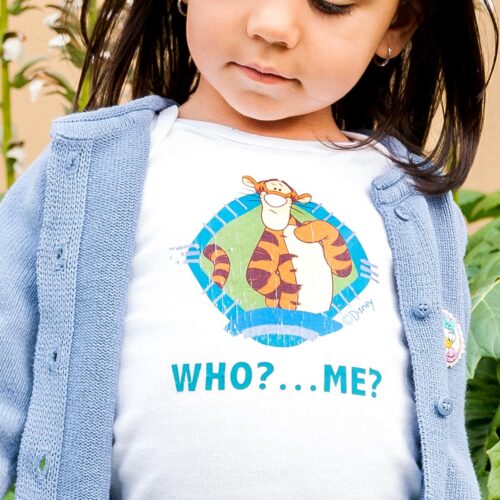
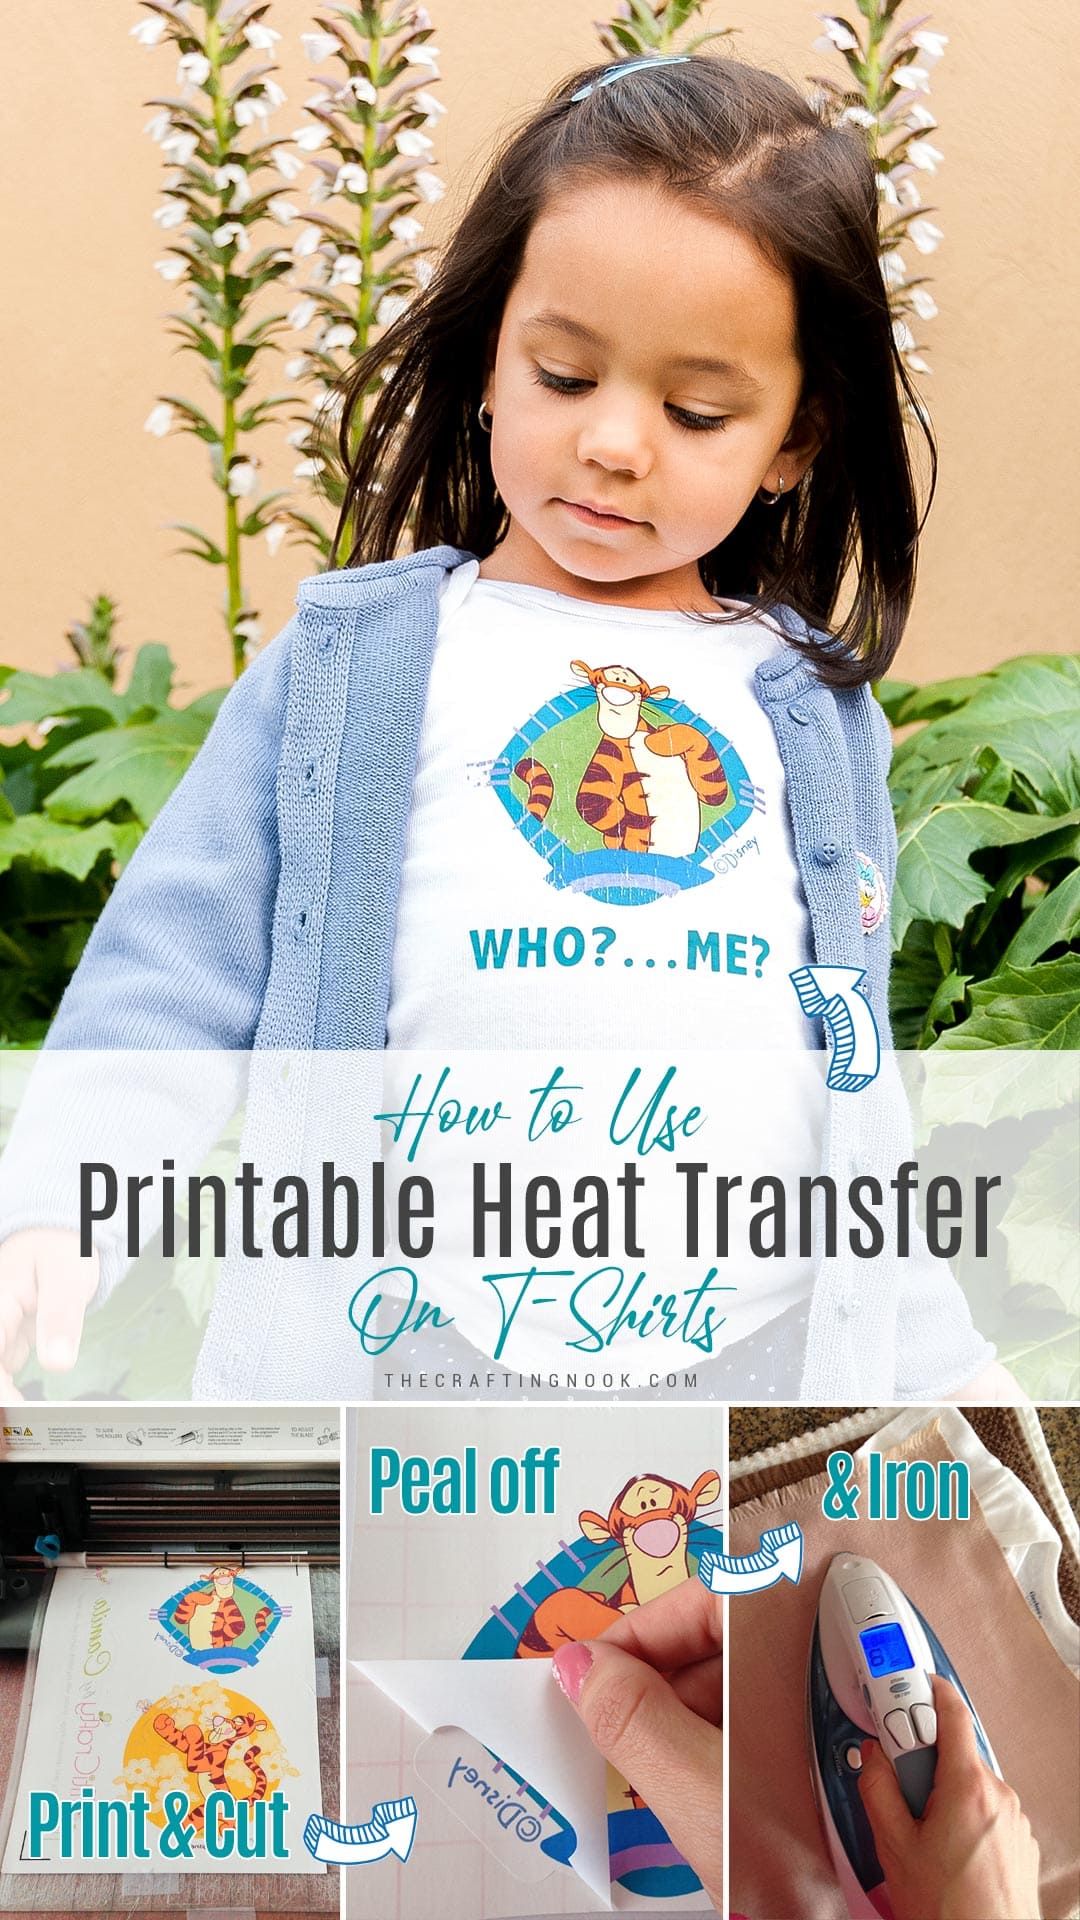
Today I’m sharing a new silhouette project using for the first time inkjet printable heat transfer material. I created this cute Tigger T-shirt for my little Girl and she loved it!

Table of Contents
Tigger Inkjet Printable Heat Transfer T-Shirt
This project is easy to make. I mixed it with normal heat transfer vinyl to create the text and a fun touch.
I did notice though that this specific material did not go as well as expected in this type of material. I applied it to a onesie-turned-into-t-shirt. As you probably know onesies fabric is very stretchy.
So my recommendation is that you use it on normal cotton t-shirts to avoid the material cracking when stretching.
Anyway, this is how I made this cute Tigger t-shirt.
What is Inkjet Printable Heat Transfer Material?
It’s a fun type of vinyl/paper that you can print out your designs on and then transfer onto fabric with a hot iron or heat press. It’s like having a magic wand that turns your creative visions into reality.
You can print all kinds of cool stuff, like photos, logos, and crazy patterns, and make your clothes, bags, and other fabric items look totally rad. It’s a game-changer for all you crafty friends out there, and once you try it, you’ll wonder how you ever lived without it.
You can use the print and cut feature of your cutting machine such as Cricut, Silhouette, or other.
How to Use Inkjet Printable Heat Transfer On T-Shirts
Supplies:
- White T-shirt
- Inkjet Printable Heat Transfer Material for light materials
- Heat Transfer vinyl
Tools:
- Inkjet Printer
- Cutting machine – Cricut or Silhouette Cameo
- Home Iron or Heat Press.
- Weeding tool
Instructions:
This tutorial is based on Silhouette Studio and Silhouette Cameo Machine. You can pretty much use the same process but use the correspondent features on your cutting machine app.
Step 1: Choose Your Design
The first step is to pick out the design you want to use. Whether it’s a favorite character or a cute phrase, choose a design that your child will love. You can create your design using a graphic design software, or find pre-made designs online.
I chose a fun Tigger graphic that I loved.
Step 2: Tracing your design
I imported a .jpg file to my silhouette studio. Then just in case I duplicated the image to keep one untouched.
Using the trace tool, create the shape of your design. In this case, I set up the High pass filter to the full and modified the Threshold so the whole image would be covered in yellow.
Then I hit trace outer edges.
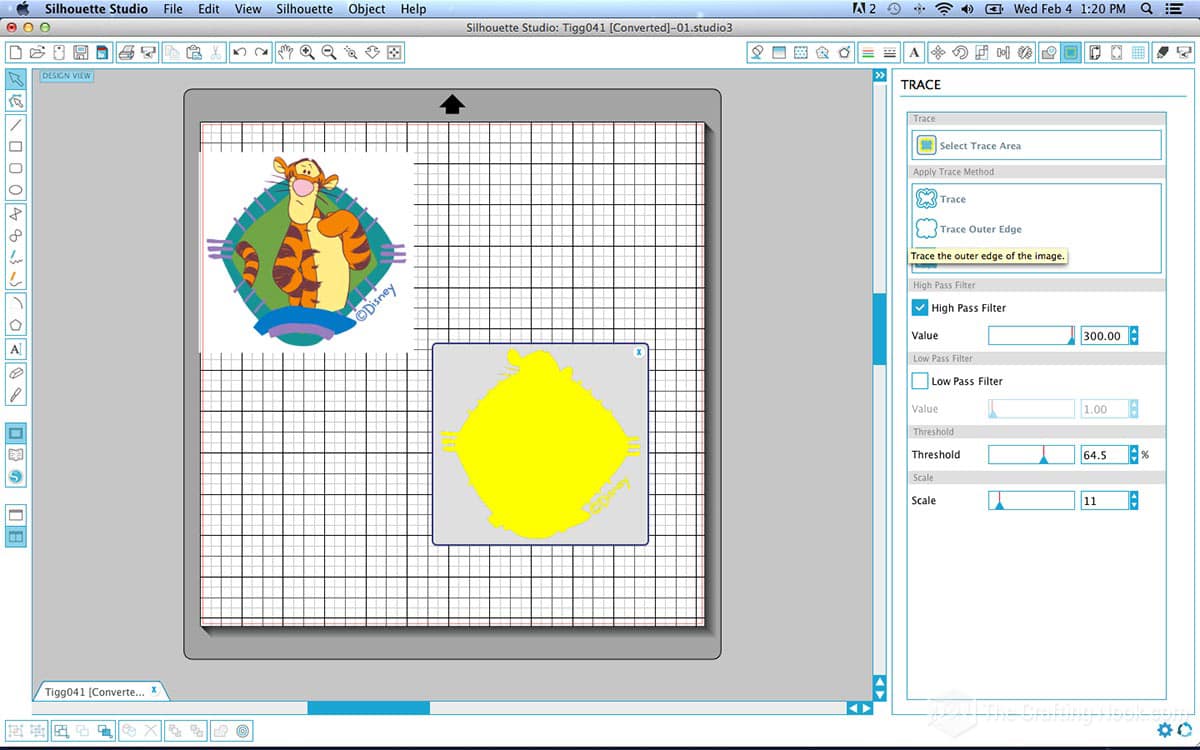
That creates a red line around the design.
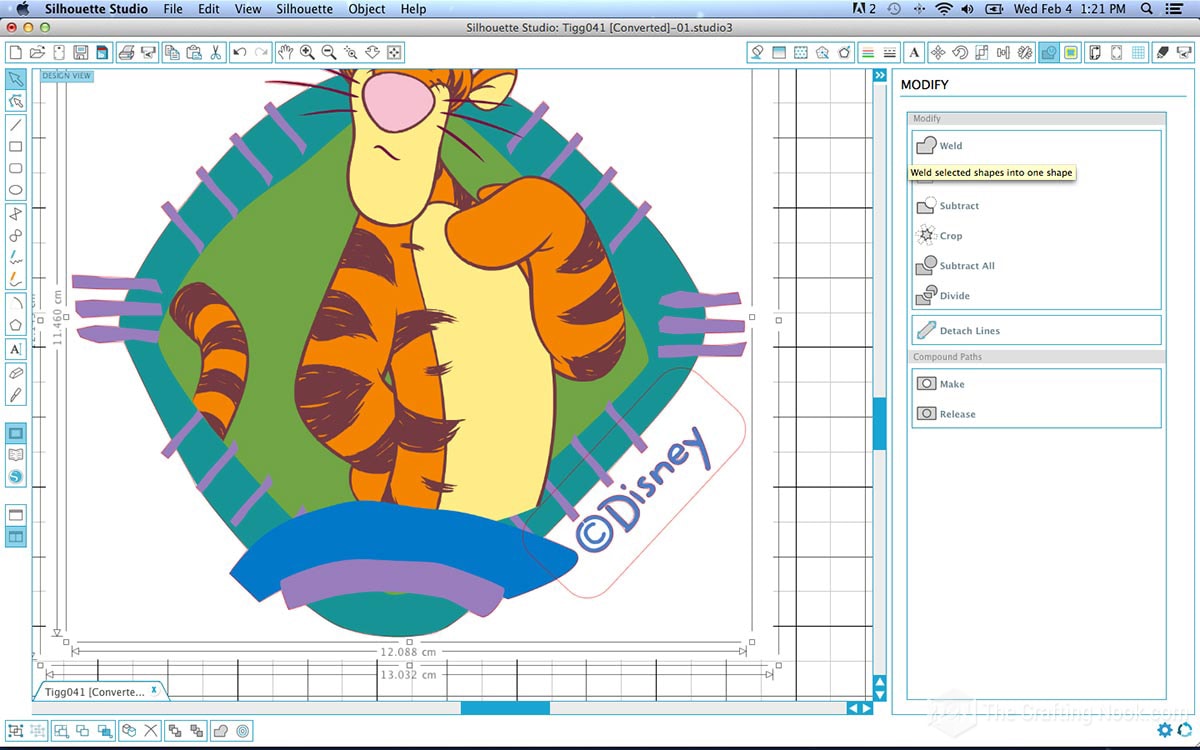
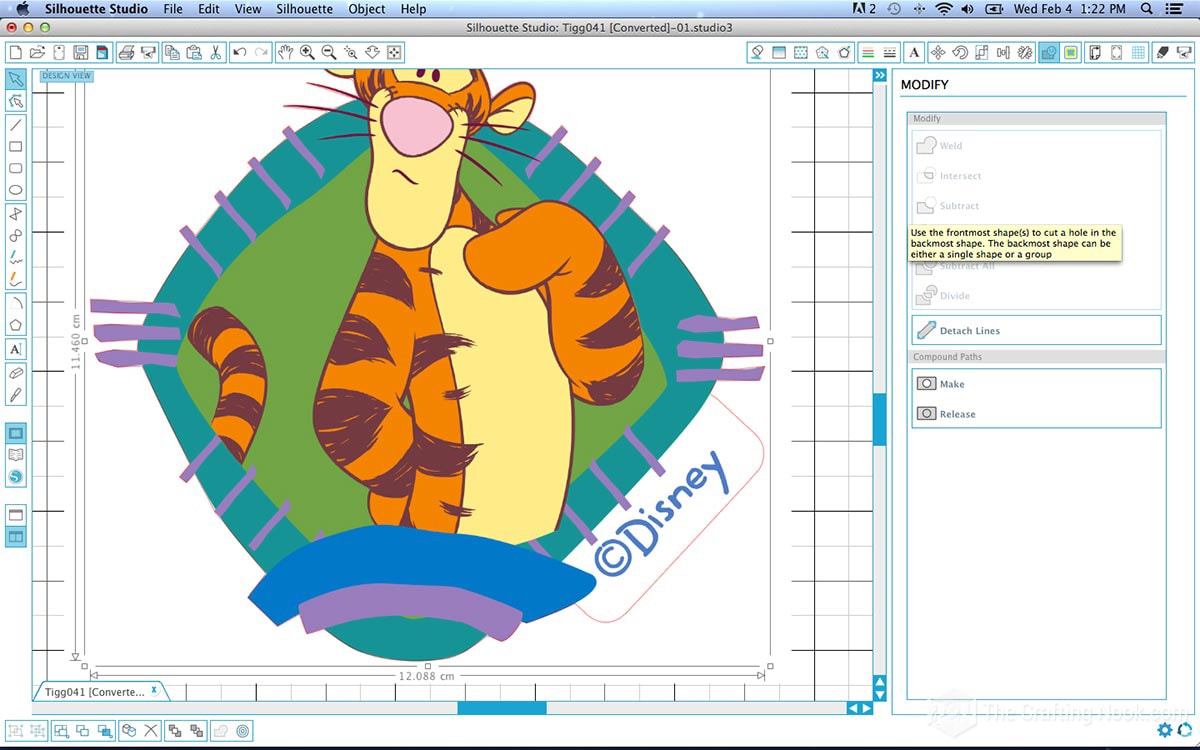
I had the word Disney outside the main graphic so I created a rectangle, I placed it in a way that overlapped the graphic with the word, and using the weld tool in Modify I created one single cut shape.
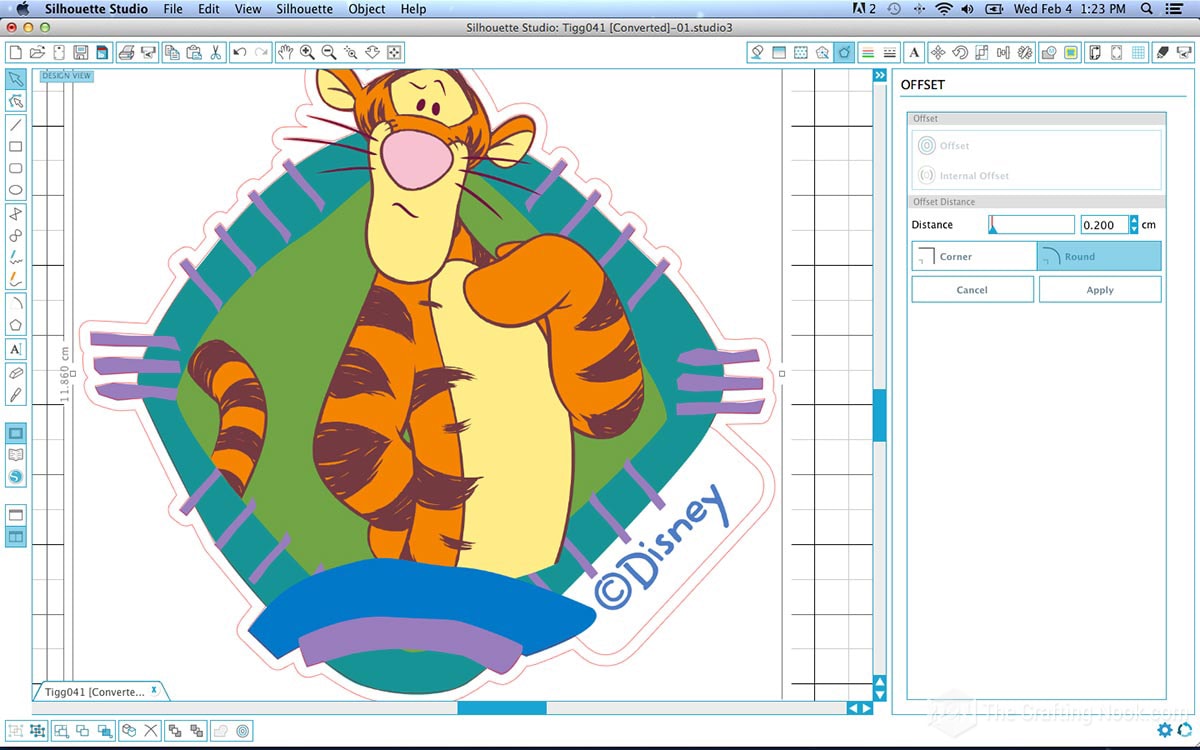
Then since I didn’t want to risk cutting so close to the graphic, I used the offset tool.
When you chose it, it creates another border bigger than the original then I just delete the original one and leave the bigger one.
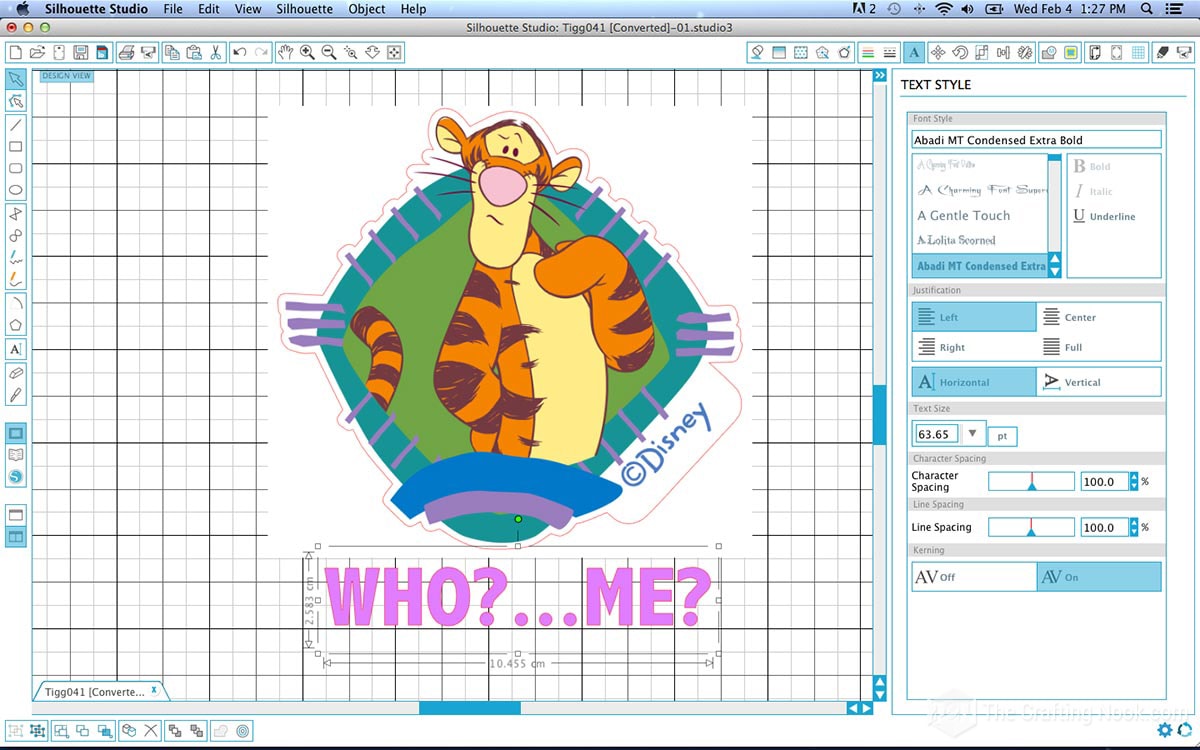
Step 3: Type your phrase (Optional step)
Now I design the wording. In this case, because of the expression of Tigger in the image I wrote: “Who?… Me?”.
I set up the size and position where it will be and set it aside.
Quick Tip:
Ok here is where my saving side starts acting. I don’t like to waste material and once we print it will also print registering marks so there will be a waste. I decided to prepare and print some other stuff to use in the future.
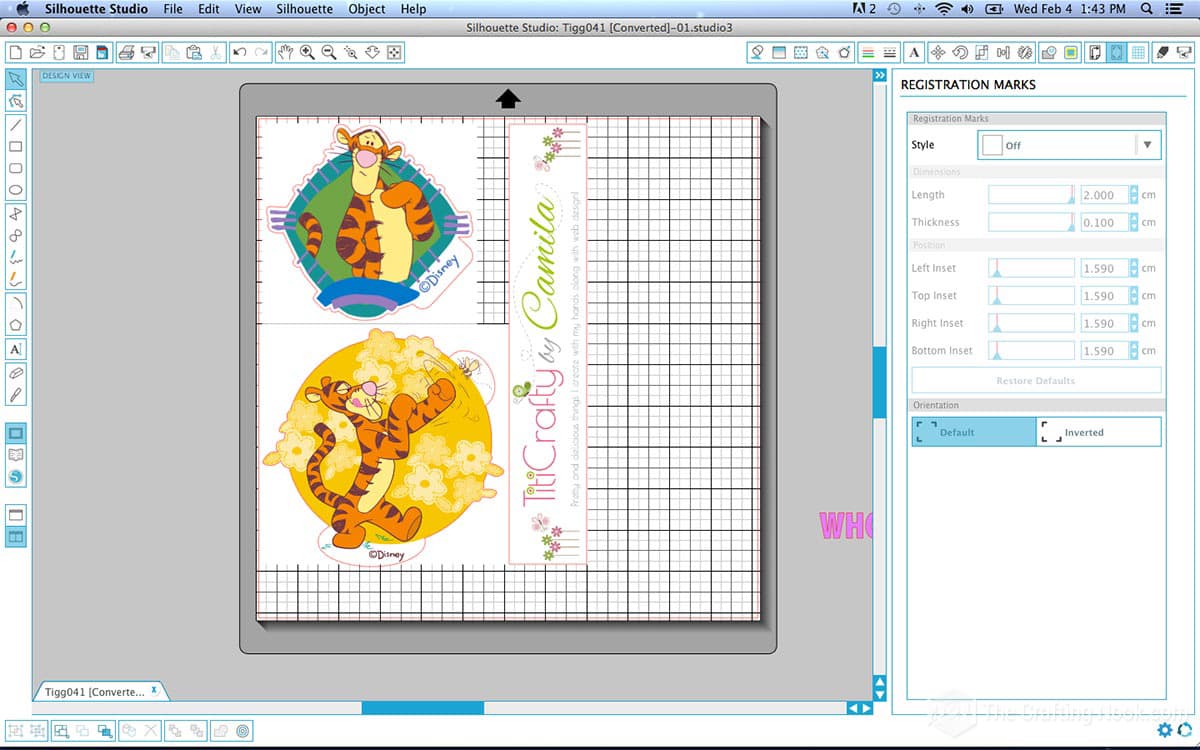
Step 4: Print Your Design
Once ready I set up the page for printing.
Open the Page Setup tool from the right sidebar. Adjust the page size there to “Printer”.
Check the boxes to turn on the print border and cut border.
Press “M” on your keyboard to turn on the registration marks.
I placed everything so it would fit into the available space.
Mirror your design and make sure everything still fits inside the print and registration marks.
I have my printer settings set to “High-quality” so that I get the best quality print.
Load your PHTV into your printer and print your design onto so that it prints on the matte side of the vinyl sheet.
Again remember to mirror your design before printing it onto the printable material for light surfaces!
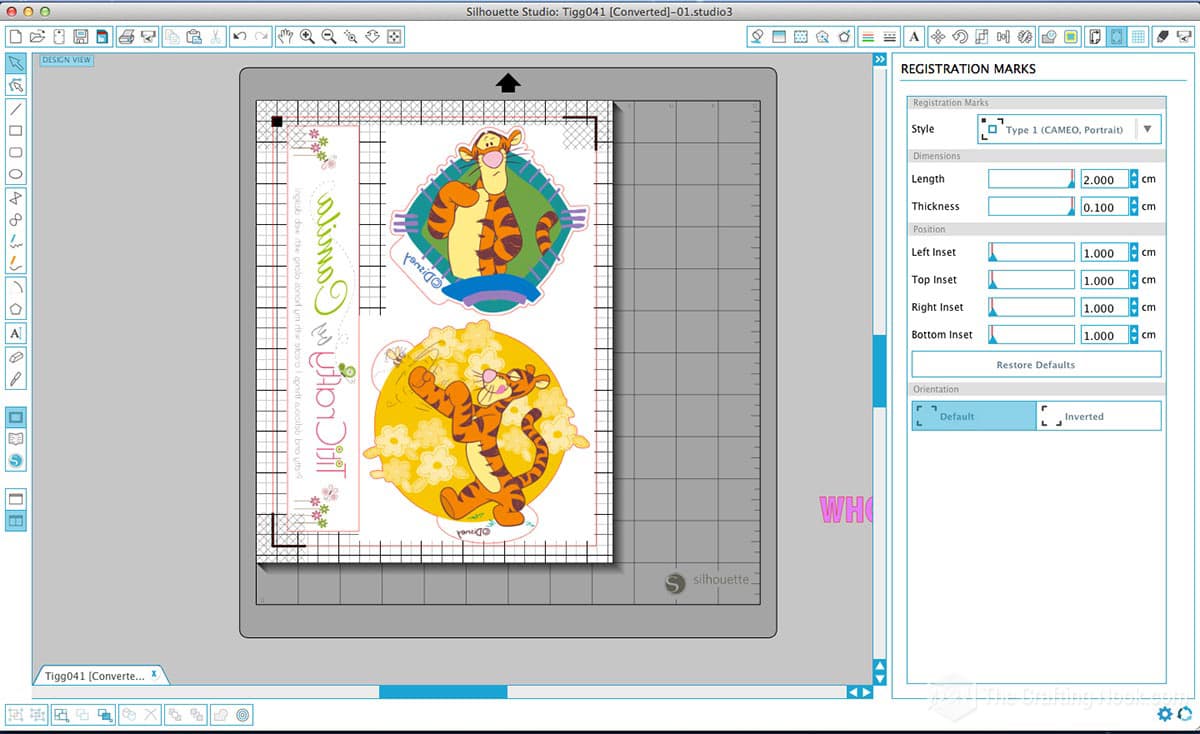
Send to print from Silhouette Studio.
Step 5: Cut Out Your Design
Once your design is printed, place the printed sheet on a Silhouette cutting mat and load it into the Silhouette Cameo.
Then go to cut settings and chose Printable heat transfer material for light fabrics in the Material type options and set the blade settings as suggested.
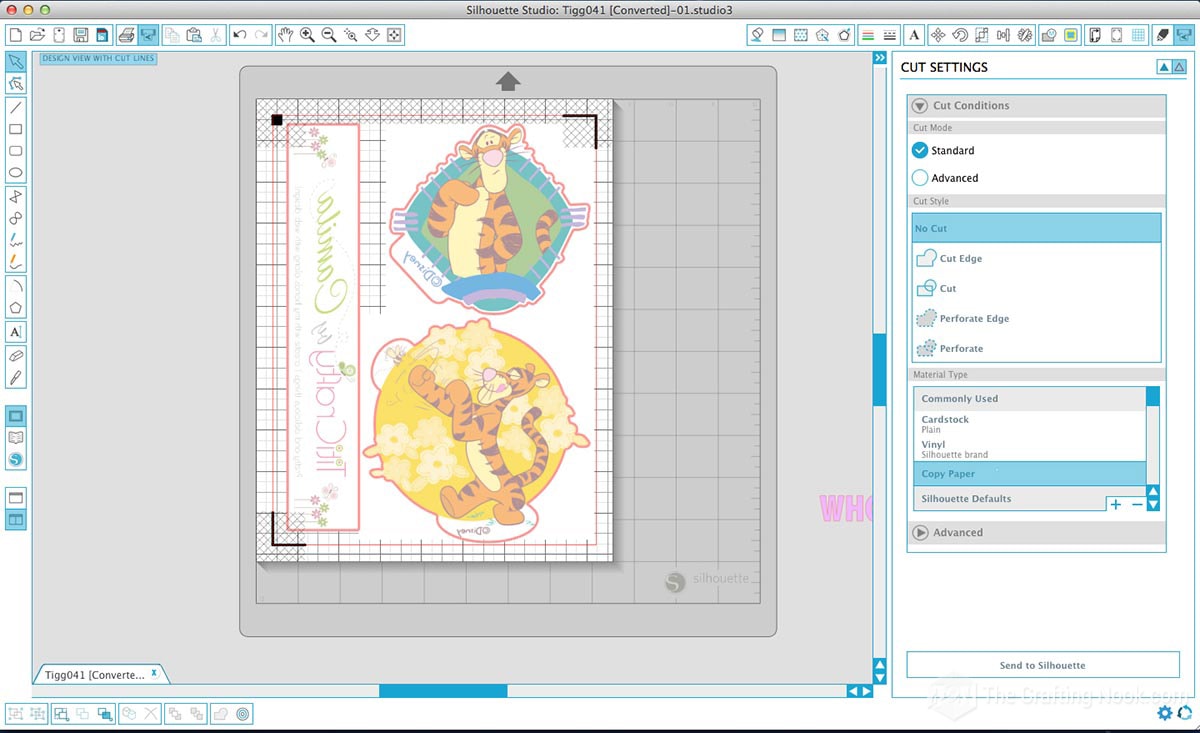
Before sending it to cut make sure the cut lines are where you want them.
Sent to cut.

Once the cutting is done, peel off the excess printable HTV with your weeding tool. I removed all the excess material that wasn’t part of my design and only left my graphics.
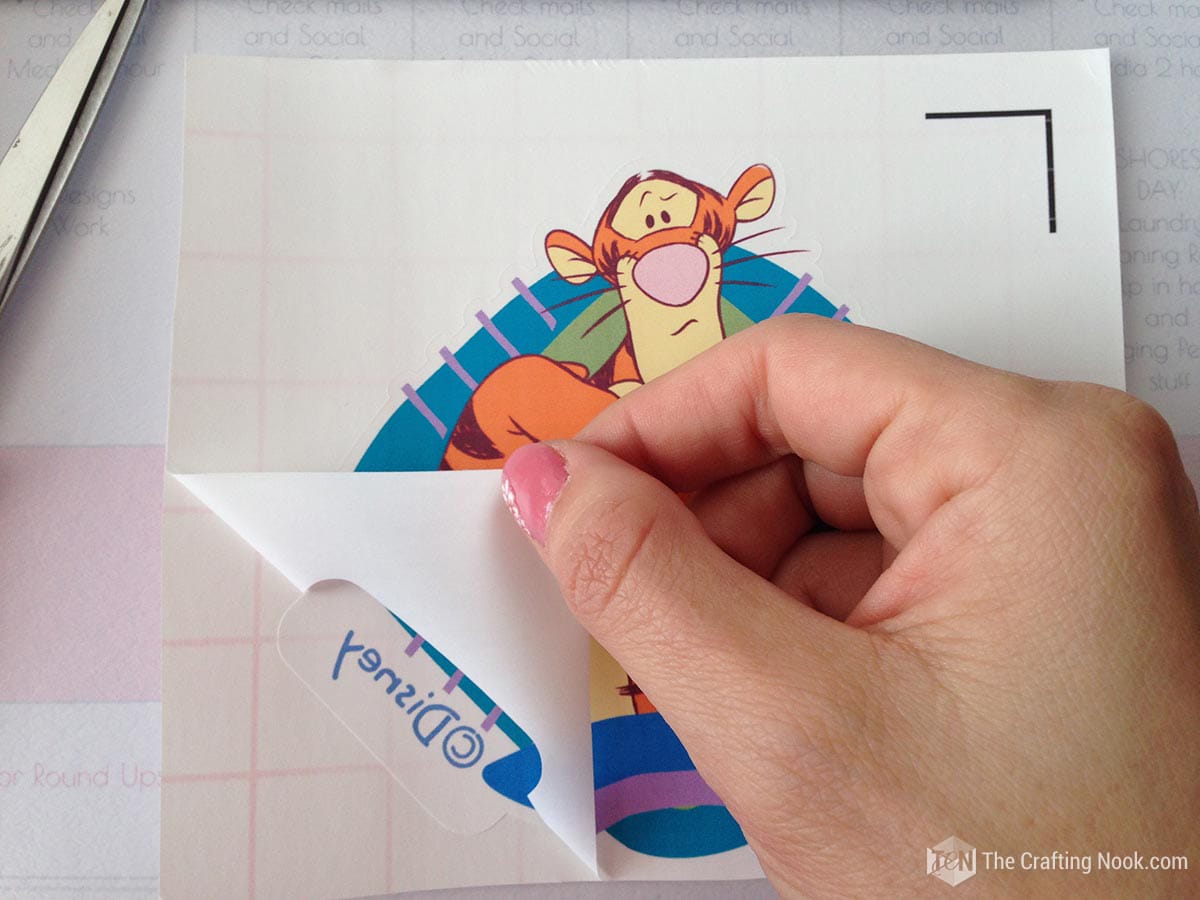
Then I set up the wording and send it cut with normal Heat transfer vinyl. If you want to learn how to use Heat Transfer Vinyl you can check this post.
Step 6: Prep Your T-Shirt
Before you transfer your design onto your kid’s t-shirt, you’ll need to prep the fabric. Wash and dry the t-shirt to remove any dirt or debris, and make sure it’s free of wrinkles.
Step 7: Transfer Your Design
Now it’s time to transfer your design onto the t-shirt!
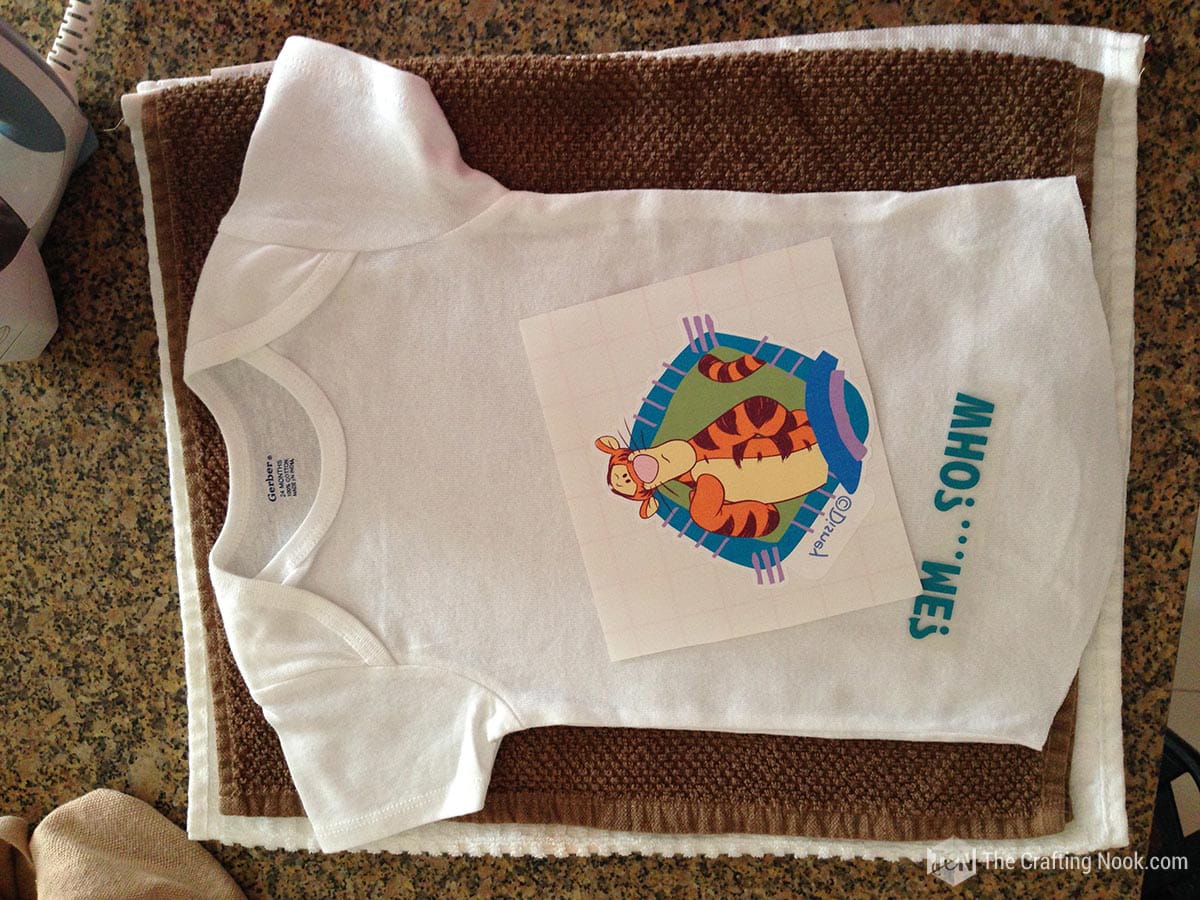
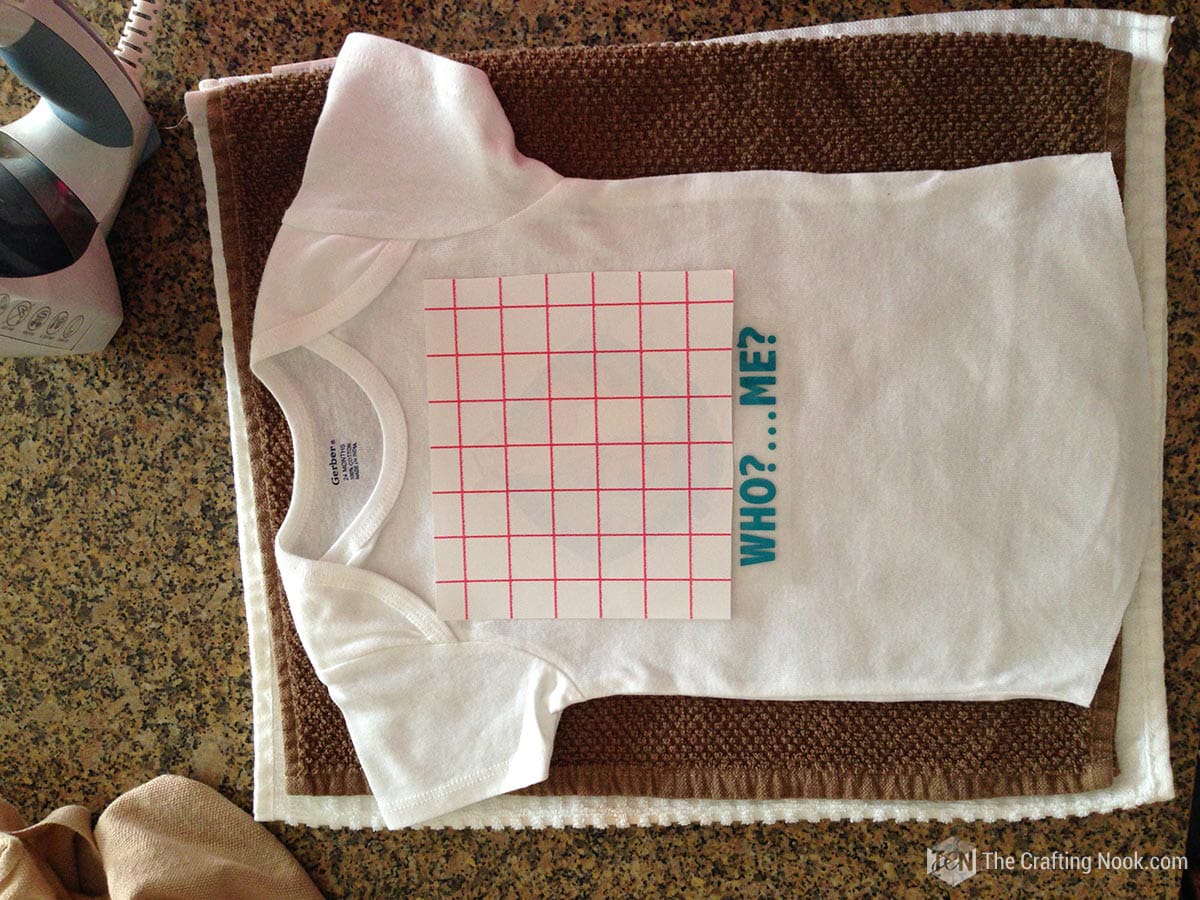
Place your vinyl design face-down onto the t-shirt, making sure it’s centered and straight.
I placed the htv wording in the right place with the backing facing up. Placed a piece of clothes on top and Ironed on cotton setting for about 40 to 60 seconds. I left it to cool down a bit and peeled off the backing.
Cover the vinyl with a protective sheet (like a piece of clothes, parchment paper or a teflon sheet), and press down firmly with a hot iron on a cotton setting for around 40-60 seconds.
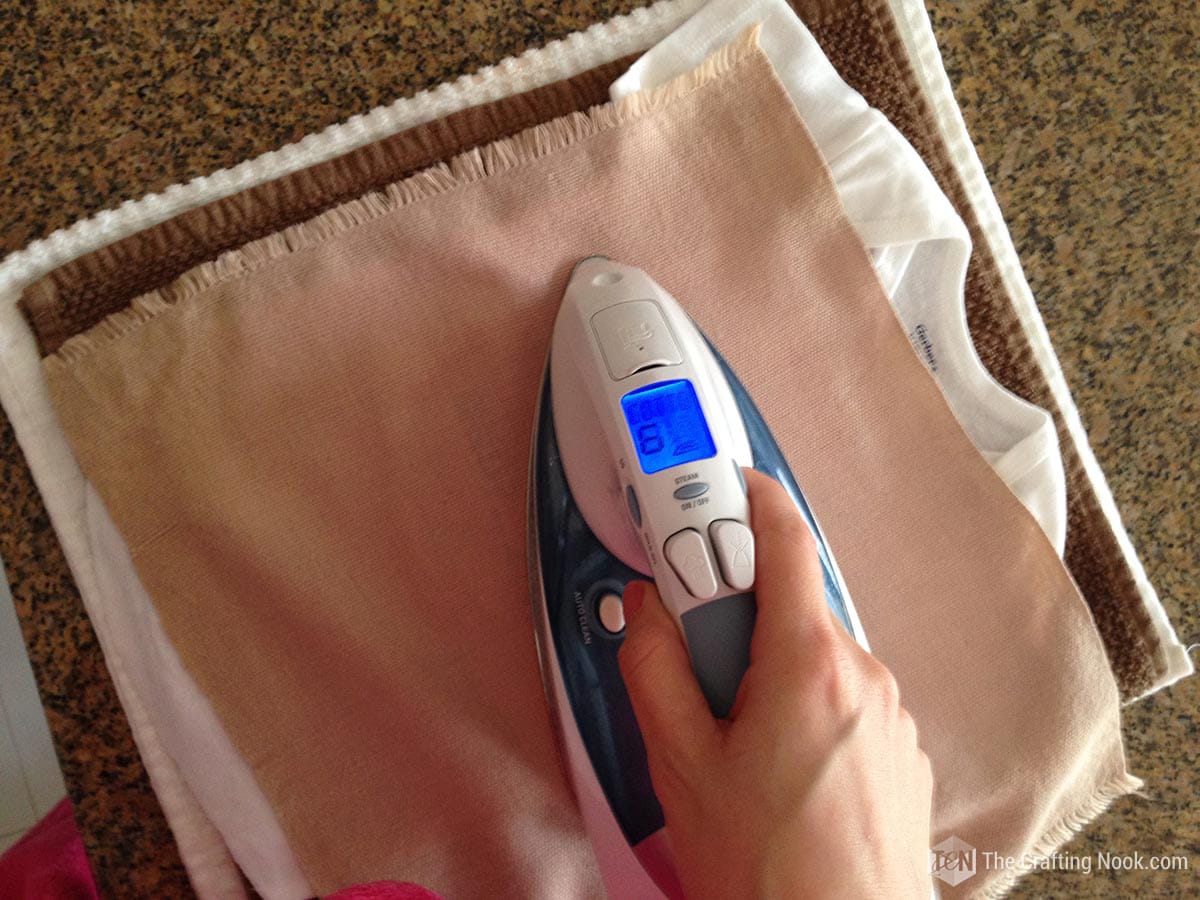
I recommend starting with 15-20 seconds and testing removing the protective sheet. If the vinyl comes off, put it back and iron it for another 15 seconds, and so on.
If using heat press, set it to 375 for 30 seconds and use firm pressure to press the image directly onto the shirt.
As soon as the time is complete, peel off the protective sheet while it is still hot, and admire your new creation!
Tadaaaaaa!!!! There you go! That’s all there is to using Inkjet Printable HTV on light materials! Now you have a cute new T-Shirt ready to be used.
Care Instructions:
Wait at least 24 to 48 hours before washing it. For longer results, wash your clothing inside out on a cold gentle cycle and tumble dry.
Crafting Tips
- Before printing, try adjusting the color saturation on your printer settings for extra vibrant designs. Your kid’s t-shirt will be a color explosion!
- Mix in some glitter PHTV to add a touch of sparkle and magic to your designs. Because who doesn’t love a little extra bling?
- After printing your design, let it sit for a few minutes before cutting it out to avoid smudging the ink.
- Most importantly, don’t be afraid to get creative with your designs! Add some glitter HTV, make a fun pun, or use your kid’s drawings for a truly unique look.
What do you think? Do you like this Tigger Printable Heat transfer T-Shirt???

Frequently Asked Questions
Is Printable Heat Transfer safe for kids to wear?
Yup, most commercial brands are totally safe! PHTV is specially designed for fabric application and is kid-friendly. Let them rock their personalized tees with confidence.
Can I wash PHTV on my kid’s t-shirt?
Yes, you can! Just make sure to follow the material washing instructions carefully to keep your design looking fresh and vibrant for as long as possible.
Can I use any inkjet printer for Printable Heat Transfer?
As long as your printer can handle the thickness of PHTV, you’re good to go! Just make sure you’re using the right settings for optimal results.
Can I use PHTV on different colored t-shirts?
For sure! PHTV works like magic on various colored t-shirts, from light pastels to bold and dark shades. Just make sure you use the right material. There is a PHTV for light colors and for dark colors. They are applied differently so look for the instructions accordingly.
Can I use PHTV for other fabric projects besides t-shirts?
Oh, definitely! PHTV is perfect for all sorts of fabric projects. Whether it’s tote bags, onesies, or even pillowcases, let your imagination run wild and bring those designs to life.
More Silhouette Projects to Try
If you like this Inkjet Printable Heat Transfer On T-Shirts tutorial you might also love these other Silhouette Project ideas too:


Want to Check Out More Silhouette Projects?
My Silhouette Challenge buddies and I are all sharing projects on our blogs today, so peruse the projects below for a wealth of Silhouette inspiration!
1. Clever Someday // 2. The Crafting Nook // 3. GingerSnapCrafts.com // 4. My Paper Craze // 5. Simply Kelly Designs // 6. Little Blue’s Room // 7. Mama Sonshine // 8. Small Stuff Counts // 9. Dragonfly & Lily Pads // 10. Give Me A Paintbrush // 11. Please Excuse My Craftermath… // 12. Barb’s Life // 13. GetSilvered // 14. Minted Strawberry // 15. unOriginal Mom // 16. Where The Smiles Have Been // 17. Persia Lou // 18. Silhouette School // 19. DailyDwelling // 20. Creative Ramblings // 21. It Happens in a Blink // 22. Adventures in All Things Food // 23. Create & Babble
✂️ Tutorial
How to Use Inkjet Printable Heat Transfer On T-Shirts
Tools
- Inkjet Printer
- Cutting machine (Cricut or Silhouette Cameo)
- Home Iron or Heat Press.
- Weeding tool
Supplies
- White T-shirt
- Inkjet Printable Heat Transfer Material for light materials
- Heat Transfer vinyl
Instructions
STEP 1: CHOOSE YOUR DESIGN
- The first step is to pick out the design you want to use. Whether it’s a favorite character or a cute phrase, choose a design that your child will love. You can create your design using a graphic design software, or find pre-made designs online.
STEP 2: TRACING YOUR DESIGN
- I imported a .jpg file to my silhouette studio. Then just in case I duplicated the image to keep one untouched.
- Using the trace tool, create the shape of your design. In this case, I set up the High pass filter to the full and modified the Threshold so the whole image would be covered in yellow.
- Then I hit trace outer edges.
- That creates a red line around the design.
- I had the word Disney outside the main graphic so I created a rectangle, I placed it in a way that overlapped the graphic with the word, and using the weld tool in Modify I created one single cut shape.
- Then since I didn’t want to risk cutting so close to the graphic, I used the offset tool.
- When you chose it, it creates another border bigger than the original then I just delete the original one and leave the bigger one.
STEP 3: TYPE YOUR PHRASE (OPTIONAL STEP)
- Now I design the wording. In this case, because of the expression of Tigger in the image I wrote: “Who?… Me?”.
- I set up the size and position where it will be and set it aside.
- QUICK TIP:
- Ok here is where my saving side starts acting. I don’t like to waste material and once we print it will also print registering marks so there will be a waste. I decided to prepare and print some other stuff to use in the future.
STEP 4: PRINT YOUR DESIGN
- Once ready I set up the page for printing.
- Open the Page Setup tool from the right sidebar. Adjust the page size there to “Printer”.
- Check the boxes to turn on the print border and cut border.
- Press “M” on your keyboard to turn on the registration marks.
- I placed everything so it would fit into the available space.
- Mirror your design and make sure everything still fits inside the print and registration marks.
- I have my printer settings set to “High-quality” so that I get the best quality print.
- Load your PHTV into your printer and print your design onto so that it prints on the matte side of the vinyl sheet.
- Again remember to mirror your design before printing it onto the printable material for light surfaces!
- Send to print from Silhouette Studio.
STEP 5: CUT OUT YOUR DESIGN
- Once your design is printed, place the printed sheet on a Silhouette cutting mat and load it into the Silhouette Cameo.
- Then go to cut settings and chose Printable heat transfer material for light fabrics in the Material type options and set the blade settings as suggested.
- Before sending it to cut make sure the cut lines are where you want them.
- Sent to cut.
- Once the cutting is done, peel off the excess printable HTV with your weeding tool. I removed all the excess material that wasn’t part of my design and only left my graphics.
- Then I set up the wording and send it cut with normal Heat transfer vinyl. If you want to learn how to use Heat Transfer Vinyl you can check this post.
STEP 6: PREP YOUR T-SHIRT
- Before you transfer your design onto your kid’s t-shirt, you’ll need to prep the fabric. Wash and dry the t-shirt to remove any dirt or debris, and make sure it’s free of wrinkles.
STEP 7: TRANSFER YOUR DESIGN
- Now it’s time to transfer your design onto the t-shirt!
- Place your vinyl design face-down onto the t-shirt, making sure it’s centered and straight.
- I placed the htv wording in the right place with the backing facing up. Placed a piece of clothes on top and Ironed on cotton setting for about 40 to 60 seconds. I left it to cool down a bit and peeled off the backing.
- Cover the vinyl with a protective sheet (like a piece of clothes, parchment paper or a teflon sheet), and press down firmly with a hot iron on a cotton setting for around 40-60 seconds.
- I recommend starting with 15-20 seconds and testing removing the protective sheet. If the vinyl comes off, put it back and iron it for another 15 seconds, and so on.
- If using heat press, set it to 375 for 30 seconds and use firm pressure to press the image directly onto the shirt.
- As soon as the time is complete, peel off the protective sheet while it is still hot, and admire your new creation!
- Tadaaaaaa!!!! There you go! That’s all there is to using Inkjet Printable HTV on light materials! Now you have a cute new T-Shirt ready to be used.
Notes
Wait at least 24 to 48 hours before washing it. For longer results, wash your clothing inside out on a cold gentle cycle and tumble dry.
Share and PIN ME!
Til’ next time…


FREE WORKBOOK
Keeping your Sweet Home Organized
Learn how to create intentional habits and simple routines to Keep Your Home Organized. Plus freebies, printables, exclusive content, and tips.
Disclaimer: By clicking on the “Yes” button above you are giving me your consent to collect and use your information according to the law and My Policy Privacy. Zero Spam I promise!