DIY Backpack Decoration Using Heat Transfer Vinyl
This post may contain affiliate links. Please read our Disclosure Policy.
This cute Backpack Decoration With Heat Transfer Vinyl is the perfect project to add a unique touch to kids’ Backpacks. Learn how to make your own!
I’m so excited! Today I’m sharing a cute project I started months ago and just now I got to finish it. I Love decorating and personalizing stuff, especially for my little girl.

Table of Contents
Why Decorating a Backpack with Heat Transfer Vinyl
I’ve done it with my girl’s shoes and onesies and I keep doing it every time I can. So this time I made this Heat Transfer Vinyl Backpack decoration for my Girl’s preschool and I’m sharing how to make it.
I bought this backpack at Walmart last summer because Em was starting school.
I knew I wanted to decorate it and personalize it so I bought it plain and in solid color.
You can decorate any backpack to make it unique either an old one or a new plain and boring backpack.
This craft turned out so cute even though since it was my very first attempt to use heat transfer vinyl, I had so many issues. LOL.
The first time I forgot a letter, then when did it again I forgot to mirror the image, and the last time, the piece was so small that it didn’t hold so I messed up the last piece of flocked vinyl.
To be able to finish it I decided to use the cutting mat so I could use really small pieces I could save LOL. It was quite an adventure but, in the end, I could make it work, and Gosh, I love it now!
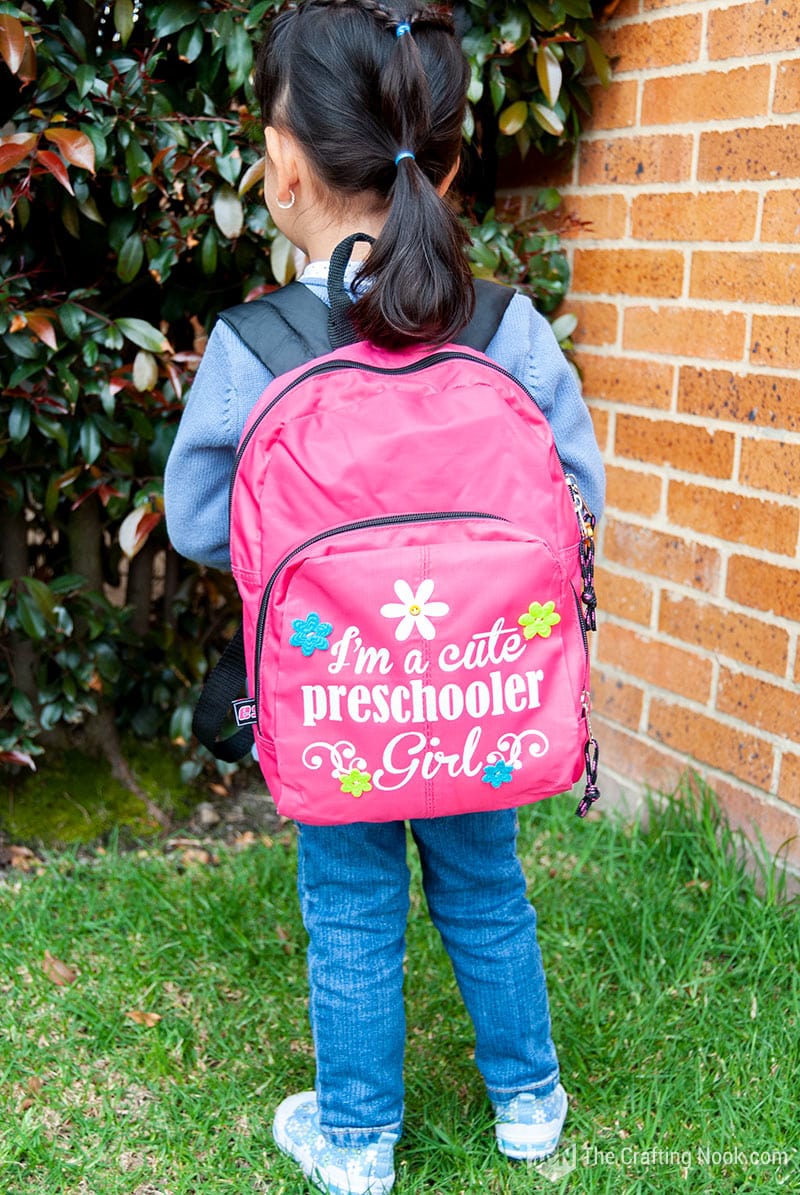
Now I can say it’s an easy project and kids can go to school with a unique touch! How cool!
Let’s start with some basics just in case you are new to heat transfer vinyl.
What’s Heat Transfer Vinyl?
Also known as HTV for short, it’s a specialty vinyl polymer that can be used on a variety of fabrics and materials to create designs and adhere through heat. It comes in a roll or sheet form with an adhesive backing so it can be cut, weeded, and placed on a substrate for heat application. It’s like a sticker that you apply with heat.
Getting started with HTV is always tricky as it involves so many tricky steps but once you get the hang of it, you will love how easy it is and how pretty your items will look.
How to Make a cute Backpack using HTV
So, let’s get started on our project.
Supplies:
- A plain backpack
- Heat Transfer Vinyl
- Buttons and appliques.
- A piece of fabric (it can be a t-shirt or a pillowcase)
Tools:
- An electric iron, heat press or heat transfer machine
- Hook tool
- Cutting machine (I use Silhouette)
Instructions:
Before we begin, be sure to follow us on Pinterest, Facebook, Instagram, and YouTube, and also sign up for our email list (at the end of this post), so you’ll never miss a post!
To be honest, I had no idea if I could apply HTV to this backpack. It’s completely synthetic and I was afraid it could melt.
So what I did was try to iron a small hidden spot of the backpack just in case. The backpack was so inexpensive that if it didn’t work it wouldn’t be a big deal.
To my surprise, the material did handle the heat well, so I was ready to go. I definitely recommend always trying in a small piece or in a really inexpensive item just in case before you go for your definite project.
Prepping the design
- The first thing to do is measuring the space you have to apply the HTV. I wanted to use the whole front pocket.
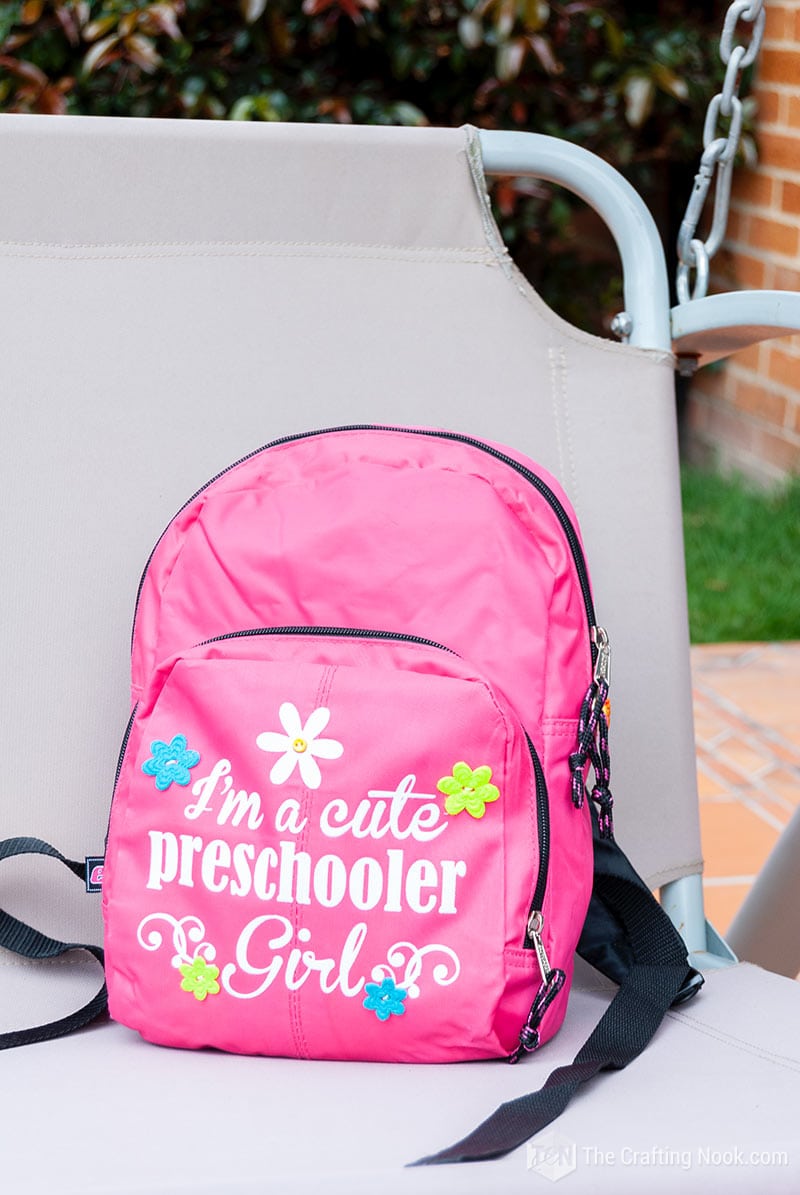
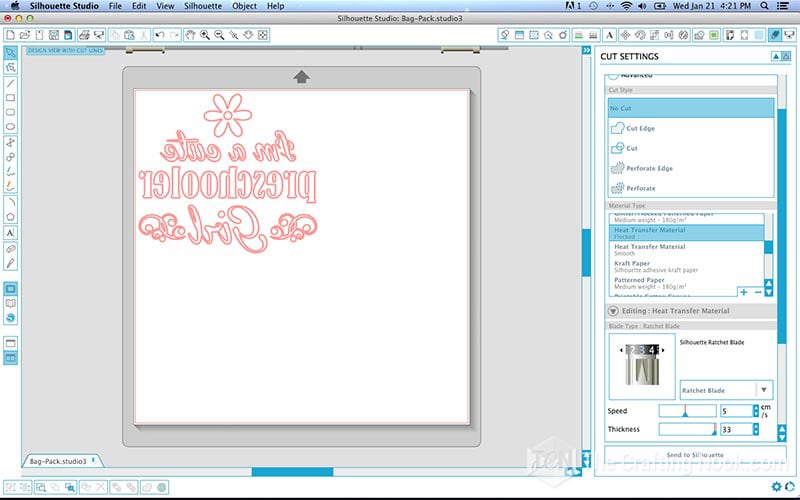
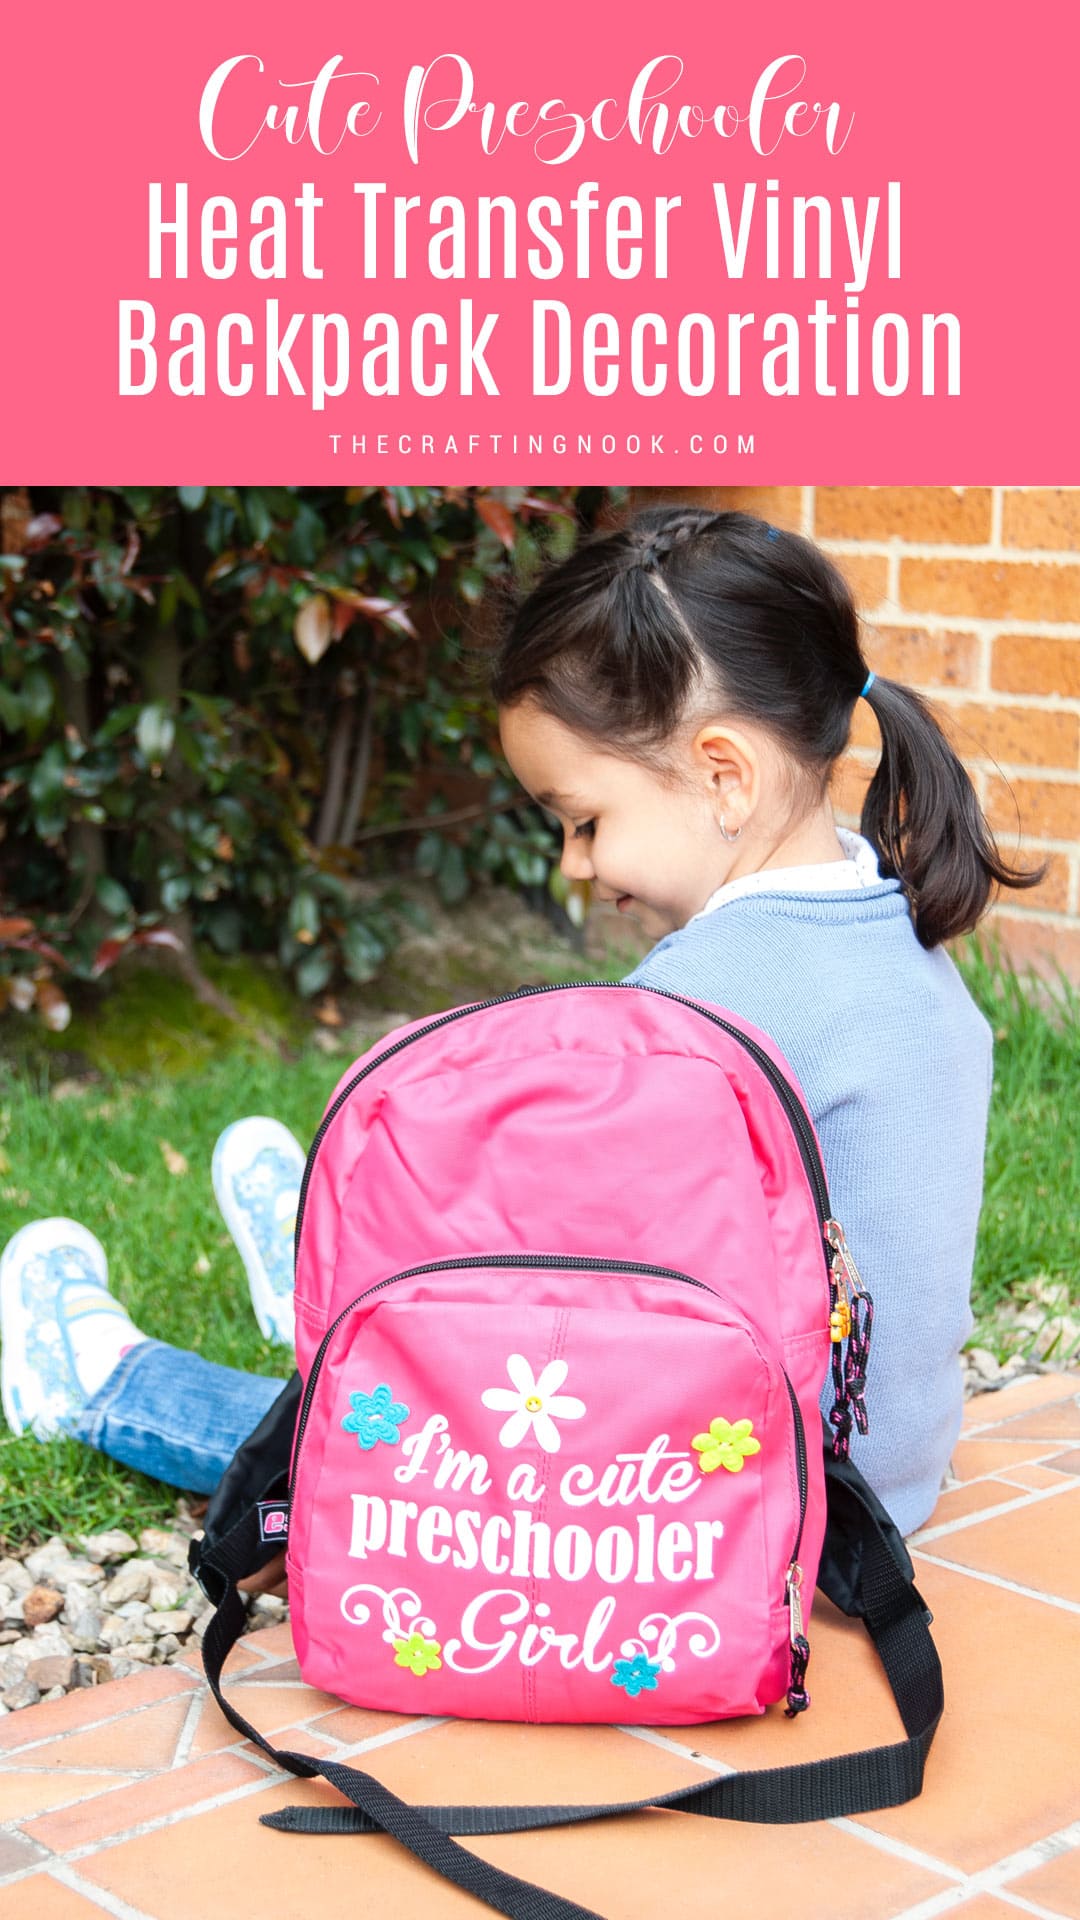
- Then I went to my Silhouette Studio and created my design. I wrote I’m a Cute Preschooler Girl and decorated with a couple of swirls and a flower. I made sure it would fit in the space I had.

Note: Make sure you don’t have any misspellings and that is everything just like you want it.
- Once ready group every piece of your art and Mirror the image. This is very important. If you don’t mirror it, it won’t work.

- Place the image where you want it to be cut and find your HTV option in settings and send to cut. Always make sure you cut your HTV with the plastic backing facing down.
How to Heat Transfer Vinyl:
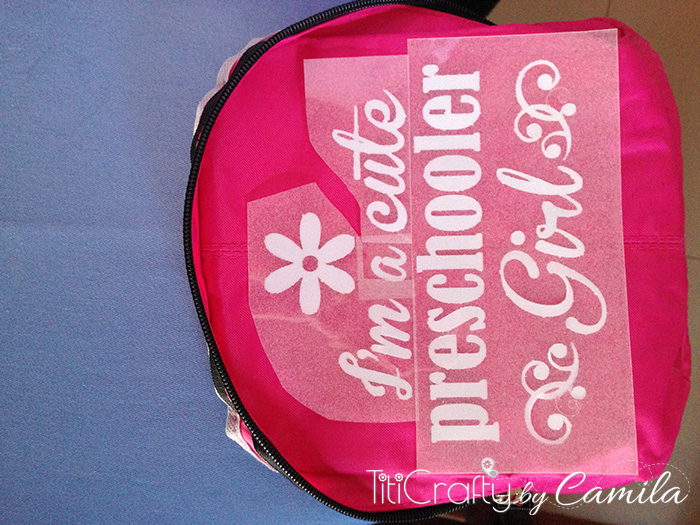
- Peel off everything that doesn’t belong to your design. Use the hook for small spaces or tricky parts.
- On your ironing board, place your design on the the backpack with the backing facing up. Make sure it’s exactly where you want it.
- Place carefully a piece of fabric on top of it and *Iron it for about 40 seconds to 1 Minute checking it here and there to make sure it’s sticking. I recommend you testing the time since each iron and heat press work differently.
*Note: Before starting this step find a hidden place in the surface you are about to use and do some trials to see how much heat the material can handle. In my case, this backpack although it was a kind of plastic could handle high heat.
- Make sure it’s all adhered before you decide to peel off the backing. If it is, then carefully peel it off and then place the piece of fabric back and Iron it again for a few more seconds adding pressure to the iron.
*Note: NEVER iron directly on the HTV, always use a piece of cloth.

There you go!
- The HTV Backpack decoration is ready.
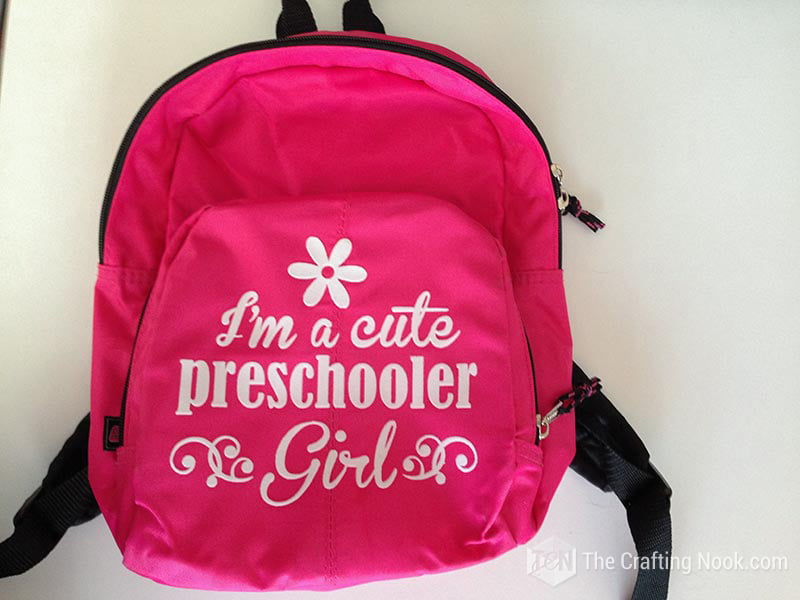
Backpack Decoration
I chose some appliques such as buttons and some cute flowers.
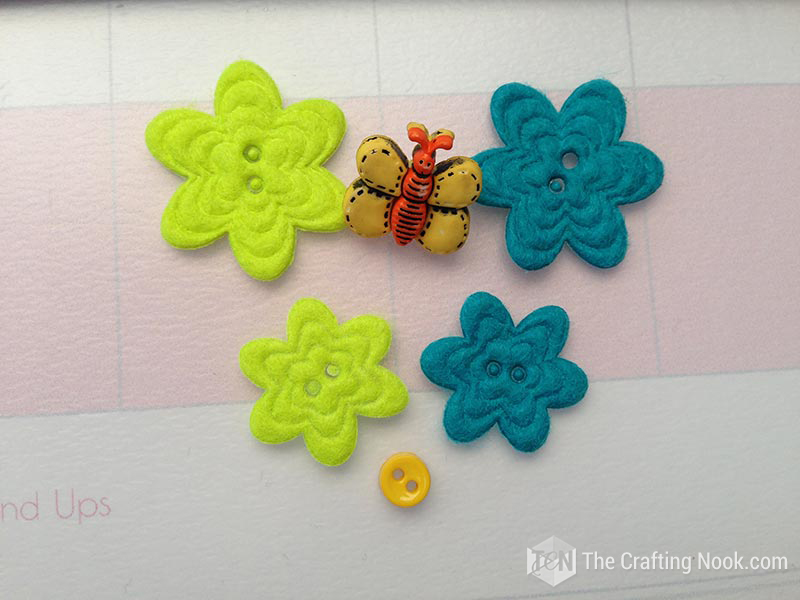
Stitched a button in the middle of the flower and then a few flowers all around the text.


I also made my Girl’s name on another HTV color and applied it to the back of the backpack to label it. It worked just lovely!


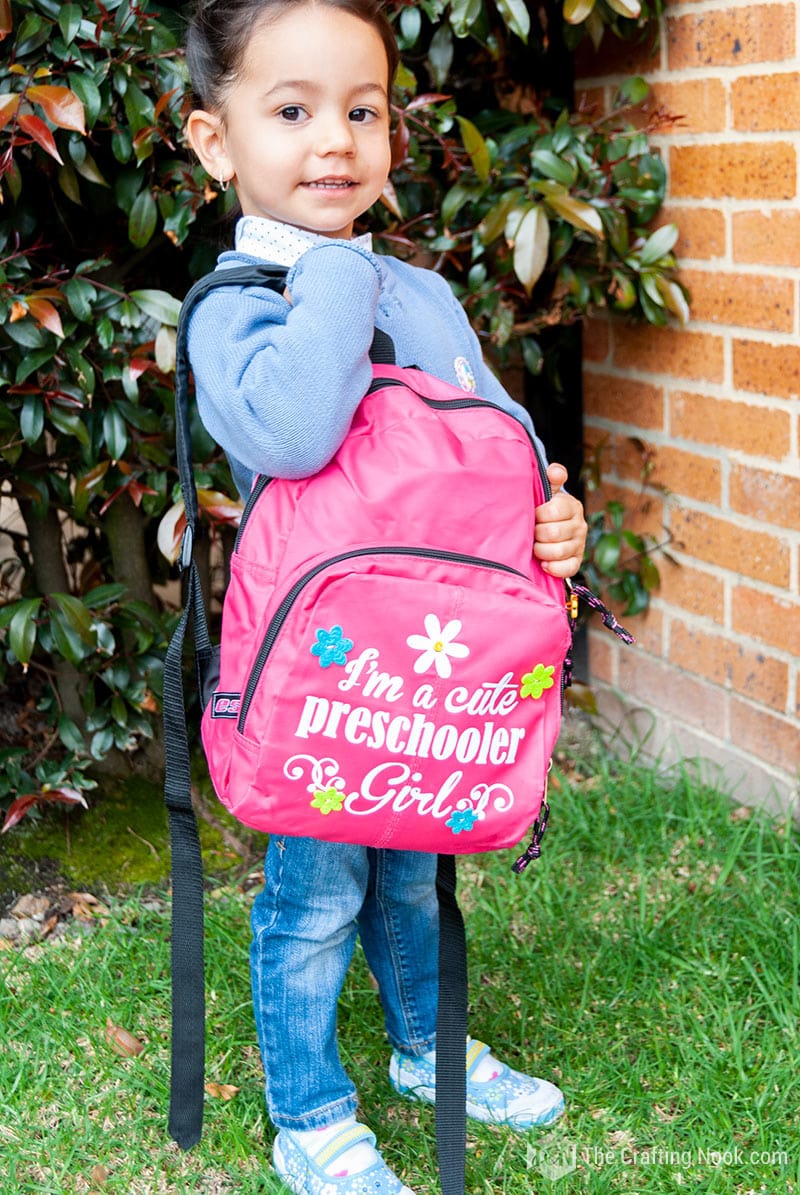
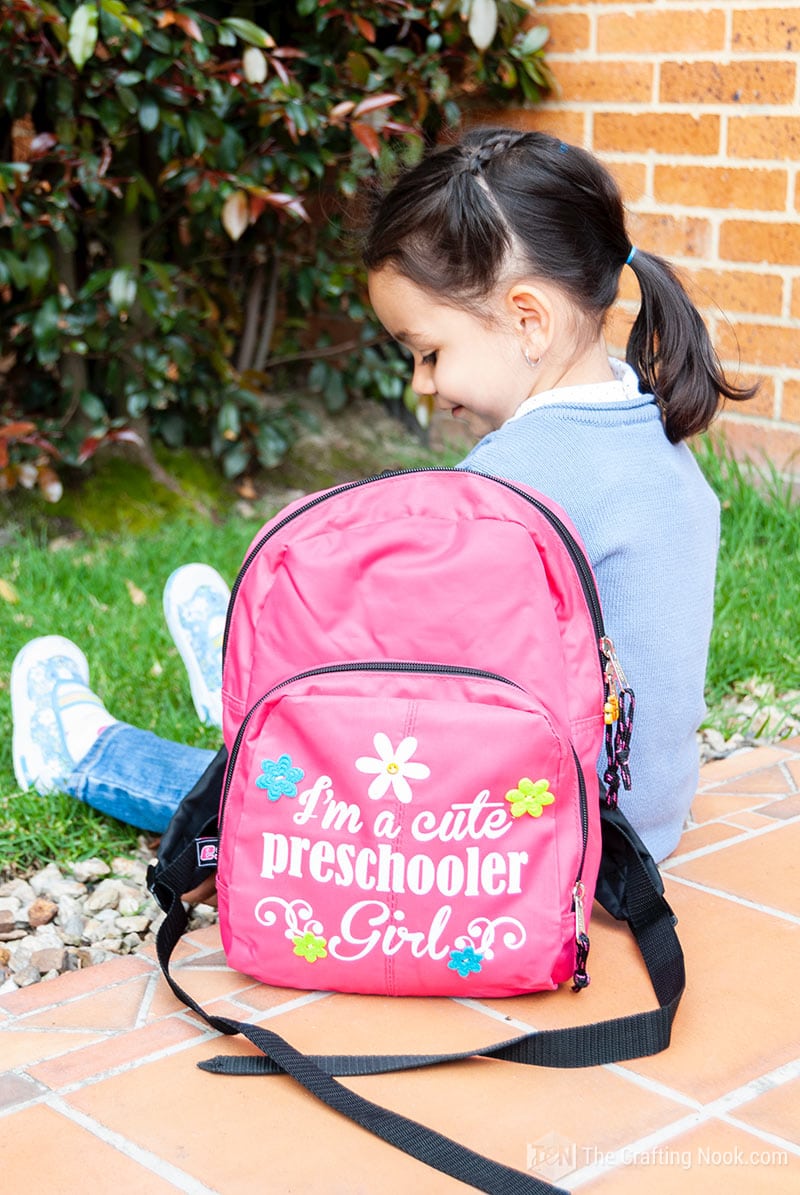
That’s it! Almost like a brand new backpack and my girl was all excited about it. Gladly she loves everything I make for her!

Frequently Asked Questions
HTV could last years under normal circumstances and usage. It will also depend on the HTV quality. Like any other product, it comes in different brands and quality and not all of them are good. I personally love Silhouette and Cricut’s.
But given that it’s good quality and good care, a T-shirt, for example, should last years without peeling off. Heat transfer vinyl is normally very durable and most of the time, a good quality vinyl will last longer than the t-shirt itself. It’s not recommended to throw an HTV in a dryer though.
HTV works best on cotton polyester or cotton/poly blends. Some synthetic fabrics, like acrylic, probably won’t work correctly because they will melt under the heat of iron. For more advanced crafters, you can apply HTV to mugs, baseball hats, school supplies, water bottles, patches, and even wood!
The quick answer is NO. Some designs, especially small designs that fit under your home iron, you can transfer with one press. But a heat press machine could be a great investment if you plan on making heat transfer vinyl designs regularly, it will help you transfer vinyl quickly and easily and give you a polished product in the end.
Yes, it works best with polyester but never apply heat directly to the polyester. Always use a cloth in between your iron and your HTV piece.
Yes, you can use a household iron for HTV designs. Iron for 40-60 seconds but check the work along the way to see that it isn’t too hot.
More Heat Transfer vinyl Projects to try
If you loved this Decorated backpack tutorial, you might also love these other Silhouette Cameo projects too:

✂️ Tutorial

DIY Backpack Decoration With Heat Transfer Vinyl Tutorial
Tools
- An electric iron, heat press or heat transfer machine
- Hook tool
- Cutting Machine (I use Silhouette)
Supplies
- A plain backpack
- Heat Transfer Vinyl
- Buttons and appliques.
- A piece of fabric it can be a t-shirt or a pillowcase
Instructions
PREPING THE DESIGN
- The first thing to do is measuring the space you have to apply the HTV. I wanted to use the whole front pocket.
- Then I went to my Silhouette Studio and created my design. I wrote I’m a Cute Preschooler Girl and decorated with a couple of swirls and a flower. I made sure it would fit in the space I had.
- Note: Make sure you don’t have any misspellings and that is everything just like you want it.
- Once ready group every piece of your art and Mirror the image. This is very important. If you don’t mirror it, it won’t work.
- Place the image where you want it to be cut and find your HTV option in settings and send to cut. Always make sure you cut your HTV with the plastic backing facing down.
HOW TO HEAT TRANSFER VINYL:
- Peel off everything that doesn’t belong to your design. Use the hook for small spaces or tricky parts.
- On your ironing board, place your design on the the backpack with the backing facing up. Make sure it’s exactly where you want it.
- Place carefully a piece of fabric on top of it and *Iron it for about 40 seconds to 1 Minute checking it here and there to make sure it’s sticking. I recommend you testing the time since each iron and heat press work differently.
- *Note: Before starting this step find a hidden place in the surface you are about to use and do some trials to see how much heat the material can handle. In my case, this backpack although it was a kind of plastic could handle high heat.
- Make sure it’s all adhered before you decide to peel off the backing. If it is, then carefully peel it off and then place the piece of fabric back and Iron it again for a few more seconds adding pressure to the iron.
- *Note: NEVER iron directly on the HTV, always use a piece of cloth.
- The HTV Backpack decoration is ready.
HTV BACKPACK DECORATION
- I chose some appliques such as buttons and some cute flowers.
- Stitched a button in the middle of the flower and then a few flowers all around the text.
- You can also make a name on another HTV color and apply it to the back of the backpack to label it.
So What do you think, do you like this Heat Transfer Vinyl Backpack??? Have you applied Heat transfer to a bag or backpack before??? Tell me all about it in the comments!
Some of my favorite HTV projects from my favorite bloggers:
- 3 Creative Onesies for a Baby Girl by Lauren over at The Thinking Closet
- How to Make a Cozy Fall Pillow using the Cricut Explore by Christene over at Keys to Inspiration
If you enjoyed this tutorial, don’t forget to Pin and share with friends!
Til’ next time…


FREE WORKBOOK
Keeping your Sweet Home Organized
Learn how to create intentional habits and simple routines to Keep Your Home Organized. Plus freebies, printables, exclusive content, and tips.
Disclaimer: By clicking on the “Yes” button above you are giving me your consent to collect and use your information according to the law and My Policy Privacy. Zero Spam I promise!
Aww, so cute! I love this idea. What a great way to encourage your child to express themselves and be unique in a sea of super hero and princess backpacks!
I 100% agree!!! Thanks so much for stopping by and leaving some love!
XO
What a cute idea! Pinning!
I have never tried this, but your’s turned out so adorable! So glad you bragged about it with us at VMG’s Brag About It link party!!
Yayyy Glad you like it! Fun project! Appreciate the pin love!
XOXO