

Easy DIY TV Stand with Wooden Crates

This post may contain affiliate links. Please read our Disclosure Policy.
When we moved into our new apartment, we had practically no furniture, and I had my heart set on making our DIY TV stand myself. I had wanted to try building furniture for so long, so this felt like the perfect opportunity to finally give it a go!
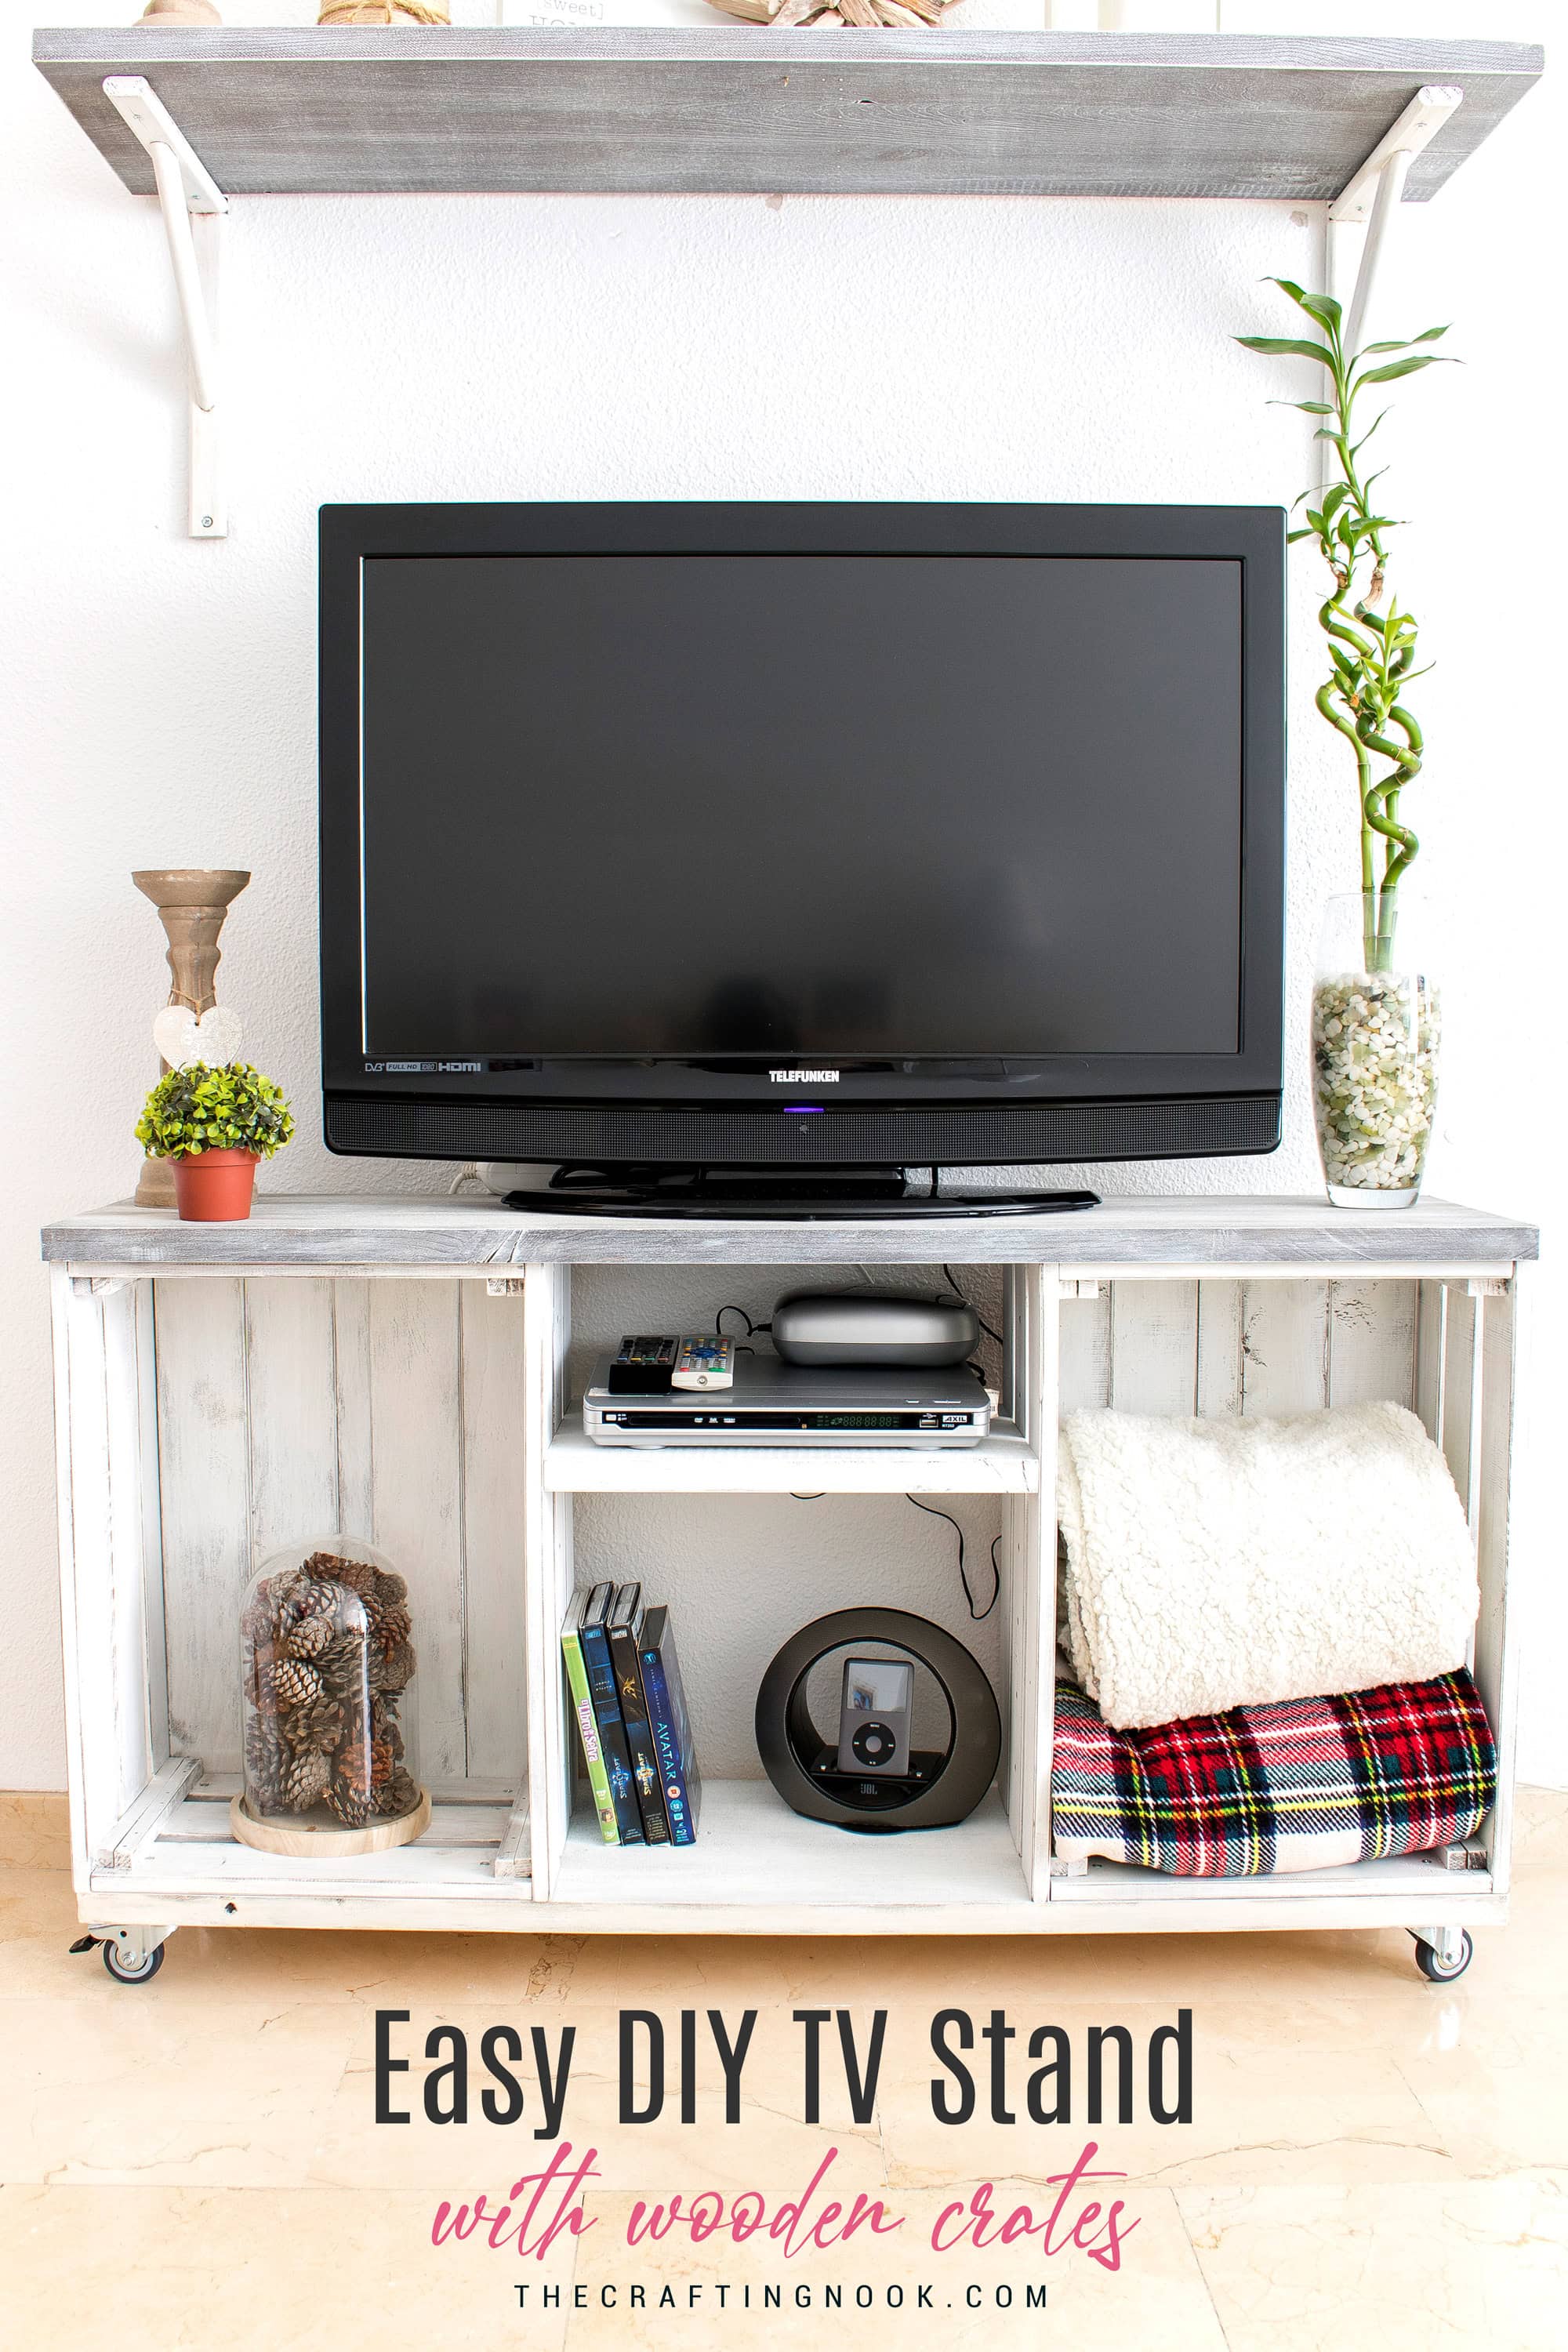
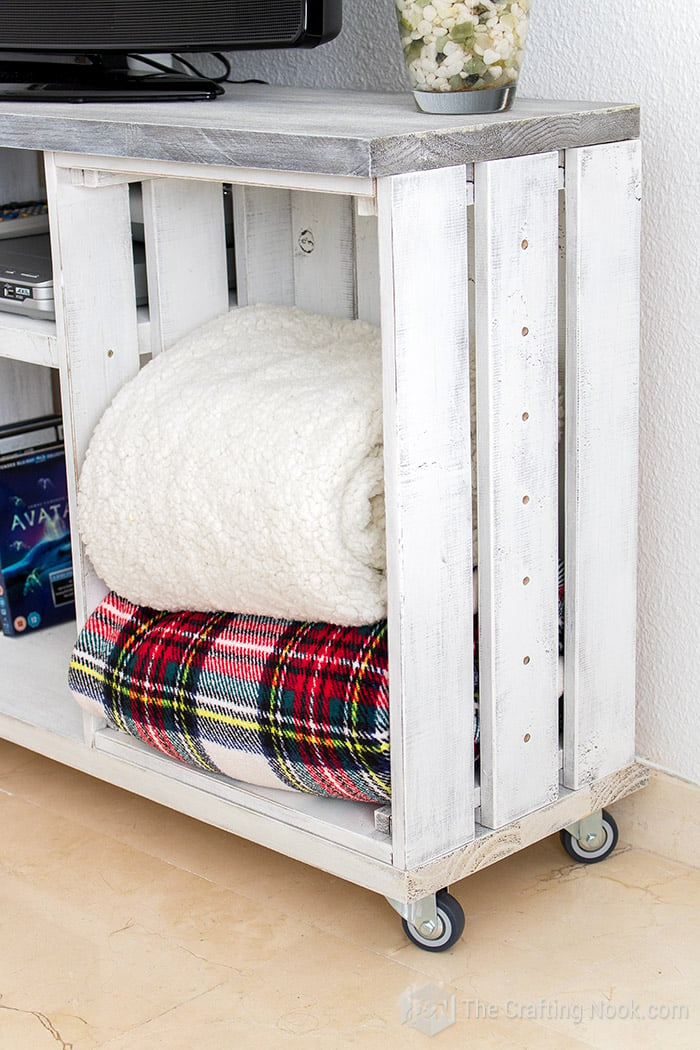
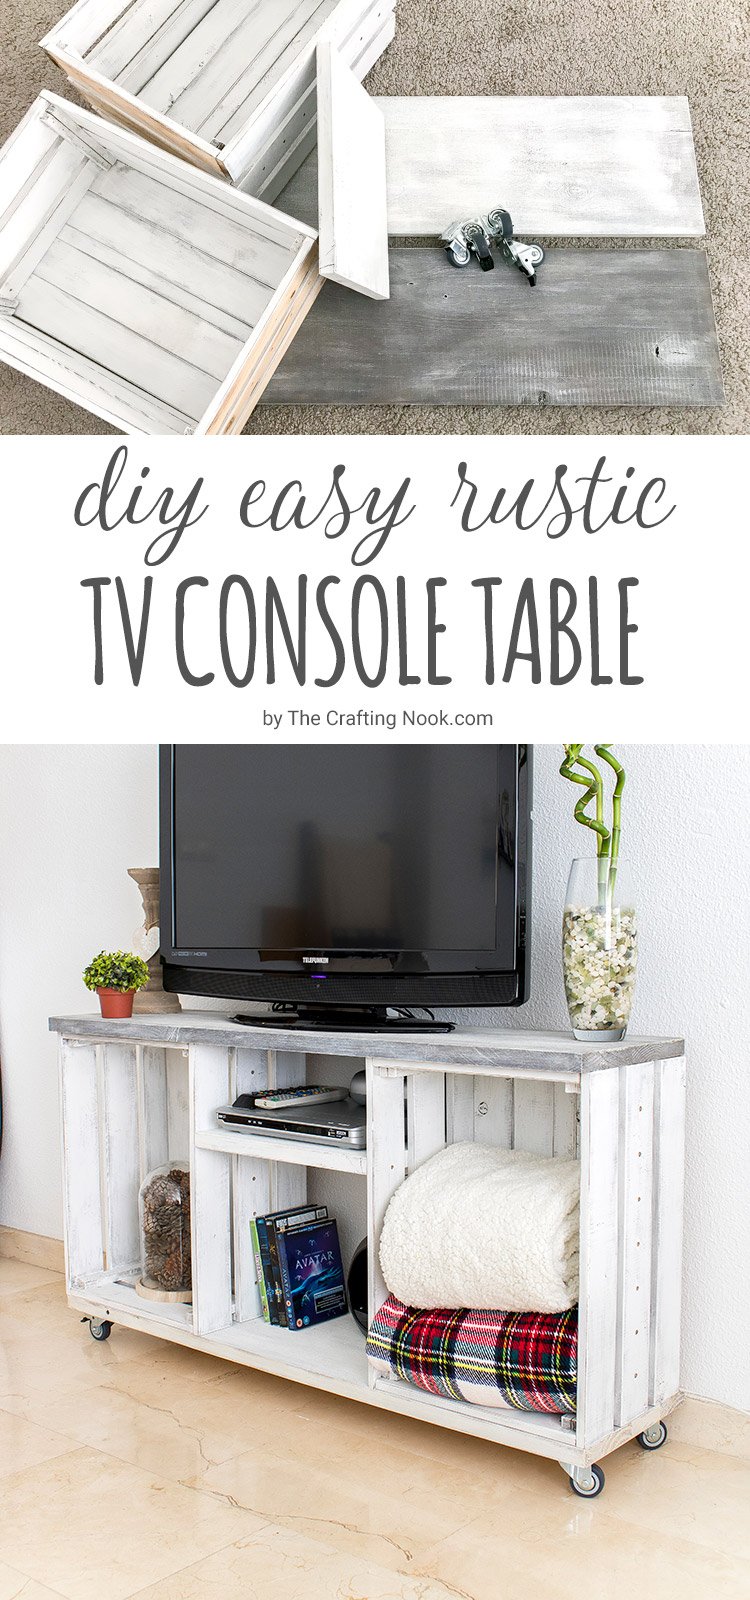
This easy TV stand turned out to be my very first real furniture project, and I couldn’t have been happier with it. I made it using two wooden crates, a few pine boards, and caster wheels. Then I gave everything a distressed white and gray finish for that rustic farmhouse look I love so much.
The best part? You don’t need complicated woodworking skills to make one. The assembly took us about an hour, and although the painting took longer, it was absolutely worth it!
Table of Contents
Why I Love This DIY Wooden Crate TV Stand
What started as a simple idea became one of my favorite projects, especially because I got to build something useful for our home.
- Beginner-friendly construction. The wooden crates already form most of the structure, so there’s no need to build a complicated frame from scratch.
- Plenty of open storage. The crates and middle shelves give you space for electronics, books, baskets, blankets, and other living room essentials.
- Easy to customize. You can change the length, paint colors, finish, and even leave off the wheels.
- Rustic farmhouse style. I used distressed white and aged gray paint to give mine the look of weathered wood.
- Easy to move. The caster wheels make repositioning the stand much easier, which was especially helpful in our apartment.
I also love that this design can work as a small entertainment center or media console, not just a simple table for the TV.
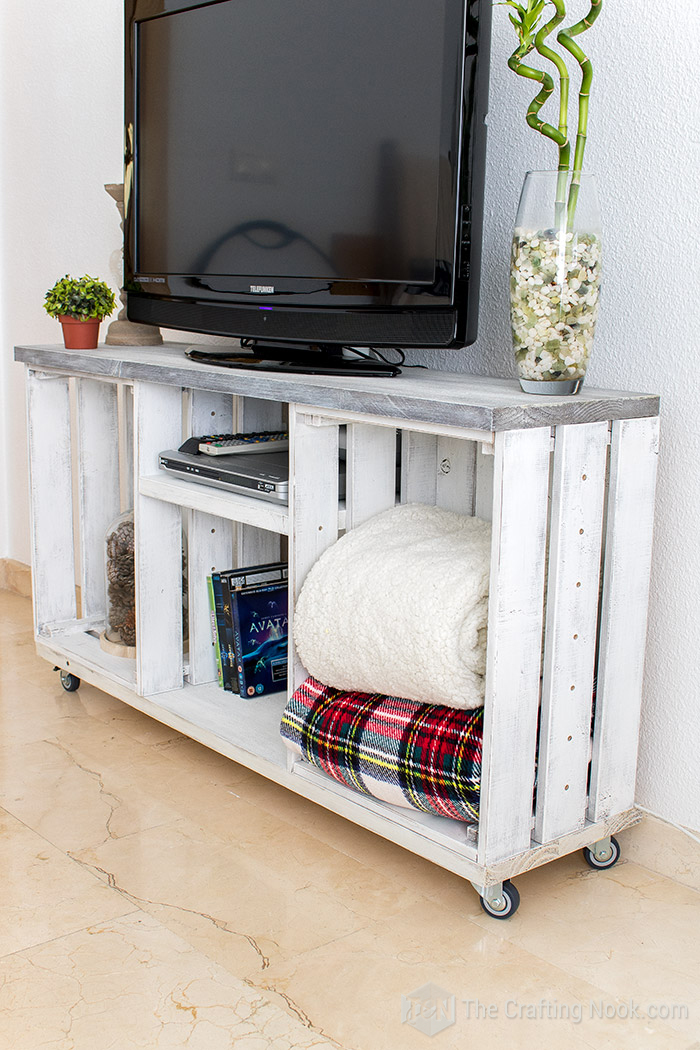
How to Make a DIY TV Stand with Wooden Crates
This project came together a little differently than I originally planned.
My husband and I went to the hardware store looking for supplies for a completely different design. We couldn’t find exactly what I had in mind, so we started playing around with ideas right there in the store.
We eventually settled on two large wooden crates and some pine boards. It was simpler than my original idea, but I loved how it turned out!
The process is straightforward. First, prepare and finish the wood. Then connect the crates with a center shelf, attach the top and bottom boards, and install the wheels.
I’ll walk you through how we built ours, including the distressed paint finish.
Here we go!
Supplies
- 2 large wooden crates
- 2 long pine boards, one for the top and one for the base
- 1 shorter pine board for the center shelf
- 4 caster wheels, preferably 2 locking and 2 non-locking
- Wood screws suitable for the thickness of your boards and crates
- Gray paint
- White paint
- Walnut-colored wood stain
- Water, for diluting the gray paint
- Spray sealer or protective clear coat
Tools
- Power drill and screwdriver
- 1/8-inch (3 mm) wood drill bit, if appropriate for your screws
- Measuring tape
- Pencil
- Bubble level
- Sandpaper or sanding block
- Paintbrushes
- Clean cloths
- Protective covering for your work area
Note
Wooden crates: I used two pine wooden crates, measuring approximately 20 3/16 × 15 1/8 × 11 inches (51.2 × 38.4 × 28 cm) each. I positioned them on their sides to create the two outer compartments of my TV stand. If you’re using a different brand or size, adjust your boards to fit.
A note about screws: I originally used screws approximately 1 3/16 inches (30 mm) long and 9/64 inch (3.5 mm) in diameter. In US hardware stores, a #6 screw is a close diameter equivalent, and 1 1/4 inches (32 mm) is a common length.
However, don’t buy screws based only on my original measurements. Check the thickness of your crates and boards to make sure the screws will hold securely without poking through the wood.
Instructions:
Before You Start: Measuring Your Wooden Crates
My finished TV stand measures approximately 45 1/4 inches (115 cm) long, but yours can be shorter or longer depending on the crates and boards you find.
I can’t give you one universal cut list because wooden crates vary quite a bit in size. The good news is that it’s easy to work out the measurements once you have your crates.
Here’s how I approached it:
- Place your two crates where you want them, with enough space between them for the center shelves.
- Decide how long you want your TV stand to be.
- Measure the combined outside widths of both crates.
- Subtract that measurement from the distance you want between the outside edges of your crates to work out the space between them.
- Cut the center shelf to fit between the crates, allowing about 1/8 to 3/16 inch (3–5 mm) of clearance if needed.
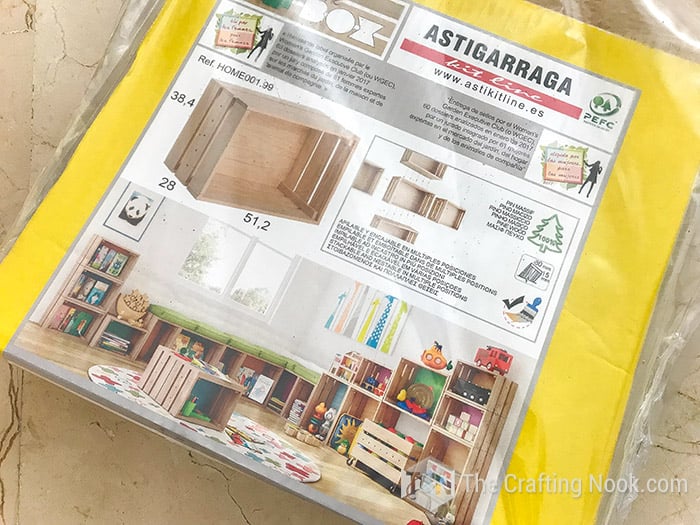
The top and bottom boards should be long enough to span both crates. You can also allow a small overhang if you like that look.
Keep in mind that wooden crates aren’t always perfectly square. Ours certainly weren’t! We actually had to sand about 3/16 inch (5 mm) from the center shelf because it was a little too tight.
If I were making this again, I would measure the actual gap between the crates before cutting that board.
One more important thing: Make sure your crates are strong enough to support the intended load, including the television and anything you plan to store inside. Lightweight decorative crates are not necessarily suitable for furniture. If you’re unsure about the strength of the crates or connections, have the design checked or reinforced before using it to support a TV.
Step 1: Prepare the Wooden Crates and Boards
I used pine crates from our local hardware store because they were easy to find and worked nicely with the pine boards we bought.
You can use other types of wood, but I preferred keeping everything pine so the pieces would have a similar look once painted.
Start by lightly sanding the crates and boards to smooth out any rough areas or splinters.
Wipe away the sanding dust before applying your stain or paint.
I also recommend checking that the crates sit evenly on a flat surface and that the boards fit properly before you start painting. It’s much easier to make adjustments now than after everything has been finished.
Step 2: Stain the Wood for the Rustic Finish
For this TV stand, I wanted two different finishes.
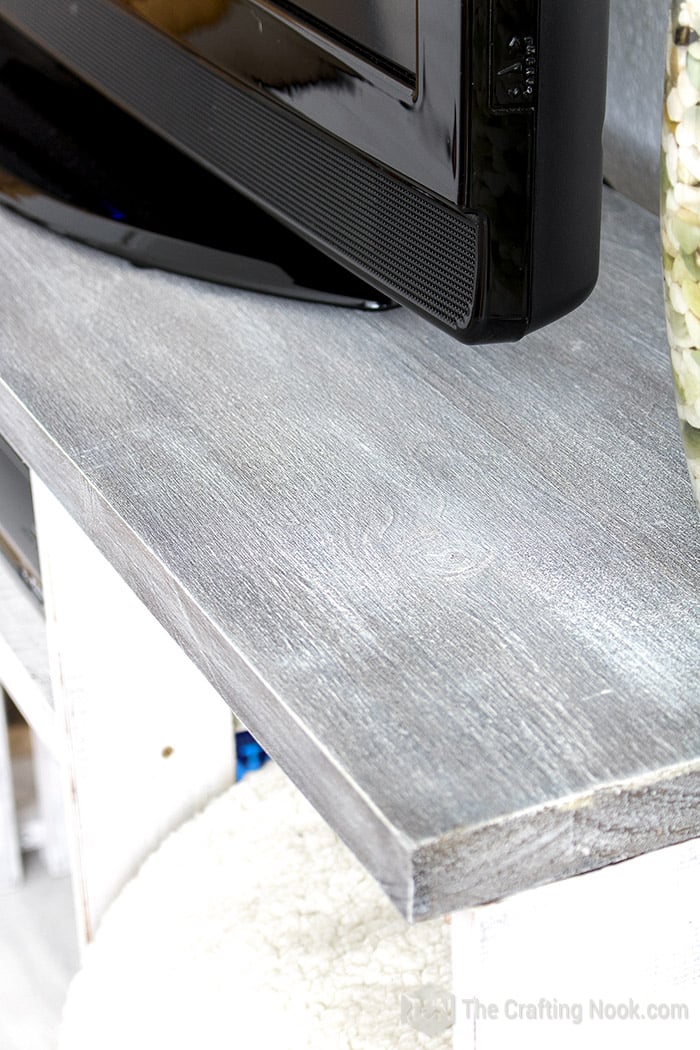
The top board would have an aged gray, almost limewashed appearance, while the botton board, crates, and center shelf would have a distressed white finish.
I started by staining the wood.
For the gray boards, I diluted gray paint with water to create a lighter, weathered look that would still show the wood grain.
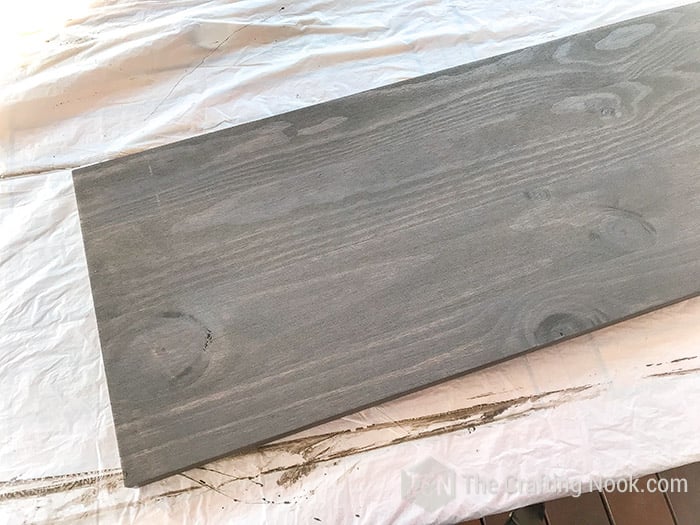
For the pieces I planned to paint white, I applied walnut-colored wood stain first. This darker base would show through the white paint later and help create that old, worn appearance.
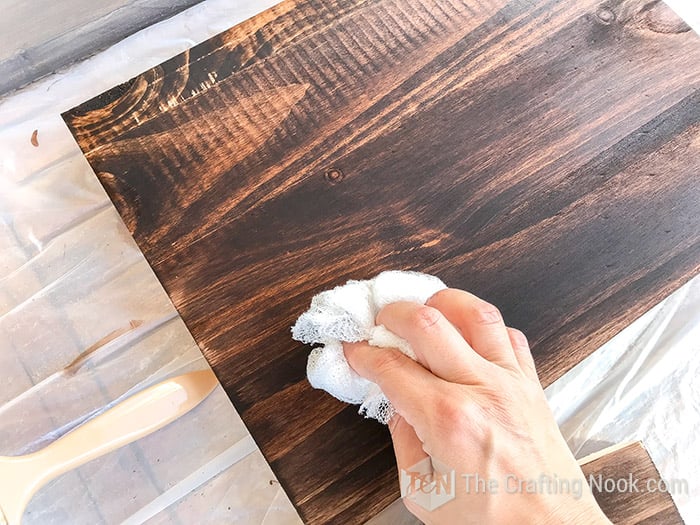
Once everything was stained, I allowed the pieces to dry thoroughly before continuing.
Step 3: Create the Distressed Gray and White Finish
This was probably my favorite part of the entire project!
I love distressed wood finishes, especially when you can still see the grain and natural imperfections underneath the paint.
For the aged gray boards:
Once the gray base was dry, I used a dry-brushing technique with cotton white paint.
The trick is to use very little paint on your brush.
I dipped just the tips of the bristles into the paint, then brushed most of it off onto a piece of paper before touching the wood.
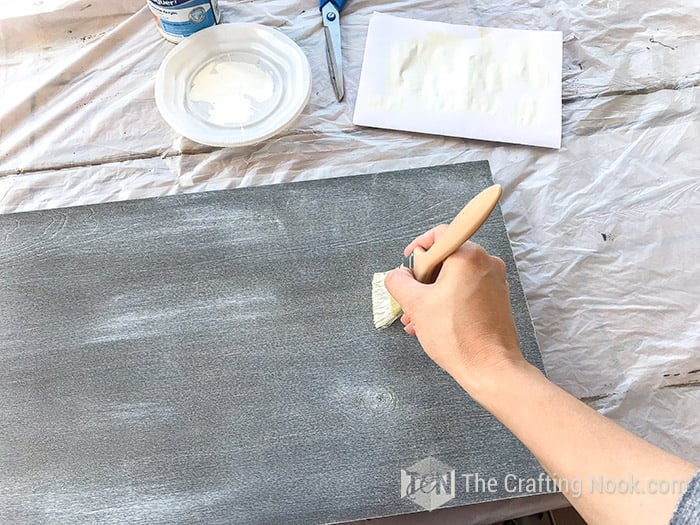
I brushed both along the wood grain and lightly across it, allowing the white to catch the raised grain and textured areas.
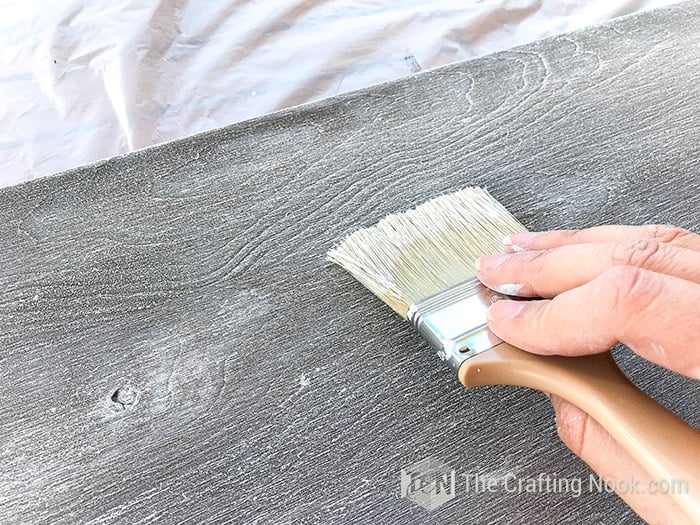
I applied a couple of light coats, letting them dry between applications.
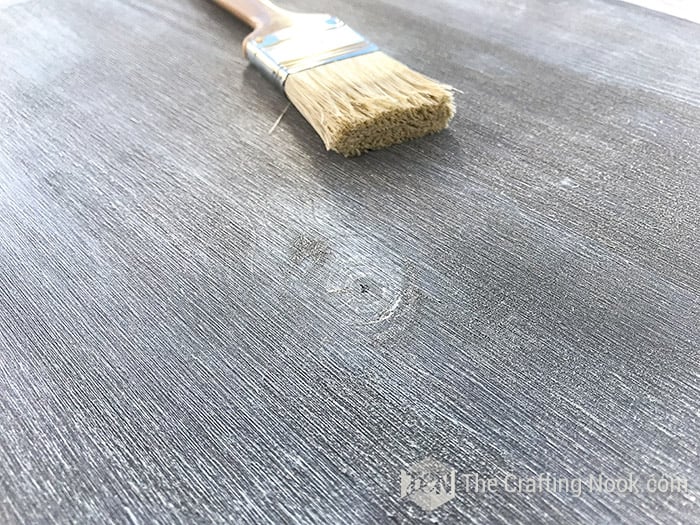
Finally, I added a few touches of gray paint to bring back some depth without covering all the white.
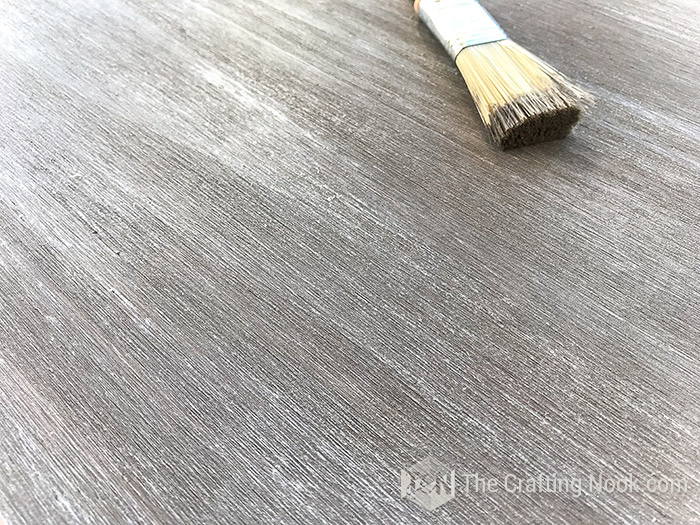
I wanted it to look naturally aged, not completely painted.
For the distressed white crates and shelf:
I used the same dry-brush technique, but this time I left a little more white paint on the brush.
My goal was to make the wood mostly white while allowing some of the darker walnut stain to peek through.
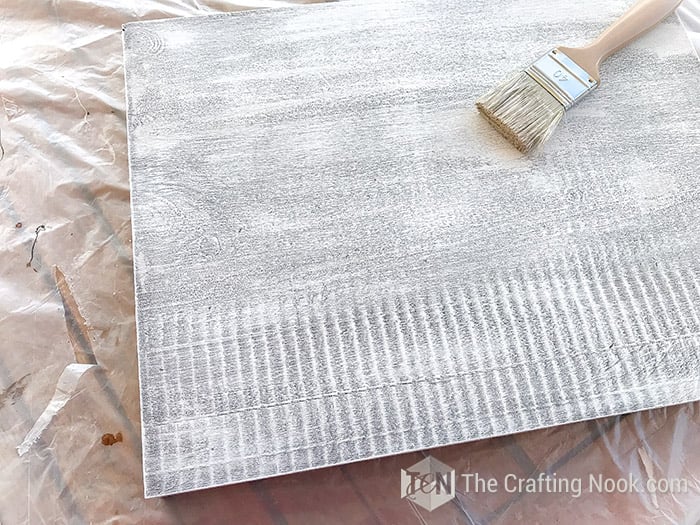
It took me approximately three coats to get the look I wanted, with drying time between coats.
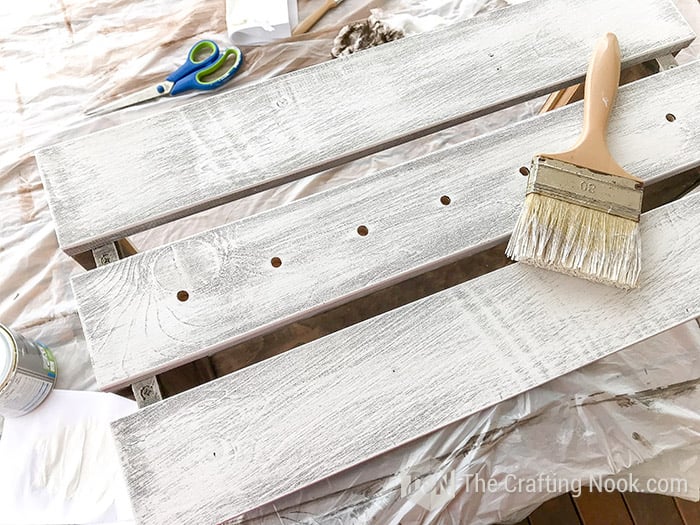
Once everything was completely dry, I used a fine-grit sanding block to distress a few edges and remove paint from areas that looked too heavily covered.
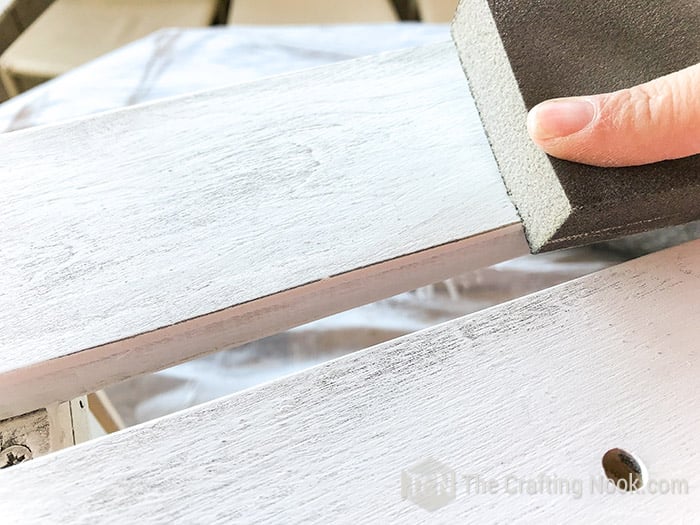
I especially liked how this brought out the corners and little imperfections in the wood.
If you want to learn more about the technique, I’ve also shared a separate tutorial on how to create a distressed wood look with dry brushing.
The rest of the wood pieces were stained with walnut wood stain.
Step 4: Seal and Protect the Wood
After spending so much time getting the finish just right, I wanted to protect it.
I initially tried using a liquid sealer, but the brush started dragging the dry-brushed paint.
Not fun at all!
So I switched to a heavy-duty spray sealer instead.
I applied two light coats to each piece, allowing approximately 30 minutes between coats according to the product I used at the time.
Then I let everything dry overnight before assembling the stand.
Important: Always follow the instructions on your specific sealer for drying, recoating, ventilation, and full curing. Dry to the touch doesn’t necessarily mean the finish is fully cured.
Between staining, painting, and drying, the finishing process took me roughly two days.
The actual construction was much faster!
Step 5: Attach the Center Shelf Between the Crates
Now comes the fun part. Putting everything together!
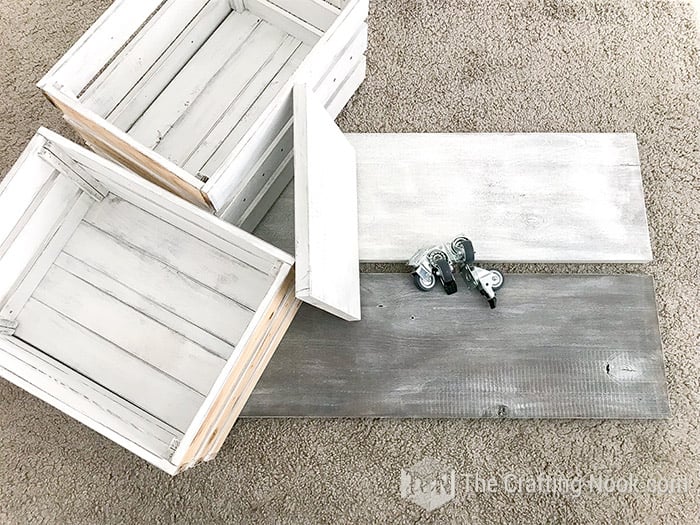
Start by placing your two wooden crates upright, with their openings facing forward.
Make sure they’re oriented the same way and positioned where you want them.
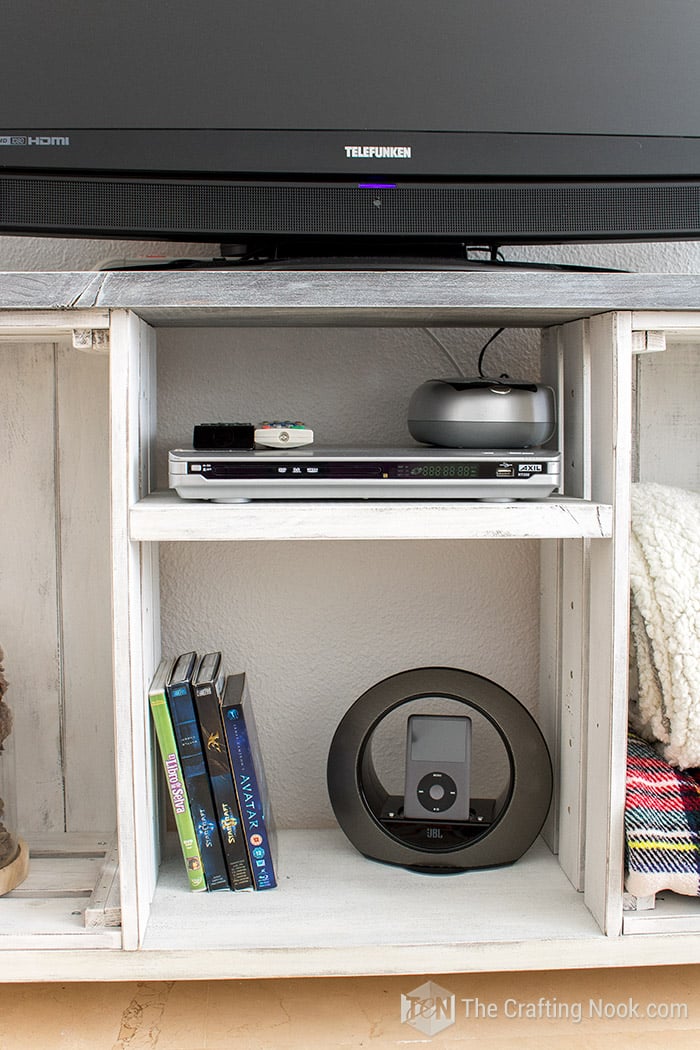
Decide how high you want the center shelf to sit. I wanted enough space above and below it for electronics, books, and other small things we would store in our entertainment center.
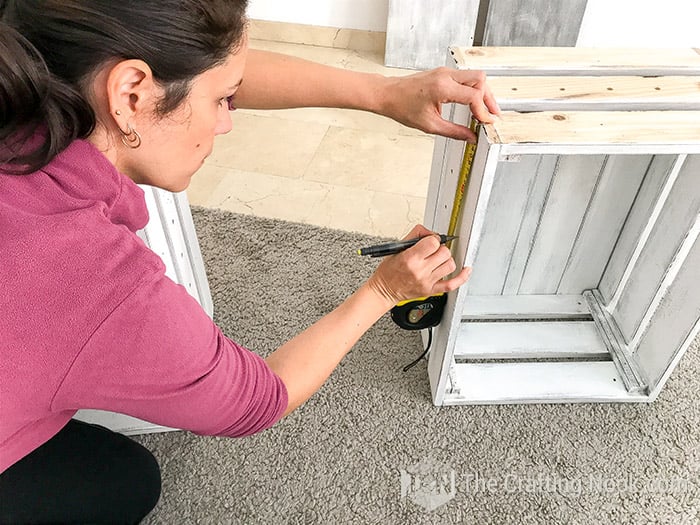
Measure from the top of each crate and mark the shelf position with a pencil.
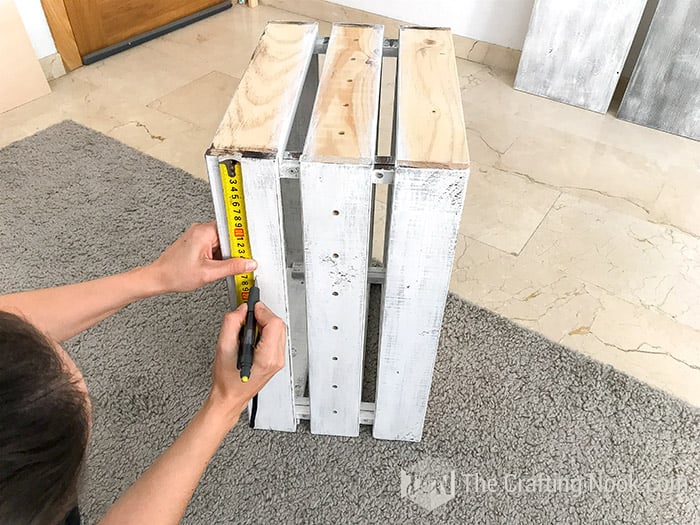
Make sure the marks are at the same height on both crates.
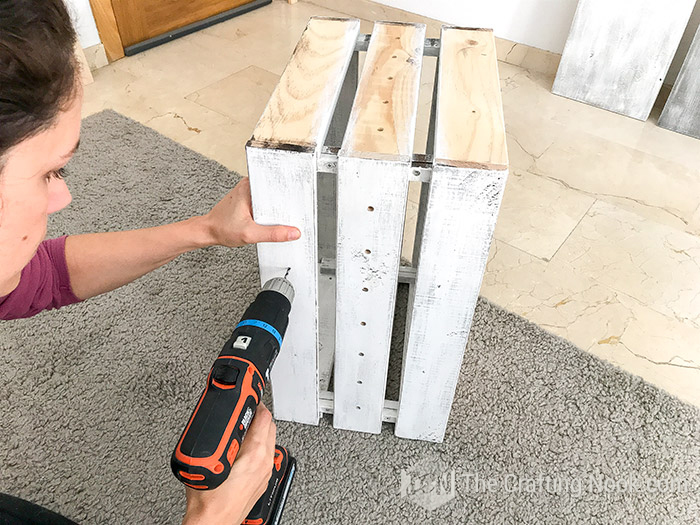
Then drill appropriate pilot holes at the marked attachment points.
With the shelf positioned between the crates, secure it to both sides using wood screws.
I didn’t have anyone helping me hold the shelf, so I stacked a few boxes and DVD cases underneath it to keep everything in place while I worked. LOL.
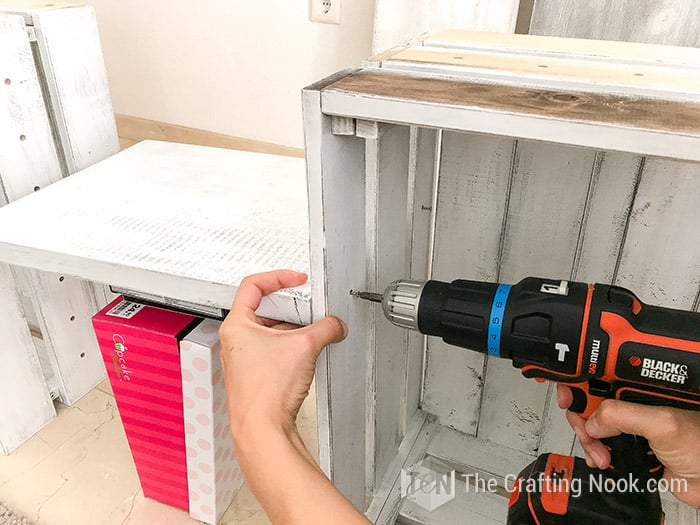
Not fancy, but it helped!
If you have clamps or an extra pair of hands, that would make this step easier.
Before tightening everything, use a bubble level to check that the shelf is straight.
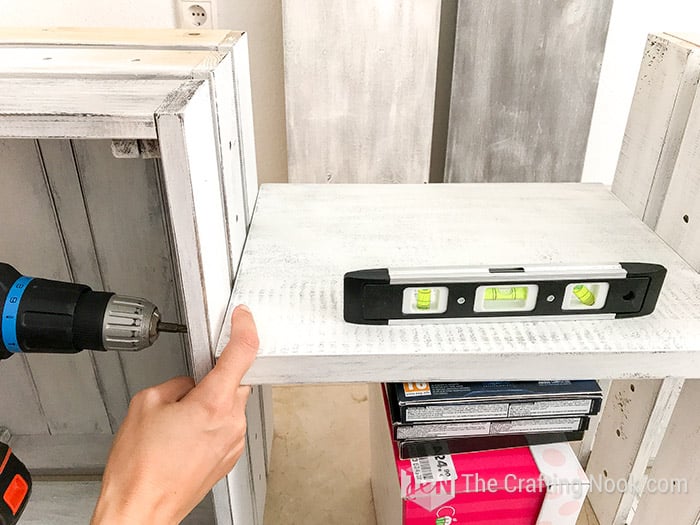
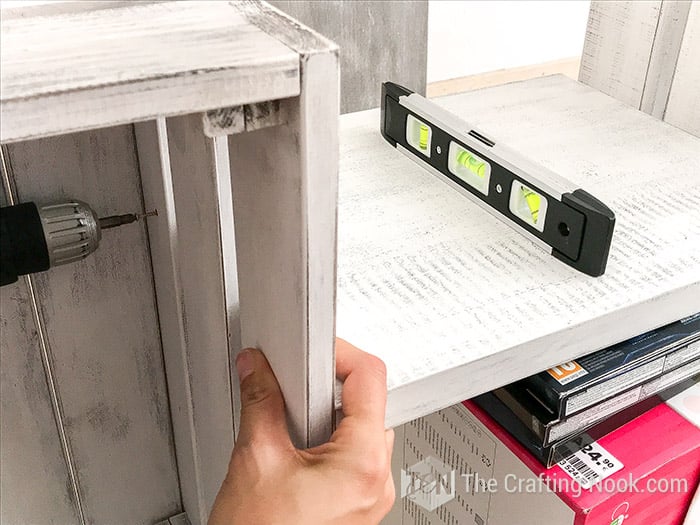
You could also use pocket-hole joinery with a Kreg jig if you prefer to conceal the screws, provided the joint is designed for the load.
I purposely avoided using wood glue in my original build because I wanted the option to disassemble the TV stand if we moved again.
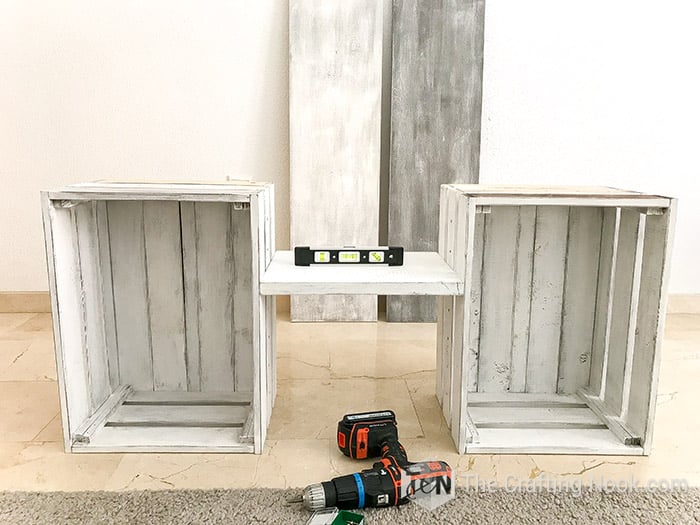
However, keep in mind that omitting glue means the mechanical connections need to provide the required strength and stability.
Step 6: Attach the Bottom Board
Once the center shelf is attached and the two crates are connected, it’s time to install the bottom board.
Lay your bottom pine board on a flat surface with its finished side facing outward.
Carefully position the joined crates on top, aligning them with the board and checking that everything is centered.
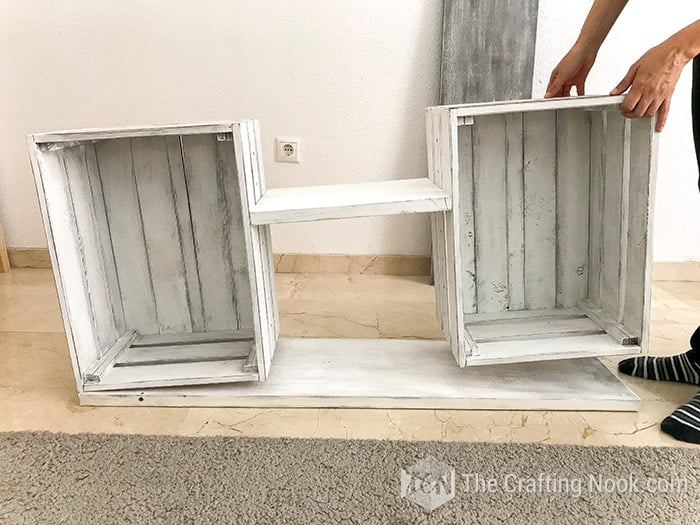
Make sure the front edges are even or have the overhang you planned.
Drill pilot holes where appropriate, then secure the crates to the bottom board using suitable screws.
In my original project, I attached each crate near its four corners.
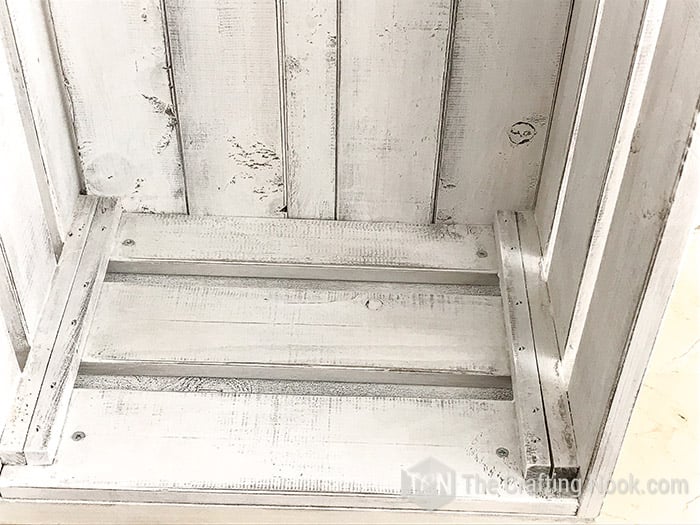
The exact screw positions will depend on how your crates are built, so make sure the screws go into solid wood rather than thin or unsupported sections.
Step 7: Attach the Top Board
Turn your attention to the top board.
Place it on the crates with the finished side facing up and adjust its position until you have the overhang you prefer.
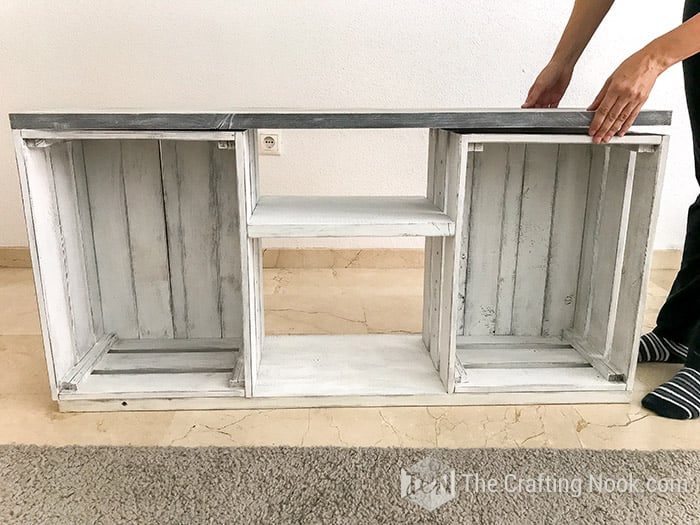
I liked having a little extra wood extending past the crates because it gave the stand a more finished furniture look.
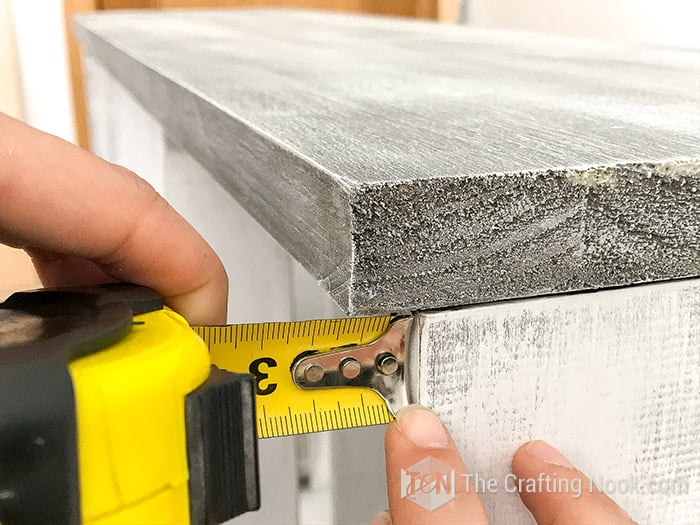
Check that the top is centered and securely supported.
Then attach it to the crates using appropriately sized screws and pilot holes where needed.
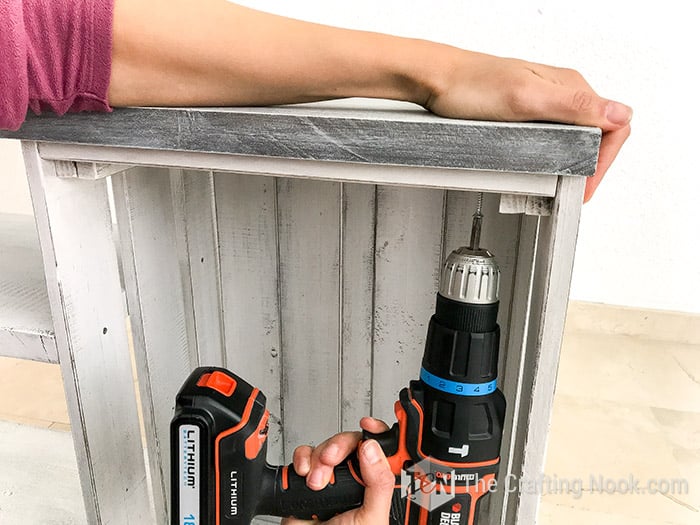
Be especially careful with this step because the top board will support the television.
The connections need to be strong enough for the intended load, and the board must not sag or shift.
At this point, you should have something that already looks like a proper rustic TV console!
Step 8: Install the Caster Wheels
I wanted our DIY TV stand to be movable, so I decided to add four caster wheels.
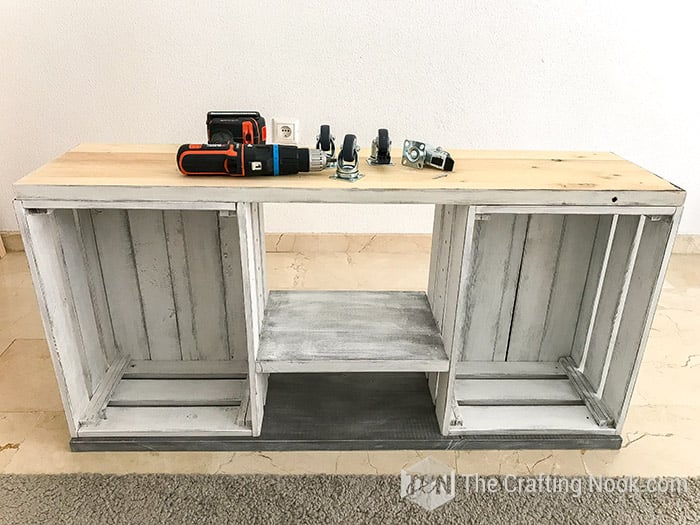
Two of mine had brakes, and the other two were standard swivel casters.
Carefully turn the assembled stand upside down on a protected surface.
Position the caster mounting plates near the corners of the base, making sure each one has enough solid wood underneath for secure mounting.
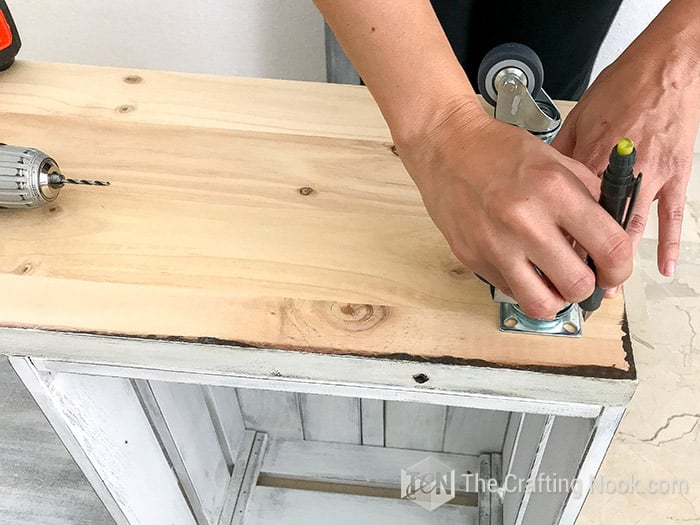
Measure the distance from the edges so all four wheels are evenly positioned.
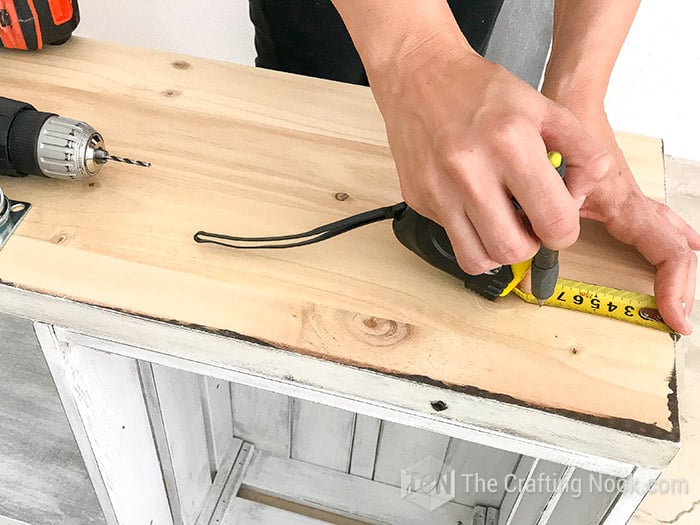
Mark the screw holes, drill appropriate pilot holes, and fasten the wheels using the hardware recommended for your casters and wood thickness.
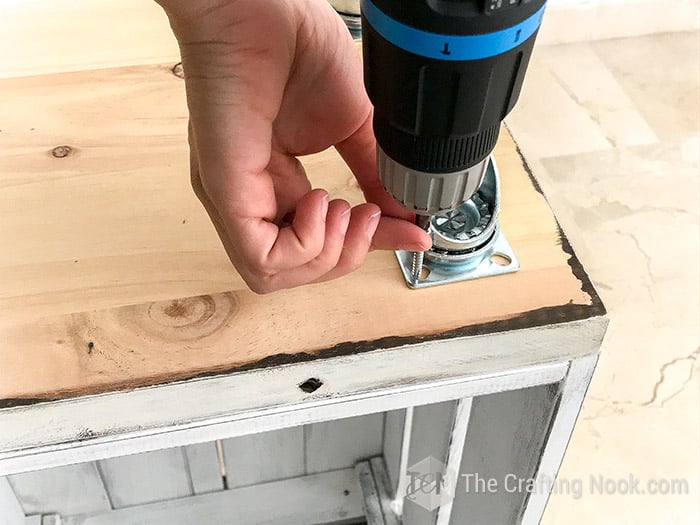
Choose casters rated to carry the total weight of the stand, the TV, and everything stored inside. The weight rating of all four casters together must be sufficient, with a safety margin.
Once all four wheels are secured, carefully turn the stand right side up.
Check that it sits evenly and doesn’t rock, flex, or move unexpectedly.
Lock the brakes once you have it in its final position.
And that’s it! Your wooden crate TV stand is assembled!
Step 9: Style Your New Farmhouse TV Stand
Once everything was assembled, I moved our new TV stand into the living room.
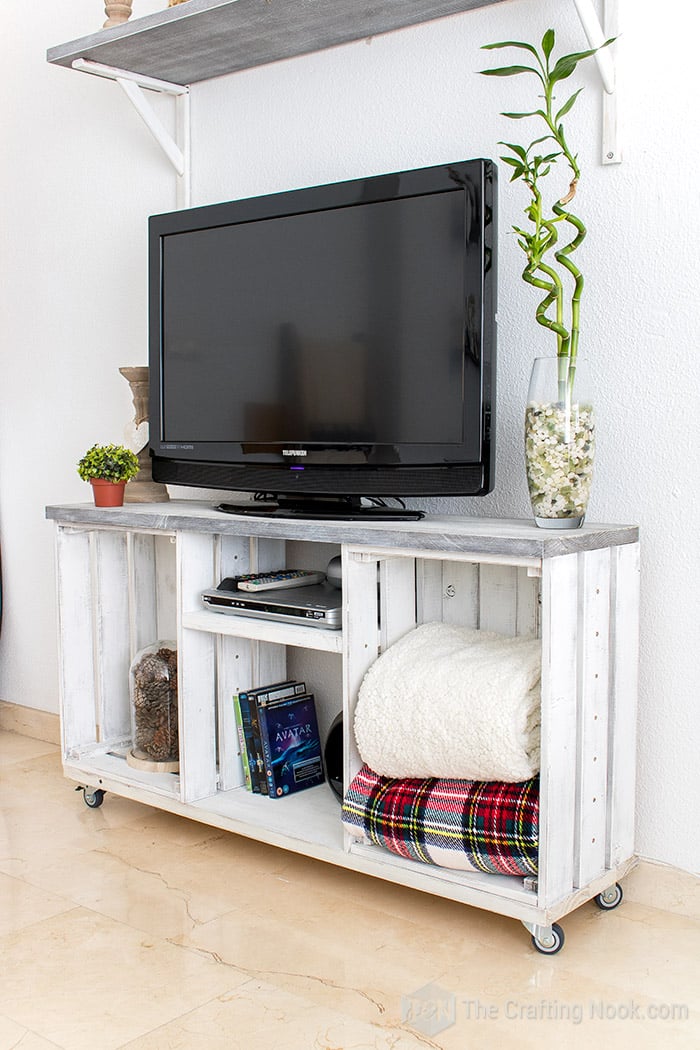
I added our electronics to the center shelves, placed some decorative pieces in one of the crates, and used the other for blankets and pillows.
I love having open storage because it gives me room to decorate while still keeping things we use close at hand.
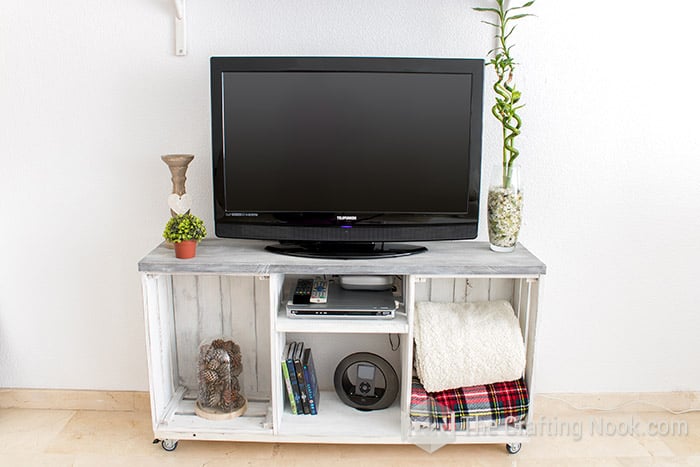
I even made a matching gray wooden shelf to hang above the television.
Since we didn’t have a fireplace in our apartment, that shelf became my little substitute for a mantel.
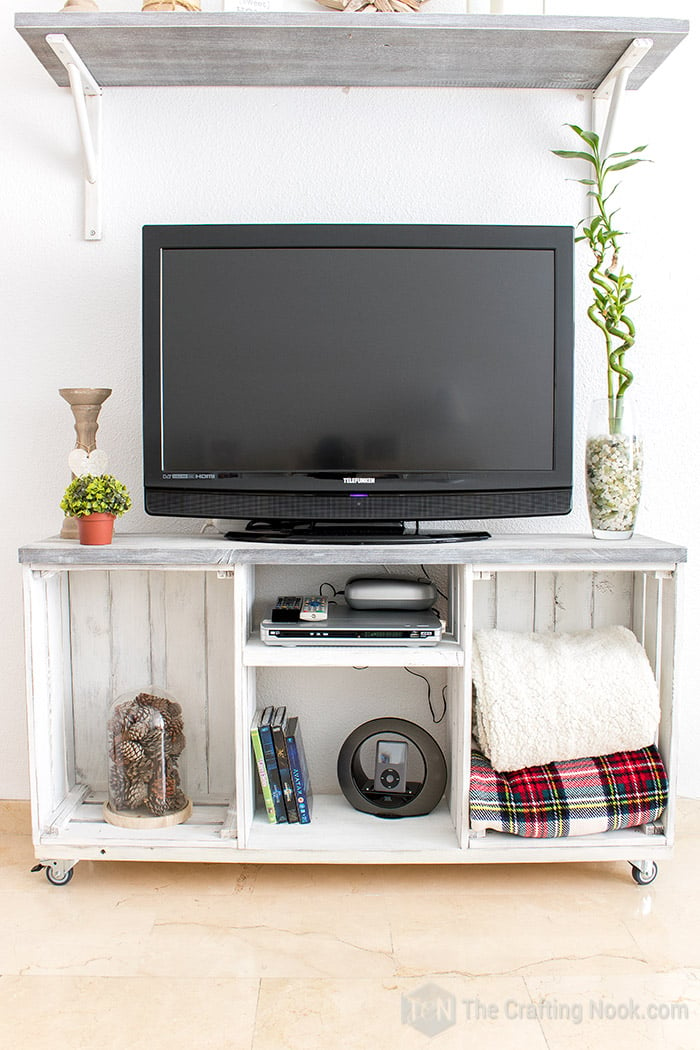
I was SO happy with how everything came together!
Before adding your television, check that the stand is level, stable, and appropriately rated for the load. Follow the television manufacturer’s instructions for safe placement and anti-tip restraints. Locking the caster wheels is helpful, but it does not replace proper tip-over protection.
Crafting Tips
After making this project, there are a few things I would recommend keeping in mind:
- Buy your crates first. It’s much easier to choose and cut your boards once you know the actual crate dimensions.
- Measure twice before cutting. Wooden crates can be slightly uneven, so don’t assume both are exactly the same size.
- Check the wood strength. Choose sturdy crates and boards suitable for supporting your television and other items.
- Test the fit before painting. I learned this one when we had to sand down our center shelf!
- Use very little paint when dry brushing. You can always add another layer, but it’s harder to undo heavy brush marks.
- Allow enough drying time. Rushing the finish can lead to smudges or damaged paint during assembly.
- Choose the right screws. Always account for wood thickness, the direction of the screw, and the weight the connection needs to hold.
- Keep the electronics ventilated. Leave enough space around your TV equipment according to the manufacturer’s recommendations.
Easy Ways to Customize Your TV Stand
One of my favorite things about this design is how easily you can change the look.
Try a natural wood finish. You can skip the distressed paint and use a clear protective finish to show off the natural wood grain.
Use different colors. A black top with white crates, a warm wood stain, or even a solid painted finish would give it a completely different personality.
Make it longer or shorter. Adjust the length of the boards and center shelf to fit your space, provided the resulting structure has adequate support.
Skip the wheels. If you prefer a stationary TV stand, you can use suitable furniture feet or a properly supported base instead. Just make sure the final height and stability work for your space.
Add storage baskets. The open crates are great for baskets, which can help hide smaller items and keep the living room a little more organized.
Frequently Asked Questions
This particular design is fairly beginner-friendly because the wooden crates already form the side sections. You don’t need to build an entire cabinet frame from scratch. However, you should be comfortable measuring, drilling, and making secure connections. A stand that supports a television must be stable and strong enough for the load.
That depends on the size of your television, the height you want, and the space available in your room. I used two large pine crates and made my stand approximately 45 1/4 inches (115 cm) long. Measure your crates before choosing the boards, and make sure the completed stand offers appropriate support for your television.
Yes! You can leave out the caster wheels and design the base to rest securely on the floor, or use suitable furniture feet. Make sure the base is level and stable, and protect your flooring if necessary.
The assembly of mine took approximately one hour once all the pieces were prepared. The staining, distressed painting, sealing, and drying took roughly two days. Your total time will depend on the finish you choose and the drying and curing requirements of your products.
More Furniture and Woodworking projects to Try
If you like this DIY Farmhouse TV Stand tutorial you might also LOVE these other woodworking project ideas too:


A Little Furniture Project I’m Still Proud Of
I know that for someone who builds furniture all the time, this might look like a very simple project. But for me, making my first real piece of furniture was a big deal!
I had wanted to work with wood for years, and getting to make something we could actually use in our home made the whole experience even more exciting.
It’s not a complicated build, and it doesn’t need to be. Sometimes a couple of wooden crates, a few boards, and a little creativity are all you need.
If you make your own DIY TV stand, I’d love to hear how it turns out! Leave me a comment below with a star rating and tag me on Instagram so I can see what you created.
✂️ Tutorial

Easy DIY TV Stand with Wooden Crates

Tools
- Measuring tape.
- Pencil
- Drill
- Appropriate drill bits
- Screwdriver
- Bubble level.
- Paintbrushes
Supplies
- 2 sturdy large wooden crates
- 2 long pine boards top and bottom
- 1 shorter pine board center shelf
- 4 caster wheels optional; 2 locking recommended
- Wood screws and appropriate mounting hardware
- Walnut wood stain
- Gray and white paint
- Spray sealer
- Sandpaper
Video

Instructions
- **Measure the crates.** Decide the overall stand length and measure the gap between the crates for the center shelf. Cut the boards to fit.
- **Prepare the wood.** Sand the crates and boards, then remove the dust.
- **Apply the base finish.** Stain the gray boards with diluted gray paint and the white pieces with walnut-colored wood stain. Let dry.
- **Create the distressed finish.** Dry brush white paint onto the gray boards and crates. Add gray touches and lightly sand edges as desired.
- **Seal the wood.** Apply a compatible protective sealer following the manufacturer’s instructions. Allow to dry and cure as directed.
- **Attach the center shelf.** Measure and mark its height on both crates. Secure the shelf with appropriate screws, checking that it is level.
- **Install the bottom board.** Position the connected crates on the bottom board and attach them securely.
- **Attach the top board.** Center the top board, check the overhang, and secure it to the crates.
- **Install the wheels.** Turn the stand over, attach properly rated casters to solid mounting points, then carefully turn it upright.
- **Place and secure the stand.** Check stability, lock the wheels, arrange your electronics, and follow the television manufacturer’s anti-tip and ventilation instructions.
Notes
- Prep and assembly: Approximately 1 hour of assembly, excluding cutting and finishing prep.
- Painting and drying: Approximately 2 days for the original finish, depending on the products used.
- My stand measured approximately 45 1/4 inches (115 cm) long.
- Leave about 1/8–3/16 inch (3–5 mm) of clearance when fitting the center shelf, if needed.
- Screw size, board thickness, caster rating, and load capacity must be chosen for your particular materials and television. – Test the fit before painting.
- Let the finish dry completely before assembly and follow curing instructions before regular use.
Some DIY TV Stand ideas I love from my favorite bloggers:
- How to Build a Farmhouse TV Console by Remodelaholic.
- Easy DIY Barn Door TV Console Tutorial by Shanty 2 Chic.
- DIY Pallet TV Stand by Preparing for Peanut.
And if you found this tutorial helpful, please save it to Pinterest so you can find it when you’re ready to start building yours.
Til’ next time…


FREE WORKBOOK
Keeping your Sweet Home Organized
Learn how to create intentional habits and simple routines to Keep Your Home Organized. Plus freebies, printables, exclusive content, and tips.
Disclaimer: By clicking on the “Yes” button above you are giving me your consent to collect and use your information according to the law and My Policy Privacy. Zero Spam I promise!
I love this! What are the dimensions of your crates? And what is the thickness of the boards?
Hi Tiffany, thank you!
Please keep in mind that every crate in every country is different. Mines are: 38,5cm wide X 51,5cm height and 32cm deep (about 15.15 In X 20.6 In X 12.59 In) and the board is 1 inch thick. Your measurements should be based on your own crates and of course, the available space, even the length of your console table. For example, I knew I had at that time a limited space so I got my boards cut to 120cm (almost 50 inches) then I placed my crates on each end of the board, and then lastly I measured the space between crates to get the shelf.
Hope this helps!
Hugs,
This is great! I’m struggling to pick what size crate to use. What’s the width dimension for the top board?
Hey Jason,
Thanks for reaching out! My TV console is really small. it’s a little over 40 inches. But the best way to do this is selecting the crates first. Just choose the ones you love. Then decide how much space you want in between the 2 crates for the console. Sum both crate’s width + the space in between and add about an inch and that’s your top board size. The bottom one can be the same or just without the extra inch.
Hope this helps!
Regards
What size tv would this fit?
My TV Console size could fit up to a 50″ but since you can build it at any size it will depend on what size you want your TV to be.
Hope this helps!
I love the way this looks!! Very beautiful! I wouldn’t have thought of using spray sealer, great idea! I also love the blanket cubbies.
Thank you!
Hi Alysha,
Thank you so much, you made my day! Yes I tried with normal liquid sealer in my test run and it dragged the dry bush effect and it lost the original look so I tried with the spray one and voila… worked like a charm!
Have a great day!
I love your TV console and is nice. I never think of DIY myself.
Thank you so much, Betty!!!
I love DIY. I can make them just like I want things to be. Sometimes is so hard to find exactly what I want!
Hugs!