DIY Buttons Embellished Shoes for Girls
This post may contain affiliate links. Please read our Disclosure Policy.
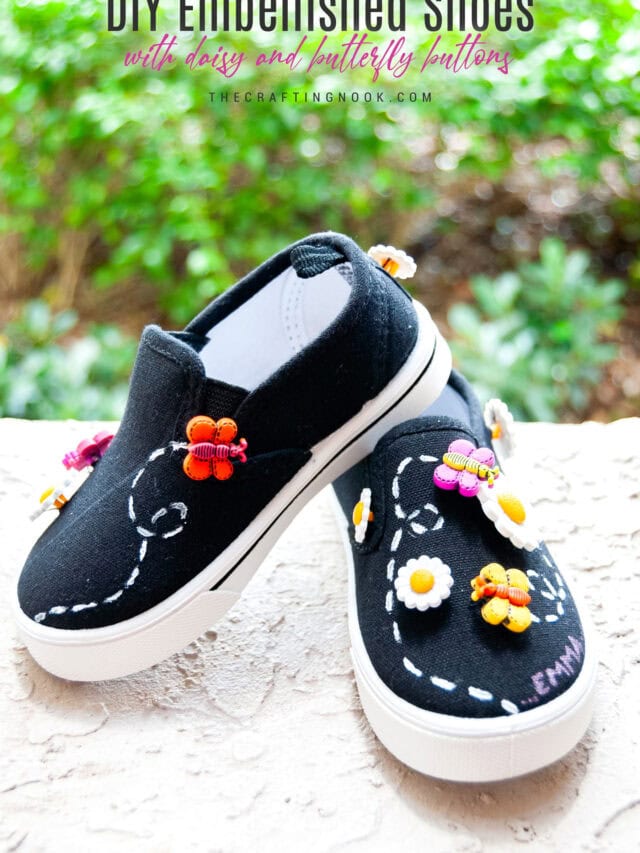
Buttons Embellished Shoes. Inexpensive shoes don’t mean they have to be boring. with just a few supplies, a little creativity, and lots of love, you can transform them into a unique masterpiece that your kids will love wearing.
I just have a thing for buttons and shoes. Well, if you are a woman, you would agree that shoes are our feminine weak spot. In my case, even kids’ shoes are my weakness.

Table of Contents
Girly Buttons Embellished Shoes
Buttons are fun, aren’t they? I love making things with buttons and of course, if you have seen my handmade cards I love bows too.
Not long ago I made embellished shoes for my girl that I loved and I really wanted to make another pair. So, since I’m having this button project series, I thought it would be nice to revamp a little bit Emma’s cute shoes.
This is another super quick project. It takes about 10 minutes and at the end, you have a new pair of shoes LOL and kids love this kind of craft.

I bought these cute felt flowers at Walmart {when I was in the USA} with no clue what to do with them. Deep down, I just knew I could use it in some cute project and here it is LOL.
Also, I already had some butterflies left from the previews shoes, ribbons, and of course, cute buttons =P.
How to Make Buttons Embellished Shoes
Supplies:
- Basic fabric shoes
- Embellishments
- Mixed buttons
- Ribbons
Tools:
- Needle and thread
- Scissors
- Optionally fabric glue

Instructions:
1. Firstly, give it some thought and decide on the composition.
2. Choose the place where you want the flowers embellishments and buttons or any embellishment you want to use.
3. Then I started sewing each piece to the shoe.

4. What I did was just to give a few stitches to each piece. When using a button over a flower, I just used the same stitch for both.

5. Since not all shoes are the same, test the needle first to make sure your shoes will be flexible enough for you to stitch on them.

I also randomly stitched a few tiny buttons here and there.
6. It’s just a decoration thing so it doesn’t really matter where. You just play around and will see the wonders you can make.

7. The last touch was a ribbon bow at the back of the shoes. It is completely optional as any decorations but I think it looks so stinkin’ cute.

8. Lastly, make a cute ribbon bow with your chosen ribbon and stitch it carefully to the higher edge of the back of the shoe.


9. Repeat the process with the other shoe and you are done!
You don’t even need to make them both exactly the same, I played with the colors.
Tadaaaaaa!!!!

Here you have it! A new look to those boring plain shoes!
Crafting Tips
- Don’t be afraid to experiment with different button sizes, shapes, and colors. Pair up contrasting colors or create fun patterns by alternating buttons of different sizes. It’s all about embracing the unexpected and letting your creativity run wild!
- Ribbons are fantastic for adding an elegant touch to canvas shoes. Cut ribbons into various lengths, then tie them in bows or create fancy knots. Attach them to the shoes near the laces or around the ankle area. It’s like giving those shoes a stylish makeover fit for a mini fashionista!
- Alternatively, you could try using fabric glue instead of sewing the buttons and appliques onto the shoes. It’s faster and easier, and you don’t have to worry about poking holes in the canvas. Plus, it dries clear, so no need to worry about any messy glue residue.
- Another fun idea is to create a theme with the buttons and appliques. For example, if your little girl loves animals, you can use buttons and appliques in the shape of cats, dogs, and other furry friends to make her shoes stand out.
- Don’t limit yourself to just the sides of the shoes – you can also add buttons and appliques to the tongues and backs for a more complete look.


What do you think??? Are these Buttons & Bows Embellished Shoes Cute or what???

How does Emma look with them on???
Have you decorated shoes like this? How was it, what did you do?
Frequently Asked Questions
Absolutely! Most buttons and appliques are designed to withstand gentle washing. Just make sure to check the care instructions for the specific buttons and appliques you used, if in the case of special items. It’s best to hand wash the shoes or use a gentle cycle in the washing machine to keep everything intact.
Great question! If you’re using fabric glue, make sure to apply a generous amount and press the buttons and appliques firmly onto the canvas. Let them dry completely before wearing or washing the shoes (at least 24-48 hours). If you prefer sewing as I did, use a strong thread and make multiple stitches through the holes of the buttons or around the edges of the appliques to ensure they stay in place. I would avoid hot glue since the buttons or decorations can fall off with time.
Generally, buttons and appliques can be used on most canvas shoes. However, it’s a good idea to check the material and construction of the shoes beforehand. Some shoes might have a more delicate canvas or a texture that makes it difficult for buttons and appliques to adhere properly. Always test a small area first to ensure they stick well and won’t damage the shoes.
Imagination (and the quality of the shoes) is the limit. You can use rhinestones, fancy buttons, vintage buttons, items that sparkle, beads (ooh gold beads), and charms, among other ideas.
More Button Crafts to Try
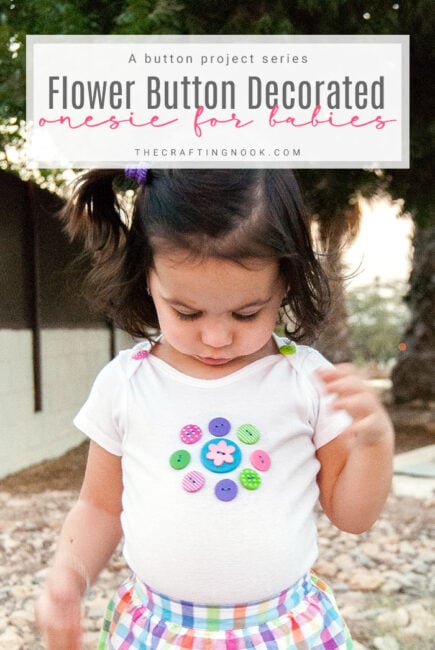
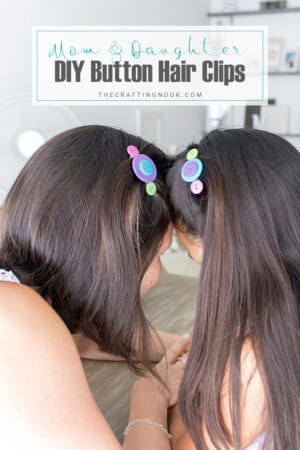
If you like this Button Embellished shoes tutorial, you might like other cute easy diy projects for kids that use buttons:
Here are some of my favorite button Projects from my favorite bloggers:
- Button Cluster Key Ring by Julie over at Sum of their Stories.
- Button Headband by Mandy over at Sugar Bee Crafts
- Cute as a Button Shoes by Joann (not a blogger but still I love this tutorial)
✂️ Tutorial

DIY Buttons Embellished Shoes for Girls
Tools
- Needle and thread.
- scissors
- Optionally fabric glue
Supplies
- Basic fabric shoes
- Embellishments
- Mixed buttons
- Ribbons
Instructions
- Firstly, give it some thought and decide on the composition.
- Choose the place where you want the flowers embellishments and buttons or any embellishment you want to use.
- Then I started sewing each piece to the shoe.
- What I did was just to give a few stitches to each piece. When using a button over a flower, I just used the same stitch for both.
- Since not all shoes are the same, test the needle first to make sure your shoes will be flexible enough for you to stitch on them.
- I also randomly stitched a few tiny buttons here and there.
- It’s just a decoration thing so it doesn’t really matter where. You just play around and will see the wonders you can make.
- The last touch was a ribbon bow at the back of the shoes. It is completely optional as any decorations but I think it looks so stinkin’ cute.
- Lastly, make a cute ribbon bow with your chosen ribbon and stitch it carefully to the higher edge of the back of the shoe.
- Repeat the process with the other shoe and you are done!
- You don’t even need to make them both exactly the same, I played with the colors.
- Tadaaaaaa!!!! You are done!
Share and PIN ME!

Til’ next time…


FREE WORKBOOK
Keeping your Sweet Home Organized
Learn how to create intentional habits and simple routines to Keep Your Home Organized. Plus freebies, printables, exclusive content, and tips.
Disclaimer: By clicking on the “Yes” button above you are giving me your consent to collect and use your information according to the law and My Policy Privacy. Zero Spam I promise!