Personalized DIY Hair Bow Holder
This post may contain affiliate links. Please read our Disclosure Policy.
Let’s create a personalized DIY hair bow holder to organize all your girl’s accessories in one place with this easy tutorial. This project is fun, customizable, and so so cute!
For those of you who are like me, crazy about hair bows and hairbands for your little girls, I’m sharing this easy and inexpensive hair accessories holder.

Table of Contents
Personalized Hair Accessory Holder Tutorial
It’s cute, it’s fun and there are tons of possibilities depending on the size you choose. I’ve made a jewelry holder before and it turned out great so why not give the hair accessories a place too, right?
I need to be honest here, due to moving around so much, I used to have my daughter’s hair bows and hairbands scattered everywhere — in a random drawer, sometimes on the floor, you name it. That’s when I decided to make a diy hair bow organizer that could not only organize them but look adorable on my daughter’s wall too!
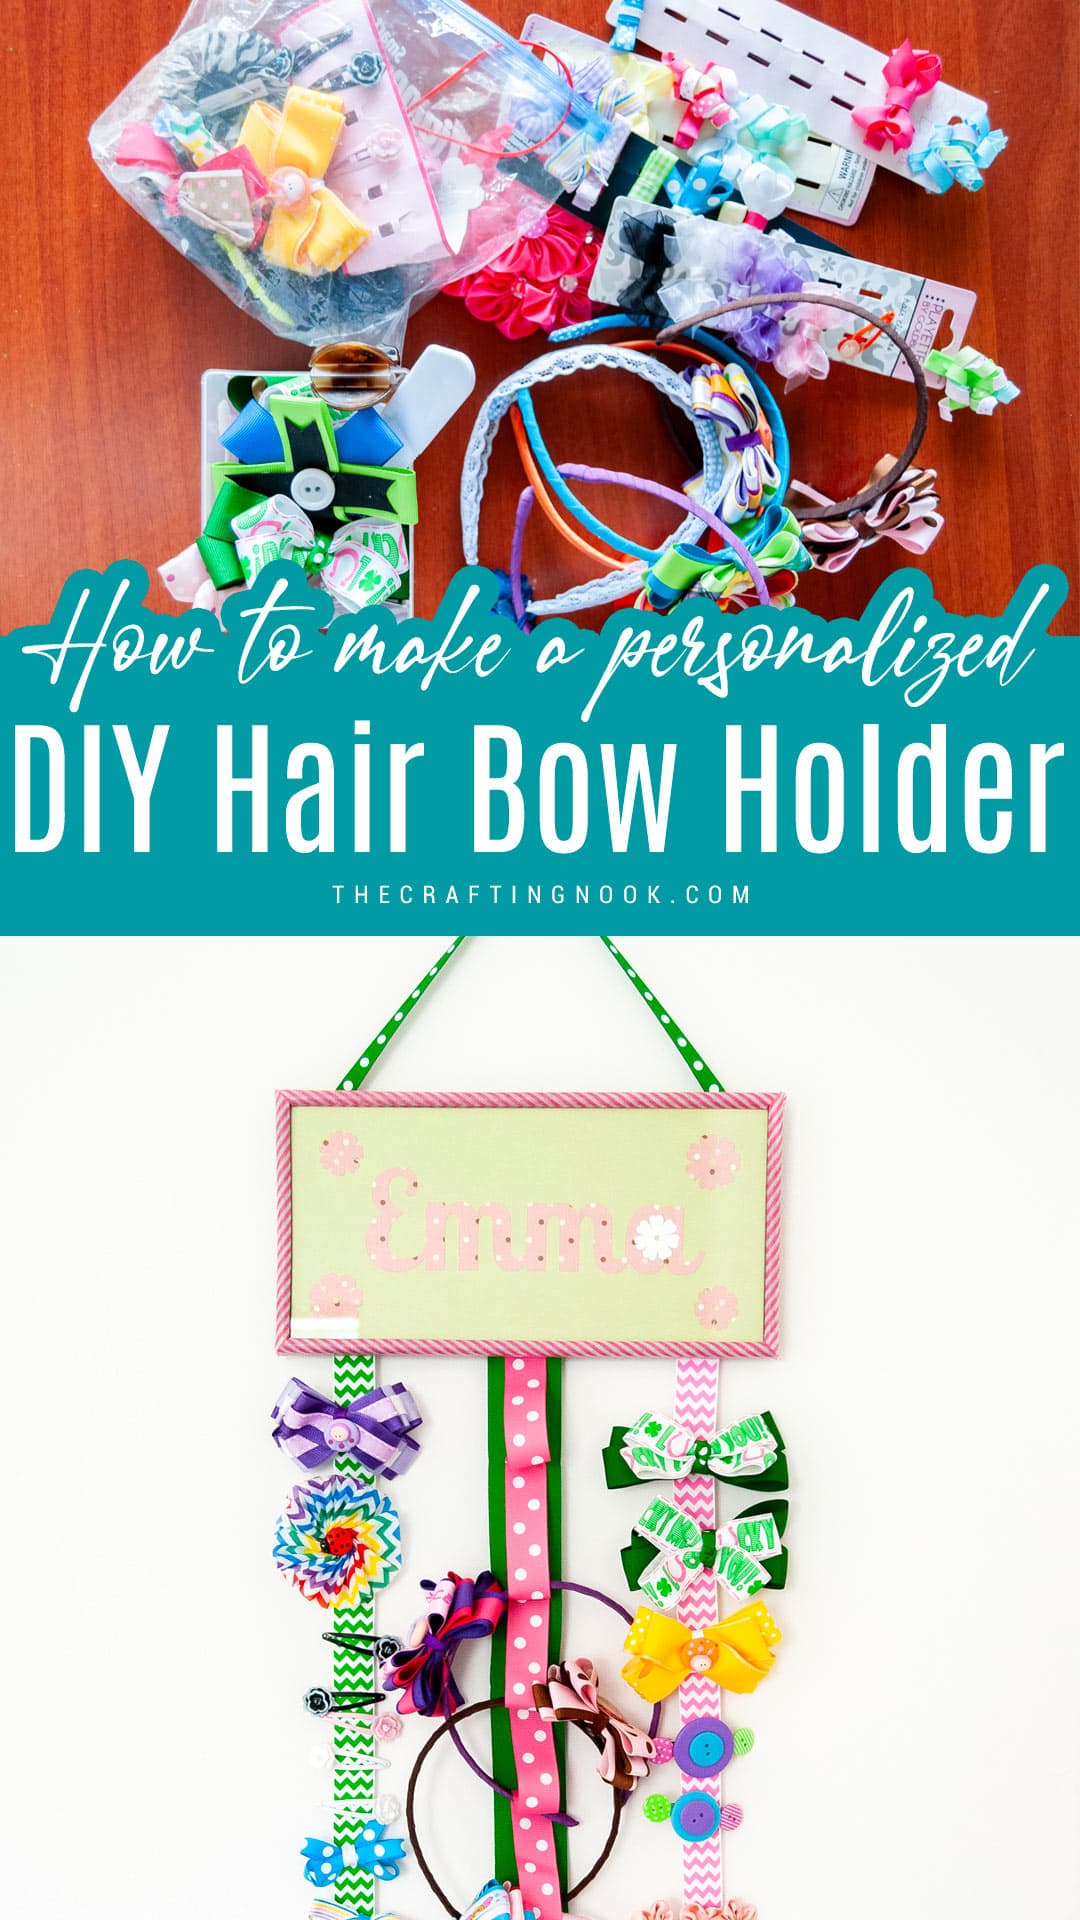
Here’s an example of the things my girl had, and it’s not even all of it. Another big part is still in storage.
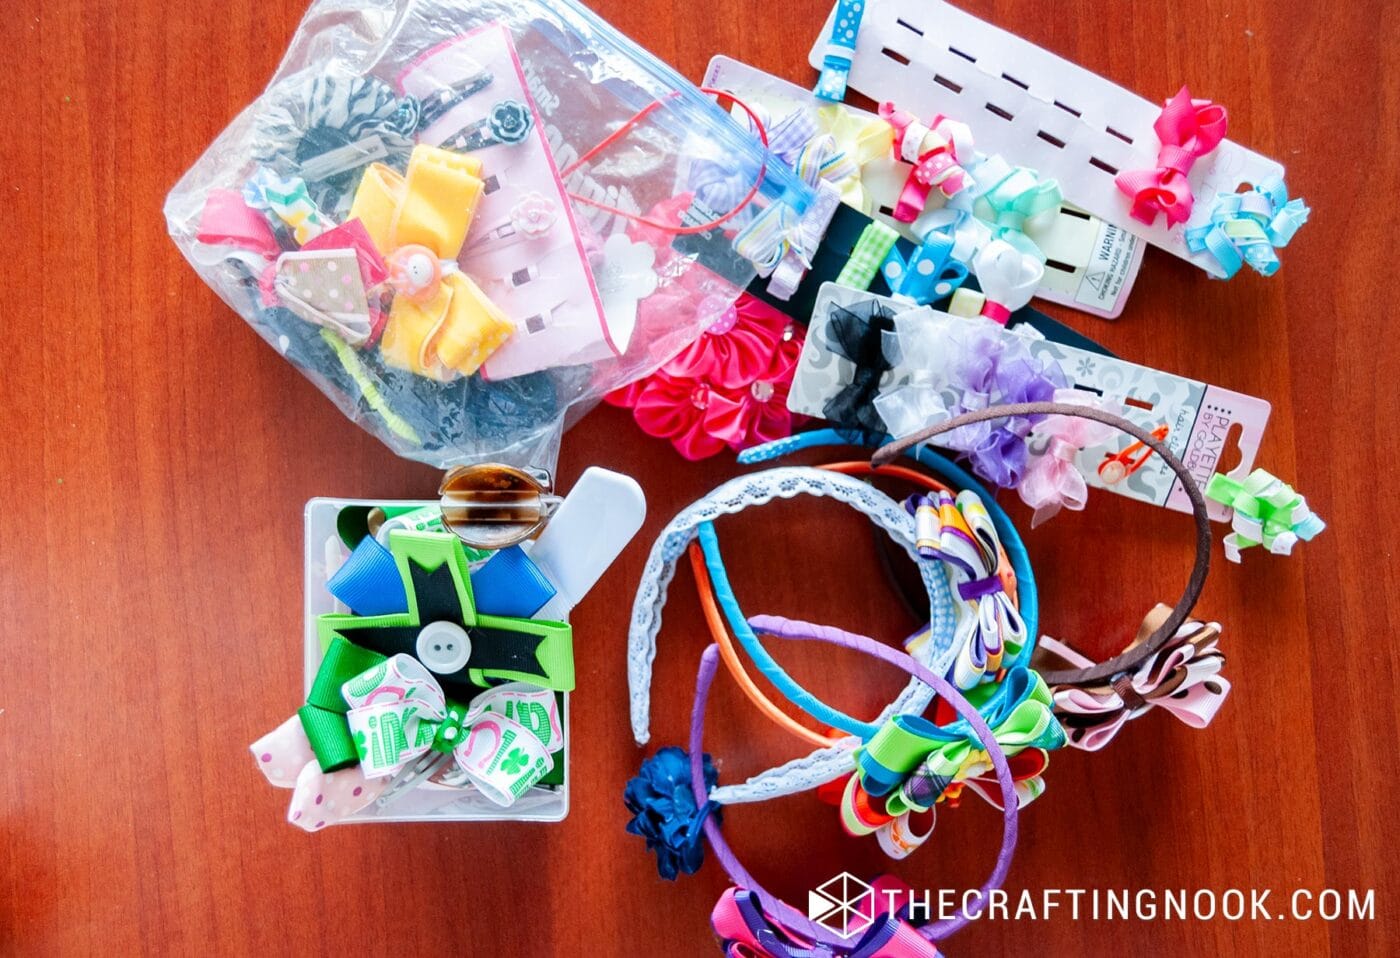
The problem with having them like this is that you have no control over what you have, where they are (most of the time) and more often than not, you stop using accessories because it gets annoying to go through bags, drawers and all over the room to find something.
So I thought this could be a creative way to organize all my daughter’s hair accessories. What I love the most about this one particularly, is that you can even organize headbands.

How to Make This Personalized DIY Hair Bow Holder
Here’s how I made it, as I always say, this is just an idea and a way of doing it, but imagination is the limit and you can tweak and improve with your own ideas and I’m sure it will turn out amazing.
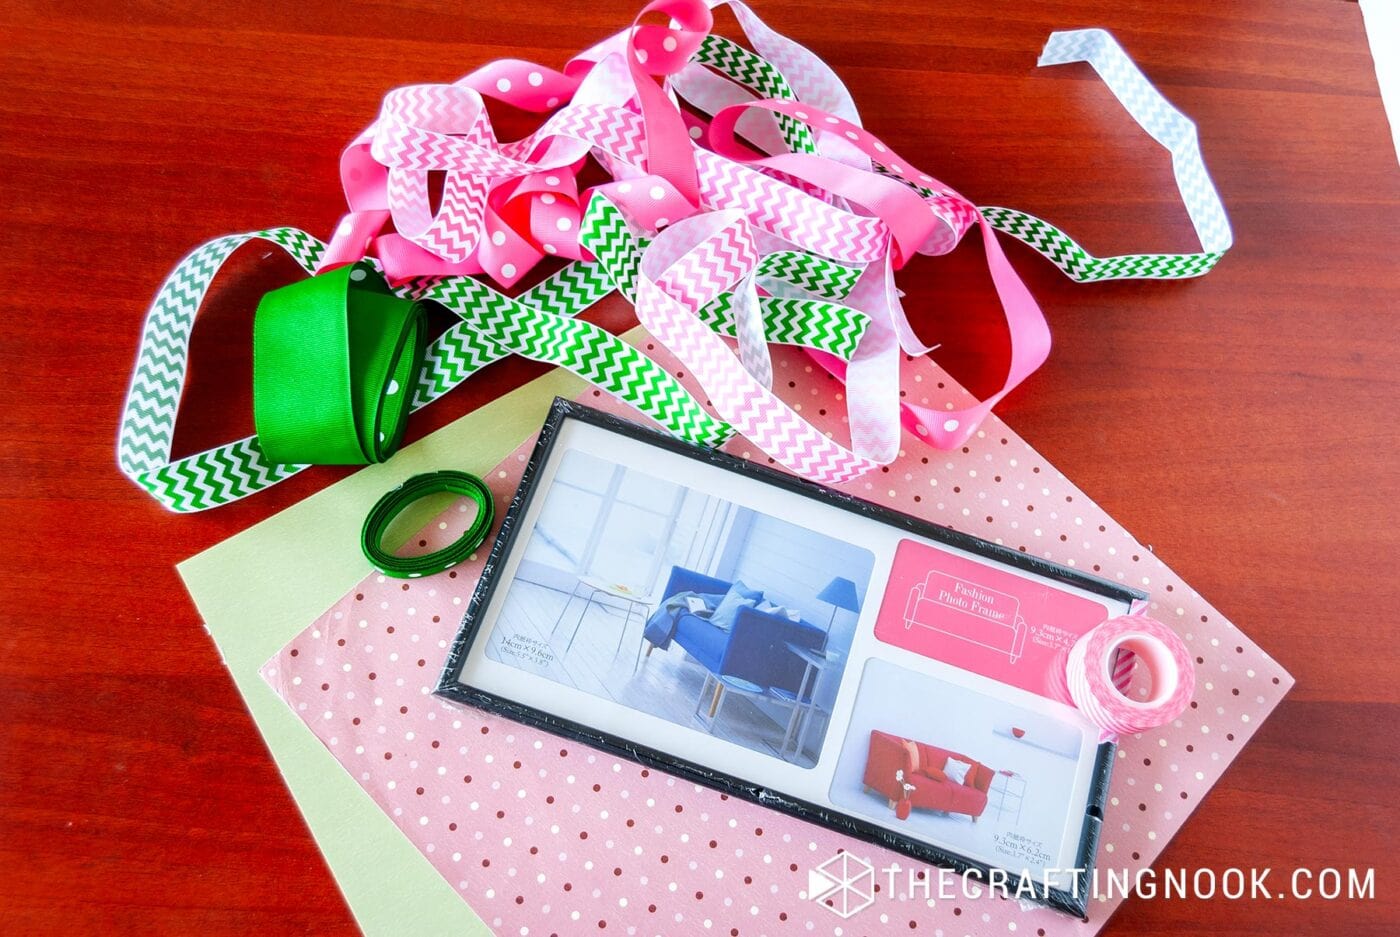
Supplies:
- Different Ribbon colors, sizes, and patterns
- Scrapbooking paper – for your daughter’s name and cutout. If you have a cutting machine (Cricut or Silhouette) you can use it to cut your daughter’s name and cute decorative shapes.
- A rectangular plain photo frame – those you can find at a dollar tree, or the dollar zone in target. It doesn’t have to be a fancy one unless you want to.
- Washi tape
- Cutouts – Flowers, letters, hearts, any detail your daughter loves.
- Thread and needle.
Tools:
- Hot glue gun and glue sticks
- Silhouette Cameo – Totally optional, you can still make this without it.
- Scissors
- Ruler
- Cutter
Instructions:
The Top of the Holder
1. Open your photo frame and remove the backing, glass, and paper cover.
2. Apply washi tape along the frame.
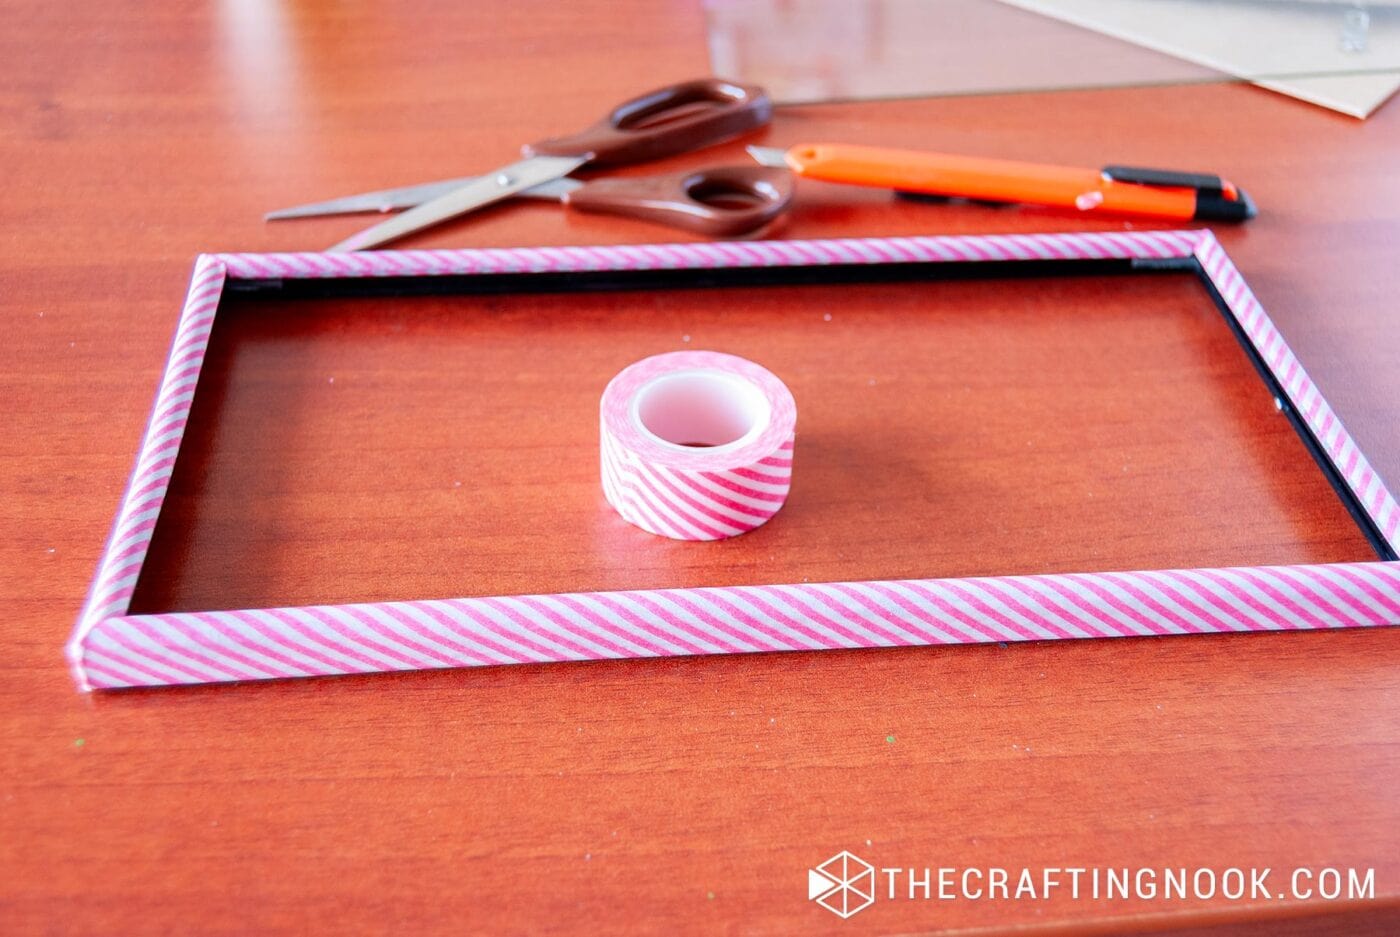
3. Then cut a piece of scrapbooking paper with the frame paper size.
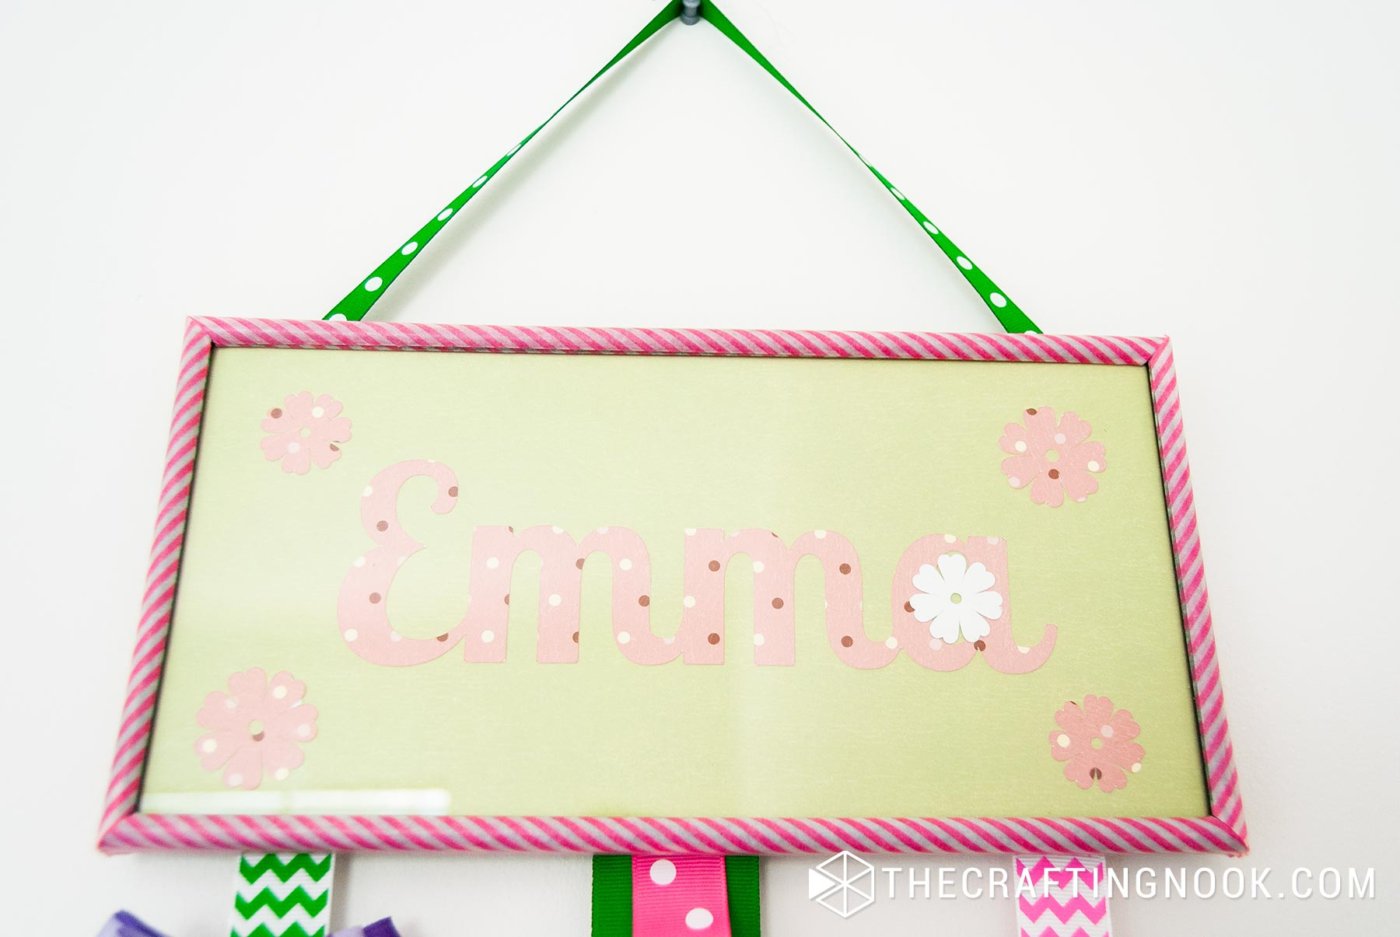
4. Decorate your scrapbook paper with your girl’s name and your cutout shapes
For example, I made my Girl’s name in a cute font and also cut some cute flowers with my silhouette.
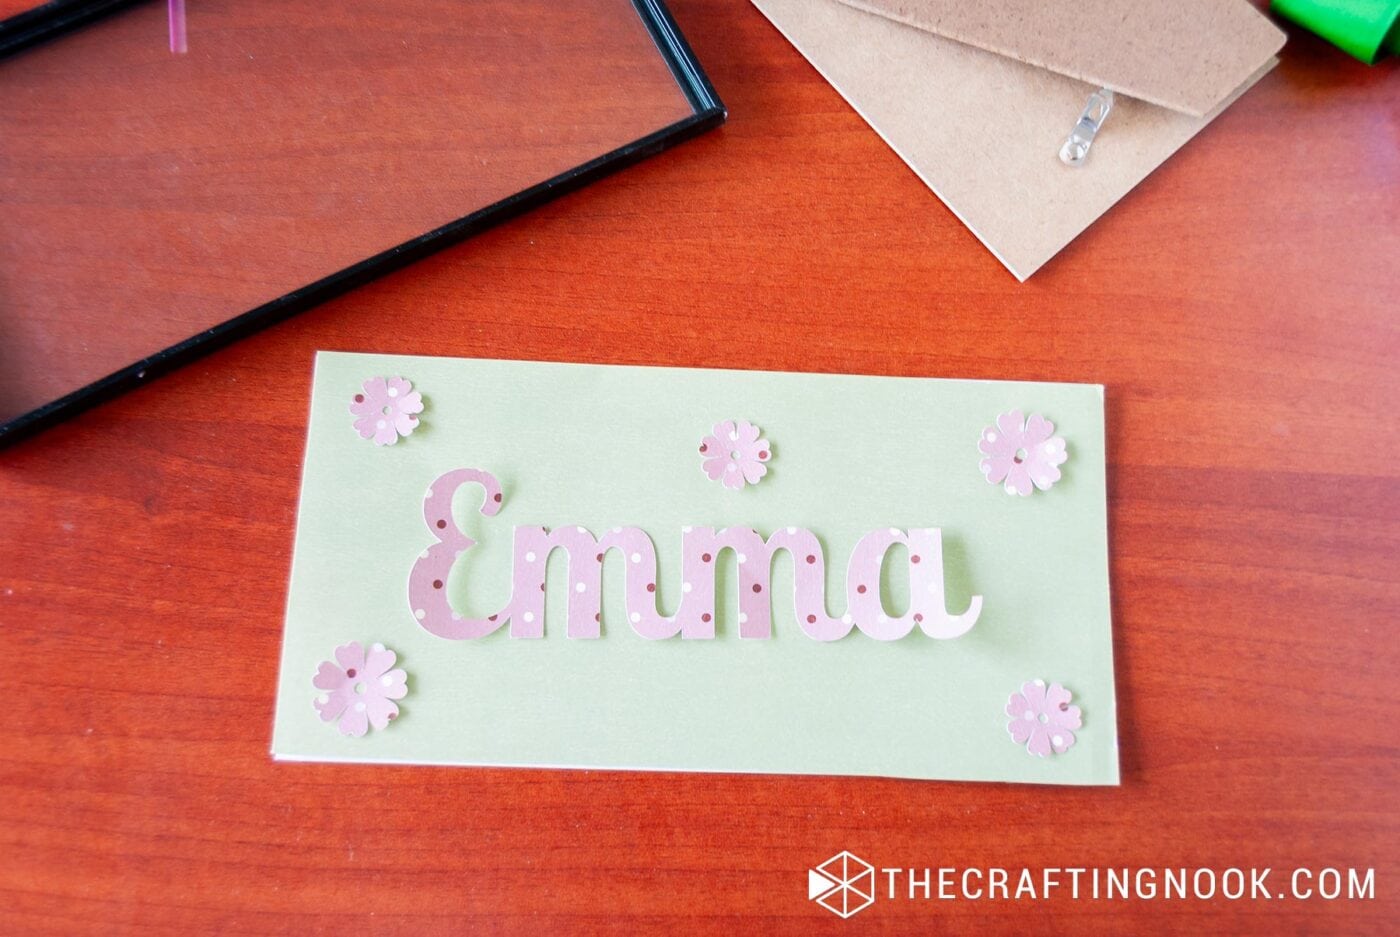
5. Apply some dots of glue to secure the decorating pieces in place.
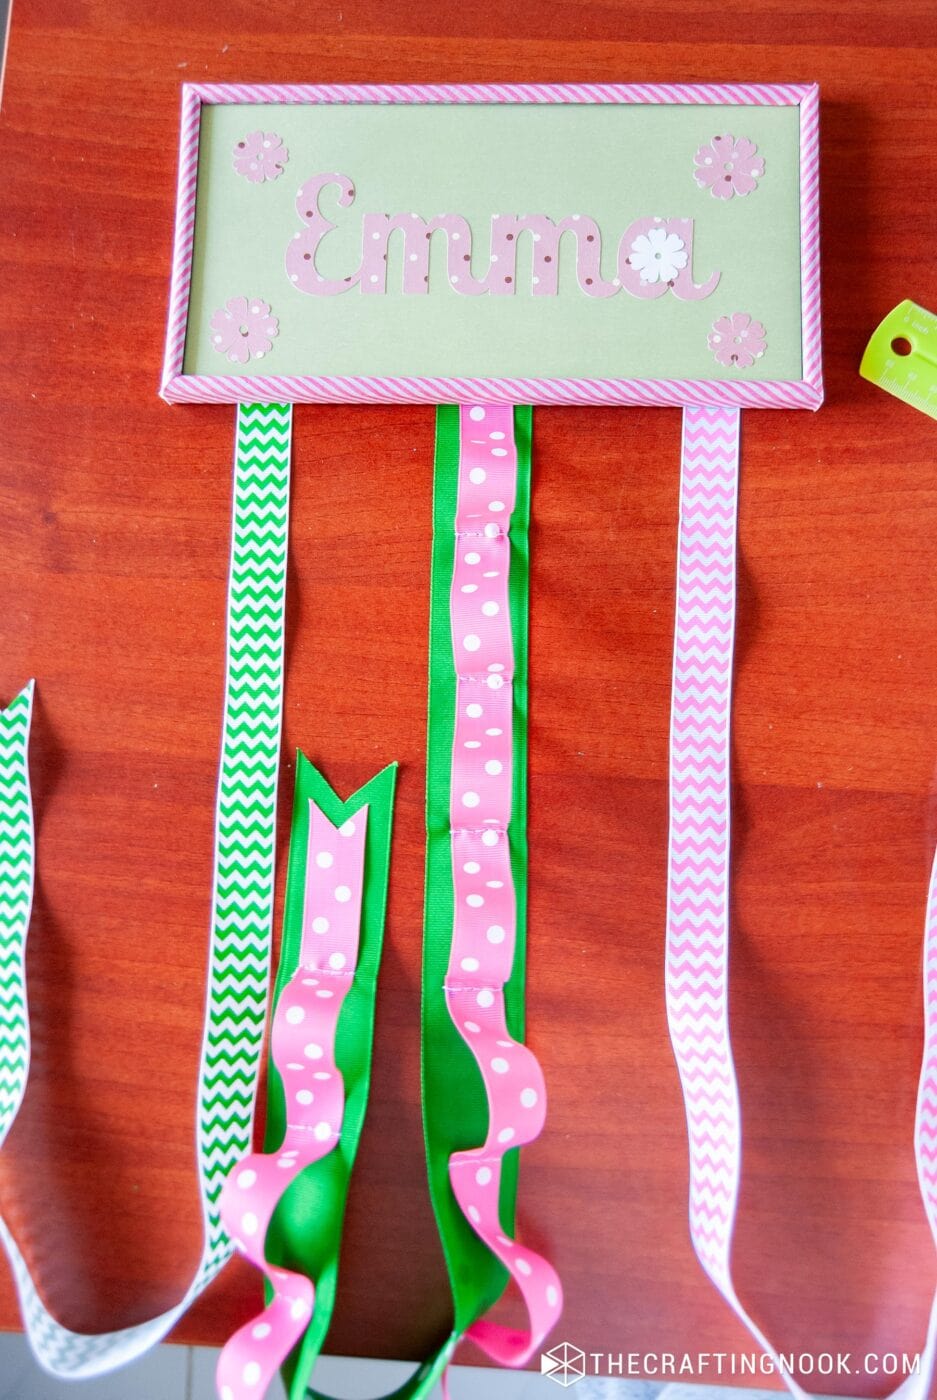
6. Put back the flame glass into the frame and place your creation facing down towards the glass
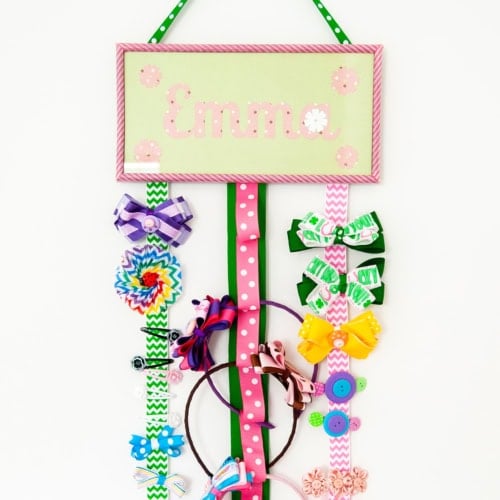
7. When you turn it over you should see something like in the photo below.

8. Set it aside.
The Bow Holders
9. Measure the length of your ribbon. Make it as long as you wish and as many as your photo frame allows, leaving enough space to handle the hairbows.
I used around a yard of 3 ribbon strips.
10. If you want to have headbands there too, then get an extra strip of ribbon slightly narrower than the main ribbons and don’t cut it yet. You should have 2 ribbons for the headbands to hold.
I used a solid 1-inch wide one as my base and a polka-dot narrower.
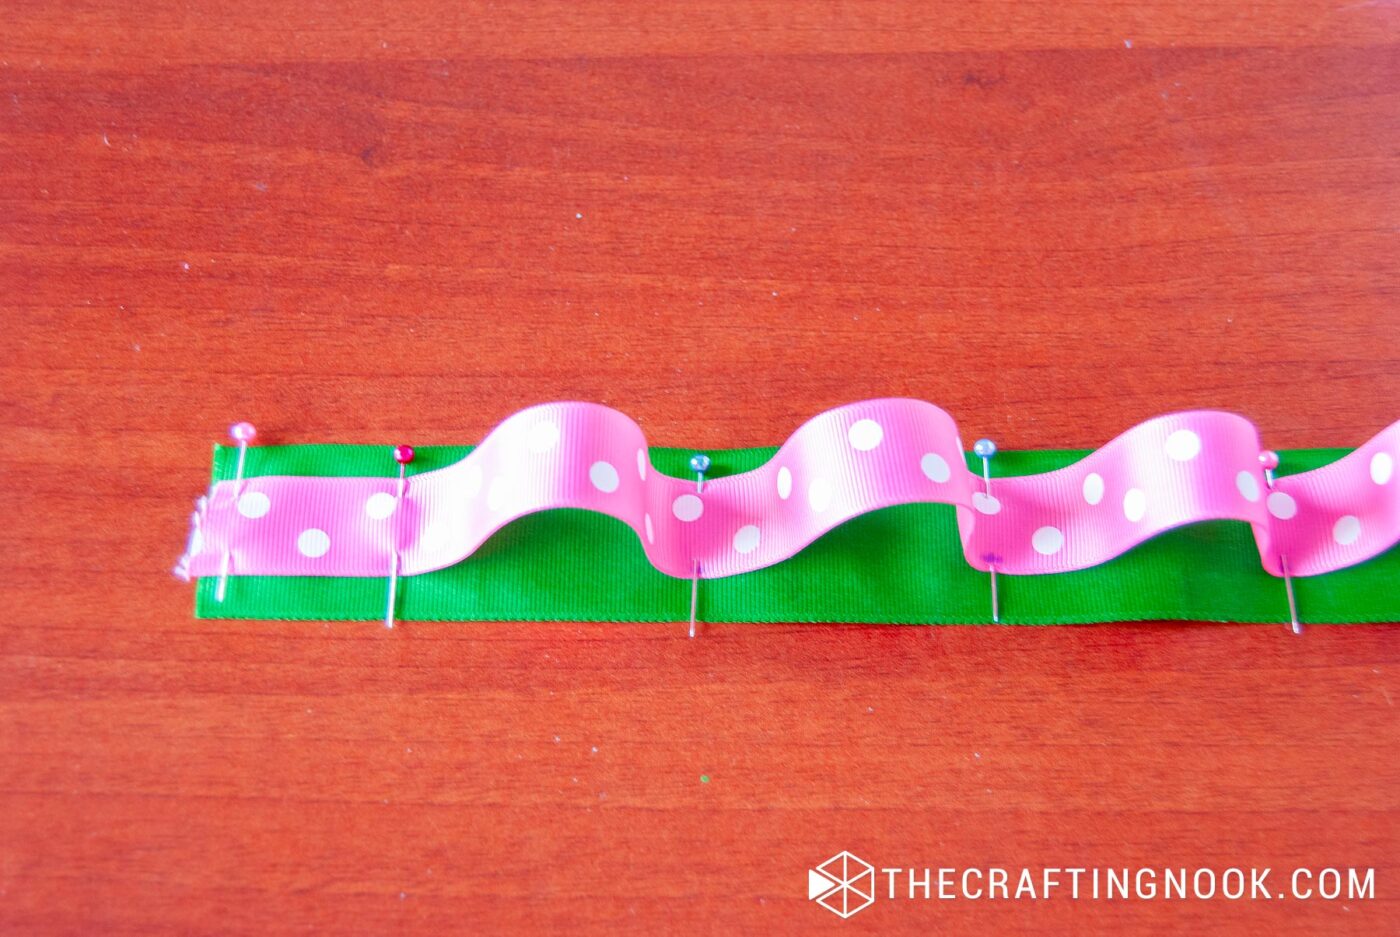
11. Make marks with a ruler on the base one every 6 cm (2 1/4 inches).
12. Then make marks every 9 cm {3 1/2 inches}. Pin together each mark as shown below.
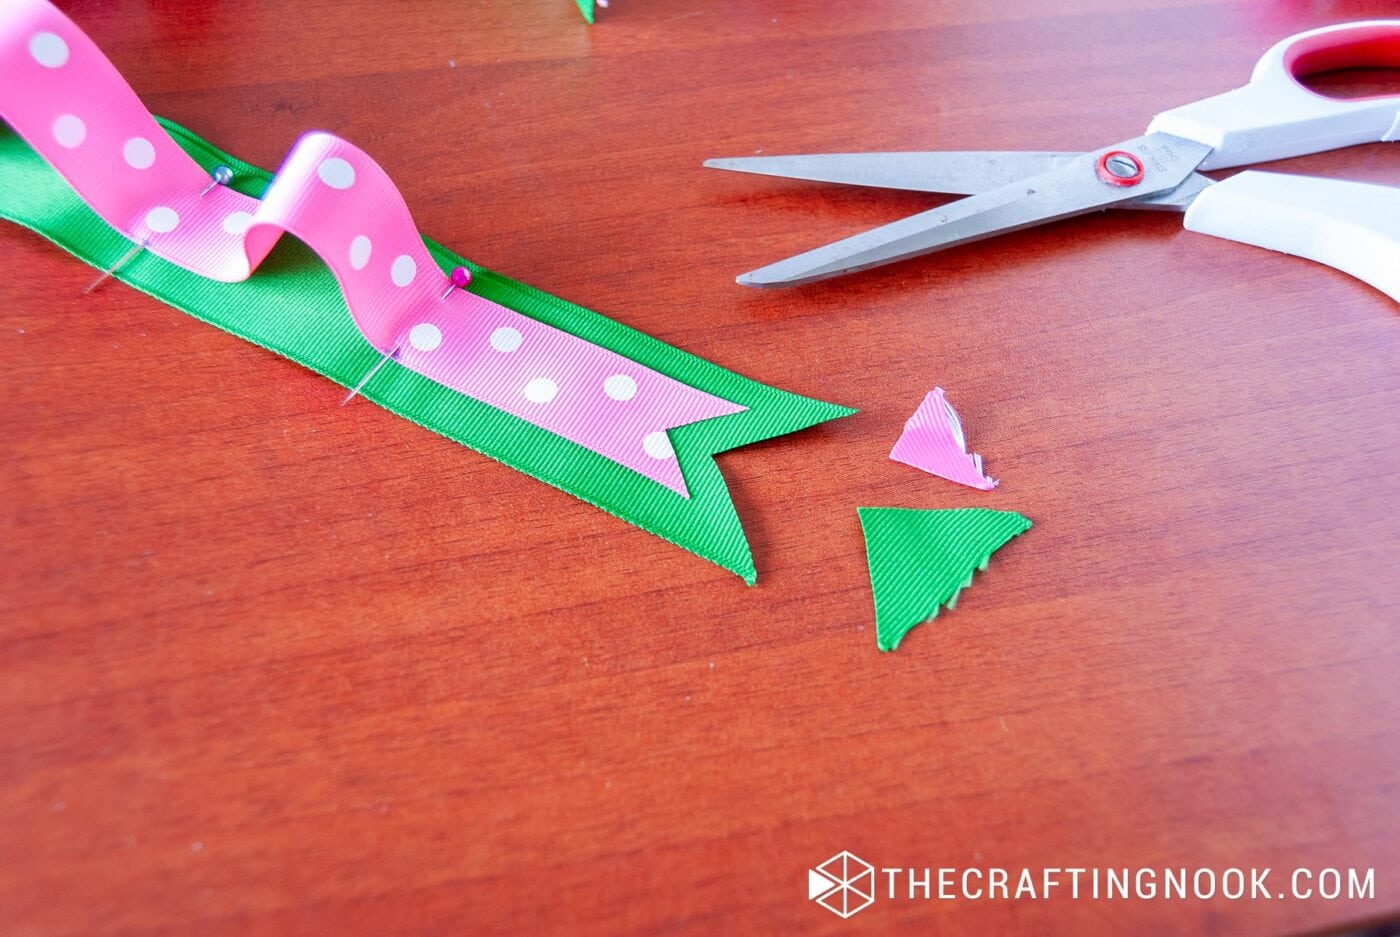
13. When you get the length you need for the narrower ribbon, make cute cuts at the end of both.
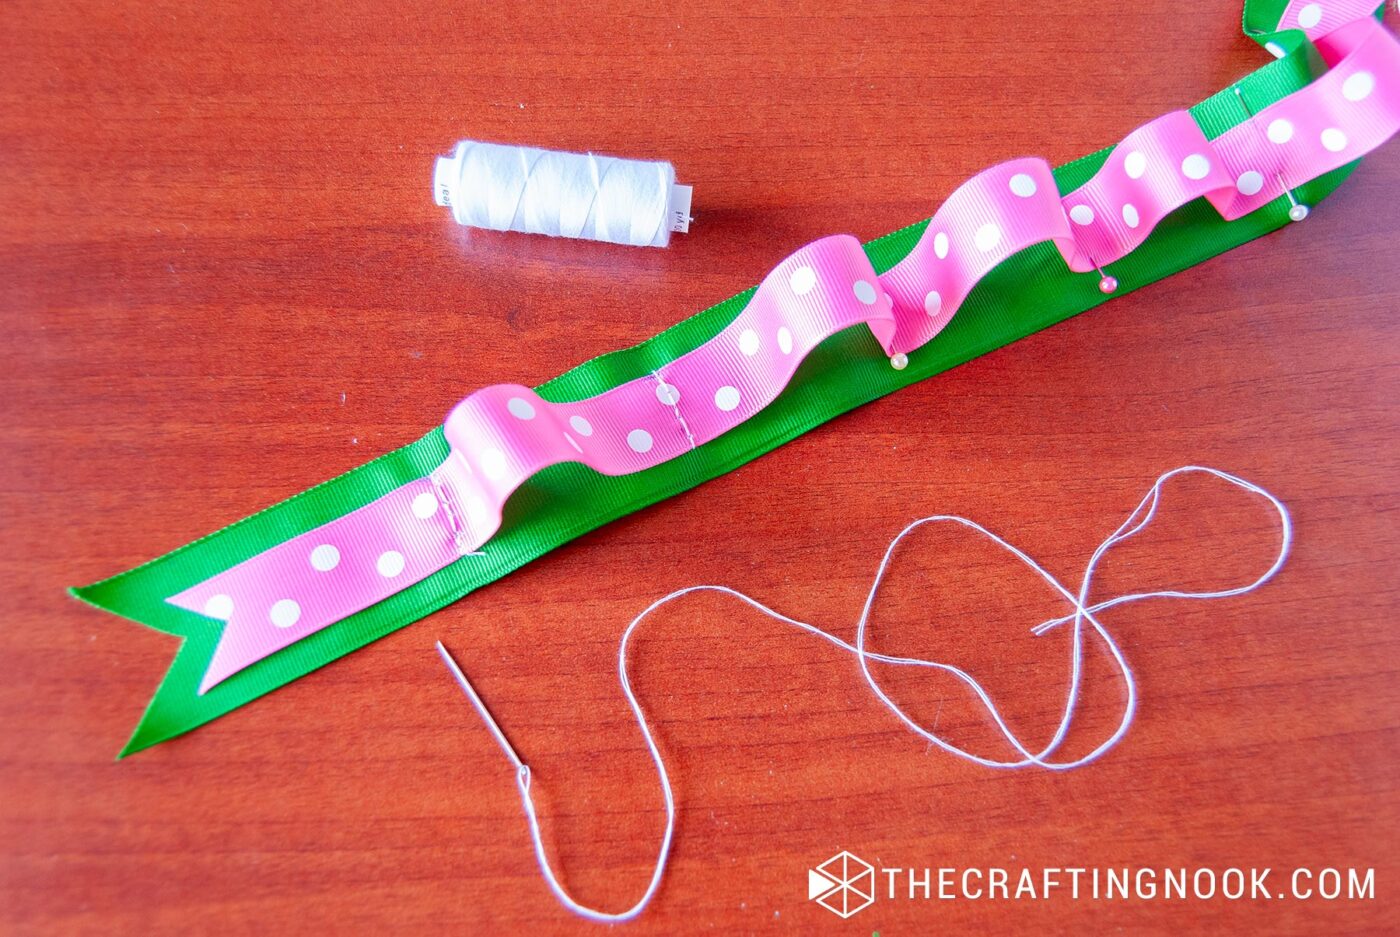
14. Now. stitch both ribbons together on each mark to create the loops for the headbands. You can do this by hand sewing like I did or using a sewing machine.
Assemble the Hair Accessory Holder
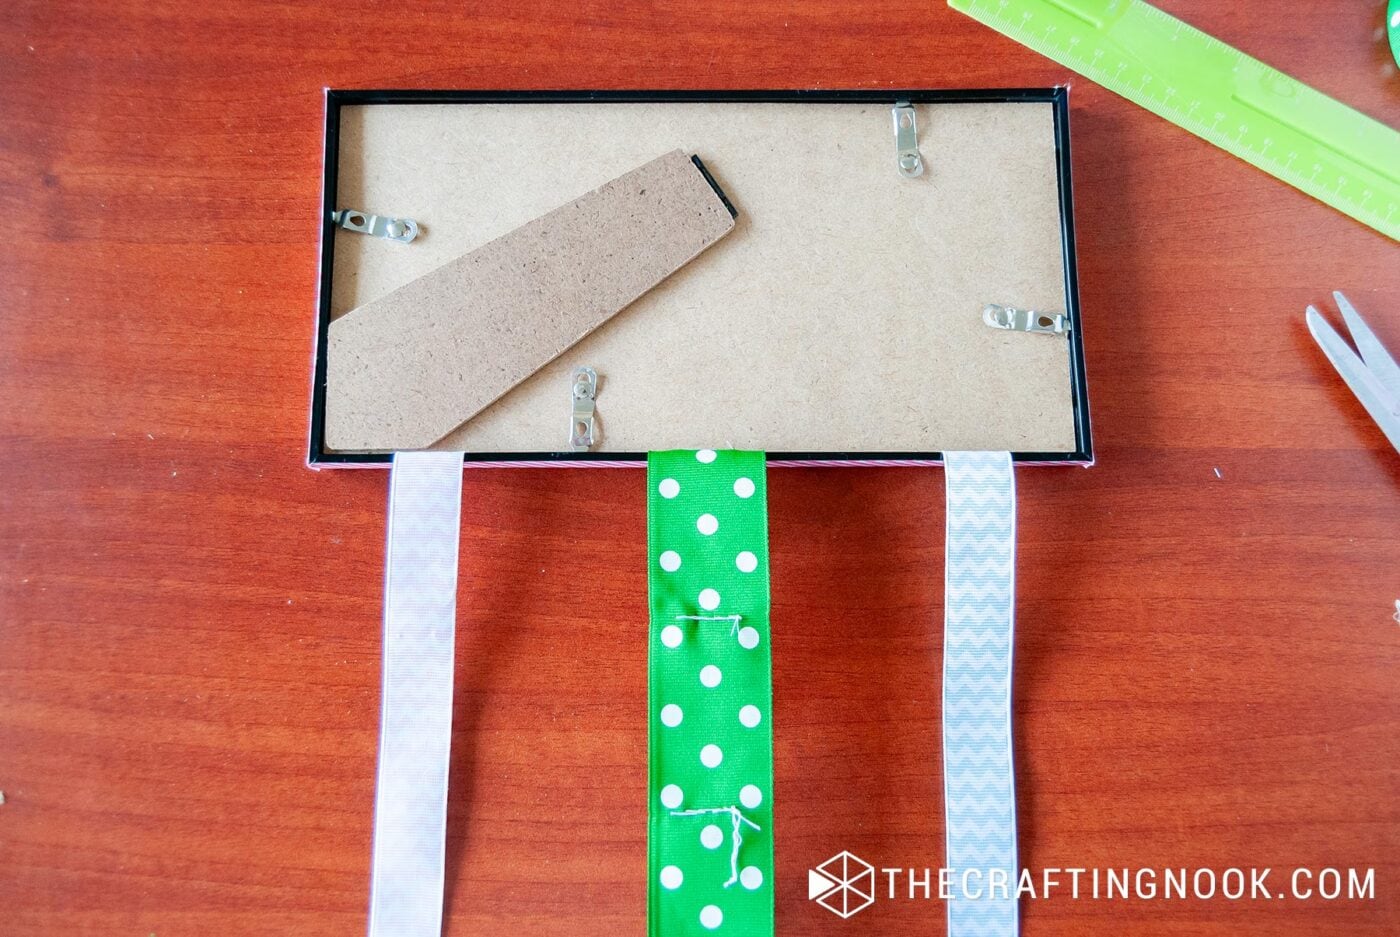
15. Now get the back of your photo frame with the inside facing you, place one ribbon end about 1 inch from the left edge, one in the middle, and one about 1 inch from the right edge. You can secure them temporarily with adhesive tape.
16. If you are using more ribbons, separate them evenly on the frame backing.
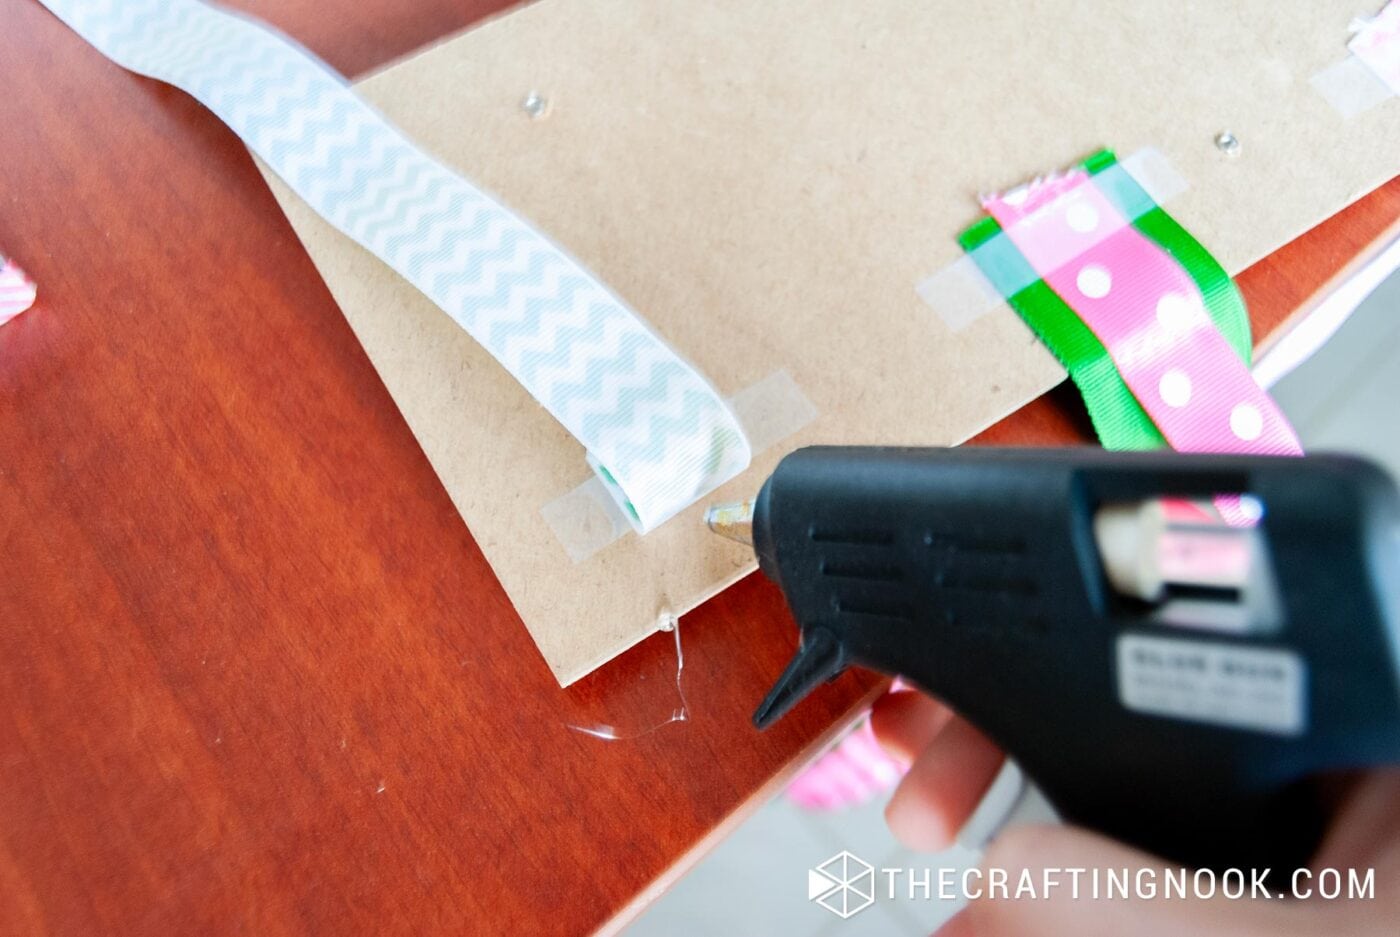
17. Then secure each ribbon well with hot glue.
18. Place the backing back into the photo frame.
19. You can completely remove the frame stand if you want. I didn’t since it didn’t make any difference.
You are almost done!
If your photo frame doesn’t have a built-in wall hanger then you create it, it’s super simple.
20. Open the backing of the frame again.
31. Finally, cut a strip of a thin ribbon, about 6-8 Inches, and glue each end of the ribbon on both ends at the top of the photo frame – right on the opposite side of the hair bow ribbons.
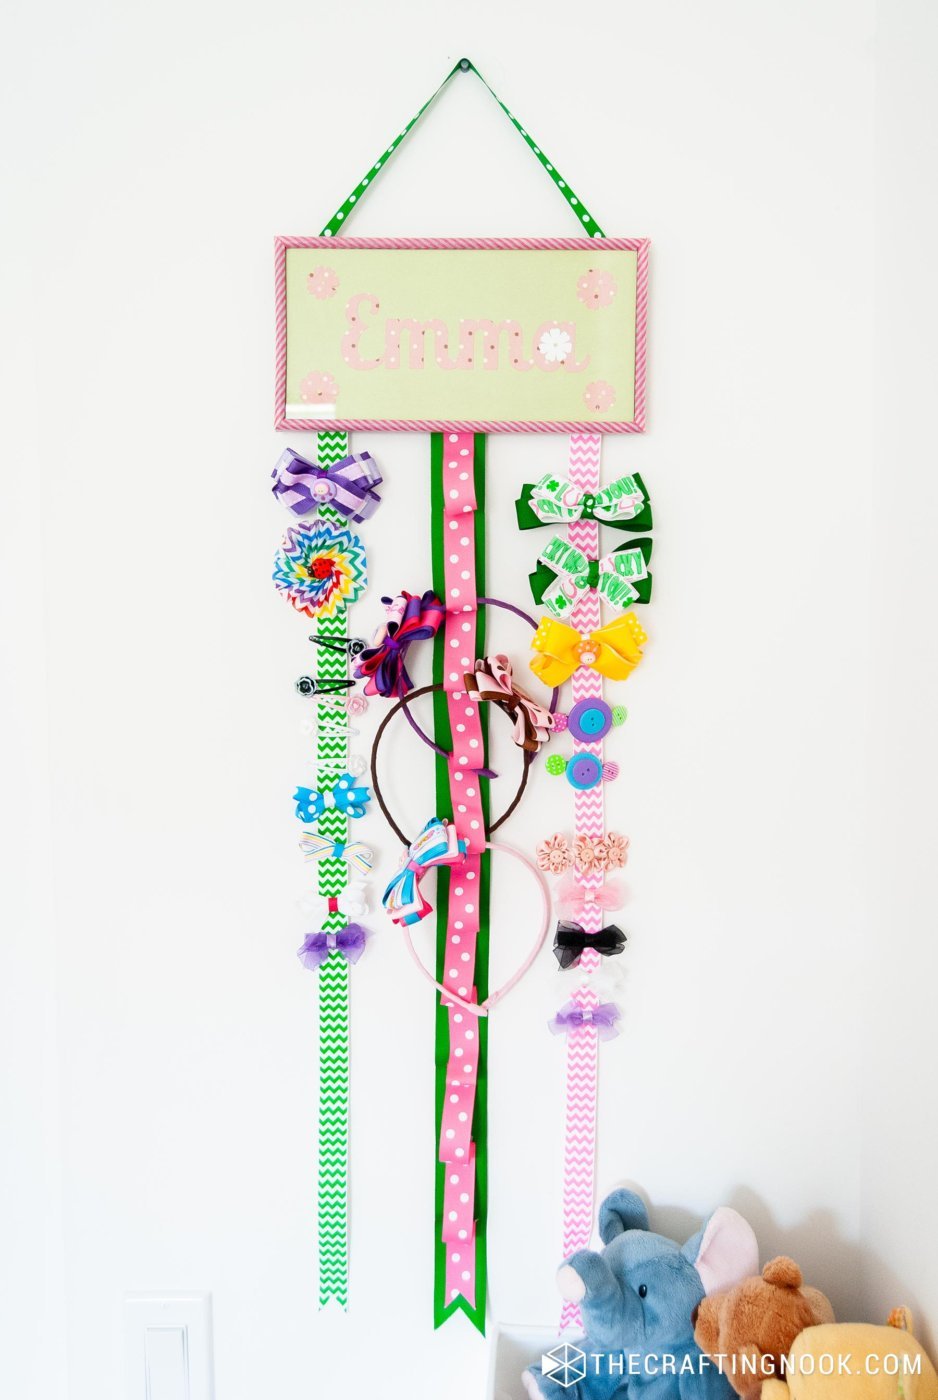
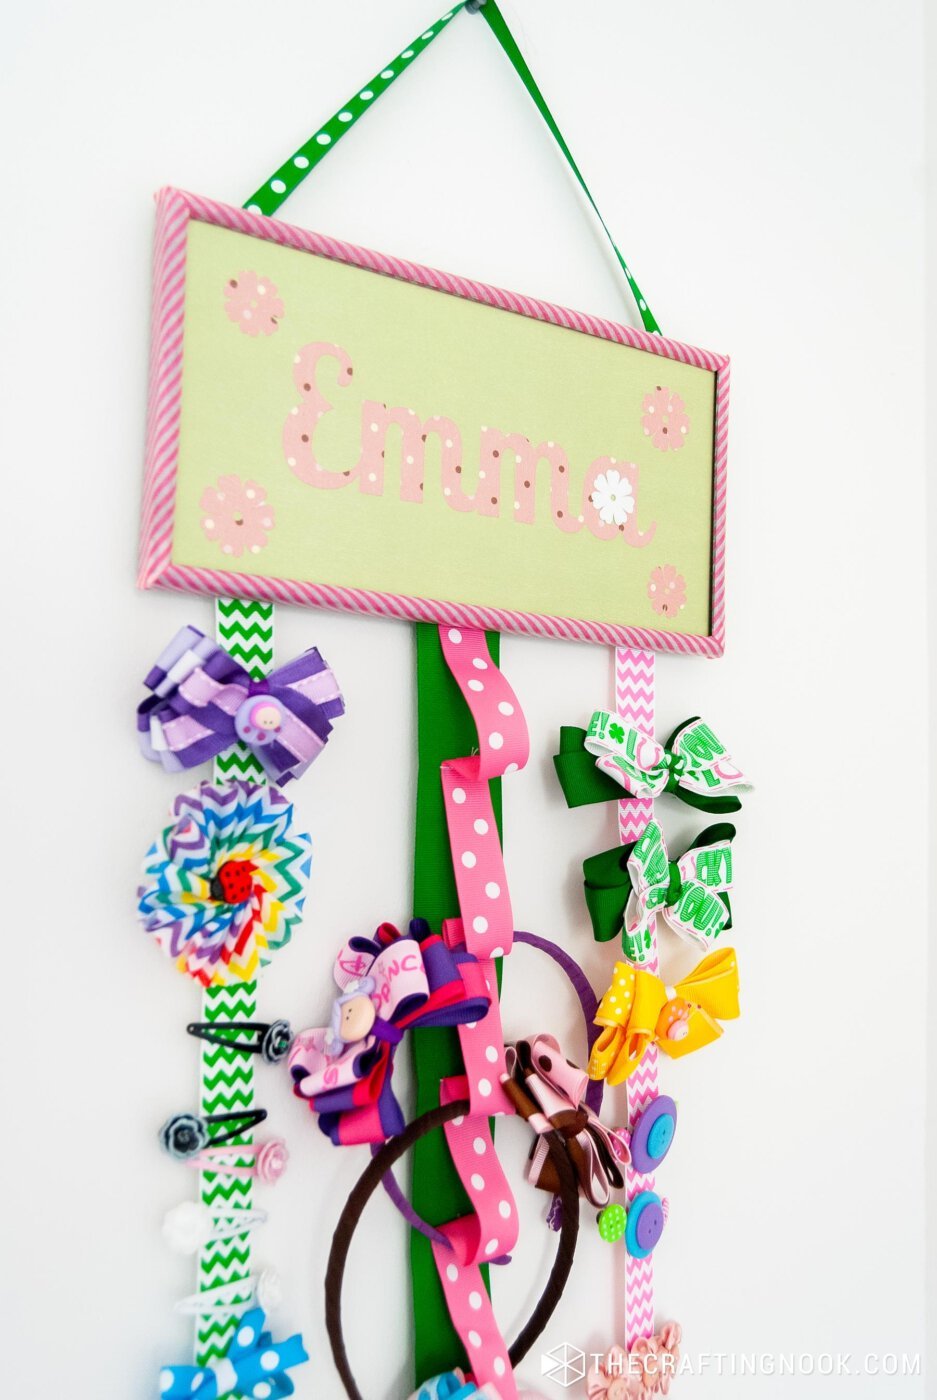
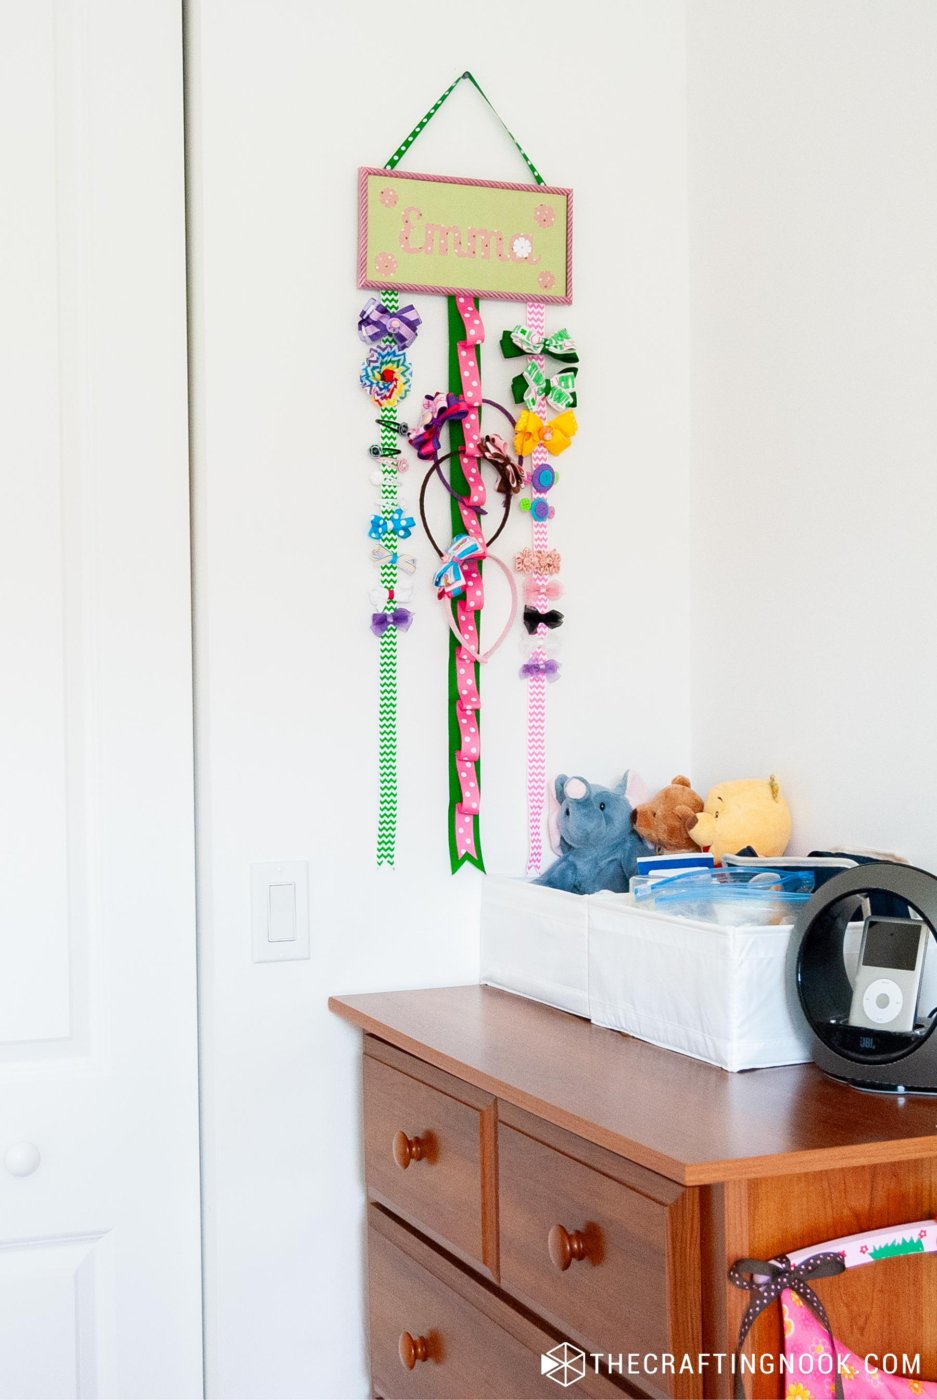
32. Tadaaaaaa! There you have it. Now your new DIY Hair Bow Holder is ready to rock!
Crafting Tips
- If the frame you chose is large enough, add a small mirror at the top or in the center of the frame. This makes it not only a hair accessory holder but also a mini vanity station for your girl to check out her hairdo while choosing her bows!
- If you have a cutting machine you could make a 3D version, by cutting multiple layers of the girl’s name and making really cute paper flowers. For this to work put the glass behind the scrapbook paper for support.
- Instead of paper cutout you can use photos and memories of your child to make it even more special.
It’s time to organize all the hair bows and headbands as you like and you are done!!!

Alternatives and Substitutions
Instead of gluing the ribbons permanently to the back frame, you could use small pieces of Velcro. This allows you to easily change out the ribbons when they wear out or when you want to refresh the design without starting from scratch.
Upcycle an old wooden frame or use an unfinished one and stain or paint it for a rustic or farmhouse look.
Strips of fabric can work as well for this project and even burlap ribbon for a more rustic look.
Instead of the scrapbook paper cutouts, you can use cute vinyl decals with your girl’s favorite themes.
Frequently Asked Questions
Yes! You can use any frame size or style you like. Just make sure it has a sturdy backing to support the ribbons and accessories. You can also upcycle old picture frames or use embroidery hoops for a different look.
Any type of ribbon works, but grosgrain or satin ribbons are popular for their durability and texture. Wider ribbons (1-2 inches) are better for holding multiple hair bows, while narrower ones can be used for smaller accessories.
Absolutely! Fabric can be a great alternative to scrapbooking paper and adds a soft, textured look. Just make sure to use fabric glue to adhere it to the frame backing securely.
You can use strong double-sided tape or fabric glue, though the drying time may be longer. You could also use tacks or staples to secure the ribbons to the frame.
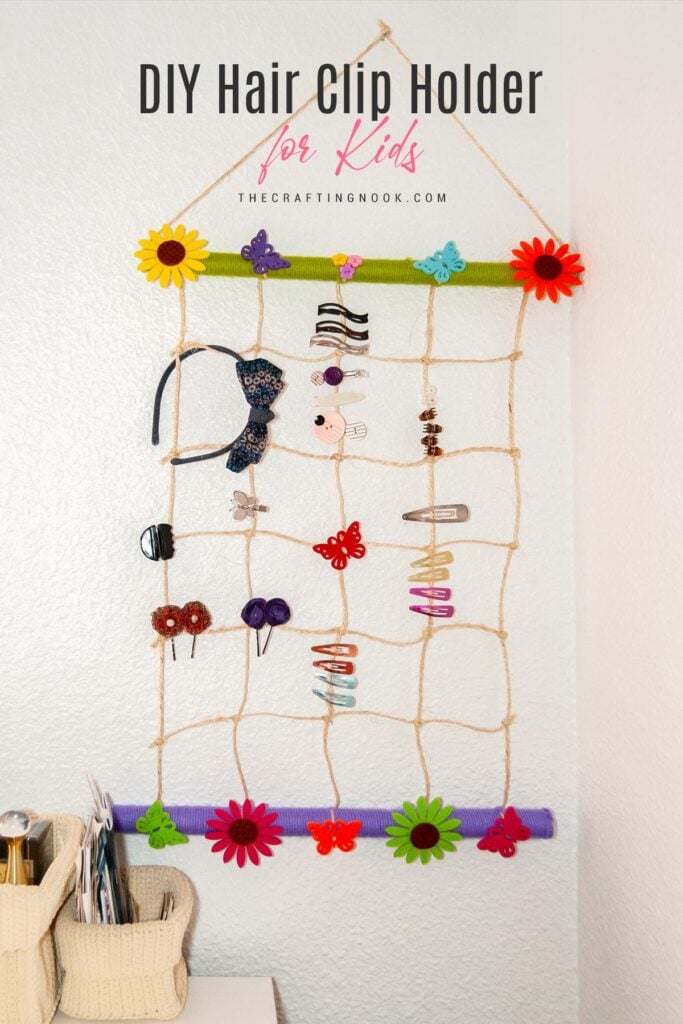
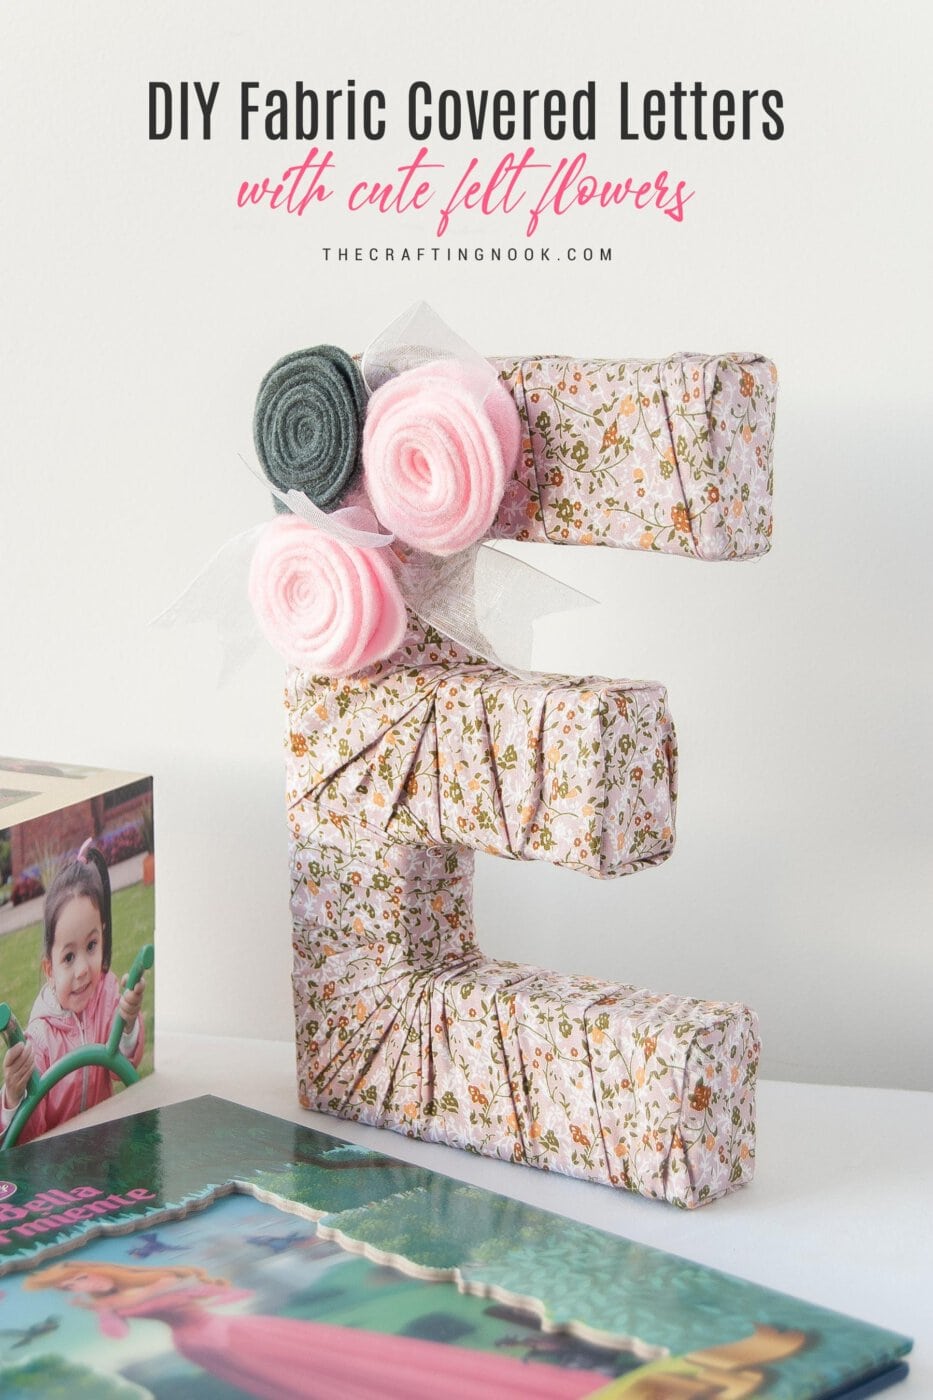
More Cute Projects For Kids To Try
Like this DIY hair bow holder idea? You might definitely love these other Cute projects for kids too:
✂️ Tutorial
How to Make a Personalized DIY Hair Bow Holder
Tools
- Hot glue gun and glue sticks
- Silhouette Cameo – Totally optional, you can still make this without it.
- scissors
- Ruler
- cutter
Supplies
- Different Ribbon colors sizes, and patterns
- Scrapbooking paper – for your daughter’s name and cutout. If you have a cutting machine Cricut or Silhouette you can use it to cut your daughter’s name and cute decorative shapes.
- A rectangular plain photo frame – those you can find at a dollar tree or the dollar zone in Target. It doesn’t have to be a fancy one unless you want to.
- Washi tape
- Cutouts – Flowers letters, hearts, any detail your daughter loves.
- Thread and needle.
Instructions
The Top of the Holder
- Open your photo frame and remove the backing, glass, and paper cover.
- Apply washi tape along the frame.
- Then cut a piece of scrapbooking paper with the frame paper size.
- Decorate your scrapbook paper with your girl’s name and your cutout shapes
- For example, I made my Girl’s name in a cute font and also cut some cute flowers with my silhouette.
- Apply some dots of glue to secure the decorating pieces in place.
- Put back the flame glass into the frame and place your creation facing down towards the glass
- When you turn it over you should see something like in the photo below.
- Set it aside.
The Bow Holders
- Measure the length of your ribbon. Make it as long as you wish and as many as your photo frame allows, leaving enough space to handle the hairbows.
- I used around a yard of 3 ribbon strips.
- If you want to have headbands there too, then get an extra strip of ribbon slightly narrower than the main ribbons and don’t cut it yet. You should have 2 ribbons for the headbands to hold.
- I used a solid 1-inch wide one as my base and a polka-dot narrower.
- Make marks with a ruler on the base one every 6 cm (2 1/4 inches).
- Then make marks every 9 cm {3 1/2 inches}. Pin together each mark as shown below.
- When you get the length you need for the narrower ribbon, make cute cuts at the end of both.
- Now. stitch both ribbons together on each mark to create the loops for the headbands. You can do this by hand sewing like I did or using a sewing machine.
Assemble the Hair Accessory Holder
- Now get the back of your photo frame with the inside facing you, place one ribbon end about 1 inch from the left edge, one in the middle, and one about 1 inch from the right edge. You can secure them temporarily with adhesive tape.
- If you are using more ribbons, separate them evenly on the frame backing.
- Then secure each ribbon well with hot glue.
- Place the backing back into the photo frame.
- You can completely remove the frame stand if you want. I didn’t since it didn’t make any difference.
- You are almost done!
- If your photo frame doesn’t have a built-in wall hanger then you create it, it’s super simple.
- Open the backing of the frame again.
- Finally, cut a strip of a thin ribbon, about 6-8 Inches, and glue each end of the ribbon on both ends at the top of the photo frame – right on the opposite side of the hair bow ribbons.
- Tadaaaaaa! There you have it. Now your new DIY Hair Bow Holder is ready to rock!
Share and PIN ME!!!
Want to Check Out More Silhouette Projects?
My Silhouette Challenge buddies and I are all sharing projects on our blogs today, so peruse the projects below for a wealth of Silhouette inspiration.
1. Just a Girl and Her Blog // 2. The Thinking Closet // 3. Ginger Snap Crafts // 4. My Paper Craze // 5. Mama Sonshine // 6. Practically Functional // 7. Adventures in All Things Food // 8. Two Purple Couches // 9. Dragonfly & Lily Pads // 10. Cutesy Crafts // 11. Pitter and Glink // 12. The Crafting Nook (This project)// 13. unOriginal Mom // 14. Persia Lou // 15. Silhouette School // 16. Creative Ramblings
What do you think??? Isn’t it cute and useful at the same time???? I love Emma’s Hair Accessories Holder!
Til’ next time…


FREE WORKBOOK
Keeping your Sweet Home Organized
Learn how to create intentional habits and simple routines to Keep Your Home Organized. Plus freebies, printables, exclusive content, and tips.
Disclaimer: By clicking on the “Yes” button above you are giving me your consent to collect and use your information according to the law and My Policy Privacy. Zero Spam I promise!
I was going to make one similar inside of a picture frame but I think I like this much more. Thank you for the great idea.
Thanks so much I’m glad I could inspire you! Have a wonderful weekend!
Hugs
Stopping by from Show-licious Craft & Recipe. link party. This has been on my to-do list for some time.. You have motivated me to just do it. Thanks for sharing!
I am thrilled to be motivating you with this crafty project. Nothing could make me happier! Thanks so much for stopping by and leaving me a huge smile!
XOXO
Hi Cami,
Your daughter is growing so fast. Mama made a beautiful project for her. You do beautiful work that comes from the heart.
Happy day my friend,
Karen Marie
Dragonfly & Lily Pads
Karen you are the sweetest and always makes so happy to have you visiting me! Thanks so much for your sweet words and yes everything I make for my girl takes a little bit of my heart. She’s just the biggest motivation I have! Thanks so much my friend… have a wonderful weekend!!!
XOXO
Super cute! What a great idea!
Yayyy Thanks so much Jenny! Happy to have you visiting!
XOXO
LOVE!
HA HA!!! Thanks =D
this is such a great idea! I am always looking for ways to organize the chaos that is my daughter’s hair accessories! This is a great solution!
Yayyy Thanks!!! Yeah I know the feeling ha ha!!! This is a fun and easy way to get it done! Thanks so much for stopping by!
Hugs
Love the colors you used for this bow holder, so cute!
Thanks SO much. Those are my faves LOL. I bet you can tell that by looking at my blog LOL. Thanks so much for stopping by and leaving some love!
Hugs