DIY Wall Jewelry Organizer With An Upcycled Fruit Crate
One of my favorite ways to keep things neat and easily accessible is by having all my accessories right where I can see them—nothing tucked away in a drawer where I might forget what I have! This DIY wall jewelry organizer is a creative way to upcycle a fruit crate into a beautiful and practical storage solution. Plus, it adds a touch of rustic charm to your home decor!
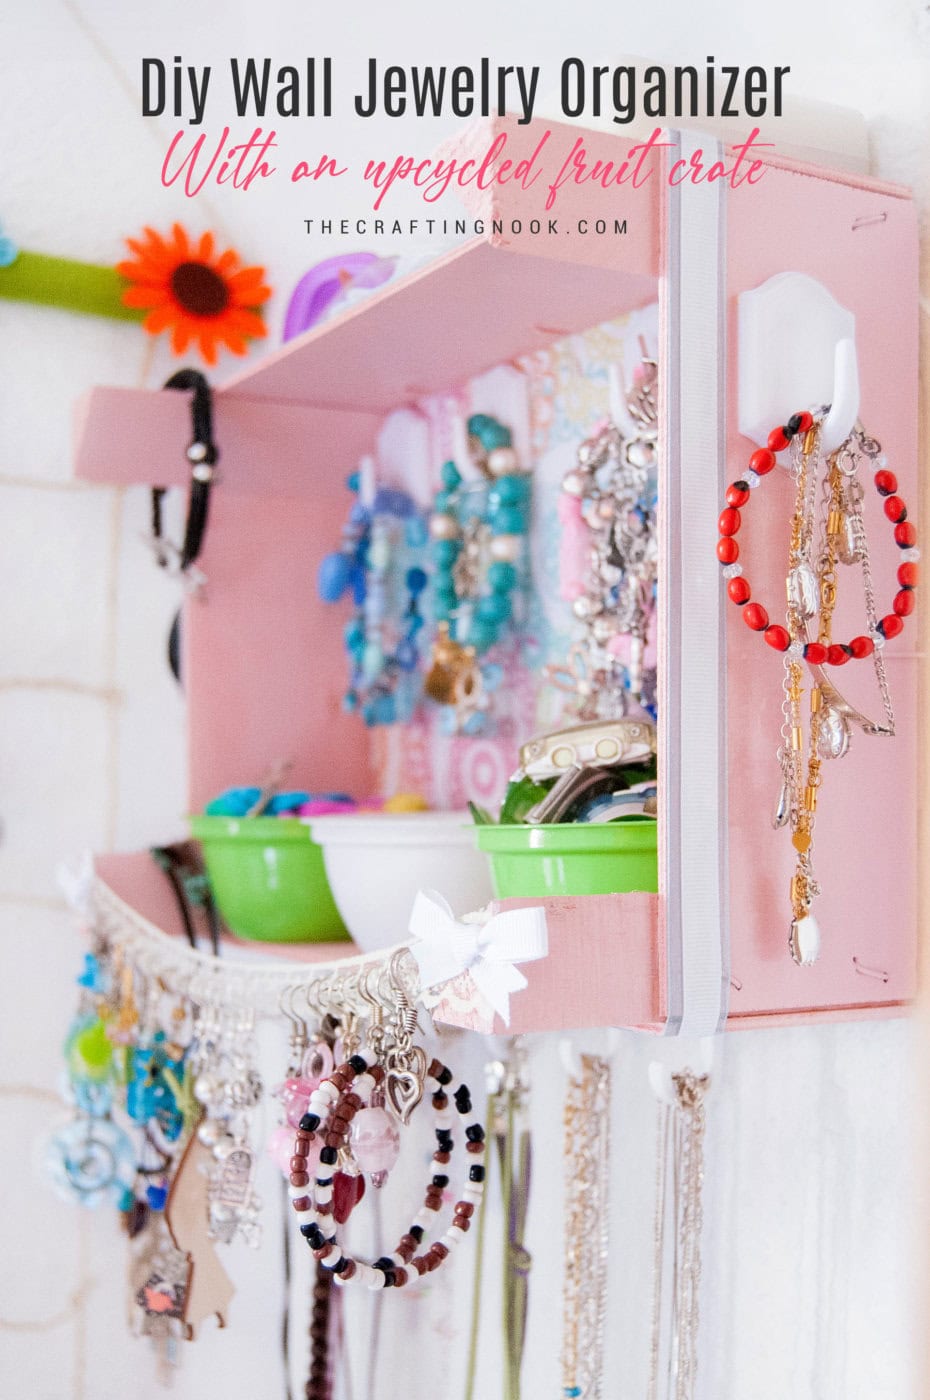
Table of Contents
wall hanging diy jewelry organizer Using An Upcycled Fruit Crate
This project is perfect for anyone who loves crafts that blend style and organization. Whether you’re a fan of upcycling or simply need a solution to keep your necklaces, bracelets, and earrings in order, this upcycled crate organizer is fun to make and super practical.
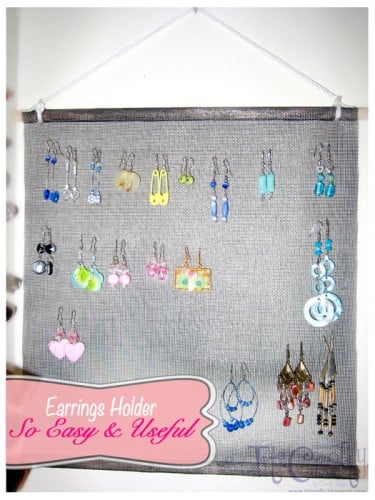
Recently, I posted an idea of how to keep hair clips Organized and handy and also another one to keep Earrings super handy. I love all kinds of organization items that can also be decorative. That’s why I made this cute Super Crafty Upcycled Fruit Crate Jewelry Organizer.
This post may contain affiliate links. Please read our Disclosure Policy.
One day I went for walking with Em and I saw these strawberry crates over a pile of other boxes and I thought, “This is just what I need!!!”. Of course, I took it home without a second thought LOL.
I just loved how it turned out. I fell in love with it!!! Hope you like it too. Here is how I made it.
I found it easy to make but it takes its time, but don’t worry it’s not that much and you will have tons of fun!
How to make a DIY wall jewelry organizer
Let’s dive into how you can create your own jewelry organizer with just a few materials!
Supplies:
- 1 wooden crate – upcycled from a fruit crate, or any wooden box or drawer will work.
- White water-based spray paint – smell less than the normal ones.
- Water-based spray paint in your choice of colors – I used pink and green for a pop of color.
- Spray primer.
- Ribbons and lace – for decorating and holding earrings.
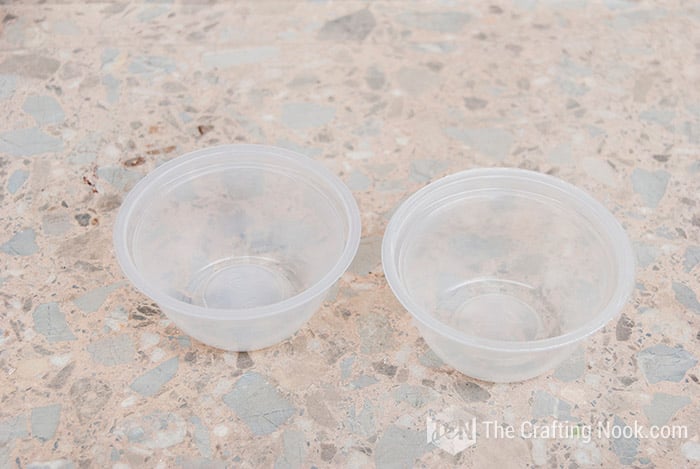
- Small plastic containers (I used upcycled ones) – perfect for rings and watches.
- Scrapbook paper – to line the inside of the crate.
- White glue or Mod Podge – to seal the scrapbook paper.
- Small self-adhesive hangers – to hang bracelets.
- Small self-adhesive cup hangers – for the bottom of the organizer.
- 1-inch framing sawtooth hangers (and small screws).
- Sandpaper – 150 and 400 grit
- Protective paper or plastic.
Tools:
- Hot glue gun and glue sticks
- A brush
- Screwdriver
- Scissors

Instructions:
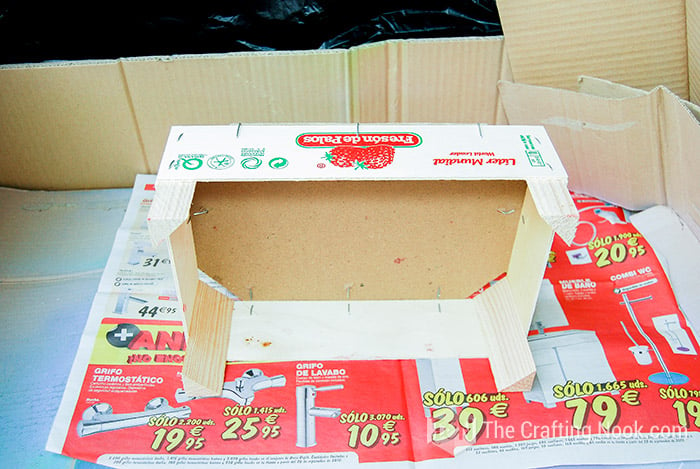
This fruit crate is made with really thin plywood and pinewood in the four corners which makes it easy to work with.
Step 1: Clean and Prep the Crate
Start by giving the crate a good sanding with the 150 grit sandpaper and thoroughly clean the crate and the small containers.
Protect the work surface to prevent any paint stains.
Step 2: Apply the Base Coat
Spray paint the crate with a primer or a white base coat. This helps the top color coat to stand out more effectively. Allow it to dry completely before proceeding to the next step.
Apply prime to the plastic containers too. Let them dry well.
Step 3: Paint the Crate and Containers
Give the crate another sanding to smooth the surface with the 400 grit sandpaper.
Choose two colors for spray painting the crate and containers.
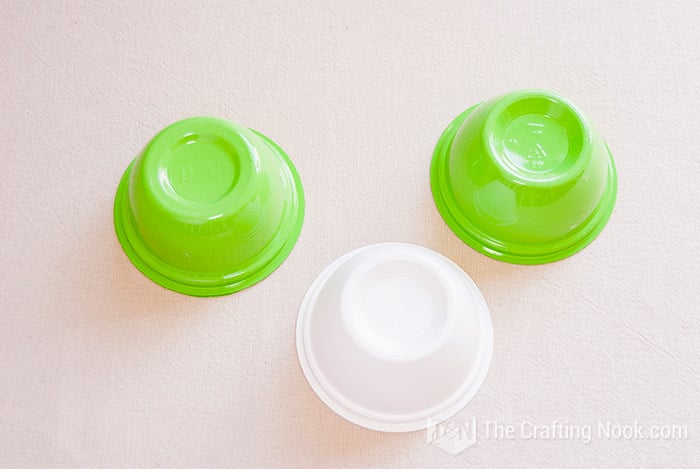
Spray the crate with one of the colors (in my case, pink) and the small containers with the other color (two were painted green, and one was white).
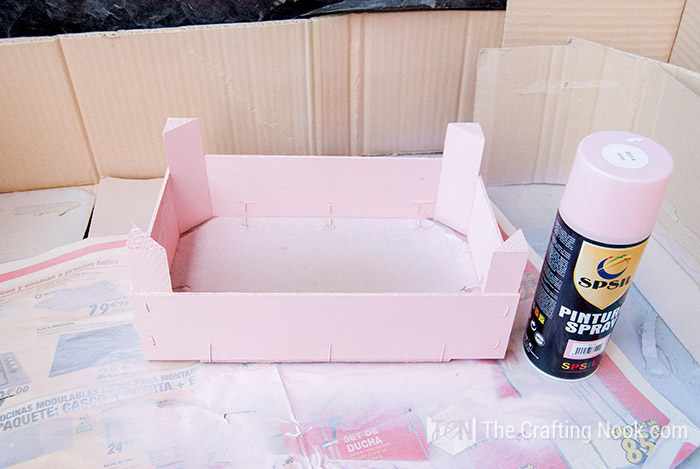
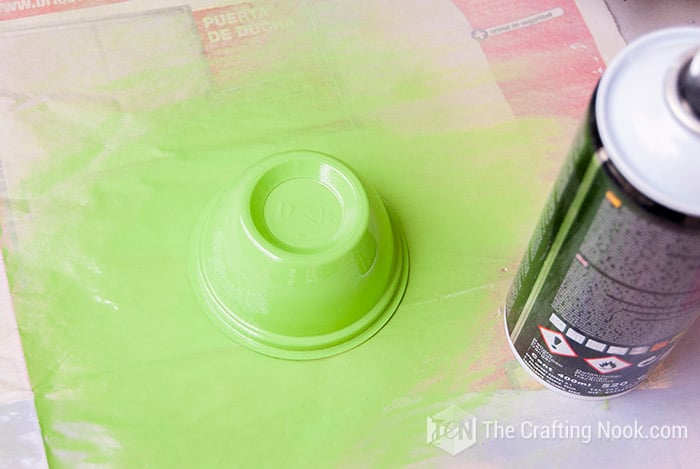
Wait about an hour between coats and apply a total of three coats for complete coverage.
Let everything dry overnight to ensure it’s fully set.
Step 4: Line the Crate with Scrapbook Paper
Measure the scrapbook paper to fit the bottom of the crate.

Apply white glue, thinned with water for easier application, or use Mod Podge.
Once the paper is secured, apply another coat of glue or Mod Podge over the top to seal it.

Allow it to dry thoroughly (about 2 hours).
Step 5: Attach the Hangers Inside the Crate
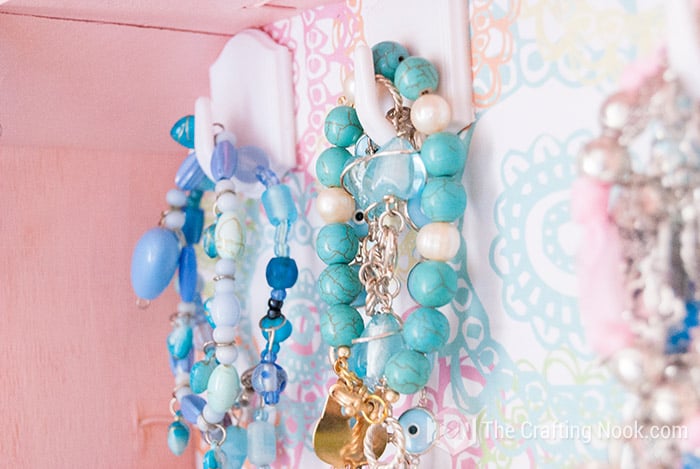
Once the crate is dry, attach small hangers along the inside, near the top. These will be the jewelry holders.

Space them evenly to hang bracelets.
Additional hangers can be attached on the sides of the crate for added storage.
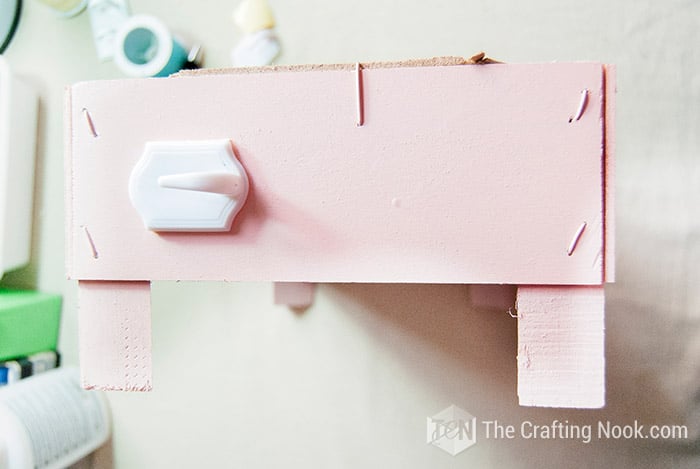
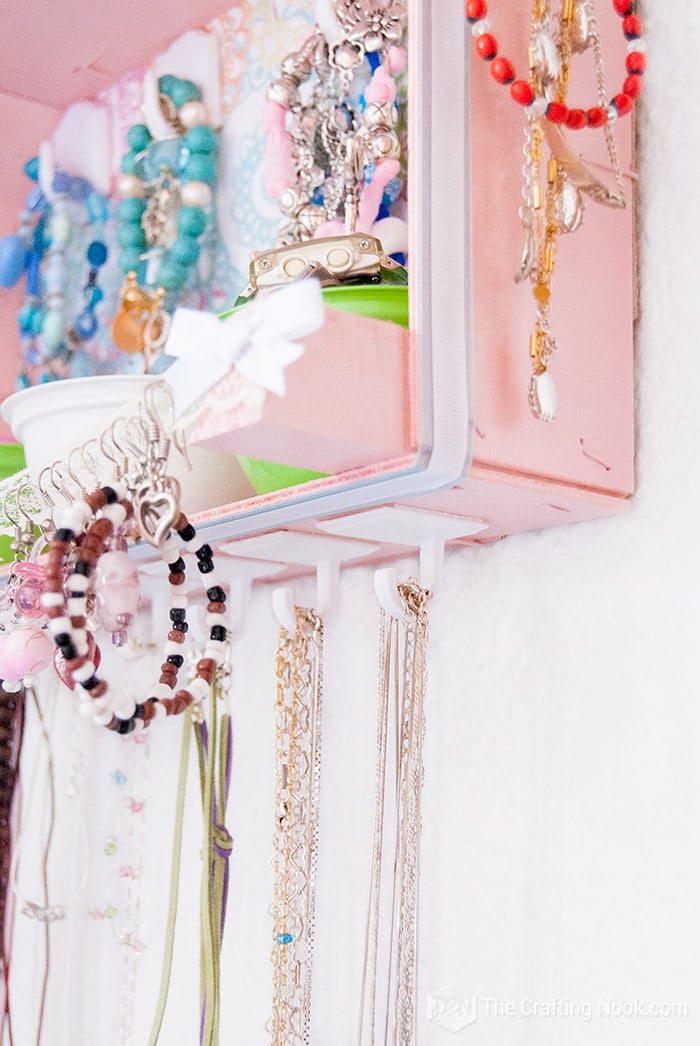
Step 6: Attach Cup Hooks for Necklaces
On the outside of the bottom side (what would normally be the crate’s base), attach cup hooks.
What makes these special is the “U” form that makes them perfect to be attached upside-down.
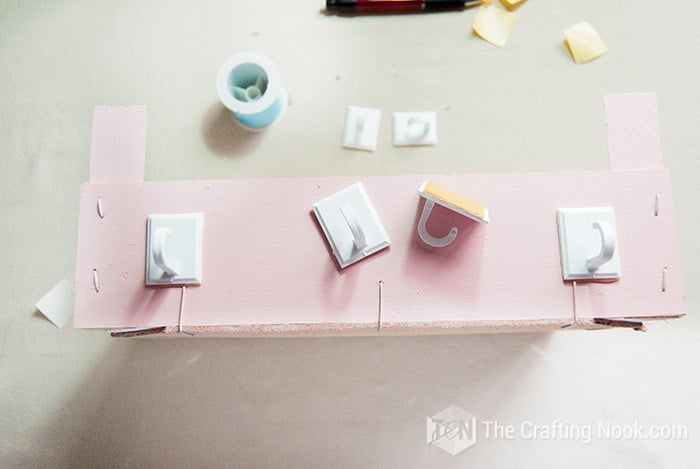
These will be used for hanging necklaces.
For extra strength and durability (and to avoid the scare of your life if they fall in the middle of the night), reinforce the adhesive backing on the hooks with hot glue.

Step 7: Decorate with Lace and Ribbons for the earring holder
Glue the lace along the wooden crate’s corners, securing it with hot glue.
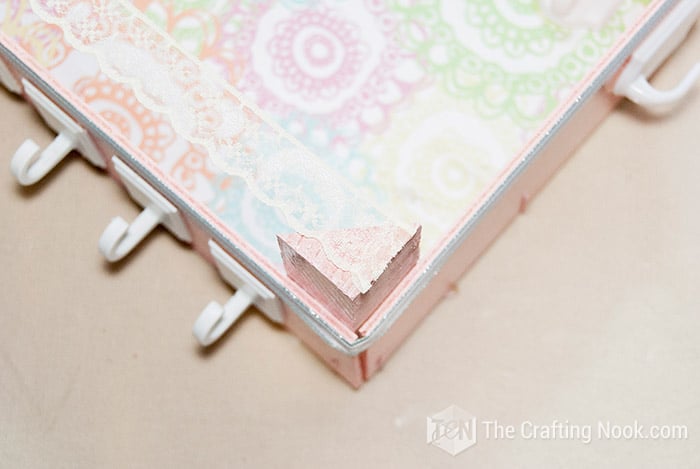
Add small ribbon bows at the ends for a decorative touch.
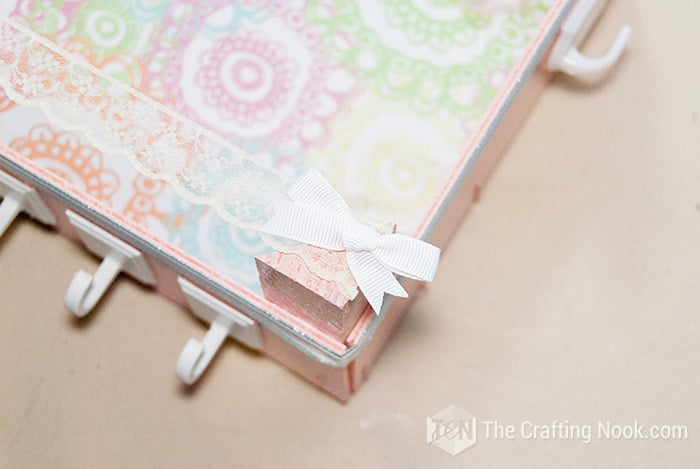
The lace will serve as earring storage, a place to hang your earrings.
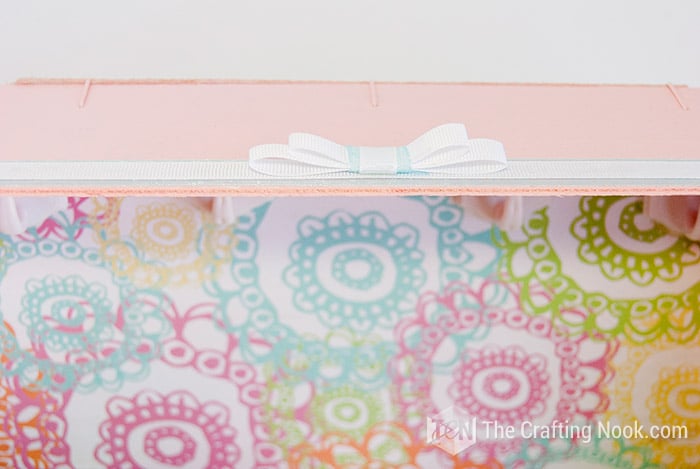
Step 8: Add Final Ribbon Details
Take two different types of ribbon (e.g., light blue organza and white grosgrain) one wider than the other so you can layer them. Wrap them around the borders of the crate.

Finish by adding a cute simple ribbon bow at the top for a decorative look.
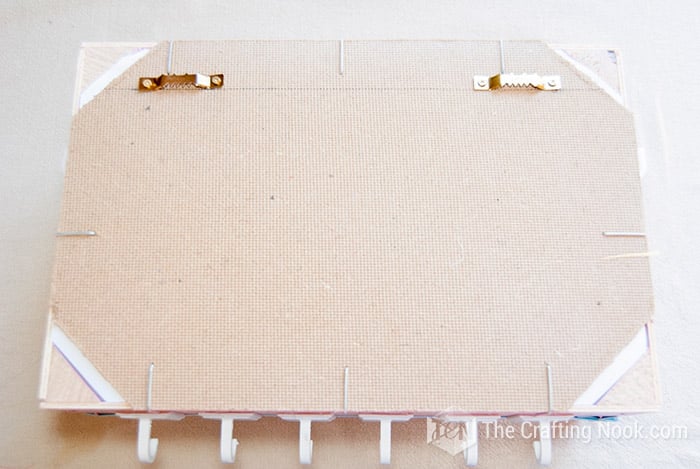
Step 9: Install Wall Mounting Hangers
On the back of the crate, attach framing sawtooth hangers.
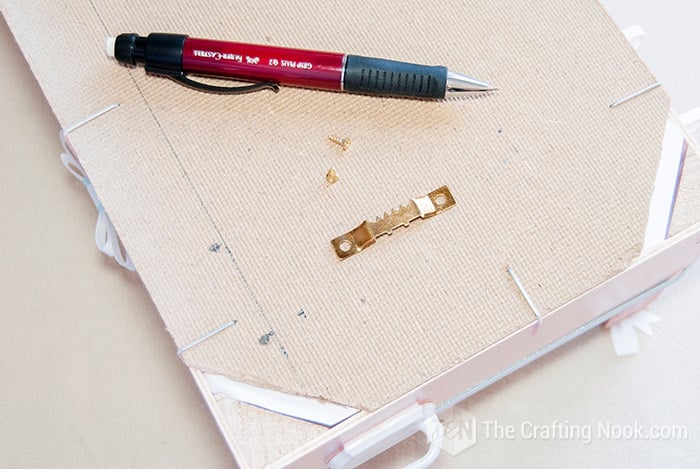
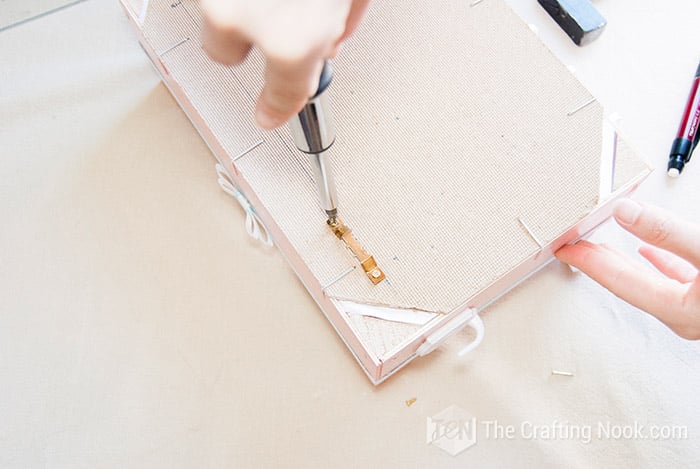
Make sure they are aligned and evenly spaced from the edges to ensure the jewelry organizer hangs straight on the wall.
Put your plastic container on the base of the crate and you are done.
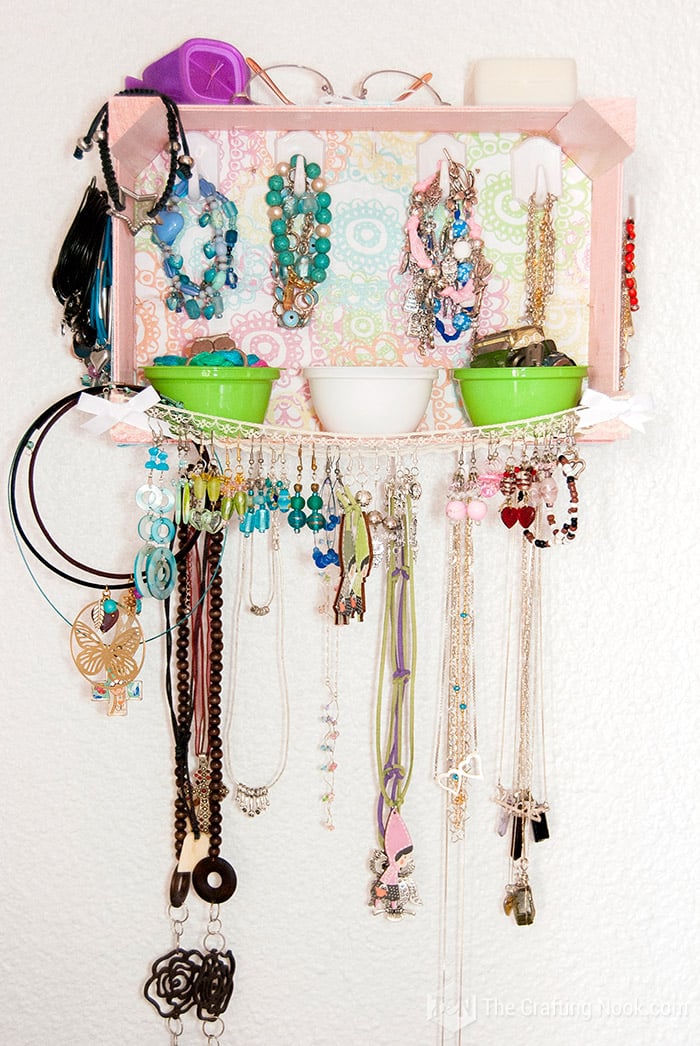
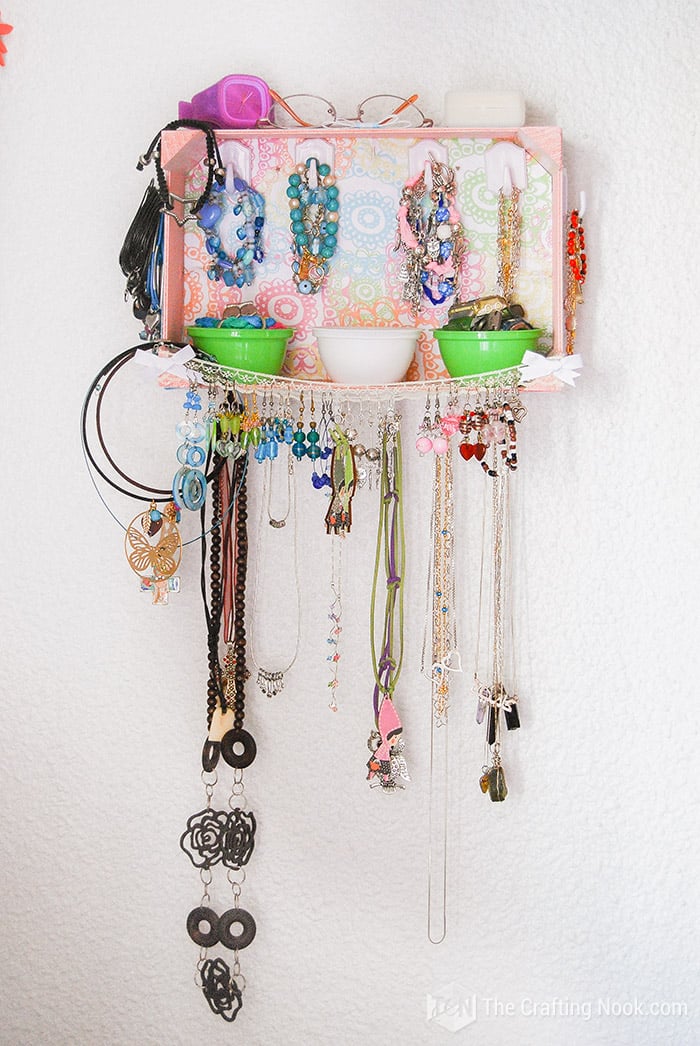
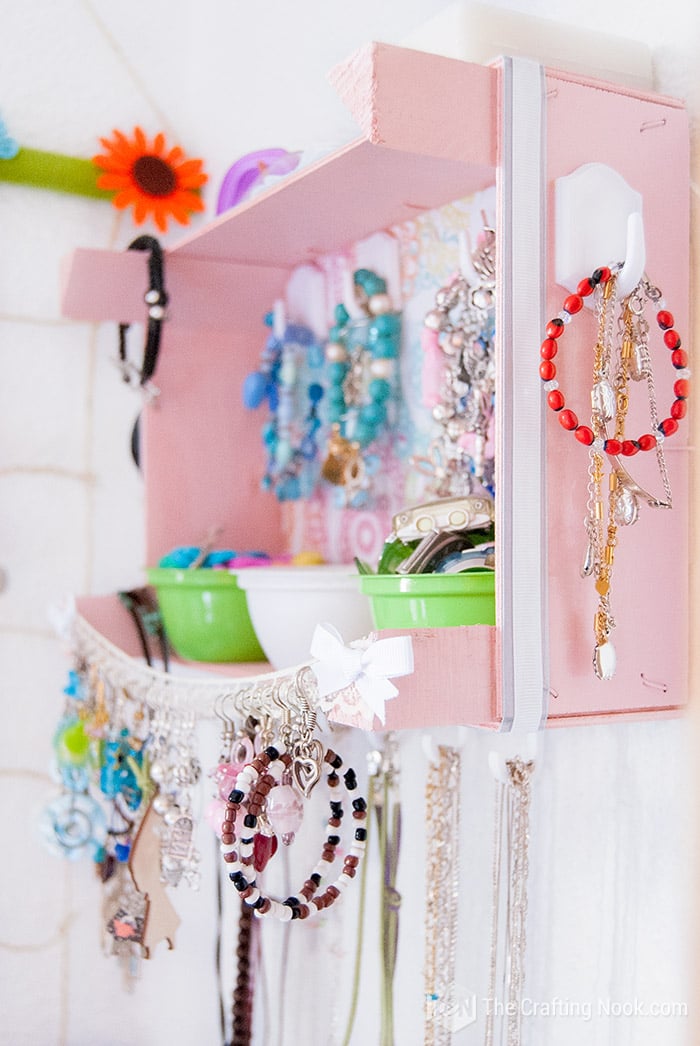
And there you go, your super crafty diy wall jewelry organizer is ready to be used!!!
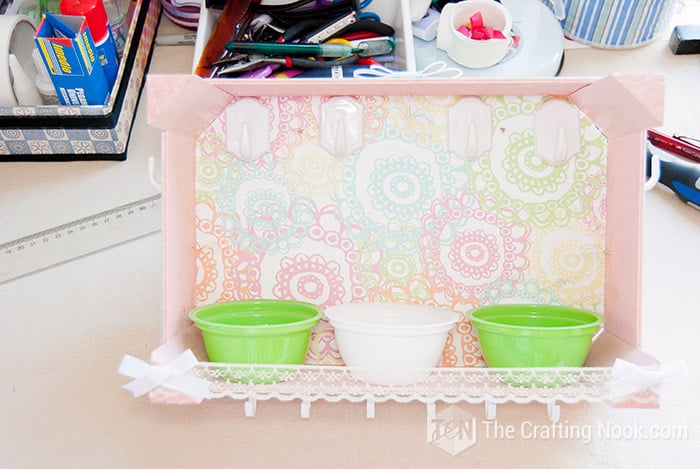
Step 10: Organize your Jewelry
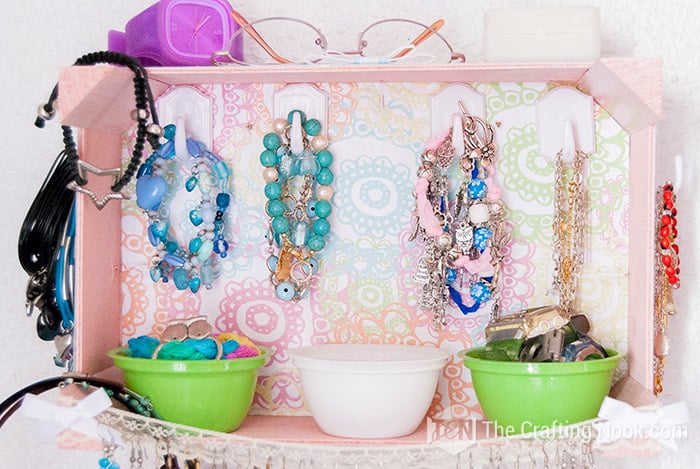
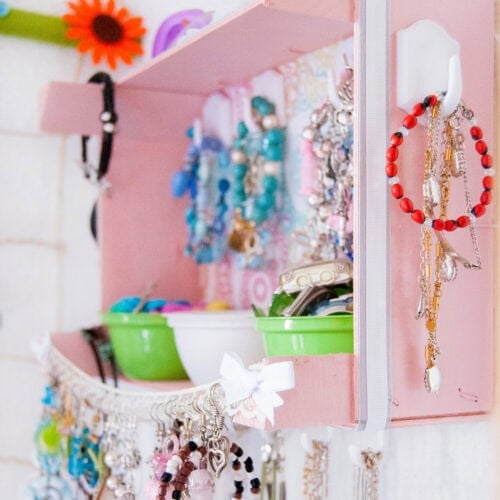
What I love the most about how this organizer turned out is that it works almost like a shelf with places to hang your stuff.
Hang all your bracelets and necklaces.
Use your plastic containers for things you can’t hang like rings, brooches, and watches and the top for other pieces or decorating items.
Hang all your earrings from the lace.
You are done! Now you have all your jewelry pieces organized in one place!
Crafting Tips
- Line a small part of the crate sides with foam or corkboard to easily pin stud earrings or brooches directly into the material for more storage options.
- Add battery-powered LED strip lights along the inside edges of the crate to illuminate your jewelry, making it easier to find items and adding a nice aesthetic touch.
- Alternatively to the hook of one of the sides, attach a small mirror to the side of the crate for a handy accessory-check station.
- Paint the inside of the crate in vibrant color blocks, using different hues for each compartment. This adds a fun, artistic twist while making each section distinct.
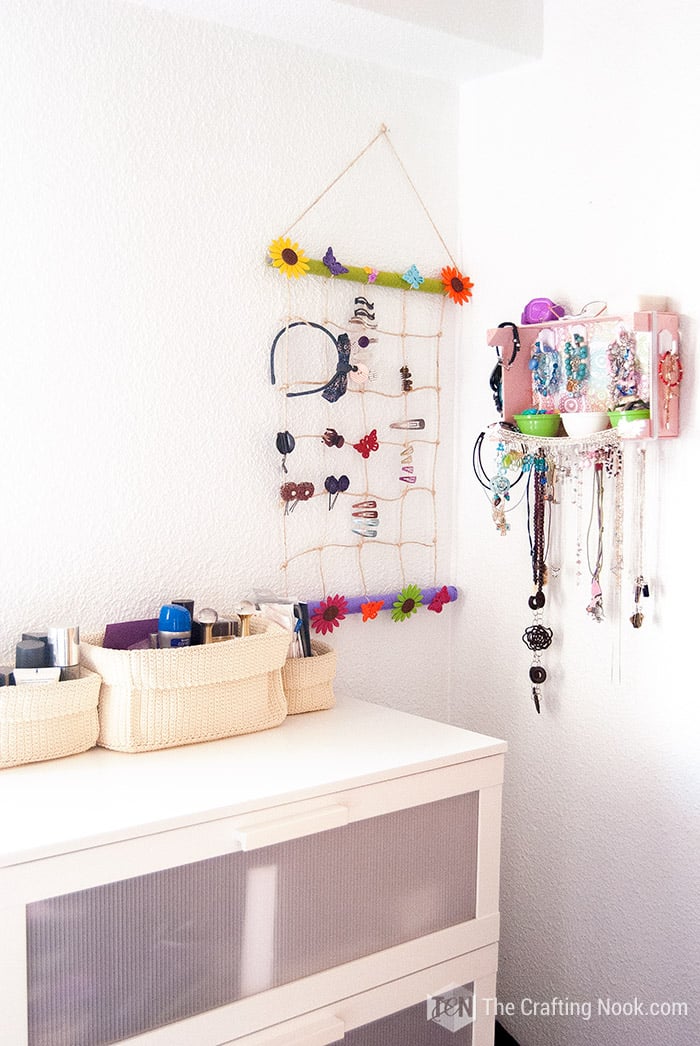
And look how my dresser looks now!!! I would love to know your thoughts!!!
Alternatives and Substitutions
Instead of ribbons, you could use colorful washi tape to decorate the edges or inside of the crate. It’s easy to apply and change up when you want a new look.
Cover the entire crate with fabric instead of paint or scrapbook paper for a softer, more decorative finish. Choose a fabric that matches the room’s theme, and use it to create a padded, luxurious feel.
You could add mini chalkboard labels and write labels for each section (e.g., “Necklaces,” “Rings,” “Bracelets”) for a playful, organized touch. Great for those who love labeling and organization.
Frequently Asked Questions
Absolutely! You can use any small wooden box, drawer, or even a sturdy cardboard box if you’re looking for a more budget-friendly option. The key is to ensure it’s strong enough to hold jewelry and can be easily mounted on the wall.
Spray paint is ideal because it provides a smooth, even coat with minimal effort. If spray paint isn’t available, acrylic paint or chalk paint works just as well. Just be sure to apply a base coat first (like white or primer) to make your chosen colors pop.
To reinforce hooks, especially if you’re using adhesive-backed ones, add a dab of hot glue or super glue for extra strength.
This depends on the strength of your wall hangers and the weight of the crate itself. To be safe, avoid overloading it with heavy jewelry or accessories. Opt for sturdy mounting brackets or anchors rated for the weight of the crate plus your jewelry.
The actual crafting time is about 2–3 hours, depending on drying times for paint and glue. It’s a relatively quick DIY project that you can finish in a day, especially if you let the paint dry overnight.
More Organizing Projects To Try
Like this diy wall jewelry organizer tutorial? You might definitely love these other organizing project ideas too:
✂️ Tutorial
Diy Wall Jewelry Organizer with An Upcycled Fruit Crate
Tools
- Hot glue gun and glue sticks
- A brush
- Screwdriver
- scissors
Supplies
- 1 wooden crate – upcycled from a fruit crate or any wooden box or drawer will work.
- White water-based spray paint – smell less than the normal ones.
- Water-based spray paint in your choice of colors – I used pink and green for a pop of color.
- Spray primer.
- Ribbons and lace – for decorating and holding earrings.
- Small plastic containers I used upcycled ones – perfect for rings and watches.
- Scrapbook paper – to line the inside of the crate.
- White glue or Mod Podge – to seal the scrapbook paper.
- Small self-adhesive hangers – to hang bracelets.
- Small self-adhesive cup hangers – for the bottom of the organizer.
- 1- inch framing sawtooth hangers and small screws.
- Sandpaper – 150 and 400 grit
- Protective paper or plastic.
Instructions
Step 1: Clean and Prep the Crate
- Start by giving the crate a good sanding with the 150 grit sandpaper and thoroughly clean the crate and the small containers.
- Protect the work surface to prevent any paint stains.
Step 2: Apply the Base Coat
- Spray paint the crate with a primer or a white base coat. This helps the top color coat to stand out more effectively. Allow it to dry completely before proceeding to the next step.
- Apply prime to the plastic containers too. Let them dry well.
Step 3: Paint the Crate and Containers
- Give the crate another sanding to smooth the surface with the 400 grit sandpaper.
- Choose two colors for spray painting the crate and containers.
- Spray the crate with one of the colors (in my case, pink) and the small containers with the other color (two were painted green, and one was white).
- Wait about an hour between coats and apply a total of three coats for complete coverage.
- Let everything dry overnight to ensure it’s fully set.
Step 4: Line the Crate with Scrapbook Paper
- Measure the scrapbook paper to fit the bottom of the crate.
- Apply white glue, thinned with water for easier application, or use Mod Podge.
- Once the paper is secured, apply another coat of glue or Mod Podge over the top to seal it.
- Allow it to dry thoroughly (about 2 hours).
Step 5: Attach the Hangers Inside the Crate
- Once the crate is dry, attach small hangers along the inside, near the top.
- Space them evenly to hang bracelets.
- Additional hangers can be attached on the sides of the crate for added storage.
Step 6: Attach Cup Hooks for Necklaces
- On the outside of the bottom side (what would normally be the crate’s base), attach cup hooks.
- What makes these special is the “U” form that makes them perfect to be attached upside-down.
- These will be used for hanging necklaces.
- For extra strength and durability (and to avoid the scare of your life if they fall in the middle of the night), reinforce the adhesive backing on the hooks with hot glue.
Step 7: Decorate with Lace and Ribbons
- Glue the lace along the wooden crate’s corners, securing it with hot glue.
- Add small ribbon bows at the ends for a decorative touch.
- The lace will serve as a place to hold earrings.
Step 8: Add Final Ribbon Details
- Take two different types of ribbon (e.g., light blue organza and white grosgrain) one wider than the other so you can layer them. Wrap them around the borders of the crate.
- Finish by adding a cute simple ribbon bow at the top for a decorative look.
Step 9: Install Wall Mounting Hangers
- On the back of the crate, attach framing sawtooth hangers.
- Make sure they are aligned and evenly spaced from the edges to ensure the jewelry organizer hangs straight on the wall.
- Put your plastic container on the base of the crate and you are done.
- And there you go, your super crafty diy wall jewelry organizer is ready to be used!!!
Step 10: Organize your Jewelry
- Hang all your bracelets and necklaces.
- Use your plastic containers for things you can’t hang like rings, brooches, and watches and the top for other pieces or decorating items.
- Hang all your earrings from the lace.
- You are done! Now you have all your jewelry pieces organized in one place!
Share and PIN ME!!!

Til’ next time…


FREE WORKBOOK
Keeping your Sweet Home Organized
Learn how to create intentional habits and simple routines to Keep Your Home Organized. Plus freebies, printables, exclusive content, and tips.
Disclaimer: By clicking on the “Yes” button above you are giving me your consent to collect and use your information according to the law and My Policy Privacy. Zero Spam I promise!
