DIY Cotton Stems (In a few Simple Steps)
This post may contain affiliate links. Please read our Disclosure Policy.
You can add a beautiful farmhouse charm to your home with these inexpensive and easy DIY cotton stems. This simple DIY project will add loads of character to your home.
One of the things I’ve been wanting to make for a long, long time is Cotton Stems. Cotton stems have been so popular for home decor for the last few years, especially farmhouse style, but they are incredibly expensive to buy here where I live and yet so crazy easy to make yourself. The good part is that they will look really close to a real one.

Table of Contents
Faux DIY Cotton Stems at Home
I’m not southern and I sure don’t have a backyard full of cotton plants BUT I sure LOVE southern and farmhouse style as part of home decor.
So, I thought, why not give it a shot by trying to make some cotton branches myself? I’m so happy I did it because I LOVE how they turned out.

What I love the most about this project is that, depending on what you have available to you in your yard or around where you live and in your cupboards, this project can be pretty much free.
What else can you ask for?
While brainstorming for a while how to DIY cotton stems, I wanted them to look as real as possible. I went through a few different ideas inspired by a few creative bloggers.
I started by creating the leaves around the cotton with craft paper like Karin from Renovated Faith did. They looked great but did not look real enough to me. Then I saw Sarah’s idea from Twelve on Main and that is when it hit me, I still had a bunch of Pinecones from last winter. That was a clever idea!
At this point, my project was perfectly free because I had everything already in my house. In my vocabulary, that means huge success!
How to make Cotton Stems
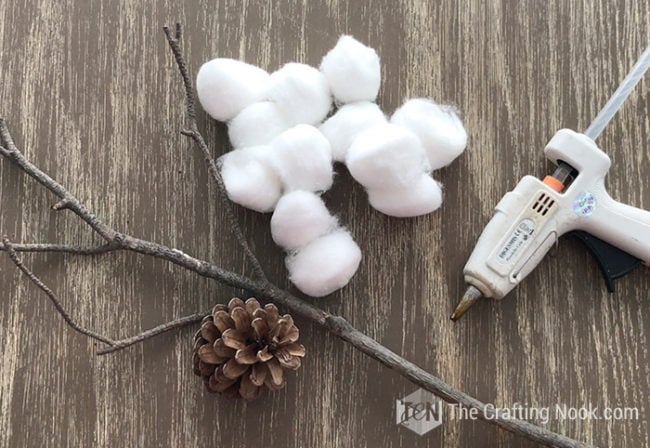
Supplies:
- Some twigs or tree branches
- Cotton Balls
- Pinecones
Tools:
- Hot Glue Gun
- Glue sticks
Instructions:
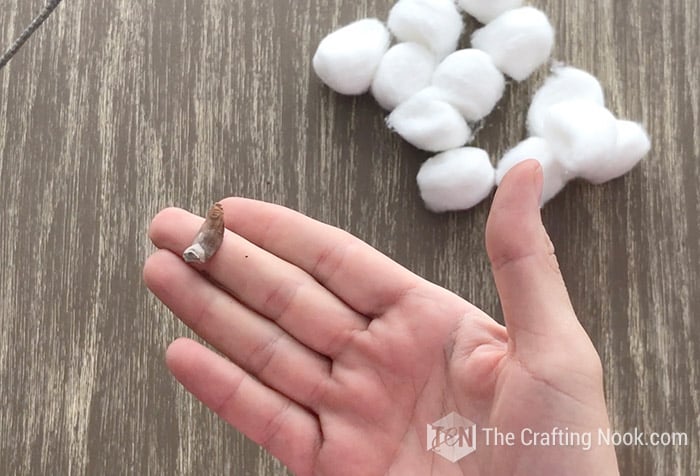
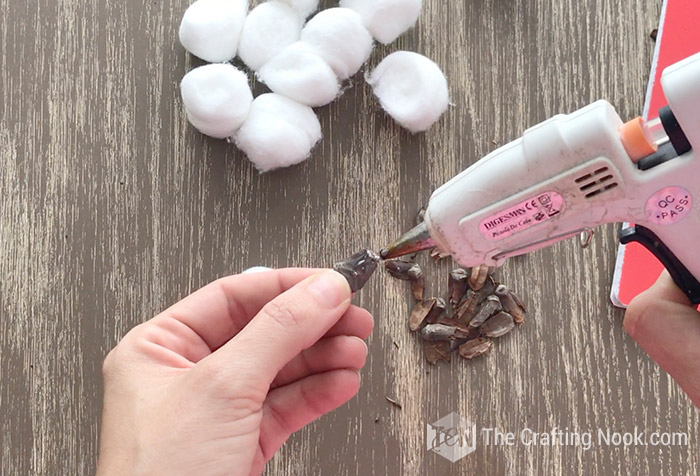
1. Firstly, Start out by pulling a bunch of the scales off of a pinecone. Any kind of pinecone will probably work for this, but I just used what I already had.
Sometimes it’s hard for the scales to come off, so what I did was press it up until I heard a click and then I pushed it down and to the sides, it came out almost completely.


2. Fluff your cotton balls. I used large cotton balls.
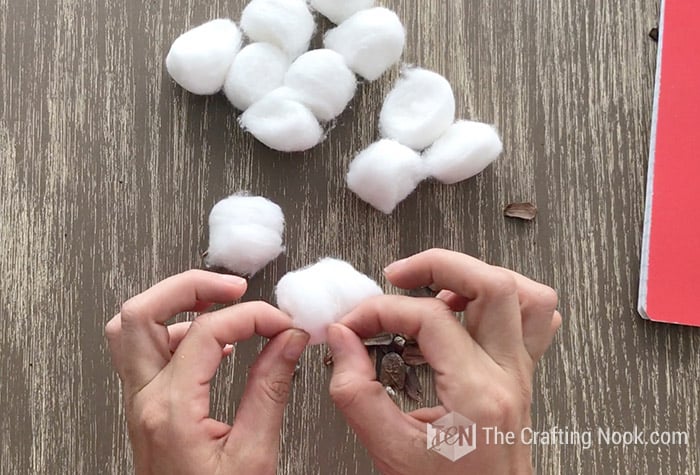
3. Next, it was time to start gluing!
4. Apply hot glue to the inner curvy side of the pinecone scale and glue it to the cotton ball.
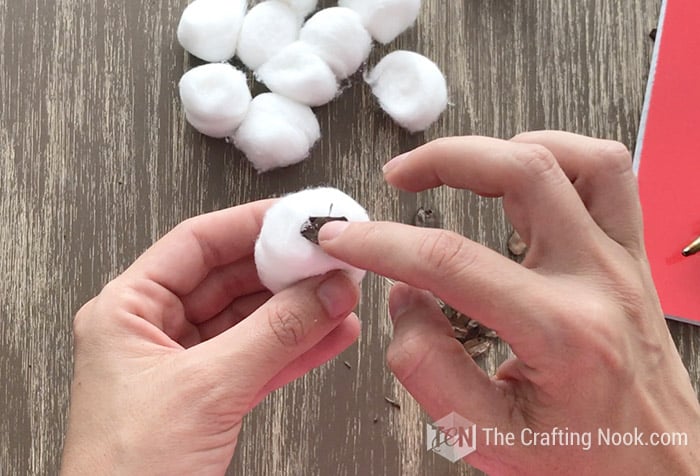
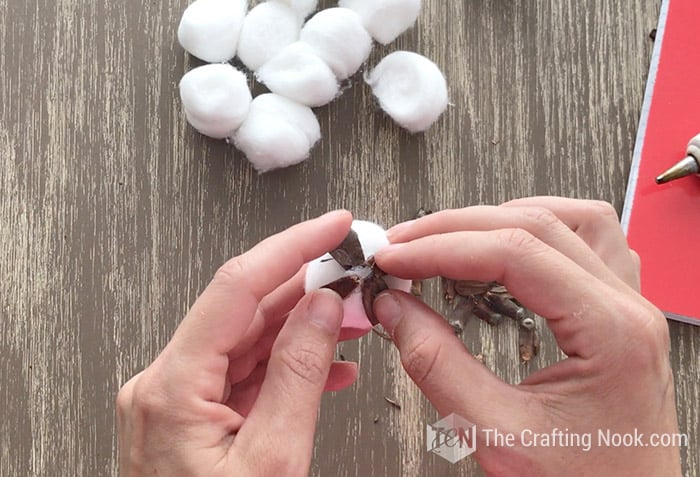
5. Then glue 3 or 4 more like a flower.

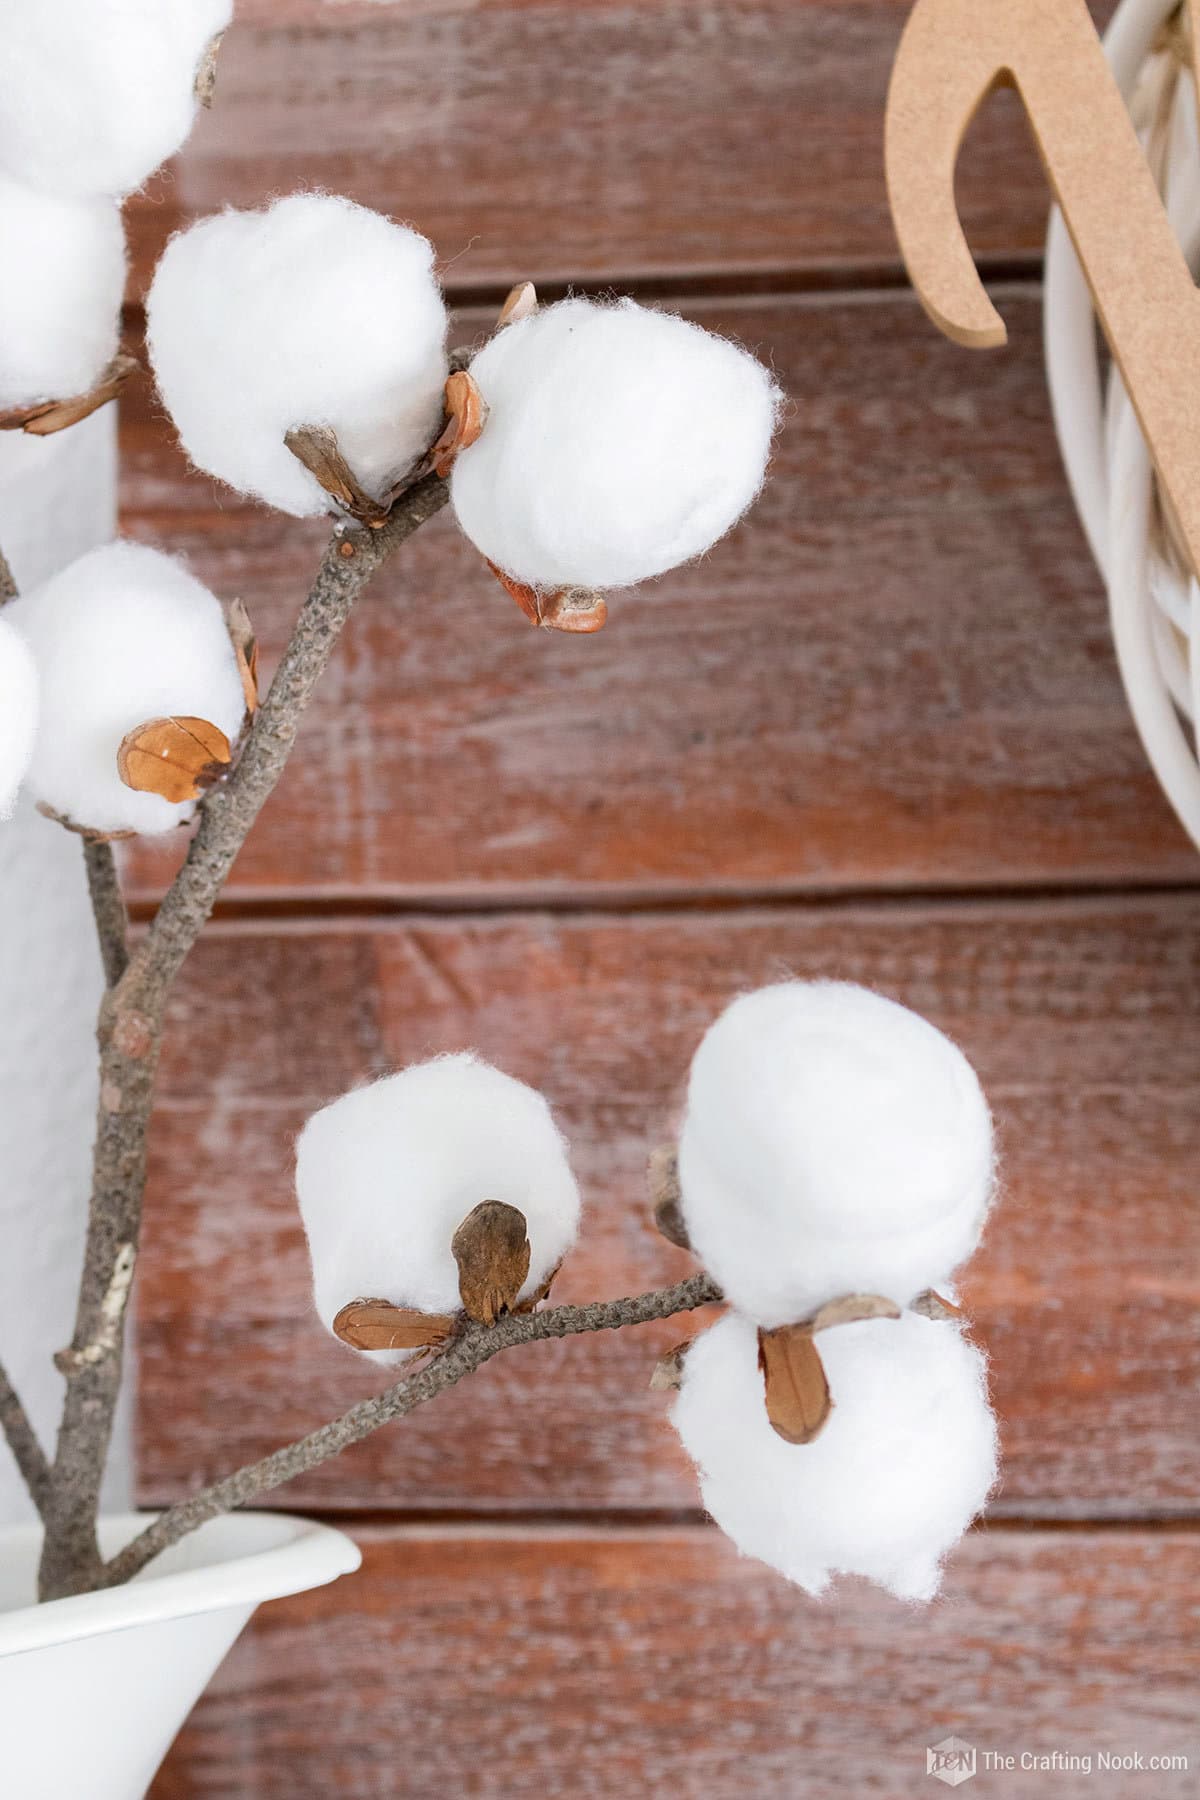
6. Now, apply hot glue to the cotton ball (between the pinecone scales) and glue one on to the end of each branch section.
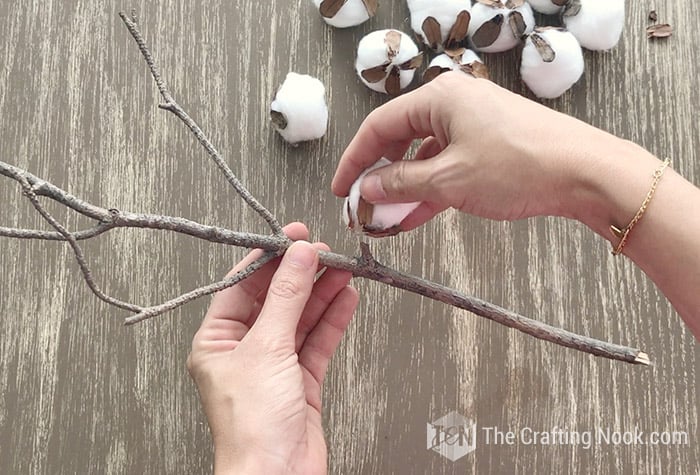
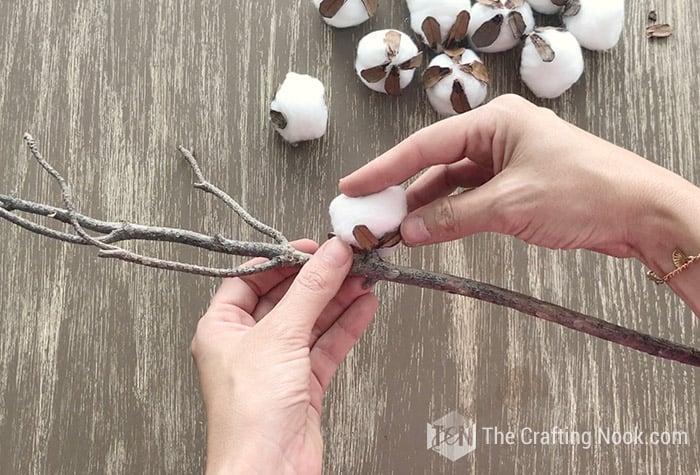
7. Add as many cotton balls as you like.
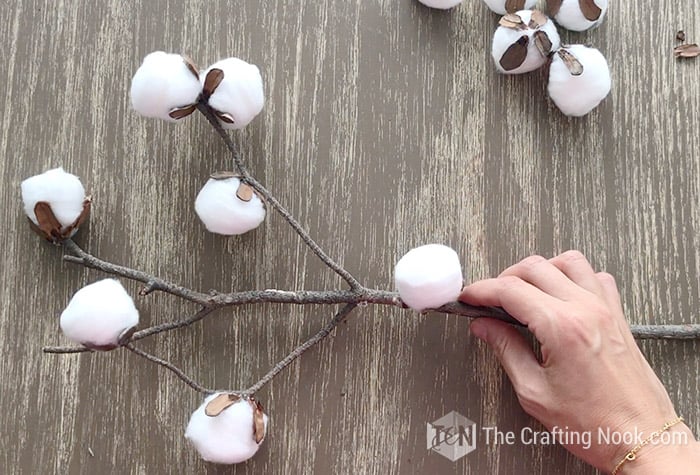
If you see spots on the branch that doesn’t have anything on it, you can stick the cotton ball to the main part of the branch using glue. You won’t be able to tell that there was no branch there.
8. You can make as many branches as you like.
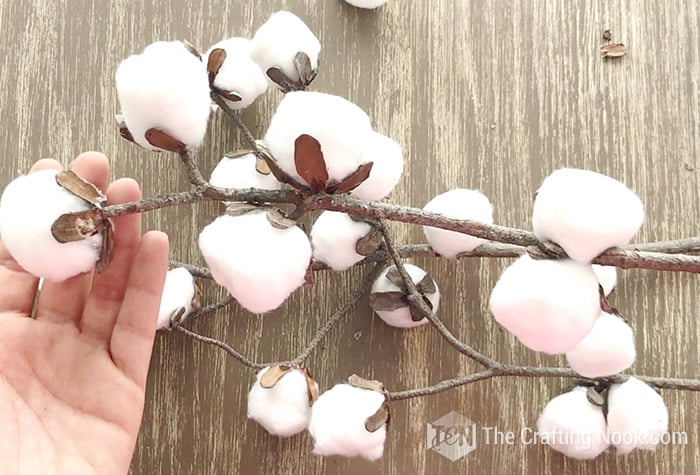
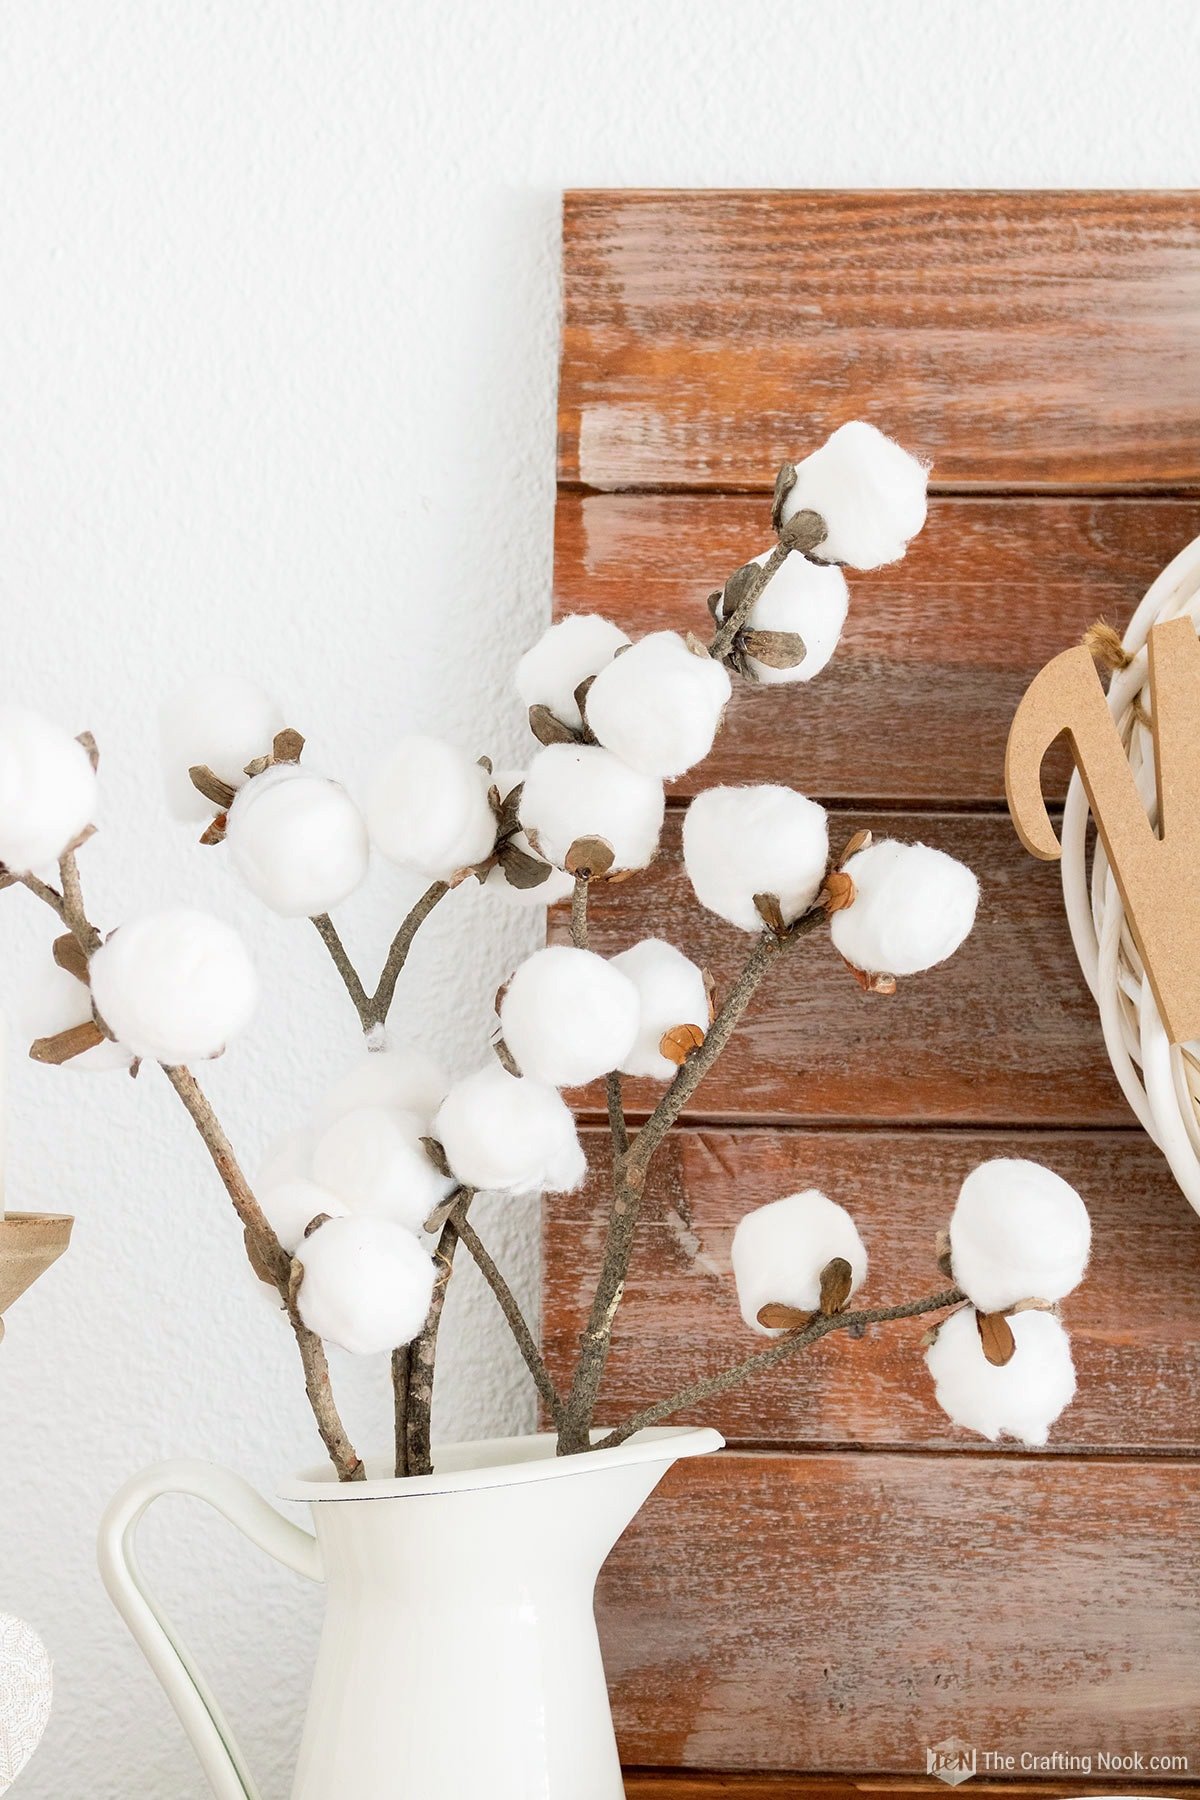
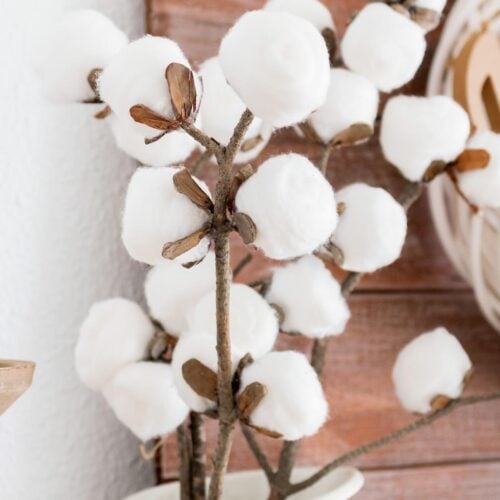
9. When you are happy with your branches, you can put them in a jar, bottle, or pitcher.
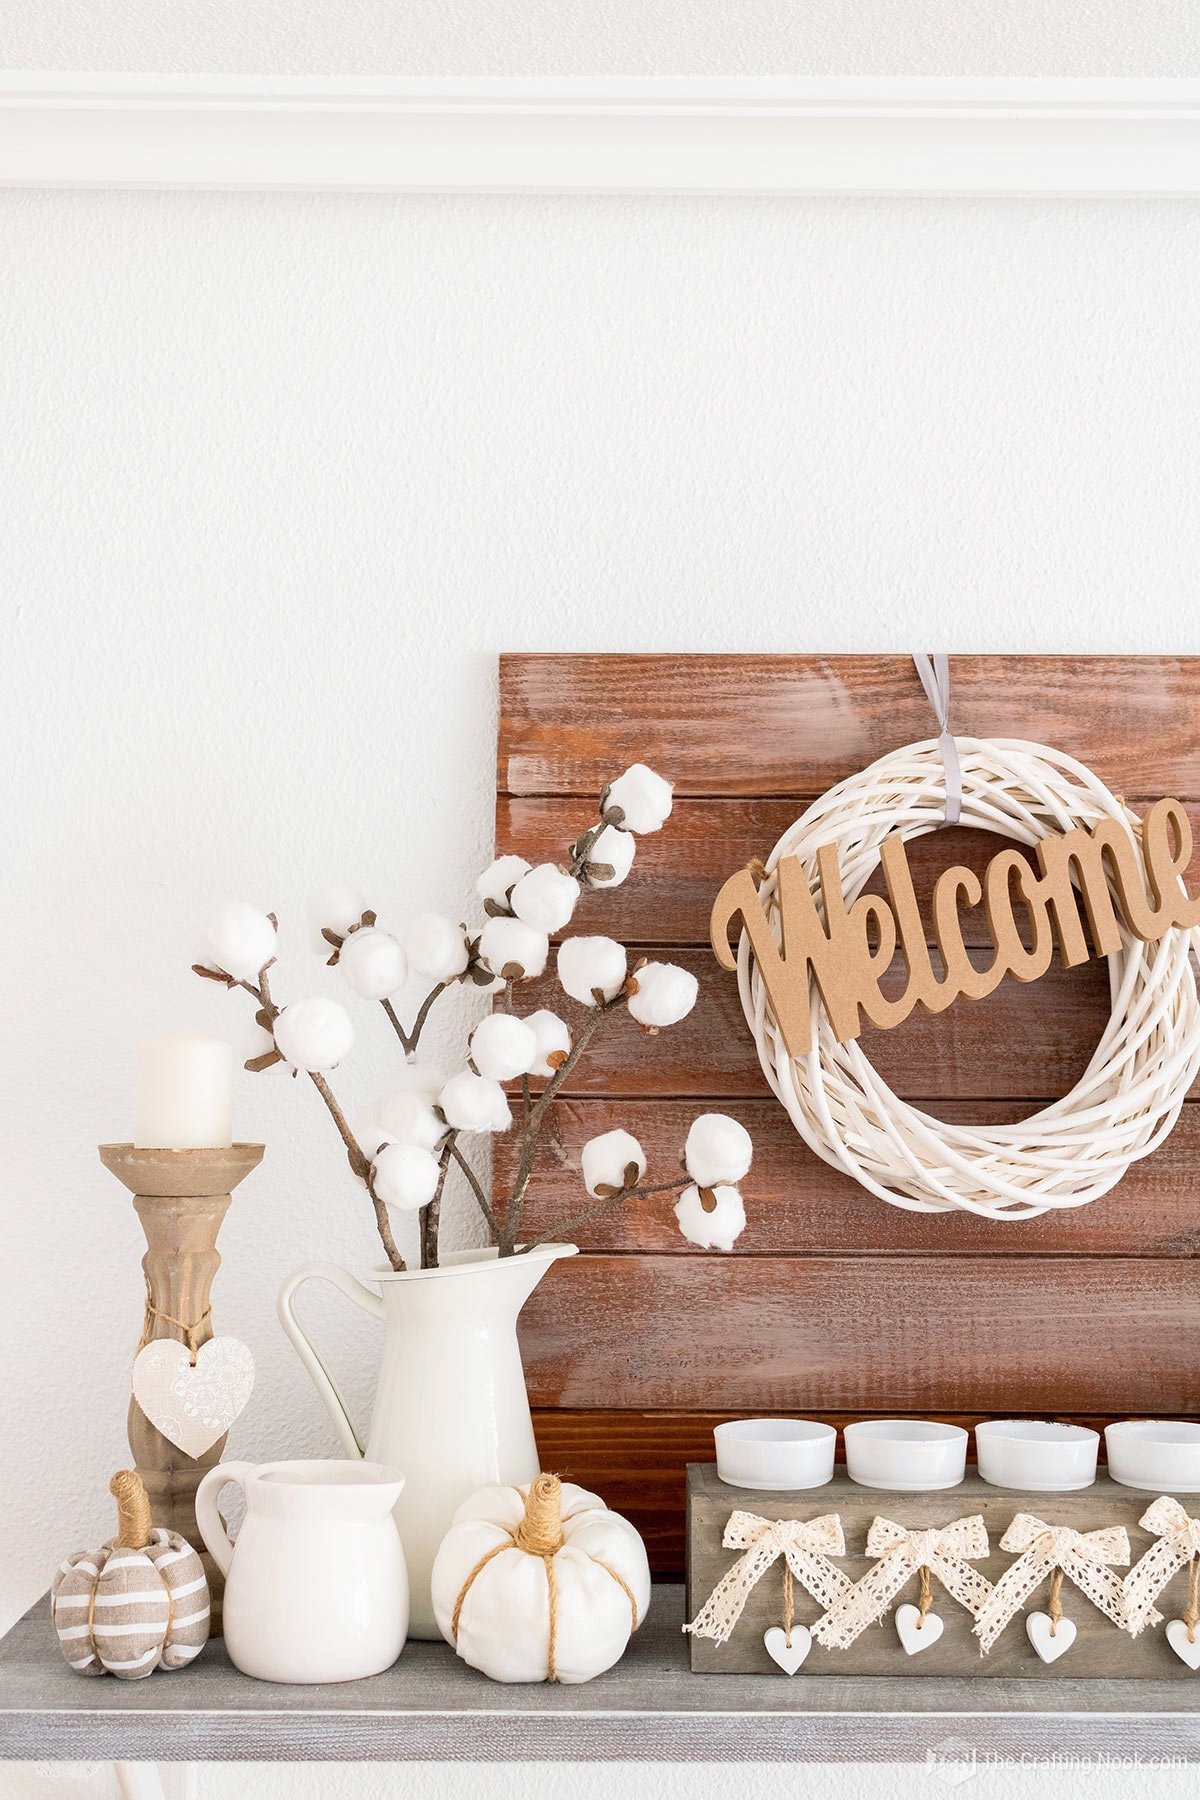
10. I finished the steps for a few more branches, plunked them in a pitcher, and I was all done!

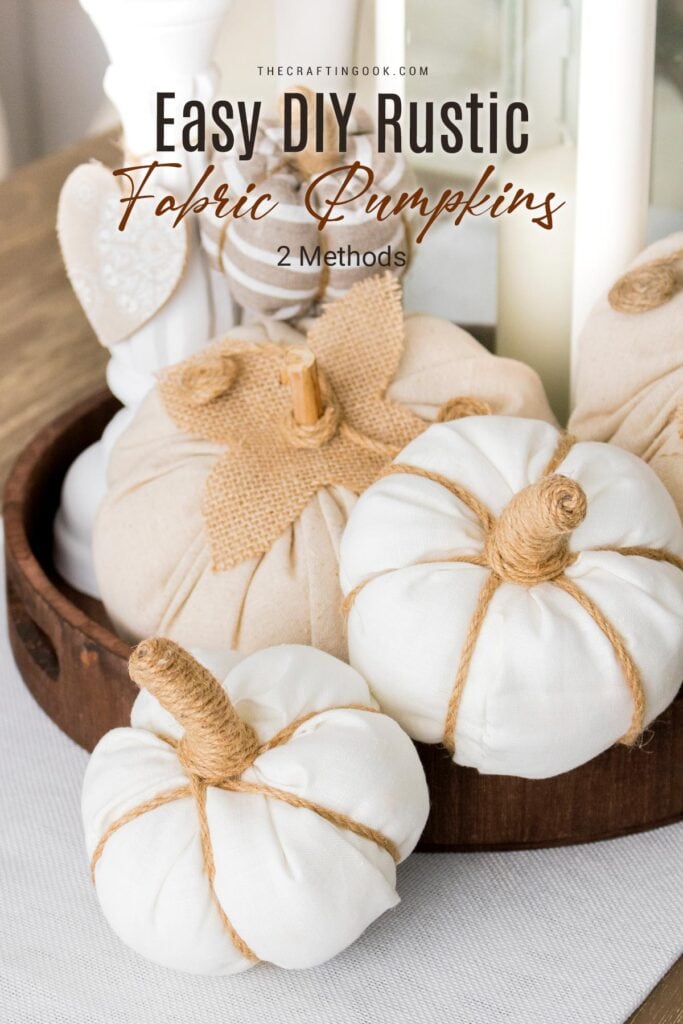
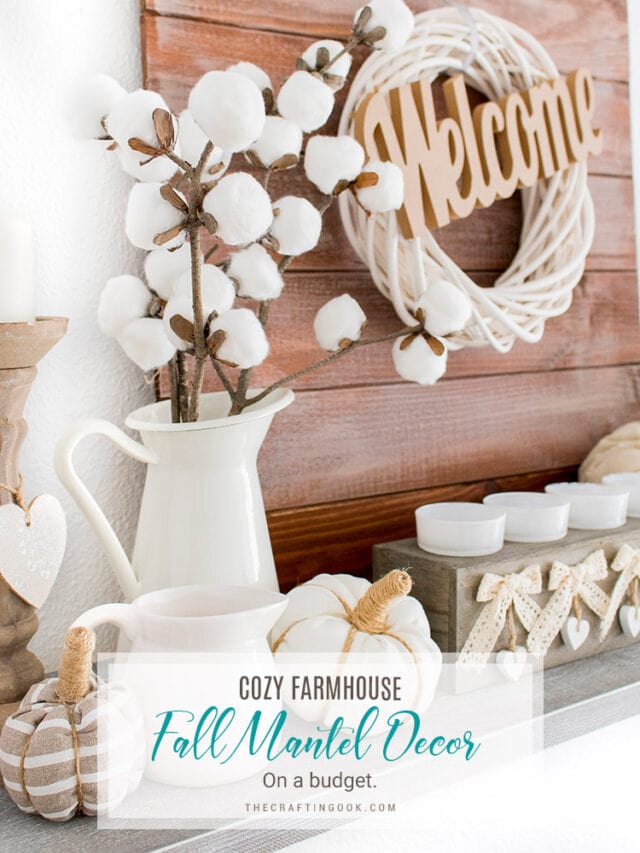
Finally, I decorated my Mantel with my lovely cotton stems and some of my cute fabric pumpkins. I absolutely love how it turned out!!!
Check out my finished decor!
Crafting Tips
- Before starting, make sure your pinecones are clean and dry. If they are freshly picked, bake them in the oven at a low temperature (around 200°F or 93°C) for about 30 minutes to remove any insects or sap to get rid of any bugs or sticky substances. This will also make it easier for the cotton balls to stick to the pinecone scales.
- Instead of using big cotton balls, try tearing them into smaller pieces to make them look more natural and realistic. Change the sizes of your cotton stems to make them feel different.
- If you want your cotton stems to look snowy or frosty, you can use white or silver glitter. Take some sparkly dust and mix it with a little bit of white craft glue. Then, use a small paintbrush to spread it onto the cotton balls.
- If you want your pinecone to be a different color, you can paint it before you put on the cotton balls. Use paint that is made of acrylic in natural colors like brown or gray. Apply the paint with a technique called dry brushing. This will help to keep the pinecone’s texture and shape. Wait for the paint to completely dry before going to the next step.
- You can lightly spray or use cotton-scented fragrance oil on the cotton to make it smell nice. Make sure the scented oil is okay to use for making crafts.
- To make your cotton stems stronger and easier to arrange, put a wire or thin stick into the bottom of each pinecone. Put a small amount of hot glue on the hole before putting the wire in so that it stays where it should. This will let you twist and shape the stems how you want.
- After finishing your cotton stems, you can either put them in a vase or tie them together with a natural-looking twine. You can also use things like dried grass, dried flowers, or dried wheat to make your display more interesting and natural.

Frequently Asked Questions
Begin by making sure the pinecones are neat and clear of any dirt or other unwanted materials. If necessary, gently clean off any loose dirt or particles with a soft brush.
Yes, normal cotton balls usually work fine for this project. But if you want a certain feel or look, you can try out different kinds of cotton like cotton filling or raw cotton.
It is based on the appearance you want to have. If you like the color of a pinecone in its natural state, you don’t need to paint it. But, if you want the pinecones to look old or worn, you can paint them before putting on the cotton. This will make them look better overall.
Before putting the cotton balls on the pinecone, pull and fluff them so they look more like real cotton. You can also add special powder to certain parts of the cotton to make it feel fuzzy.
I’m a true believer that imagination is the limit. But to mention a few ideas I’ve seen out there: Egg carton for the cotton boll base, Cardstock or paper craft in brown shades, Pipe wires for the branches, Regular wire wrapped in florist tape for branches, and others.
I mean anything goes depending on the look you are looking for. In my case I was looking for the most realistic look, so I found this one to be the closest. I’m sure it could still be even more realistic but I’m happy with how mine turned out.
More Fall Projects to Try
If you like this Faux DIY Cotton Stems tutorial, you might also love these other Fall project ideas too:

✂️ Tutorial
DIY Cotton Stems (In a few Simple Steps)
Tools
- Hot glue gun
- Glue sticks
Supplies
- Some twigs or tree branches
- Cotton Balls
- Pinecones
Instructions
- Firstly, Start out by pulling a bunch of the scales off of a pinecone. Any kind of pinecone will probably work for this, but I just used what I already had.
- Sometimes it’s hard for the scales to come off, so what I did was press it up until I heard a click and then I pushed it down and to the sides, it came out almost completely.
- Fluff your cotton balls. I used large cotton balls.
- Next, it was time to start gluing!
- Apply hot glue to the inner curvy side of the pinecone scale and glue it to the cotton ball.
- Then glue 3 or 4 more like a flower.
- Now, apply hot glue to the cotton ball (between the pinecone scales) and glue one on to the end of each branch section.
- Add as many cotton balls as you like.
- If you see spots on the branch that doesn’t have anything on it, you can stick the cotton ball to the main part of the branch using glue. You won’t be able to tell that there was no branch there.
- You can make as many branches as you like.
- When you are happy with your branches, you can put them in a jar, bottle, or pitcher.
- I finished the steps for a few more branches, plunked them in a pitcher, and I was all done!
Share and PIN ME!!!

Til’ next time…


FREE WORKBOOK
Keeping your Sweet Home Organized
Learn how to create intentional habits and simple routines to Keep Your Home Organized. Plus freebies, printables, exclusive content, and tips.
Disclaimer: By clicking on the “Yes” button above you are giving me your consent to collect and use your information according to the law and My Policy Privacy. Zero Spam I promise!