DIY Leather Cord Necklace with Owl Pendant – Beginners Tutorial
This post may contain affiliate links. Please read our Disclosure Policy.
This beginner tutorial for a leather cord necklace diy with an owl pendant will teach you how to create easy handmade leather jewelry at home in no time. This is a great project for beginners and for people who want to DIY their own unique jewelry.
Have I mentioned that I LOOOOOOVE Owls? haha! Well… I crazily do! I made this super easy leather cord necklace with knots and a super cute owl pendant.

Seriously! This is super easy to make, really cute, and very crafty. The variations and alternatives are endless!
Last week I was shopping for some craft supplies and I saw this cute owl pendant, I couldn’t help it so I bought it (thankfully it was very inexpensive).
I also found some lovely leather cords and other nice jewelry accessories so I run back home super excited to start my new handmade jewelry piece!

Table of Contents
How to make this Leather Cord Necklace DIY
This cute diy leather necklace with knots is the easiest handmade jewelry you will ever make. Just a few supplies and your imagination. Learn how!
Here is how I made it:
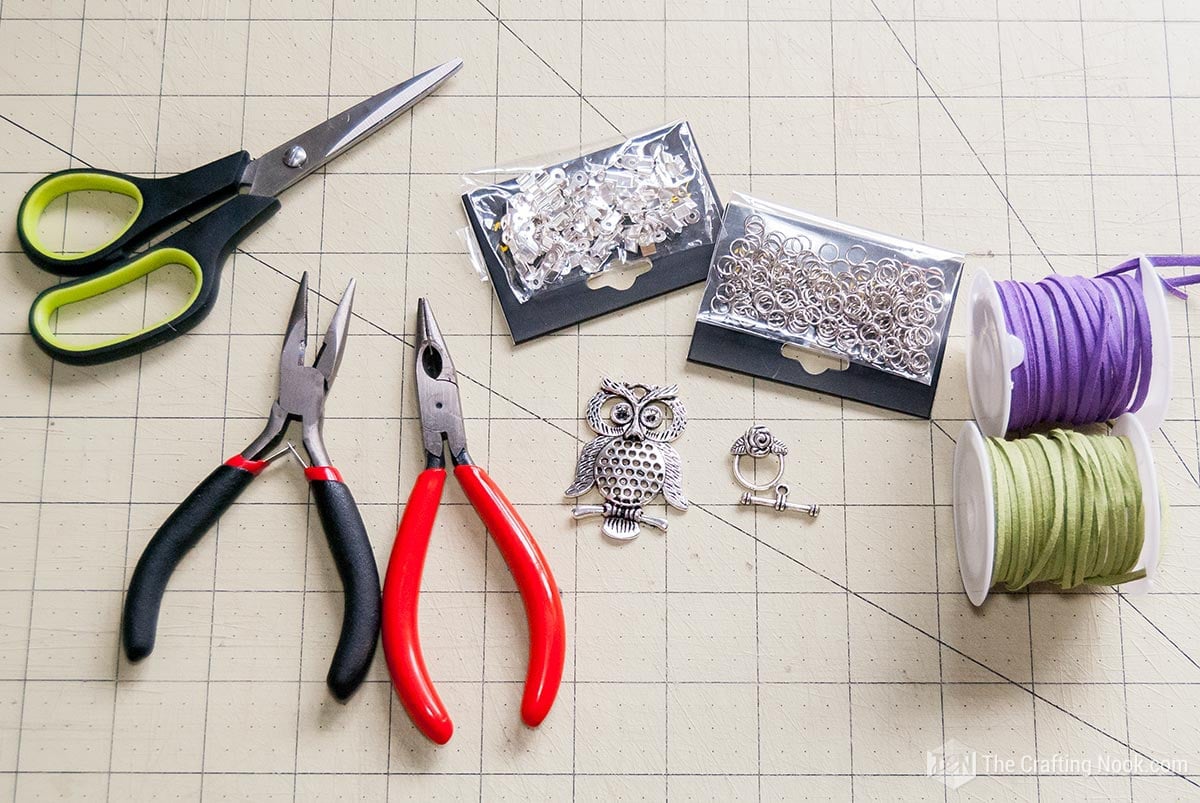
Supplies:
- 3mm Leather cords – I used 2 purple and green but feel free to use your favorite color combination.
- Owl Charm – I used an owl but you can use your favorite one.
- Jump rings (3-5mm)
- Fold-over cord crimp ends (that match your cord thickness)
- Clasp – I used a very cute toggle clasp (bar and ring)
Tools:
- Jewelry pliers (flat nose pliers and bent nose pliers)
- Scissors
Instructions:
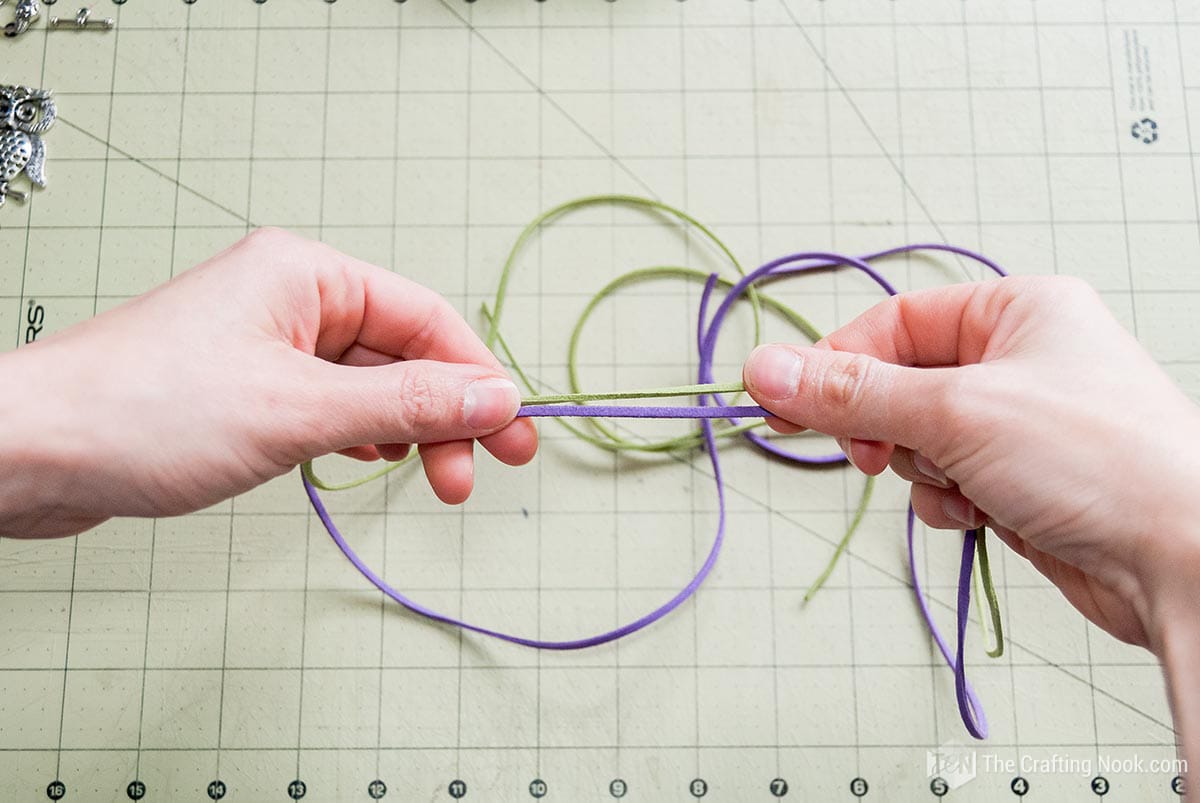
I used 2 cord colors, which means 2 cords. I used green and violet.
1. Firstly, I cut them to equal size, long enough that when the knots are made, the necklace is still on the wished length.
It’s always better to have leftovers than to need more leather later.
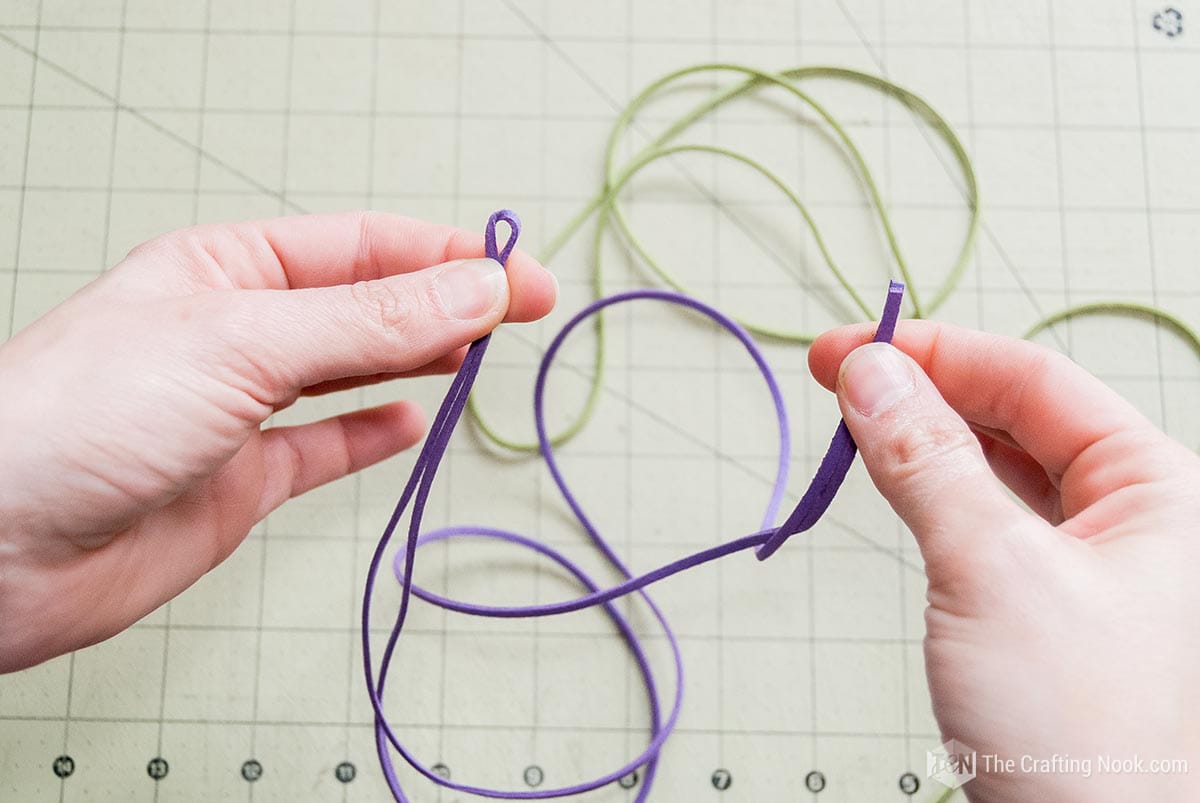
2. Then, since the hanging loop was fixed and too small (no bail), I used just one of the cords to attach the pendant. I took the violet cord color and I folded it in half.
3. Next, I inserted the folded end through the hole, from the back to the front.
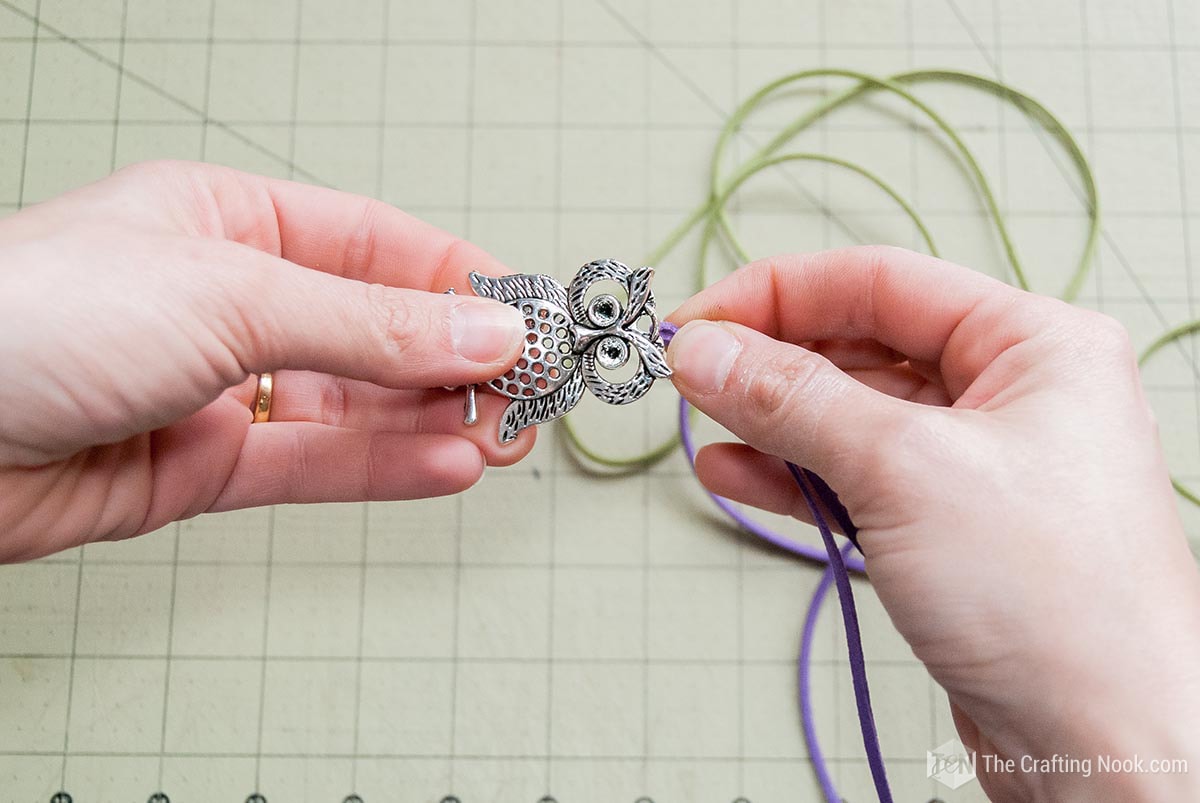
4. When it was out, I left a few centimeters (about an inch).

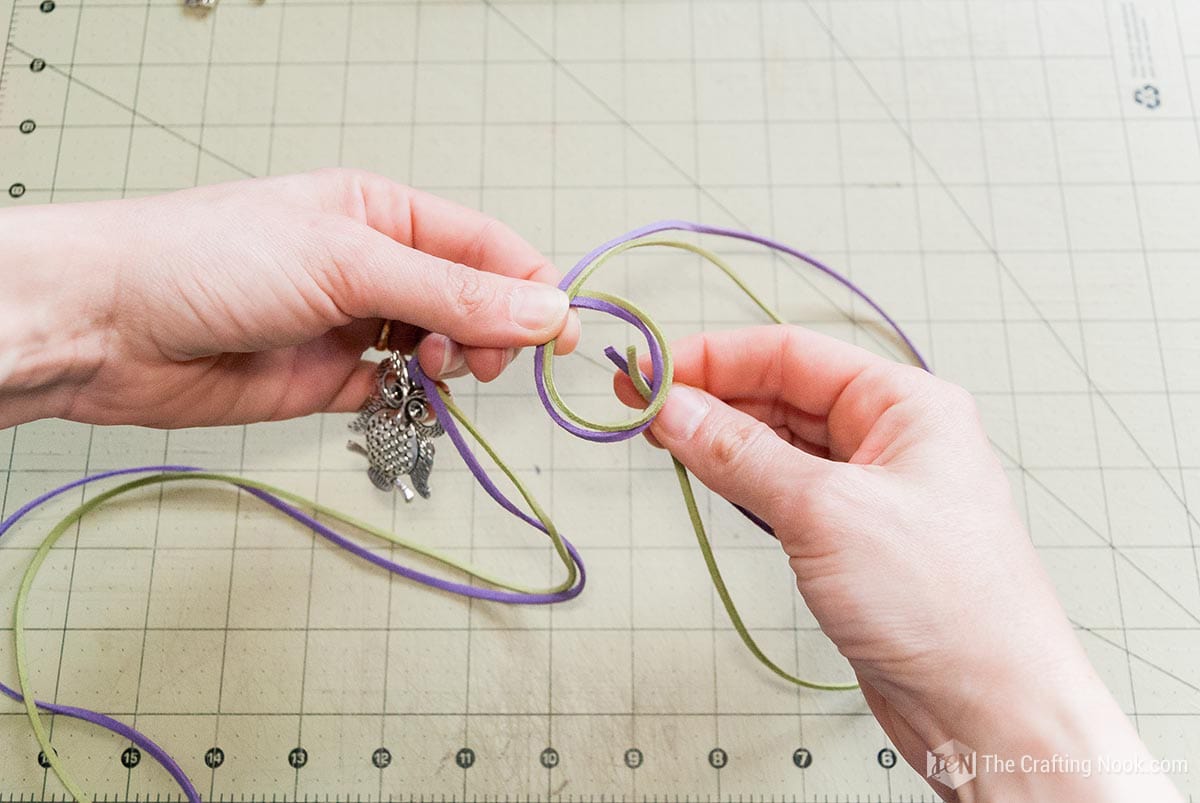
5. I inserted the other end (both cords) through the folded end of the cord.
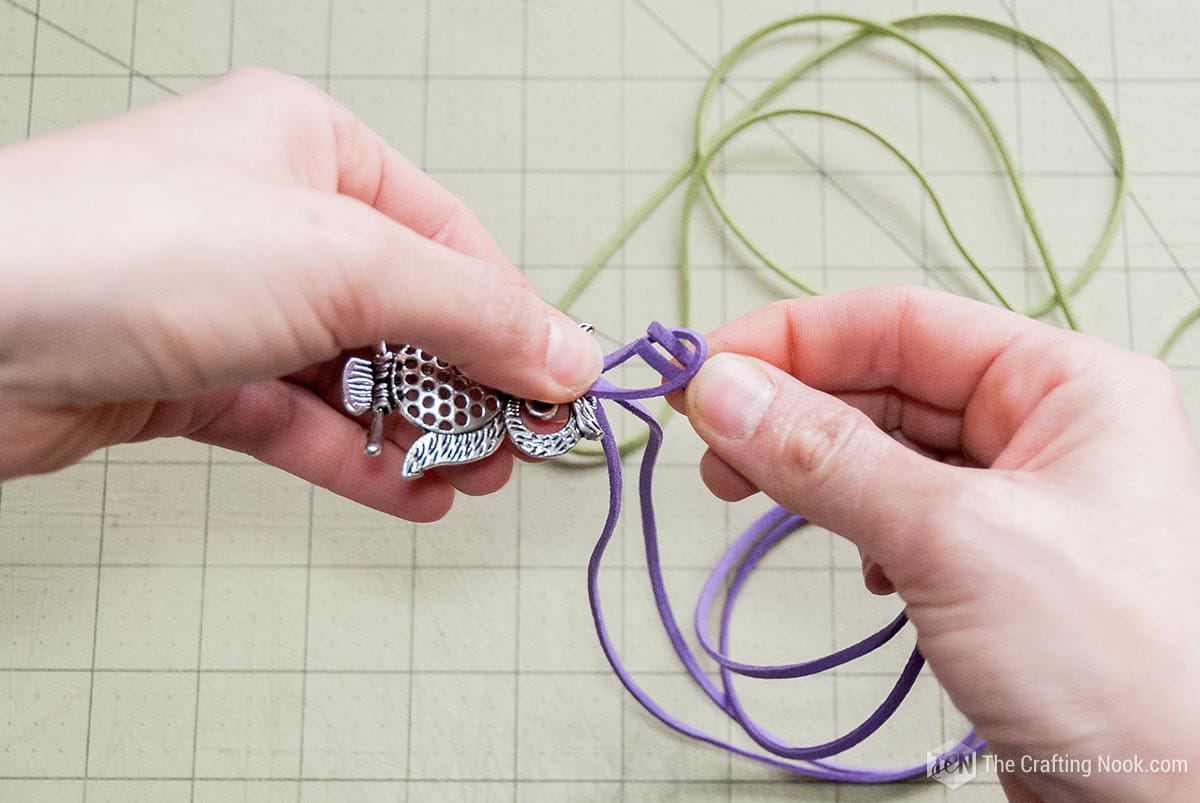
6. I pulled the cord leaving a little space.
7. Through that space, insert the green end of your cord halfway.
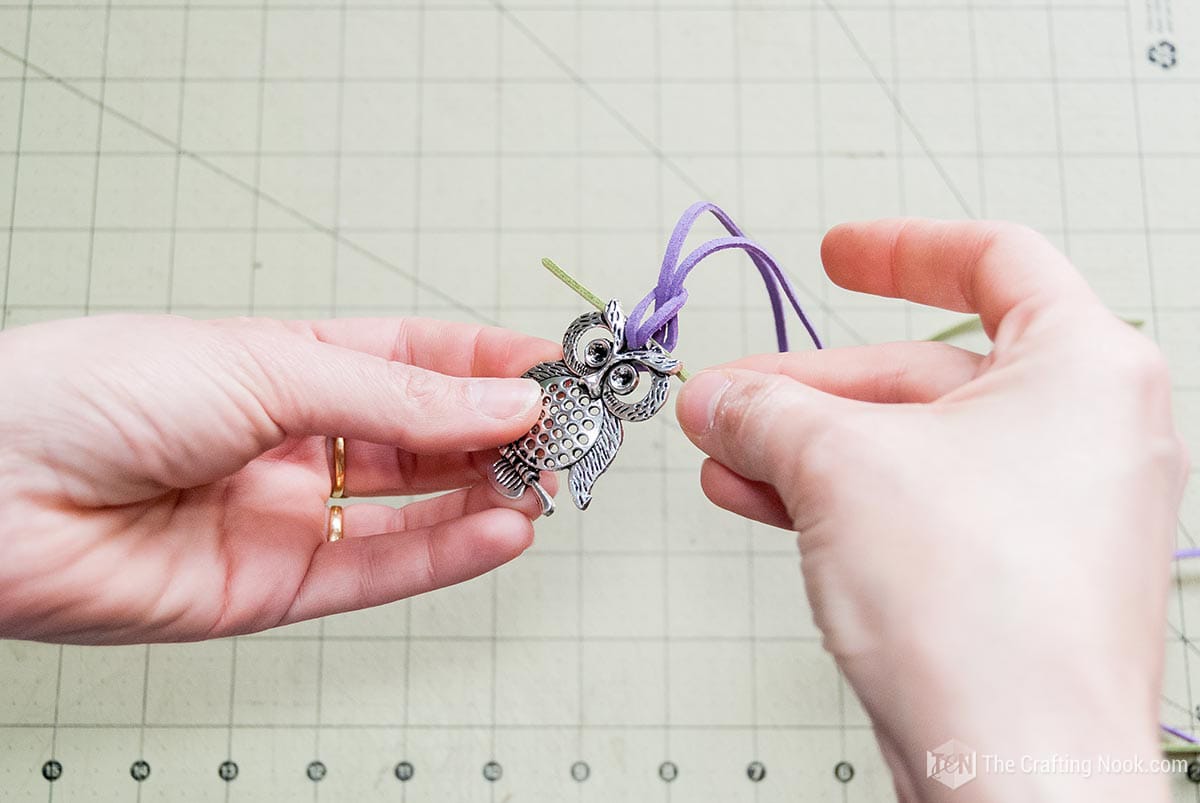
8. I tightened the violet cord to secure the green one in place.
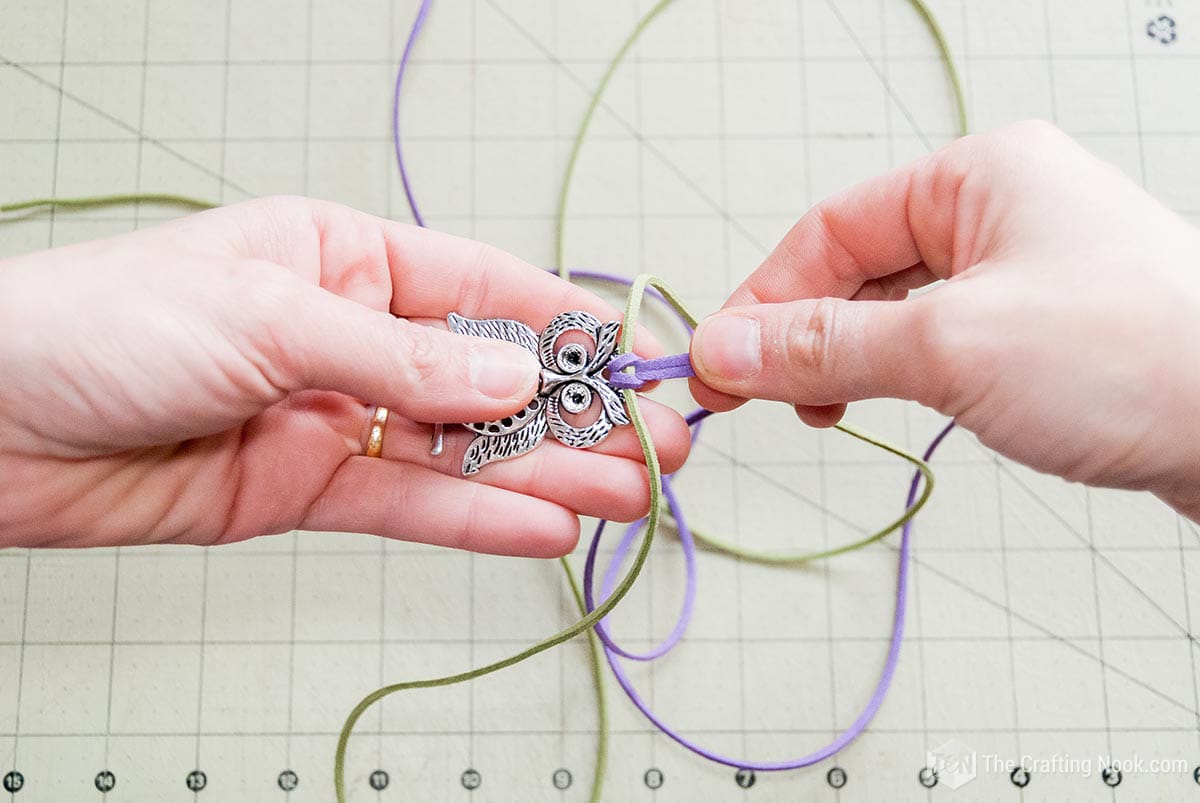
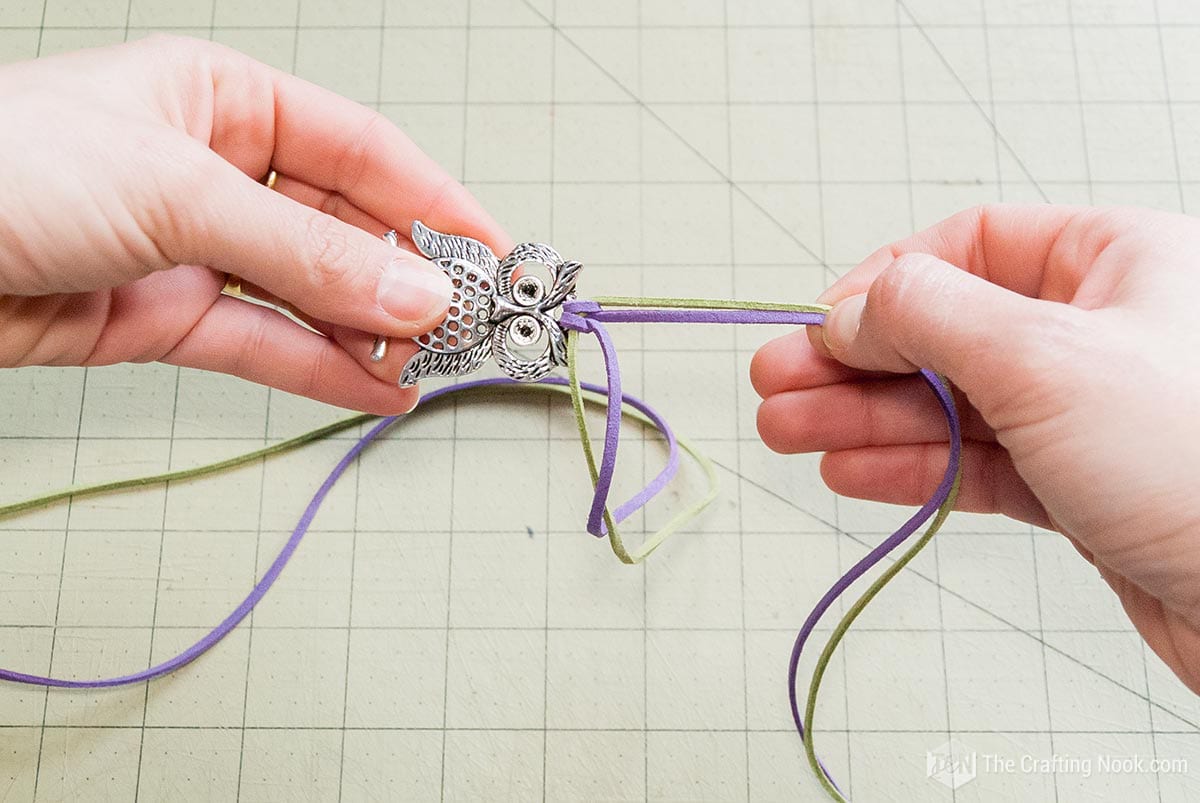
9. At this point, you should have 2 pieces of cord both colors on each side of the pendant.
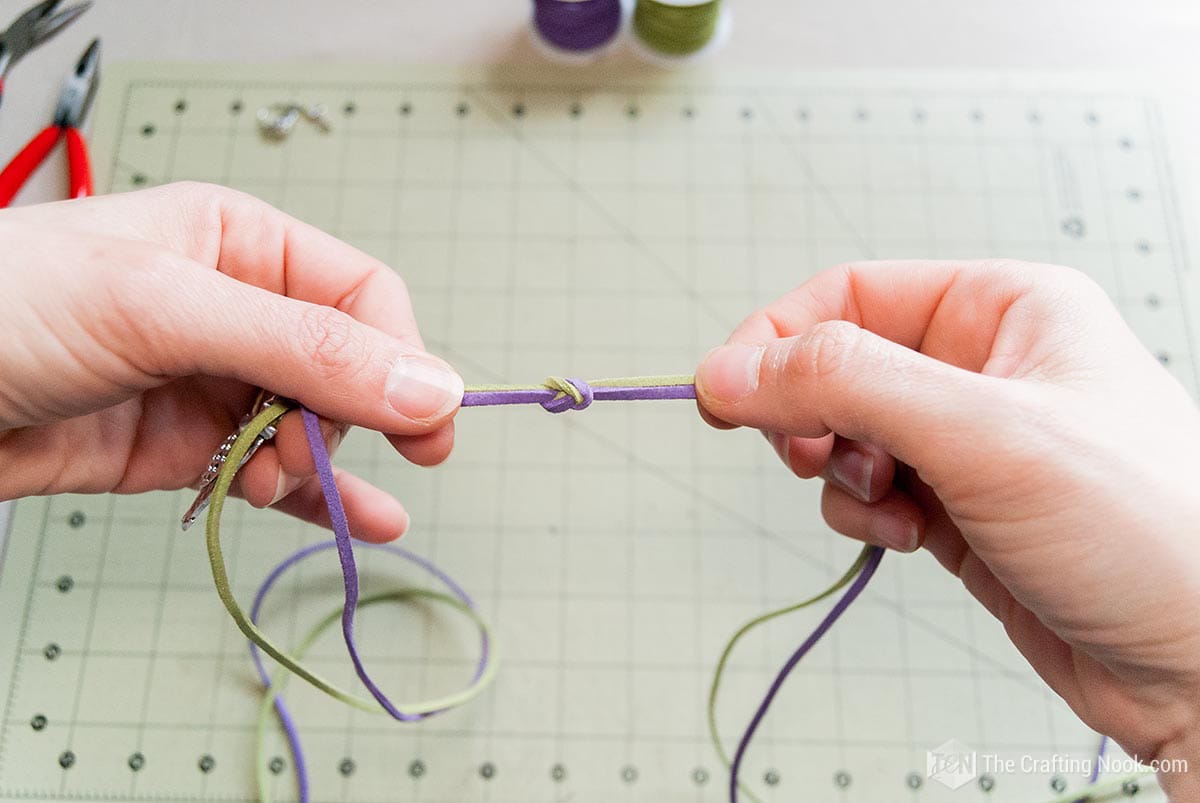
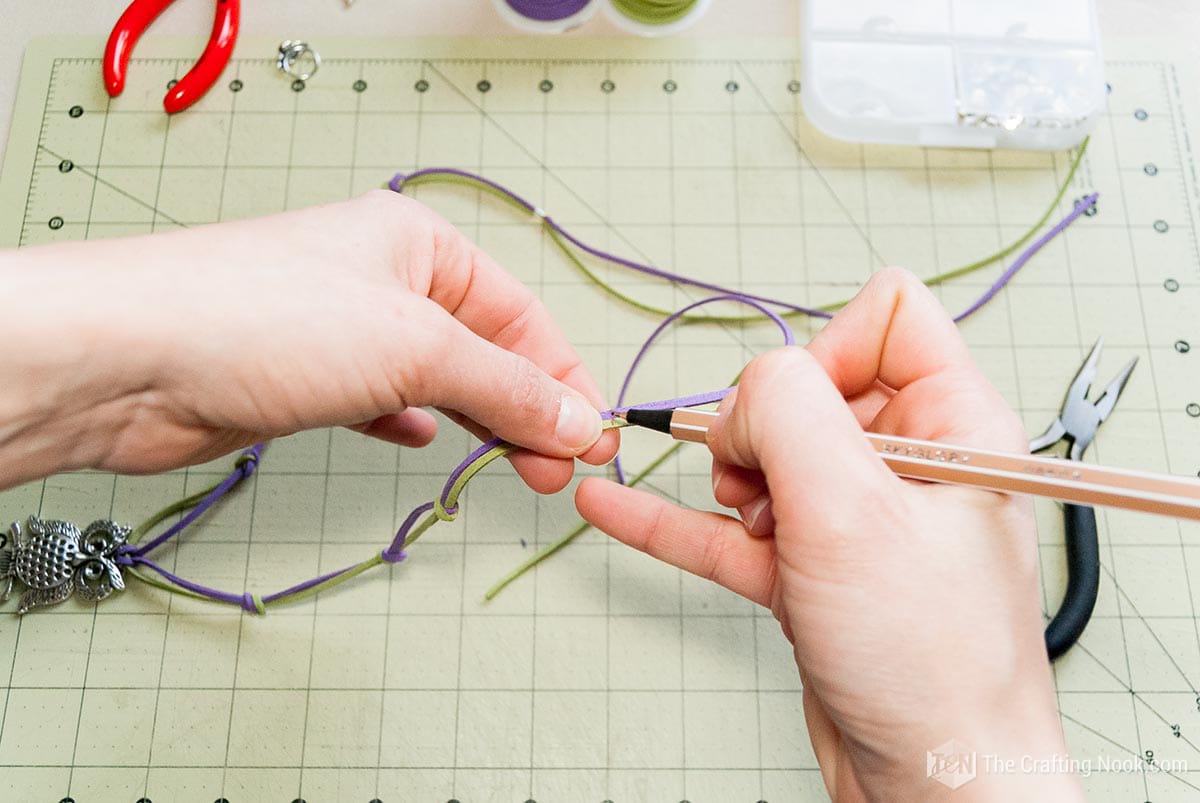
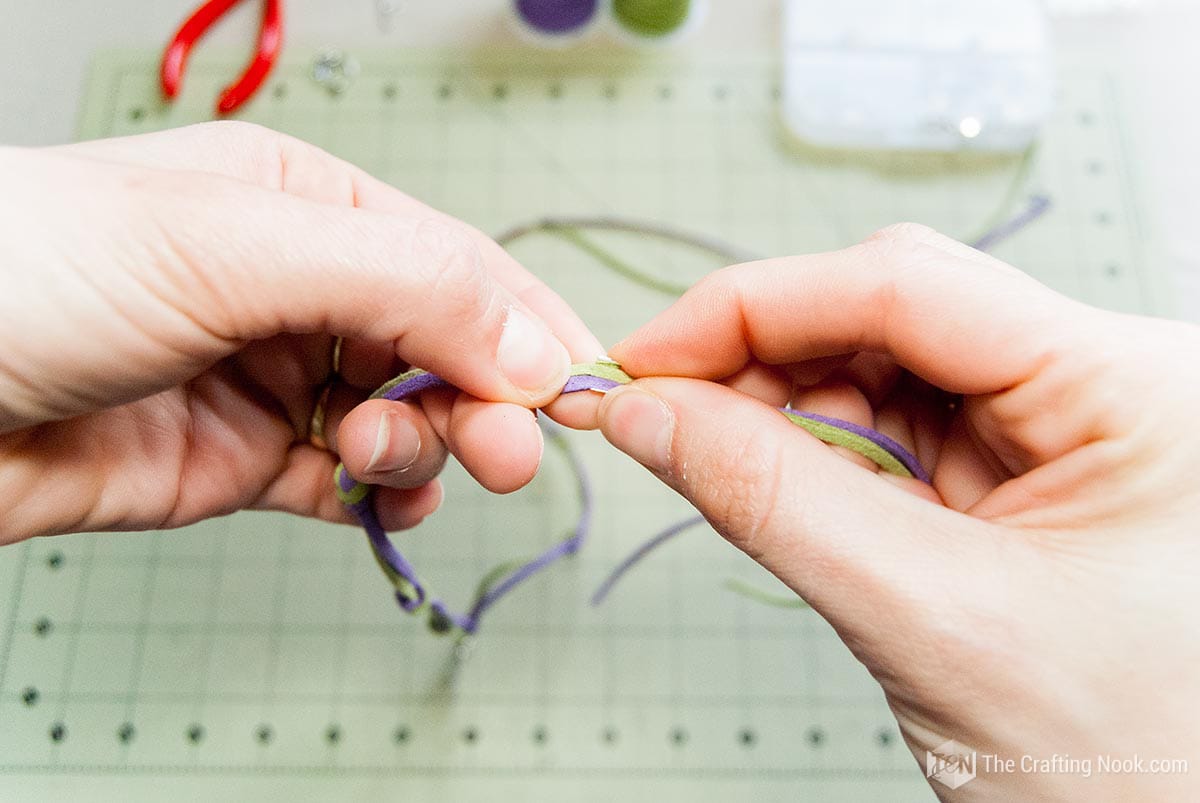
10. I made the first knot a few centimeters (about an inch) away from the pendant.
11. Make it tight. I tried to make visible both colors on the knot.
12. Keeping the same distance I made a knot for the opposite side of the necklace and here is the pattern you’ll follow
If you feel creative, you can add beads after each knot. The beads should have a hole big enough so both cords would fit.
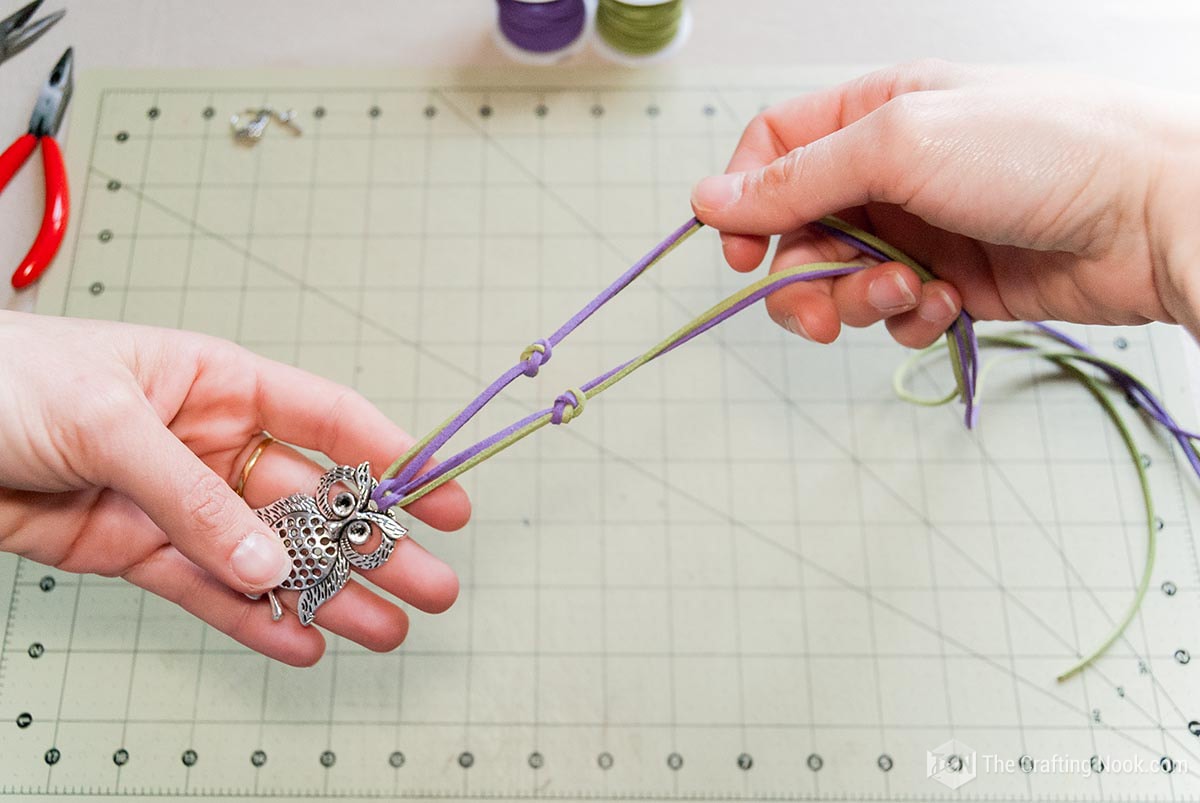
13. From that point on I repeated the knots at the same distance until it got the desired necklace length.
14. When I got it done I measured again putting the owl where I wanted it to be on my chest.
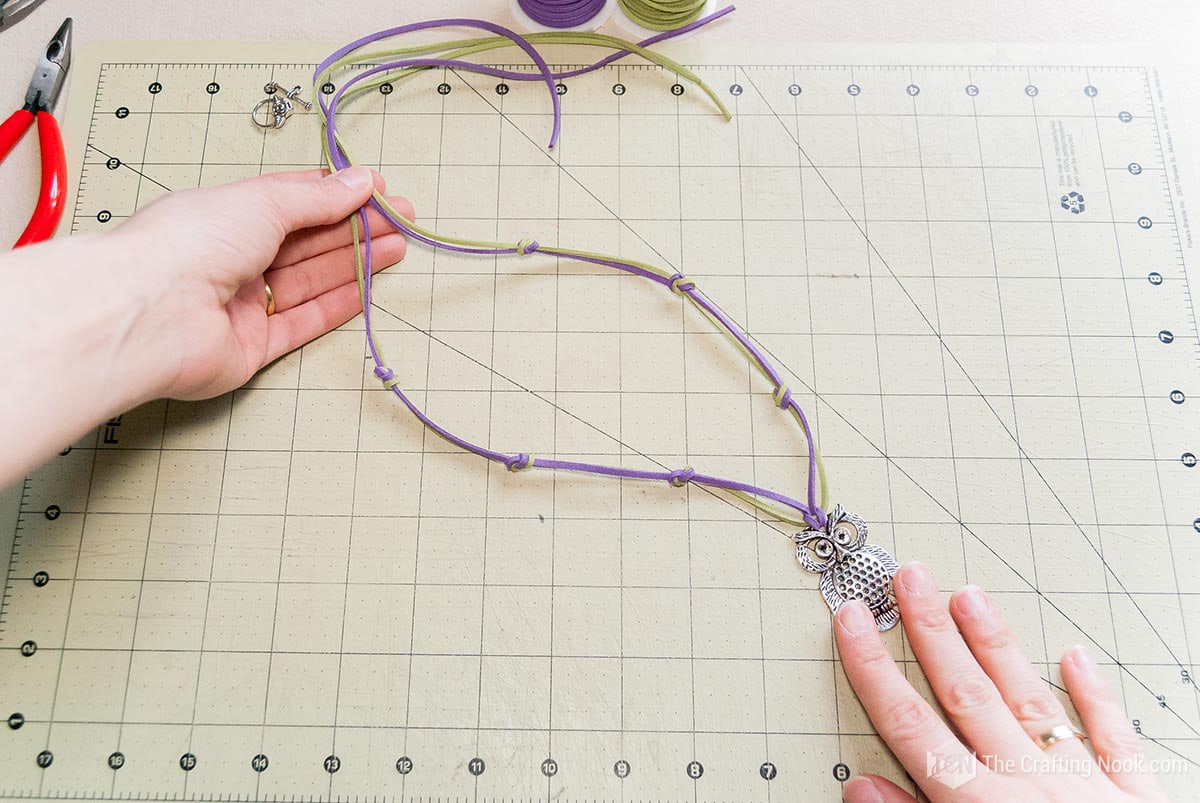
15. I Made a mark to guide where to put the clasp.
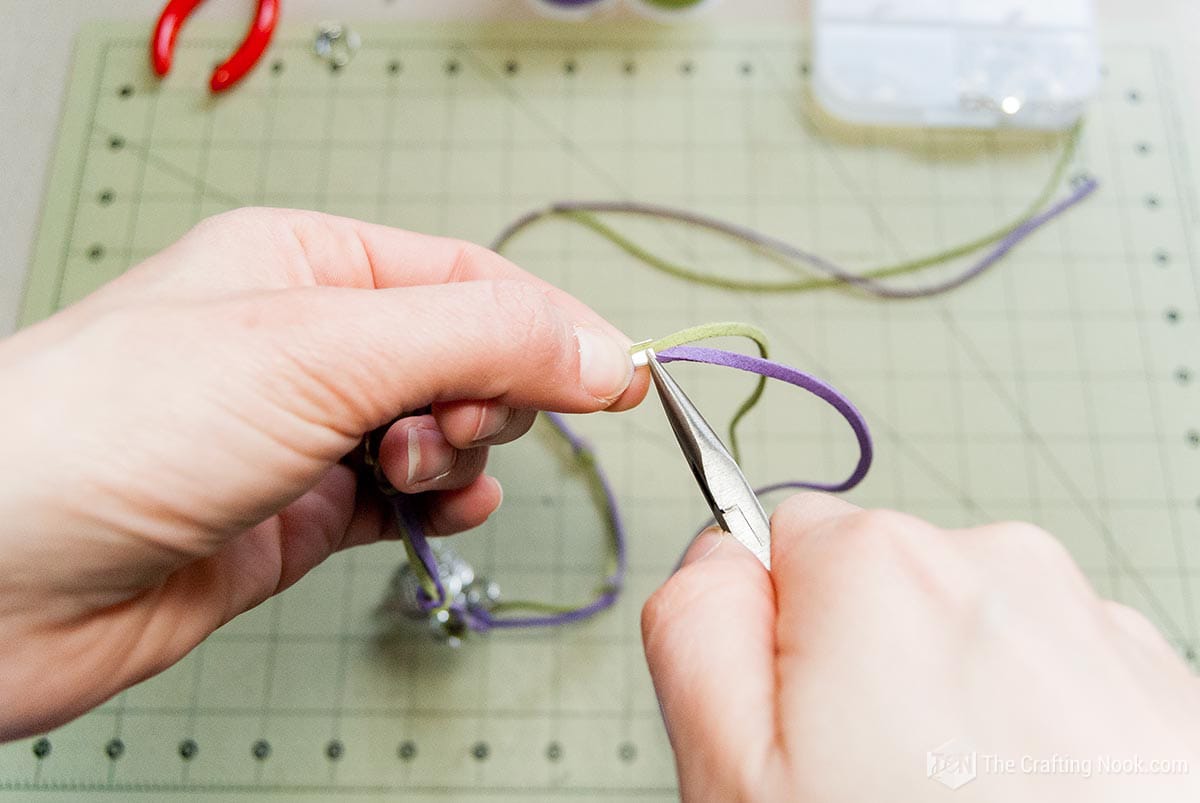
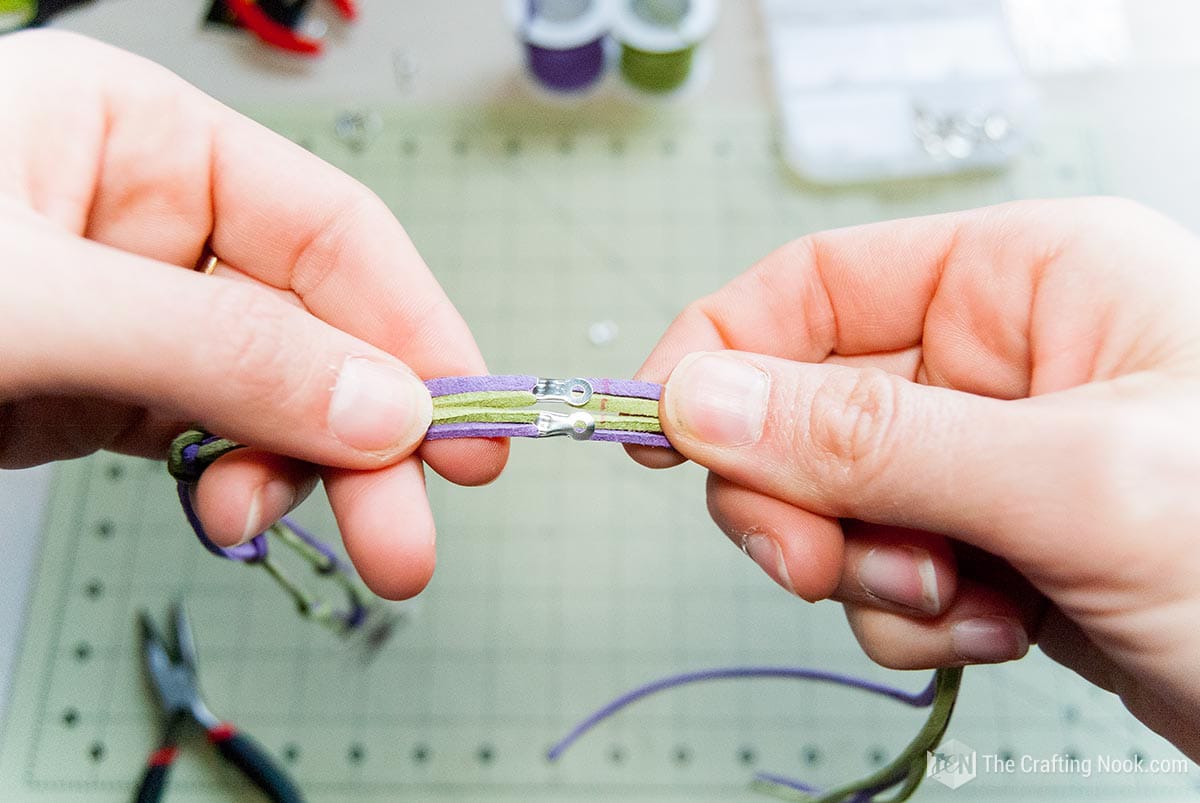
16. I used some fold-over crimp ends on the string ends.

17. Then I placed it just before the mark because he clasps make the necklaces a bit longer.
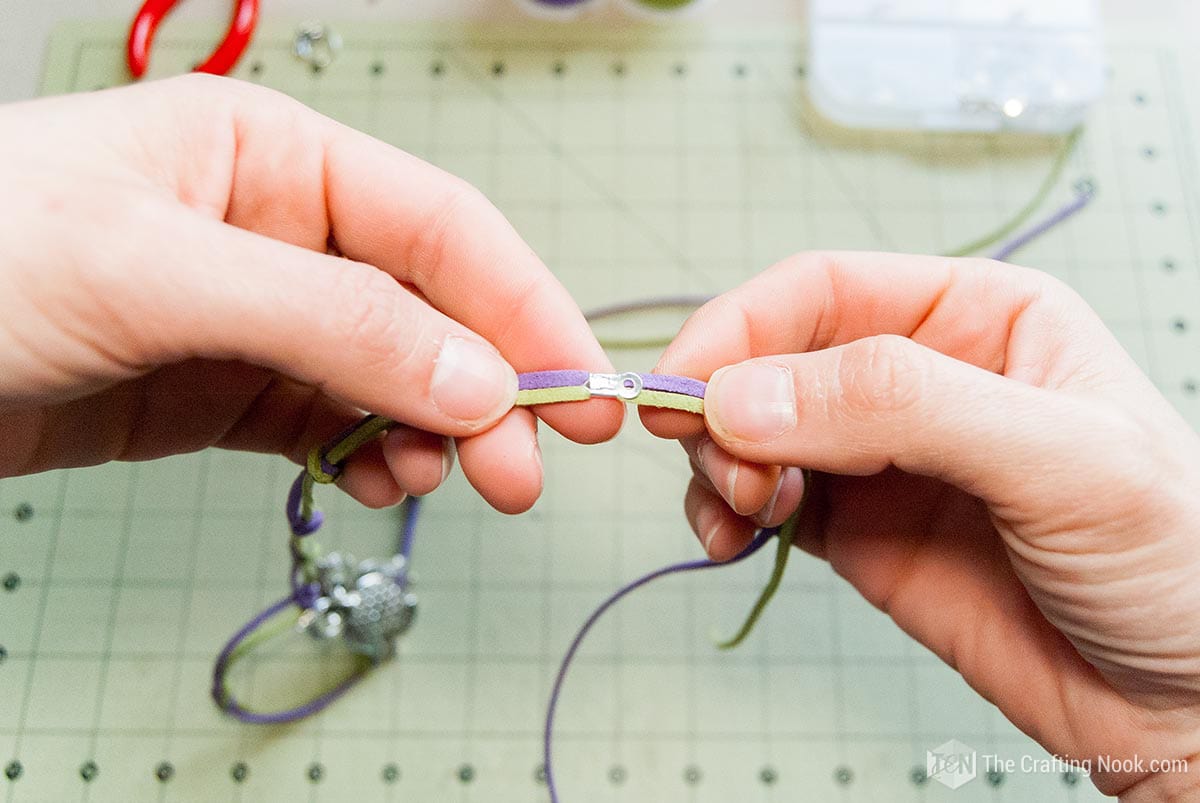
18. Placing both cords in the cord crimp end, I tightened them with a plier to secure the cords well. You can additionally apply a tiny dab of glue to make it extra secured.
I didn’t cut the leftovers yet just in case the length needs to be adjusted.
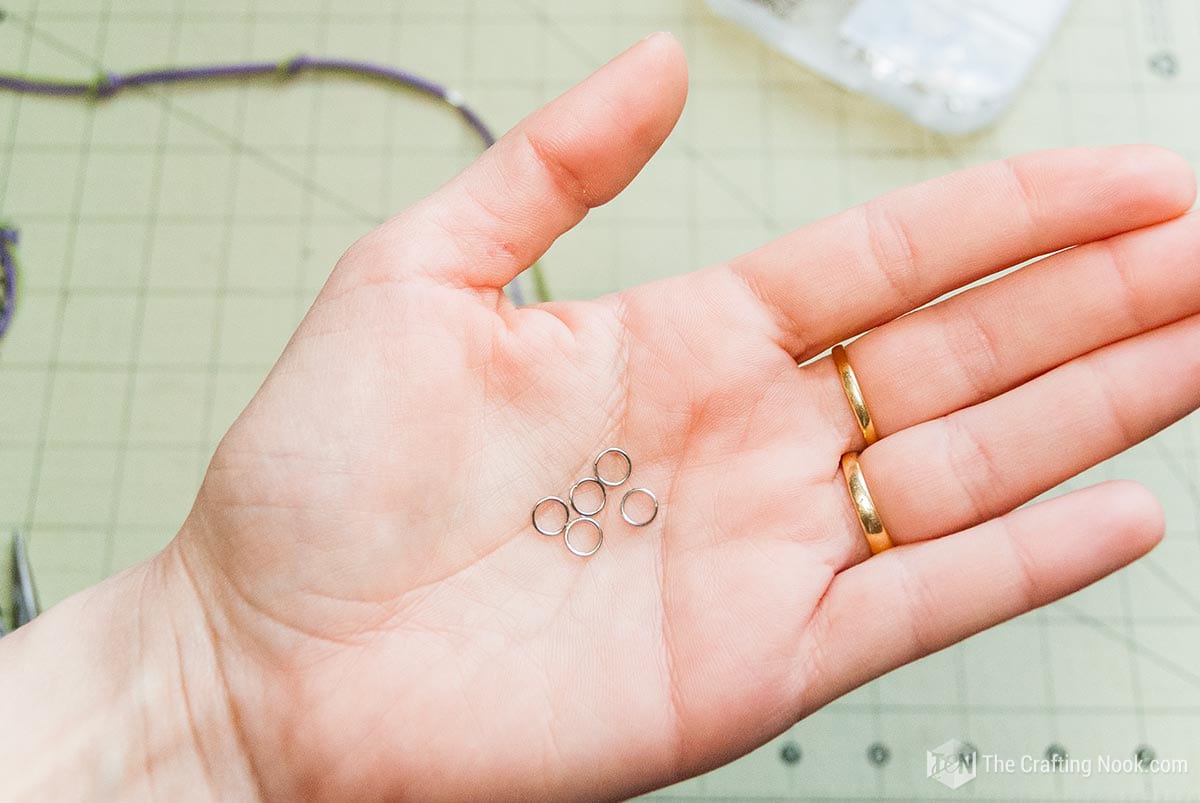
19. When I finished with both ends of the necklace, I took some jump rings.
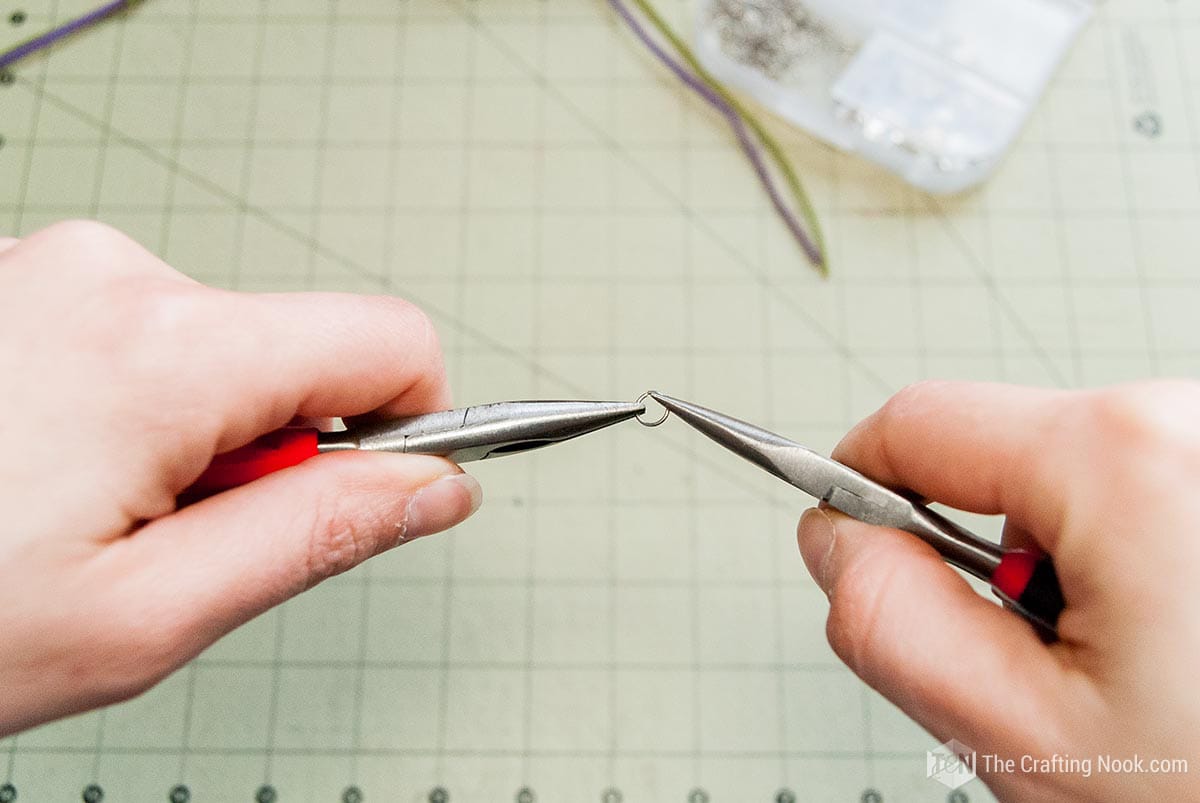
20. With your pliers, open a little bit one jump ring, enough to insert the cord end ring.
21. I inserted the cord end and the clasp on each end.
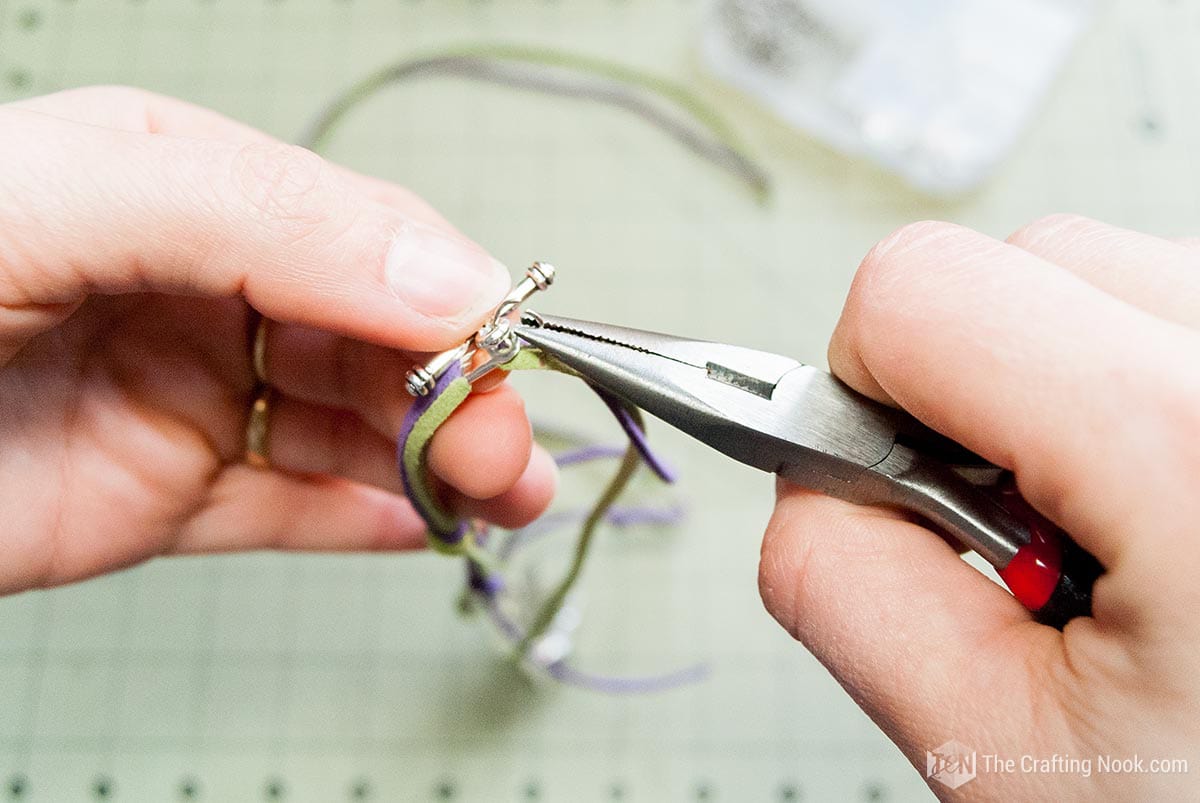
22. I closed the jump ring again, of course.
23. Lastly, if everything is ok and the length is right, cut the leftover ends of your cord.
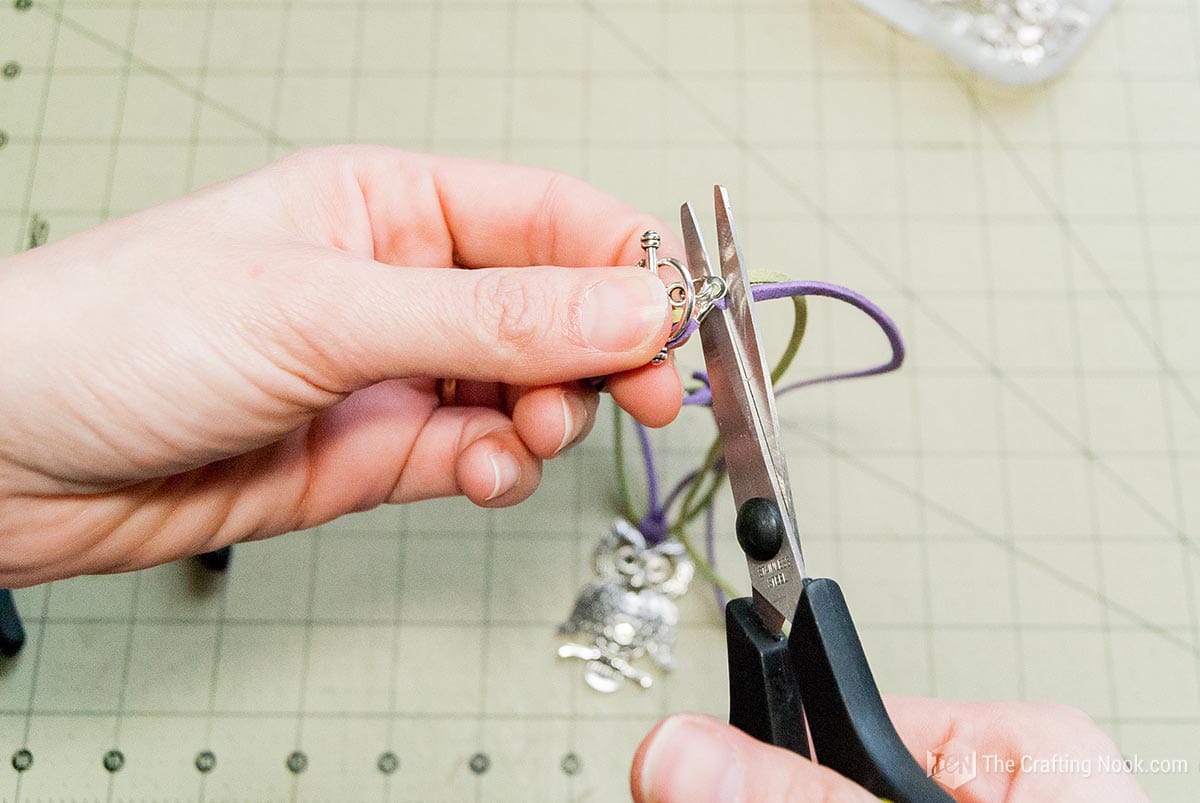
That’s it, A finished necklace!!! You have now a super cute leather cord necklace!

Cute isn’t it???

Crafting Tips
- Use unconventional materials for your pendant. Sure, you can use a traditional metal or gemstone pendant, but why not mix it up a bit? Try using a seashell, a small piece of driftwood, or even a mini toy figurine as your pendant. The possibilities are endless!
- Experiment with different knotting techniques. Don’t just stick to the basic knots – there are so many different knotting techniques out there that can add depth and dimension to your necklace. Try a macrame knot or a lark’s head knot for a unique touch.
- The finishing touches can make a big difference in the overall look of your bracelet. Make sure to trim the ends of the leather cord neatly and use jump rings to attach a clasp for easy wearability. You can also add a dab of glue to the ends of the leather cord to secure them and prevent fraying.
- Play around with asymmetry. Who says your necklace has to be perfectly symmetrical? Try placing your pendant off-center or using different lengths of cord on each side for a playful, casual look.
- Add beads or charms for extra flair. If you want to add a little extra something to your necklace, try incorporating beads or charms into the design. You can use them to add pops of color, texture, or even symbolism to your piece.
- Don’t stress too much about achieving perfection. Handmade bracelets are meant to have character and charm, so embrace the imperfections! If a jump ring is a little wonky or your knots aren’t perfectly even, don’t worry about it. It’s those little quirks that make your bracelet one-of-a-kind and full of personality.
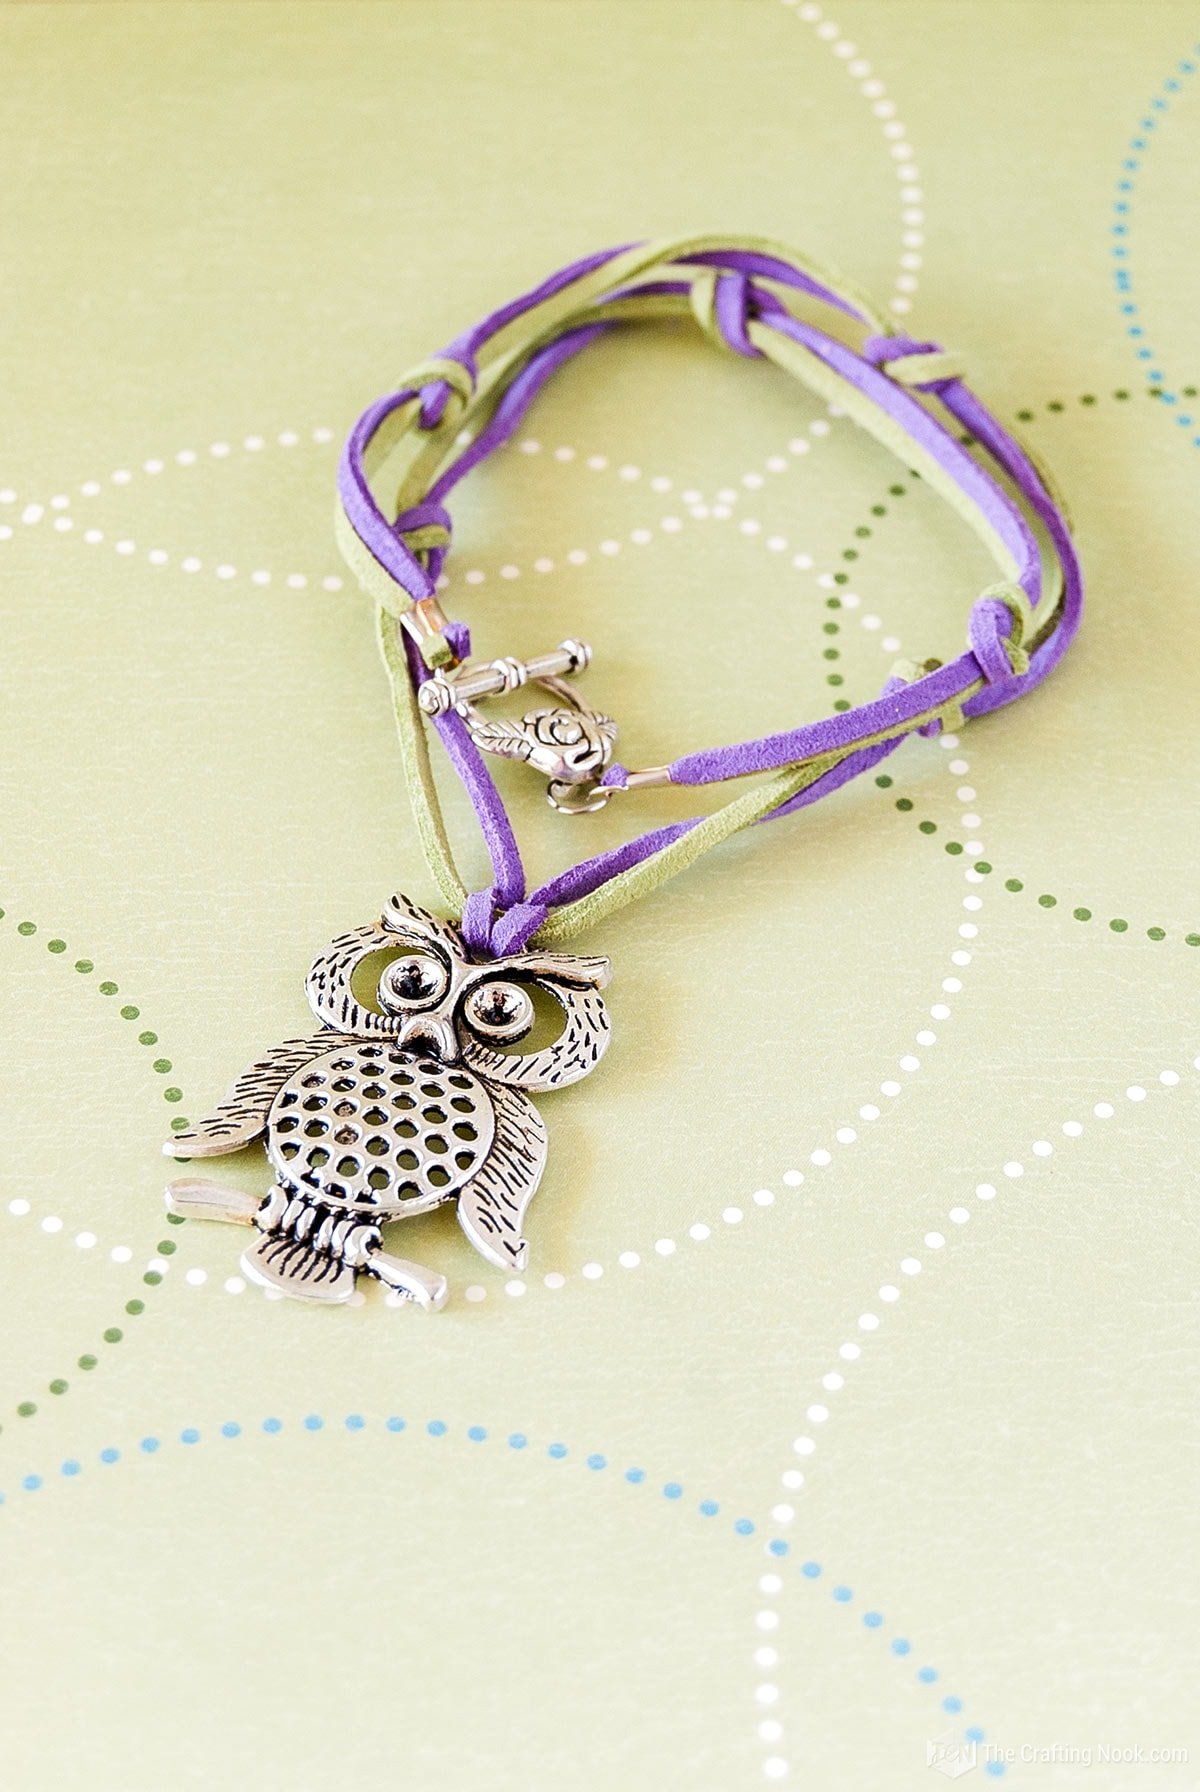

How do I look? I LOOOOVE it!!!
What do you think????
Frequently Asked Questions
You can use any type of leather cord that you like! Some common options include round leather cord, braided leather cord, and flat leather cord. You can also mix and match different types of cord for a more textured look.
Oh, absolutely! Mixing and matching different colors of leather cord is a fantastic way to add a playful and vibrant touch to your bracelet. Don’t be afraid to go wild with your color choices and let your creativity shine!
Oh, absolutely! Charms are like little personality boosters for your handmade jewelry. You can choose charms that resonate with you – whether it’s a cute animal, a fun hobby, or something meaningful to you. Charms can add a playful and personalized touch to your design.
Totally! Mixing up textures is a great way to add some visual interest and tactile appeal to your necklace. You can try braided, stitched, or even embossed leather cord to add that extra oomph to your design. Get playful with it!
Measure your desired necklace length using a tape measure or piece of string. Keep in mind that the knots and pendant will add some extra length, so factor that in when measuring. You can also try on the necklace as you go to make sure it’s the right length.
Leather can be sensitive to water and oils, so be sure to remove your necklace before swimming, showering, or applying lotions or oils. You can also clean your necklace with a soft, dry cloth if it gets dirty.
More Handmade Jewelry Projects to try
If you like this cute leather cord necklace diy tutorial, you might also love these other handmade jewelry projects too:

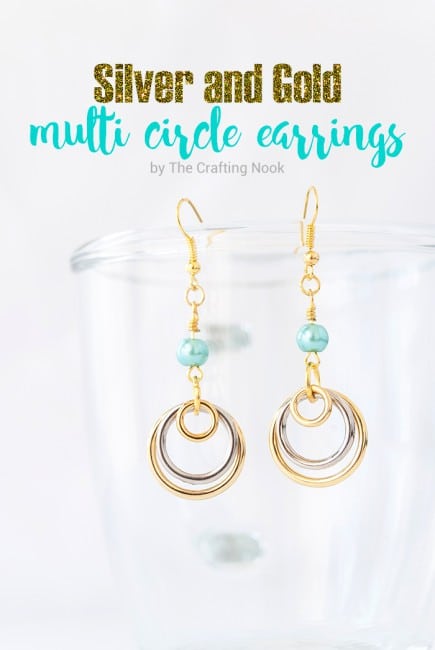
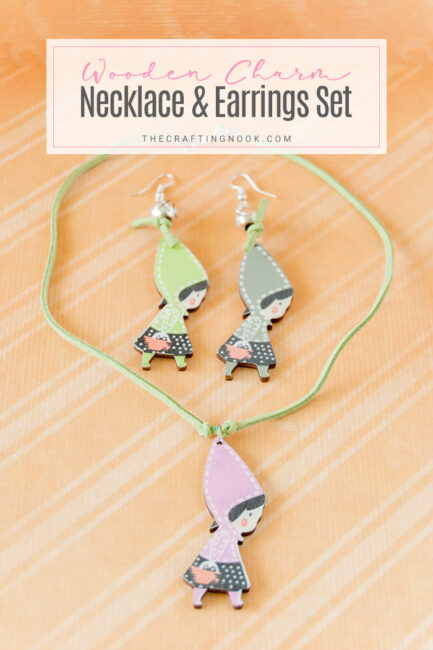
Want some core cute handmade jewelry ideas to make from my favorite bloggers?
- Denim Tassel Earrings by Julie over at Sum of their Stories
- DIY Beaded Arc Wire Necklace by Adrianne over at Happy Hour Projects
- Demin Memory Wire Bracelet by Amy over at Amy Latta Creations
✂️ Tutorial

DIY Leather Cord Necklace with Owl Pendant – Beginners Tutorial
Tools
- Jewelry pliers (flat nose pliers and bent nose pliers)
- scissors
Supplies
- 3 mm Leather cords – I used 2 purple and green but feel free to use your favorite color combination.
- Owl Charm – I used an owl but you can use your favorite one.
- Jump rings 3-5mm
- Fold-over cord crimps that match your cord thickness
- Clasp – I used a very cute toggle clasp bar and ring
Instructions
- I used 2 colors, which means 2 cords. I used green and violet.
- I cut them to equal size, long enough that when the knots are made, the necklace is still on the wished length.
- It’s always better to have leftovers than to need more leather later.
- Since the hanging hole is too small, I used just one of the cords to attach the pendant. I took the violet string and I fold it in half.
- I inserted the folded end through the hole, from the back to the front.
- When it was out, I left a few centimeters (about an inch).
- I inserted the other end (both cords) through the folded end.
- I pulled the cord leaving a little space.
- Through that space, I inserted the green cord halfway.
- I tightened the violet cord to secure the green one in place.
- At this point, you should have both colors on each side of the pendant.
- I made the first knot a few centimeters (about an inch) away from the pendant.
- Make it tight. I tried to make visible both colors on the knot.
- Keeping the same distance I made a knot on the other string set and here is the pattern you’ll follow
- From that point on I repeated the knots at the same distance until it gets the desired length.
- When I got it done I measured again putting the owl where I wanted it to be on my chest.
- Make a mark to guide where to put the clasp.
- I used some fold-over crimp on the string ends.
- I placed it just before the mark because he clasps make the necklaces a bit longer.
- Placing both cords in the cord end, I tightened them with a plier to secure the cords well.
- I didn’t cut the leftovers yet just in case the length needs to be adjusted.
- When I finished with both ends I took some jump rings.
- With your pliers, open a little bit one jump ring, enough to insert the cord end ring.
- I inserted the cord end and the clasp on each end.
- I closed the jump ring again, of course.
- Now if everything is ok and the length is right, cut the leftover cord.
- That’s it!!! You have a super cute leader cord necklace!
Share and PIN ME!!!

Til’ next time…


FREE WORKBOOK
Keeping your Sweet Home Organized
Learn how to create intentional habits and simple routines to Keep Your Home Organized. Plus freebies, printables, exclusive content, and tips.
Disclaimer: By clicking on the “Yes” button above you are giving me your consent to collect and use your information according to the law and My Policy Privacy. Zero Spam I promise!
so so cute and i love the green and purple together. Thanks so much for linking up last week at Creativity Unleashed. You were this week’s FREE ad space winner! Featuring you tomorrow on the blog and hope to see you back. :)
Yayyyy how cool! This is super exciting Thanks so much Jocie! I’ll be there!!
XOXO
I love that this is so simple and nice :) I have a lot of leather cord just like this and have been looking for things to do with it!
Natalie,
natalie-patalie.blogspot.com/
I’m glad to inspired and give some purpose to your leather cords! Can’t wit to see it! XOXO
I wanted to let you know that You Were Featured on VMG206 ~ Brag About It Tuesday’s Linky Party from last week! I have pinned your project to my Brag About It Features Pinterest Board. I can’t wait to see what you’ve been working on this week!
~ Megin
Join me each Tuesday for Brag About It Link Up Party
YAYYYYYY woot woot!!! Wowwww Thanks so much Megin!!! I’m so excited! Can’t believe it!!!!
Hugs
Cami
This is so cute; I love owls too! Thanks so much for linking up to Inspire Me Wednesday. Featuring you in this week’s issue.:)
WOOHOOOOOOO, So exciting!!! Thanks so much!!! What an Honor!!! I’ll be there!!!
Hugs
Cami
I absolutely love this! I’m definitely going to use your steps on how to do it and create my own! Thanks for sharing at Friday follow along! http://Www.leahinspired.com
I’m so glad it inspired you!!!
Hugs
Cami
I love this necklace! It’s so cute :) I would love to make one someday when I have the time lol. Hope you have a good week!She Turned Her Dreams Into Plans
Yayyy Thanks so much Stephanie! glad you like it!
Hugs
Cami
This is very cute, indeed, Cami! Love your step-by-step tutorial :-) Thank you for sharing at our All My Bloggy Friends Party !
Yayy Linda Thanks soooo much!!!
Hugs
Cami
I love this, and the tutorial is awesome! Thanks so much for sharing with us at A Bouquet of Talent. Just pinned this cutie, too! :)
Hugs
Kathy
Yayyyy Kathy, I’m so happy you like it! Hope to have you around soon!
Hugs
Cami
I love everything owl!
Very cute!
Sam
cooksandcreates.blogspot.com
Thanks you Sam!!! So nice to have you here!!
xoxo
Cami
so cute!!! I’m hopping over from Sarah’s blog hop. Hugs!
Yayyy Katherine, so glad to have you here!! Happy that you like it!
Hugs
Cami
OOOw is so beautiful!!!With your tutorial looks not so dificult..
thanks for sharing a tut.
http://freestilcreatingbyvilly.blogspot.gr/2013/05/morning-walk-to-beach-and-brilliant.html
Thanks so much Anastasia!!! Hope to have you around soon!!!
Hugs
Cami
So cute!
Come party with APIMP!
I would love for you to share and link up at my TGIF Link Party.
http://apeekintomyparadise.blogspot.com/2013/05/tgif-link-party-3.html
Hugs, Cathy
Thank so much I’m heading over there now!!
Hugs
Cami
SO CUTE! I always get so inspired by your creations then I cant seem to find the commitment to follow through. this one is TOO easy though. If I can’t find the time to do this than I am really behind!! Thanks for sharing and as always for the inspiration! This is a MUST DO!
Awww you are so sweet! I’m so happy I inspire you! This is a super easy necklace! I’d love to see it when you make it!
hugs
Cami
I love it and look forward to making some too.
Yayyy Can’t wait to see it!!!
Hugs
Cami
I love this idea and have to try it.
Thank you so much! I would love to see it when it’s done!!!
Hugs
Cami
I love your necklace and the colors are the best. I have light green and lavender in our room and bathroom. They go so well together. Thanks for the cute Mother’s day cards. I love picture of you and your baby, so adorable, just love babies. Your tutorial for the necklace is so helpful. Happy Days
Yayyyy Thank you so much, you have no idea how much it means to me that people like my work and inspires them! You are very sweet and your comment is even sweeter! and yes I love those colors too =D
Hugs
Cami