DIY Easy Leather Cord Bracelet
This post may contain affiliate links. Please read our Disclosure Policy.
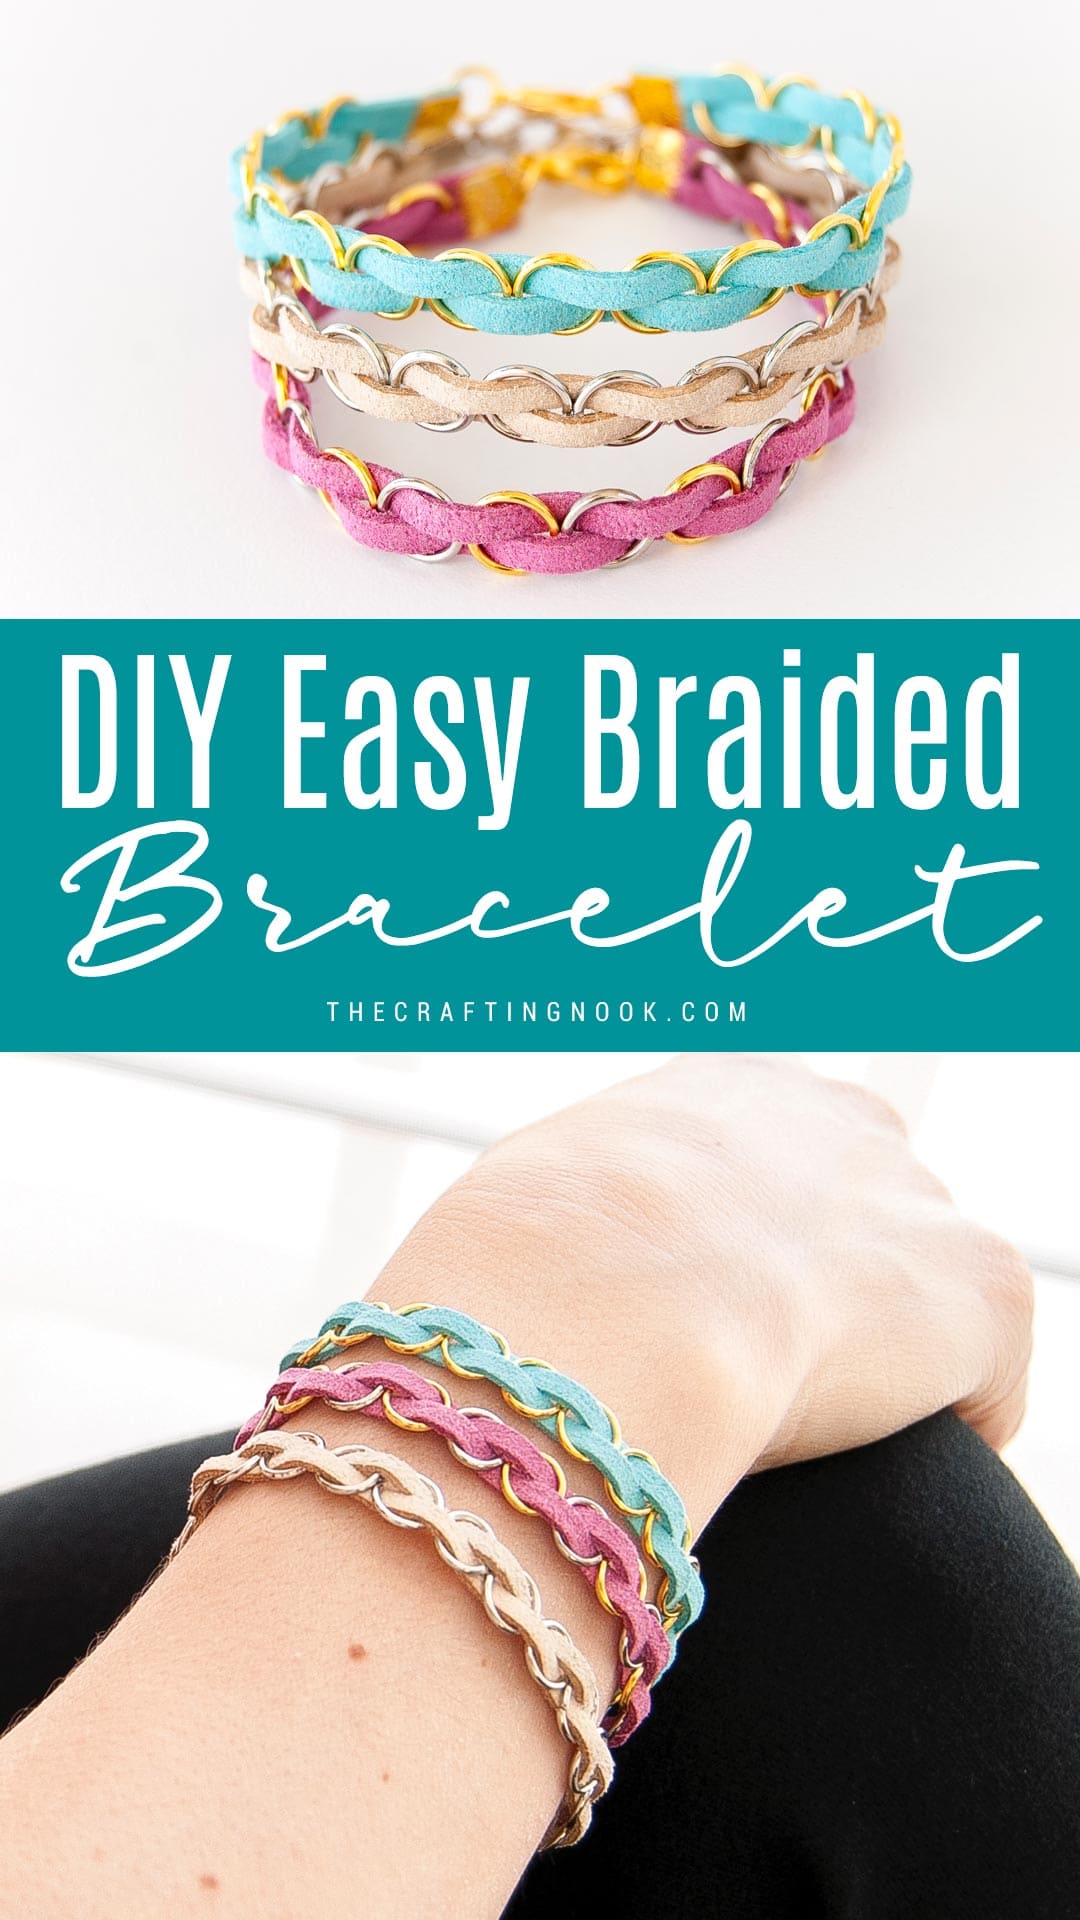
This cute leather cord bracelet DIY is so easy to make. The toughest part is deciding on a color scheme. Learn how to make these pretty bracelets here.
Today I come doubly excited! Oh yeah! Today I’m sharing a super fun and easy crafty Jewelry piece that I just LOVE and I’m also sharing my very first video tutorial ever in this easy braided bracelet DIY.

Table of Contents
Creating a Leather Cord Bracelet
How cool is that? But ok, please, forgive my video mistakes as it’s my first and I kind of moved the camera by accident a couple of times and also went out of the camera. I’m still getting the hang of it. Still, I love how it turned out!!!
I saw this bracelet a long time ago and it got stuck in my head. Although I’m not sure it was made exactly like this, I thought I would finally give it a try with how I could remember.
It’s fun, it’s easy to make, and most of all it’s so versatile. You can make it in any color; you can combine colors and metallic parts and you can use different sizes of cord and jump rings. I had so much fun I made 3 all at once LOL.
Easy crafts are my faves, anything I can make in minutes or at least within the same day is awesome and that’s why I loved these braided leather bracelets so much.
This style of bracelet is so quick to make, in one hour you can have about 10 of these finished LOL. Hope you enjoy this tutorial and that it inspires you to make some for yourself.
This braided bracelet DIY is one perfect craft to work with kids. You can let them do the braiding or looping and you take care of the pliers at the end.
These cuties are also perfect as fun friendship bracelets and gifts! You will never go wrong with crafty jewelry!

Why do you call this a braided bracelet?
Well, that was the closest name I could find. Although it’s not an actual braid, it kind of looks like one.
How to Make a Leather Cord Bracelet
So Let’s get to it, shall we?
You’ve got this!!
Supplies:
- 2 Leather cord strands – I used 3mm.
- Lobster clasp
- About 10 to 15 jump rings (the size should be twice the width of the cord) – I used 6mm.
- 1-3mm jump ring for the clasp
- 2 Cord crimp clasp ends (the size should be twice the width of the cord) – I used 6mm.
- Fabric glue *optional.
Tools:
- Bend nose pliers
- Flat nose pliers
- Scissors

Step by Step Instructions:
Before we begin, be sure to follow us on Pinterest, Facebook, Instagram, and YouTube, and also sign up for our email list (at the end of this post), so you’ll never miss a post!
Preferably work on a flat surface, depending on the colors you are working with, I even recommend laying a white sheet so you can see all the little items you are going to use for this bracelet project.
Step 1: The braiding
- Start by getting your 2 leather cord strands and align them together. Then insert them into one jump ring: one strip from front to back and the other one from back to front. Like this:

- Then insert a second jump ring but then inverse the process. The strip that came from the back, insert it from front to the back. You should get something like this:

- Keep inserting jump rings alternating the strips until you get the right size for your wrist.


Step 2: Install crimp clasp ends
- Cut any excess of the leather cord leaving a few millimeters to put the cord ends.
- Put together both cord strip ends and put in place the cord crimp end, optionally add a dab of fabric glue and close it. With a flat nose plier secure the cord end. These type of cord ends has sort of teeth so once you secure them they won’t come off unless you push really hard.

Step 3: Install the clasp
- Open a jump ring with your pliers and insert the cord end and your lobster clasp. Close the jump ring.

- Do the same on the other end of the bracelet but this time insert only the cord end. Close the jump ring.
- Repeat this process with different cords and colors.

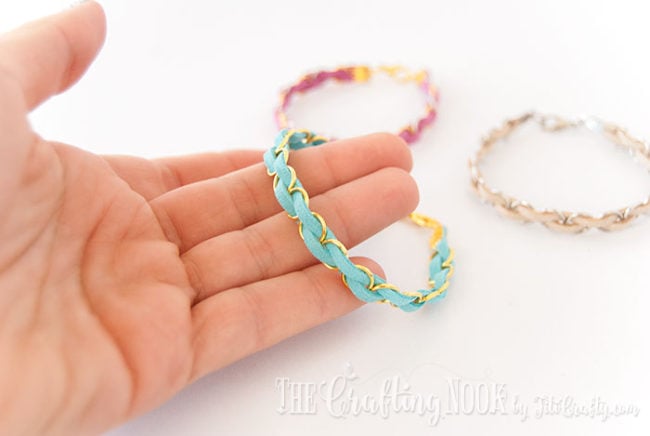
There you go, You got yourself some really cute Braided bracelets!


How cute and pretty are these easy leather cord bracelets?
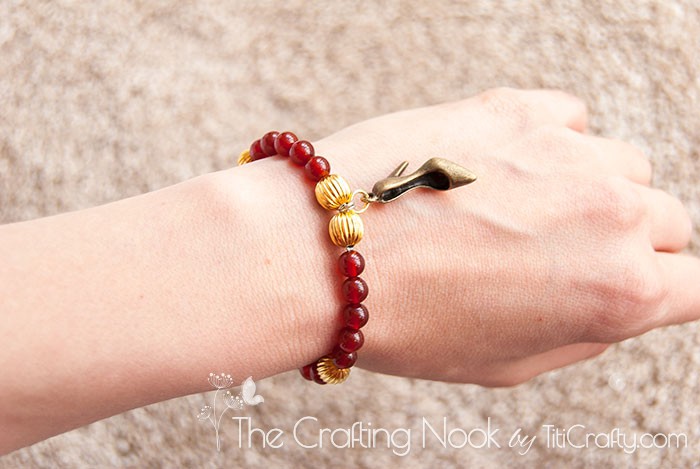
Optionally and as a final touch, you can add charms hanging from the jump rings so you can have your own charm bracelets.
I decided to keep them simple and I love it!

Crafting Tips
- Working with jump rings requires some basic jewelry-making tools, such as pliers. Flat-nose pliers can be used to open and close jump rings, while round-nose pliers are handy for creating loops or bending wire. Make sure you have the right tools on hand to make your job easier and more precise.
- To make your bracelet even more fun and unique, consider adding charms or beads to your design. Charms can be attached to jump rings or threaded onto the leather cord, while beads can be used to add color and texture. Play around with different combinations to create a personalized bracelet that reflects your style.
- The finishing touches can make a big difference in the overall look of your bracelet. Make sure to trim the ends of the leather cord neatly and use jump rings to attach a clasp for easy wearability. You can also add a dab of glue to the ends of the leather cord to secure them and prevent fraying.
- Don’t stress too much about achieving perfection. Handmade bracelets are meant to have character and charm, so embrace the imperfections! If a jump ring is a little wonky or your knots aren’t perfectly even, don’t worry about it. It’s those little quirks that make your bracelet one-of-a-kind and full of personality.


LIKE IT??? Please leave me your comments and ideas below in the comments!
Frequently Asked Questions
I used leather cord, but heavy or thick ribbon can work, jersey -r t-shirt yarn can make super cute bracelets too. But the best results can be found with a leather cord for sure.
Ok short answer, it depends. The size of the cord is totally up to you but the jump ring size and crimp clasp will depend on the size of the cord. For example: for a 3mm leather cord, you would use a 6mm jump ring and crimp. If your cord is 6mm, then your jump rings and crimps should be 12mm.
Oh, absolutely! Mixing and matching different colors of leather cord is a fantastic way to add a playful and vibrant touch to your bracelet. Don’t be afraid to go wild with your color choices and let your creativity shine!
Oh, absolutely! Charms are like little personality boosters for your bracelet. You can choose charms that resonate with you – whether it’s a cute animal, a fun hobby, or something meaningful to you. Charms can add a playful and personalized touch to your design.
Totally! Mixing up textures is a great way to add some visual interest and tactile appeal to your bracelet. You can try braided, stitched, or even embossed leather cord to add that extra oomph to your design. Get playful with it!
More Handmade Jewelry Projects to Try
If you like this crafty and easy leather cord bracelet DIY tutorial, you might also love these other handmade jewelry projects too:

✂️ Tutorial

Easy Braided Bracelet DIY
Tools
- Bend nose pliers
- Flat Nose Pliers
- scissors
Supplies
- 2 Leather cord strands – I used 3mm.
- Lobster clasp
- About 10 to 15 jump rings the size should be twice the width of the cord – I used 6mm.
- 1 3mm jump ring for the clasp
- 2 Cord crimp clasp ends the size should be twice the width of the cord – I used 6mm.
- Fabric glue *optional.
Instructions
- Preferably work on a flat surface, depending on the colors you are working with, I even recommend laying a white sheet so you can see all the little items you are going to use for this bracelet project.
STEP 1: THE BRAIDING
- Start by getting your 2 leather cord strands and align them together. Then insert them into one jump ring: one strip from front to back and the other one from back to front.
- Then insert a second jump ring but then inverse the process. The strip that came from the back, insert it from front to the back. You should get something like this:
- Keep inserting jump rings alternating the strips until you get the right size for your wrist.
STEP 2: INSTALL CRIMP CLASP ENDS
- Cut any leftover of the leather cord leaving a few millimeters to put the cord ends.
- Put together both cord strip ends and put in place the cord crimp end, optionally add a dab of fabric glue and close it. With a flat nose plier secure the cord end. These type of cord ends has sort of teeth so once you secure them they won’t come off unless you push really hard.
STEP 3: INSTALL CLASP
- Open a jump ring with your pliers and insert the cord end and your lobster clasp. Close the jump ring.
- Do the same on the other end of the bracelet but this time insert only the cord end. Close the jump ring.
- Repeat this process with different cords and colors.
- There you go, You got yourself some really cute Braided bracelets!
- Optionally and as a final touch, you can add charms hanging from the jump rings so you can have your own charm bracelets.
Some really cool handmade jewelry pieces from my favorite bloggers:
- Leather Wrap Bracelets with Charm by Amy Latta Creations.
- DIY Studded braid bracelets by A Pumpkin and a Princes.
- T-shirt yarn bracelets by Blue Bear Wood.
If you enjoyed this tutorial, don’t forget to PIN it and share it with friends.
Til’ next time…


FREE WORKBOOK
Keeping your Sweet Home Organized
Learn how to create intentional habits and simple routines to Keep Your Home Organized. Plus freebies, printables, exclusive content, and tips.
Disclaimer: By clicking on the “Yes” button above you are giving me your consent to collect and use your information according to the law and My Policy Privacy. Zero Spam I promise!