DIY Christmas Buffalo Plaid Wreath with Monogram
This post may contain affiliate links. Please read our Disclosure Policy.
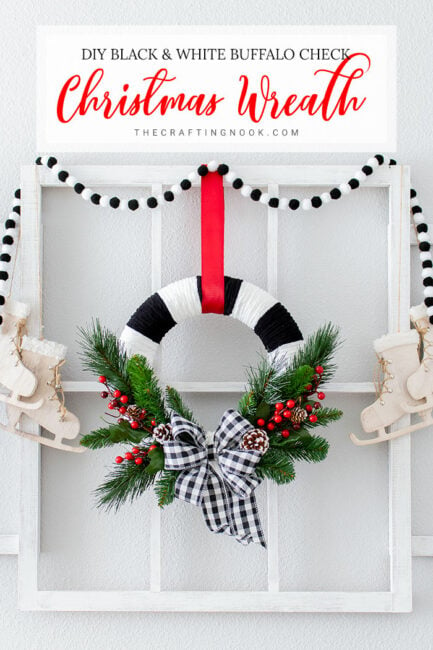
Let’s get festive with a gorgeous Christmas Buffalo Plaid wreath DIY! Crafted with love, buffalo plaid ribbons and a personal touch with a monogram add a touch of cozy cheer to your holiday decor. Follow our easy steps and spread the holiday spirit with this adorable creation!
A Plaid Wreath wreath is a perfect addition to a rustic holiday décor. This Monogrammed Christmas Wreath is quick and easy to make. It’s the perfect blend of traditional and modern and the part is that everything in here can be undone so you can reuse every item. No glue, no sew, no permanent attachments.

Table of Contents
A Festive Christmas Buffalo Plaid Wreath with Monogram
Ok ok, there is only one thing that needed hot glue but it can also be released since it’s in the back. That is the Monogram.
Anyway, I’ve made a tradition to ALWAYS have a Christmas Wreath. I try my best to make them different but it seems clear that I have a particular style in which even though I use different items the wreaths always have the same style.

I love the holidays, the music, the scent, the food, the decorations, and the time with my family makes me look forward to this season for most of the year every year.
To be honest, I especially love any excuse so I can make my home festive, and this year I decided to make my decor all red and white with black here and there.
Crafting your own decorations is a great way to get your creative juices flowing and to make your home so special and unique! Follow along in this tutorial and you’ll see how easy it is to make your own Buffalo Plaid Wreath diy!
If you don’t remember my previous Christmas wreath, here are my favorite in case you want to take a look:
- Rustic Burlap Christmas Wreath
- Farmhouse Christmas Wreath
- Red and gold Christmas Wreath
A few facts about this Monogrammed Buffalo Plaid Christmas Wreath
- I’ve reused my last year’s wreath foam which was made out of a pool noodle. Yup, you heard the right. Super easy and cheap! I even had it still wrapped in light-shade burlap ribbon and I decided to use it as it is.
- Everything I added I either attached it with pins or thread, no glue except for the monogram which I used hot glue to attach a ribbon to the back. So it will be easy to dissemble it and re-use the items later on.
- It could cost nothing if you happen to have all the items. I know it’s easy to say it but if you have greenery or Christmas tree sprigs, plaid fabric or ribbon, a wooden letter (for the family name) and a few ornaments you are done! If you don’t have it all, you will probably spend hardly a few bucks!
- It can be finished in about 30 minutes.
How does this sound?
Good, right?
The best part?
You don’t even need to be an experienced crafter to put this wreath together!
So, shall we start?
How to Make a Monogrammed Christmas Buffalo Plaid Wreath
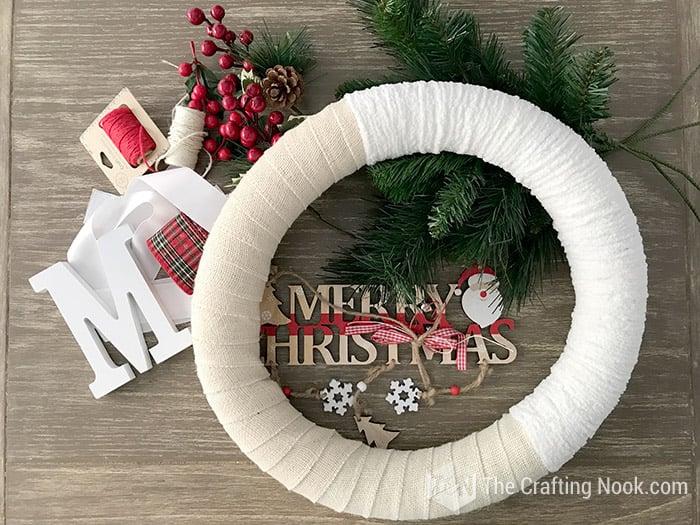
Supplies:
- Wreath form frame – I made my own foam wreath form with a pool noodle, if you want to learn how, check it out HERE.
- Light or white burlap ribbon (2 Inches wide x 3 yards)
- Buffalo Plaid Ribbon or fabric (2 Inches wide X about 2 yards)
- White ribbon for the bow and hanger (1,5 Inches wide)
- 4 Christmas tree springs (or as many as you like also will depend on the size and shape)
- Thread or yarn (same color as burlap ribbon)
- 2 Cranberry sprigs
- Wooden Merry Christmas Sign.
- Wooden Letter (You family name’s Letter)
Tools:
- Scissors
- Hot glue gun and glue sticks
- Pins
- A wreath hanger
Instructions:
Prepping the wreath base
My wreath foam was homemade, I made it for my Rustic Christmas Wreath and you can find the tutorial to make one if you want to save some money!

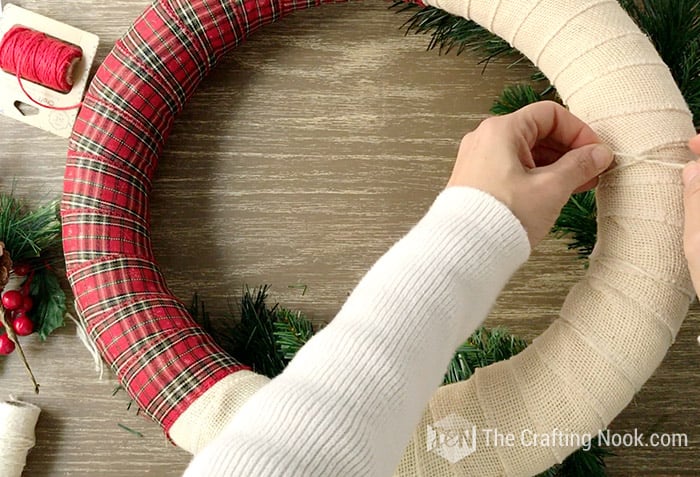
Start wrapping the wreath foam with the light beige burlap ribbon and covered about 50% of it.
Secure the ends with a string of yarn or twine. I do it like this because I will be using the wreath foam and the burlap in the future so I don’t want to damage either of them.
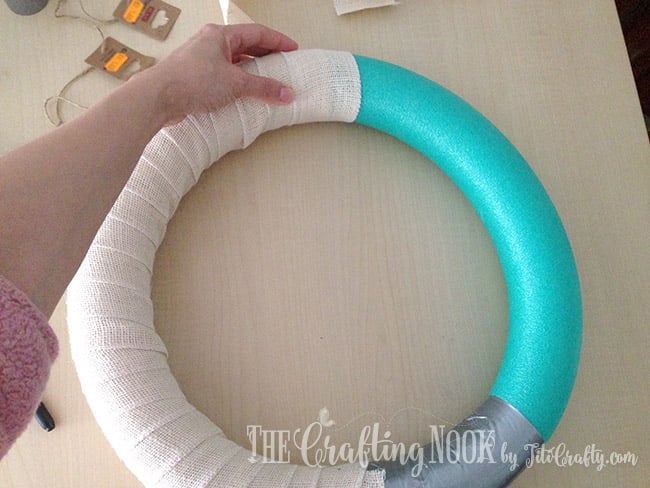
Then wrap the other 50% with the Buffalo Plaid ribbon overlapping the burlap on both ends.
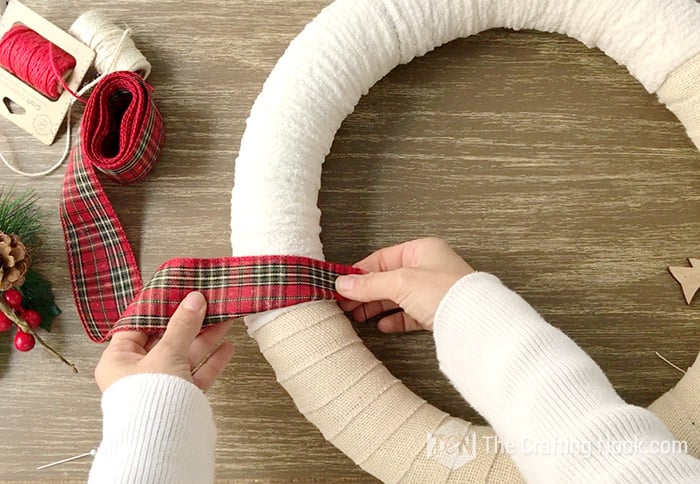
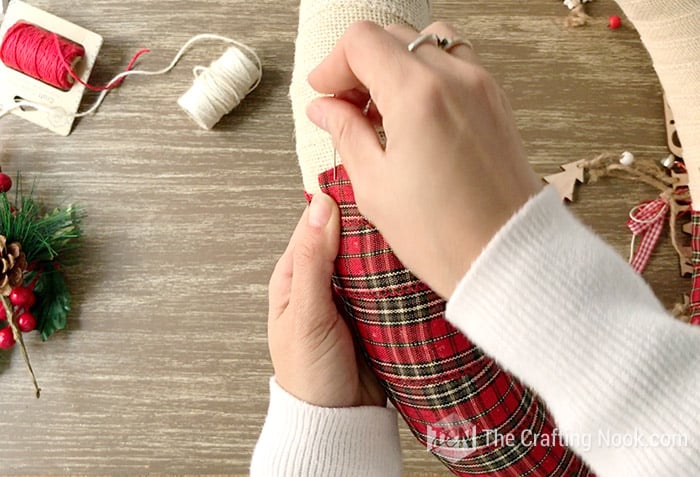
Secure the first end with a pin.

When you reach the other end cut the ribbon and pinned it in place making sure the tip went through the foam and on the back of your wreath.
The wreath base is ready!

Wreath Decoration
So let’s set that the plaid ribbon part is the top of the wreath and the burlap is the bottom.
Now, take your Christmas tree springs, try to curve them a little bit to match the wreath shape.
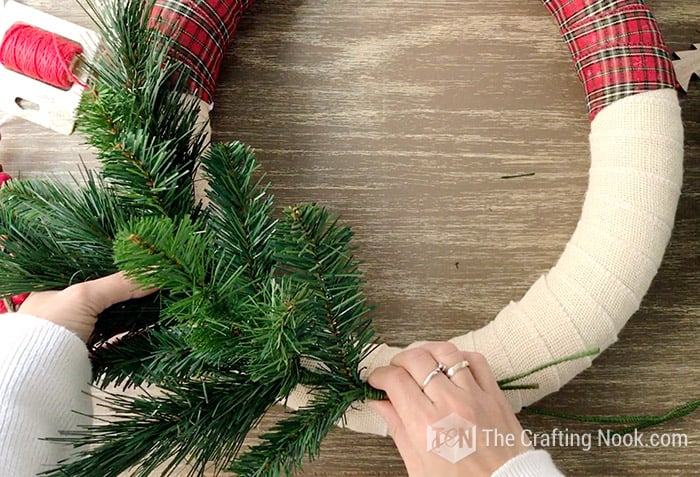
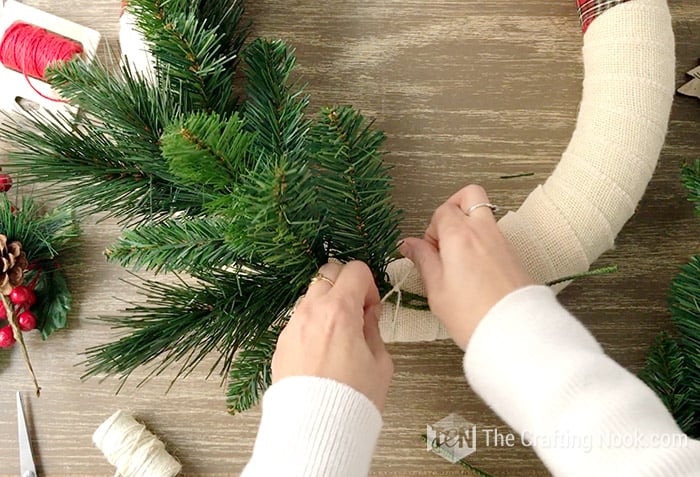
Once you decide the perfect place, secure them with yarn or twine strings preferably the same color as the burlap.
Place 2 Springs on each side, one on top of the other but slightly displaced so it would look larger and fluffier.
The spring stems should meet and overlap right in the middle of the lower side of the wreath foam.
Also, secure the Springs in as many places as you need so they don’t fall or lose position when you hang the wreath.
When you are happy with your spring placing, insert among the spring branches a cranberry spring to add a pop of color.
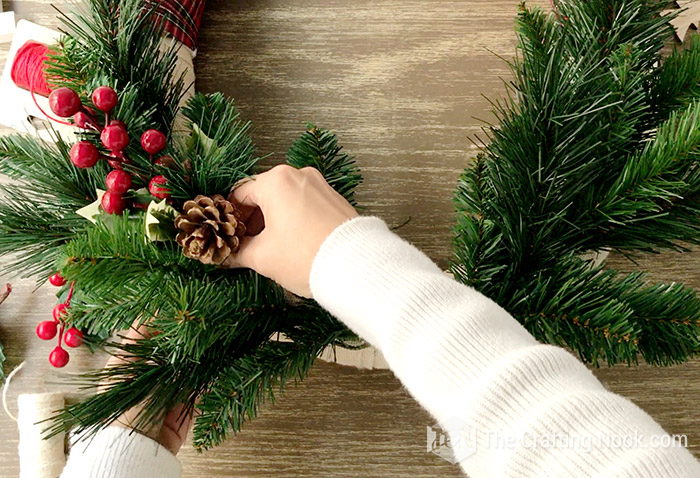
Add one spring or more on each side. Secure with twine or yarn if necessary.

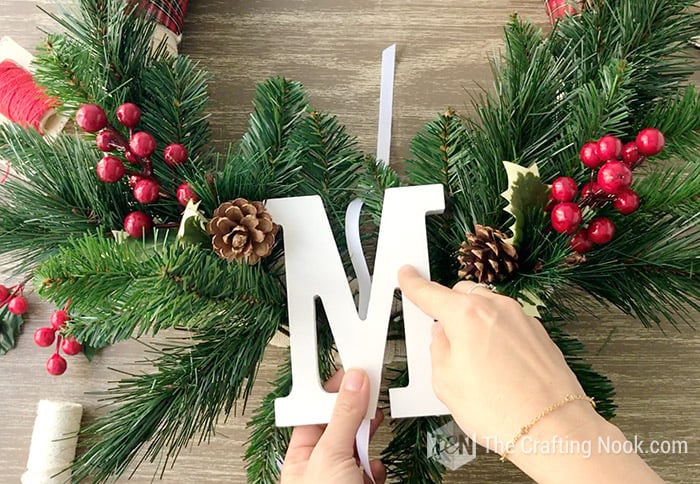
Then using your hot glue gun, secure a piece of thread or ribbon to the back of your wooden letter. You can use wood stapler too.

When the glue is completely cold and the ribbon secured, place the letter on top of the Spring stems right in the middle and tie a knot or a bow on the back of the wreath foam to secure the monogram.

If by any chance you notice the monogram slides towards the bottom of the wreath, just put it back in place and insert a pin on the back through the ribbon into the wreath foam.
There you go!

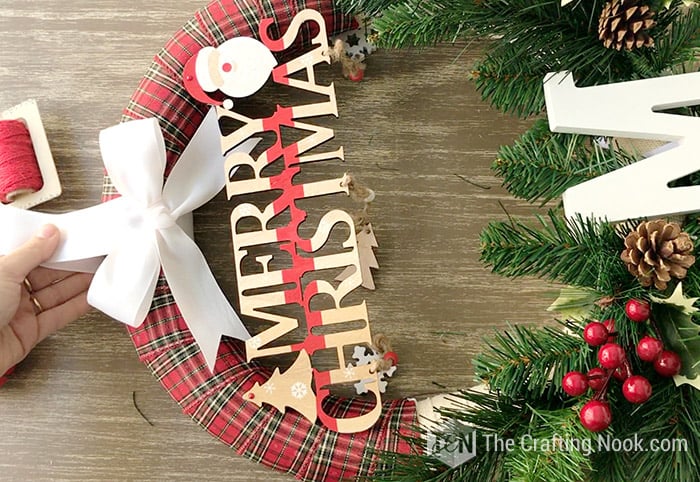
The Merry Christmas sign.
This step is completely optional, but I love greeting people so I almost always add something like this to my wreaths.
You can find wood signs like this at local craft stores or even on etsy or amazon.
Removed the hanging threads and use the holes to secure it onto the wreath foam.

Insert a long sewing pin (those with big ball heads) through the hole, then bent it slightly.

Once you decide where you want it just pin the sign pin vertically on the wreath so it will stay in place.

That’s it!
Last but not least, the wreath hanger!
You can go ahead and hang it directly on your wreath hanger but I love making a ribbon a the top of the wreaths and hang them from there.
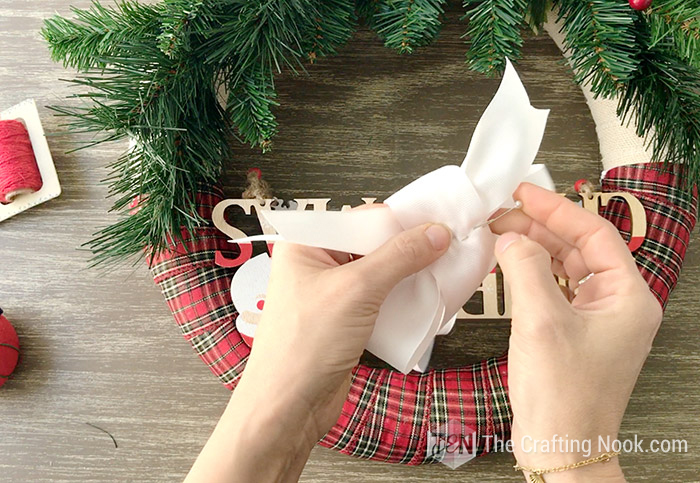
Make a cute ribbon bow.

Use another piece of ribbon to hang the wreath and attach the bow to the ribbon with pins making sure the ribbon stays on the top side of the wreath.

Hang it on your wreath hanger!!!!
Woohoo! Your pretty Christmas Buffalo Plaid Wreath diy is all ready to rock your front door.
Crafting Tips
- Always iron your ribbons before you begin making your wreath so that it looks neat and smooth.
- Put the fake pine springs on top of each other to make your wreath look deeper and more three-dimensional.
- After you have put everything together, take a moment to look at your wreath and make any final adjustments or additions. You can make it more magical by adding decorations like small ornaments, bells, or fairy lights.
- Add natural things like pinecones, cinnamon sticks, or dried orange slices to your wreath. These things not only make your creation smell good for a celebration but also give it a natural and old-fashioned vibe.
- If you want your wreath to smell even better add things a little bit of essential oil to the springs or put scented sachets hidden in the wreath. As people come to your door, they will smell a nice scent.
- Hang your wreath carefully. Use a strong wreath hanger or attach it tightly with a durable ribbon or wire.
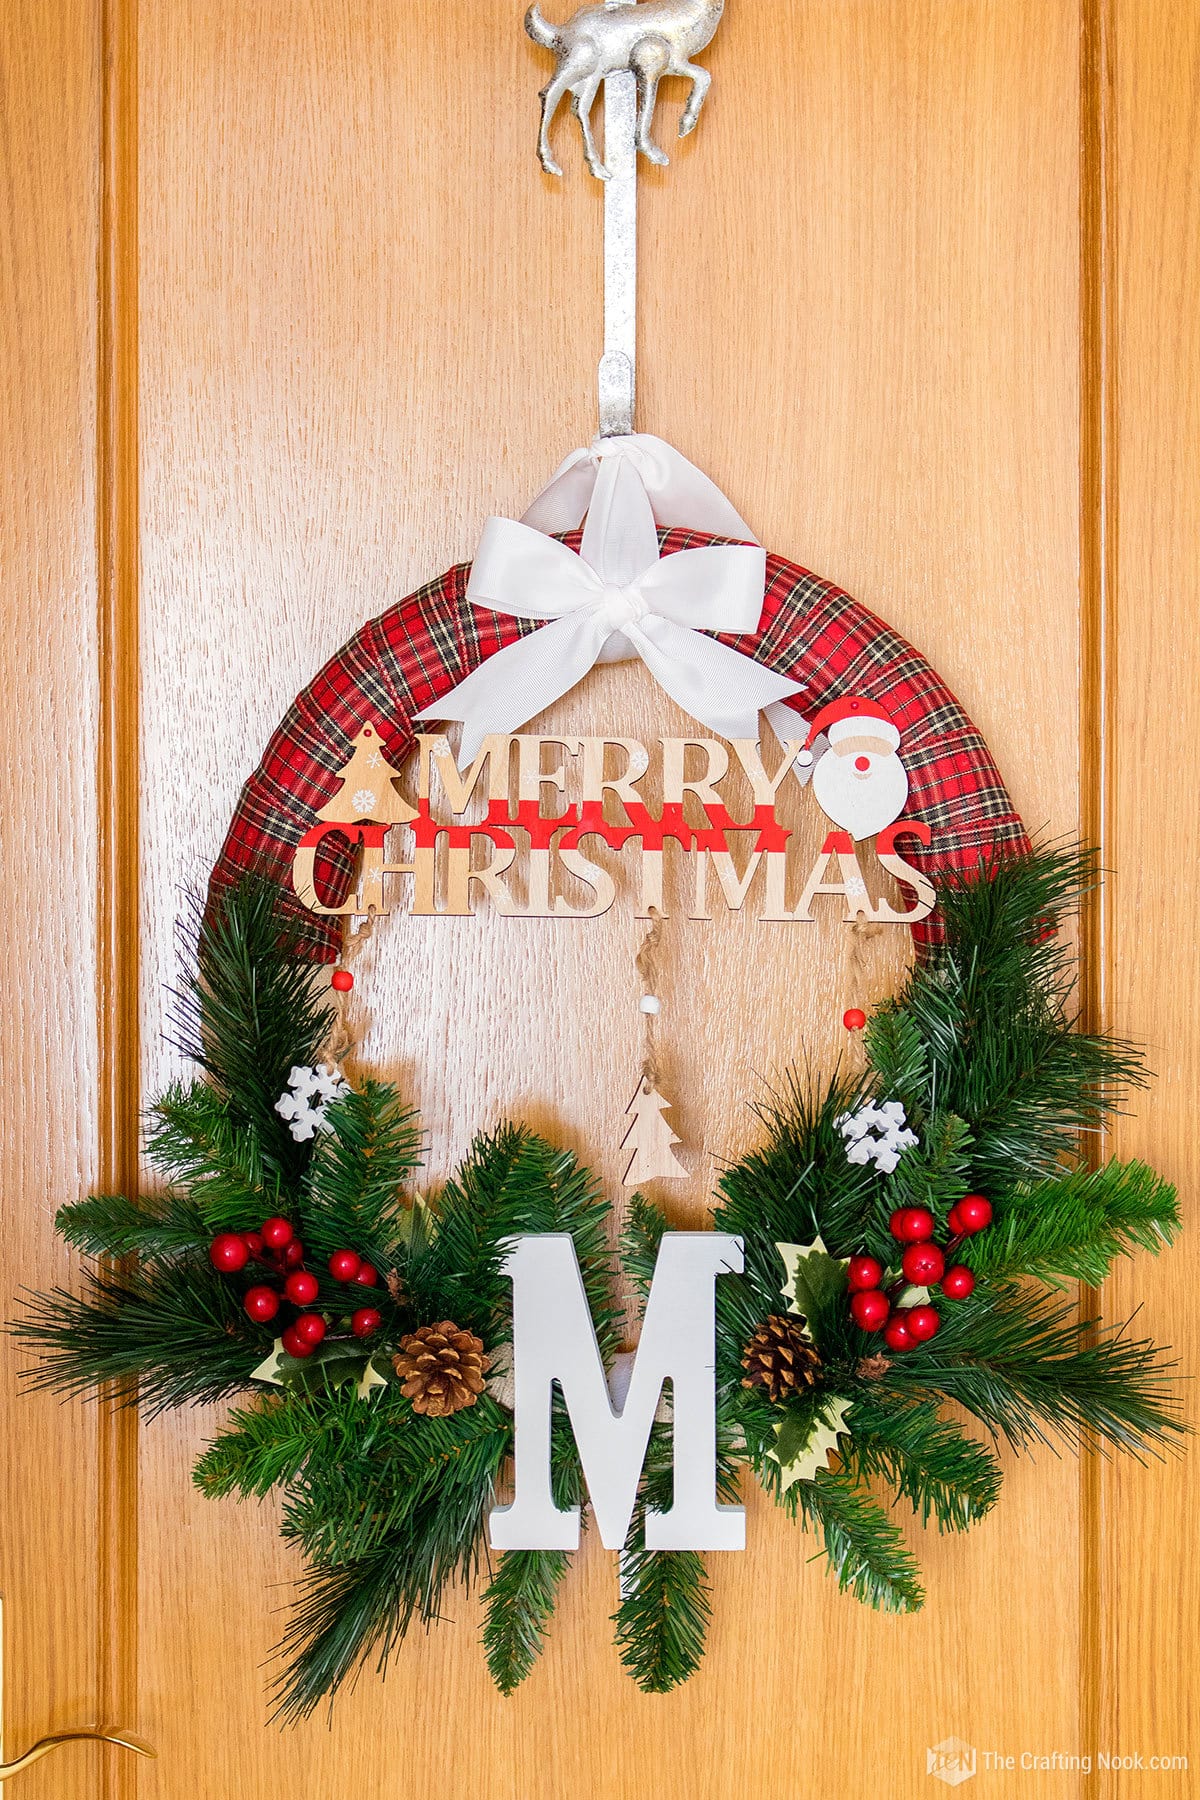
This is how mine turned out!

Frequently Asked Questions
Instead of using glue, you can use floral wire, twine, or T-pins to attach the pieces to the wreath base. Wrap the floral wire around the stems, tie the twine tightly, or put T-pins through the back of the parts and fasten them to the wreath.
Yes, when you use string or T-pins, the elements will stay in place and make a strong wreath. Check and fix the attachments as necessary to make sure the wreath stays in place.
That’s teh whole point. I love being able to reuse as much as possible. so yes, since you’re not permanently sticking anything, you can easily take off the parts and use them again for other projects or to make different wreaths. Just undo or take off the strings and pins, and you can use the parts for something else.
Absolutely, one good thing about not using permanent glue is that you can still make changes to the wreath even after it’s finished. To achieve the design you want, just untie or remove the things attached, move them to where you want them, and then tie or pin them back in place.
If you tie the wreath with strong twine or pins, it will last all through the holiday season. Check the things holding the wreath and make sure they are secure. If they are loose, tighten them up so the wreath won’t fall apart.
More Christmas Wreath Projects to Try
If you enjoyed this Buffalo Plaid Wreath diy project, you certainly will love these other Christmas project ideas too:


✂️ Tutorial

DIY Christmas Buffalo Plaid Wreath with Monogram
Tools
- scissors
- Hot glue gun and glue sticks
- Pins
- A wreath hanger
Supplies
- Wreath form frame – I made my own foam wreath form with a pool noodle if you want to learn how, check it out HERE.
- Light or white burlap ribbon 2 Inches wide x 3 yards
- Buffalo Plaid Ribbon or fabric 2 Inches wide X about 2 yards
- White ribbon for the bow and hanger 1,5 Inches wide
- 4 Christmas tree springs or as many as you like also will depend on the size and shape
- Thread or yarn same color as burlap ribbon
- 2 Cranberry sprigs
- Wooden Merry Christmas Sign.
- Wooden Letter You family name’s Letter
Instructions
PREPPING THE WREATH BASE
- My wreath foam was homemade, I made it for my Rustic Christmas Wreath and you can find the tutorial to make one if you want to save some money!
- Start wrapping the wreath foam with the light beige burlap ribbon and covered about 50% of it.
- Secure the ends with a string of yarn or twine. I do it like this because I will be using the wreath foam and the burlap in the future so I don’t want to damage either of them.
- Then wrap the other 50% with the Buffalo Plaid ribbon overlapping the burlap on both ends.
- Secure the first end with a pin.
- When you reach the other end cut the ribbon and pinned it in place making sure the tip went through the foam and on the back of your wreath.
- The wreath base is ready!
WREATH DECORATION
- So let’s set that the plaid ribbon part is the top of the wreath and the burlap is the bottom.
- Now, take your Christmas tree springs, try to curve them a little bit to match the wreath shape.
- Once you decide the perfect place, secure them with yarn or twine strings preferably the same color as the burlap.
- Place 2 Springs on each side, one on top of the other but slightly displaced so it would look larger and fluffier.
- The spring stems should meet and overlap right in the middle of the lower side of the wreath foam.
- Also, secure the Springs in as many places as you need so they don’t fall or lose position when you hang the wreath.
- When you are happy with your spring placing, insert among the spring branches a cranberry spring to add a pop of color.
- Add one spring or more on each side. Secure with twine or yarn if necessary.
- Then using your hot glue gun, secure a piece of thread or ribbon to the back of your wooden letter. You can use wood stapler too.
- When the glue is completely cold and the ribbon secured, place the letter on top of the Spring stems right in the middle and tie a knot or a bow on the back of the wreath foam to secure the monogram.
- If by any chance you notice the monogram slides towards the bottom of the wreath, just put it back in place and insert a pin on the back through the ribbon into the wreath foam.
- There you go!
THE MERRY CHRISTMAS SIGN.
- This step is completely optional, but I love greeting people so I almost always add something like this to my wreaths.
- You can find wood signs like this at local craft stores or even on etsy or amazon.
- Removed the hanging threads and use the holes to secure it onto the wreath foam.
- Insert a long sewing pin (those with big ball heads) through the hole, then bent it slightly.
- Once you decide where you want it just pin the sign pin vertically on the wreath so it will stay in place.
- That’s it!
LAST BUT NOT LEAST, THE WREATH HANGER!
- You can go ahead and hang it directly on your wreath hanger but I love making a ribbon a the top of the wreaths and hang them from there.
- Make a cute ribbon bow.
- Use another piece of ribbon to hang the wreath and attach the bow to the ribbon with pins making sure the ribbon stays on the top side of the wreath.
- Hang it on your wreath hanger!!!!
- Woohoo! Your pretty Christmas Buffalo Plaid Wreath diy is all ready to rock your front door.
Hope you enjoyed this Monogrammed Buffalo Plaid Christmas Wreath Tutorial as much as I enjoyed making it and sharing with you!
Share and PIN ME!!!

Til’ next time…


FREE WORKBOOK
Keeping your Sweet Home Organized
Learn how to create intentional habits and simple routines to Keep Your Home Organized. Plus freebies, printables, exclusive content, and tips.
Disclaimer: By clicking on the “Yes” button above you are giving me your consent to collect and use your information according to the law and My Policy Privacy. Zero Spam I promise!