DIY Craft & Food Photography Backdrops with Real Wood
This post may contain affiliate links. Please read our Disclosure Policy.
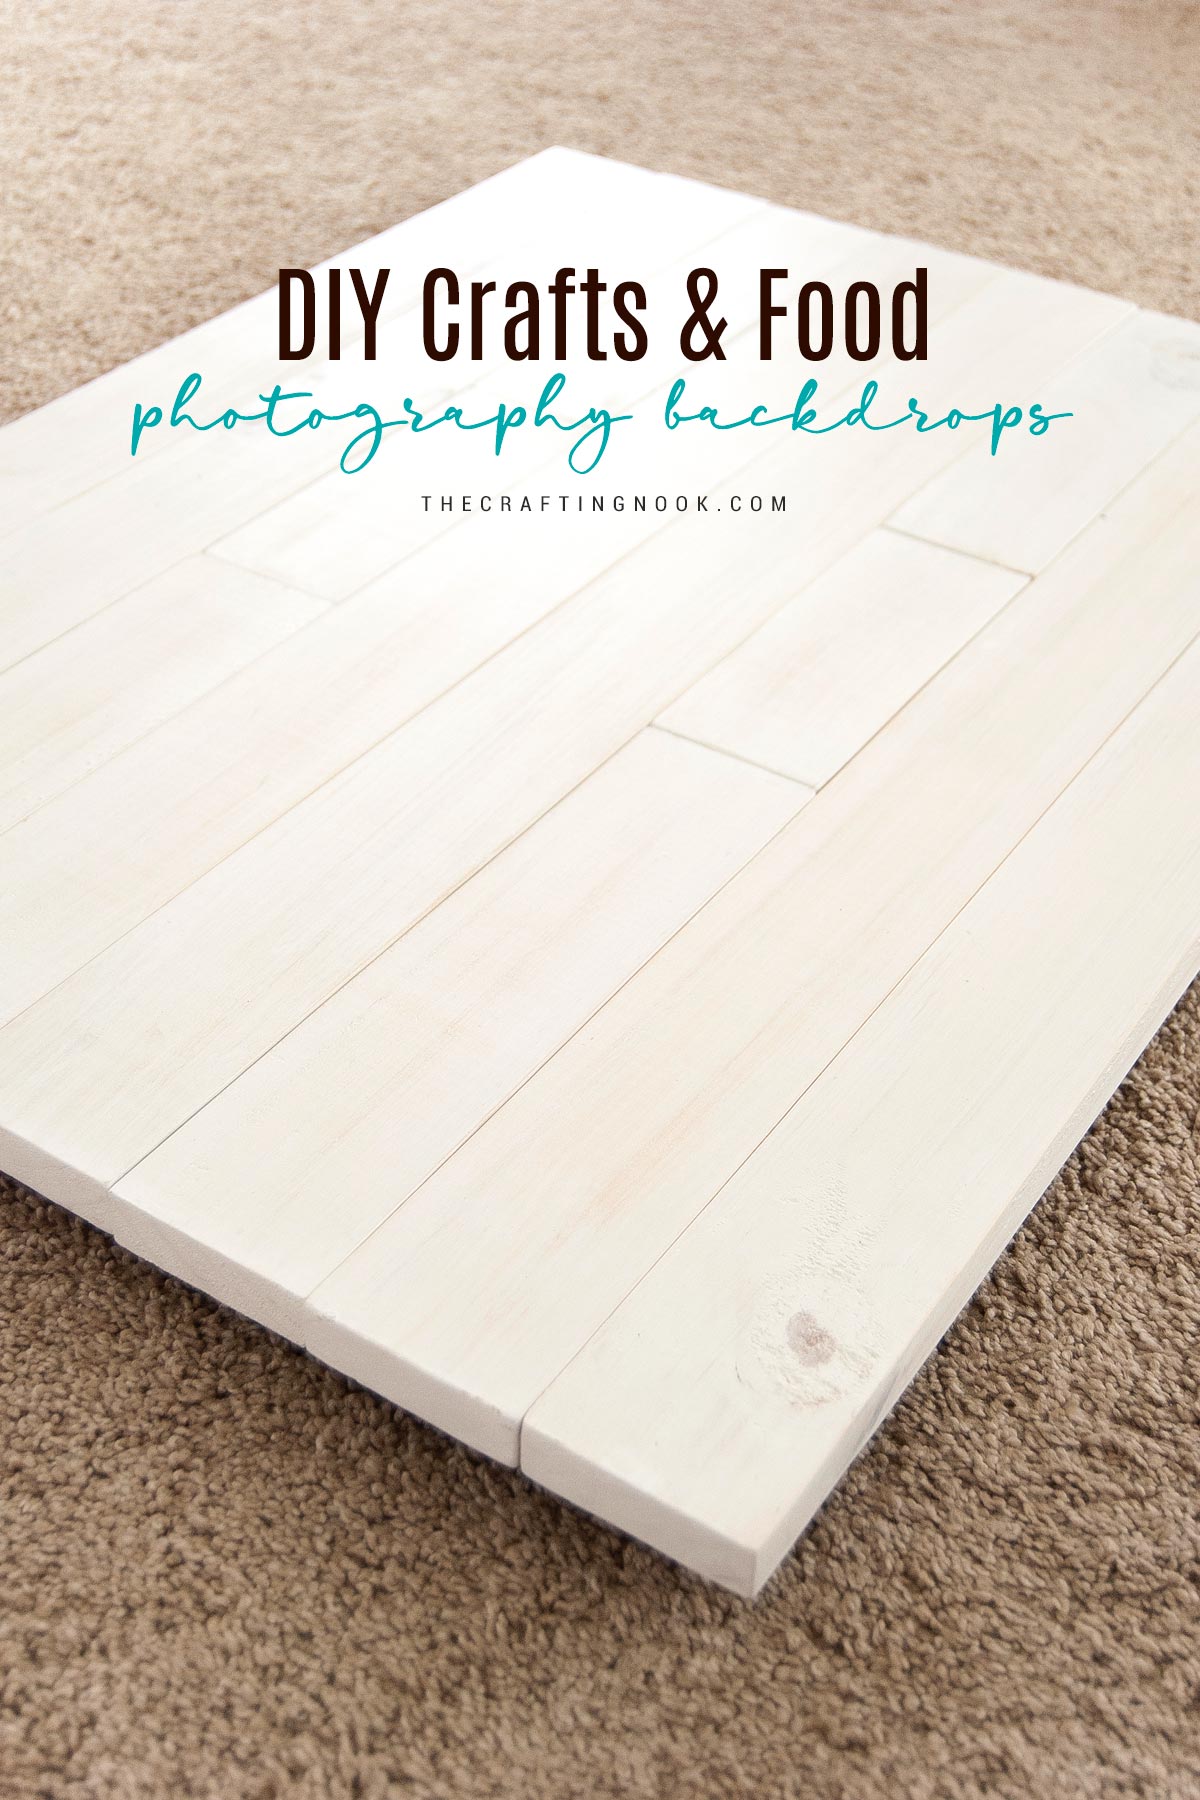
Do you love DIY projects, food photography, and photography backdrops? Well, here are a couple of tips for making your own unique crafts and food photography backdrops with real wood, for cheap, complete with photography examples!
There’s no secret I love wood. One of my very favorite backgrounds to take photographs is definitely wood. Wooden textures are one of the favorites for food bloggers and craft bloggers are no different.
Although you can find gorgeous canvas food photography backgrounds out there, the real wood texture just has something special that a canvas backdrop will never replace. In this blog post, I’ll show you how to make one simple and inexpensive backdrop.
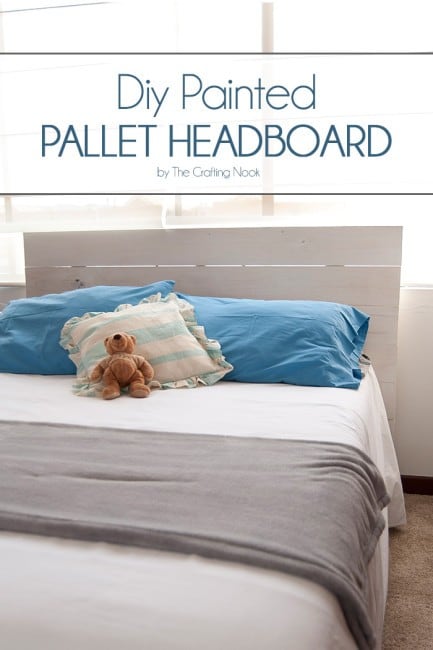
After making my beautiful Wooden Headboard, I got some leftover wood boards and I knew right away what I was going to make. An awesome pallet photo backdrop was on the way.
It literally cost me $0 because I had everything from the headboard and also some extra pieces in my parent’s toolbox LOL.
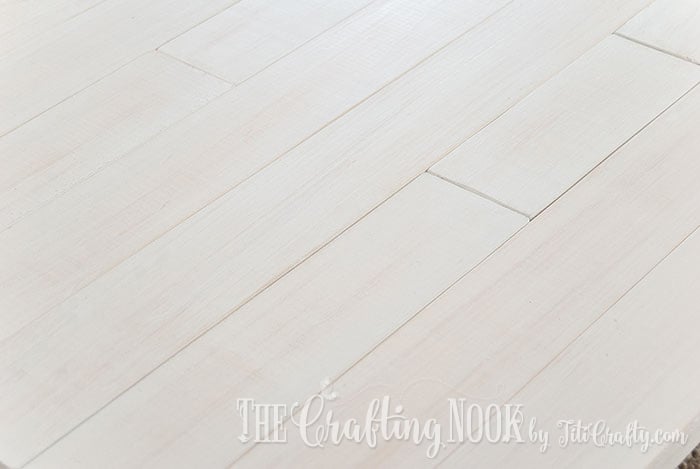
Table of Contents
Real Wood DIY Craft & food photography backdrops
This project didn’t take long to finish. In just a few hours I had all done but just to be sure I let it dry well.
I had a fun time making it so I plan on making a new one here. I’m so in love with how photos look using this type of backdrop. It’s so much better when it’s real although I have used printed backdrops too.
If you like to take pretty food photos or product photos, you definitely will love this easy DIY food photography backdrop. You can make it by buying wood, using reclaimed wood, leftovers, or pretty much any wood you can find that can be turned into boards.
So, if you love working with wood as much as I do, you will find this project fun and so useful as you can use it as a base for photos or as a background. I have used mine many times and I always love how it looks!
Take a look at these crafts and food shots:

You don’t need to be a food photographer to have one of these, they work even as part of your home decor. I use mine for crafts and recipes but I have also used it for my Mantel decor as well.
How to Make Craft & Food Photography Backdrops
Let’s go!
Supplies:
- Wood boards {the size will depend on your taste and the design you wish}
- 3 wood planks for the back. {the size would be a couple of inches shorter than your whole backdrop}
- White paint
- Nails and screws
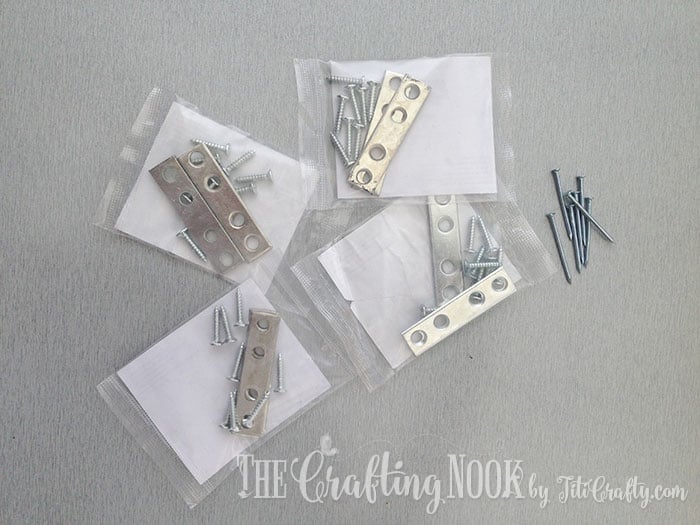
- Flat joints
- White mate indoors and outdoors paint.
- Transparent mate sealant spray.
- Thick brush.
- A Towel {one that you can throw away later}
- Wood sandpaper.
Tools:
- Drill/screwdriver
- Hammer
Instructions:
Step 1: Prep Work
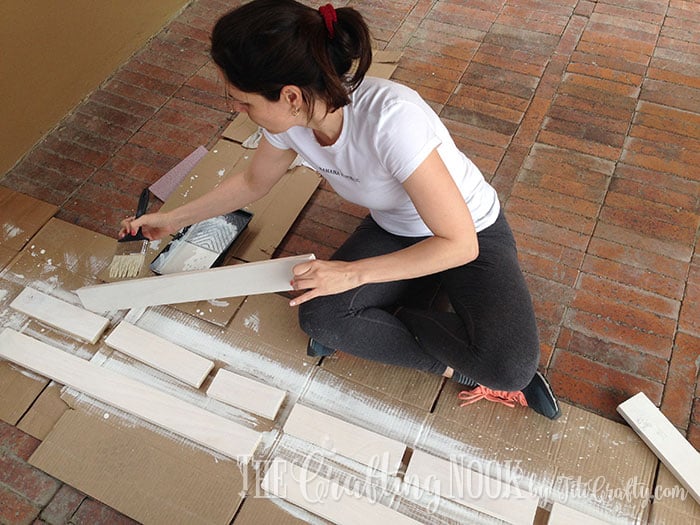
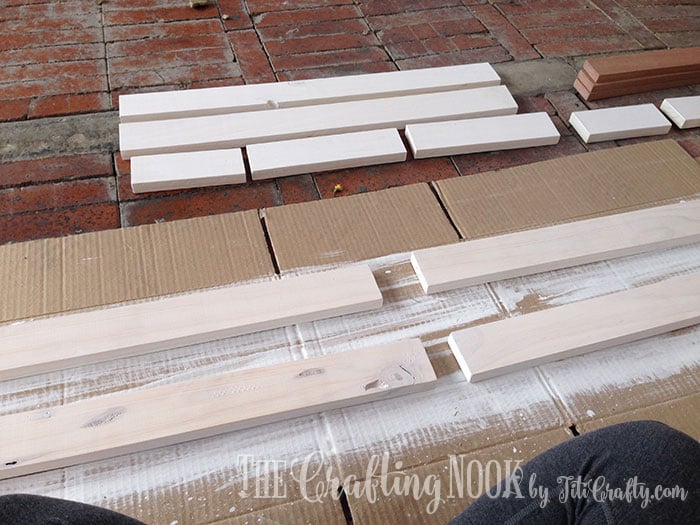
Firstly, I started by cutting the wood boards I had left in half lengthwise. You can do this at your local hardware store like home depot or such.
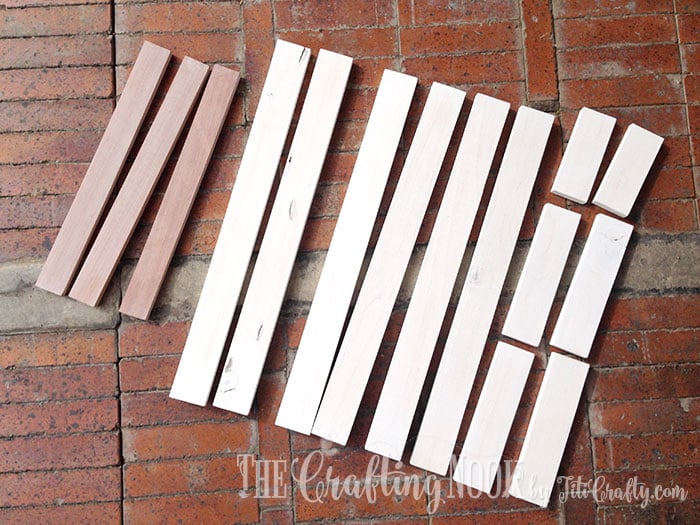
I wanted to have more lines in the backdrop design. So I added short pieces that I put to use by placing them in between the larger pieces.

Step 2: Sand the Wood Boards
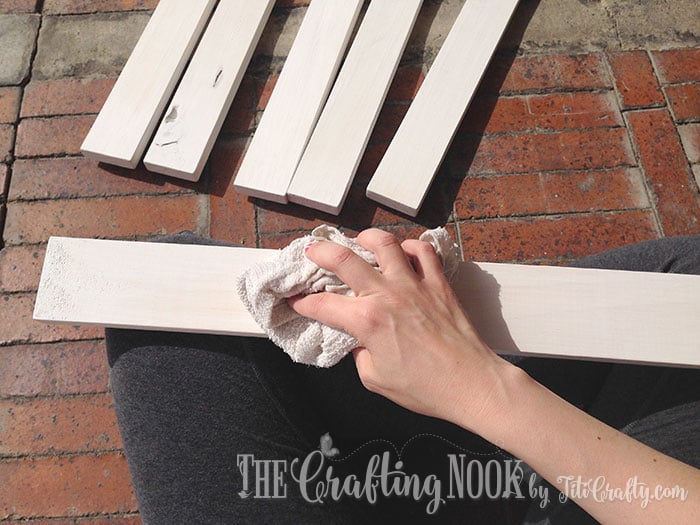
Once I got them all as I wanted, it was time to sand each piece. The idea is to sand down the edges and corners of each board so it won’t be so sharp and it kind of gives a small rustic look.

As each board was done, I clean them well using a damp towel to remove all the dust.
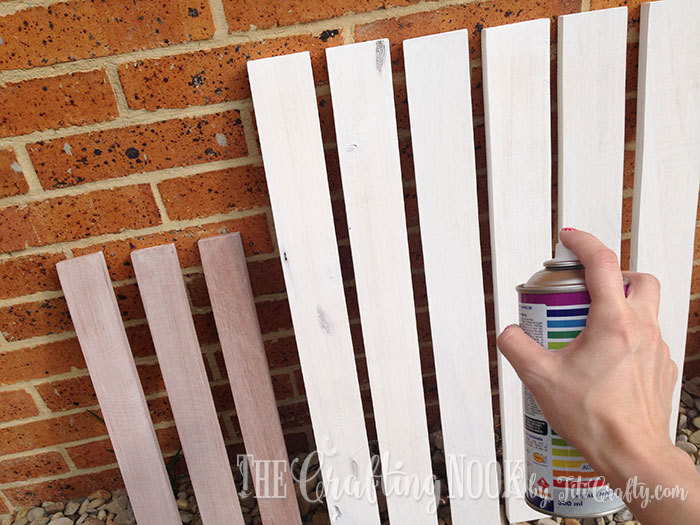
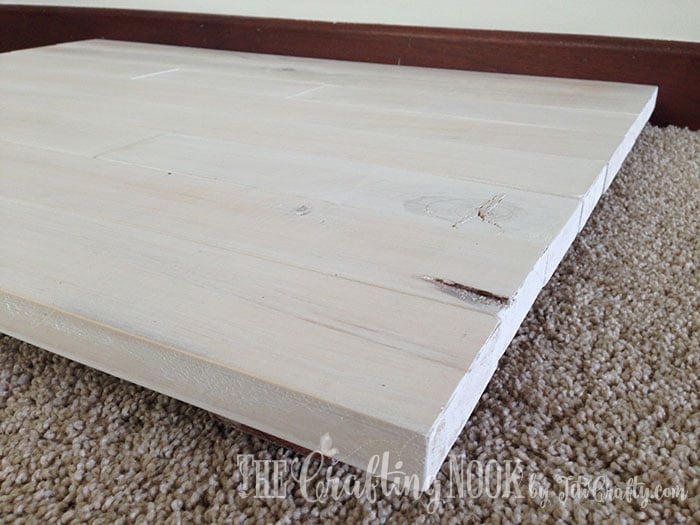
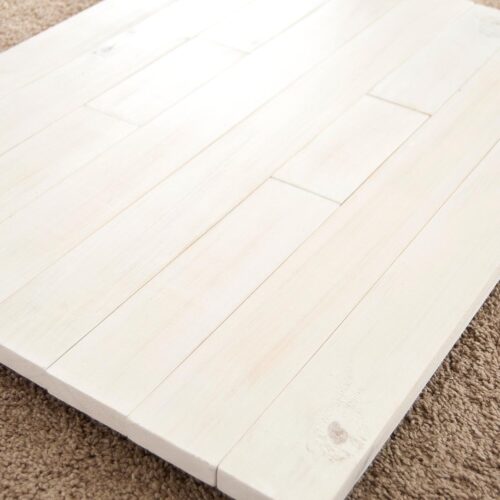
Step 3: Paint the boards with a whitewashed technique
I wanted the wood marks to be visible and yet have a white look. So, I chose to go for a whitewash technique.
You can create this effect by watering down the paint. I made it a 1:1 proportion of paint and water. You could say, you create a white stain for your boards.
I started painting each board. To get the look I wanted, it took 3 coats of paint letting each coat dry for a few minutes.
When you water it down, the wood slowly absorbs the paint and water from each coat and reveals the wood marks. You measure how much you want the white to show up so add fewer or more coats as you see fit.
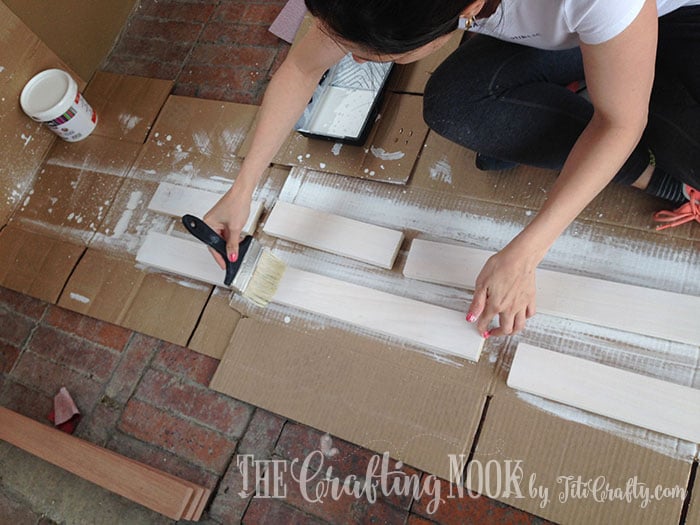
Let the paint dry for a couple of hours.

Step 4: Wash out some paint
Then with a damp towel rub lightly each board. This makes the paint more evenly and allows you to reveal more wood marks in specific places that might have too much paint.
Let it dry again completely
Step 5: Seal the boards
Spray the transparent sealant. It dries really quickly so this is an easy process. Just to be sure let it dry for about 30-60 min so the smell goes away a bit too.

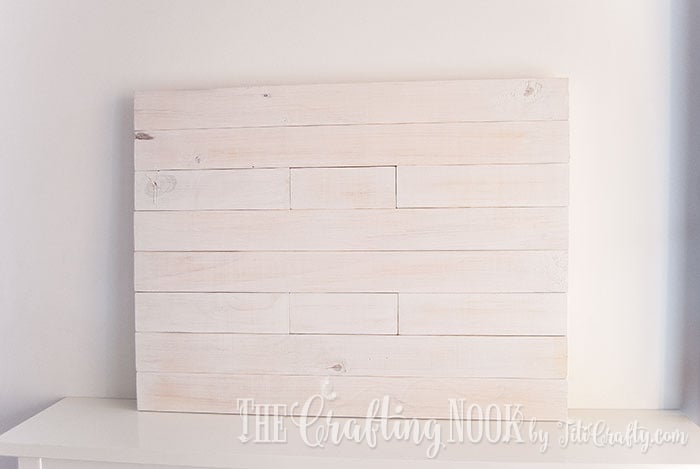
Step 6: Finally, Assemble the Craft and food photography backdrops
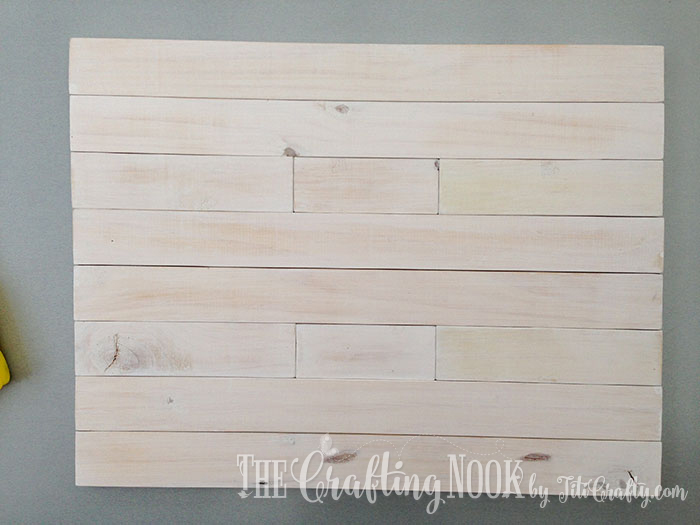
Lay all the boards together in the order you want them. I made it 2 full boards and then in-line 3 short ones, 2 full, 3 in-line shorts, and 2 full. You get the idea.
This step could be easier with pocket holes to attach each board together but I didn’t have that tool so I used what I had.
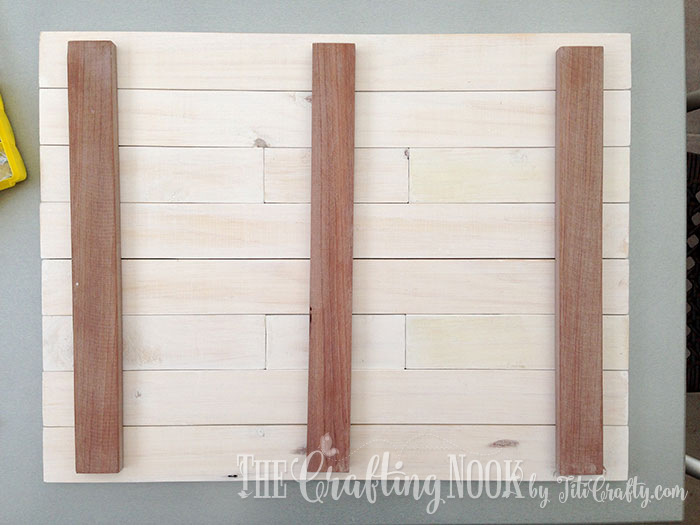
Place the 3 boards on the back. It should be one in the center and one on each end. If everything looks as it should then put the planks aside.
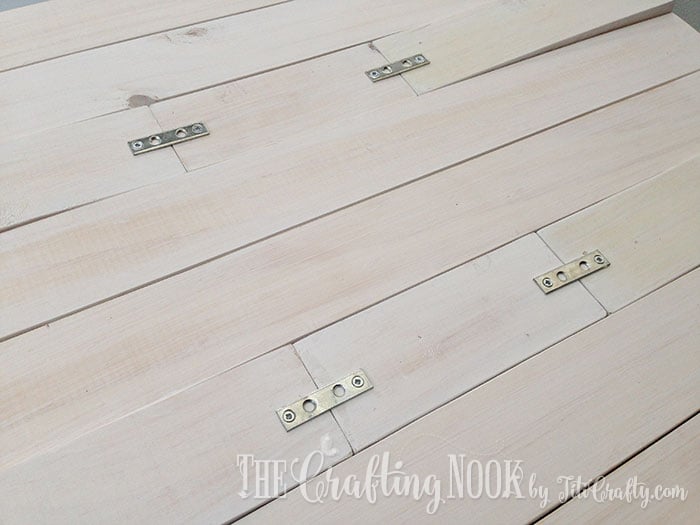
Place and screw the metallic joints on the in-line woods so they stay together.
At first, you will notice that the ones that are ends will bend up a little. That’s fine, you will fix it with the support boards.
Nail in place the support boards.
If you don’t want nails to be visible, then I would suggest nailing from the back. And use as many as you think it’s best. I end up also adding a few screws too just to make sure everything stays in place.
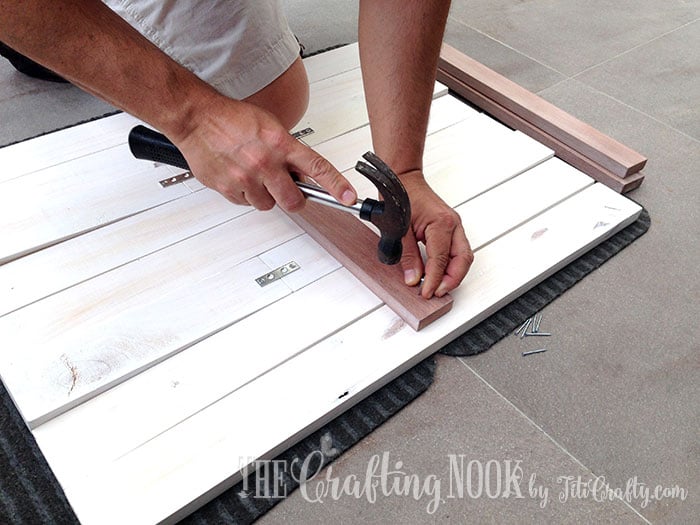
I started with the center plank and then the side ones.
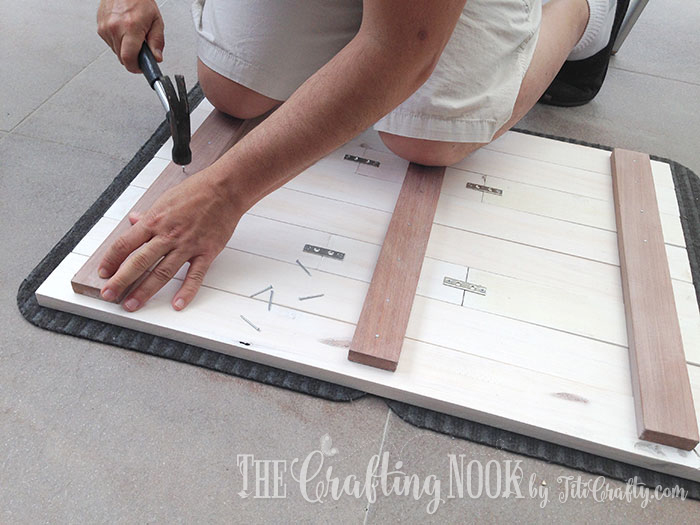
Our food photography backdrop is almost done!
Because I knew avoiding scratching any surfaces in the house was really important, I placed some self-adhesive felt foams on the support boards.

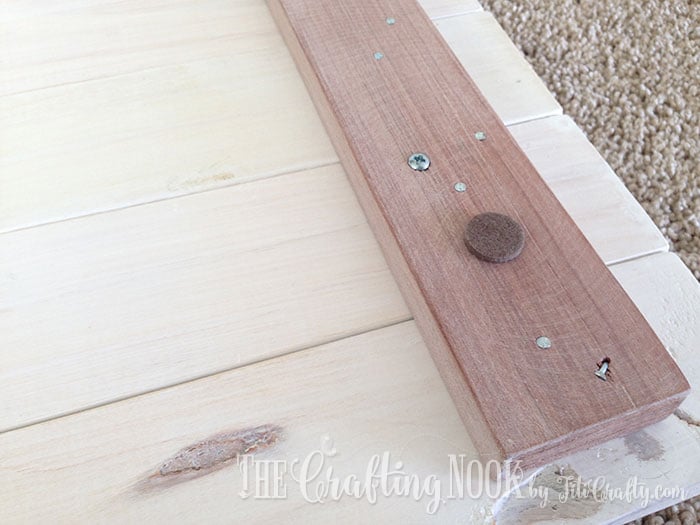

I know my mom and dad would KILL me if I scratched any of their tables or wood flooring. So, this was my best solution to stay alive!
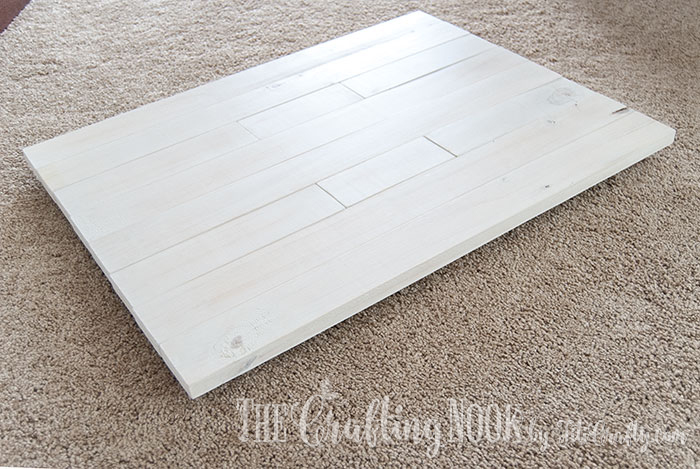
Now, there you go!

The wooden photography backdrop is done and ready to rock some photos!
Here are some photos I have taken using my backdrop!
I’m definitely planning on making more wooden backdrops with different finishes and techniques but for now, I’m super happy with the final result.
Frequently Asked Questions
Some of my favorite craft and food photography backgrounds: antique and distressed sheet pans, ceramic and porcelain floor tiles, craft and construction paper, paper grocery bags, natural parchment paper, thin plywood or pinewood, and foam boards among many other ideas.
The perfect colors to choose from are grey, black, and white. But you can also try brown tones like chestnut or walnut. Food is often warm in tone. Shooting on a neutral or more cool-toned photography background enhances the food subject. If you are shooting products or crafts, probably light colors will do better.
there is a wide range of photography backgrounds to choose from, fabric and muslins, Wooden boards, paper rolls, backdrop textured, colorful cardstock, vinyl backdrops, small marble pieces, ceramic tiles, and wood boards.
Take photos under natural light. That’s the first. Do not use overhead lights or lamps or your built-in flash because it causes bad shadows. Move around to find the best light source. Don’t feel confined to taking photos in your kitchen or office, anywhere with good light will do. Try taking photos from multiple angles. Most importantly, minimize clutter.
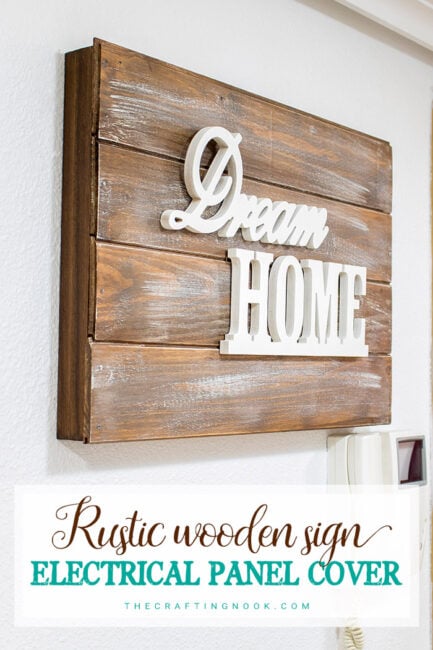
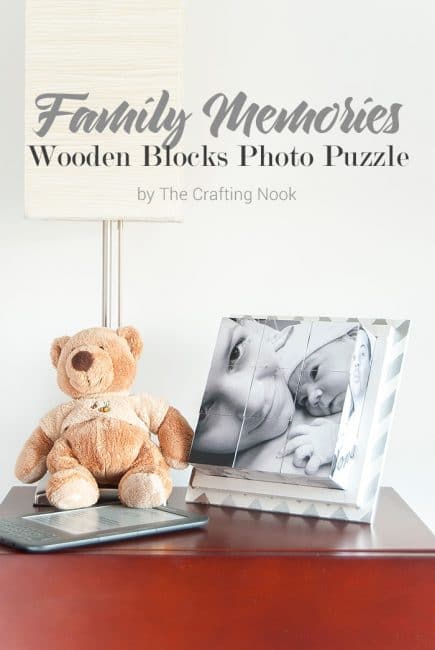
More Woodworking Projects to Try
If you enjoyed this wooden backdrop tutorial, you might also love these other woodworking project ideas too:
✂️ Tutorial
DIY Crafts and Food Photography Backdrops with real wood
Tools
- Drill/screwdriver
- Hammer
Supplies
- Wood boards {the size will depend on your taste and the design you wish}
- 3 wood planks for the back. {the size would be a couple of inches shorter than your whole backdrop}
- White paint
- Nails and screws
- Flat joints
- White mate indoors and outdoors paint.
- Transparent mate sealant spray.
- Thick brush.
- A Towel {one that you can throw away later}
- Wood sandpaper.
Instructions
STEP 1: PREP WORK
- Firstly, I started by cutting the wood boards I had left in half lengthwise. You can do this at your local hardware store like home depot or such.
- I wanted to have more lines in the backdrop design. So I added short pieces that I put to use by placing them in between the larger pieces.
STEP 2: SAND THE WOOD BOARDS
- Once I got them all as I wanted, it was time to sand each piece. The idea is to sand down the edges and corners of each board so it won’t be so sharp and it kind of gives a small rustic look.
- As each board was done, I clean them well using a damp towel to remove all the dust.
STEP 3: PAINT THE BOARDS WITH A WHITEWASHED TECHNIQUE
- I wanted the wood marks to be visible and yet have a white look. So I chose to go for a whitewash technique.
- You can create this effect by watering down the paint. I made it a 1:1 proportion of paint and water. You could say, you create a white stain for your boards.
- I started painting each board. To get the look I wanted, it took 3 coats of paint letting each coat dry for a few minutes.
- When you water it down, the wood slowly absorbs the paint and water from each coat and reveals the wood marks. You measure how much you want the white to show up so add fewer or more coats as you see fit.
- Let the paint dry for a couple of hours.
STEP 4: WASH OUT SOME PAINT
- Then with a damp towel rub lightly each board. This makes the paint more evenly and allows you to reveal more wood marks in specific places that might have too much paint.
- Let it dry again completely
STEP 5: SEAL THE BOARDS
- Spray the transparent sealant. It dries really quickly so this is an easy process. Just to be sure let it dry for about 30-60 min so the smell goes away a bit too.
STEP 6: FINALLY, ASSEMBLE THE CRAFT AND FOOD PHOTOGRAPHY BACKDROPS
- Lay all the boards together in the order you want them. I made it 2 full boards and then in-line 3 short ones, 2 full, 3 in-line shorts, and 2 full. You get the idea.
- This step could be easier with pocket holes to attach each board together but I didn’t have that tool so I used what I had.
- Place the 3 boards on the back. It should be one in the center and one on each end. If everything looks as it should then put the planks aside.
- Place and screw the metallic joints on the in-line woods so they stay together.
- At first, you will notice that the ones that are ends will bend up a little. That’s fine, you will fix it with the support boards.
- Nail in place the support boards.
- If you don’t want nails to be visible, then I would suggest nailing from the back. And use as many as you think it’s best. I end up also adding a few screws too just to make sure everything stays in place.
- I started with the center plank and then the side ones.
- OUR FOOD PHOTOGRAPHY BACKDROP IS ALMOST DONE!
- Because I knew avoiding scratching any surfaces in the house was really important, I placed some self-adhesive felt foams on the support boards.
- Now, there you go! The wooden photography backdrop is finished and ready to rock some photos!
Share and PIN ME!

Til’ next time…


FREE WORKBOOK
Keeping your Sweet Home Organized
Learn how to create intentional habits and simple routines to Keep Your Home Organized. Plus freebies, printables, exclusive content, and tips.
Disclaimer: By clicking on the “Yes” button above you are giving me your consent to collect and use your information according to the law and My Policy Privacy. Zero Spam I promise!