Easy DIY Heating Pad You Can Make at Home
This post may contain affiliate links. Please read our Disclosure Policy.
Today, I’m sharing how to make a simple and easy DIY heating pad using cotton fabric and uncooked rice. It’s beginner-friendly, takes about 30 minutes, and doesn’t require any special sewing skills.
If where you live is as cold as where I live, this tutorial will help you a lot to stay warm. I’ve made several of these over the years and mostly use them to stay warm during colder months, and I’ve found it comforting to have one nearby when I’m dealing with bad cramps. It’s one of those simple things that just feels nice to have around. I’ve made some as a gift too.

Table of Contents
Homemade Heating Pad Tutorial
You may have endless ways of doing this project. I found this one the easiest, but as you might know, imagination is the limit.
You only need fabric, ribbon, and white rice, besides thread, a needle, and a sewing machine. Though, I think this is something you might be able to hand sew as well.
I just love this and the best part is a couple of minutes in the microwave and you will have quite some time of warmth. I love putting the heating pad on my lap while watching TV or close to my hands while I’m on the computer. It’s just awesome.
How to Make a DIY Microwavable Heating Pad in Minutes
There are many ways to make a DIY heating pad. In this tutorial, I’m showing you a simple method for making a larger one that’s comfortable and easy to use.
Let’s go!
Supplies:
- Cotton fabric – I used scrap pieces I already had, 2 different ones, one for each side. Just make sure it’s 100% cotton, especially if you’ll be heating it in the microwave.
- Uncooked rice – Regular rice works great, but you could also use flaxseed or barley if you prefer.
- Scissors
- Ribbon {fabric matching color}
- Optional: A few drops of essential oil for a calming scent (lavender is my go-to).
Tools:
- Large funnel
- Sewing Machine – Or a needle and thread if you’re sewing by hand.
- Pins or clips – To hold things in place as you sew.
- Scissors
- Fabric (mark-and-be gone) markers.
Quick Safety & Use Notes
While heating pads are generally safe, there are a few precautions to keep in mind:
- Use 100% cotton fabric and thread
- Start microwaving at 30–45 seconds and increase gradually
- Do not overheat or leave unattended
- Keep the heat pack dry (no wet rice)
- Avoid using the heating pad directly on bare skin when it’s very hot. To pre-heat the bed is very useful when it’s really hot, though.
- For ongoing or medical pain, always check with a professional.
Rice Variation and Alternatives
Regular uncooked rice works well for most DIY heating pads. Some people also use whole corn, walnut shells, flax seeds, cherry pits and jasmine rice, but rice is easy to find, affordable, and heats evenly. Avoid fillings that hold moisture or have strong odors when heated.
Instructions:
This heat pack is one of the easiest projects I’ve ever made. No fancy tools or expensive materials—just a few simple steps and some basic sewing.
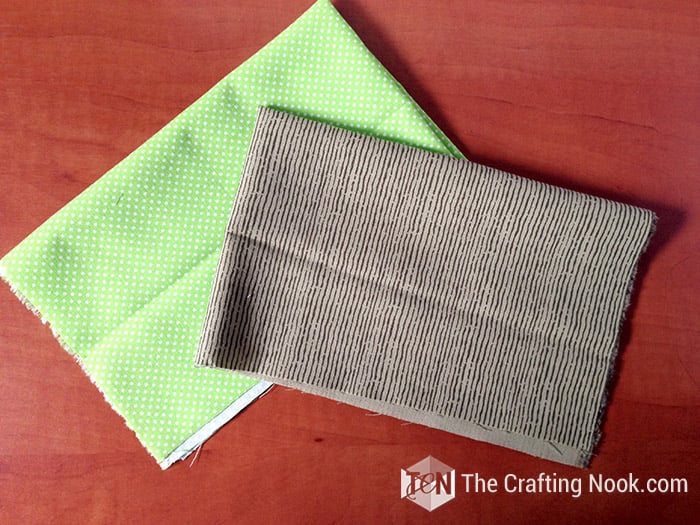
Step 1: Cut the fabric
You’ll need two pieces of cotton fabric, both the same size . I usually go with something around 30×15 cm – 12 x 6 inches, but you can adjust the size depending on how big or small you want your heating pad to be.
Just make sure the fabric is 100% cotton, especially if you’re planning to microwave it. Synthetic fabrics can be a fire hazard.
Step 2: Place fabric right sides together
Lay your two pieces of fabric on top of each other with the right sides facing in. That way, when you flip it inside out later, the pretty side will show.
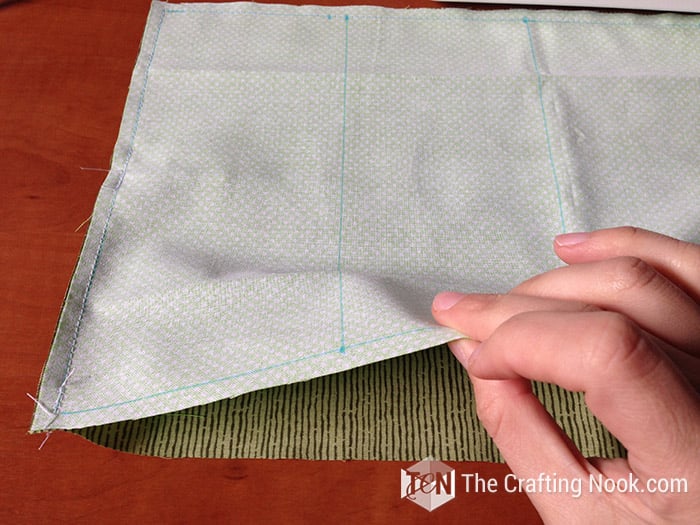
Step 3: Sew around the edges
Leave about a 1 cm (¼ inch) seam allowance on all sides. I also like to draw lines every 7 cm (2.75 inches) across the width to mark where each rice pocket will go later.
(This part is just for reference for now—you’ll see why in a sec.)

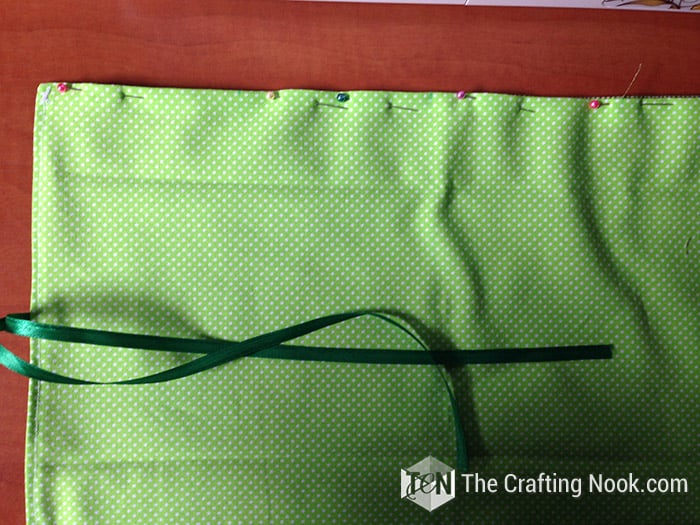
Now, cut a piece of ribbon about twice as long as your heating pad width.

Fold it in half and place it in between the fabric layers, centered along one of the short ends.
Pin it in place. This will be the tie that holds your heating pad when rolled up.

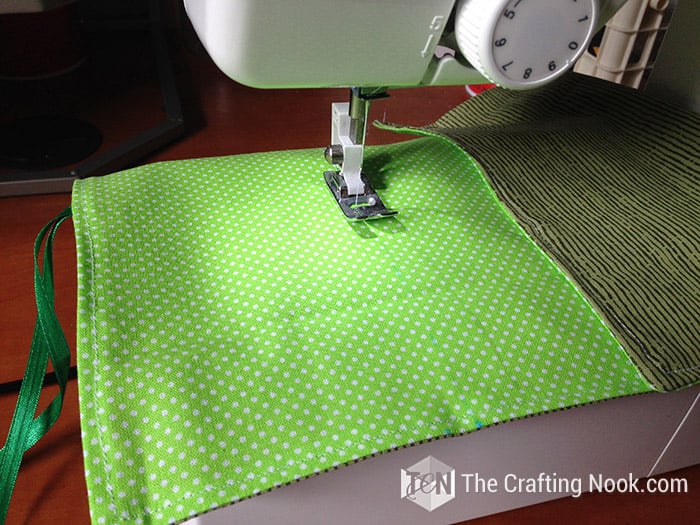
Step 4: Sew the outer edges
Go ahead and stitch around three sides, leaving one of the long sides open.
Flip the whole thing right side out and give it a nice press with the iron to flatten everything out.
This is where those reference lines come back in. Since they’re now on the inside, just mark a few dashed lines on top so you can follow them when sewing the pockets later.
Fold in the edges of the open side to create a hem and pin in place. This will make it easier to sew everything up once the rice is added.
For a neater finish, I like to sew around the edges again (French seam style). Totally optional, but it does look nicer.
Now, go ahead and sew along those marked lines to create the pocket sections. That’s what keeps the rice evenly distributed and makes the heating pad feel so good to use.
Cut all the remaining threads.
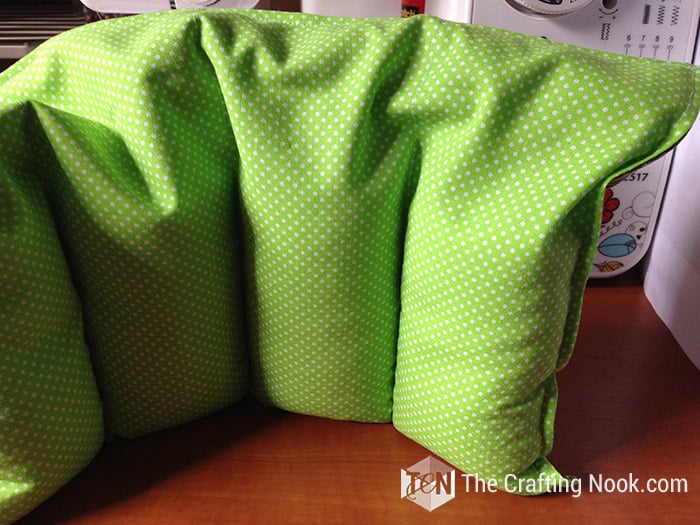
Step 5: Filling up the heat pad
Using a funnel (or a spoon if you’re careful), fill each pocket about ¾ full with rice. You want them full enough to hold warmth, but still soft and bendy.
Optional: Add a drop or two of essential oil to each pocket before filling for a nice calming scent. Lavender is my go-to!
Step 6: Closing It up
As you fill each pocket, press the rice down gently and pin right above it to keep everything in place for stitching (Sorry, I completely forgot to take a picture of this step).
Once they’re all filled and pinned, sew each pocket closed along the top edge.
Remove the pins, let the rice settle, and smooth everything out.
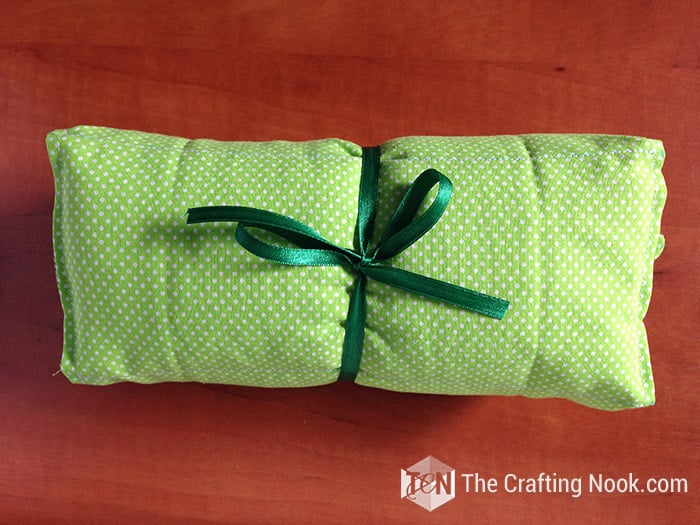
Step 7: Finishing touches
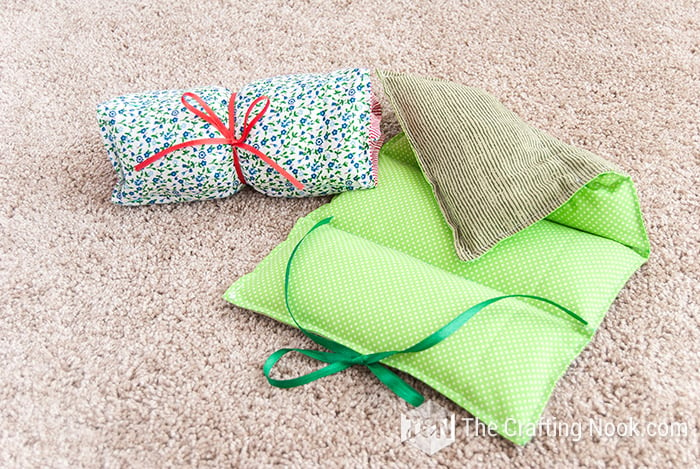
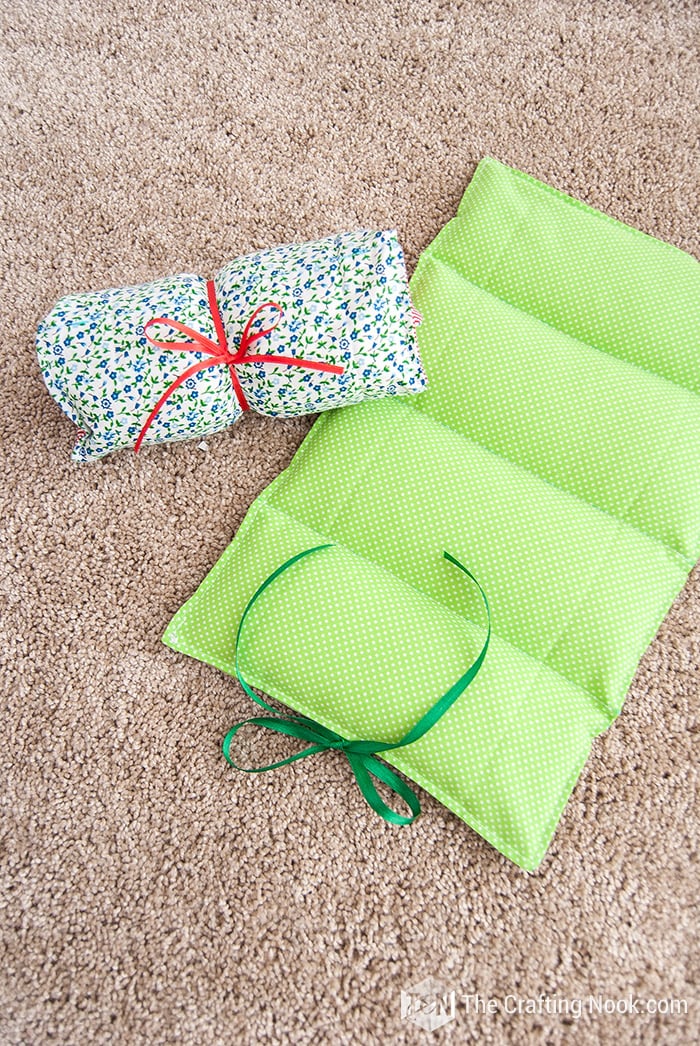
Roll your homemade DIY heating pad and tie it up with that ribbon you added earlier. Make a cute bow and that’s it—your cozy, microwavable heating pad is ready to use!
There you go!
I even made some other Homemade Heat packs in different colors!
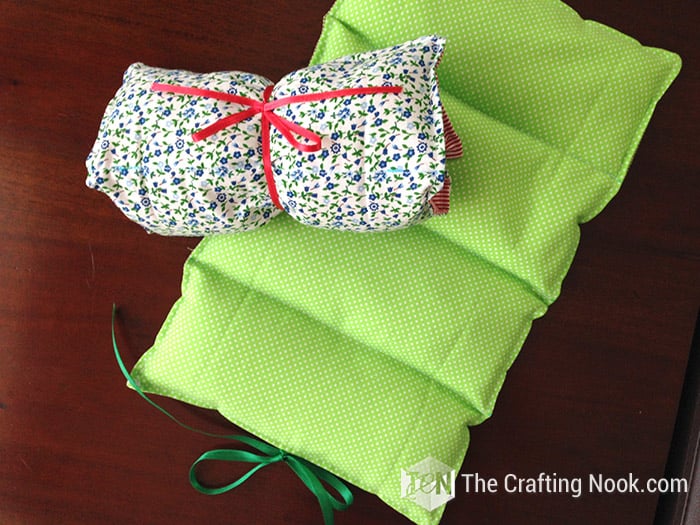
It’s super easy, quick to make and so, so awesome to stay warm.
Crafting Tips
- If you want to be able to wash your heating pad, sew a simple envelope-style fabric cover using 100% cotton. This lets you remove the rice insert and wash the cover separately while keeping the filling dry and safe.
- Don’t overfill the pad. Leaving a little space allows the rice to shift and heat more evenly, which also makes the pad more comfortable to use.
- Use a medium stitch length and reinforce the opening where you close the pad. This area gets the most stress over time, especially if the heating pad is used often.
- If you’re new to sewing, stick with woven cotton fabrics for both sides. They’re easier to sew, safer for the microwave, and hold their shape better than stretchy fabrics.

Hope you enjoy today’s tutorial and that you got inspired to make your own.
Variations and alternatives
Some homemade heating pad without rice alternatives that can be made at home dependnding on what you are using it for could be:
- Once you’re comfortable with the basic method, you can easily adapt this heating pad into different shapes depending on how you plan to use it.
- A longer neck and shoulder wrap works well for tension and stiffness. Sewing a few vertical channels helps keep the rice evenly distributed along the curve.
- A square or large rectangular pad is great for your lower back or tummy and is one of the easiest shapes to customize.
- A smaller U-shaped or eye-mask-sized version can be used for relaxation. If making an eye mask, keep it lightweight and avoid overfilling so it stays comfortable.
- Mini versions also work well as hand warmers. These are quick to make, easy to gift, and fit nicely inside coat pockets during colder months.
- The Rice Sock Method: If you need a quick, no-sew option, fill a clean cotton sock about three-quarters full with uncooked rice. Tie or sew it closed and microwave it in short intervals, checking the temperature each time. Always test it on the inside of your arm before use.
Frequently Asked Questions
Yes, when made with 100% cotton fabric and uncooked rice, and heated in short intervals. Always start with 30–45 seconds, check the temperature, and never overheat or leave it unattended.
Woven 100% cotton fabric is the safest and easiest option. Avoid synthetic or stretchy fabrics, as they can melt or overheat in the microwave.
With regular use, a rice heating pad can last for years. If the rice develops an odor or the fabric shows wear, it’s time to replace the filling or make a new one.
The rice insert should not be washed. If you want to clean it easily, make a removable cotton cover that can be washed separately.
Yes. Many people use the terms interchangeably. In this tutorial, the heating pad (or heat pack) is filled with rice and warmed in the microwave.
More Sewing Projects to Try
If you enjoyed this fun DIY Heating Pad tutorial, you might also love these other cute sewing project ideas too:


✂️ Tutorial

Homemade DIY Heat Pack Tutorial
Tools
- Sewing Machine
Supplies
- Your favorite fabrics. I used 2 different ones one for each side.
- Ribbon {fabric matching color}
- Regular rice
- Large funnel
- scissors
- fabric mark-and-be gone markers.
- Essential oils *optionl.
Instructions
STEP 1: CUT THE FABRIC
- First, cut your fabric to the desired size. Mine was 30×15 cm {12X6 Inches}. It’s a large homemade heating pad.
STEP 2: CREATING THE HEAT PACK MAIN BAG
- Then putting together the front and back pieces right sides together, trace your layout.
- I left 1cm (1/4 inch) seam allowance from the edge on each side and traced lines every 7 cm (2.75 inches). This will make the rice pockets.
- Or course this will be only for reference you will see why in a bit.
- Cut a string of ribbon about double the length of your heat pack.
- Fold in half.
- view of string of ribbon on open fabric marked with measurements
- Place it in between both fabrics lengthwise about in the middle of one of the short sides.
- Pin in place.
STEP 3: SEWING THE PACK
- Stitch along the sides leaving one long side open.
- Turn it right side out. Press.
- This is where I was talking about the reference.
- Your lines are now inside but you can make a few dashes so you know where to stitch.
- Fold your open side edges inwards to make a hem. Pin in place.
- I do this because it’s easier to fill each pocket and then stitch them close later.
- Stitch around the edges again (french seam) to make it look prettier.
- Stitch each pocket’s lines.
- Cut all the remaining threads.
STEP 4: FILLING UP THE HEAT PACK
- Using a large funnel fill 3/4 of each pocket with white or jasmine rice.
- Optionally you can add a few drops of essential oils in each pocket
STEP 5: CLOSING UP THE HEATING PAD
- Using a pin, Close each pocket really close to the top of the rice. Sorry I completely forgot to take a picture of this step. But once you have filled a pocket just press all the rice down press closing the pocket right where the rice is and pin. This is only to make it easy to stitch close the heat pack.
- When you are done filling the pockets and pinning each one, just stitch along the edge.
- Remove the pins and let the rice spread.
STEP 6: FINISHING UP THE CUTE HEAT PACK
- Roll the heat pack and tie it with your ribbon and make a cute bow.
- There you go! You are done! You can make more in different colors.
Some other heat packs I love from my favorite bloggers:
- Diy No-Sew Natural Heating Pads (Rice Socks) by Making Lemonade.
- DIY Rice Heating Pad with Lavender essential oils by Crafting in the Rain
If you enjoyed this DIY Homemade Heat Pack tutorial, don’t forget to PIN and share it with friends!

Til’ next time…


FREE WORKBOOK
Keeping your Sweet Home Organized
Learn how to create intentional habits and simple routines to Keep Your Home Organized. Plus freebies, printables, exclusive content, and tips.
Disclaimer: By clicking on the “Yes” button above you are giving me your consent to collect and use your information according to the law and My Policy Privacy. Zero Spam I promise!
