Freezer Paper DIY Reindeer Pillows for Christmas (+ Free Cut Files)
This post may contain affiliate links. Please read our Disclosure Policy.
Looking for some creative ways to decorate for Christmas this year? Check out these freezer paper DIY reindeer pillows (and get free cut files)! These fun reindeer pillows are a great addition to any holiday home decor.
Aren’t you super excited about Christmas? I know I am. Even though things have been hectic and crazy lately I still get this special excitement just by seeing the Christmas tree and all the decor in and outside my home.

Table of Contents
Easy Rustic Freezer Paper DIY Reindeer Pillows for Christmas
Also because my house it’s so looking like a HOME now with so much effort and making myself many of my furniture pieces and buying others second-handed, now I feel comfy and so happy.
Part of this cozy feeling is because I love making pillows and today I’m so excited to share with you these Freezer Paper Reindeer Pillows I’ve made.
I had shared a couple of Christmas ago how to make envelope Christmas Pillowcases and today I’m sharing how to make them with a zipper. Super easy too.
Every time I see a pretty fabric I automatically think about pillowcases, for a sofa, for bedrooms for anything LOL. I just have a thing for Pillowcases, what can I say.
But enough about me…
How to make DIY Reindeer Pillows for Christmas using FREEZER PAPER
Supplies:
- 2 fabric squares per pillow – 2 inches larger than your pillow insert.
- Freezer paper
- 1 zipper per pillow larger than your pillows
- Silver and gold fabric paint – of your favorite colors
- Foam brush
- 2 Red Rhinestones – size and color are totally up to you, it’s for the nose
- Fabric glue
- Ribbon bows {optional}
- Needle and thread
- Reindeer Template Cut File Free Here!
Tools:
- Iron – if you have a heat press, even better but not necessary.
- Cutting Machine – Silhouette Cameo or Cricut. If you’re good with scissors, this design is easy enough to cut out.
- Sharp scissors, rotary cuter or craft knife
- sewing machine {this last is optional you can always hand-sew}

Instructions:
Step 1: Prep Work
For this project, I painted the reindeer first and then sew the pillowcases because I was making my own covers.
I thought it would be easier but you can do it after making the pillow cases if you prefer or paint the reindeer on a pre-made pillow cover.
Step 2: Create and prepare your design
So I designed my reindeer on my cutting machine’s software, in this case, I have a Silhouette Cameo. Any cutting machine will do and if don’t have one and you are patient enough you can cut it yourself with scissors or an x-acto knife.
You can snag your Reindeer Cut files here for free!
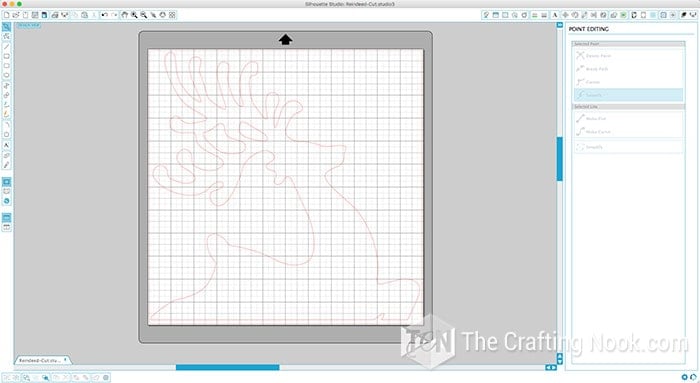
Once the design was done I mirrored the design for one of the pillows since I need to use the freezer paper with the sticky side up.
The other one, I left without mirroring since both reindeers are supposed to be facing each other.

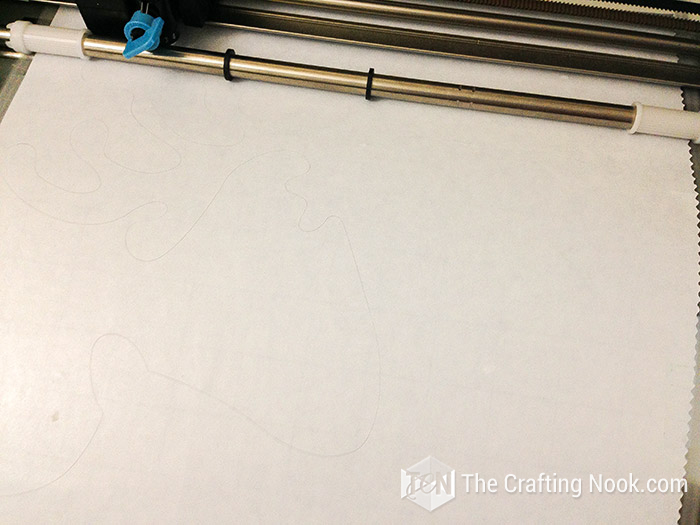
Placed a 20”x20″ piece of freezer paper on the cutting mat with the waxed side up.

Step 3: Cut your design
Send the design to cut using the normal print paper settings and adjusted the blade to the indicated number.
Once the freezer paper stencil is cut, remove the internal pieces leaving only the hollow shape of the reindeer.
Quick TIP: you can keep the reindeer silhouette you removed from the mat to make another project!


Step 4: Iron on your Freezer Paper
Position your design on the right side of the fabric to have an idea of where to place it. Because I wanted the reindeer on the bottom of the pillow you have a straight-cut line as a reference. I placed that cut line 1 inch from the bottom edge. This is where your zipper will be.
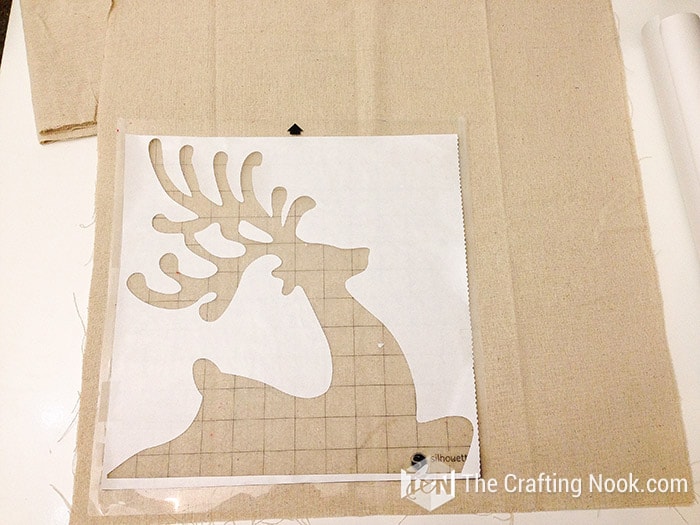
Then remove it from the mat and place the design with the waxed side facing down where you decided it to be.

Iron it on high for a few seconds until you see it doesn’t come off easily.
Step 5: Paint your designs
Now let’s PAINT!!!!
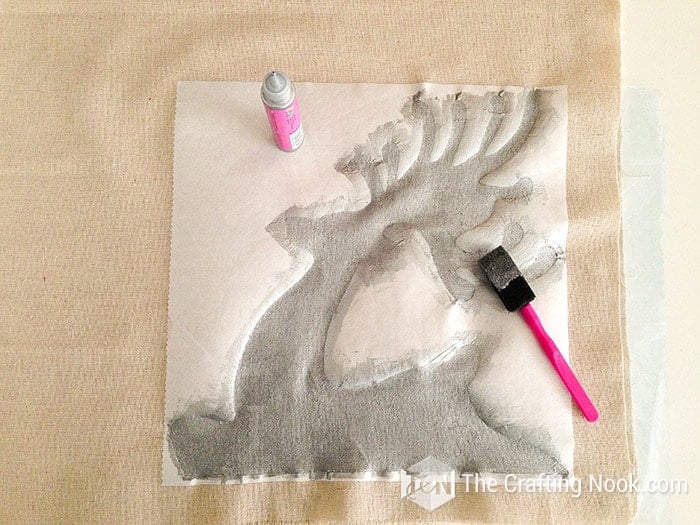
Slide a piece of cardboard covered with plastic wrap, to make your fabric stiffer and easier to paint. Also to protect the underneath surface.
I try my best to always brush from the edges of the freezer paper to the fabric to avoid the paint leaking in causing those ugly edges.
In some places, it’s not that easy but it’s something I like to do whenever I can.

Fill the hole reindeer and even add a second coat if you see the need.
With the silver, I didn’t need it but with the Gold, it was a pain. It was not a Gold Gold color, more like champagne, so I gave it a second coat and still didn’t get the contrast I wanted but I liked the overall look.
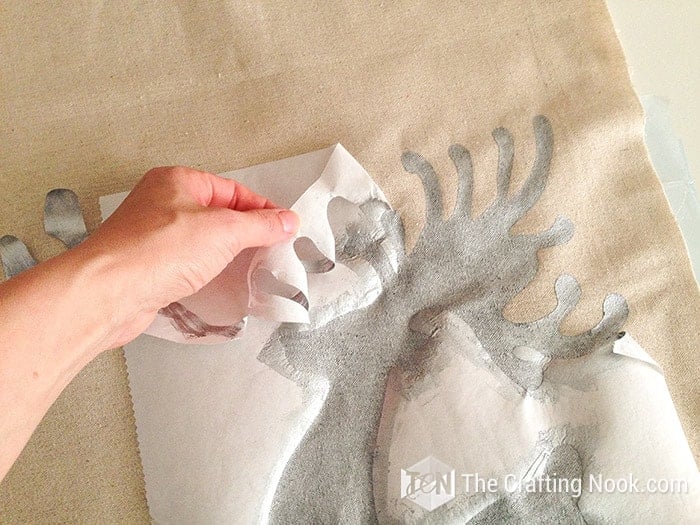
Let it dry for a few minutes. Most fabric paints dry really quickly and yu want to peel off before it’s completely dry.
Once dry carefully remove all the freezer paper.
Let it dry completely now.
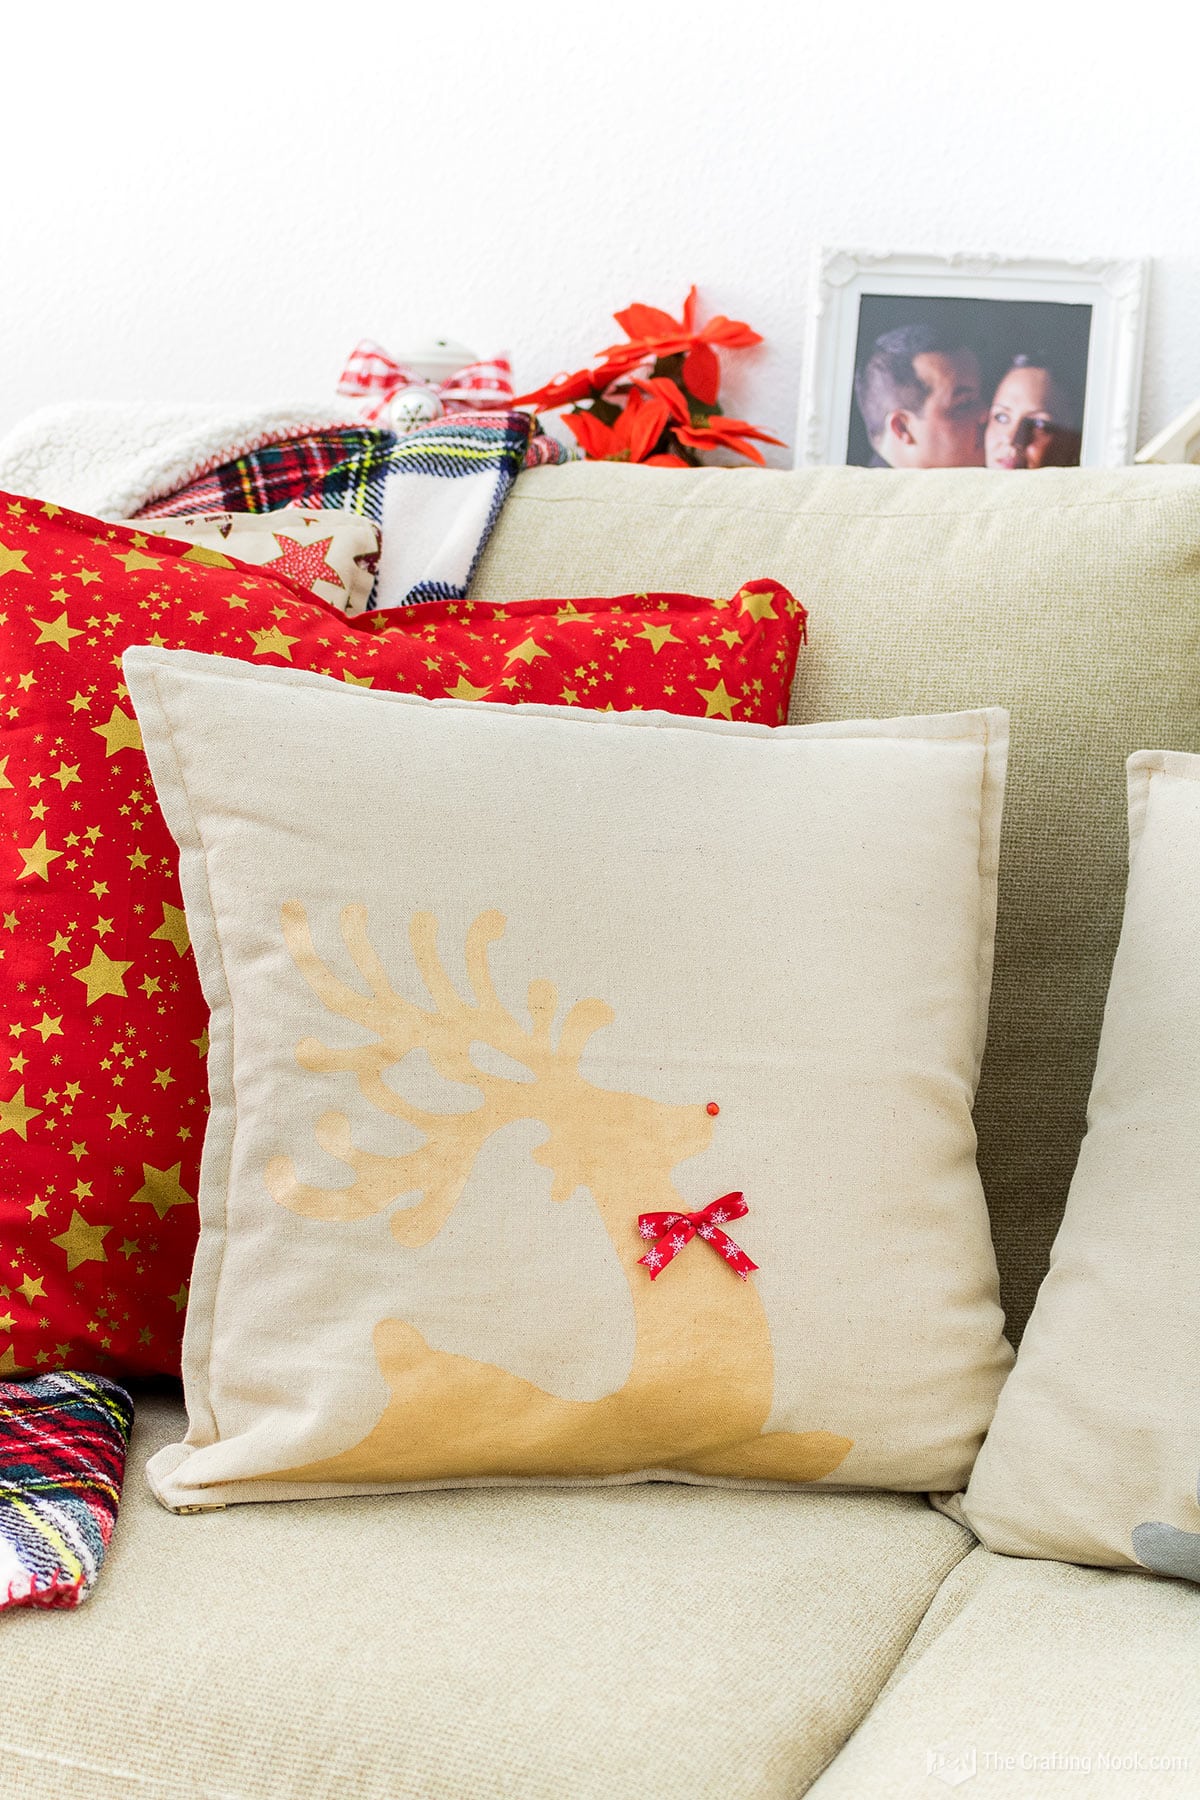
Step 6: Glue the noses
Pour a drop of fabric glue on the tip of the nose of your reindeer and place your rhinestone.
Let the fabric glue dry well.
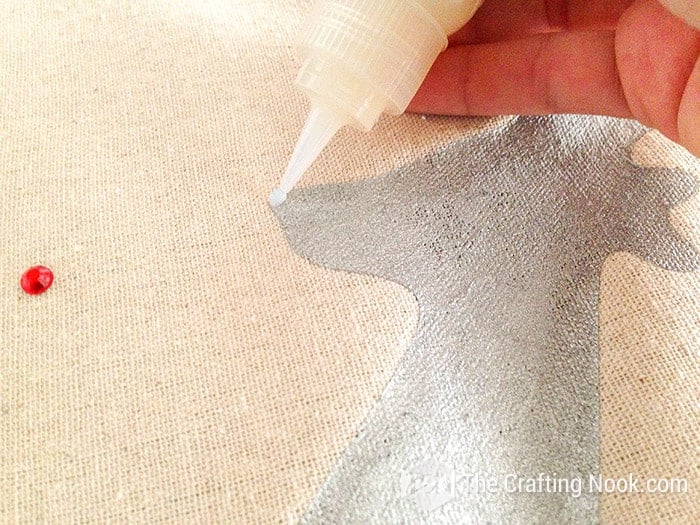
There you go, a cute red nose!

Step 7: Decorate your Reindeer Pillows
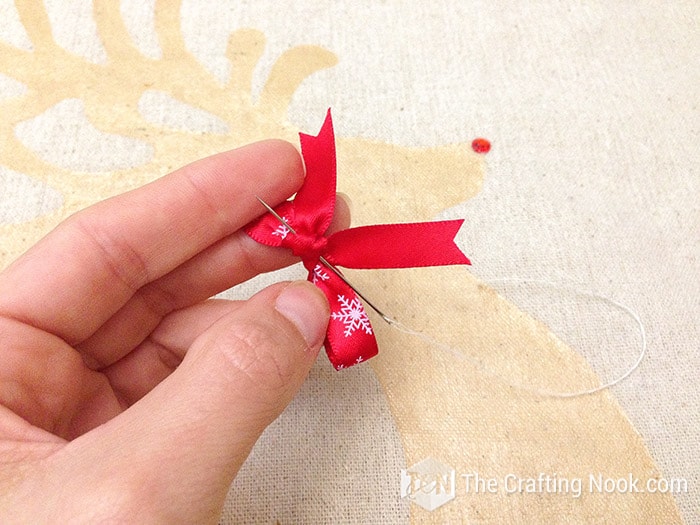
I played with 2 bows imagining one reindeer is a girl and the other a boy.

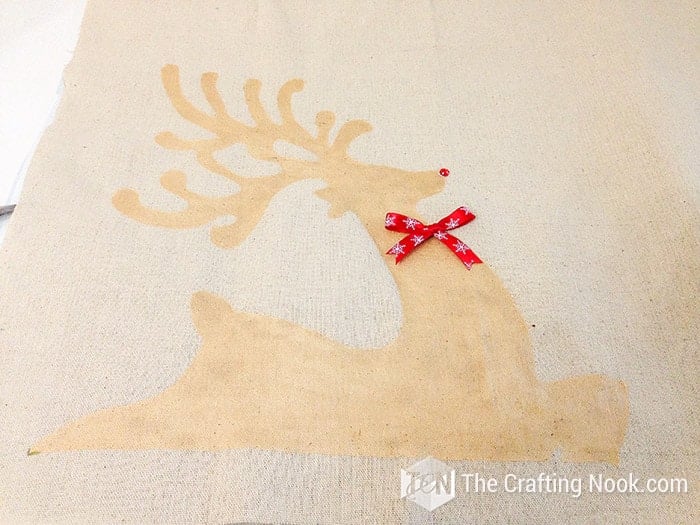
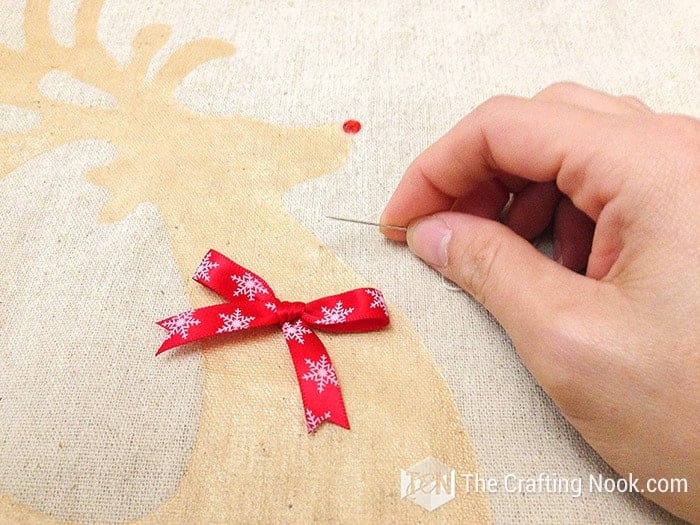
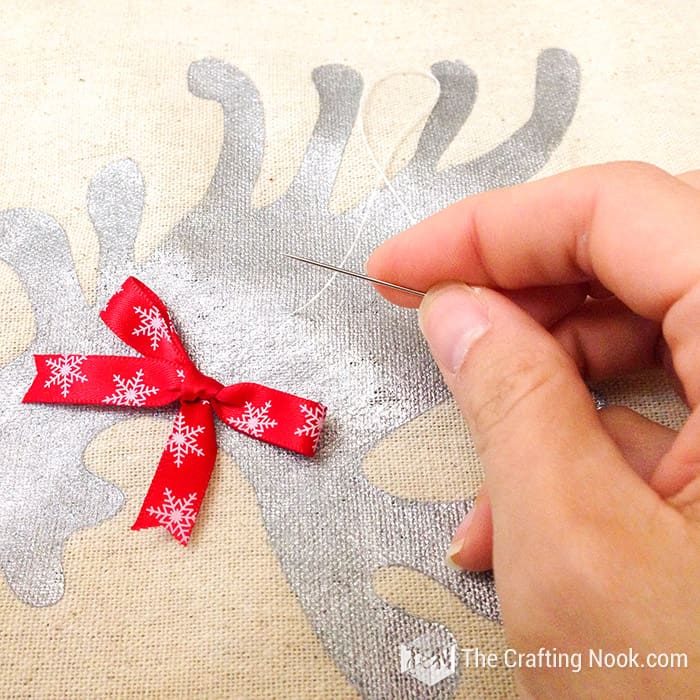
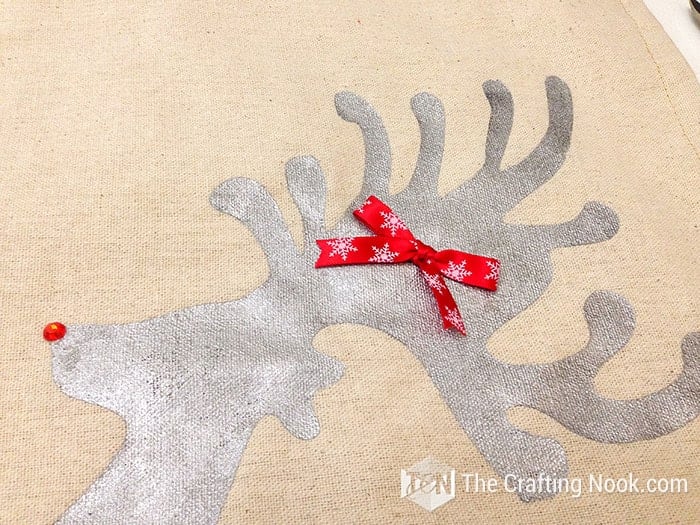
I put the bow on the horns of the silver reindeer to make it a girl. And I put the other bow on the neck of the gold reindeer as the boy.
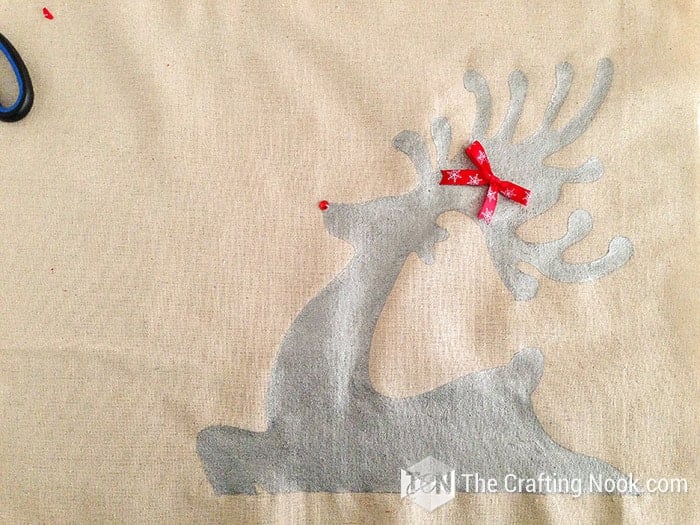
Stitch each bow in place with your needle and thread. Just a few stitches will do.
Step 9: Sew your Reindeer Pillows
Now the sewing part. Believe me, it’s not that hard.
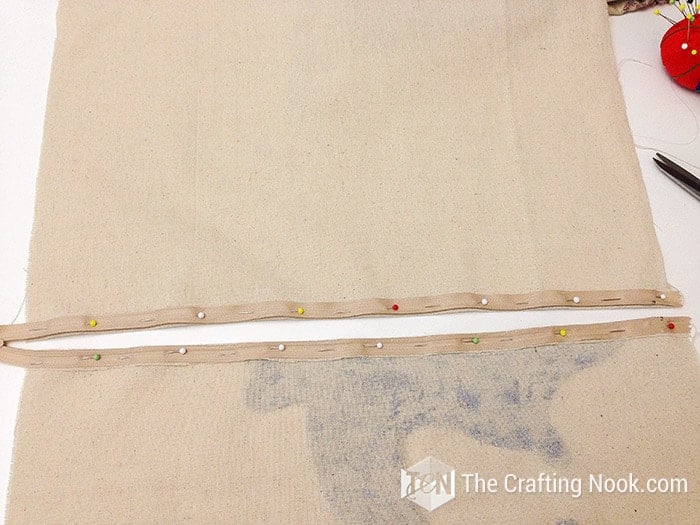
Fold the bottom edge inwards {where your reindeer is} and place your zipper making sure the zipper teeth are slightly showing above the folded edge.
Pin in Place.

When you are done on one side, do the same on the other side making sure both sides match the position with the zipper.
Using your zipper foot on your sewing machine, they are narrow in size and have a notch on the left for the needle and a notch on the right. This is so that the presser foot can butt up right next to the zipper, making a seam really close to that zipper.
I usually start at the bottom of the zipper and work my way to the top.
So first, position your needle all the way over to the left (so you don’t break your needle) and now you’re ready to begin sewing along the right side of the seam.
Slide your fabric (right side up) underneath the presser foot and find the pin you used to mark the bottom of the zipper.
Remember that every zipper teeth width is different, so feel how far out your zipper teeth come and sew just to the right of them, not ON them. Whatever distance away from the teeth you use, just make it consistent as you sew along the zipper.
Back stitch a time or two and then start sewing.
Keep sewing all the way down the zipper until you are about 2 inches from the end. Repeat on the other side. If you need a more detailed tutorial to install the zipper check out this post.
Then leaving the zipper opened, place both right sides together and stitch the 3 other edges leaving 1/2 inch seam allowance. You can see a more detailed tutorial about french seam pillows HERE Envelope Christmas Pillowcases
Turn it inside out and then stitch again along the edges {except the zipper one} leaving about another 1/2 inch seam allowance.

You are all done!
Tuck in your favorite pillow, close your zipper, and let’s make your sofa rock!

Crafting Tips
* Iron on the freezer paper with the waxed side facing down onto the fabric and with close attention to detail, making sure all the edges are sealed!
* Don’t let the paint completely dry before peeling off the freezer paper. Wait just a few minutes and remove it.
* Heat set your paint once it’s dry! place a piece of cloth or parchment paper over the design and iron it to seal the paint.
* If you are not planning on reusing or washing the throw pillow covers, you can paint with acrylic paint or craft paint of your choice.
* If the mat has started to lose some of its stickiness, then spray a Repositionable Adhesive Spray to the back of the fabric/fusible web before placing it on the mat.
* Just as you shouldn’t use your good fabric scissors to cut paper, you should also use a separate cutting blade for cutting fabric on the Silhouette. The blue casing of the Silhouette fabric blade allows you to easily distinguish it from the regular ratchet blade, but in all other ways, they are identical.
* Cutting the corners of your pillowcase will ensure that when you turn it inside out and add a pillow insert, you’ll be able to get crisp corners on your finished pillow. It’s not hard, just when you approach a corner, stop with your needle down about an inch from the corner. Then turn your fabric so you sew your stitch at a 45-degree angle. Once you’re done, cut the corners off before moving on your zig-zag stitch to finish the edge.
* Cutting your fabric the same dimensions as your pillow insert will ensure a snug fit and that your pillow is nice and plump without “dog ears” at the corners.
* Always zig-zag stitch the edges of your fabric (serge without a serger) to make sure your edges a finished look and keep them from fraying.
Hope you like how my Rustic Christmas Reindeer Pillows with Freezer Paper turned out!


Frequently Asked Questions
Plastic (nylon coil) zippers are better for cushion covers than metal ones as they are smoother and easier to sew. A matching thread is always best.
This sewing tutorial is great for all levels. It’s easy enough for beginners and super fun and quick to make if you’re already an expert!
Envelope pillow covers are perfect for square pillows of any size, But it works on rectangular or even circular pillows by adjusting the size and shape of the fabric based on the size of your specific pillow insert.
Absolutely! As long as the fabric you choose is washable, your pillow cover will be totally washable. If you decorated them then follow washing instructions from the material used.
Yes, Freezer paper also makes amazing stencils, especially if you’re stenciling onto fabric. Freezer paper is thicker than parchment or wax paper and makes a strong stencil. It is dull on one side and shiny on the other.
Definitely Yes. Any fabric that can be ironed onto qualifies for freezer paper stenciling. Because freezer paper is polycoated on one side, it will adhere to fabric with an iron to help bring your design to life.
Shiny side DOWN!!! Always!!!
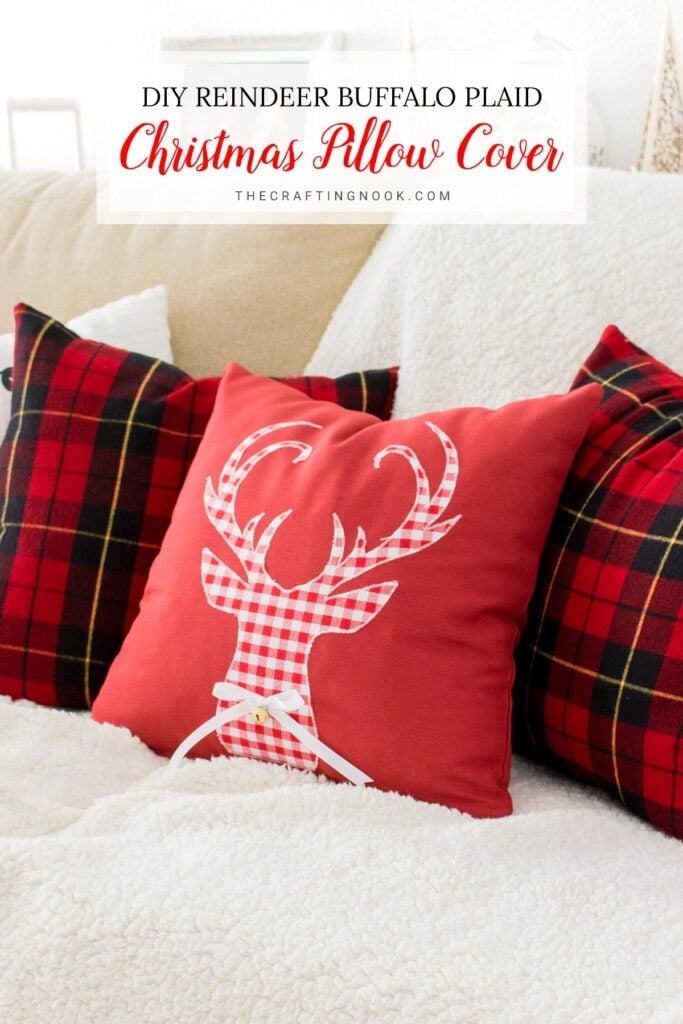
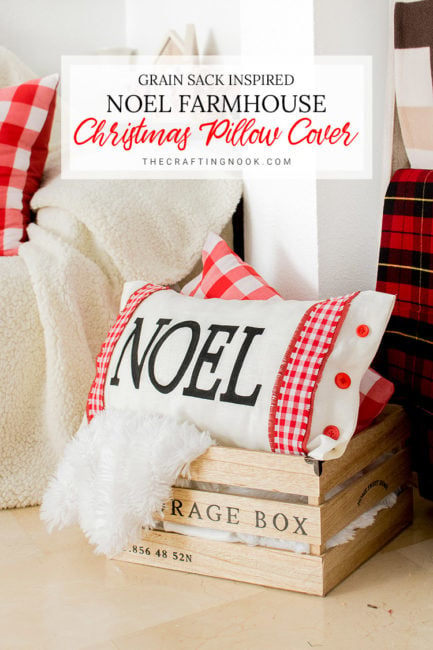
More Christmas Pillows to Try
If you like these Rustic Christmas DIY Reindeer Pillows, you might also love these other Christmas project ideas too:

✂️ Tutorial

Freezer Paper DIY Reindeer Pillows for Christmas (+ Free Cut Files)
Tools
- Iron – if you have a heat press, even better but not necessary.
- Cutting Machine – Silhouette Cameo or Cricut. If you’re good with scissors, this design is easy enough to cut out.
- Sharp scissors
- sewing machine {this last is optional you can always hand-sew}
Supplies
- 2 fabric squares per pillow – 2 inches larger than your pillow insert.
- Freezer paper
- 1 zipper per pillow larger than your pillows
- Silver and gold fabric paint – of your favorite colors
- Foam brush
- 2 Red Rhinestones – size and color are totally up to you it’s for the nose
- Fabric glue
- Ribbon bows {optional}
- Needle and thread
- Reindeer Template Cut File Free!
Instructions
STEP 1: PREP WORK
- For this project, I painted the reindeer first and then sew the pillowcases because I was making my own covers.
- I thought it would be easier but you can do it after making the pillowcase if you prefer or paint the reindeer on a purchased pillowcase.
STEP 2: CREATE AND PREPARE YOUR DESIGN
- So I designed my reindeer on my cutting machine’s software, in this case, I have a Silhouette Cameo. Any cutting machine will do and if don’t have one and you are patient enough you can cut it yourself with scissors.
- Once the design was done I mirrored the design for one of the pillows since I need to use the freezer paper with the sticky side up.
- The other one, I left without mirroring since both reindeers are supposed to be facing each other.
- Placed a 20”x20″ piece of freezer paper on the cutting mat with the waxed side up.
STEP 3: CUT YOUR DESIGN
- Send the design to cut using the normal print paper settings and adjusted the blade to the indicated number.
- Once cut, remove the internal pieces leaving only the hollow shape of the reindeer.
STEP 4: IRON ON YOUR FREEZER PAPER
- Position your design on the right side of the fabric to have an idea of where to place it. Because I wanted the reindeer on the bottom of the pillow you have a straight-cut line as a reference. I placed that cut line 1 inch from the bottom edge. This is where your zipper will be.
- placing the stencil on the rustic fabric
- Then remove it from the mat and place the design with the waxed side facing down where you decided it to be.
- Iron it on high for a few seconds until you see it doesn’t come off easily.
STEP 5: PAINT YOUR DESIGNS
- Now let’s PAINT!!!!
- Slide a piece of cardboard covered with plastic wrap, to make your fabric stiffer and easier to paint. Also to protect the underneath surface.
- I try my best to always brush from the edges of the freezer paper to the fabric to avoid the paint leaking in causing those ugly edges.
- In some places, it’s not that easy but it’s something I like to do whenever I can.
- Fill the hole reindeer and even add a second coat if you see the need.
- With the silver, I didn’t need it but with the Gold, it was a pain. It was not a Gold Gold color, more like champagne, so I gave it a second coat and still didn’t get the contrast I wanted but I liked the overall look.
- Let it dry for a few minutes. Most fabric paints dry really quickly and yu want to peel off before it’s completely dry.
- Once dry carefully remove all the freezer paper.
- Let it dry completely now.
STEP 6: GLUE THE NOSES
- Pour a drop of fabric glue on the tip of the nose of your reindeer and place your rhinestone.
- Let the fabric glue dry well.
- There you go, a cute red nose!
- Red rhinestones placed in the design
STEP 7: DECORATE YOUR REINDEER
- I played with 2 bows imagining one reindeer is a girl and the other a boy.
- I put the bow on the horns of the silver reindeer to make it a girl. And I put the other bow on the neck of the gold reindeer as the boy.
- Stitch each bow in place with your needle and thread. Just a few stitches will do.
STEP 8: SEW YOUR REINDEER PILLOWS
- Now the sewing part. Believe me, it’s not that hard.
- Fold the bottom edge inwards {where your reindeer is} and place your zipper making sure the zipper teeth are slightly showing above the folded edge.
- Pin in Place.
- When you are done on one side, do the same on the other side making sure both sides match the position with the zipper.
- Using your zipper foot on your sewing machine, they are narrow in size and have a notch on the left for the needle and a notch on the right. This is so that the presser foot can butt up right next to the zipper, making a seam really close to that zipper.
- I usually start at the bottom of the zipper and work my way to the top.
- So first, position your needle all the way over to the left (so you don’t break your needle) and now you’re ready to begin sewing along the right side of the seam.
- Slide your fabric (right side up) underneath the presser foot and find the pin you used to mark the bottom of the zipper.
- Remember that every zipper teeth width is different, so feel how far out your zipper teeth come and sew just to the right of them, not ON them. Whatever distance away from the teeth you use, just make it consistent as you sew along the zipper.
- Back stitch a time or two and then start sewing.
- Keep sewing all the way down the zipper until you are about 2 inches from the end. Repeat on the other side. If you need a more detailed tutorial to install the zipper check out this post.
- Then leaving the zipper opened, place both right sides together and stitch the 3 other edges leaving 1/2 inch seam allowance. You can see a more detailed tutorial about french seam pillows HERE Envelope Christmas Pillowcases
- Turn it inside out and then stitch again along the edges {except the zipper one} leaving about another 1/2 inch seam allowance.
- You are all done!
- Tuck in your favorite pillow, close your zipper, and let’s make your sofa rock!
Notes
Is there any other interesting Zippered Pillow Cover methods?
Yes indeed.
- Corey from Hey There Home has one that I LOVE.
- Sarah, from Life on Virginia Street, also has a great tutorial.
Share and PIN ME!

Til’ next time…


FREE WORKBOOK
Keeping your Sweet Home Organized
Learn how to create intentional habits and simple routines to Keep Your Home Organized. Plus freebies, printables, exclusive content, and tips.
Disclaimer: By clicking on the “Yes” button above you are giving me your consent to collect and use your information according to the law and My Policy Privacy. Zero Spam I promise!