How To Paint Buffalo Plaid The easy way.
This post may contain affiliate links. Please read our Disclosure Policy.
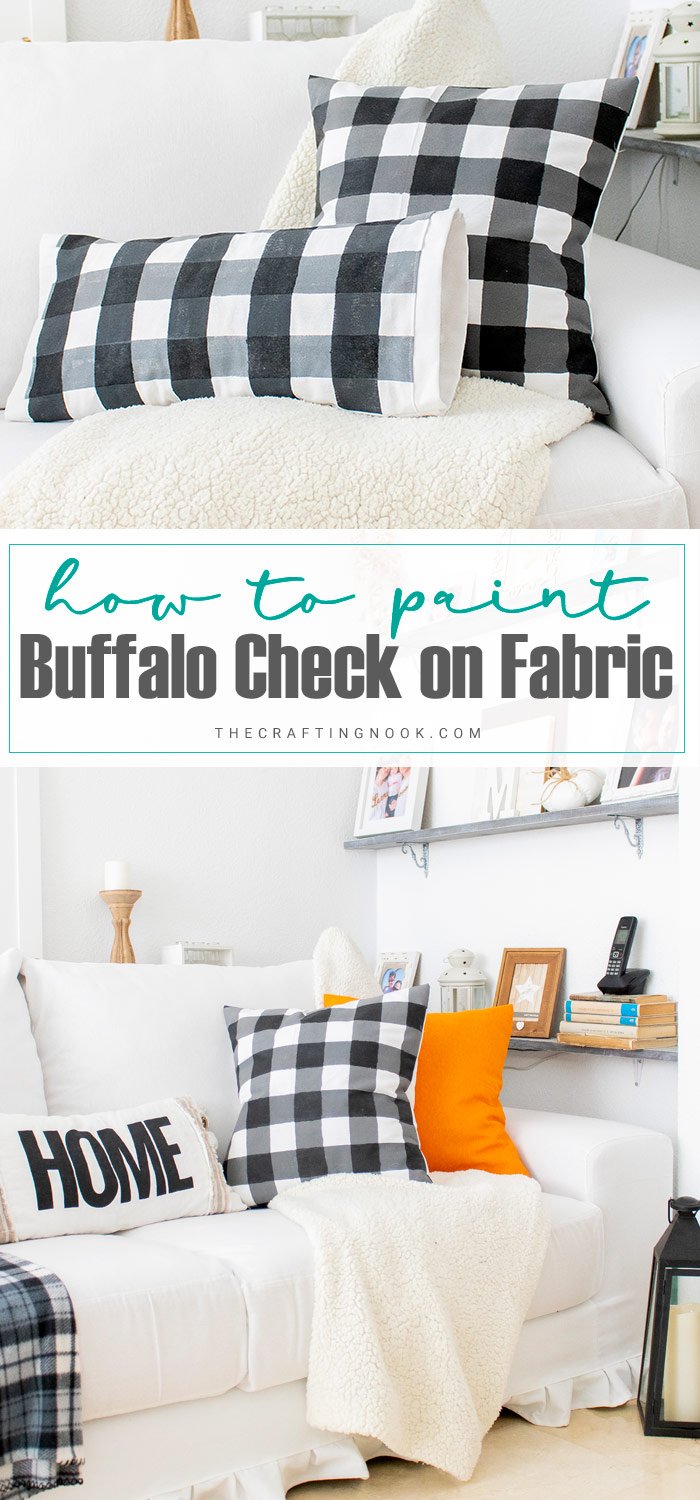
Learn how to paint buffalo plaid easily on fabric or any surface with some paint and painter’s tape. Watch a video tutorial on how I made some cute pillows for my living room.
Ok friends, I know this buffalo check trend is growing and I’m getting a little obsessed but let’s face it, It’s so pretty! I can’t help it, I want my whole home decor with it.
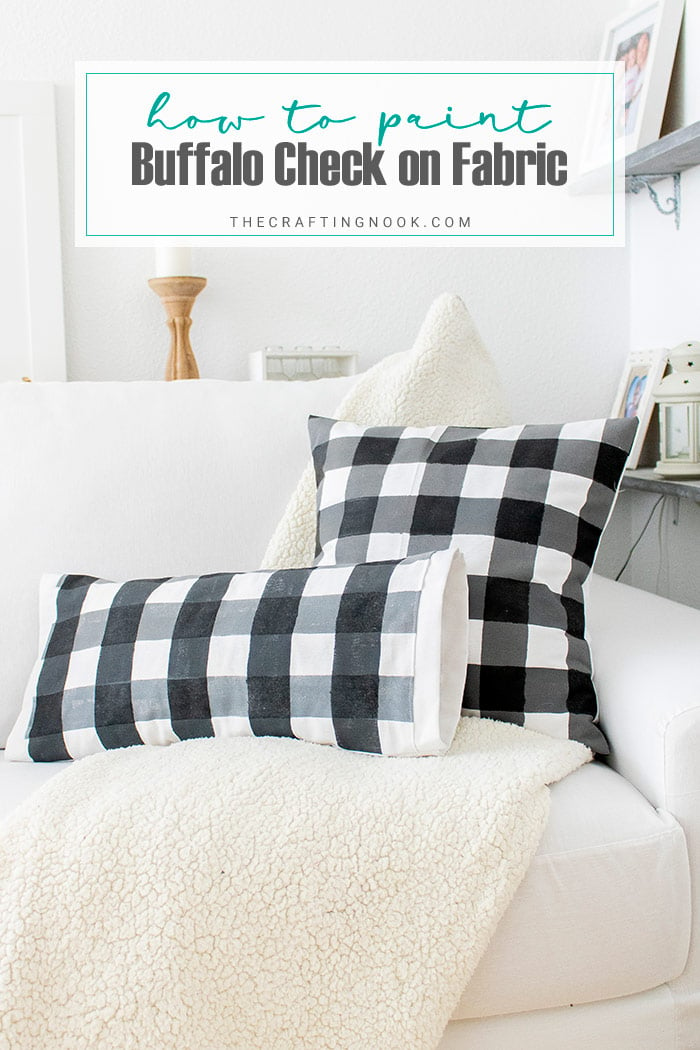
Table of Contents
Painting Buffalo Plaid on Fabric
The problem is that where I live buffalo plaid is not so popular and very hard to find and when I finally do, usually it’s expensive. So, I had to get creative and try to figure out a way to create my own buffalo check.
I wanted so badly some buffalo plaid pillow covers for fall and Christmas and couldn’t find the fabric. Then I came across Michelle’s tutorial on how to paint buffalo plaid sign (so clever) and I said: That’s it!!! I just discovered how to paint buffalo check so I would apply it to fabric and see how it goes.
Learning how to paint buffalo plaid is so easy. You can either do it as Michelle does it over at Weekend Craft or you can find stencils like Donna does it over at Funky Junk which looks crazy amazing.
But for this specific experiment, I found that some masking tape would make it a bit easier so I went for it.
I made a test run on a smaller piece of fabric to make sure it would work and then despite the imperfections, I decided to create another one for a larger pillow.
How to Paint Buffalo Plaid on Fabric
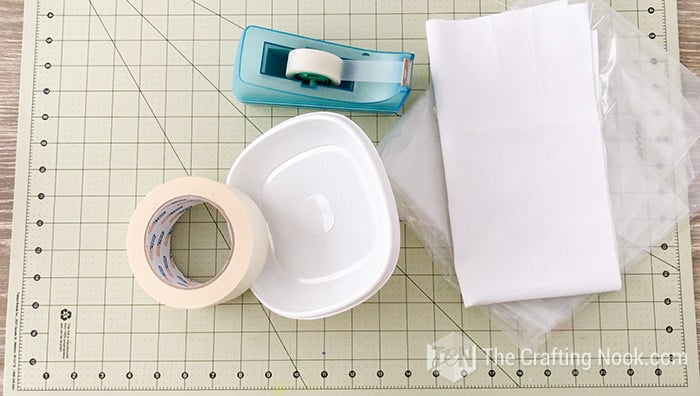
Supplies:
- Piece of white fabric
- Painter’s tape – Masking tape (I used 2 Inches wide)
- Black and white paint (grey if you have or create it yourself)
- Plastic or paper plate
- Plastic protection for your work surface.
Tools:
- Brushes
Instructions:
I created this fun video tutorial if you like this kind of style! If you are more of a step-by-step photo kind of person, scroll down a bit and keep reading.
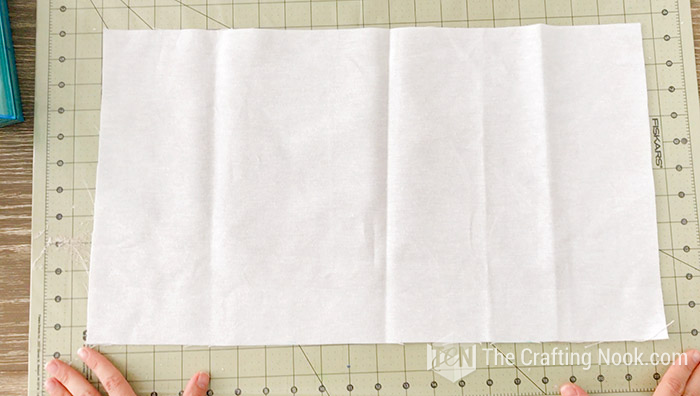
Step 1: Prep Work
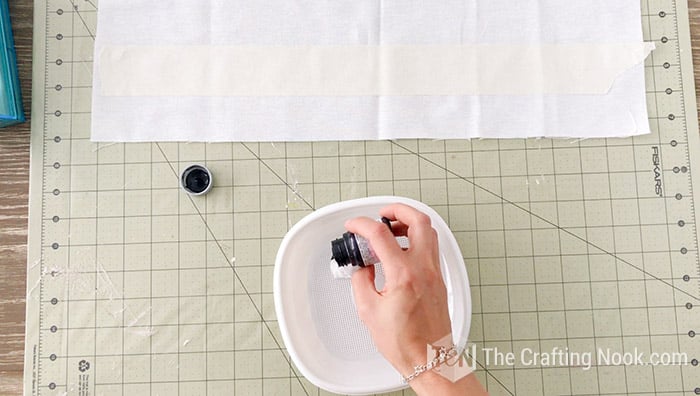
Firstly, Protect your working surface with a plastic sheet. I used my cutting mat and secured the plastic on the back with tape.
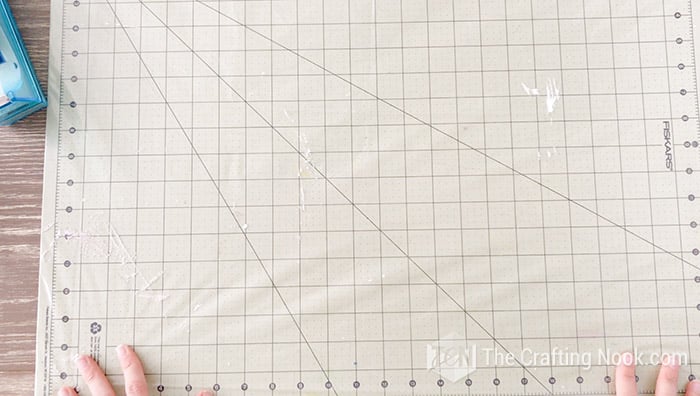
Lay your fabric piece on the cutting mat.
Step 2: Create the Horizontal Lines
Then starting at the top of your fabric edge, add your first piece of tape to create horizontal stripes. Press them down smoothly on your fabric to seal it so the paint won’t leak through.
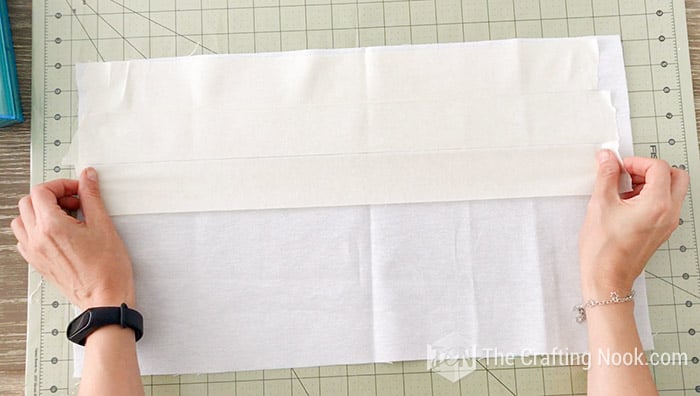
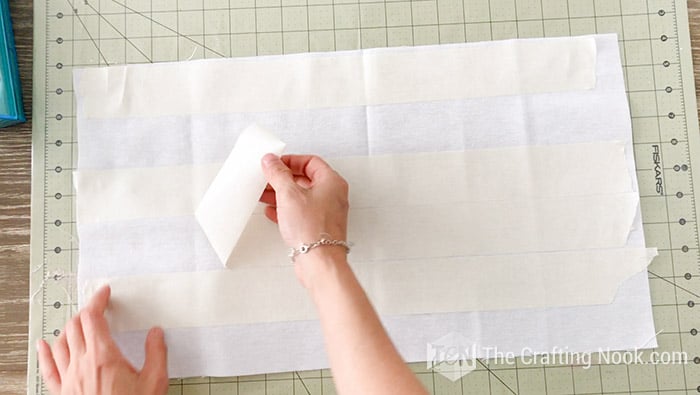
Use a strip of tape as a spacer in between stripes. Lay 3 rows of masking tape tight together but without overlapping.

Then remove the second piece of tape and place it right below the third piece of tape.
Then add a new piece of tape below the fourth. here again, you remove the fourth and place it below the fifth.
Keep doing this until you reach the end of your surface.
You will need 2 shades of grey and black. You can either create your own grey or just buy your favorite shades. In this case, the light grey will be my base color.
Start painting with the lighter grey stripes.
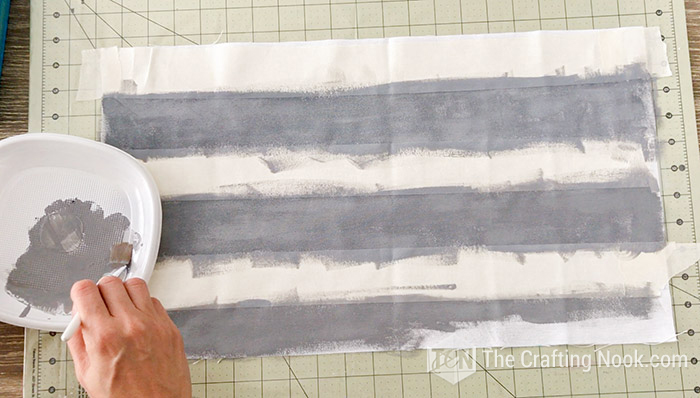
Let it dry for a few minutes and then peel off the tapes.
Then wait until it’s completely dry. Don’t discard your tape stripes.
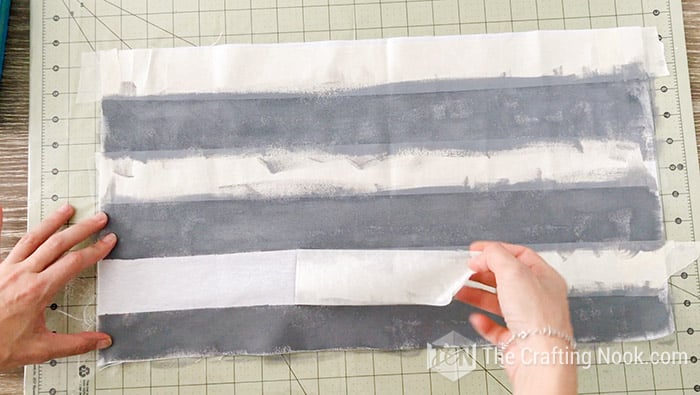
Step 3: Create the Vertical lines
Once dry, Start taping your fabric creating vertical stripes from one of the fabric ends. Use the same technique described in step 2.
Paint your stripes using the second color of paint, in this case, a darker shade of grey.
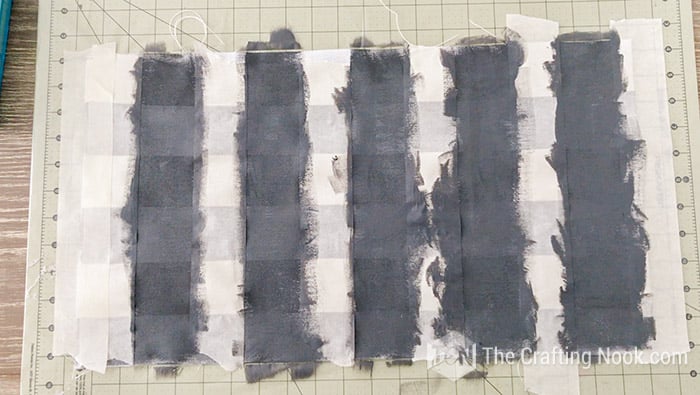
Let it dry completely.
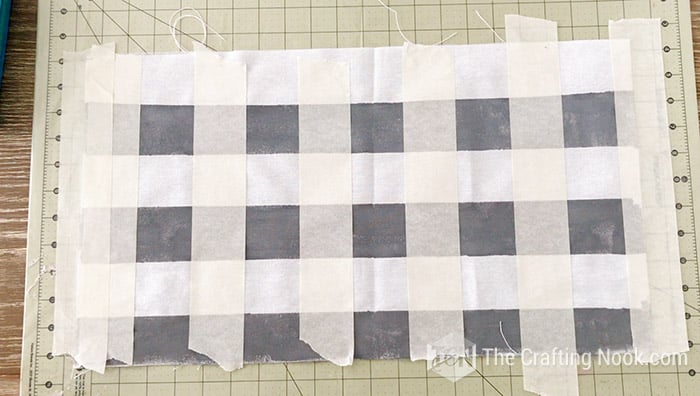
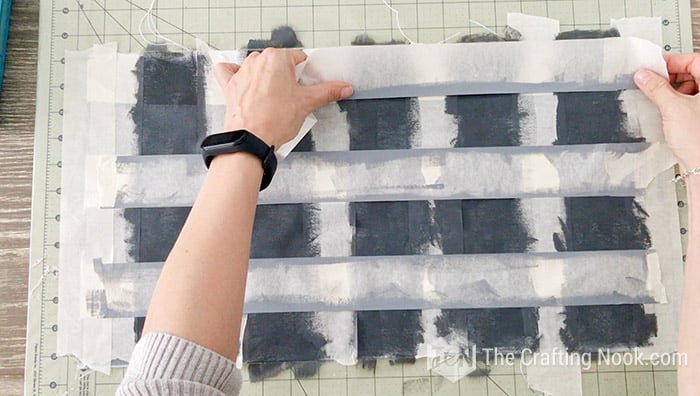
This time you won’t remove your vertical tapes. You will need them in place for the next step.
Step 4: Add the black sections
Once dry, put back your initial horizontal tape stripes in the same place as in Step 2.
Now start painting the unmasked squares on your surface with black paint but don’t soak your brush too much, just a thin coat will do.
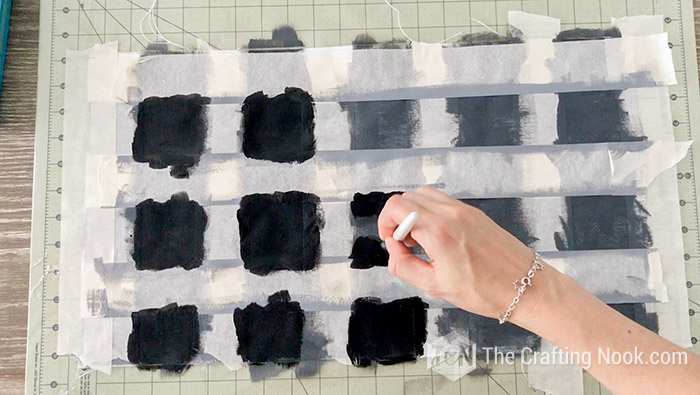
Let it dry for a few minutes and remove your tape stripes carefully.
Let it dry completely.
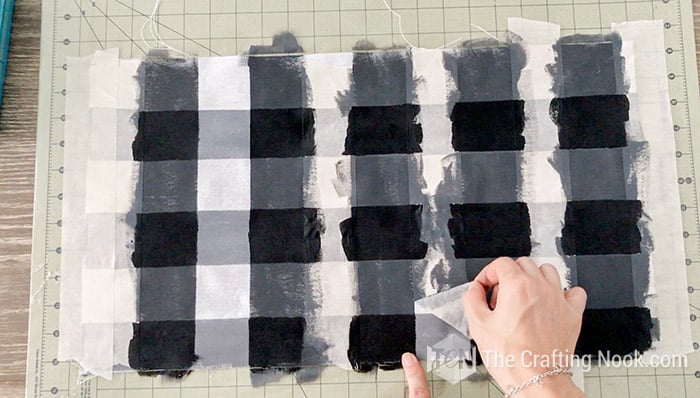
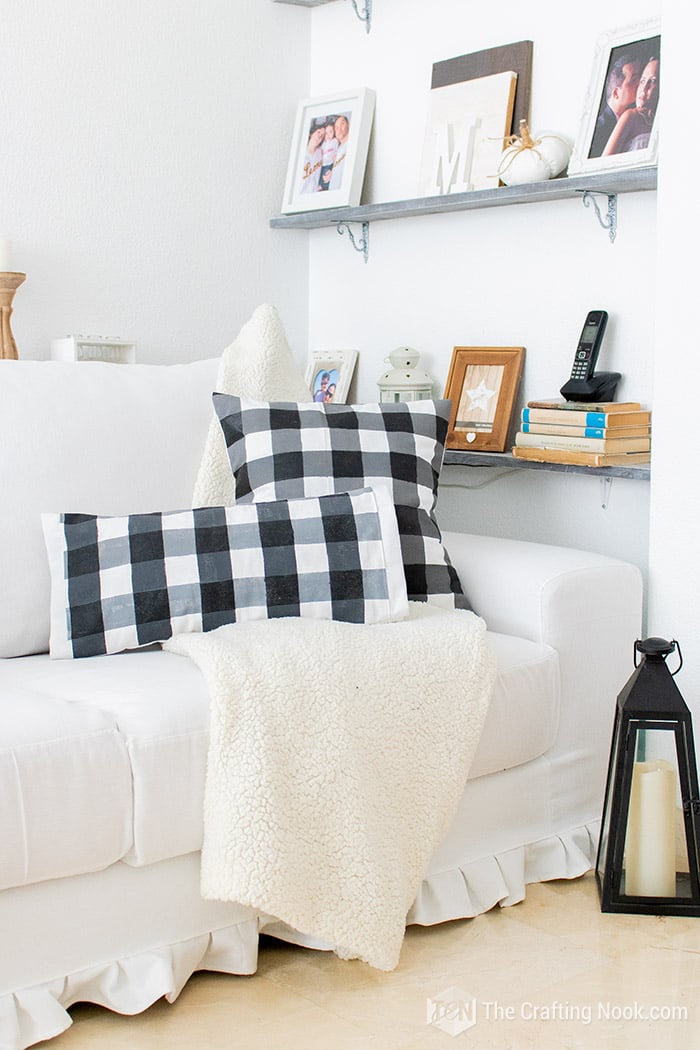
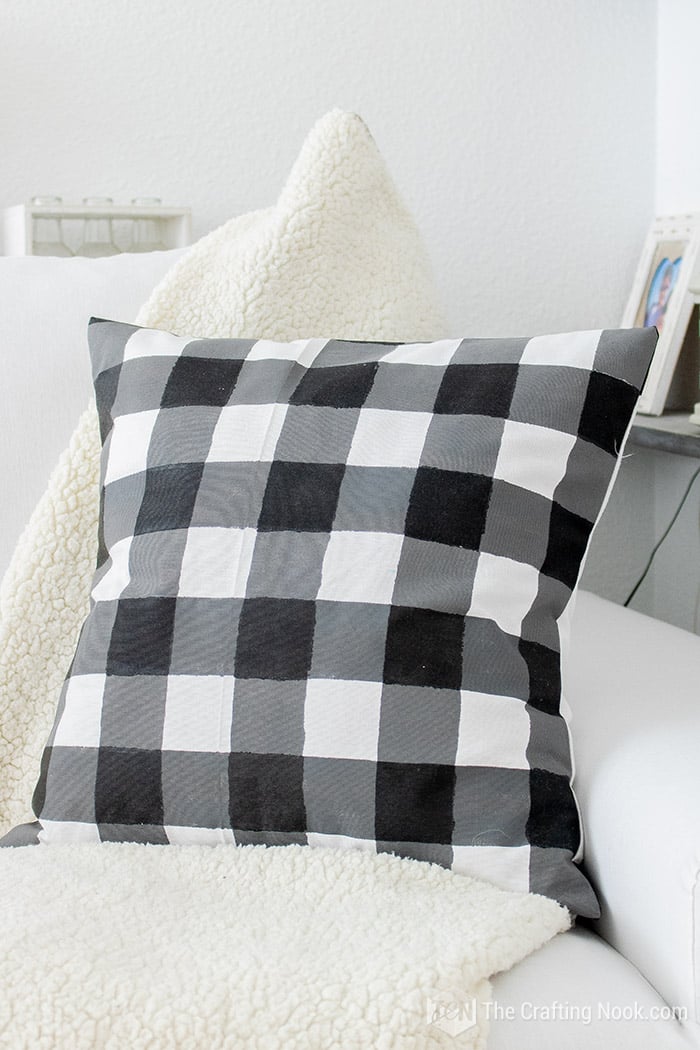
You are done. Your Buffalo plaid painted fabric is ready to be used.
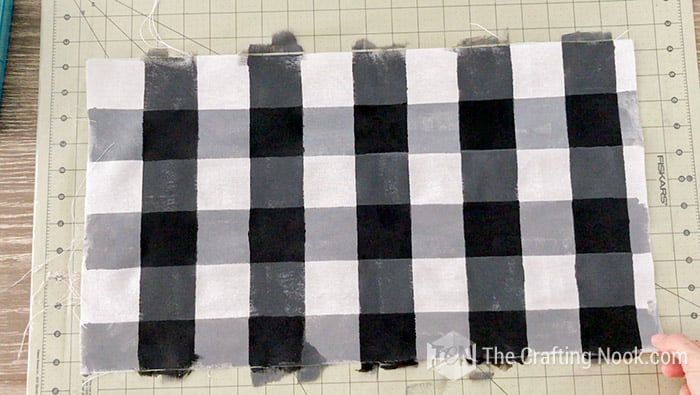
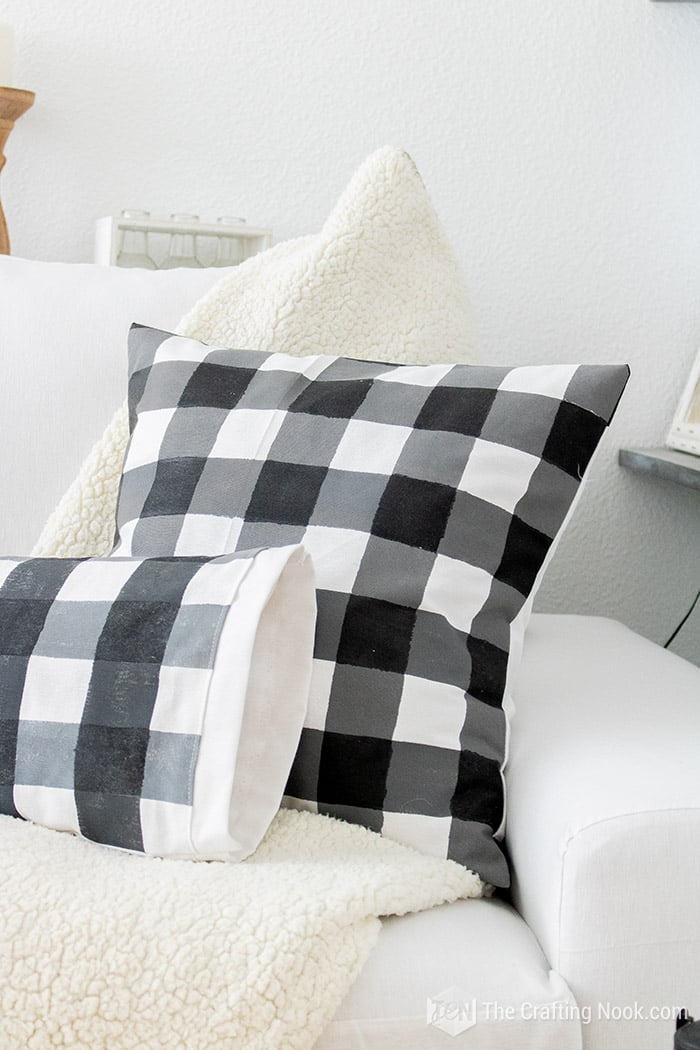
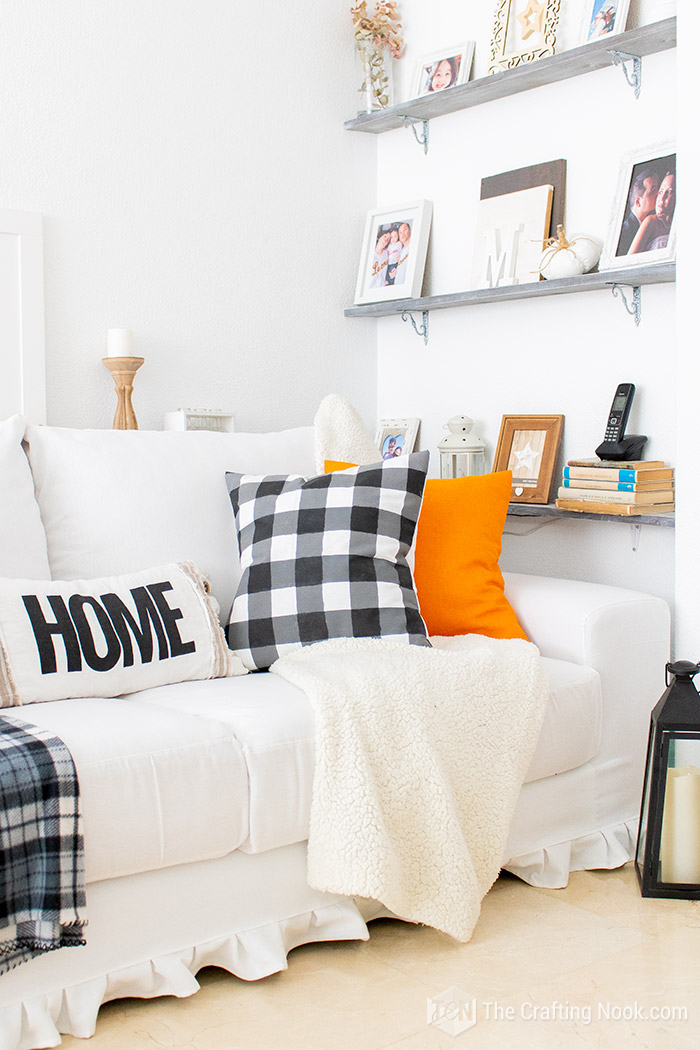
As I mentioned I wanted some cute buffalo plaid pillows so I used the fabric to create pillow covers.
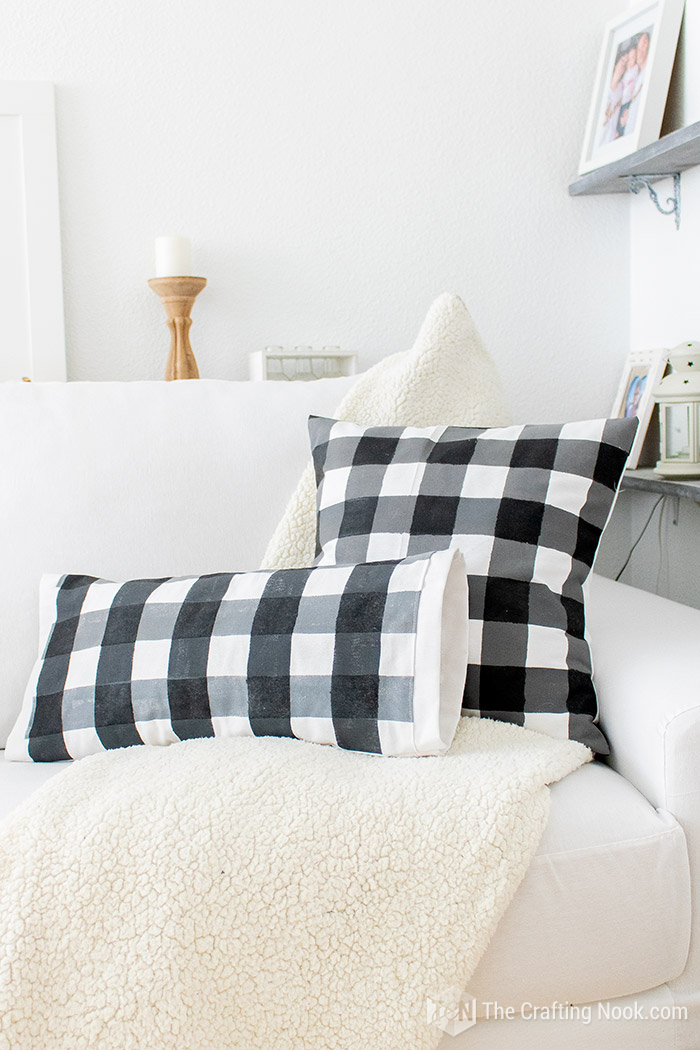
What do you think? Doesn’t it look pretty? Not perfect, but still so pretty! I love it.
It was so useful to learn how to create my own buffalo plaid pattern. Now I can create wood signs, decor pieces, and even fabric-made things.
There’s no need to discard ideas just because you can’t find certain things where you live, you can definitely create yourself most things!
I love that about creativity.
Well, that’s it for today hope you enjoyed this tutorial and that it inspires you to create and be creative!!!
Crafting Tips
I just have to mention a few things I notice that would be useful for anyone that would like to try this:
- Avoid paints that have a plastic finish. Mine is like that and just after a few washes, it starts to feel like fabric again. But I must add that my paint despite being a bit plastic, the color lasts forever. All my painted pillows are still black after 2 years.
- Find really good quality fabric paint. This is a must so your pattern will last long.
- Don’t aim for perfection, it will never be perfect but with patience, it will be so pretty.
- It doesn’t work for any purpose. I mean it will be time-consuming and expensive to make a buffalo plaid tablecloth or something like that. Smaller projects are perfect for this technique.
- If you are painting non-fabric surfaces I recommend using craft paint or acrylic paint.
Frequently Asked Questions
Traditional buffalo plaid fabric is found in red and black or black and white, but it also comes in many colors nowadays. You can find buffalo plaid in almost any color and shade actually.
Buffalo check or buffalo plaid is often a two- or three-color striped fabric whose pattern creates large squares of equal size in all directions (as opposed to checked gingham fabric, which has small squares). While it often includes black as one of the colors, black is not required in order to qualify the pattern as a buffalo check.
Pretty much any surface work. You can paint buffalo plaid on wood, cardboard, fabric, clay pots, walls, and many more.
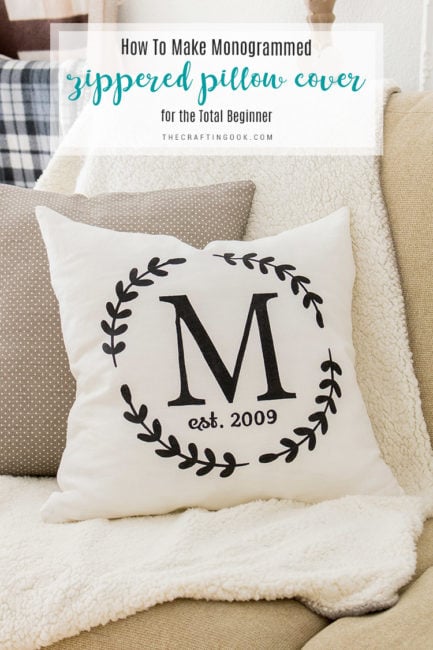
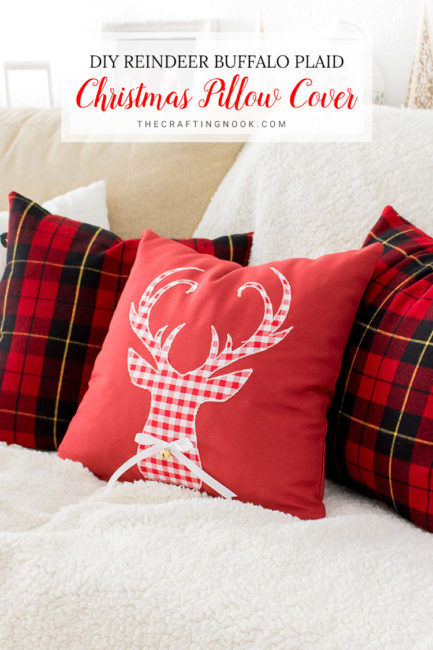
More Pillow Crafts to Try
If you enjoyed learning how to paint buffalo plaid, you might also love these other easy craft ideas too:

✂️ Tutorial

How To Paint Buffalo Plaid The Easy Way.
Tools
- Brushes
Supplies
- Piece of white fabric
- Painters tape – Masking tape I used 2 Inches wide
- Black and white paint grey if you have or create it yourself
- Plastic or paper plate
- Plastic protection for your work surface.
Instructions
STEP 1: PREP WORK
- Firstly, Protect your working surface with a plastic sheet. I used my cutting mat and secured the plastic on the back with tape.
- Lay your fabric piece on the cutting mat.
STEP 2: CREATE THE HORIZONTAL LINES
- Then starting at the top of your fabric edge, add your first piece of tape to create horizontal stripes. Press them down smoothly on your fabric to seal it so the paint won’t leak through.
- Use a strip of tape as a spacer in between stripes. Lay 3 rows of masking tape tight together but without overlapping.
- Then remove the second piece of tape and place it right below the third piece of tape.
- Then add a new piece of tape below the fourth. here again, you remove the fourth and place it below the fifth.
- Keep doing this until you reach the end of your surface.
- You will need 2 shades of grey and black. You can either create your own grey or just buy your favorite shades. In this case, the light grey will be my base color.
- Start painting with the lighter grey stripes.
- Let it dry for a few minutes and then peel off the tapes.
- Then wait until it’s completely dry. Don’t discard your tape stripes.
STEP 3: CREATE THE VERTICAL LINES
- Once dry, Start taping your fabric creating vertical stripes from one of the fabric ends. Use the same technique described in step 2.
- Paint your stripes using the second color of paint, in this case, a darker shade of grey.
- Let it dry completely.
- This time you won’t remove your vertical tapes. You will need them in place for the next step.
STEP 4: ADD THE BLACK SECTIONS
- Once dry, put back your initial horizontal tape stripes in the same place as in Step 2.
- Now start painting the unmasked squares on your surface with black paint but don’t soak your brush too much, just a thin coat will do.
- Let it dry for a few minutes and remove your tape stripes carefully.
- Let it dry completely.
- You are done. Your Buffalo plaid painted fabric is ready to be used.
Share and PIN ME
Til’ next time…


FREE WORKBOOK
Keeping your Sweet Home Organized
Learn how to create intentional habits and simple routines to Keep Your Home Organized. Plus freebies, printables, exclusive content, and tips.
Disclaimer: By clicking on the “Yes” button above you are giving me your consent to collect and use your information according to the law and My Policy Privacy. Zero Spam I promise!