Easy DIY Princess Poppy Troll Costume for Kids
This post may contain affiliate links. Please read our Disclosure Policy.
Making a Princess Poppy Troll costume at home doesn’t have to be complicated or stressful. This easy DIY Poppy Troll costume is designed for kids and uses simple materials you can put together without advanced crafting skills.
In this tutorial, I’ll show you exactly how to make a Poppy Troll costume step by step, plus a video so you can see the finished look before you start. If you’re looking for a fun, homemade costume that actually looks like Princess Poppy and is doable at home, this one works.

Table of Contents
How to make this Poppy Troll Costume
My daughter went all in on Trolls this year. One day it was Frozen, the next it was full-on Princess Poppy obsession. If you have kids, you know how fast that switch can happen.
After she asked me (many times) to be Poppy for Halloween, I started looking for a costume that didn’t blow the budget. No luck. So I did what I usually do and made it myself.
This Poppy Troll costume is surprisingly easy to make, even if you’re not a professional sewer. The dress takes just a couple of hours, and the wig can be done in about 30 minutes. I’ve included step-by-step photos for the outfit and a video tutorial for both the dress and the wig, so you can see exactly how everything comes together before you start.

One of the things I wanted most with this costume was flexibility. There’s no pattern required, which means you can adapt it to any child’s size. All you need is a simple sleeveless dress, like one you may already have in your child’s closet, plus a few easy-to-find supplies.
For the wig, I had to get creative. Tulle rolls can be expensive where I live, so instead I used a very inexpensive pink tulle skirt from a party store. It worked perfectly and kept the whole project budget-friendly. Everything else is simple, affordable, and easy to find.
This costume is meant to be fun, not stressful. You can keep it simple or add extra details depending on the time you have and what your child loves. I was short on time when I made this, so I kept things quick and easy, and it still turned out great.
Let’s do this!
Project snapshot
- Type of project: Sewing
- Skill level: Beginner
- Time needed: About 2 hours for the dress + 30 minutes for the wig
- Pattern required: No
- Tools required: Sewing machine
- Best for: Kids costume (easy to adjust for different sizes)
- Budget range: Low
Supplies:
- A sleeveless dress {that you might already have}
- Blue felt and light blue Felt {how much? That will depend on your kid’s size}
- Tulle skirt {any size will do, just make sure it’s really thick}
- A small piece of white yarn {Thick}
- Headband
- Teal Foam
- Hot glue gun
- Needle and thread {white or light blue}
- Large cup {those really large}
- Pen or pencil, ruler, and scissors.
- Pins
- Lots of Love!
Tools:
Optional:
- Pink Sweater and pink tights {for Poppy skin}.
Fabrics Alternatives
You can use numerous types of fabric. I used Felt because is cheap and warm. Also, the felt is stiffer so it keeps the shape. You can also use: Fleece if you need it warmer, or Cotton or knit for warmer weather.

Instructions for Poppy’s Dress:
Step 1: Prepare the base shape
Prepare the base shape
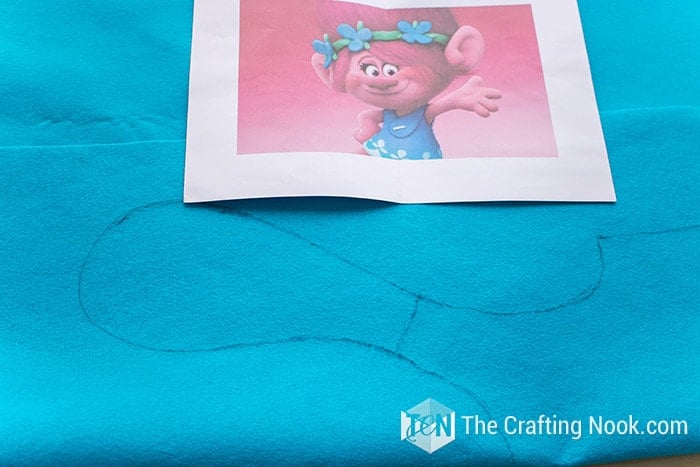
Take a sleeveless dress that fits your child and fold it in half lengthwise.

Fold your blue felt in half and place the folded dress on top, aligning it with the fold. This will be your guide for sizing.
Trace the shape of the dress onto the felt.
On one shoulder only, extend the shoulder line into a soft drop shape. This will become the signature flap on Poppy’s dress.
Cut the felt along the traced lines, including the shoulder flap. This piece will be the back of the dress.
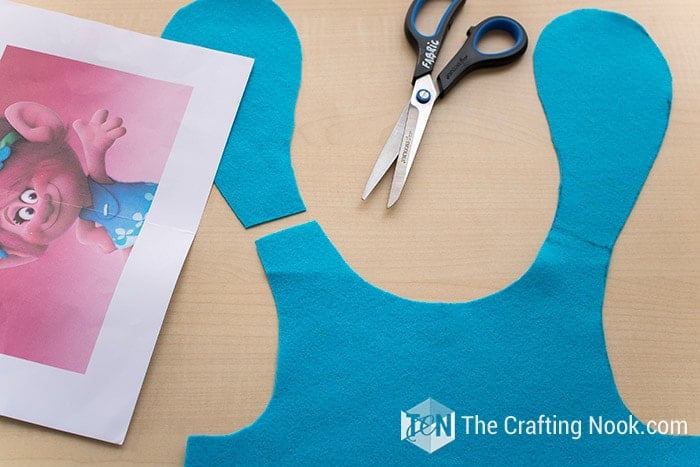
Using this cut piece as a guide, trace and cut a second piece without the shoulder flap. Slightly widen the neckline on this piece.
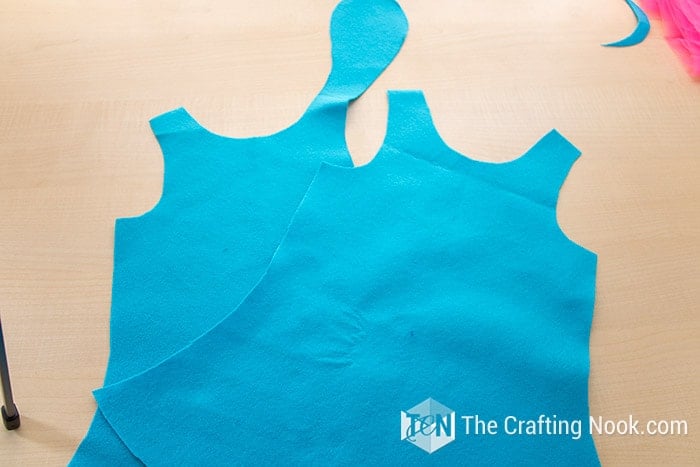
This will be the front of the dress.
Step 2: Create the decorative front panel
Place your light blue felt at the bottom of the front dress piece. It should cover about ¼ of the dress height.
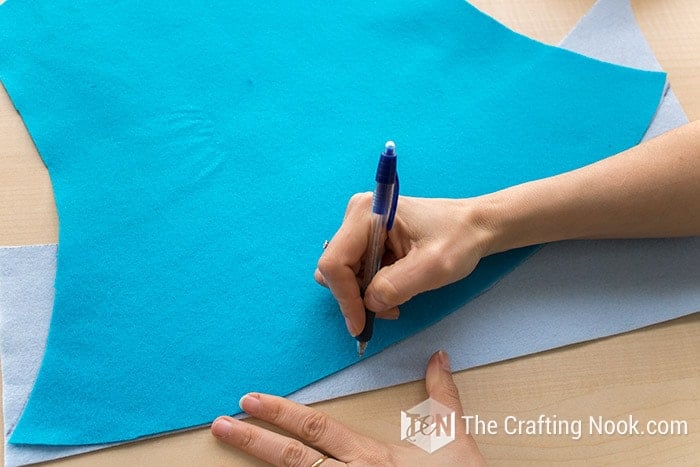
Trace the bottom shape of the dress onto the light blue felt.
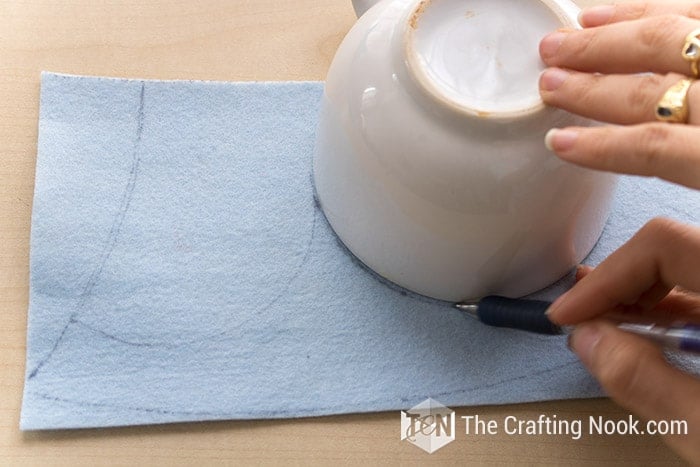
Using a cup or round object, draw wave shapes about one inch from the bottom edge. Aim for at least four rounded peaks.


Cut the wavy panel and set it aside.
Step 3: Make the teardrop decorations
Draw one large teardrop (about 1½ inches long) and one smaller teardrop (about 1 inch). Adjust slightly depending on dress size.
Cut these shapes out and use them as templates:
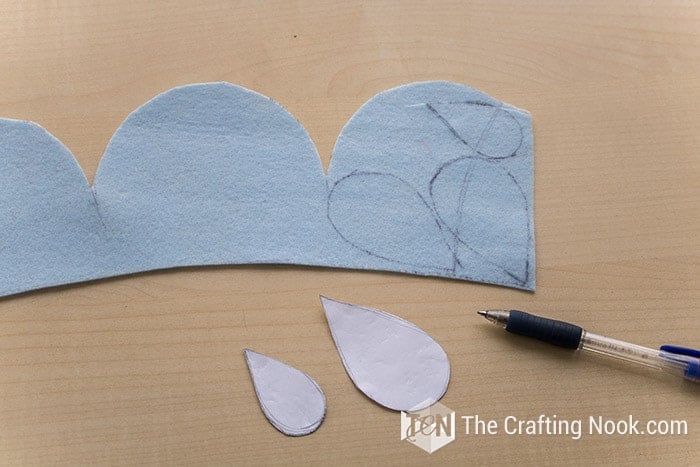
1 large teardrop and 2 small teardrops for each wave peak.
Arrange the teardrops on top of the light blue panel in a repeating pattern, then place the entire panel onto the front of the dress.
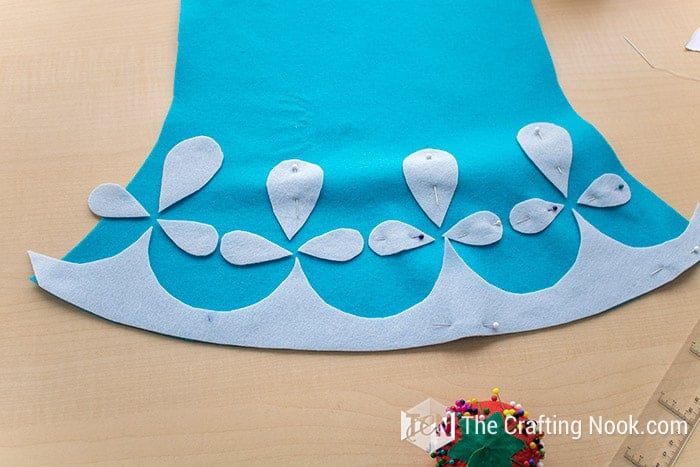
Pin everything in place.
Step 4: Sew the decorations
Hand-sew the decorative pieces to the dress. The stitches do not need to be perfect.
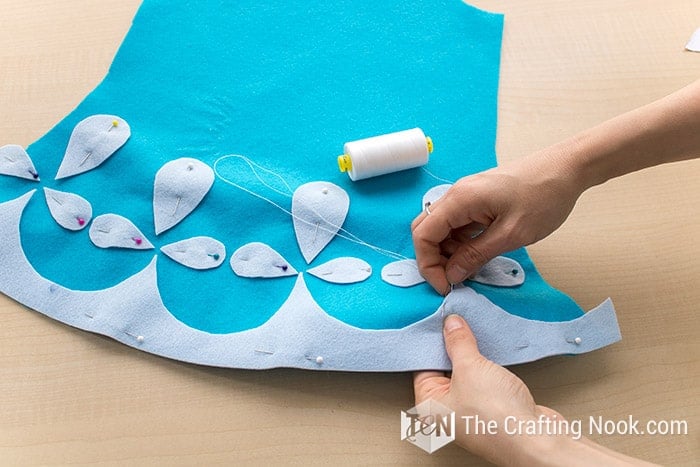
To keep stitches less visible, insert the needle through the blue felt close to the edge of the light blue pieces, then back through the light blue felt.
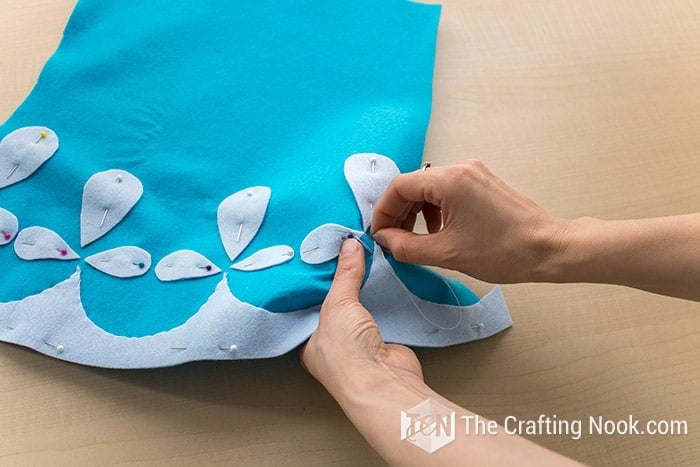
Once finished, you should have a fully decorated front panel.

You can repeat this process on the back if you want, but it’s optional. I skipped it to save time.
Step 5: Assemble the dress
Place the front and back pieces right sides together.
Stitch:
both side seams
the shoulder without the flap
Leave the flap shoulder open for now.

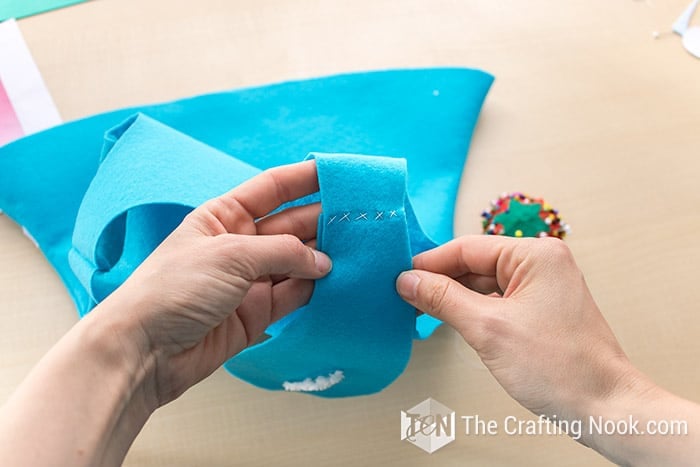
To attach the flap, align the cut edge with the original shoulder line so it looks like a continuation of the dress.
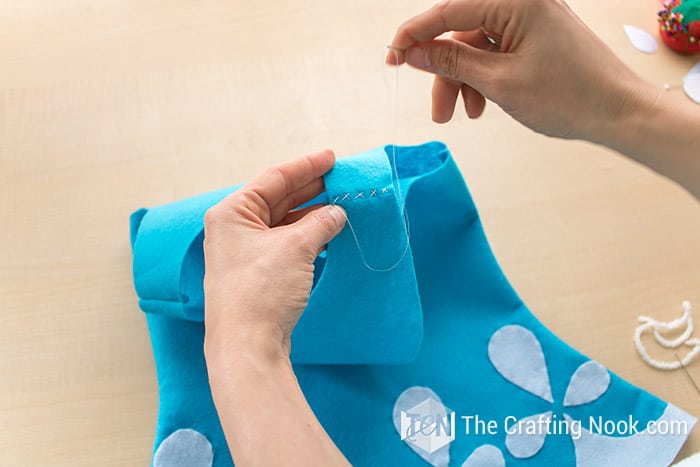
Stitch along that line using a simple cross stitch. (Watching the video here helps clarify this step.)
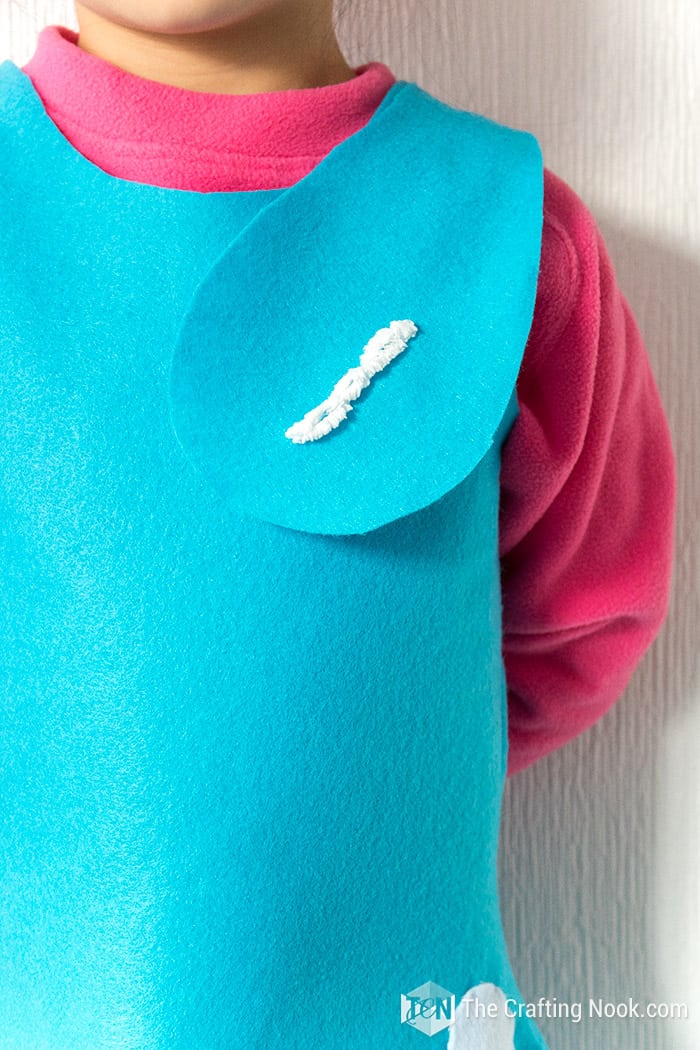
Step 6: Add the final flap detail
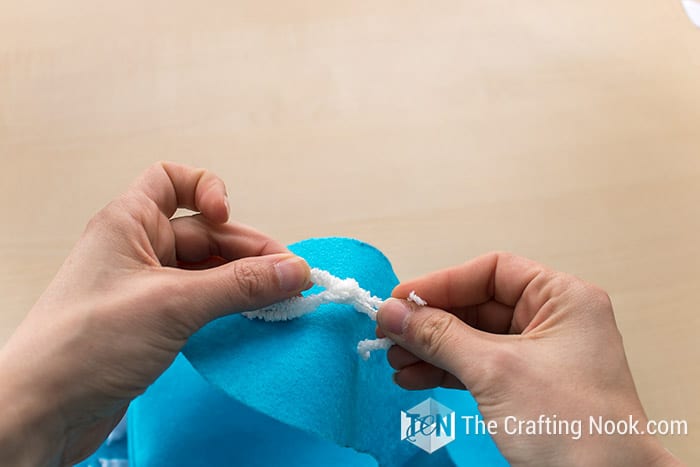
Using thick white yarn and a yarn needle, sew one large decorative stitch across the flap.
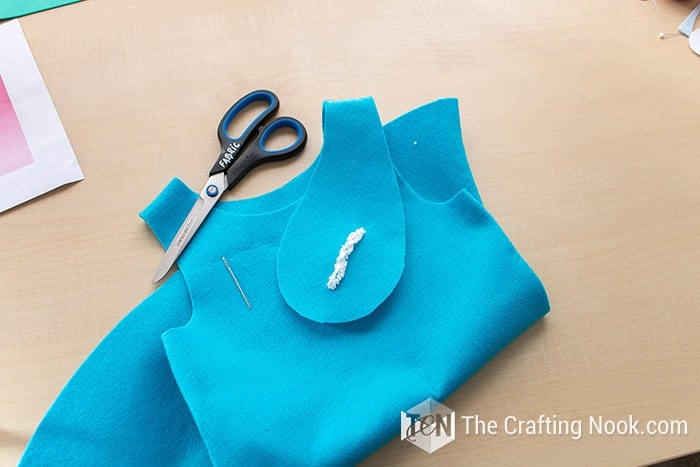
Make sure both ends meet on the wrong side of the fabric and secure with a knot.
Your Poppy Troll dress is now finished.

FIT NOTE: Since each body is different you might consider adding a zipper on one side. My girl is silly skinny so I didn’t need but some of the other moms added it and it looked great.

Poppy’s Hair Wig Instructions:
The wig is the final touch that really brings this Princess Poppy costume to life.

I explain the full wig process step by step in the video, including how I used a very inexpensive pink tulle skirt instead of tulle rolls.
Watch the video and feel free to ask questions in the comments if anything isn’t clear.

Here you go your Poppy Troll Costume is ready to rock!!!!

Not bad for a last-minute costume right?

Let me know your thoughts in the comments, I would love to know!
Crafting Tips
- Felt is the easiest fabric to work with. It doesn’t fray, holds its shape, and hides small stitching mistakes, which makes it ideal for beginners.
- Hand sewing works just fine. You don’t need a sewing machine for this project. Simple stitches are enough, and they won’t show much once the costume is finished.
- Trace a dress that already fits. This saves time and removes guesswork when it comes to sizing.
- Decorate only the front to save time. The costume still looks great even if the back is left plain.
- Lay everything out before sewing. Pin all pieces in place first so you can adjust spacing and alignment easily.
Alternatives and Variations
Fabric alternatives:
Use fleece for colder weather, or cotton or knit fabric for warmer climates.
Simpler version:
Skip the teardrop shapes and keep only the wavy hem for a faster, minimal look.
More detailed version:
Add decorations to the back of the dress or use contrasting thread to make the details stand out.
Size adjustments:
This pattern-free method works for different ages. Just scale everything based on the dress you’re tracing.
Wig alternative:
Using a pre-made pink tulle skirt instead of loose tulle saves time and money and is much easier to manage.
Frequently Asked Questions
No. This costume doesn’t use a pattern. You’ll trace a sleeveless dress that already fits your child, which makes sizing simple.
Yes. The entire costume can be hand-sewn. Felt is forgiving and hides small stitching imperfections.
The dress takes about two hours, and the wig takes around 30 minutes, depending on your pace.
Yes. Because you’re using a dress as your guide, it’s easy to adjust the costume for different sizes.
Not always. If the dress slips on easily, you can skip it. For snug fits, adding a zipper on one side works well.
No. The wig is explained step by step in the video, and using a tulle skirt instead of loose tulle makes it much easier.
More Halloween project Ideas to try
If you like this Poppy Troll Halloween Costume tutorial, you might love these Halloween project ideas too:

✂️ Tutorial

DIY Poppy Troll Costume Tutorial
Tools
- Hot glue gun
- Sewing Machine
Supplies
Dress
- A sleeveless dress {that you might already have}
- Blue Felt {how much? That will depend on your kid’s size but around a yard or so}
- Light blue Felt 1/4 of yard
- A small piece of white yarn {Thick}
- Needle and thread {white or light blue}
- Large cup {those really large}
- Pen or pencil ruler, and scissors.
Wig
- Headband
- Tulle skirt {any size will do just make sure is really thick}
- Teal Foam
Instructions
Step 1: Prepare the base shape
- Prepare the base shape
- Take a sleeveless dress that fits your child and fold it in half lengthwise.
- Fold your blue felt in half and place the folded dress on top, aligning it with the fold. This will be your guide for sizing.
- Trace the shape of the dress onto the felt.
- On one shoulder only, extend the shoulder line into a soft drop shape. This will become the signature flap on Poppy’s dress.
- Cut the felt along the traced lines, including the shoulder flap. This piece will be the back of the dress.
- Using this cut piece as a guide, trace and cut a second piece without the shoulder flap. Slightly widen the neckline on this piece.
- This will be the front of the dress.
Step 2: Create the decorative front panel
- Place your light blue felt at the bottom of the front dress piece. It should cover about ¼ of the dress height.
- Trace the bottom shape of the dress onto the light blue felt.
- Using a cup or round object, draw wave shapes about one inch from the bottom edge. Aim for at least four rounded peaks.
- Cut the wavy panel and set it aside.
Step 3: Make the teardrop decorations
- Draw one large teardrop (about 1½ inches long) and one smaller teardrop (about 1 inch). Adjust slightly depending on dress size.
- Cut these shapes out and use them as templates:
- 1 large teardrop and 2 small teardrops for each wave peak.
- Arrange the teardrops on top of the light blue panel in a repeating pattern, then place the entire panel onto the front of the dress.
- Pin everything in place.
Step 4: Sew the decorations
- Hand-sew the decorative pieces to the dress. The stitches do not need to be perfect.
- To keep stitches less visible, insert the needle through the blue felt close to the edge of the light blue pieces, then back through the light blue felt.
- Once finished, you should have a fully decorated front panel.
- You can repeat this process on the back if you want, but it’s optional. I skipped it to save time.
Step 5: Assemble the dress
- Place the front and back pieces right sides together.
- Stitch:
- both side seams
- the shoulder without the flap
- Leave the flap shoulder open for now.
- To attach the flap, align the cut edge with the original shoulder line so it looks like a continuation of the dress.
- Stitch along that line using a simple cross stitch. (Watching the video here helps clarify this step.)
Step 6: Add the final flap detail
- Using thick white yarn and a yarn needle, sew one large decorative stitch across the flap.
- Make sure both ends meet on the wrong side of the fabric and secure with a knot.
- Your Poppy Troll dress is now finished.
- FIT NOTE: Since each body is different you might consider adding a zipper on one side. My girl is silly skinny so I didn’t need but some of the other moms added it and it looked great.
Poppy’s Hair Wig Instructions:
- The wig is the final touch that really brings this Princess Poppy costume to life.
- I explain the full wig process step by step in the video, including how I used a very inexpensive pink tulle skirt instead of tulle rolls.
- Watch the video and feel free to ask questions in the comments if anything isn’t clear.
- Here you go your Poppy Troll Costume is ready to rock!!!!
Video

Notes
If you like this Poppy Troll Costume Tutorial, Don’t forget to share and Pin it!

Til’ next time…


FREE WORKBOOK
Keeping your Sweet Home Organized
Learn how to create intentional habits and simple routines to Keep Your Home Organized. Plus freebies, printables, exclusive content, and tips.
Disclaimer: By clicking on the “Yes” button above you are giving me your consent to collect and use your information according to the law and My Policy Privacy. Zero Spam I promise!