DIY Gorgeous Felt Leaf Wreath for Christmas
This post may contain affiliate links. Please read our Disclosure Policy.
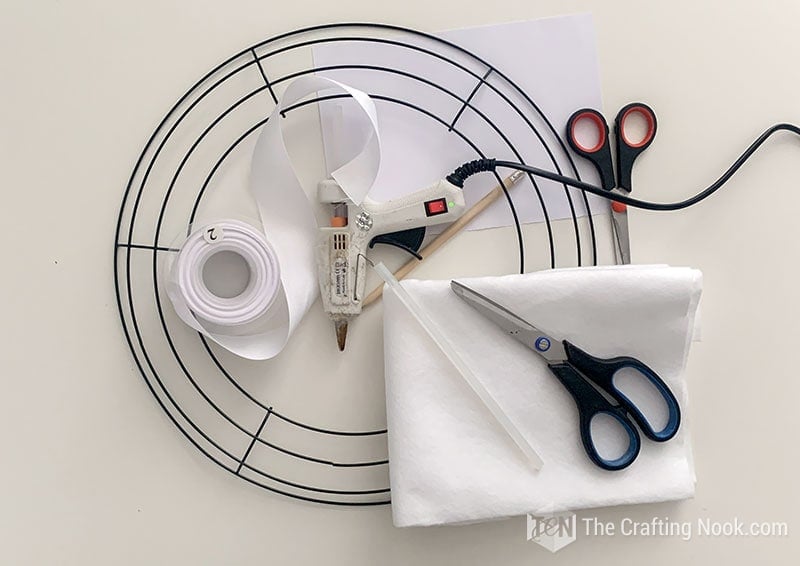
Get into the holiday spirit by making this gorgeous felt leaf wreath. The materials are simple: felt, ribbon, wreath frame, and hot glue. See how to make one yourself here.
With felt, it’s easy and so fun to make a homemade Christmas wreath.

Table of Contents
Easy Felt Leaf Wreath Tutorial
You probably know me by now well enough to know that Christmas is my favorite time of the year and that I count the days after summer is over to start my Holiday decorations.
This year I decided to go for a more Winter Wonderland style, with lots of white, snowy, and cozy looks.
This DIY Christmas wreath is perfect for this holiday decorating!
Whether you hang this holiday felt wreath on a door, window, mantel, or a tabletop, it will create a festive and cozy ambiance. And making a felt wreath is much easier than you think!
Given that I initially purchased enough felt for my sofa slipcover, I decided I could spare a little of it since I have always wanted to make a felt wreath.
Winter is a great time to make this wreath since the process of cutting and assembling it’s such a soothing activity. The result is a soft, squishy wreath.
Throughout this post, I share with you my cute and super easy DIY felt leaf wreath instructions. No sewing or cutting machine is needed.
For this project, any thick piece of thick synthetic material or wool does the work, I used normal white felt fabric. Naturally, you may choose any color of felt you like.

The finished dimensions of this wreath are 15″ by 15″ (38 X 30 cm) using a wire wreath frame.
The best part of this felt wreath is that it only takes an hour or so to make. This project would be great for a group of girlfriends, or a family craft night, especially with kids because it uses readily available materials and supplies and it’s simple enough to not interfere with lively conversation.
How to Make A Felt Leaf Wreath for Christmas

Supplies:
- Wire wreath frame (You can use foam wreath form too)
- 2 Inch white ribbon
- 1 yard and 1/2 white felt fabric.
- Paper or cardstock
- Decorative items optional.
Tools:
- Hot glue gun and glue sticks.
- Scissors
- Pencil
Felt Leaf Wreath Instructions:
Before we begin, be sure to follow us on Pinterest, Facebook, Instagram, and YouTube, and also sign up for our email list newsletter (at the end of this post), so you’ll never miss a post!
Step 1: Make the paper leaves. Lots of them.
I didn’t create any printable leaf template because I wanted to show you, you can do it too. It’s so super simple. I made 2 types of leaves: a simple one and a point one (the traditional Christmas leaf).
The simple leaf is like a drop-shape. decide the size you would like it to be and draw a drop. Mines is 3.5 Inches (9 cm)
The second one is making a pointy tip, like if you were going to draw a Christmas tree, and then 3 curves ending in ponty tips: one smaller, then one larger and then another one smaller. You can check out the video where you can see what I mean.
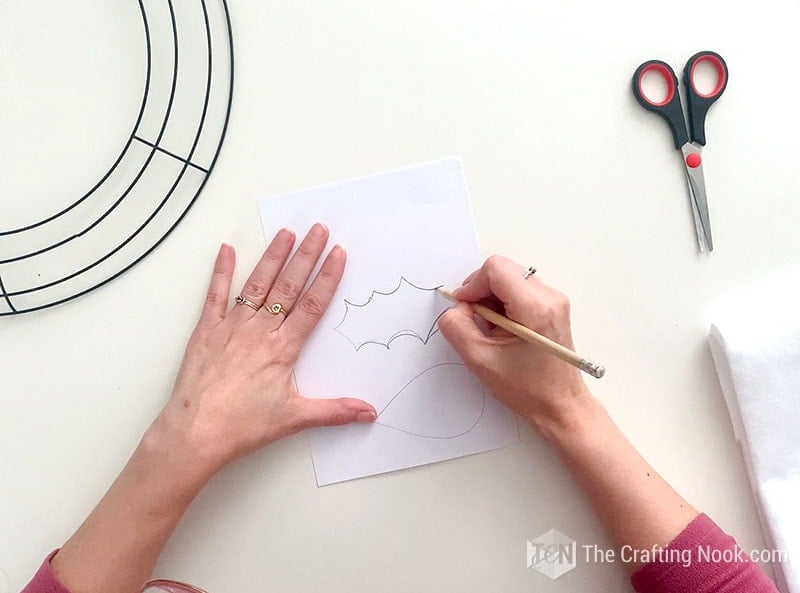
Once you have the two leaves ready, cut them with your scissors.
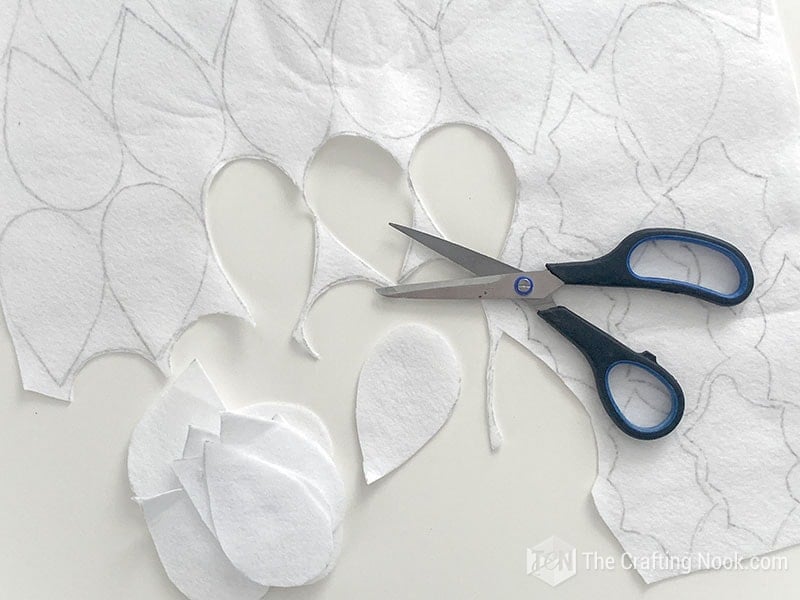
Step 2: Make the felt leaves. Lots of them.
The next step is to transfer your leaves onto the felt. Using your paper or cardstock template, trace the pattern onto the felt as shown:

I tried to optimize the felt fabric as much as I could so I put my paper leaf template on top of the felt very close to the edges and started drawing the shape.

Then moved the leaf right next to the previous one and draw it and so on and so forth.
I made over 80 simple leaves and around 20 pointy. So just fill your felt space mixing between the two.
Cut out all the felt leaves, making sure to cut off pencil markings.

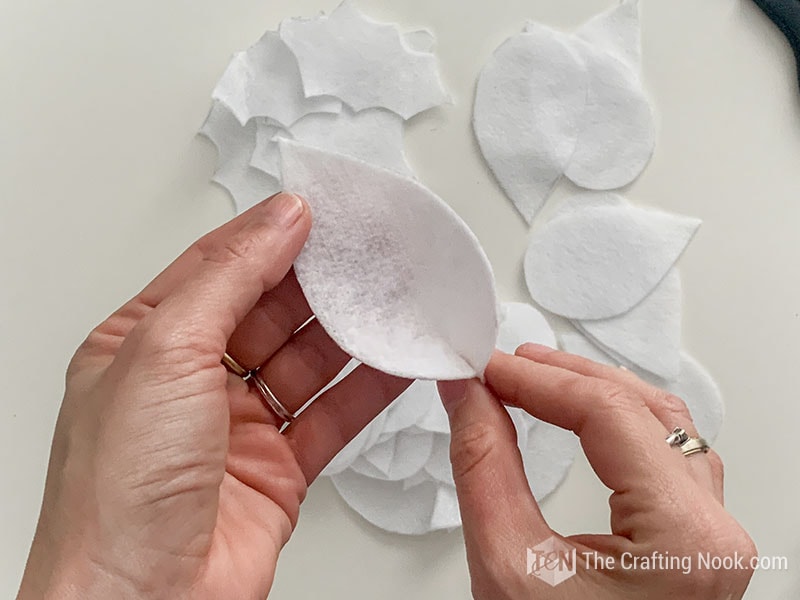
Step 3: Shape the Leaves
Add a dab of hot glue on the rounded (not the pointed) end of a felt leaf to give the leaves a three-dimensional look.
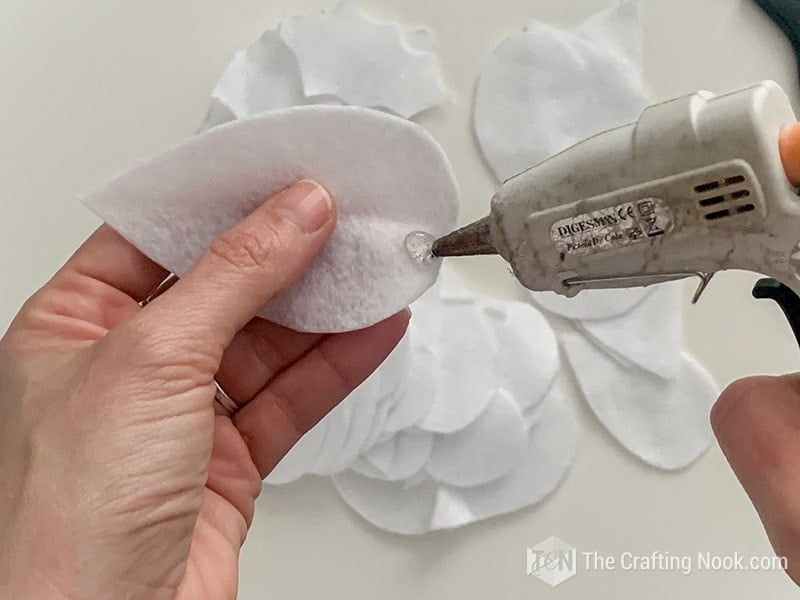
Fold and pinch the ends together and hold them for a few seconds until they hold. Do this for each and every leaf and also to the pointy ones but bluing the opposite end of the pointy one.
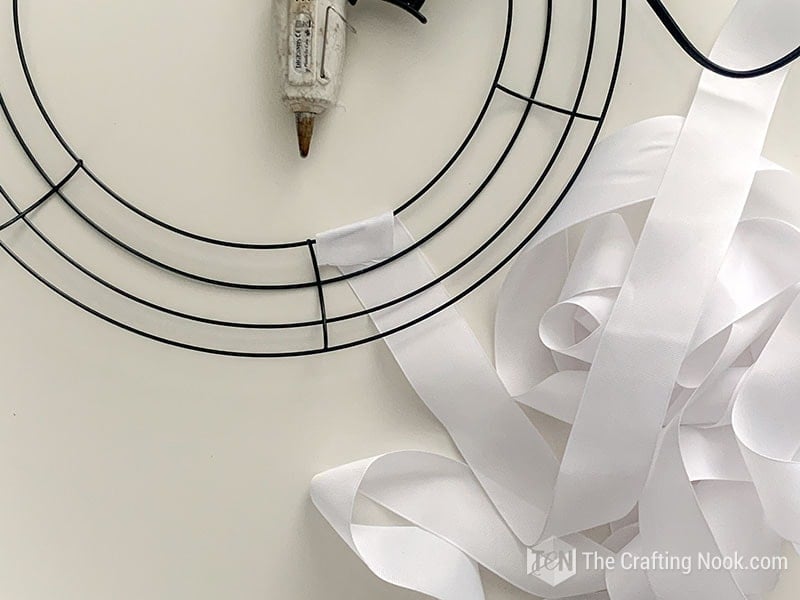
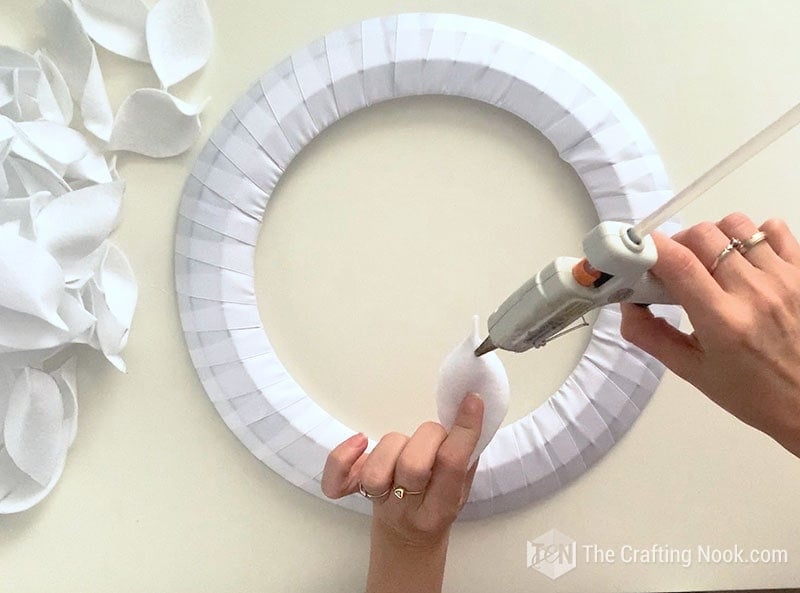
Step 4: Wrap the wreath form with a ribbon
Because the wreath will be covered with felt leaves, you want to wrap your wreath form with fabric or ribbon the same color as your felt. I used a white ribbon.
Place the ribbon strip on the wreath back and fold the end around one of the wires of the wreath frame. Dab a little hot glue on one end and press. Let the glue harden for around 10 seconds.
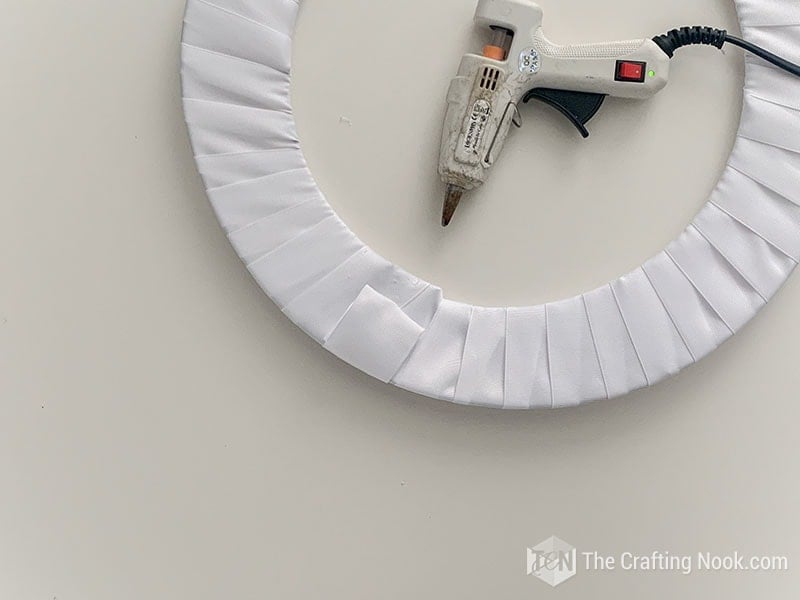
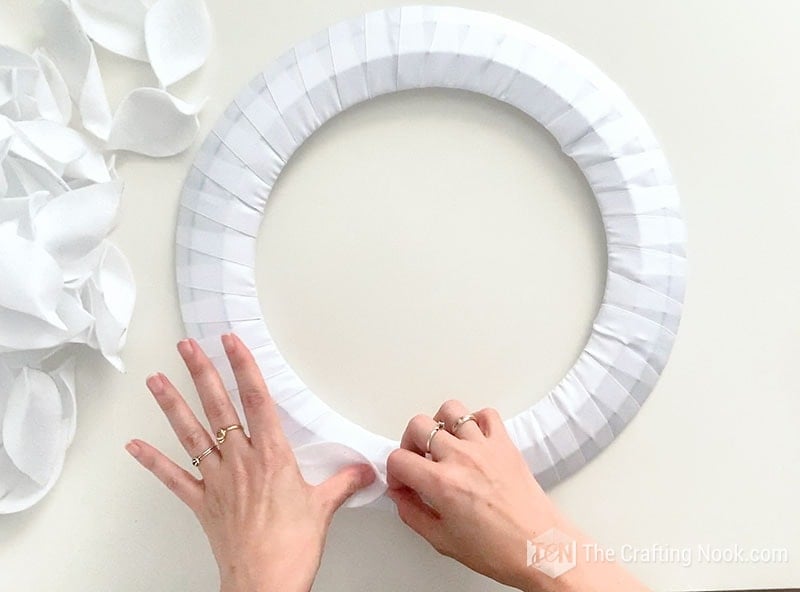
Wrap the ribbon around the wreath. If you prefer you can glue every few inches to secure the ribbon. I didn’t because I want to remove it all after the holidays and winter are over and use the frame for another wreath.
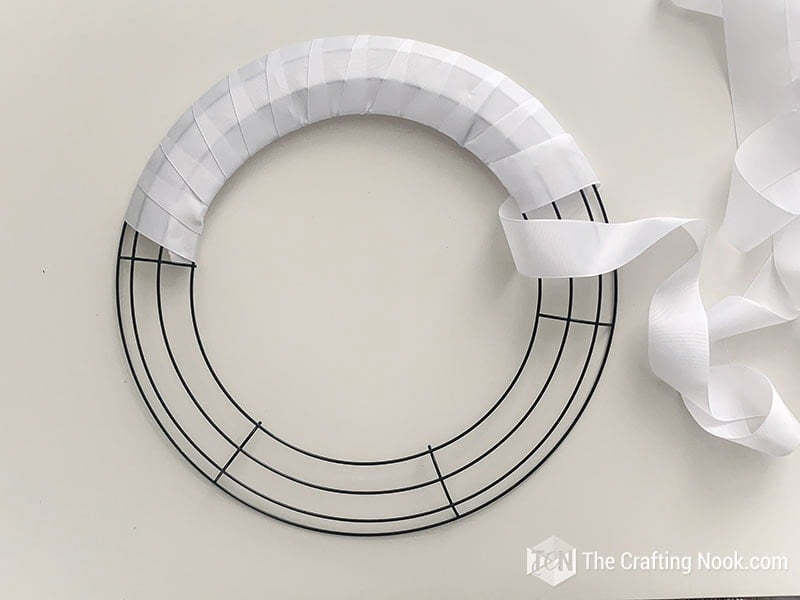
Continue wrapping all the way around until the wreath frame is completely covered. Cut the strip and glue in place on the wreath back.
Step 5: Start Gluing the felt leaves
Glue the leaves with a dab of hot glue on the front of the wreath.
I recommend all points pointing roughly but not too perfectly, in the same direction. Every now and then alternate simple leaves with pointy leaves.

The width of my rows is usually three or four leaves. For a softer, more natural look, stagger the leaves.
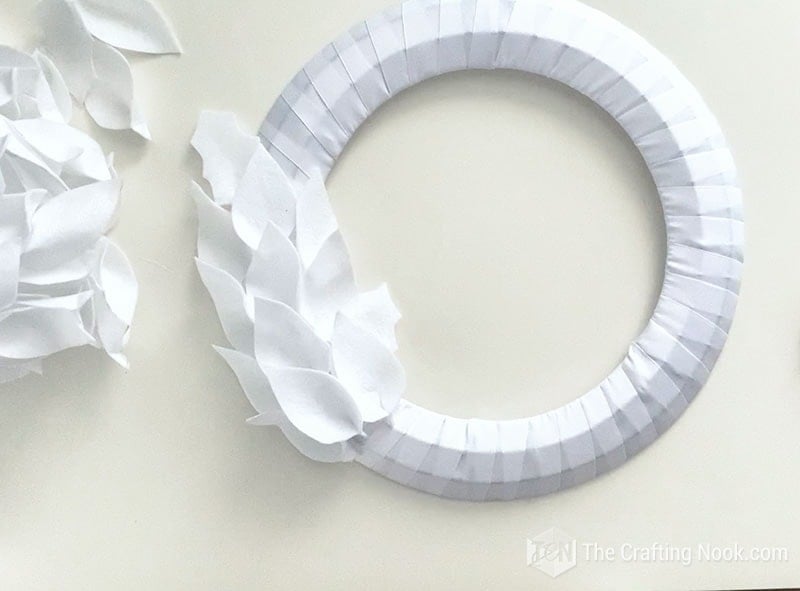
Continue gluing the leaves until you have covered the wreath.
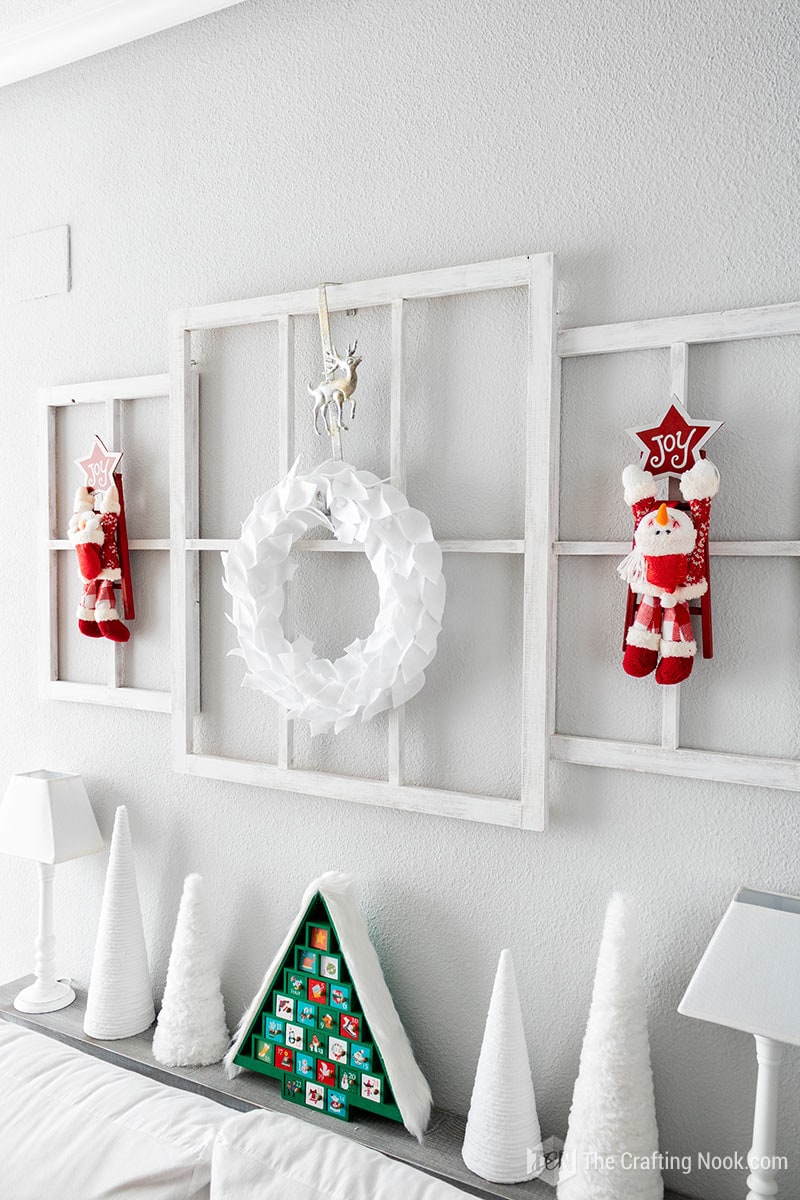
Step 6: Final Touch – Details and Decoration
I couldn’t leave it as is and added a few small touches that might not seem like much but it does make a difference.
I glued 3 tiny pom-poms every few leaves.

That’s it!
If hanging on a wall or above a mantle, the open spaces between the vines can be ideal for slipping over a hook or nail on the wall. When hanging on a door, you can use a traditional over-the-door hanger, or the same nail or hook.

Crafting Tips
- Don’t glue stuff directly to the wreath form, instead, you can wrap strips of fabric or a cheap ribbon around the wreath so you can glue over it. That way when you are done, you can just cut the fabric or ribbon and reuse the wreath form.
- I’ve seen many people recommending using expensive wool felt available from shops like Etsy to make felt flowers. You’re welcome to do this, but for simple designs, expensive wool felt doesn’t really make a discernible difference in the finished product. Just make sure it isn’t poor quality felt that feels cheap in your hands and pulls apart easily.
- If you’re working with kids on this type of project who are not experienced with handling hot glue guns carefully, make sure you use a low-temperature glue gun and stay with them all the time until they handle it well.
- I recommend using a good sharp pair of scissors. But if you are working with kids then use snub-nosed, classroom scissors and be with them the whole time.
Here’s how mine turned out!

Simple yet so cozy and elegant.
Variations and Alternatives
If you don’t have or don’t want to use Felt, any thick piece of thick synthetic material or wool will do the work. Even burlap could be a gorgeous option but a bit too messy. You can use the color of your choice.
Wreath form, you can use a foam wreath or even a grapevine wreath instead of the wire frame. Optionally, you can use a pool noodle and create your own wreath base and even make larger wreaths.
Decorations, if you want to add additional decorations or add more color, you can use berries and greenery, make felt flowers, snowflake buttons, and ribbon bows, just to name a few.
Frequently Asked Questions
Wall decor – Use a piece of ribbon or cord to hang the wreath on a wall, mantle, window, or door. On a tabletop – put a hurricane vase with a candle in the center.
The best option is hot glue, it sticks very quickly and speeds up the process. However, if you don’t want to glue stuff directly to the wreath form, you can wrap strips of fabric or a cheap ribbon around the wreath so you can glue stuff over it. That way when you are done, you can just cut the fabric or ribbon and reuse the wreath form.
Well, I’m tempted to say any kind, but actually, it will depend on the project. Since most of my projects are for my own home and it’s temporary, I use normal felt (wool felt if I find it at a good price) I find in my local craft stores. Felt comes in a variety of qualities so if you are using it to sell products, I recommend higher quality for durability.
Some lightweight felt will be more stretching than the heavier ones, but compared to woven fabrics, felt tends to be quite stiffer and more resistant. Felt doesn’t drape or flow, so it’s not the best choice for some fabric projects.
You can spray a light layer of starch on your felt, and using a buffer cloth, iron it as normal. Do this on both sides of the felt until you reach the desired stiffness.
More Wreath Ideas to Try
If you like this felt leaf wreath tutorial, you might also love these other Christmas Craft Projects ideas too:


✂️ Tutorial

DIY Gorgeous Felt Leaf Wreath for Christmas
Tools
- Hot glue gun and glue sticks
- scissors
- Pencil
Supplies
- Wire wreath frame You can use foam wreath form too
- 2 Inch white ribbon
- 1 yard and 1/2 white felt fabric.
- Paper or cardstock
- Decorative items optional.
Instructions
STEP 1: MAKE THE PAPER LEAVES. LOTS OF THEM.
- I didn’t create any printable leaf template because I wanted to show you, you can do it too. It’s so super simple. I made 2 types of leaves: a simple one and a point one (the traditional Christmas leaf).
- The simple leaf is like a drop-shape. decide the size you would like it to be and draw a drop. Mines is 3.5 Inches (9 cm)
- The second one is making a pointy tip, like if you were going to draw a Christmas tree, and then 3 curves ending in ponty tips: one smaller, then one larger and then another one smaller. You can check out the video where you can see what I mean.
- Once you have the two leaves ready, cut them with your scissors.
STEP 2: MAKE THE FELT LEAVES. LOTS OF THEM.
- The next step is to transfer your leaves onto the felt. Using your paper or cardstock template, trace the pattern onto the felt as shown:
- I tried to optimize the felt fabric as much as I could so I put my paper leaf template on top of the felt very close to the edges and started drawing the shape.
- Then moved the leaf right next to the previous one and draw it and so on and so forth.
- I made over 80 simple leaves and around 20 pointy. So just fill your felt space mixing between the two.
- Cut out all the felt leaves, making sure to cut off pencil markings.
STEP 3: SHAPE THE LEAVES
- Add a dab of hot glue on the rounded (not the pointed) end of a felt leaf to give the leaves a three-dimensional look.
- Fold and pinch the ends together and hold them for a few seconds until they hold. Do this for each and every leaf and also to the pointy ones but bluing the opposite end of the pointy one.
STEP 4: WRAP THE WREATH FORM WITH A RIBBON
- Because the wreath will be covered with felt leaves, you want to wrap your wreath form with fabric or ribbon the same color as your felt. I used a white ribbon.
- Place the ribbon strip on the wreath back and fold the end around one of the wires of the wreath frame. Dab a little hot glue on one end and press. Let the glue harden for around 10 seconds.
- Wrap the ribbon around the wreath. If you prefer you can glue every few inches to secure the ribbon. I didn’t because I want to remove it all after the holidays and winter are over and use the frame for another wreath.
- Continue wrapping all the way around until the wreath frame is completely covered. Cut the strip and glue in place on the wreath back.
STEP 5: START GLUING THE FELT LEAVES
- Glue the leaves with a dab of hot glue on the front of the wreath.
- I recommend all points pointing roughly but not too perfectly, in the same direction. Every now and then alternate simple leaves with pointy leaves.
- The width of my rows is usually three or four leaves. For a softer, more natural look, stagger the leaves.
- Continue gluing the leaves until you have covered the wreath.
STEP 6: FINAL TOUCH – DETAILS AND DECORATION
- I couldn’t leave it as is and added a few small touches that might not seem like much but it does make a difference.
- I glued 3 tiny pom-poms every few leaves.
- That’s it!
- If hanging on a wall or above a mantle, the open spaces between the vines can be ideal for slipping over a hook or nail on the wall. When hanging on a door, you can use a traditional over-the-door hanger, or the same nail or hook.
Share and PIN ME!

Til’ next time…


FREE WORKBOOK
Keeping your Sweet Home Organized
Learn how to create intentional habits and simple routines to Keep Your Home Organized. Plus freebies, printables, exclusive content, and tips.
Disclaimer: By clicking on the “Yes” button above you are giving me your consent to collect and use your information according to the law and My Policy Privacy. Zero Spam I promise!
