DIY Merry Christmas Garland with Craft Foam
This post may contain affiliate links. Please read our Disclosure Policy.
Making your own holiday decorations is easy, inexpensive, and so fun! This easy DIY Merry Christmas Garland craft project decorates walls, Christmas trees, and wreaths. Best of all, the kids can help you make it. Learn how to make one of your own with this step-by-step tutorial.
I think there’s always time for a last-minute Christmas decoration, don’t you agree Today is a Challenge day!

Table of Contents
DIY Glittered Merry Christmas Garland
Yup, challenge because it’s our trimestrial Silhouette Challenge in which a group of awesome bloggers team up to bring you a boost of inspiration with projects made using our beloved Silhouette machines.
This trimester is Holiday season themed so you will find quite some ideas for your festivities!
Mine is this cute and SUPER EASY to make DIY garland with the words Merry Christmas made with Glittered craft foam for your Christmas tree, fireplace mantel, entryway, or anywhere you think it will bring joy!
For this homemade garland, I used an already glittered craft foam. I’ve seen it in most craft stores at least here in Spain, so I’m pretty sure you can find it anywhere.
I tried cutting the craft foam with my silhouette cameo 1 but no luck. I know some bloggers have been able to make it but maybe because mine is glittered, it might have prevented them from cutting.
Of course, if you can’t find the glitter craft foam you can always use regular craft foam and glitter it yourself as I did with my glittered Snowflakes. It was cardstock but the same rules apply to craft foam. A coat of glue and lots of glitter! LOL.
How to male a Glittered Merry Christmas Garland
This Glittered Merry Christmas Garland diy project is absolutely the easiest craft you will make even if you don’t have a cutting machine.
Supplies:
- Glitter craft foam {large sheet}
- Plain paper
- Cord, ribbon, or twine {I used baker’s twine}
Tools:
- Glue gun
- Scissors
- Pencil
- Ruller {if needed}
- A cutting machine – Silhouette Cameo or Cricut
- X-acto knife *optional
Instructions:
Step 1: Design the garland
The first thing we need to do here is choose the font you want your garland to be made with. I chose IFC Insane Rodeo for this project.
If you don’t have a cutting machine, you can work this step on your Word, PowerPoint, Canva, or whatever app you know how to use and work the letters there in the size you need them for your garland. Then Print them.
Then using my Silhouette Studio I set it up so it would fit in a letter sheet.
You can avoid cutting twice the repeated letters since you can just repeat them on the craft foam. I missed that on the Merry word but fixed it on the Christmas word.

Step 2: Cut the design
Sent to cut using the plain paper setting and adjusted the blade to recommended number.
If you printed your design then cut your letters with scissors and/or a craft knife.

Step 3: Trace the letters on the craft foam
Once all the letters are cut, use the letters as stencils and start tracing them on the back of the glitter craft foam.

Make sure you mirror your letters as you are working on the back of the foam.

Count how many of the same letters you need so you trace them on the foam.
Like I had to make 3 “R”, 2 “M” and 2 ”S”. Depending on your chosen words you might have to adjust accordingly.


Step 4: Cut your craft foam letters
Then with a sharp pair of scissors start cutting your letters.
Well, what I did was use a craft cutter (or x-acto knife) for the longest straight part of each letter like in this “T” and then used the scissors I cut the round parts.

Cut all your letters.

Step 5: Assemble your Merry Christmas Garland
Get your cord and organize your letters so you won’t misplace any letters.

On the back of your letters right a few millimeters from the top put a few dabs of hot glue.
Be careful here if your glue gun gets really hot it might damage your foam so make some tests on a small piece first. I recommend low-heat hot glue for this project.
In my case, my gun doesn’t get that hot. Hot enough to melt the glue but not to damage my foam. If yours is too hot then I suggest using another kind of glue like UHU for instance.

Leave about 8 inches of the cord before starting to glue it to your letter.

Leave about 1 inch and then glue the next letter.

Remember you are working on the backs so you need to be careful not to place letters wrong.
I made each word on a separate thread just to have some freedom when placing it on the tree. But if you will put it on your mantel or a wall, for example, you can make both words on one single thread.

There you go!
The Glittered Merry Christmas garland is all done and ready to be hung!

Crafting Tips
* If you don’t have a cutting machine, just print the letters and cut them yourself. Try using simple types of fonts that you can easily cut with scissors or cutters and then transfer to the craft foam.
* Make sure you use a low-heat hot glue gun o you don’t melt or damage the craft foam.
* When working with a glittered craft foam or any textured craft foam, you should always work on the back of the foam and that means you need to remember to mirror (flip horizontally) the letters so they will read right on the glitter side.
* If your craft foam doesn’t have glitter, you can make your own. Just apply glue to your letters and pour glitter all over them. Follow the same steps I did for my glitter paper snowflakes here.
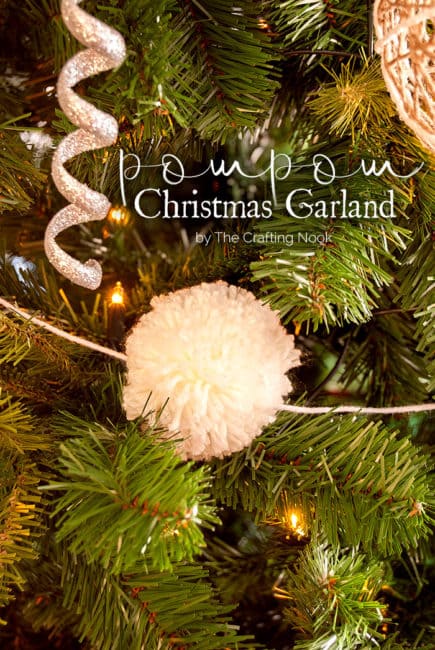
* You don’t need to stop at the craft foam letters you can add different types of ornaments in between letters such as pom poms, orange slices, greenery, ornaments, pinecones, candy canes, or anything else that would fit your Christmas theme.
* You could use a red ribbon or red foam as a pop of color. Creativity is the limit.


I’m loving how it looks on the Christmas Tree. This craft was inspired by The Tomkat Studio’s Christmas Tree Garland. But she made it with wooden letters. I wanted it to be more inexpensive and so I decided to go for the glitter craft foam instead. LOVE it!
How about you? Do you like it? This craft is easy, pretty and so inexpensive! Let me know your thoughts in the comments!
Frequently Asked Questions
Well, each crafter might have their own opinion on this and also different experiences. Also, the answer will depend on the project itself. This type of project is ideal a glue that dries fast, that’s why I love low-heat hot glue guns. Contact glue such as UHU is good too but to be working with kids it’s not ideal. Elmer’s glue would be a good choice whenever kids are involved.
Elmer’s glue is a great option for gluing craft foam other craft foam, construction paper, cardboard, and even wood. It’s also usually the cheapest and most accessible option, making it a great choice for simple projects especially because it’s kids-safe, non-toxic, and kid-friendly.
If you are not a fan of craft foam or just don’t have any at hand, you can use cardstock, cardboard, or scrapbook paper, among other materials.
More Christmas Tree Projects to Try
If you like this Merry Christmas Garland tutorial, you might also LOVE these other Christmas project ideas too:

✂️ Tutorial

DIY Merry Christmas Garland with Craft Foam
Tools
- Glue gun
- scissors
- Pencil
- Ruller {if needed}
- A cutting machine –Silhouette Cameo or Cricut.
- X-acto knife *optional
Supplies
- Glitter craft foam {large sheet}
- Plain paper
- Cord ribbon, or twine {I used baker’s twine}
Instructions
STEP 1: DESIGN THE GARLAND
- The first thing we need to do here is choose the font you want your garland to be made with. I chose IFC Insane Rodeo for this project.
- If you don’t have a cutting machine, you can work this step on your Word, PowerPoint, Canva, or whatever app you know how to use and work the letters there in the size you need them for your garland. Then Print them.
- Then using my Silhouette Studio I set it up so it would fit in a letter sheet.
- You can avoid cutting twice the repeated letters since you can just repeat them on the craft foam. I missed that on the Merry word but fixed it on the Christmas word.
STEP 2: CUT THE DESIGN
- Sent to cut using the plain paper setting and adjusted the blade to recommended number.
- If you printed your design then cut your letters with scissors and/or craft knife.
STEP 3: TRACE THE LETTERS ON THE CRAFT FOAM
- Once all the letters are cut, use the letters as stencils and start tracing them on the back of the glitter craft foam.
- Make sure you mirror your letters as you are working on the back of the foam.
- Count how many of the same letters you need so you trace them on the foam.
- Like I had to make 3 “R”, 2 “M” and 2 ”S”. Depending on your chosen words you might have to adjust accordingly.
STEP 4: CUT YOUR CRAFT FOAM LETTERS
- Then with a sharp pair of scissors start cutting your letters.
- Well, what I did was use a craft cutter (or x-acto knife) for the longest straight part of each letter like in this “T” and then used the scissors I cut the round parts.
- Cut all your letters.
STEP 5: ASSEMBLE YOUR MERRY CHRISTMAS GARLAND
- Get your cord and organize your letters so you won’t misplace any letters.
- On the back of your letters right a few millimeters from the top put a few dabs of hot glue.
- Be careful here if your glue gun gets really hot it might damage your foam so make some tests on a small piece first. I recommend low-heat hot glue for this project.
- In my case, my gun doesn’t get that hot. Hot enough to melt the glue but not to damage my foam. If yours is too hot then I suggest using another kind of glue like UHU for instance.
- Leave about 8 inches of the cord before starting to glue it to your letter.
- Leave about 1 inch and then glue the next letter.
- Remember you are working on the backs so you need to be careful not to place letters wrong.
- I made each word on a separate thread just to have some freedom when placing it on the tree. But if you will put it on your mantel or a wall, for example, you can make both words on one single thread.
- the Merry Christmas Garland finished and ready to be placed
- There you go! Ready to be hung!
Want to Check Out More Silhouette Projects?
My Silhouette Challenge buddies and I are all sharing projects on our blogs today, so peruse the projects below for a wealth of Silhouette inspiration!
1. Small Stuff Counts // 2. HaberdasheryFun // 3. Create & Babble // 4. Creative Ramblings // 5. Cutesy Crafts // 6. Architecture of a Mom // 7. The Crafting Nook // 8. Get Silvered // 9. Where The Smiles Have Been // 10. Curly Crafty Mom // 11. unOriginal Mom // 12. Ginger Snap Crafts // 13. Practically Functional // 14. Sisters, What! // 15. The Thinking Closet // 16. Dream a Little Bigger
Share and PIN ME!

Til’ next time…


FREE WORKBOOK
Keeping your Sweet Home Organized
Learn how to create intentional habits and simple routines to Keep Your Home Organized. Plus freebies, printables, exclusive content, and tips.
Disclaimer: By clicking on the “Yes” button above you are giving me your consent to collect and use your information according to the law and My Policy Privacy. Zero Spam I promise!