DIY Macrame Plant Hanger (Easy Tutorial)
This post may contain affiliate links. Please read our Disclosure Policy.
You don’t need to be a macrame expert to give this DIY Macrame Plant Hanger a try. All you need is a little rope and lots of spare time. Learn how to make your own here.
Today I have a special guest taking over the blog. I would love you to meet and welcome my mom, Ruth. She blogs over at Programando la Vida (Programming the Life). She blogs in Spanish and focuses her blog on super simple and easy crafts, organization, and delicious recipes from our home country.

One of her biggest passions is crocheting and macrame. And she also makes the cutest crafts for me so I thought it would be nice to have her as my special guest and share with you the amazing things she creates.
You might also love these other Handmade Craft ideas: Easy DIY Braided Bracelet, and DIY 5 Minutes Mesh Yarn Knit Bracelet.
Table of Contents
DIY Macrame Plant Hanger
Without any further ado, I’ll leave you with her.
Hello dear TCN’s friend. It’s so nice to be here and share with you our special macrame project.
As you probably already know, Cami is all about cute crafts and keeping her home decor simple but neat, cozy and cute.
She has made having plants her thing whether they are real fresh plants or faux ones. That gave me the idea of creating hanging planters for her so her plants could also be decorative.
I created this macrame pot holder tapestry for her since she loves having wall hangings and also loves the teal/turquoise color. I had already made a rustic jute macrame plant holder a few years ago and she loved it but then wanted another one more delicate and cuter for her bedroom.
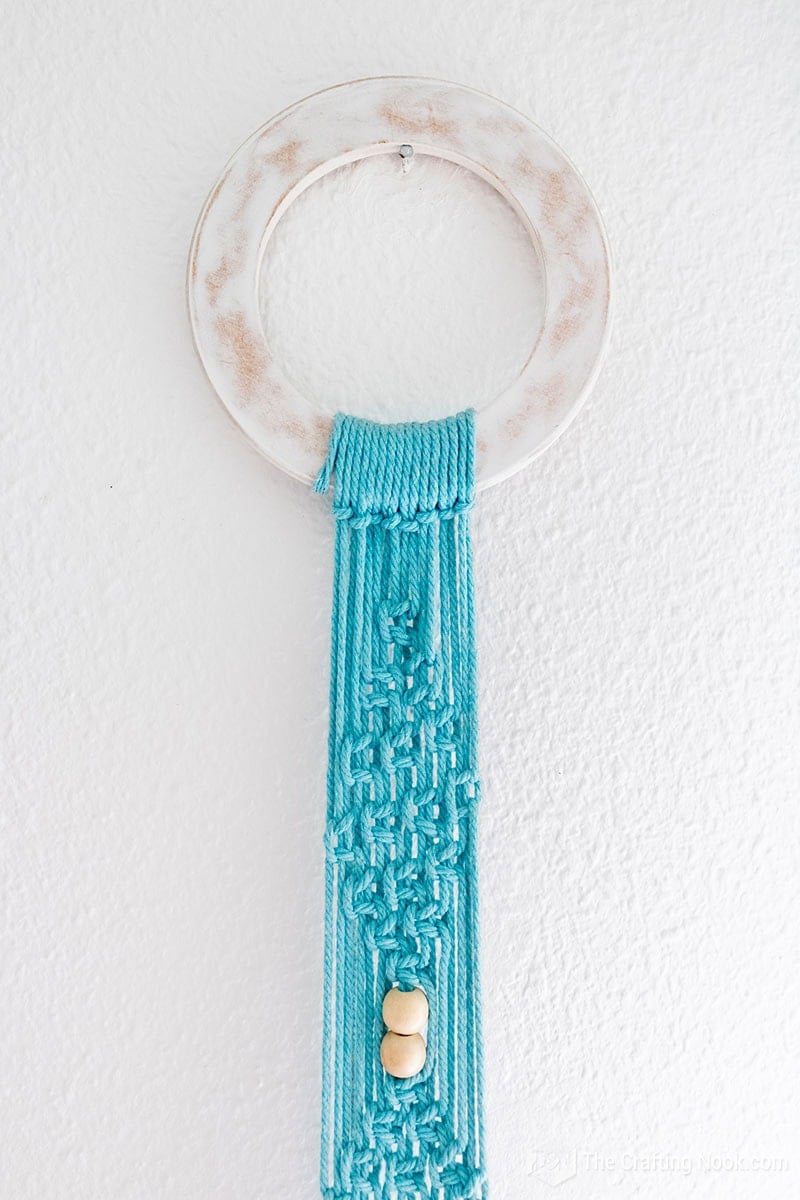
The DIY project is very easy to do, I finished it within a few days. The good thing is that it only used basic knots so if you have more available time, you probably will make it faster. This is such a fun project for macrame beginners.
The inspiration for this easy DIY project was on Pinterest as always. I hope you will be encouraged and make this macramé plant hanger.
What is Macrame?
From a technical standpoint, macrame is the art of creating beautiful textiles using various different knots. Some knots used are the larks head knot, square knot, half hitch, and double half hitch knot.
How to make a Plant Hanger with Macrame
Before we begin, be sure to follow my daughter on Pinterest, Facebook, Instagram, and YouTube, and also sign up for her email list (at the end of this post), so you’ll never miss a post!
Supplies:
- Macrame cord or Cotton cord (or rope) in the color you like best.
- Wooden Beads or embellishments, if desired.
- Pair of scissors.
- Measuring tape.
- Wooden ring of about 15 cm (or as you like more).
- Elastic Bands (I use them to hold the bent strings).
Instructions:
I created this quick video tutorial to make it easy for you! However, if you are more of a photo step-by-step kind of person just scroll down and keep reading!
You can find this post in the Spanish version for Tapiz Porta Matero en Macramé over at my blog.
Let’s start.
Firstly, you have to decide what size you want the macrame planter tapestry to be from top to bottom. Mine reached 130 cm. So the strings should be 3 times the size of the finished tapestry.
Prep work
You will need to cut 8 strands in total that are folded in half which means you would have 16 pieces of cord to work with.
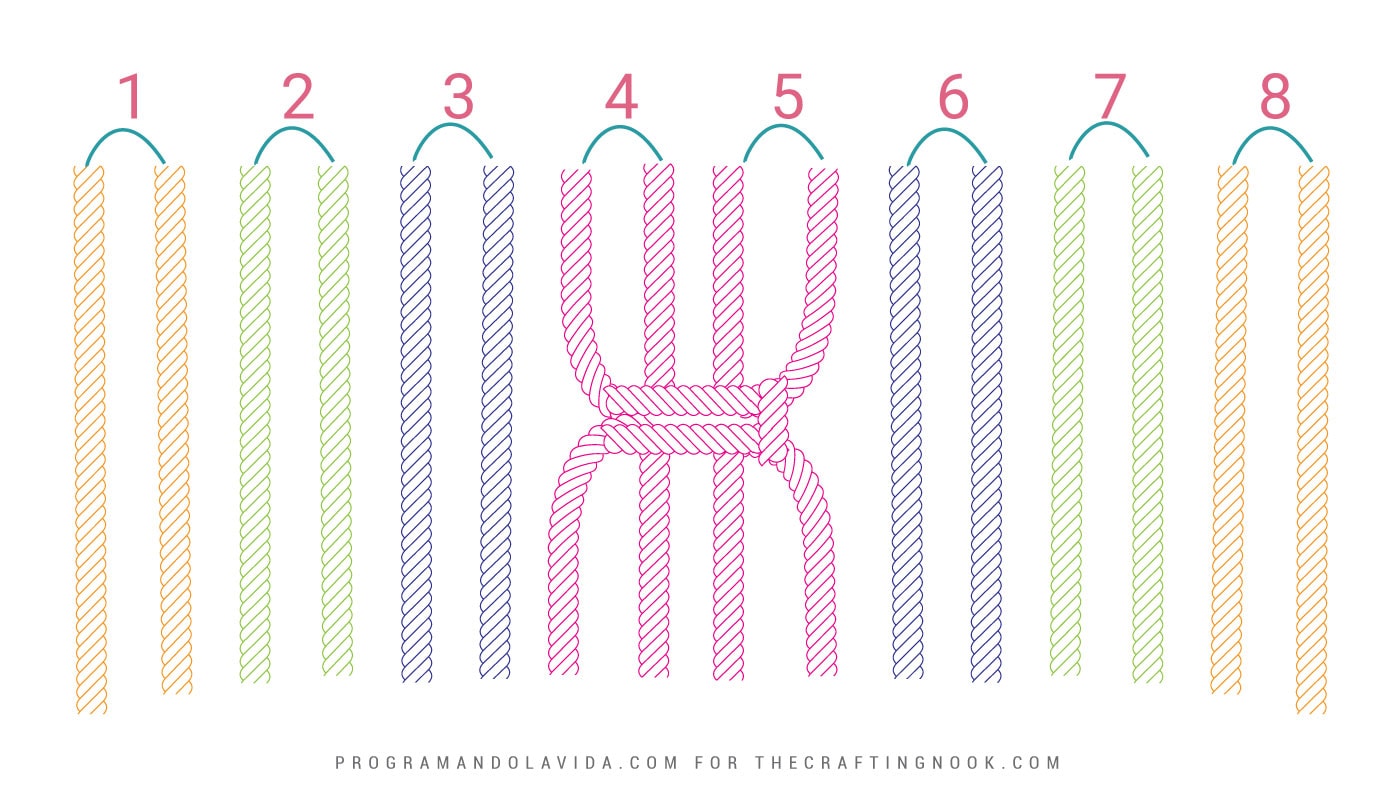
I have created these graphics with the strings in different colors and numbers to make it easier to see which strings are used for the knots.
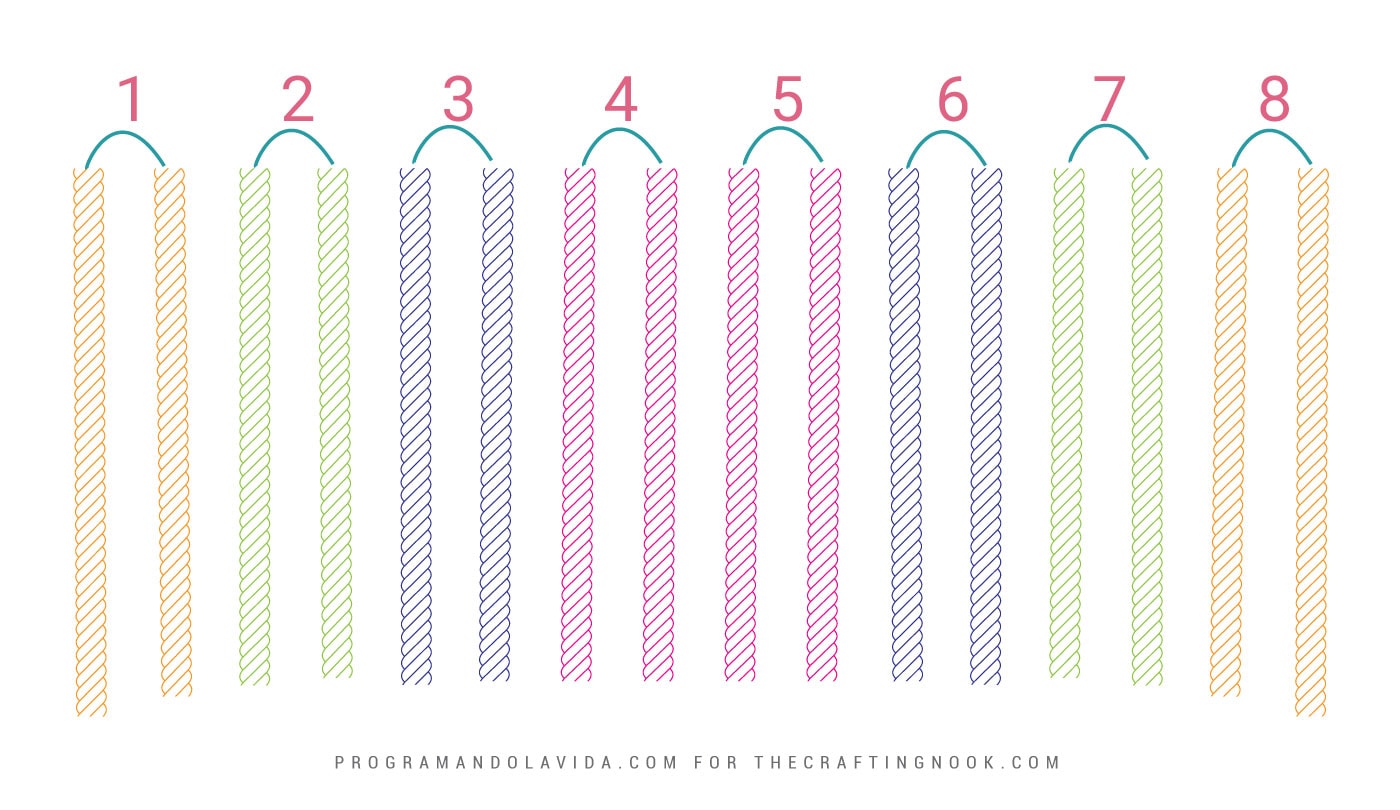
Step 1: Attach your cords to the ring. Take one of your cords, fold it in half, and attach it to the wooden ring with a lark’s head knot. To make a Lark’s Head Knot, take your rope and fold it in half. Then put the loop over and behind the dowel. Now, pull the ends of the rope through the loop and tighten.
Repeat that with the rest of the cords and bring them together one next to the other.
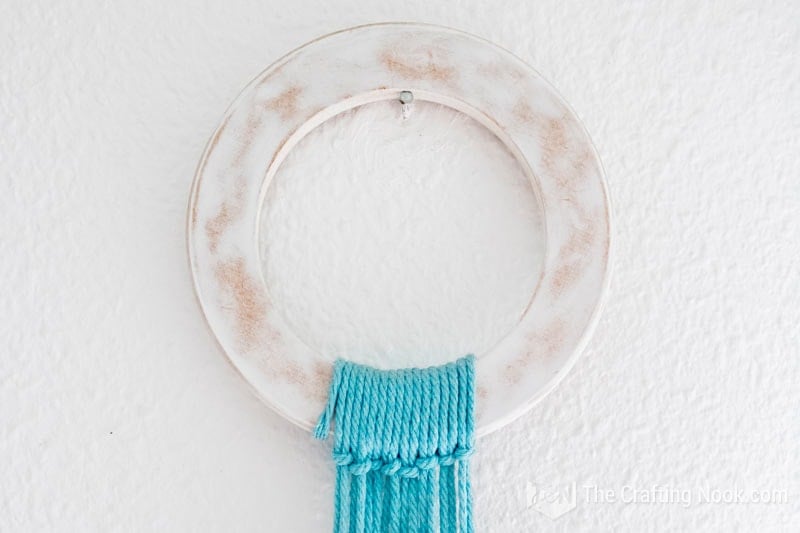
Leave about 1-2 Inches of cord to start the diamond design.
The macrame tapestry
Step 2: Make the first square knots. We will work first with cords 4 and make the first square knot. As you can see, you’ll work with four cords. The ones on the left and right will be your working cords and the two in the center cords will be your filler cords.
Bend the left cord in front of the two middle filler cords and under the right cord. Then, bring the right cord behind the filler cords and up through the loop you made in with the left cord and tighten. This is called a half knot. To complete the square knot, you’ll make another half knot, but this time it’ll be reversed, first with the right cord in front and the left behind.
Step 3: Now from here on we’ll be working on alternating Square Knot. So, we’ll use cords 3-4 and 5-6 to knit the next row which has only 2 squares basic macrame knots.
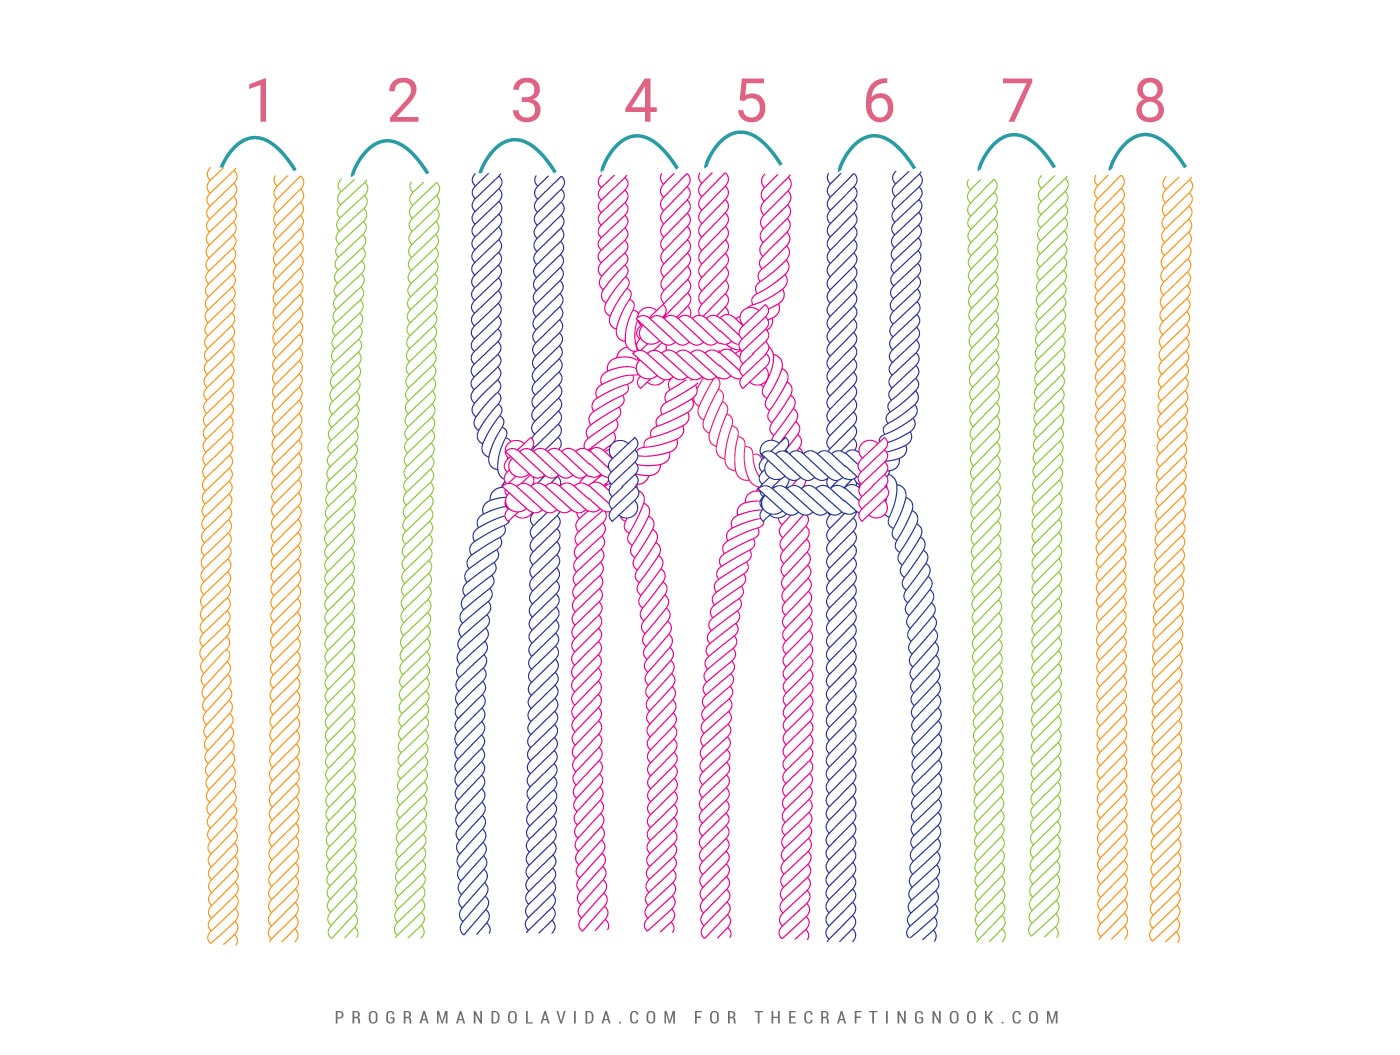
You can see that the 4 strings that make up a knot are mixed from here.
Step 4: The next row has 3 square knots and to make them we will use cords 2-3, 4-5, and 6-7. I show it in the following graphic.
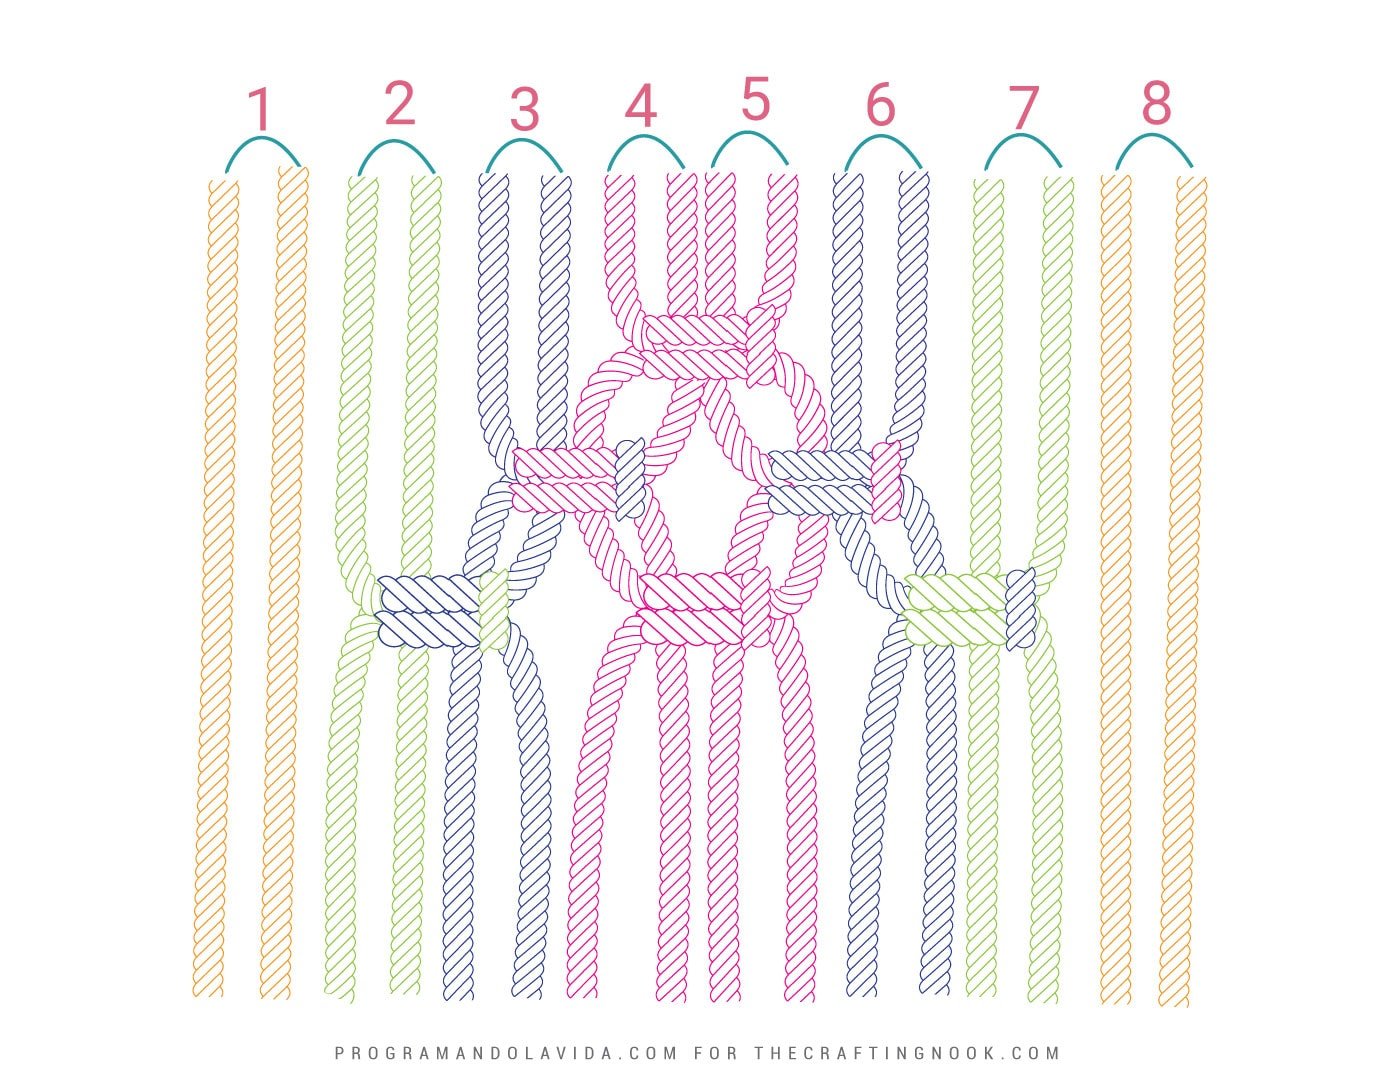
Step 5: The next row has 4 square knots and we are already in the middle of the diamond that forms our macrame hanger tapestry. We are using all the cords to make this row. You can see it in the next graphic.

Step 6: The 3 knots that form this row show us that we are making a return. We will use cords 2-3, 4-5, and 6-7. See how it looks below:
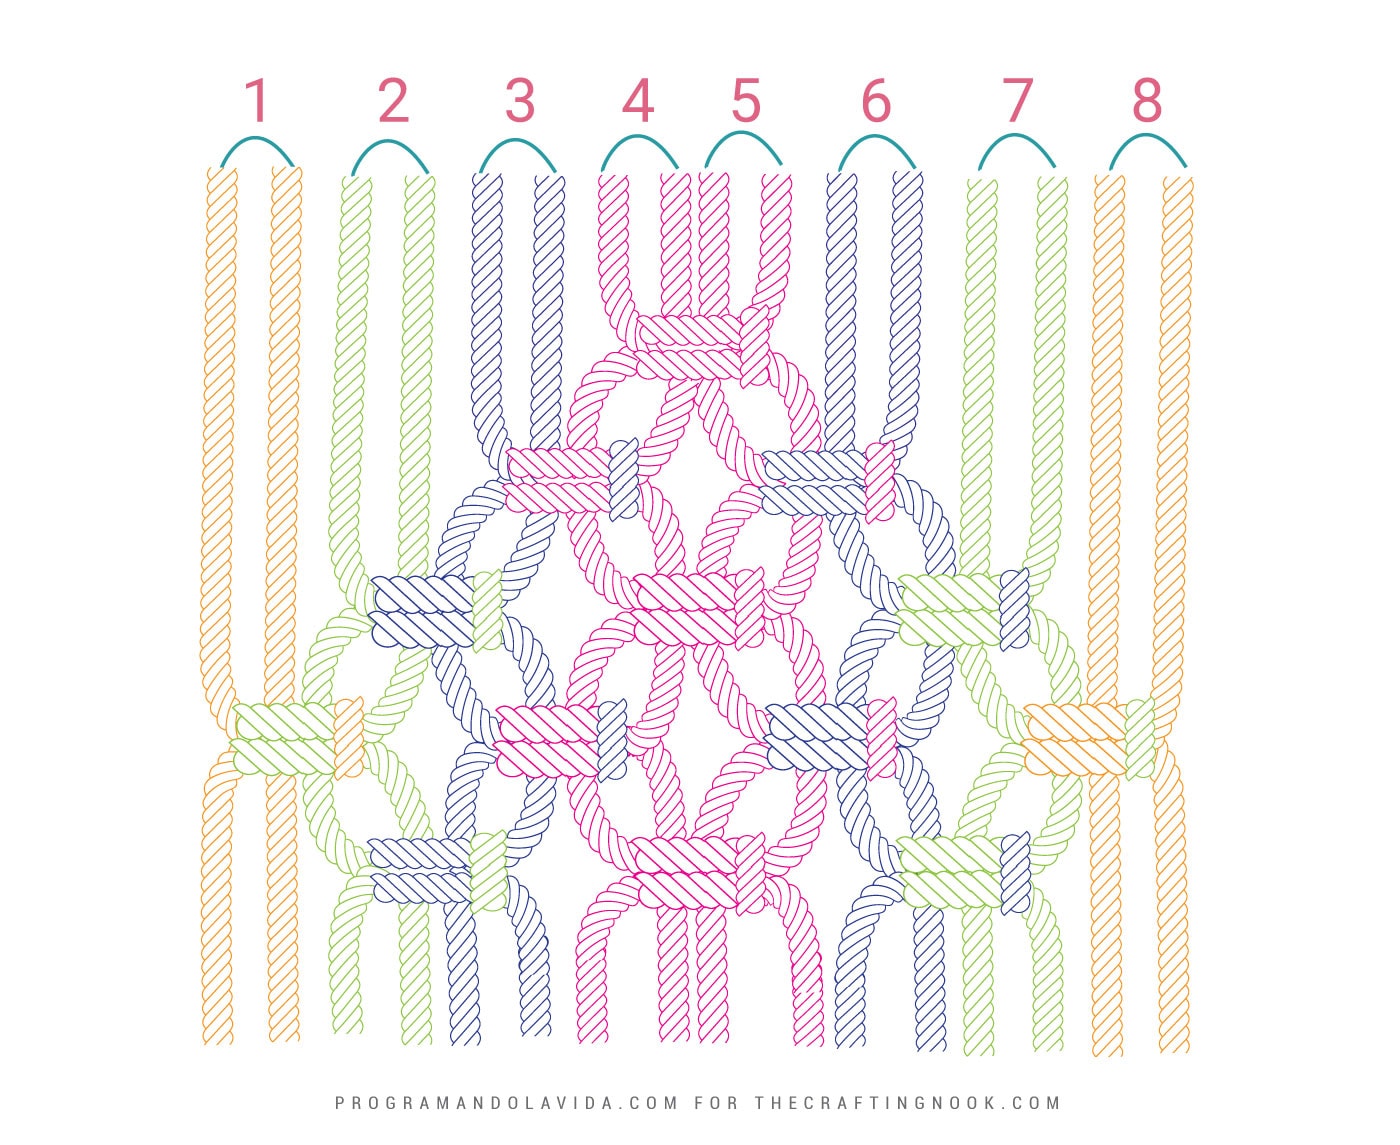
Step 7: Here make just 2 square knots and use cords 3-4, and 5-6 for it. We are getting close to closing the diamond.

Step 8: Finally, one single square knot. With this knot, we finish the first diamond.

Step 9: Now it’s time to attach the embellishments if you want to use them. I used some light wooden beads that I thought matched very well with the turquoise color of the cord. So these embellishments will work as separations from one diamond to the next.
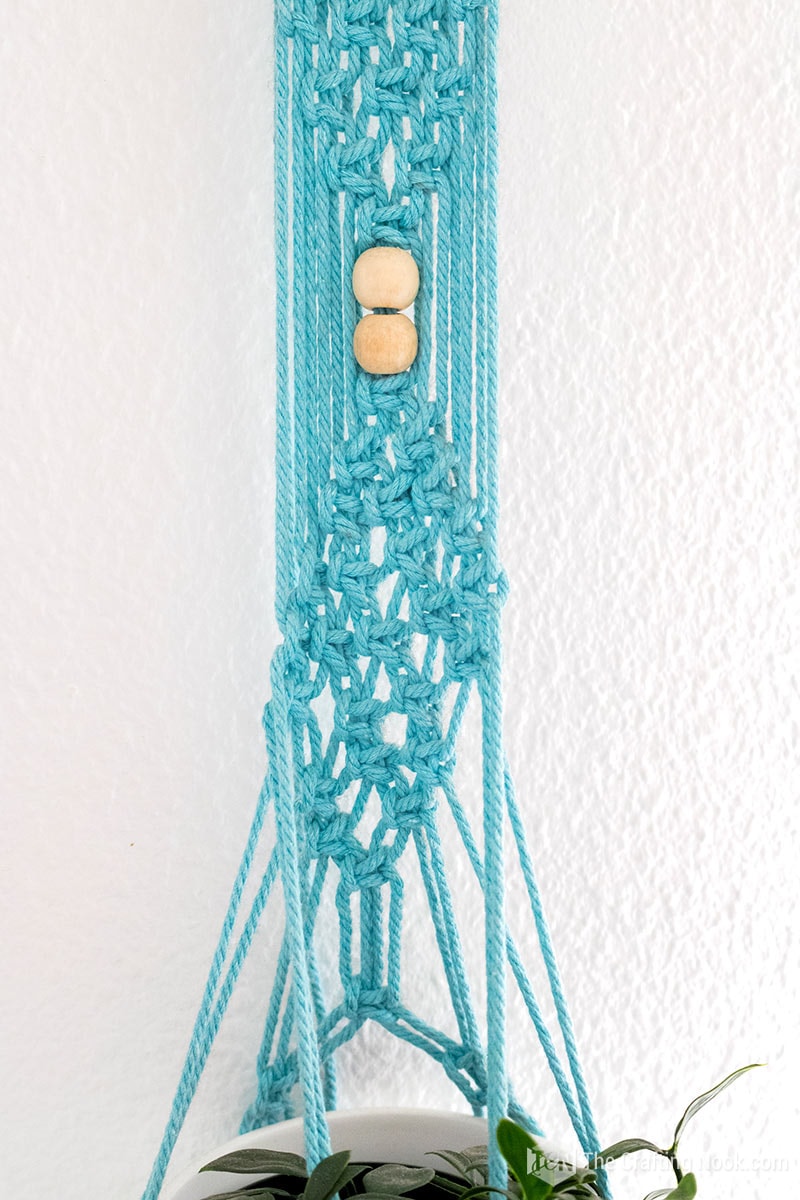
Step 10: Now you just have to repeat steps 1 to 8 to knit 2 more diamonds.
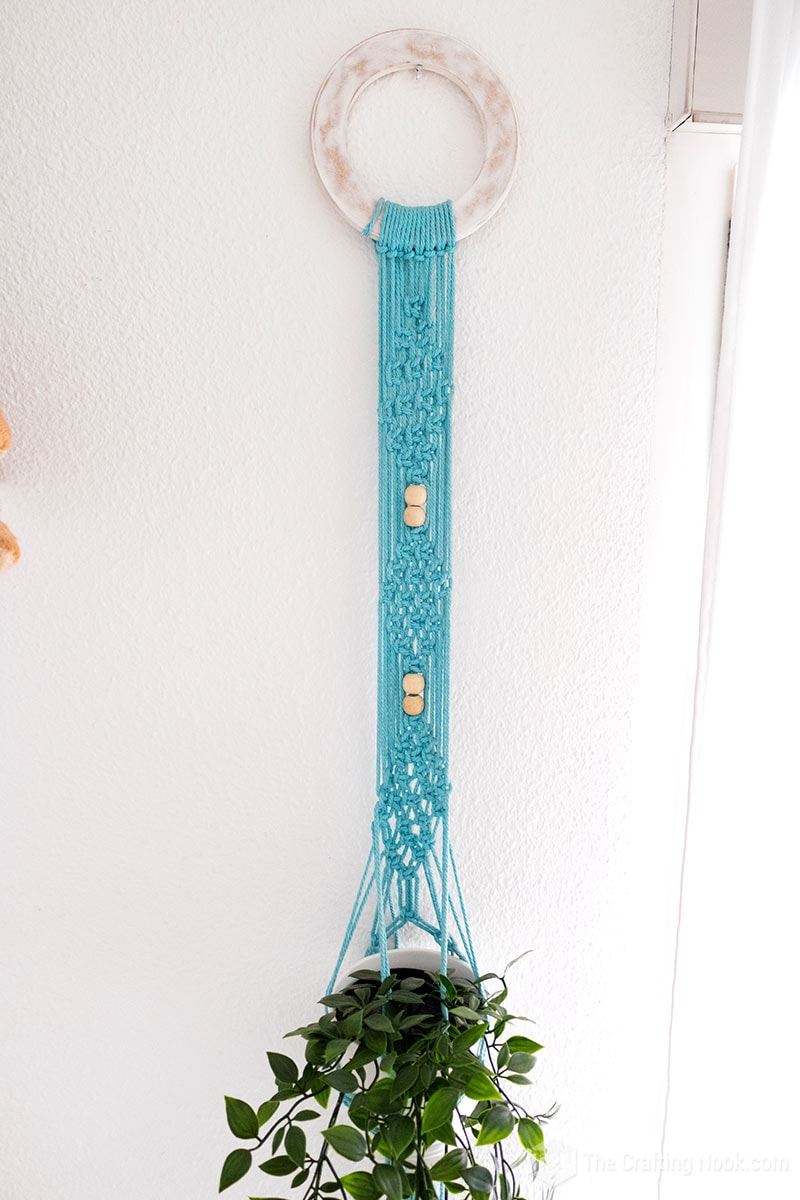
The plant pot holder (the basket)
Step 11: To create the basket where the pot will be placed, drop down about 2-3 inches from the last diamond. We’re going to tie a row of four square knots straight across. Skip the first 2 cords and tie 4 square knots, then skip the last 2 cords.
Step 12: Now, grab the two cords you didn’t use on each side, flip the cords toward the center on both sides and then tie a square knot about an inch or so below the row of square knots we just tied.
Step 13: Use the left two cords from that square knot and the next two cords to the left to tie a square knot about an inch and a half below the knot you just tied in the center. It’ll be on the left side.
Step 14: Then do the same thing on the right side.
Step 15: Flip your plant hanger around and continue tying square knots all the way around at the same level as those first two. There will be 5 square knots altogether.
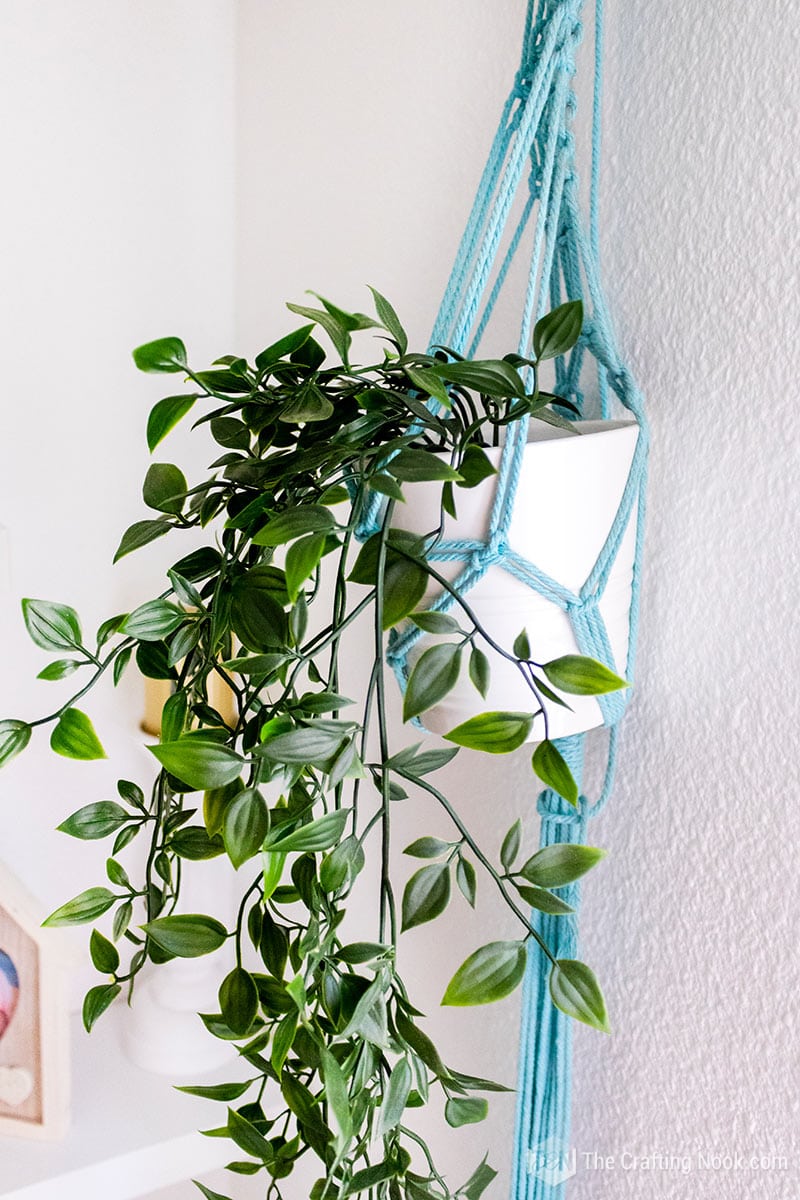
Step 16: The Wrapping knot. Now you need to grab one of your pieces of cord and use it to tie a wrapping knot around all the cords under that last row of square knots. Give it as many wraps as you reach the desired size.
Step 17: Cut the tail to the desired length. My daughter left it long but you can cut it where you like it best. You can also make a finer, fluffier fringe by brushing the ends with a white brush.
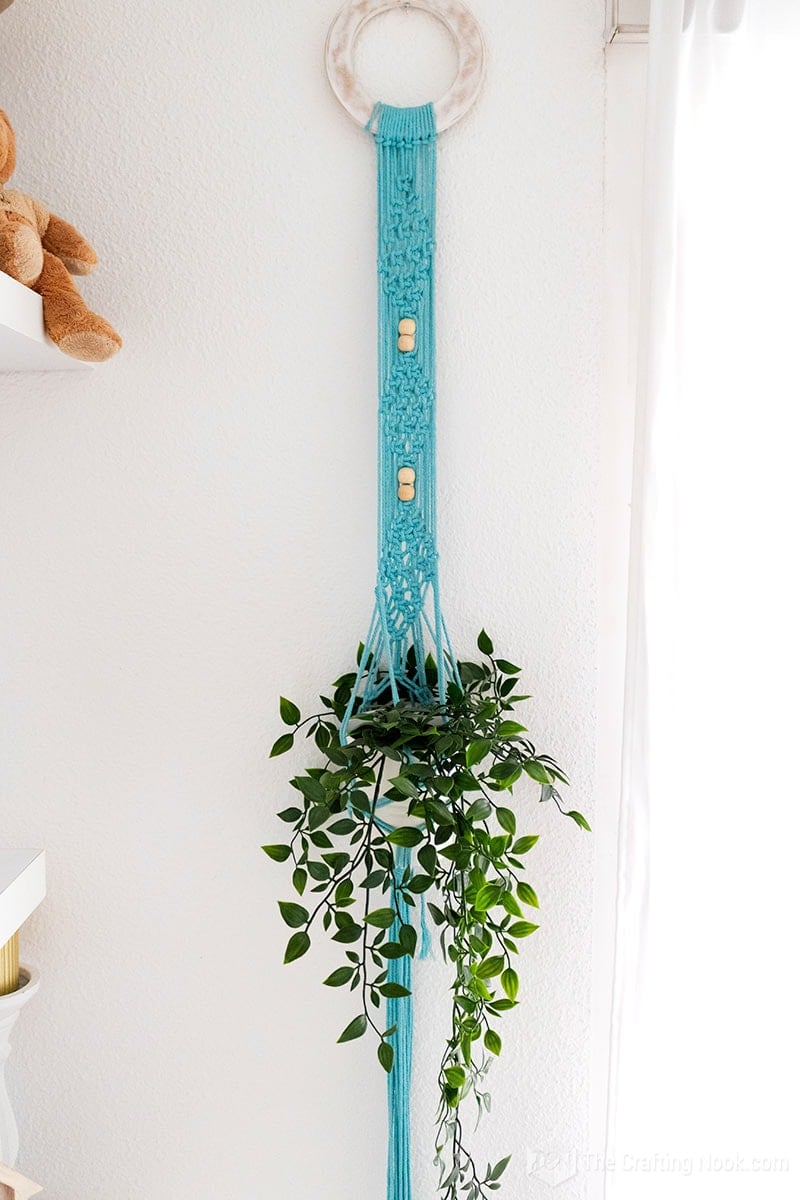
And ready! Our wonderful DIY Macrame Plant hanger is ready to rock!
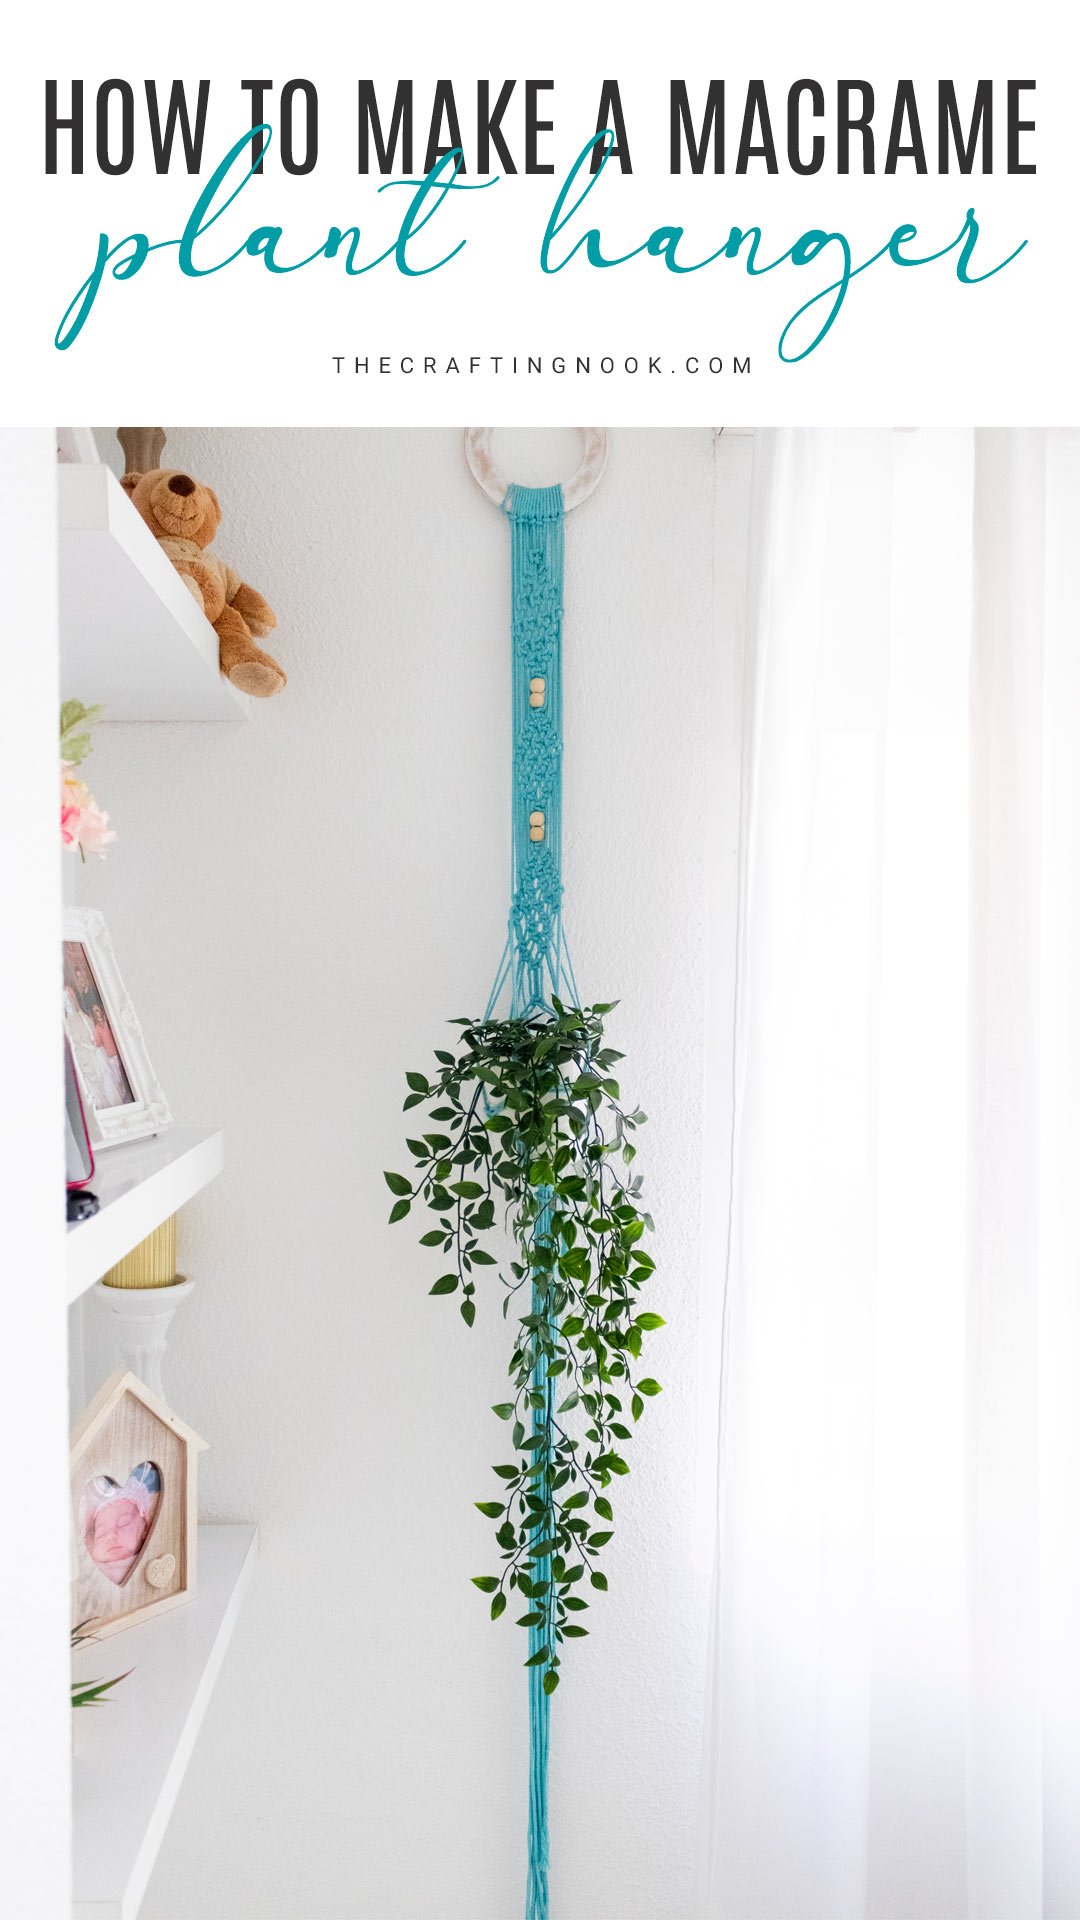
My daughter decided to hang it on her bedroom wall and it looks so pretty!
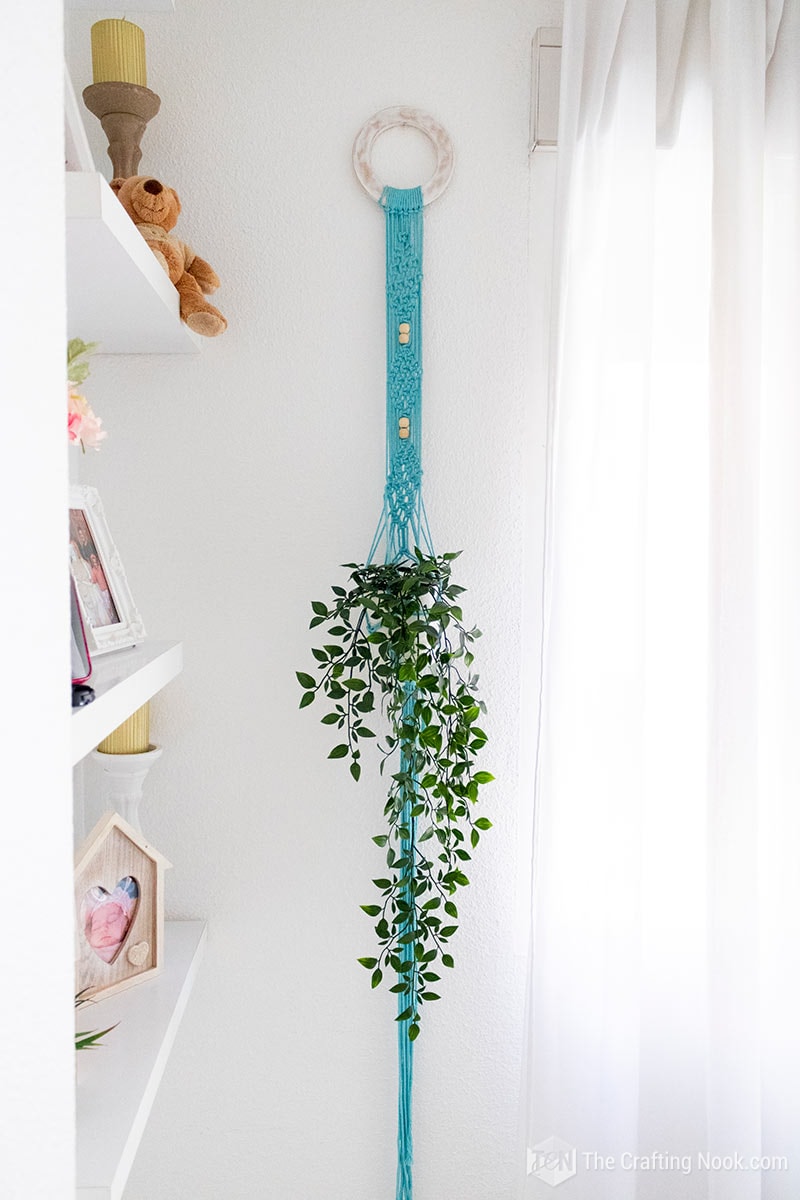
Well, that’s it for now, hope you enjoyed this cuttle little project.

You can visit my blog over at Programando la Vida and follow my Instagram and YouTube Channel.
Macrame Plant Holder Tips
- If you want to make this macrame plant hanger, but your jar or pot has a differents shape than ours, use your planter to see where you need to put the knots for the netting. Line up the top of your planter with the top row of spider knots and check if the measurements we gave you in the tutorial still look right on your jar. If not, move them up or down until your container fits.
- You can easily add more beads to this project for extra embellishment. String a bead onto the top and bottom right before start the netting. You can also string beads onto your cords before making your first spider knots to add decoration to the bottom part of your straps.
- Experiment by making longer or shorter tapestry section making more or less diamond shapes.
A short history of macrame
According to Britannica, macramé, also spelled Macrame, (from Turkish makrama, “napkin,” or “towel”), coarse lace or fringe made by knotting cords or thick threads in a geometric pattern.
Macramé was a specialty of Genoa, where, in the 19th century, towels decorated with knotted cord were popular. Its roots were in a 16th-century technique of knotting lace known as punto a groppo.
In the 1960s macramé became a popular craft and creative art technique in America and in Europe. Macrame is having a comeback moment. This art of weaving and knotting regained popularity in the 1970s as wall hangings, clothing, and home goods such as plant hangers, plant pot hangers, lampshades, hammocks, window coverings, and wall hangings.
Frequently Asked Questions
Oh, my goodness! It’s incredible how many gorgeous patterns and designs can be created with just a few basic knots! You can make home decor, functional and decorative items like plant hangers and shelves, decorate your clothes, make handmade jewelry, or even a big comfy hammock!
Not at all! It’s true that many macrame designs can look complicated at first glance, but really only use a couple of different knots placed in different ways. You can make a beautiful wall hanging or plant hanger with just the basic larks head knot, square knots, double half hitches, spiral knots, and maybe a wrapping knot in for fun!
In most cases, your Macrame cord needs to roughly be about four times the length of your project. But if your cord is folded in half with a Lark’s Head Knot to create two cords, then go for eight times the length.
Macrame Knowledge Base
Basic Macrame terminology
- Row: A line of knots side by side, each tied with a different working cord.
- Alternating Cords: Forming a new group of cords by taking half the cords from adjacent knots previous tied, and tying a new knot the lays below and between where the cords are from.
- Filler Cords: The cords that are in the center of the knotting cords.
- Holding Cord: The Cord, Dowel, or ring onto which you anchor your project while you work on it.
- Knotting Cords: The right and left cords that are used to tie knots over filler cords.
- Working Cords: All cords in a design, those that do the tying (knotting cords), and the ones that are tied around (filler cords).
- Wrapping Cord: The cord used to gather and wrap a group of cords. You’ll see this at the top of a plant hanger.
What are the Needed macrame supplies?
To start a macrame project there are some supplies you cannot start without and some that are completely optional depending on the design and your taste.
Cord or rope is the most important supply. No shock on that. Then of course you need sharp scissors and measuring tape. Those are the essential ones.
Then comes the optional. Wooden rings, metal rings, sticks or dowels, beads in different sizes and materials (wooden, plastic, metal, etc.), ribbons, etc.
And also, optionally you can use other items that will help you make the project easier and organized, like T-pins, rubber Bands, macrame board, crochet hooks, and embroidery needles, among other items.
What is the best Cord or rope for Macrame?
For macrame, the most important supply you need is some sort of Macrame Cord, Rope or String, so let’s start by defining each one:
Macrame cord: is a tightly braided six-strand (or sometimes more) cotton cord separated into sections twisted around each other to form a thicker and stronger rope. Sturdy, but not the best if you want to brush out the ends for fringe.
Macrame rope: is usually 3-strand rope (or sometimes four) where the strands are twisted around each other. It’s stronger than macrame string but softer than cord. It can be brushed it out for a pretty wavy fringe.
Macrame string: is the soft, single-strand twisted string. It’s much softer than macrame rope, and creates smaller, tighter knots. It’s also much more prone to expansion and uneven thickness. It brushes out to make a beautiful fringe.
But you can also use yarn, twine or jute, hemp, cotton jersey, or any kind of string that can work for the type of macrame you are making.
What size of cord is used for Macrame?
Cords and Ropes come in such a wide variety of sizes/diameters, some more suitable for certain projects than others.
Smaller Ropes, 3mm or less work wonderfully for jewelry, as well as projects that are small or delicate.
Medium Ropes would be the winners, 4mm-7mm are perhaps most commonly used, a great size for macrame beginners, sturdier than the smaller ropes, and the perfect size for plant hangers like this one, wall hangings, furniture, lanterns, curtains, rugs, etc.
Large Ropes, 8mm-12mm (and bigger) make a visual statement and are so fun to work with particularly for wall hangings. They can be a bit more challenging to work with because of their size, but worth the effort.
Where to buy the macrame cords or ropes?
You can find Macrame Cord, Rope, or String in craft stores such as Michael’s, Hobby Lobby, Blick Art Materials, Home Depot, Joann, Lowe’s, Walmart; online craft shops such as Etsy, Amazon.
And also, specialty shops are great places. These are almost always small businesses, so you’re supporting creators and entrepreneurs directly. It may take longer for products to ship and restock, but it’s more than worth the peace of mind.
How to measure the cord?
In most cases, your Macrame cord needs to roughly be about four times the length of your project. But if your cord is folded in half with a Lark’s Head Knot to create two cords, then go for eight times the length.
According to Macrame for Beginners, when estimating the length of your cord, you should look at the pattern first and follow these tips:
- If your pattern consists of many knots, you will probably need more rope
- When your pattern consists of many straight cords, you can cut the rope a bit shorter
- The thicker the cord, the longer it needs to be
- Braided and 3-ply ropes take up more length per knot than a single strand cord
- When in doubt, always cut more rope than you think you need
- Always estimate extra cord to create a fringe at the end
What are the Macrame BASIC knots?
Lark’s Head Knot
Sometimes referred to as a Cow Hitch Knot. This knot is what gets your macrame cords attached to an object, such as dowel, branch, or an anchor. Fold your cord in half and place the loop over the dowel rod. Bring the loop around the back and pull your two cord ends through the loop to tighten.
Reverse Lark’s Head Knot
A Reverse Lark’s Head Knot is done in the reverse, so the bump is hidden in the back of the knot. Fold the cord in half and place the loop under the dowel rod. Bring the loop round to the front and pull your two cords through the loop to tighten.
Square Knot
A square knot is one of the most widely used macrame knots and it can be created as left facing or right facing.
Square knots need to have at least 4 cords (2 working cords and 2 filler cords) but can have more. The first and last cords are the working cords. We’ll call them working cord 1 and 4. The middle cords are filler cords and we’ll number those 2 and 3. These cords will switch places but will still keep their original numbering.
Half Knots
A half knot is simply half of a square knot. It can be right facing or left facing, depending on which side you start on.
There are many more but for the sake of this tutorial these are the ones you will need.
Diy Macrame Plant Hangers Hooks (walls and ceiling)
While hanging plants from the ceiling without drilling holes for hooks is challenging, it’s possible. With some old-fashioned DIY methods and technology, you can do it.
You can use different products from: Clamps, Tensions rods to hang plants, High-strength magnets, Removable adhesive hooks, Old ladder as a plant stand, Hang plants from coat racks.
As for the usually way top to hang them there are heavyweight hooks you can drill either on the wall or to the ceiling. There are plenty different styles to choose from.
Then use an S hook to connect the macrame plant hanger to the hook.
Best Plants for a Macrame plant holder
- Golden Pothos. This beautiful trailing plant looks adorable in a macrame plant hanger. The heart-shaped variegated leaves will complement the looks amazingly well!
- Swiss Cheese Plant. The heart-shaped dark green leaves with cuts look stylish in any style of home decor. It’s a perfect pick for a large macrame hanger.
- Round Leaf Peperomia. This gorgeous evergreen perennial plant will look beautiful with glossy, plump, round green leaves in small pots kept in macrame hangers.
- Chinese Money Plant. The small and round leaves of this plant look just perfect in little pots hanging with the help of macrame planters by the windows.
- Cactus. Cactus are popular, easy, low-maintenance houseplants. For the fanciest look indoors, place the potted cactus plants in a macrame hanger. Perfect for very small macrame plant hangers or multiple baskets macrame plant hanger. These plants are a súper easy to care for, require little water and are very adaptive to the environment although they do better nearby natural light.
- Haworthia. This beautiful succulent with fleshy thick leaves looks prettier when grown in a small pot housed in a macrame hanger.
- String of Hearts trailing plant is a small and cute addition to your macramé hanger. It’s a sought-after beauty and is just perfect for smaller spaces. We’ve planted it in our signature dipped ceramic pots, which look striking up on display. Put your hanger somewhere you can admire it whenever you walk into the room.
- Spider Plant gives off some boho 70s vibes, making it the perfect partner for a macramé planter. It’s also one of the most adaptable houseplants and the easiest to grow.
If you forget about your plant every once in a while, don’t panic. It’s a hardy houseplant, so it’s not going to get too grumpy. To keep it happy and healthy, make sure it gets a drink once the soil starts to dry out and it will grow happily. It might even produce a few babies!
- Heart Leaf Plant. Of the many varieties of Philodendron, a favorite type of hanging plant because it’s naturally occurring and easy to propagate. Philodendron hederaceum has these dark-green, heart-shaped leaves. The tendrils can get really, really long. You can clip it back and start new little plants from your cuttings, or you can kind of just let it go crazy.
- Marble Queen is a fab starter plant and is one of our rare houseplants. This unique beauty will add interest and character to your indoor jungle. You might also know it as the Marble Queen Pothos and the Variegated Devil’s Ivy.
Not only is it a plant of many names, but it naturally hangs, with its white and green variegated leaves, this plant is a showstopper and the perfect trailing plant to suit our Macrame Plant Hanger.
The Marble Queen is easy to care for, with a drink once a week you’ll see the stunning variegated leaves thrive and grow. Just hang your Marble Queen in the Medium macramé planter in either a bright or shady spot and water the plant once a week when the soil becomes dry. - Boston Fern is one of the most popular ferns of all. The bushy fronds look fab on display and emerge beautifully from a stylish macramé plant hanger. It’s also fast growing, so you’ll have the lushest leaves in no time, which you can trim and preen to create your perfect look.
- Tradescantia. The two-toned striped leaves are ideal for creating a colorful look. Grow this low-maintenance plant in macrame hangers for an amazing display.
- String of Pearls. This beautiful plant with leaves that look just like peas, is a succulent, creeping vine. Like any succulent, it’s very low maintenance and requires very little watering.
It looks stunning in a hanging planter with all the vines pushed to one side to create a “spilled” effect. The trailing stems can grow up to 2 or 3 feet long.
- English Ivy or the Hedera, is the perfect option to pop in the macramé plant hanger. Its bushy leaves are fast-growing and trail down beautifully from high up. Why not hang your planter somewhere you can see them draping down? Not only does it look great in a macramé planter, but this trailing beauty’s one of the best air purifying trojans. Pretty impressive, huh?!
Ideal Pots for Macrame Planters
Since Macrame planters or plant hangers have the rest of dripping water and make a mess, it’s recommended to use pots that don’t have drainage.
The negative side of this is the part of no drainage. However, you can fix this by choosing your favorite pot that goes beautifully with your macrame plant hanger and then put some small stones on the base and then put your plant in its own pot (can be plastic) with drainage inside the pretty pot.
The rocks will prevent your plant from going straight to the bottom and will create a space for the extra water to stay away from the plant.
That way you don’t make a mess every time you water your plants but you also keep your plant safe and healthy.
My favorite pots are ceramic ones. Ikea has some really cute ones. The one I used for this project is from there.
There’s no right or wrong in choosing your pot, just make sure your plant has room to grow, drainage, and lots of love.
More Home Decor Project Ideas to Try
Loving this Macrame Plant Hanger tutorial? You might also love these other Crafty Home Decor Projects too:

DIY Macrame Plant Hanger Tutorial
Tools
- scissors
- Measuring tape.
Supplies
- Macrame cord or Cotton cord or rope in the color you like best.
- Wooden Beads or embellishments if desired.
- Wooden ring of about 15 cm or as you like more.
- Elastic Bands I use them to hold the bent strings.
Instructions
- Firstly, you have to decide what size you want the macrame planter tapestry to be from top to bottom. Mine reached 130 cm. So the strings should be 3 times the size of the finished tapestry.
PREP WORK
- You will need to cut 8 strands in total that are folded in half which means you would have 16 pieces of cord to work with.
- I have created these graphics with the strings in different colors and numbers to make it easier to see which strings are used for the knots.
- Step 1: Attach your cords to the ring. Take one of your cords, fold it in half, and attach it to the wooden ring with a lark’s head knot. To make a Lark’s Head Knot, take your rope and fold it in half. Then put the loop over and behind the dowel. Now, pull the ends of the rope through the loop and tighten.
- Repeat that with the rest of the cords and bring them together one next to the other.
- Leave about 1-2 Inches of cord to start the diamond design.
THE MACRAME TAPESTRY
- Step 2: Make the first square knots. We will work first with cords 4 and make the first square knot. As you can see you’ll work with four cords. The ones on the left and right will be your working cords and the two in the center cords will be your filler cords.
- Bend the left cord in front of the two middle filler cords and under the right cord. Then, bring the right cord behind the filler cords and up through the loop you made in with the left cord and tighten. This is called a half knot. To complete the square knot, you’ll make another half knot, but this time it’ll be reversed, first with the right cord in front and the left behind.
- Step 3: Now from here on we’ll be working on alternating Square Knot. So we’ll use cords 3-4 and 5-6 to knit the next row which has only 2 square basic macrame knots.
- You can see that the 4 strings that make up a knot are mixed from here.
- Step 4: The next row has 3 square knots and to make them we will use cords 2-3, 4-5, and 6-7. I show it in the following graphic.
- Step 5: The next row has 4 square knots and we are already in the middle of the diamond that forms our macrame hanger tapestry. We are using all the cords to make this row. You can see it in the next graphic.
- Step 6: The 3 knots that form this row show us that we are making a return. We will use cords 2-3, 4-5, and 6-7. See how it looks below:
- Step 7: Here make just 2 square knots and use cords 3-4, and 5-6 for it. We are getting close to closing the diamond.
- Step 8: Finally, one single square knot. With this knot, we finish the first diamond.
- Step 9: Now it’s time to attach the embellishments if you want to use them. I used some light wooden beads that I thought matched very well with the turquoise color of the cord. So these embellishments will work as separations from one diamond to the next.
- Step 10: Now you just have to repeat steps 1 to 8 to knit 2 more diamonds.
THE PLANT POT HOLDER (THE BASKET)
- Step 11: To create the basket where the pot will be placed, drop down about 2-3 inches from the last diamond. We’re going to tie a row of four square knots straight across. Skip the first 2 cords and tie 4 square knots, then skip the last 2 cords.
- Step 12: Now, grab the two cords you didn’t use on each side, flip the cords toward the center on both sides and then tie a square knot about an inch or so below the row of square knots we just tied.
- Step 13: Use the left two cords from that square knot and the next two cords to the left to tie a square knot about an inch and a half below the knot you just tied in the center. It’ll be on the left side.
- Step 14: Then do the same thing on the right side.
- Step 15: Flip your plant hanger around and continue tying square knots all the way around at the same level as those first two. There will be 5 square knots altogether.
- Step 16: The Wrapping knot. Now you need to grab one of your pieces of cord and use it to tie a wrapping knot around all the cords under that last row of square knots. Give it as many wraps as you reach the desired size.
- Step 17: Cut the tail to the desired length. My daughter left it long but you can cut it where you like it best. You can also make a finer, fluffier fringe by brushing the ends with a white brush.
- And ready! Our wonderful DIY Macrame Plant hanger is ready to rock!
Some other macrame projects I love from my favorite bloggers:
Macrame Feather DIY
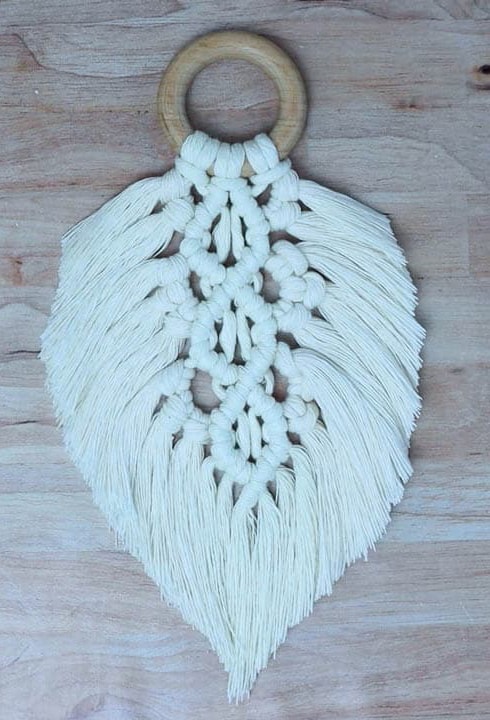
Macrame feathers are a trendy way to spruce up any macrame project. They can be used as a beautiful boho accent in macrame jewelry, key chains, wall hangings, home decor, or even macrame furniture. Plus, a DIY macrame feather is a great way to use up scrap cord!
This post will show you three easy ways to make beautiful macrame feathers with step-by-step instructions.
As an added bonus, she has included a link to get a free set of printable templates! You can use them to perfectly cut your feathers the easy way.
Cute Macrame Plant Hanger
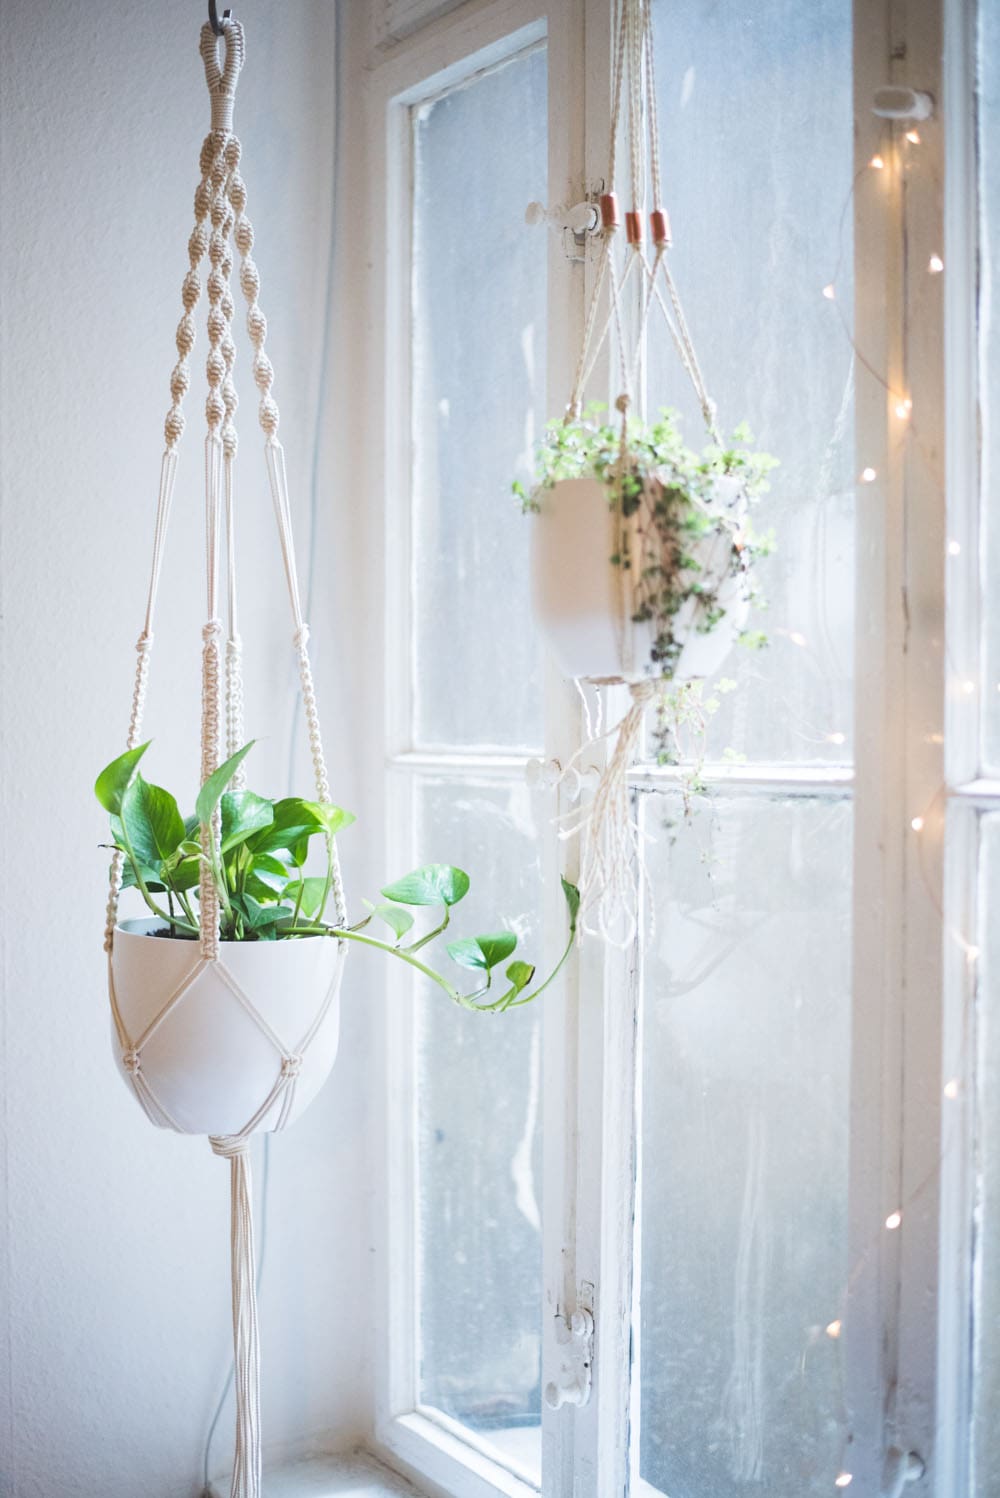
This is such a cute plant hanger it is indeed super easy. Although there are also mega simple versions, where you actually have to make only a handful of knots, I love the slightly more complex patterns. But don’t worry, that doesn’t mean that this DIY is complicated. The hardest and most annoying step is actually measuring and cutting the cords.
Macrame Necklace
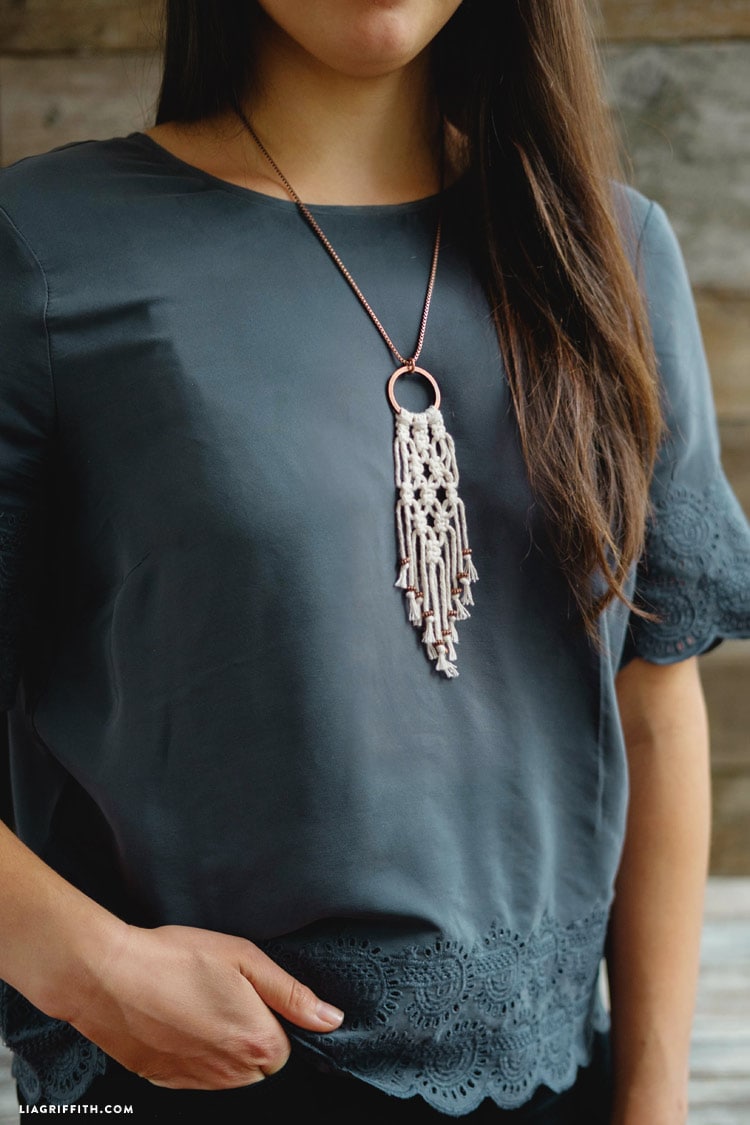
simple DIY macrame necklace, perfect for pairing with all of your summer outfits! This necklace uses a series of the most basic macrame knots — the square knot. To make this necklace, you will need a chain and jewelry findings such as a lobster clasp with two jump rings, a copper keyring for the center, and some beads to add into your macrame weaving. Just make sure that the beads are the same thickness as your string or the beads will slip off! Follow the step-by-step photo tutorial to braid your DIY macrame necklace.
Jute Rope Plant Hanger Diy
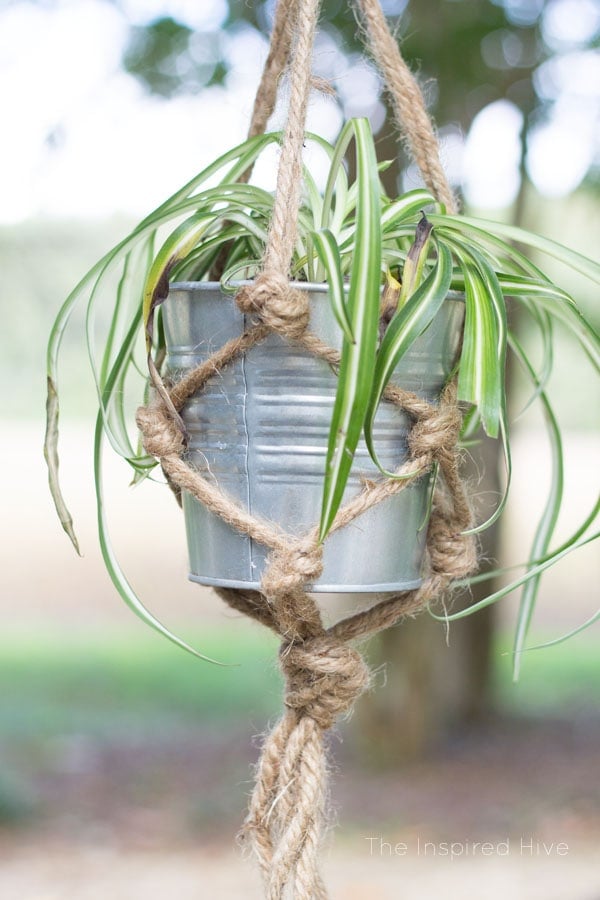
This planter is gorgeous and one of my favorite styles. She decided to use rope for her Monthly DIY Challenge, and thought it would be fun to try creating her own plant hanger, but to help it meet her style she used jute rope instead of macrame cord. She wanted to make some fern hangers for the front porch but she ended up using houseplants instead. Let’s see how she made it.
More Advanced Macrame Plant Hanger Pattern Free

Are you looking for an easy macrame plant hanger DIY that still looks fancy and advanced? This wall hanging plant holder is a perfect project for a beginner or more advanced knotter!
The whole design is made using square knots, so it’s nice and simple, but still decorative and boho chic.
She’ll walk you through the whole process, including the diamond square knot pattern, the plant basket, cutting down the dowel, and attaching the hanger!
Macrame Plant Hanger Without Tassel Diy

Learn how to make this beautiful Diy Macrame Plant Hanger No Tassel Pattern.
This super cute plant hanger style shows that there are always many ways to make something and that in the variation is the uniqueness of each project.
The author recommeds making sure you use the right size cords since each brand can vary and that depending on the size you use, don’t put very heavy plants and pots in it.
Diy Macrame Plant Hanger With Beads Tutorial
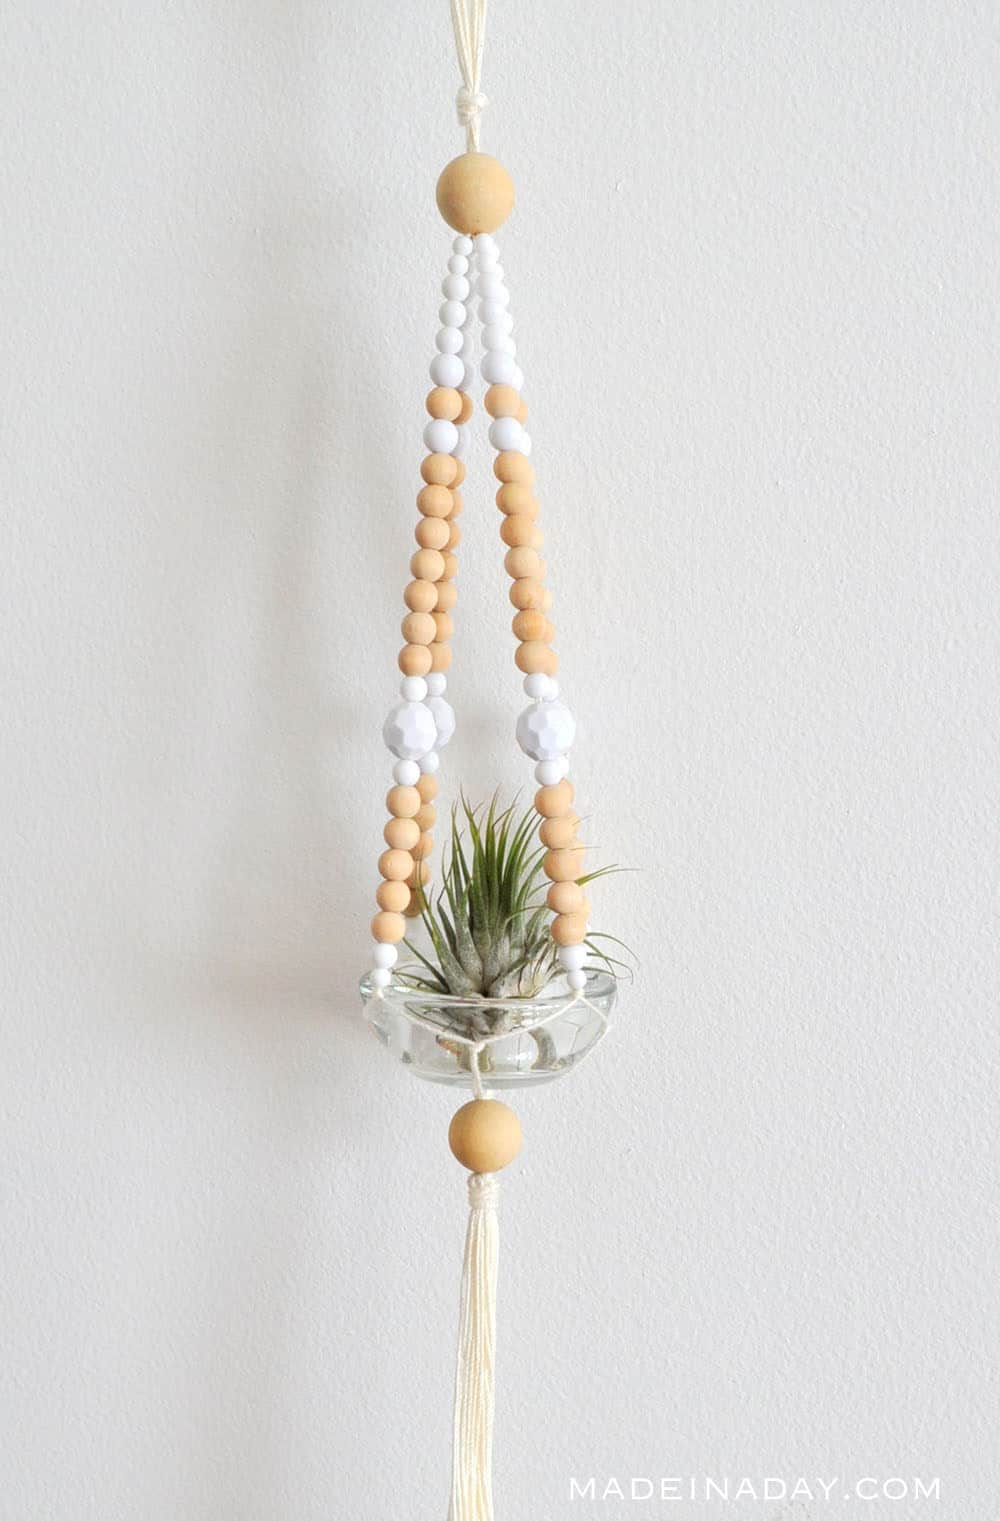
Looking for a fun way to display your air plants this spring? Try your hand at this Easy Beaded Macrame Plant Hanger! This simple sweet hanger is sure to add a boho touch to your decor.
Even if you have not tried macrame before, (She had not tried hermyself until this project), it is so simple. They are so cute you are going to want more than one! This post is a little long but once you make one it will be super easy. Go check it out!
Simple Rope Plant Hanger Diy

This simple rope macrame plant hanger is similar to those macrame plant holders our moms were all making in the 70’s, but not nearly as complicated and a lot less shag hanging down below. Plus, this only takes MINUTES to make because it’s not very fussy at all…but it has just enough detail to make it pleasing to look at!
This type of plant hanger is perfect for weird spaces, cutout opening on walls, windows, and any blank corner that needs some accent and life.
Check it out!
Macrame Plant Hanger Pattern Free

Do you want to add something new to decorate your home or space? Macrame is a great simple medium to create amazing home decor. It adds a little boho feel to any room.
Working with macrame is a great hobby for beginners as well as more seasoned crafters. It can be used to make something as simple as a plant hanger or as intricate as a dream catcher.
Whatever level of macrame pattern you may take on, a lot of the patterns include similar knots.
Check these out!
If you enjoyed this DIY Macrame Plant Hanger, don’t forget to PIN and share it with friends.
Til’ next time…


FREE WORKBOOK
Keeping your Sweet Home Organized
Learn how to create intentional habits and simple routines to Keep Your Home Organized. Plus freebies, printables, exclusive content, and tips.
Disclaimer: By clicking on the “Yes” button above you are giving me your consent to collect and use your information according to the law and My Policy Privacy. Zero Spam I promise!

