DIY Upcycled Baby Bow Headbands
This post may contain affiliate links. Please read our Disclosure Policy.
A great way to keep using those elastic baby bow headbands for a long time as they grow is to turn them into some cute upcycled headbands for big girls. Learn how you can do this too!
My girl looks so cute with them on. You have to try this!!!

Table of Contents
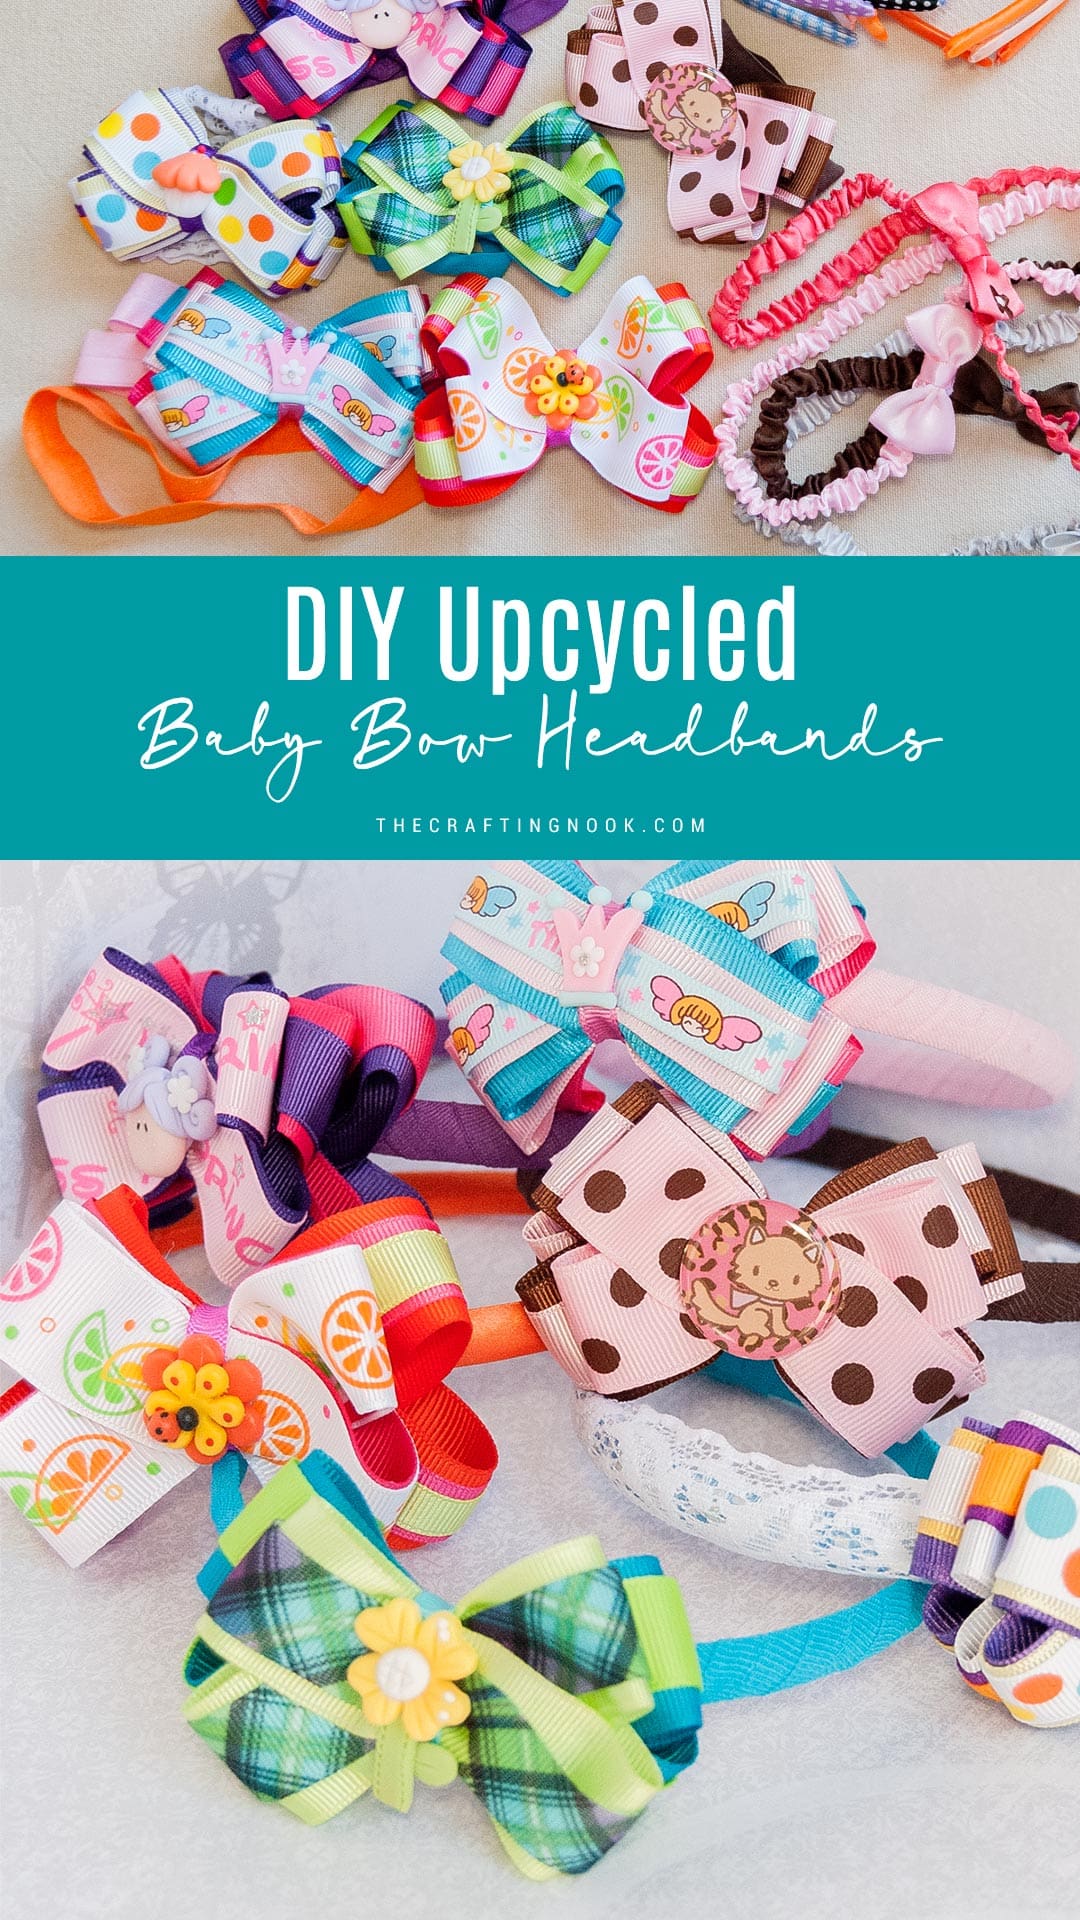
Upcycled Baby Bow Headbands for Big Girls
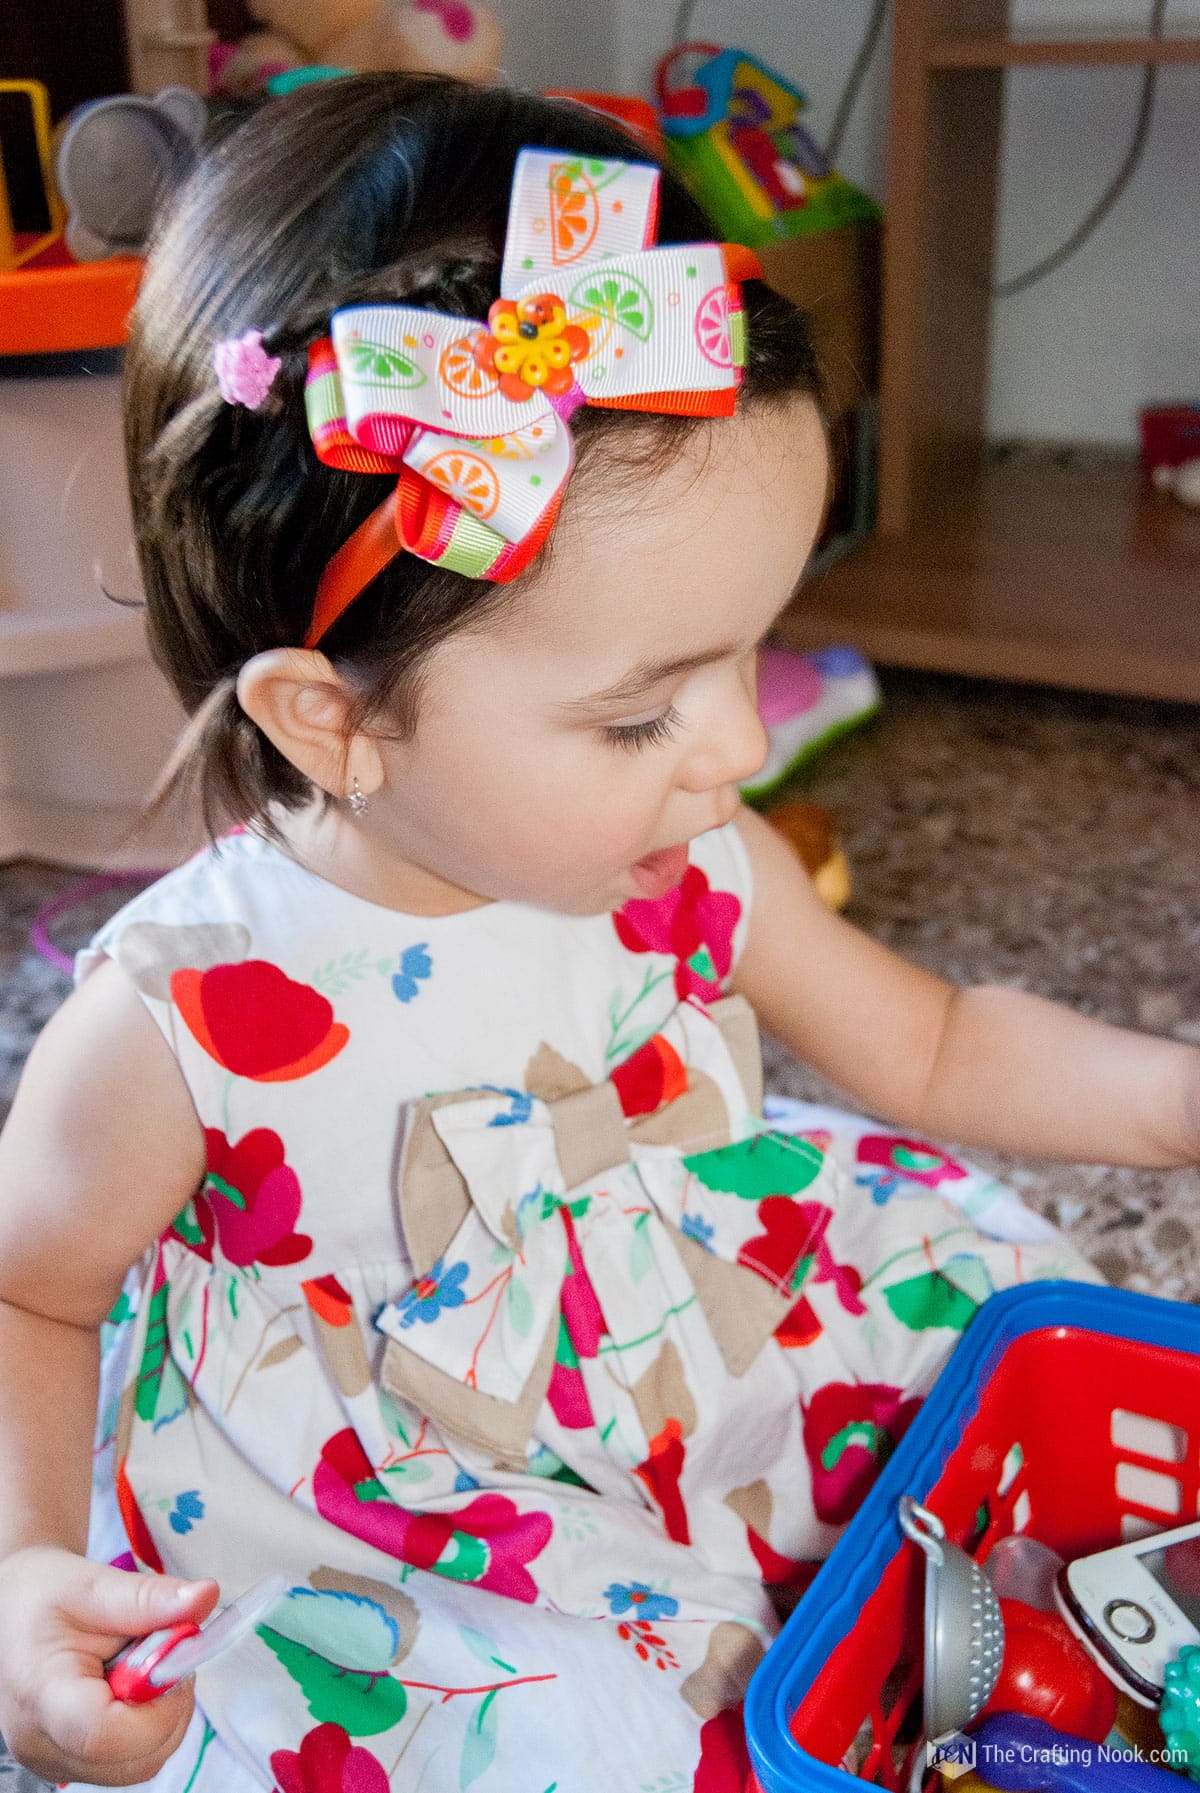
I got many lovely and cute headbands for my baby girl from our family and relatives since she was in my belly.
The cutest headbands ever, with their big and colorful bows. So much art and creativity on each one but my baby girl couldn’t use them much because the elastic always annoyed her, even now.

The thing is that they were so cute and I loved them so much that I couldn’t bear the thought of giving them away.
So I came up with the idea of reusing them making these kinds of headbands made with plastic so they wouldn’t be elastic anymore.
And it worked!!! She likes to wear them now.
I love how they turned out. I made some of them because Em has so many LOL. The rest is on my to-do list to come up with other ideas.
It is super easy to make and you only need some plastic headbands {or hair clips} and a hot glue gun or thread and needle.
How to make these upcycled Baby bow headbands
With this tutorial, you will use up to the last piece of your old headbands.
Supplies:
- Plastic headbands.
- Old elastic baby headbands with bows
Tools:
- Scissors
- Hot glue gun and glue sticks
- Needle and thread.

Instructions:
1. Get your selection of elastic bands.

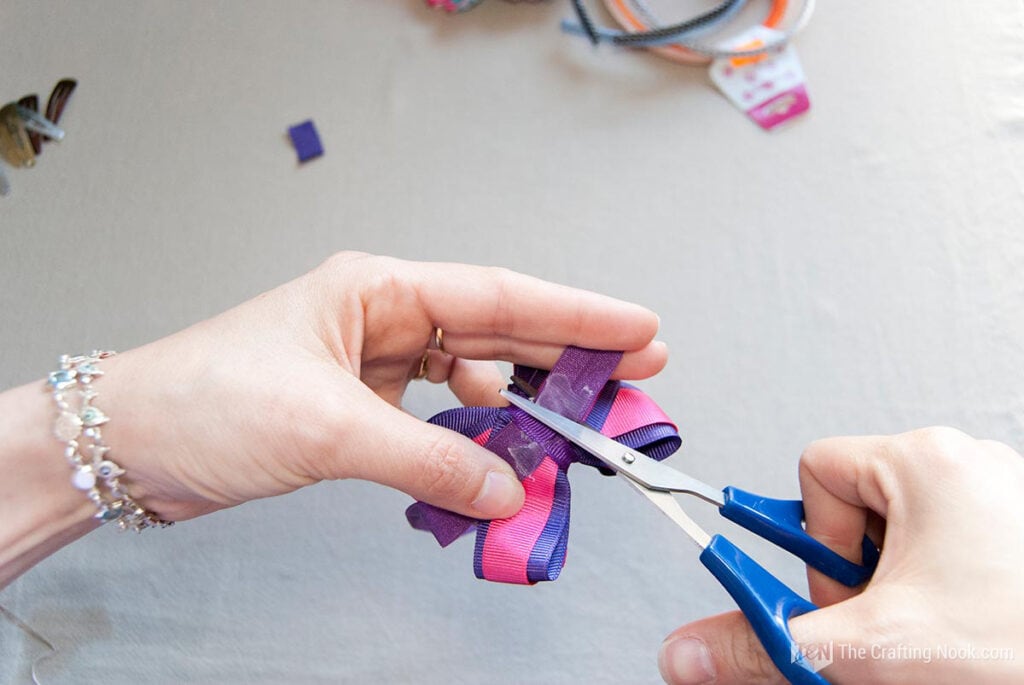
2. Just cut off the elastic strip from the bow as close as possible to the joints.


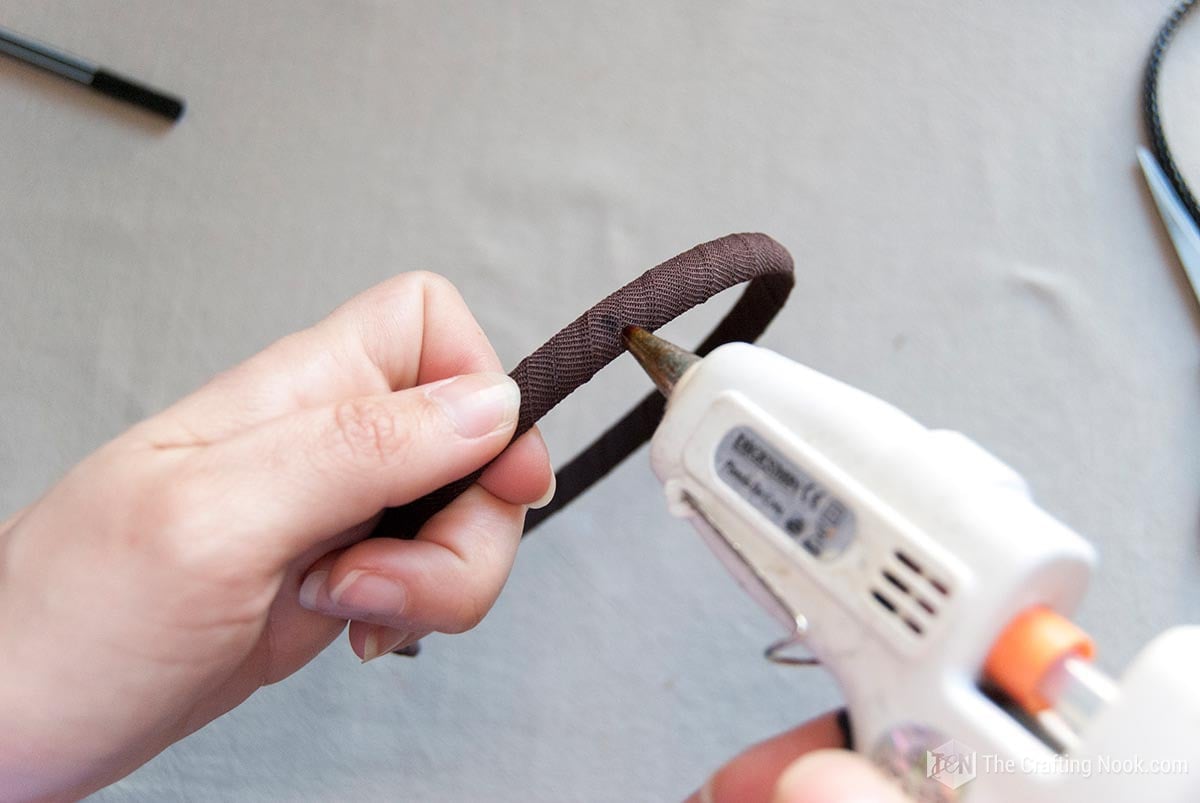
3. Used it to wrap it around the plastic headband while stretching it tightly. Add a dab of glue to secure the end of the elastic and then go around covering the headband.

4. When you get to the end, glue it with a dab of hot glue. Secure for a few seconds until it cools down.

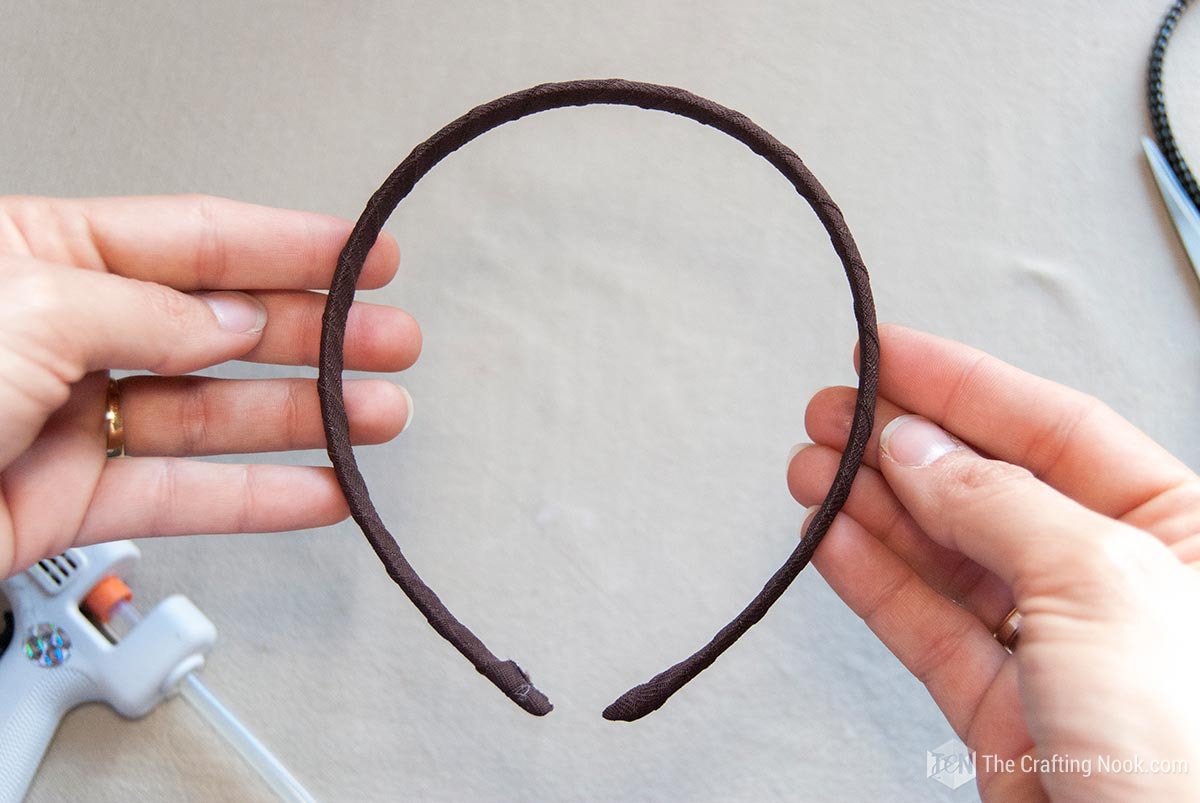
And the headband is wrapped.
Now the bow.
5. Decide first where you wanted the bow to be placed and leave a mark.
6. Then add a big dab of hot glue where the mark is and put the bow in place.
7. To reinforce the bow add a few dabs of hot glue in a few more spots along the headband below the bow.

There you go… you got yourself a cute bow headband for girls!

Here is another example, and it was almost the same.

Cut the elastic from the baby headband bow, and wrap the plastic headband.
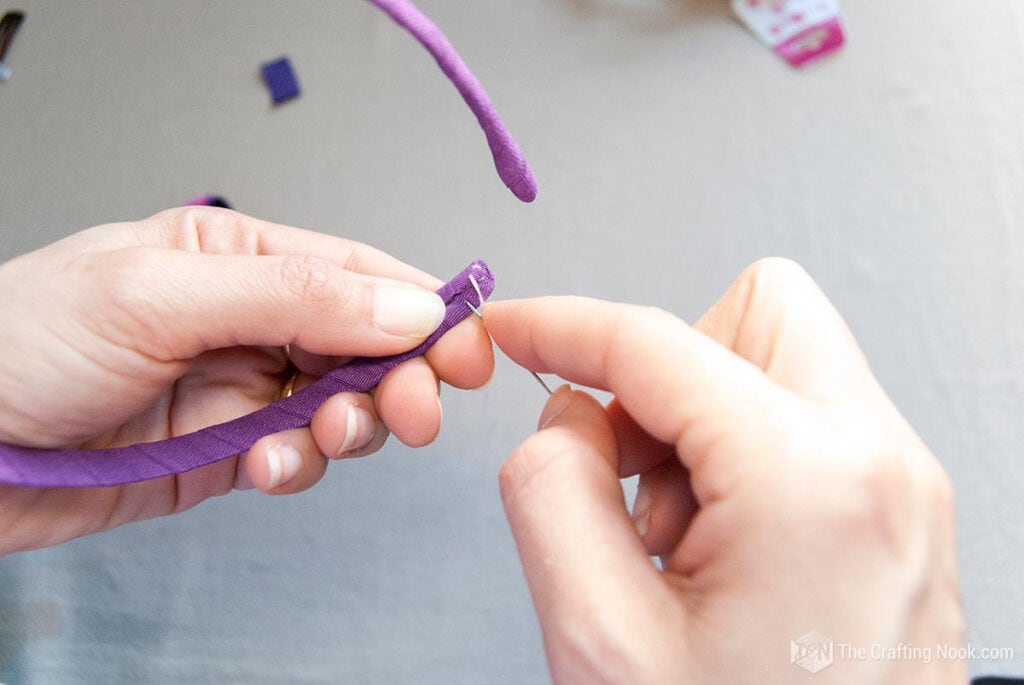

But this time at the end of the plastic headband I made some stitches instead of gluing.


Then marked the place for the bow, glued it, and tadaaaaa!!!

Crafting Tips
* If the old headbands’ elastic bands are in really bad shape, just use what you have at hand, ribbon or fabric scraps.
* If your bows don’t have embellishments, you can add anything you have even small toys and buttons.
Look how cute she looks with another one I made!


What do you think? Have you made headbands like these? How else would you make them?
Frequently Asked Questions
The fastest and easier way is to use hot glue. If the headband is wrapped in fabric, ribbon, or elastic bands you can also attach it by stitching it either directly to the fabric or ribbon or placing a piece of fabric or felt on the inner side putting the headband between the piece and the bow and stitching them together.
You can use from fabric and elastic to plastic or metallic headbands. It will mostly depend on who will use it and what is more comfortable for them.
Then you could make a cute bow yourself and glue it to the headband, or you can buy cute bows at thrift stores or craft stores.
In my experience, hot glue is the best. It hardens fast and, in most cases, it won’t come off. But you are free to try and test!
More Upcycled projects to Try


✂️ Tutorial

DIY Upcycled Baby Bow Headbands
Tools
- scissors
- Hot glue gun and glue sticks
- Needle and thread.
Supplies
- Plastic headbands.
- Old elastic baby headbands with bows
Instructions
- Get your selection of elastic bands.
- Just cut off the elastic strip from the bow as closed as possible to the joints.
- Used it to wrap it around the plastic headband while stretching it tightly. Add a dab of glue to secure the end of the elastic and then go around covering the headband.
- When you get to the end, glue it with a dab of hot glue. Secure for a few seconds until it cools down.
- And the headband is wrapped.
- Now the bow.
- Decide first where you wanted the bow to be placed and leave a mark.
- Then add a big dab of hot glue where the mark is and put the bow in place.
- To reinforce the bow add a few dabs of hot glue in a few more spots along the headband below the bow.
- There you go… you got yourself a cute bow headband for girls!
- Here is another example, and it was almost the same.
- Cut the elastic from the baby headband bow, and wrap the plastic headband.
- But this time at the end of the plastic headband I made some stitches instead of gluing.
- Then marked the place for the bow, glued it, and tadaaaaa!!!
More headband ideas from my favorite bloggers:
- DIY Big Bow Headbands by Scattered Thoughts of a Crafty Mom.
- Easy felt hearts headband tutorial by Kiddie Foodies.
- Double-Sided Stitched Headband by Wild Olive.
Share and PIN ME!
Til’ next time…


FREE WORKBOOK
Keeping your Sweet Home Organized
Learn how to create intentional habits and simple routines to Keep Your Home Organized. Plus freebies, printables, exclusive content, and tips.
Disclaimer: By clicking on the “Yes” button above you are giving me your consent to collect and use your information according to the law and My Policy Privacy. Zero Spam I promise!
I thought about how to reuse my baby headbands and your post showed me exactly how to after all this time. I bought a hot glue gun and glued away. I made so many new headbands and clips I couldn’t count how many.
That is SO good to know!!! I have made so many too, These in the post are only a few of them and she had like over 30 headbands LOL. She’s still using them each day!
Hugs
That’s smart!! I love taking ornaments from broken rings or earrings and turn them into charms too!
The gang over at My Personal Accent think your post about Turning Baby Headbands Into Little Miss Headbands is brilliant!! We would like to invite you to party with us starting at 5:00 Thursday nights at our new Blog Strut Peacock Style Link Party to share your creative ideas. Come on over!! http://wp.me/P2Vf55-1K
These headbands are ridiculously cute and I love how easy they are to make! I’d be thrilled if you’d come on over to Pink Recipe Box and link up at Creative Wednesdays: http://pinkrecipebox.com/creative-wednesdays-with-pink-recipe-box-4/
Those are adorable and such a clever idea! My little Molly also always hated the elastic headbands.
What a great idea! Such a great way to continue using those headbands. Thanks for sharing at my Twirl & Take a Bow party! Have a great week.
Leslie
House on the Way
Hi
You’ve been featured at Sew Crafty Angel today.
Angel
These are so cute! I really like the pink and brown headband. I used to dress my daughter in pink and brown a lot when she was a baby.
Navy Wifey Peters @ <a href=”http://www.usscrafty.blogspot.com/2013/08/submarine-sunday-43.html>Submarine Sunday Link Party</a>
These are adorable! I used your post as inspiration to make some for shelbi. Let me know what you think :) http://healthycraftymommys.blogspot.com/2013/08/diy-make-your-own-bows-and-headbands.html.
Just shared on Facebook, Twitter and Google + (and with my daughter for her little girls)!!
Hugs, my sweet Friend!
I loooooooove these – sooooo cute!!Great idea with wonderful resultsShe looks absolutely adorable with these headbands
Super cute!
You clever girl!!
Those are precious! Don’t you just love having a little girl to dress up?! I love all of the pretty little bows and outfits that my daughter can wear! Adorable! :)
-Heather
http://www.stringtownhome.net