Glittered Twine Star Christmas Ornament
This post may contain affiliate links. Please read our Disclosure Policy.
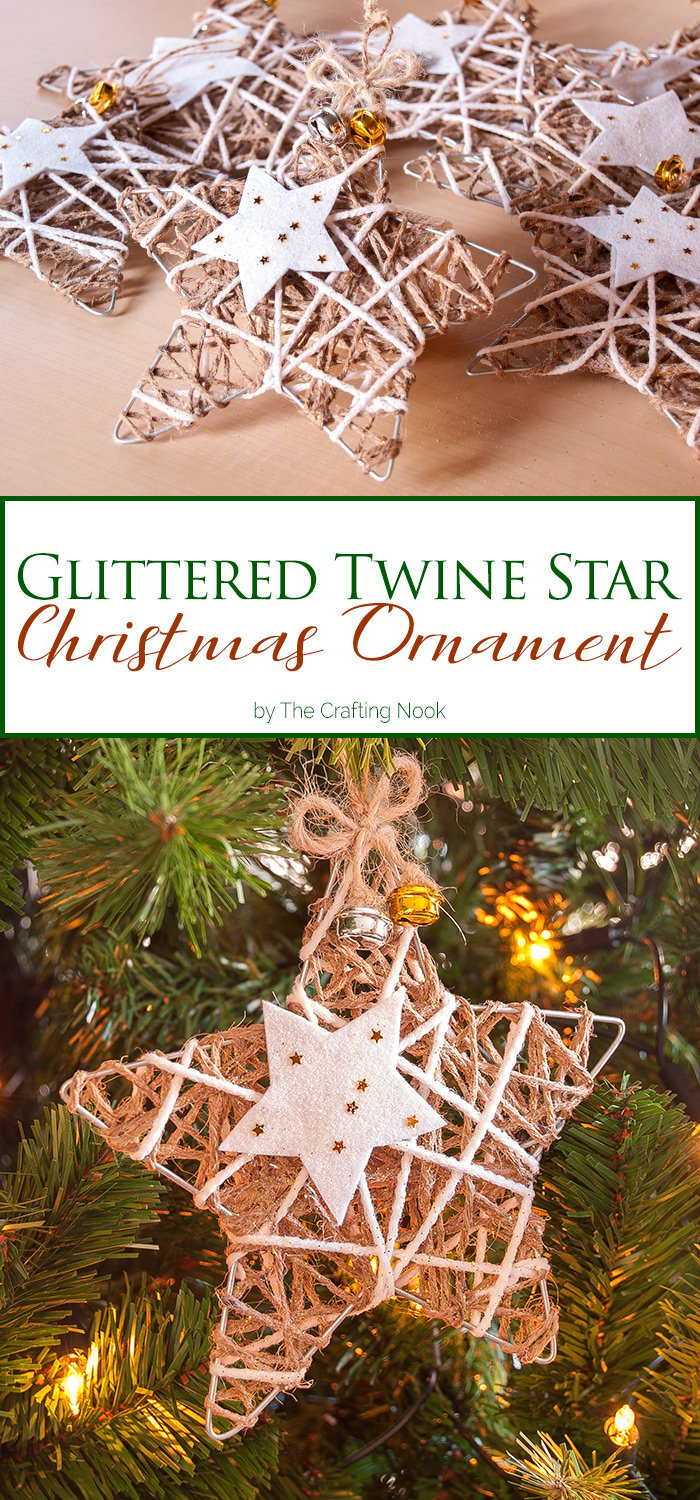
This cute and rustic Glittered Twine Star Christmas Ornament will Add some glam to your Christmas tree. It’s easy to make so much rustic style!
I don’t know about you, but for me, this is getting better and better and so much excitement!!! Love Christmas so much and I’m so happy creating our ornaments and all our decorations.

My girl is so excited too about our Christmas decor, we can’t wait to actually start putting everything on the new tree. Today I’m super happy to share with you this cute and rustic Glittered Twine Star Christmas Ornament, hope you love it as much as we do!
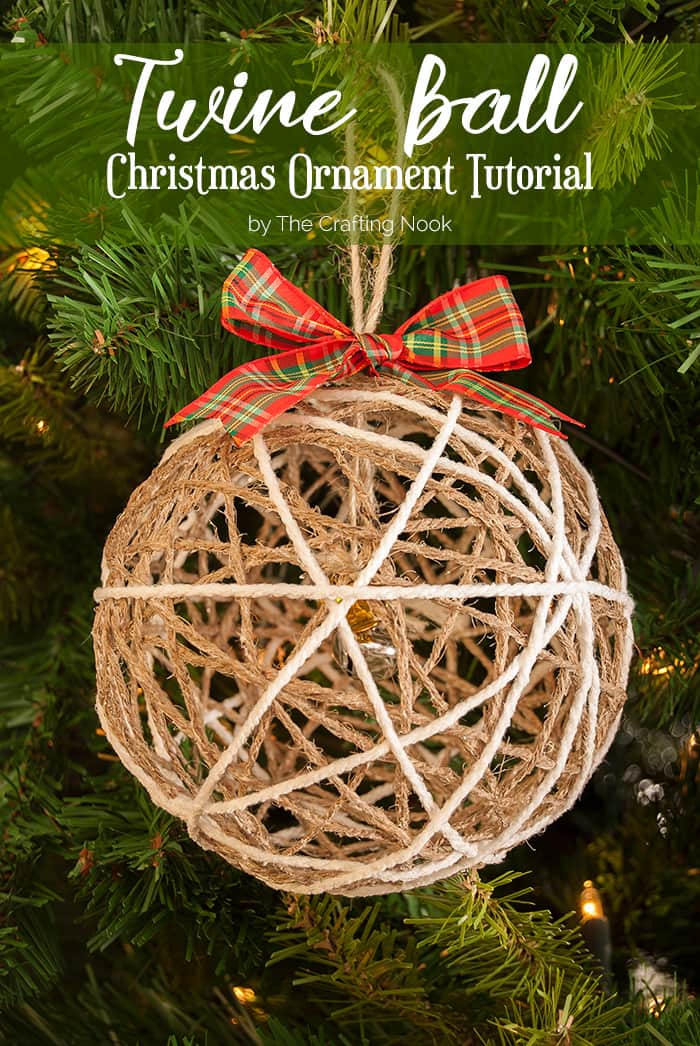
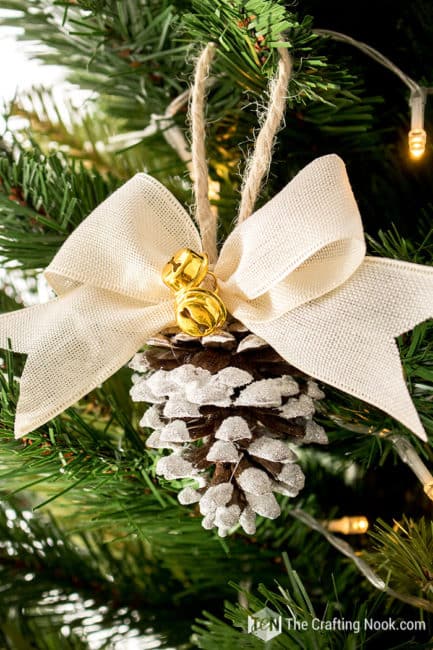
You might also love these other Christmas ornament ideas: DIY Rustic Flocked Pinecone Christmas Ornaments, DIY Twine Ball Christmas Ornaments, and DIY Buffalo Check Christmas Ornament
Table of Contents
Rustic Twine Star Christmas Ornament
Like our Twine Ball Christmas Ornaments, these stars are easy to make but it takes time to have them done. Not like days but I made 8 of this, 4 medium and 4 larger and they took me a whole afternoon to have stars done and then let them dry overnight.
I finished the details the next day in the afternoon. It’s so much fun to make them though. In my opinion, crafting is relaxing and even therapeutic.

The first couple stars I was a bit stressed because I was taking photos and stuff but then the rest was fun and the process much more fluid.
What I love the most about this type of crafts is that it’s all about imperfection. That’s precisely the beauty of them. None of them are the same. The twine is imperfect and the wiring pattern is imperfect.
Making the stars with wire is so imperfect but when you finish them you will most definitely fall in love!
How to Make A Twine Star Christmas Ornament
Supplies:
- Galvanized wire 10 gauge {here says 10 but each country might have different numbers but make sure has a good diameter but that you still can bend it with a plier.}
- Jute twine
- White yarn {optional but recommended}
- Stars printed on a page {this is as a guide to making the stars}
- White Felt
- White {snow} and gold glitter.
- Tiny gold stars {optional}
- Christmas bells silver and gold
- White glue or mod podge.
- Jingle bells or beads optional
Tools:
- Flat Nose Pliers
- Scissors
- Glue gun + silicon sticks.

Before we begin, be sure to follow us on Pinterest, Facebook, Instagram, and YouTube, and also sign up for our email list (at the end of this post), so you’ll never miss a post!
Step 1: Creating the wire Star
I started with the wire stars. For that, I decided what sizes of stars I wanted to make.
Since I wasn’t sure I printed different sizes on the same page. Once decided the size I started working with my wire.
I made my first bend with my nose pliers about 1 inch {2.5 cm} from the end.

This will be the start and finish point and it should belong to an internal corner of the star as follows:


Next would be to make the first point of the star. Place your bent corner on top of your printed star and mark where you should bend your wire. Using your nose pliers, bend your wire trying to keep the same direction from your first corner.

Mark again on the internal corner and bend again.

Following the star design, make your 5 points.
When your wire meets the end, bend the wire one last time so it would overlap your first internal corner and cut about 1 inch {2.5 cm} from the corner.
Please bear with me as I try to explain this process I’m showing you each step with photos in case I get you all confused.


Finally, you have three options here. You can use a hot glue gun to stick both ends together, use a thin wire to keep both ends together, or as I did just make loops with both ends.

This is a bit hard since the wire is strong for only fingers so I used the nose pliers, I would put both end and pint sides inside the pliers and turn the pliers around so the end would overlap and create a loop.
You can play around with your first star and see what works best for you.
Make as many stars as you want before moving on.


Now the really fun part!
Step 2: Wrap The wire Star with twine
In a small glass bowl mix 2 parts of glue for each part of water. This makes the glue a little thinner and easier to handle.
I used about 5 meters {5.5 yards} of twine for each star. And about 1.5 meters {1.6 yards} of yarn for 6 and 8 inches stars {16 y 20 cm.}
Soak your twine in the glue.


Then take one end and with your thumb and index finger remove the excess of glue pressing and pushing the glue down along the twine.

Wrap the twine around the star randomly. I started putting one end of the twine close to wire end loops and then made loops without a specific pattern.

It’s important to keep the string tight against the wires as you wrap because it could unravel, but also not so tight so you can modify the wire shape. It happened a couple of times and it’s so annoying.


When you run out of twine, tuck the end under the closest twine string.

Step 3: Wrap The wire Star with yarn
Repeat the process with white yarn.


If you notice the star is too soaked you can remove excess with a paper towel by making quick but soft pats around the star.

Step 4: Glitter the star
I suggest you have a large container for the next step or a mat. While the stars are wet apply generously white {snow} glitter and also some {not too much} gold glitter. I mean a lot more white than gold to frost it and add some sparkle.

Step 5: Let the Stars dry
Hang the stars and place some plastic bags or plastic wrap on the floor below them so they don’t drip directly on the floor.

You definitely don’t want to have to remove glue from the floor later.

Let them dry overnight.
Step 6: Decorate the Twine Star Christmas Ornaments
While they dry cut some small stars on white felt. They don’t need to be perfect.


Apply your diluted glue on each star and sprinkle white {snow} glitter and some gold glitter on each star.


Then apply a few gold stars randomly on the stars.


Let them dry for a few hours.
Once your twine stars and your felt stars are dry, glue one felt star on each twine star wherever you like best.


Cut some extra pieces of twine strips let’s say about 6 inches {15 cm} and with knots hang a bell on each end. I made it one silver one gold on each strip.

Make a cute bow leaving your bells hanging. You can replace the twine for ribbon for this if you prefer.

Step 7: Hang the Star
Finally cut some twine strips for your hangers. Fold and make a knot.

Insert the folded twine through an opening on your top point of the stars.

Insert one end through the other.

Pull tight.

…and the last but not least step is gluing your twine bow to your star point right on top of your hanger.


Other ways you can decorate your Twine Star Christmas Ornament:
Imagination is the limit. I kept it simple here but you can add gorgeous ribbon bows, your favorite Christmas embellishments, cotton ball, cinnamon sticks, greenery, red berries, other types of glitter, sequins, and so on.

Whew! This was long, hope I didn’t lose you. Are you still with me? I hope so. If any steps were not clear enough, please don’t hesitate to ask I’ll reply as soon as I can.
So, there you go! A super cute Glittered Twine Star Christmas Ornament Set.
They are all ready to be hung on the tree!
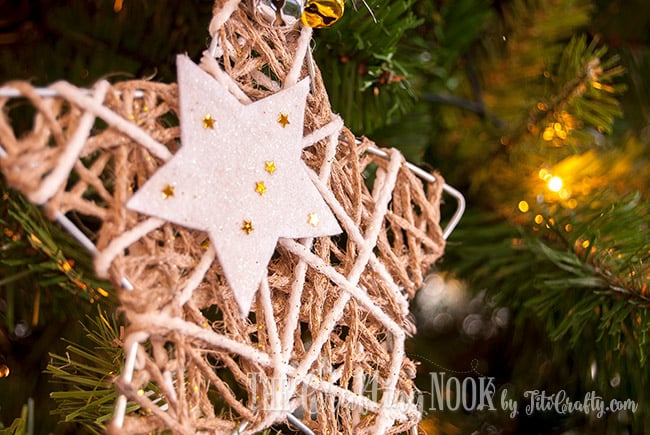
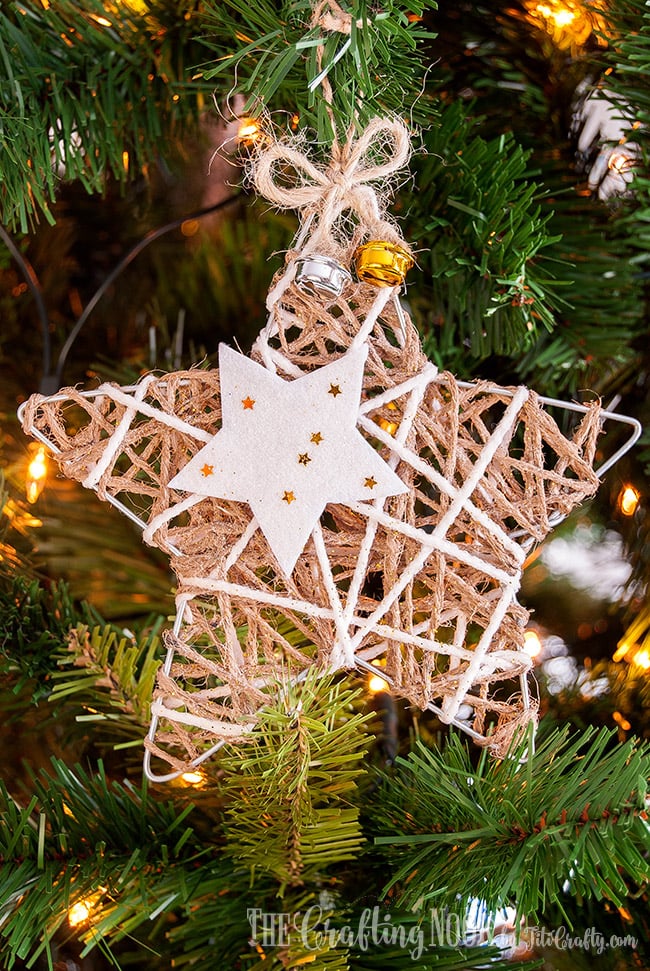

Hope you like these cuties and that you want to try making them! I’m sure it would be so much fun and if you involve your kids, they would most certainly have lots of fun too.
Let me know your thoughts in the comments, I would love to hear your opinion!
Frequently Asked Questions
Yes, absolutely. Imagination is the limit and also the absorption of the material. You can use any of the different types of twine, yarn, white cotton twine, or any color for that matter, I just like white LOL and even baker’s twine would work wonderfully if you love that kind of color.
Oh yes, you definitely can. Just make sure, the sticks are well glued so they can handle the glue-soaked twine, and be a little bit extra careful while wrapping the star.
I can’t say any type because I haven’t tried them all but I know for sure you can use mod podge, normal school glue, or any white glue from any brand. I know other crafty friends used tacky glue and liquid starch and say it works wonderfully. So my guess is, you have to try and test.
More Christmas Ornament Ideas to Try
If you like this cute twine star Christmas ornament tutorial, I’m sure you will love these other Christmas project ideas too:
✂️ Tutorial

DIY Glittered Twine Star Christmas Ornament
Tools
- Flat Nose Pliers
- scissors
- Glue gun + silicon sticks.
Supplies
- Galvanized wire 10 gauge {here says 10 but each country might have different numbers but make sure has a good diameter but that you still can bend it with a plier.}
- Jute twine
- White yarn {optional but recommended}
- Stars printed on a page {this is as a guide to making the stars}
- White Felt
- White {snow} and gold glitter.
- Tiny gold stars {optional}
- Christmas bells silver and gold
- White glue or mod podge.
- Jingle bells or beads optional
Instructions
STEP 1: CREATING THE WIRE STAR
- I started with the wire stars. For that, I decided what sizes of stars I wanted to make.
- Since I wasn’t sure I printed different sizes on the same page. Once decided the size I started working with my wire.
- I made my first bend with my nose pliers about 1 inch {2.5 cm} from the end.
- This will be the start and finish point and it should belong to an internal corner of the star as follows:
- Next would be to make the first point of the star. Place your bent corner on top of your printed star and mark where you should bend your wire. Using your nose pliers, bend your wire trying to keep the same direction from your first corner.
- Mark again on the internal corner and bend again.
- Following the star design, make your 5 points.
- When your wire meets the end, bend the wire one last time so it would overlap your first internal corner and cut about 1 inch {2.5 cm} from the corner.
- Finally, you have three options here. You can use a hot glue gun to stick both ends together, use a thin wire to keep both ends together, or as I did just make loops with both ends.
- This is a bit hard since the wire is strong for only fingers so I used the nose pliers, I would put both end and pint sides inside the pliers and turn the pliers around so the end would overlap and create a loop.
- You can play around with your first star and see what works best for you.
- Make as many stars as you want before moving on.
STEP 2: WRAP THE WIRE STAR WITH TWINE
- In a small glass bowl mix 2 parts of glue for each part of water. This makes the glue a little thinner and easier to handle.
- I used about 5 meters {5.5 yards} of twine for each star. And about 1.5 meters {1.6 yards} of yarn for 6 and 8 inches stars {16 y 20 cm.}
- Soak your twine in the glue.
- Then take one end and with your thumb and index finger remove the excess of glue pressing and pushing the glue down along the twine.
- Wrap the twine around the star randomly. I started putting one end of the twine close to wire end loops and then made loops without a specific pattern.
- It’s important to keep the string tight against the wires as you wrap because it could unravel, but also not so tight so you can modify the wire shape. It happened a couple of times and it’s so annoying.
- When you run out of twine, tuck the end under the closest twine string.
STEP 3: WRAP THE WIRE STAR WITH YARN
- Repeat the same process in step 2 but with white yarn.
- If you notice the star is too soaked you can remove excess with a paper towel by making quick but soft pats around the star.
STEP 4: GLITTER THE STAR
- I suggest you have a large container for the next step or a mat. While the stars are wet apply generously white {snow} glitter and also some {not too much} gold glitter. I mean a lot more white than gold to frost it and add some sparkle.
STEP 5: LET THE STARS DRY
- Hang the stars and place some plastic bags or plastic wrap on the floor below them so they don’t drip directly on the floor.
- You definitely don’t want to have to remove glue from the floor later.
- Let them dry overnight.
STEP 6: DECORATE THE TWINE STAR CHRISTMAS ORNAMENTS
- While they dry cut some small stars on white felt. They don’t need to be perfect.
- Apply your diluted glue on each star and sprinkle white {snow} glitter and some gold glitter on each star.
- Then apply a few gold stars randomly on the stars.
- Let them dry for a few hours.
- Once your twine stars and your felt stars are dry, glue one felt star on each twine star wherever you like best.
- Cut some extra pieces of twine strips let’s say about 6 inches {15 cm} and with knots hang a bell on each end. I made it one silver one gold on each strip.
- Make a cute bow leaving your bells hanging. You can replace the twine for ribbon for this if you prefer.
STEP 7: HANG THE STAR
- Finally cut some twine strips for your hangers. Fold and make a knot.
- Insert the folded twine through an opening on your top point of the stars.
- Insert one end through the loop.
- Pull tight.
- …and the last but not least step is gluing your twine bow to your star point right on top of your hanger.
- Hang the Star on your tree.
Notes
Other Ways You Can Decorate Your Twine Star Christmas Ornament:
Imagination is the limit. I kept it simple here but you can add gorgeous ribbon bows, your favorite Christmas embellishments, cotton ball, cinnamon sticks, greenery, red berries, other types of glitter, sequins, and so on.Share and PIN ME
Til’ next time…


FREE WORKBOOK
Keeping your Sweet Home Organized
Learn how to create intentional habits and simple routines to Keep Your Home Organized. Plus freebies, printables, exclusive content, and tips.
Disclaimer: By clicking on the “Yes” button above you are giving me your consent to collect and use your information according to the law and My Policy Privacy. Zero Spam I promise!
