Rustic DIY Christmas Table Centerpiece Upcycling a Fruit Crate
This post may contain affiliate links. Please read our Disclosure Policy.
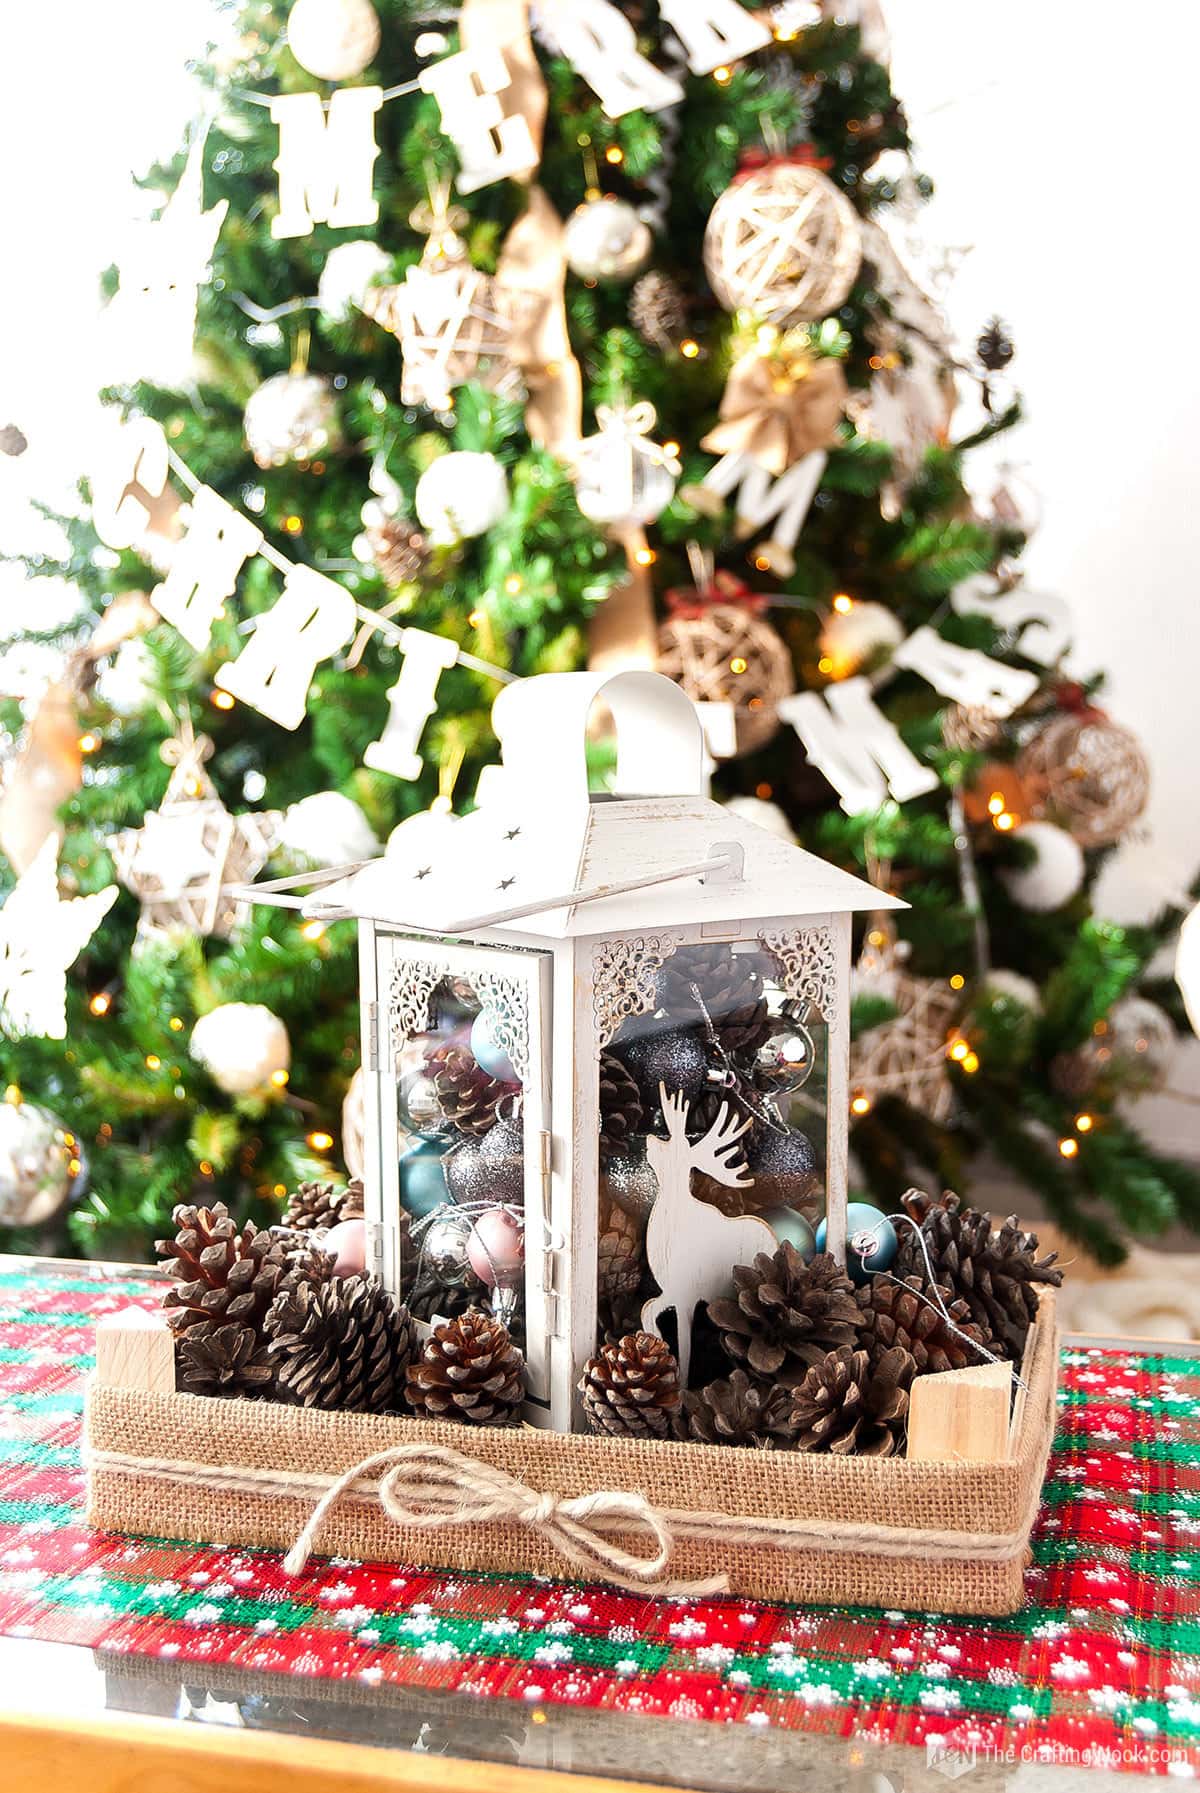
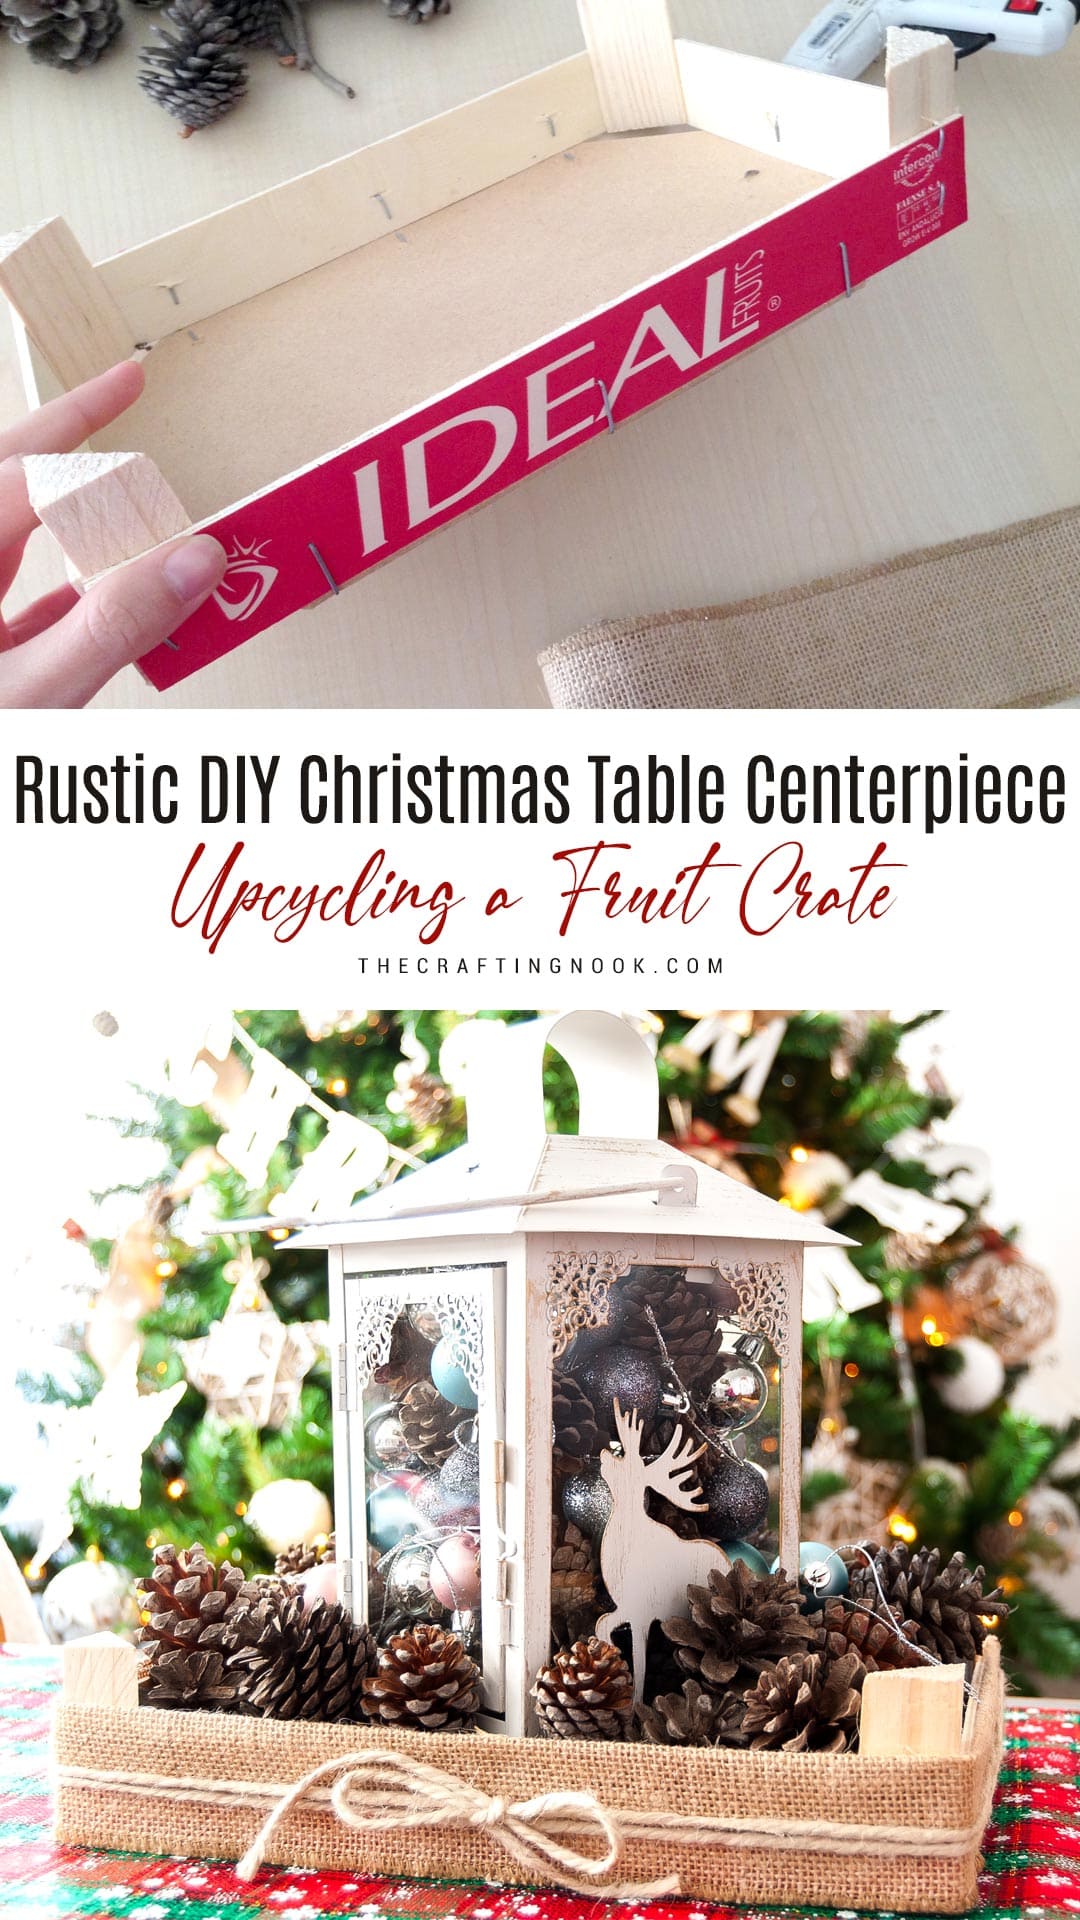
Create a gorgeous Rustic DIY Christmas table centerpiece turning trash into treasure. Add a festive touch to your holiday table with this upcycling fruit crate into a tray.
This year’s Christmas decor has been the BEST ever so far!!!! I’m so excited decorating and there is so much I want to make and so little time – ahem… and money… ahem.

Table of Contents
DIY Christmas Table RUSTIC Centerpiece
But you probably know by now that this being our first Christmas in our new home is so special and I’m all about pretty and meaningful {and rustic} decoration. I’m loving this Rustic holiday centerpiece craft. Made a whole difference in our living room.
This project was really inexpensive. I found the lantern on sale. Those Christmas ornaments cost less than $3 and you can find them even at a dollar store for less, the tray is an upcycled strawberry crate I saved from the trash and all the pinecones were gotten from a nearby park.
You might remember that I used these for my Rustic Christmas Tree as well. So, I just had to actually buy the ornaments, the burlap ribbon, and the twine.
It’s a super easy DIY project that you can make in less than 30 minutes and you will get a fancy, expensive-looking centerpiece for your holiday season.
Tell me you don’t like the sound of that?
I bet you love it!
It’s all about imagination and saving stuff that most people see as trash and taking opportunities on sales!
how to make this upcycled Christmas Table Centerpiece
Let’s go!
Supplies:
- A strawberry/fruit crate – with short sides work best
- Burlap ribbon
- Twine
- A cute lantern – Any empty lantern will do.
- Small Christmas ornaments
- Pinecones
- Toilet paper tubes
Tools:
- Hot glue gun and glue sticks
- Scissors
Instructions:
The Lantern
1. Firstly what we have to do is prepare the lantern!!!
2. Place your toilet paper tube right in the center of your lantern if you want to save pinecones and ornaments. It’s also a good spot for a battery-powered candle or light-string battery box.
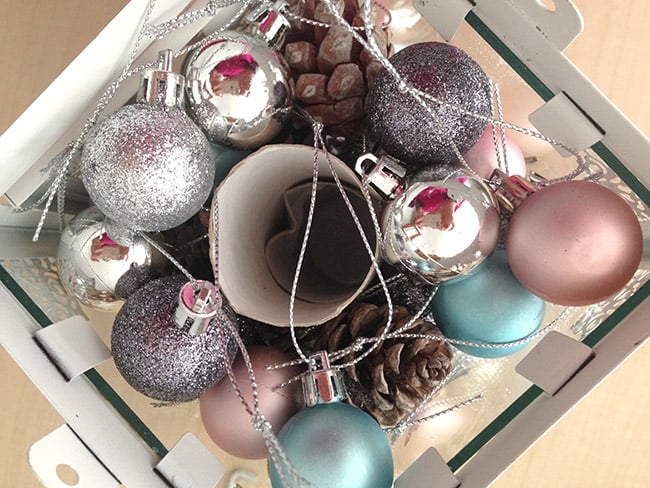
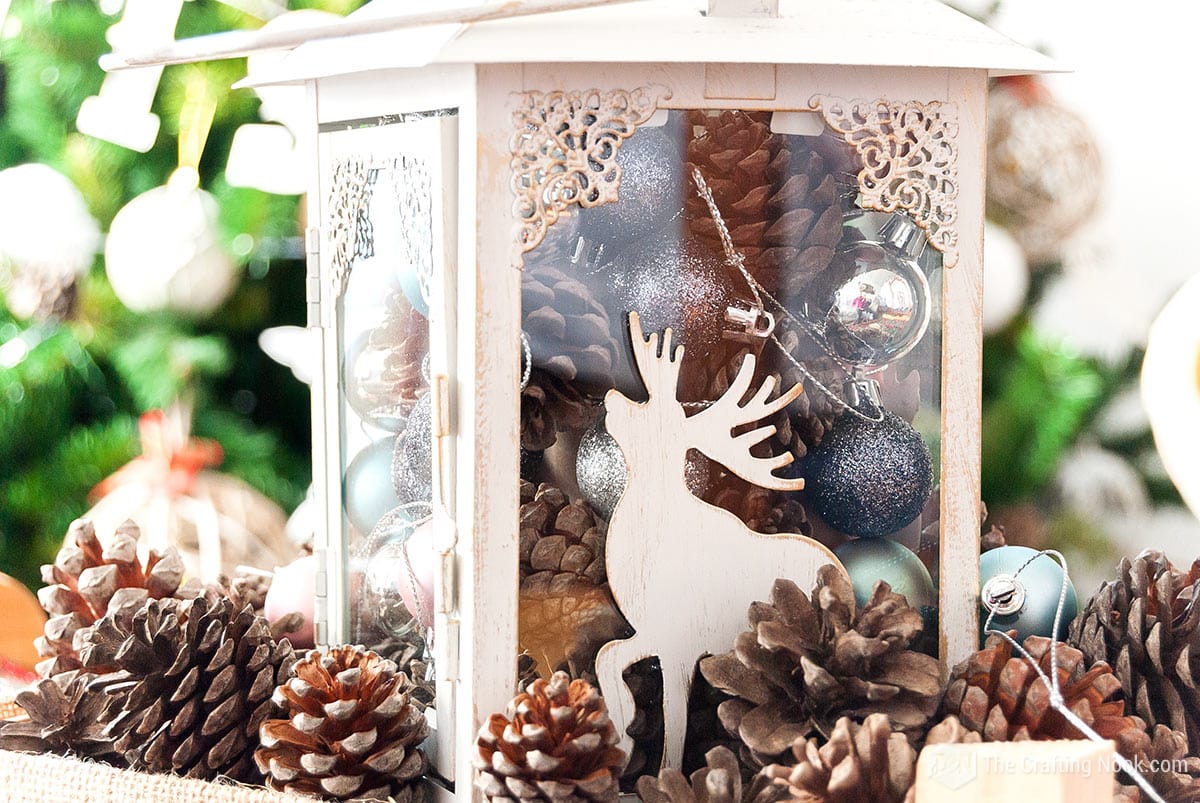
3. Stuff the lantern with pinecones and ornaments randomly trying to spread evenly.

4. Close your lantern and set it aside!
Working on the tray
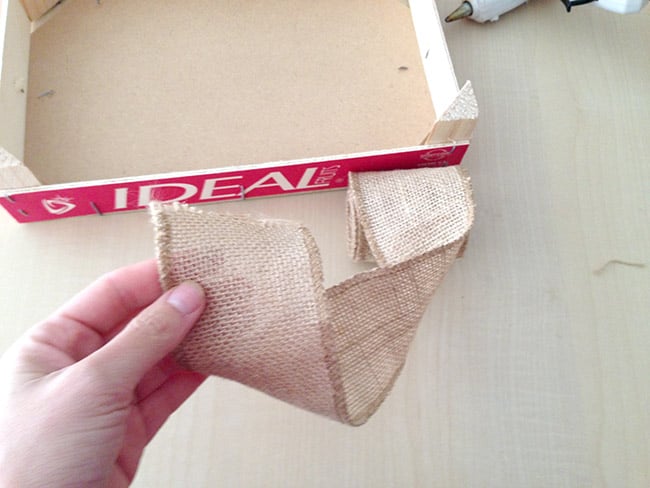
5. Take your fruit crate and measure the sides’ height.

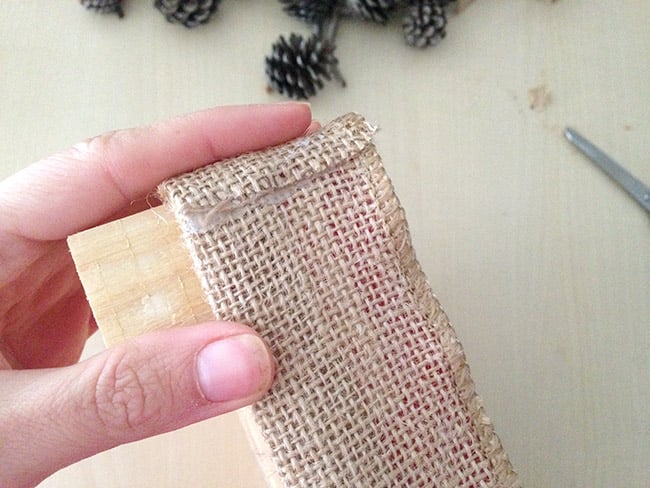
My ribbon was wider than the crate’s height (couldn’t find a narrower one) so I folded it to meet the exact height.
6. On one outside corner of the create add some hot glue.

7. Quickly place one end of your burlap ribbon.
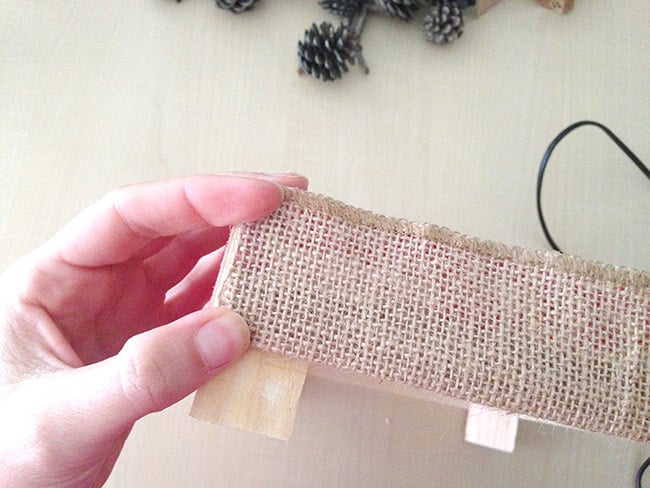
8. Go all around your crate applying some glue every now and then. I didn’t apply too much since I want to update it in the future. I only applied a few points of glue on each side.
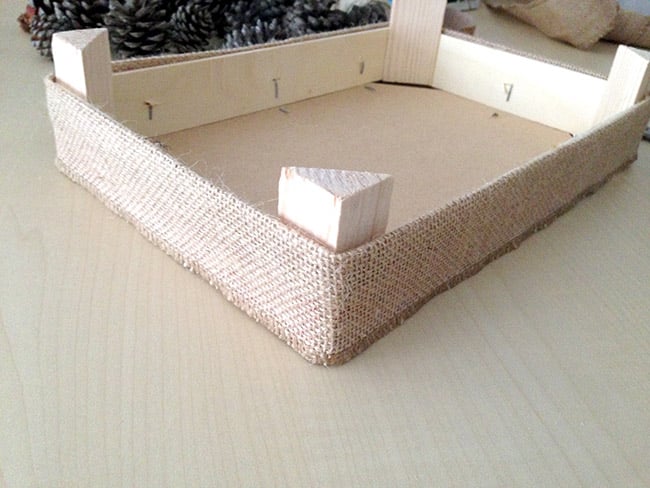
9. When your ribbon’s ends meet, cut leaving a bit more burlap to overlap the starting end.
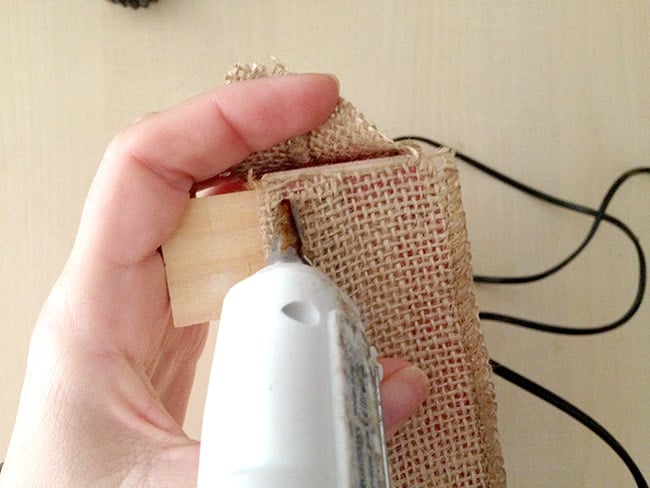
10. Apply some hot glue and stick the final ribbon end.
There you go, your crate/tray should look so rustic and new by now!
Working on the Crate Decoration
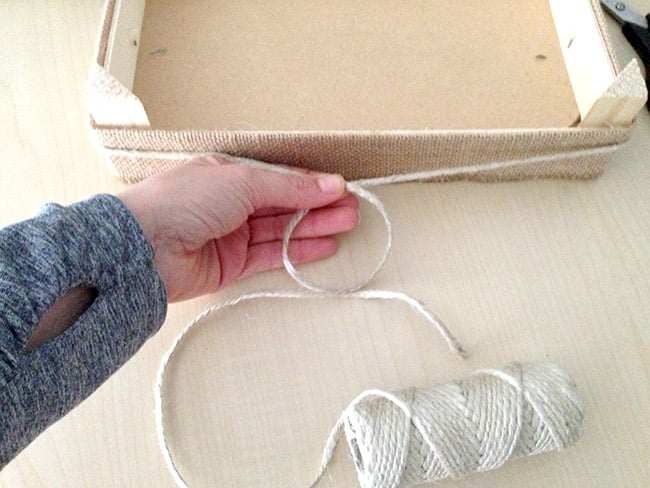
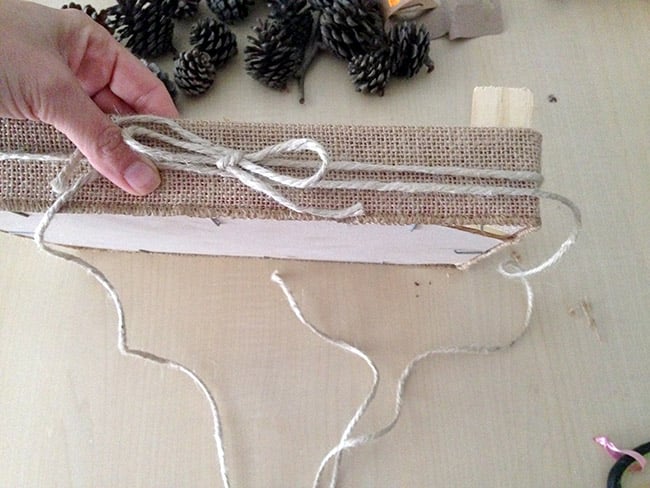
11. Measure your twine going all around your crate and leaving enough to make a bow. Cut it twice if you want to have a bow on both large sides.
12. Make your cute bow. It doesn’t have to be perfect. The beauty of rustic is imperfection.
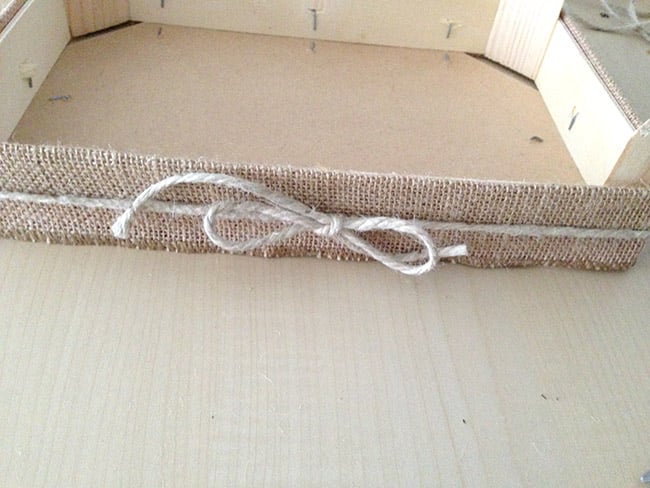
13. Then repeat the process on the other side by going all around the crate from the bow and to the other side.
Woot… It’s almost done!

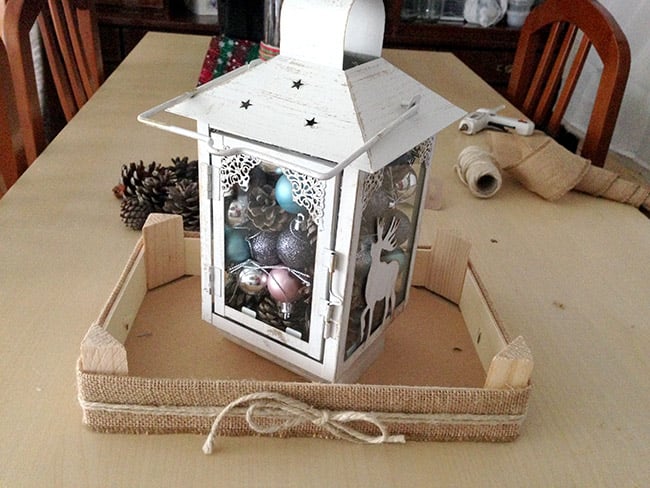
14. Make sure your lantern is at the same level as your crate’s height. You can use a wooden scrap, cardstock, or whatever you have at hand.
I wanted the lantern to be as visible as possible so I placed a box lid underneath it in the middle of the crate.
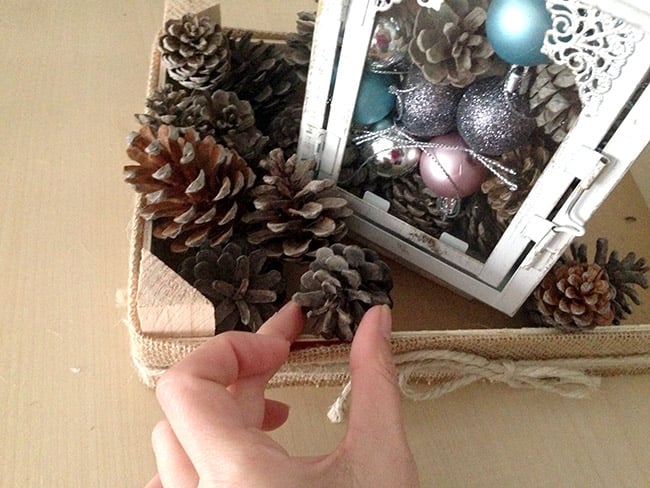
15. Finally, I started putting all the pinecones around the lantern making sure they looked good and covering all visible spots from the crate and box lid.
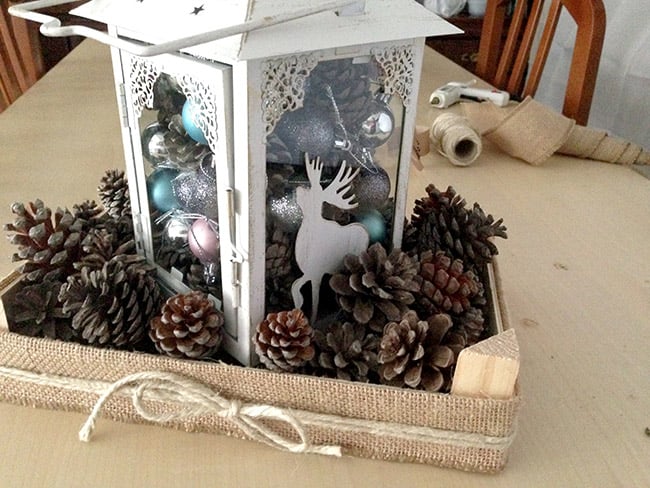
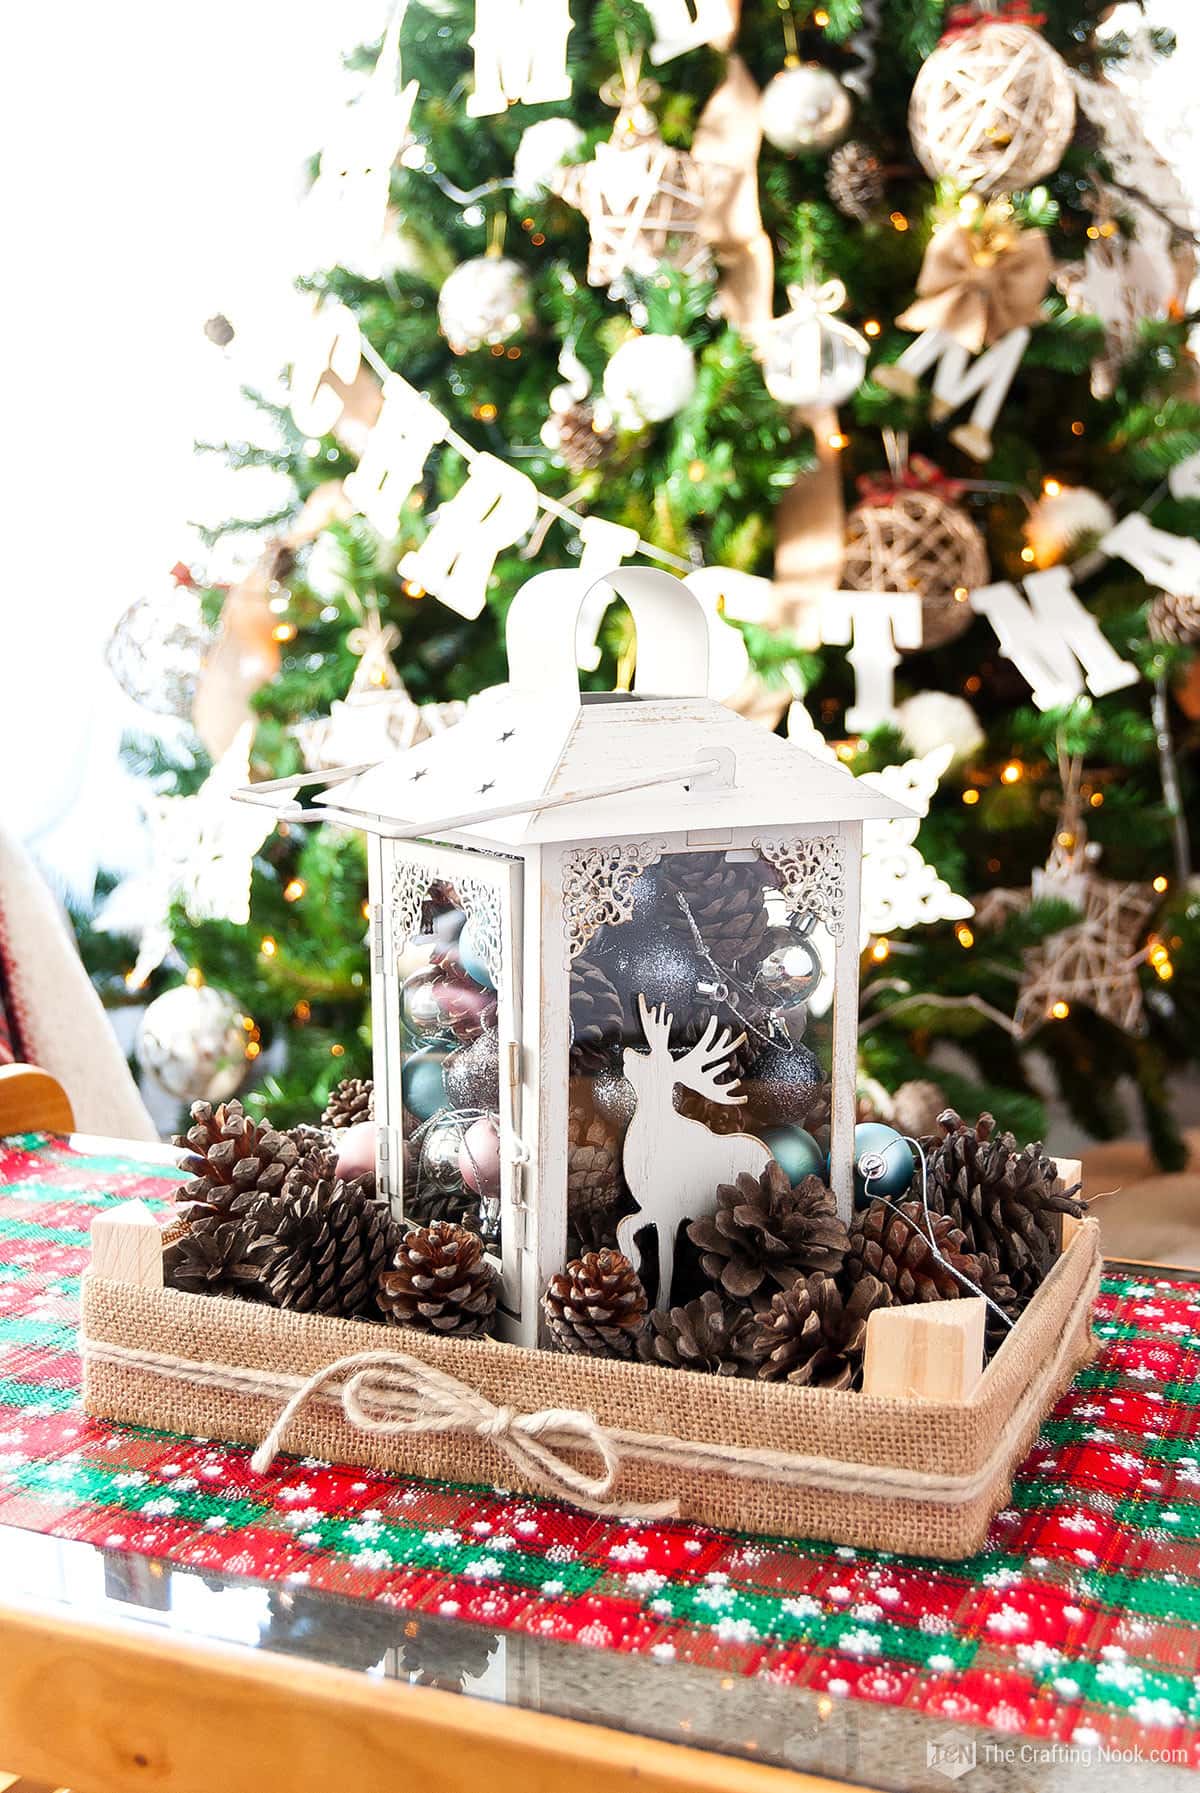
There you go!!! We have a gorgeous Rustic Christmas Table Centerpiece to decorate our Christmas table decoration.
I placed a piece of cute plaid towel table runner first and then I put the centerpiece. It all looks so cute now!!!
I put mine on our coffee table but you can put this centerpiece idea anywhere you like, like your dining room table, side table, entryway console, etc.

Crafting Tips
- Make your fruit crate look old-fashioned by rubbing sandpaper on the wood to create a worn-out, rustic style.
- Use twine to make a bow or wrap it around the corners of the crate for a vintage touch.
- Fill up the lantern with battery-powered LED candles to make it glow warmly and flicker.
- Put small decorations on the sides of the box, using different colors and textures to make your centerpiece fun.
- You might want to add some fresh green plants, like pine branches or eucalyptus, to make it smell nice and look pretty.
- To make the rustic atmosphere better, apply a thin layer of artificial snow or white paint to the pinecones and greenery to create a winter-like look.
- Make sure to add things like cinnamon sticks, dried orange slices, or small bells to your decoration for a nice smell and holiday spirit.
- Try using different colors, like soft pastels or bold jewel tones, for the ornaments and ribbons. This will give a new and surprising touch to the traditional rustic theme.
- Make the centerpiece look more natural by adding dried berries, acorns, or small branches with berries mixed in.
What do you think???

Frequently Asked Questions
Absolutely, ALthough burlap ribbon gives that rustic country look, you can use other materials like lace, plaid fabric, or jute twine to match your own style and theme.
You can use hot glue to make sure the burlap ribbon stays in place around the crate. Put a little glue on the crate and firmly stick the ribbon onto it until it stays in place. You can also wrap a few loops of twine too.
First, put the lantern in the middle of the crate. After that, place the pinecones around the lantern by fitting them in between the gaps or stacking them to create more dimension. Afterward, place the decorations on the sides of the crate, using different colors and sizes to create a pleasing and balanced arrangement. Feel free to add additional decorations like cranberries or red berries spring, battery-powered white candles, faux snow
Oh Yes, adding fresh plants like pine branches or eucalyptus can make the centerpiece look beautiful. Just put the sprigs between the pinecones and ornaments for a fresh and fragrant touch.

I hope you enjoyed this tutorial and this idea for a centerpiece.
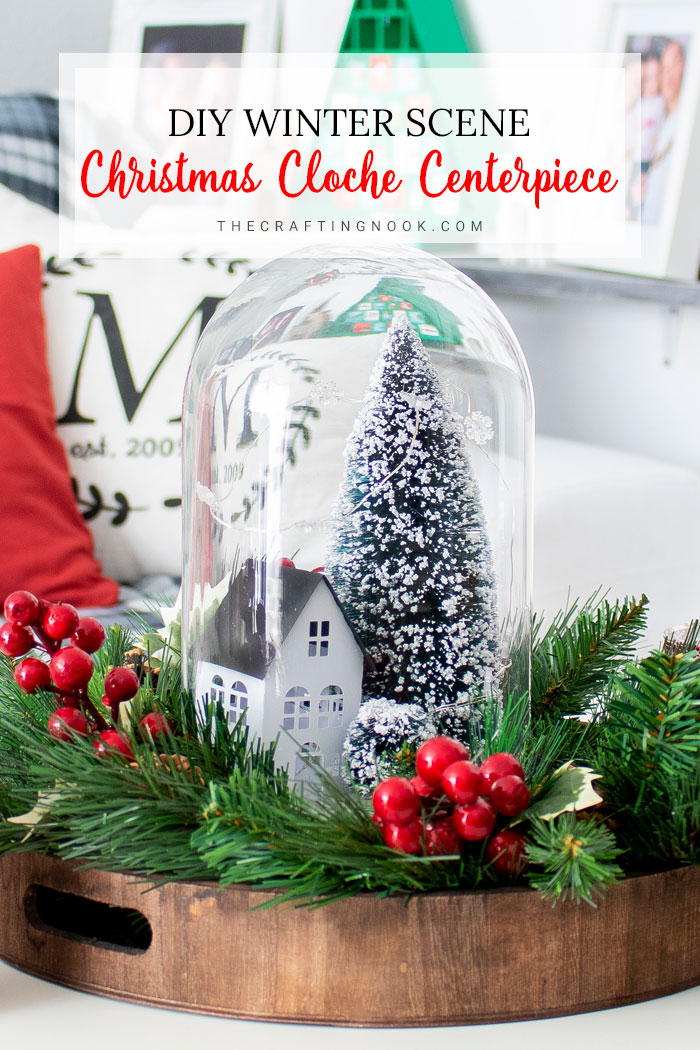
More Christmas Decorating Ideas To Try
If you liked this cute DIY Christmas table centerpiece tutorial, you might also love these other Christmas Projects ideas too:


✂️ tutorial

Rustic DIY Christmas Table Centerpiece Upcycling a Fruit Crate
Tools
- Hot glue gun and glue sticks
- scissors
Supplies
- A strawberry/fruit crate – with short sides work best
- Burlap ribbon
- Twine
- A cute lantern – Any empty lantern will do.
- Small Christmas ornaments
- Pinecones
- Toilet paper tubes
Instructions
THE LANTERN
- Firstly what we have to do is prepare the lantern!!!
- Place your toilet paper tube right in the center of your lantern if you want to save pinecones and ornaments. It’s also a good spot for a battery-powered candle or light-string battery box.
- Stuff the lantern with pinecones and ornaments randomly trying to spread evenly.
- Close your lantern and set it aside!
WORKING ON THE TRAY
- Take your fruit crate and measure the sides’ height.
- My ribbon was wider than the crate’s height (couldn’t find a narrower one) so I folded it to meet the exact height.
- On one outside corner of the create add some hot glue.
- Quickly place one end of your burlap ribbon.
- Go all around your crate applying some glue every now and then. I didn’t apply too much since I want to update it in the future. I only applied a few points of glue on each side.
- When your ribbon’s ends meet, cut leaving a bit more burlap to overlap the starting end.
- Apply some hot glue and stick the final ribbon end.
- There you go, your crate/tray should look so rustic and new by now!
WORKING ON THE CRATE DECORATION
- Measure your twine going all around your crate and leaving enough to make a bow. Cut it twice if you want to have a bow on both large sides.
- Make your cute bow. It doesn’t have to be perfect. The beauty of rustic is imperfection.
- Then repeat the process on the other side by going all around the crate from the bow and to the other side.
- Woot… It’s almost done!
- Make sure your lantern is at the same level as your crate’s height. You can use a wooden scrap, cardstock, or whatever you have at hand.
- I wanted the lantern to be as visible as possible so I placed a box lid underneath it in the middle of the crate.
- Finally, I started putting all the pinecones around the lantern making sure they looked good and covering all visible spots from the crate and box lid.
- There you go!!! We have a gorgeous Rustic Christmas Table Centerpiece to decorate our Christmas table decoration.
Share and PIN ME!!!
Til’ next time…


FREE WORKBOOK
Keeping your Sweet Home Organized
Learn how to create intentional habits and simple routines to Keep Your Home Organized. Plus freebies, printables, exclusive content, and tips.
Disclaimer: By clicking on the “Yes” button above you are giving me your consent to collect and use your information according to the law and My Policy Privacy. Zero Spam I promise!