Our Neutral Rustic Christmas Tree
This post may contain affiliate links. Please read our Disclosure Policy.
A cozy and natural Christmas tree with rustic touches. Learn how to make this Neutral Rustic Christmas Tree yourself with simple DIY tips.
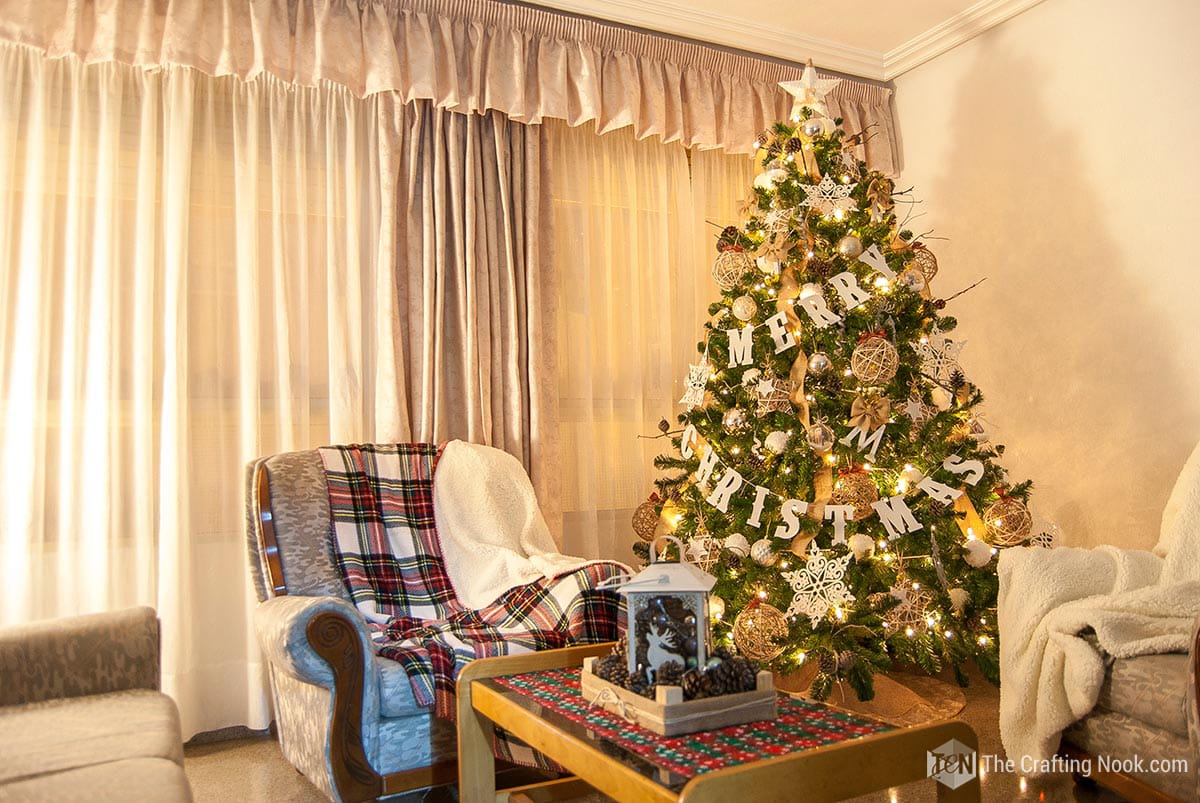
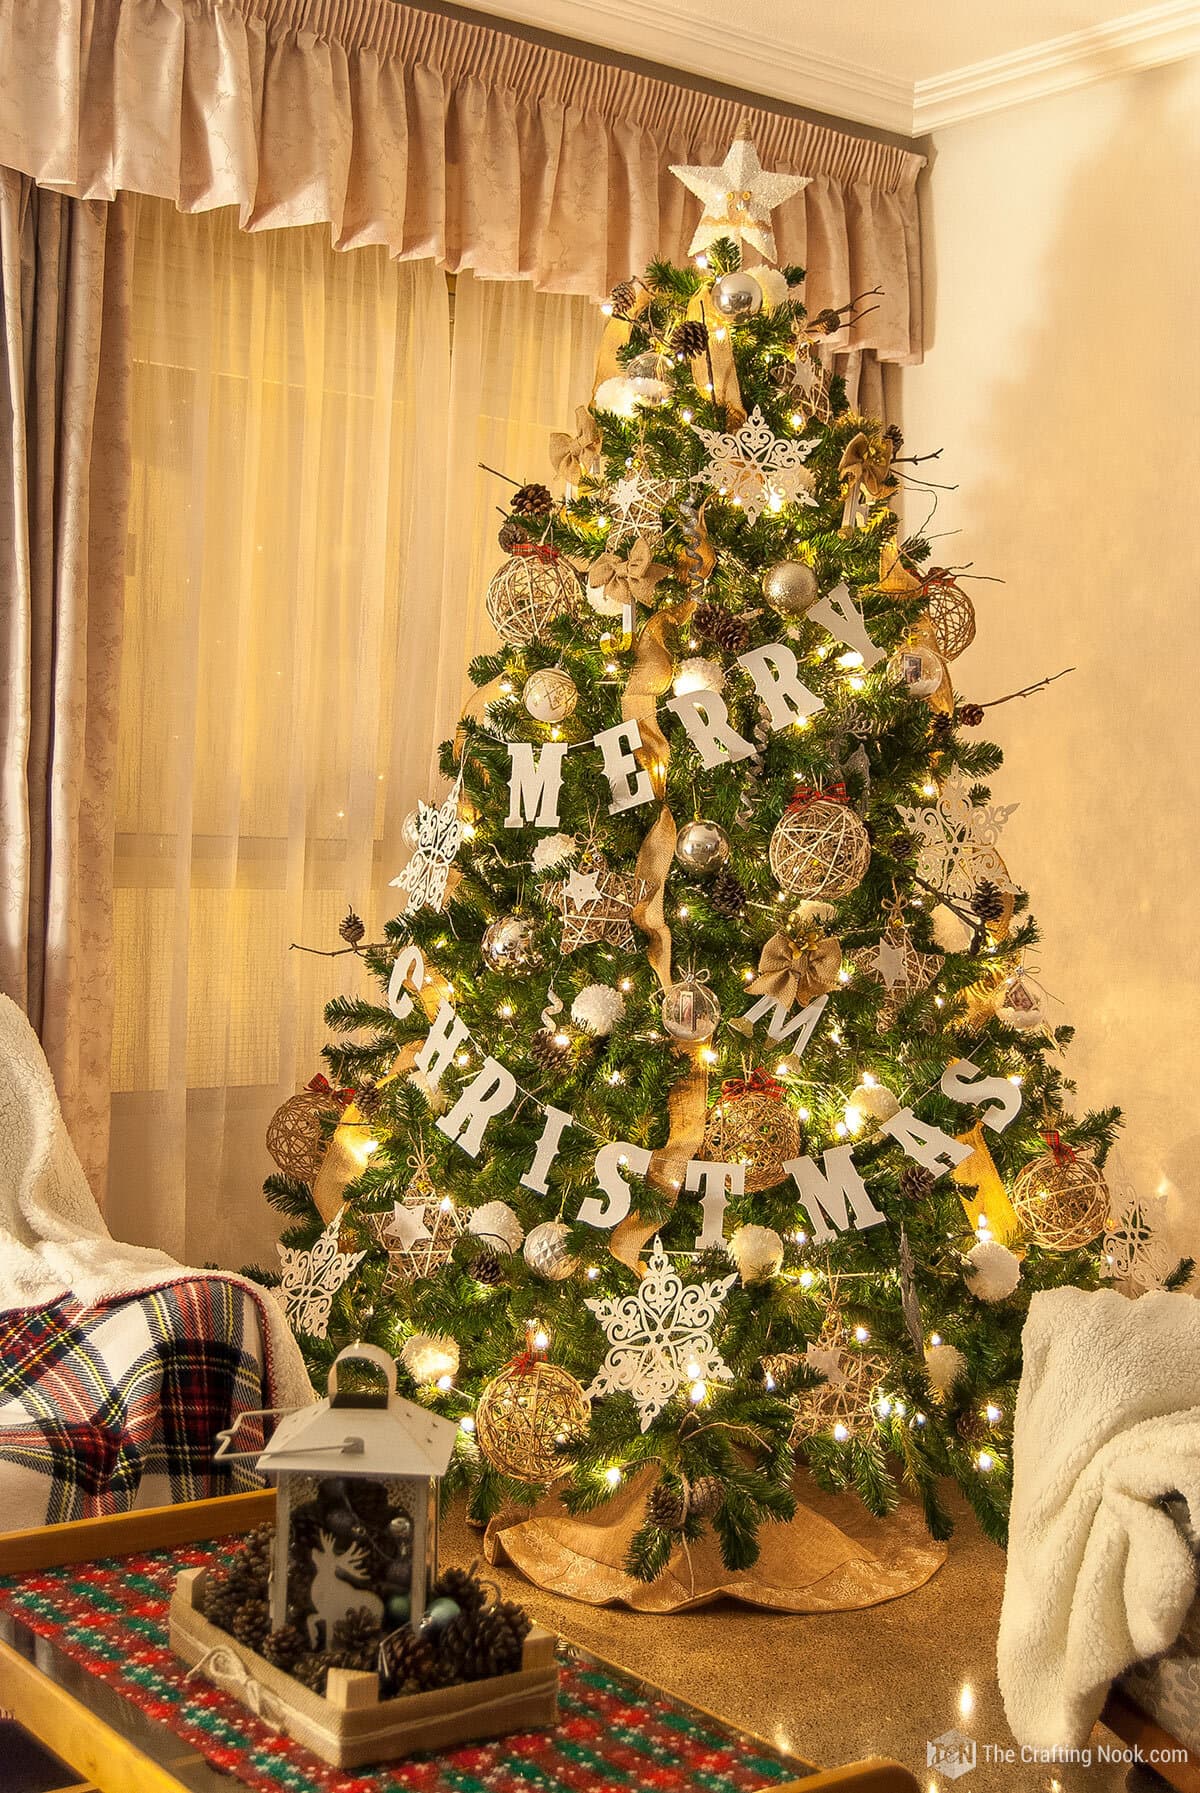
My home looks and smells like Christmas now! What a difference it makes to have the Christmas Tree up! Oooh and so LOVE how it turned out! I’m proud to present Our brand-new and mostly handmade farmhouse Christmas Tree!!!

Table of Contents
Our Neutral Rustic Christmas Tree Decoration
As I mentioned a couple of posts ago, I recently moved to a new country and we came with only a few bags and lots of hopes. One of my biggest goals was to have a really cozy and personal Christmas decor. I had to buy the tree and ornaments {or supplies to make them} and have my own rustic Christmas decorations.
My whole life I had someone else’s tree. This year I wanted MY tree. Mine mine mine! ahem, ok OURS OURS OURS. I wanted to buy the one I felt my heart pounding harder and that’s exactly what I did.
Once the tree was home, I started working on the tree decorations and ornaments I wanted to make and the style I was hoping to achieve. It’s been so exciting. Every time I see the tree, I feel so HAPPY, so fun of joy and hope.
Christmas has always been my favorite time of the year and I wanted our first Christmas on our new home to be special. Our Neutral Rustic Christmas Tree would be just that!
One thing I was certain of is that this year’s decoration was going to be neutral and with a rustic charm. Going from that I went for a walk to a park nearby and went for twigs and pinecone hunt.
Yup LOL. I can’t even imagine what I looked like to people. Running up and down hills catching nice pinecones and useful twigs and branches.
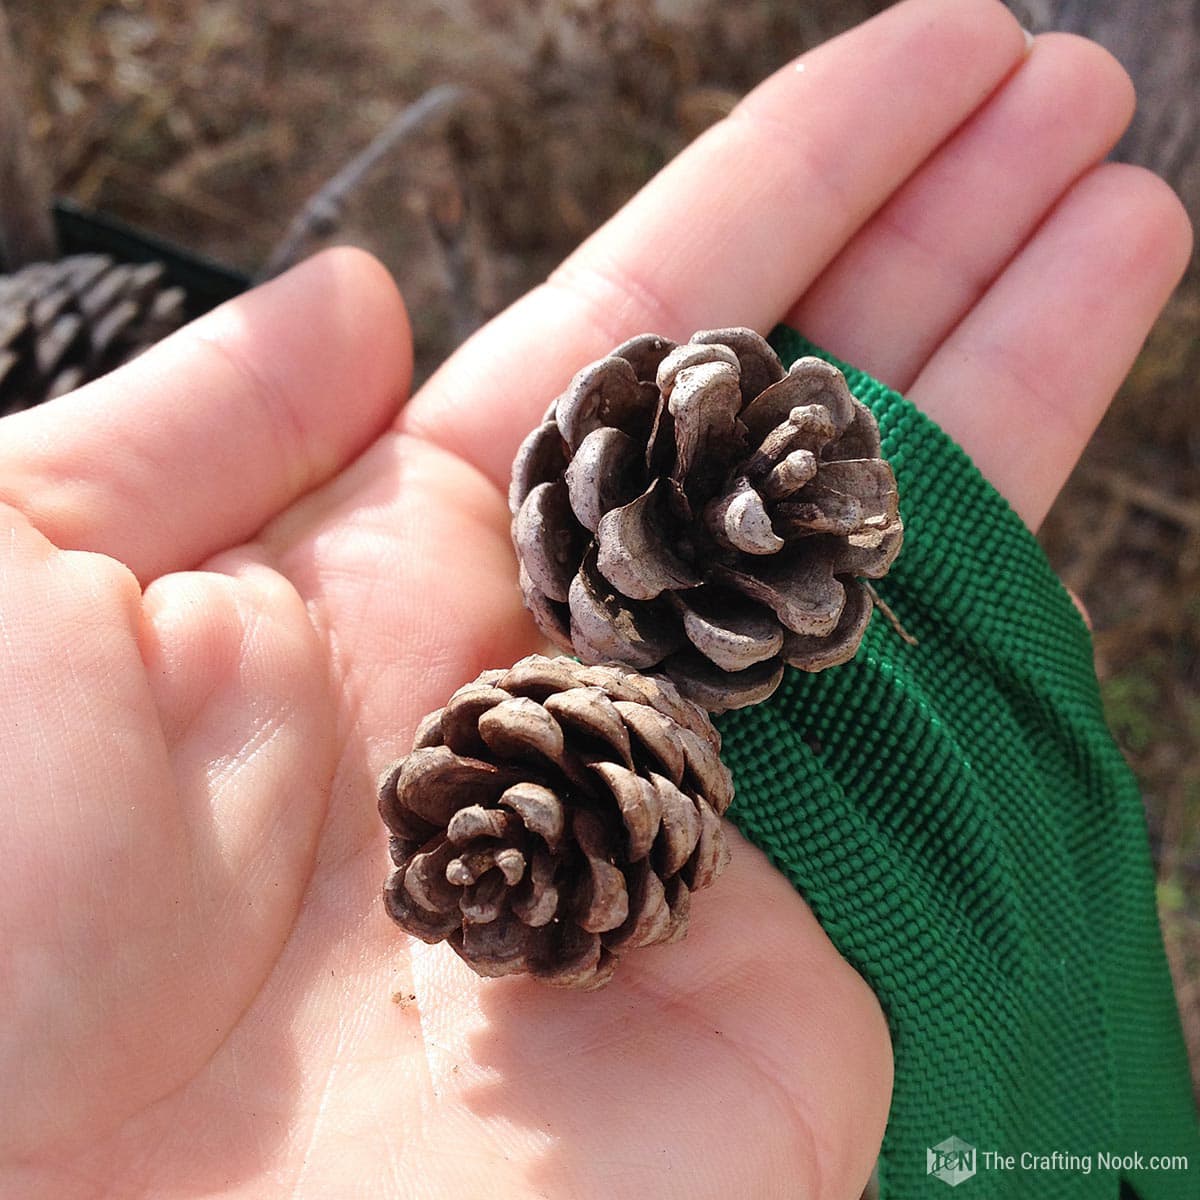
I brought home so many of those things that I thought I had gone crazy compulsive LOL. But in the end, it was good.

I didn’t want to treat the pinecones because I wanted them as natural as possible but I did spray them outside with lots of insecticide to kill anything that might be still alive.
I left them outside for a couple of days spraying again a couple more times… hey! better safe than sorry!!!!
Where to start decorating the tree
I used only clear string lights. I worked my way making sure some light went back inside and others to the outside.
After I finished, I thought I got short with 400 lights, I might double that next year. This tree is BIG! It’s almost 7 feet and really leafy. I love it! LOL.
Once the twitch, branches, and pinecones didn’t smell, I brought them inside and started tying up some branches and twigs with pinecones among the Christmas tree branches. I used the tree branches to secure the twigs in place. Depending on the size I even used more than one tree branch to secure them.

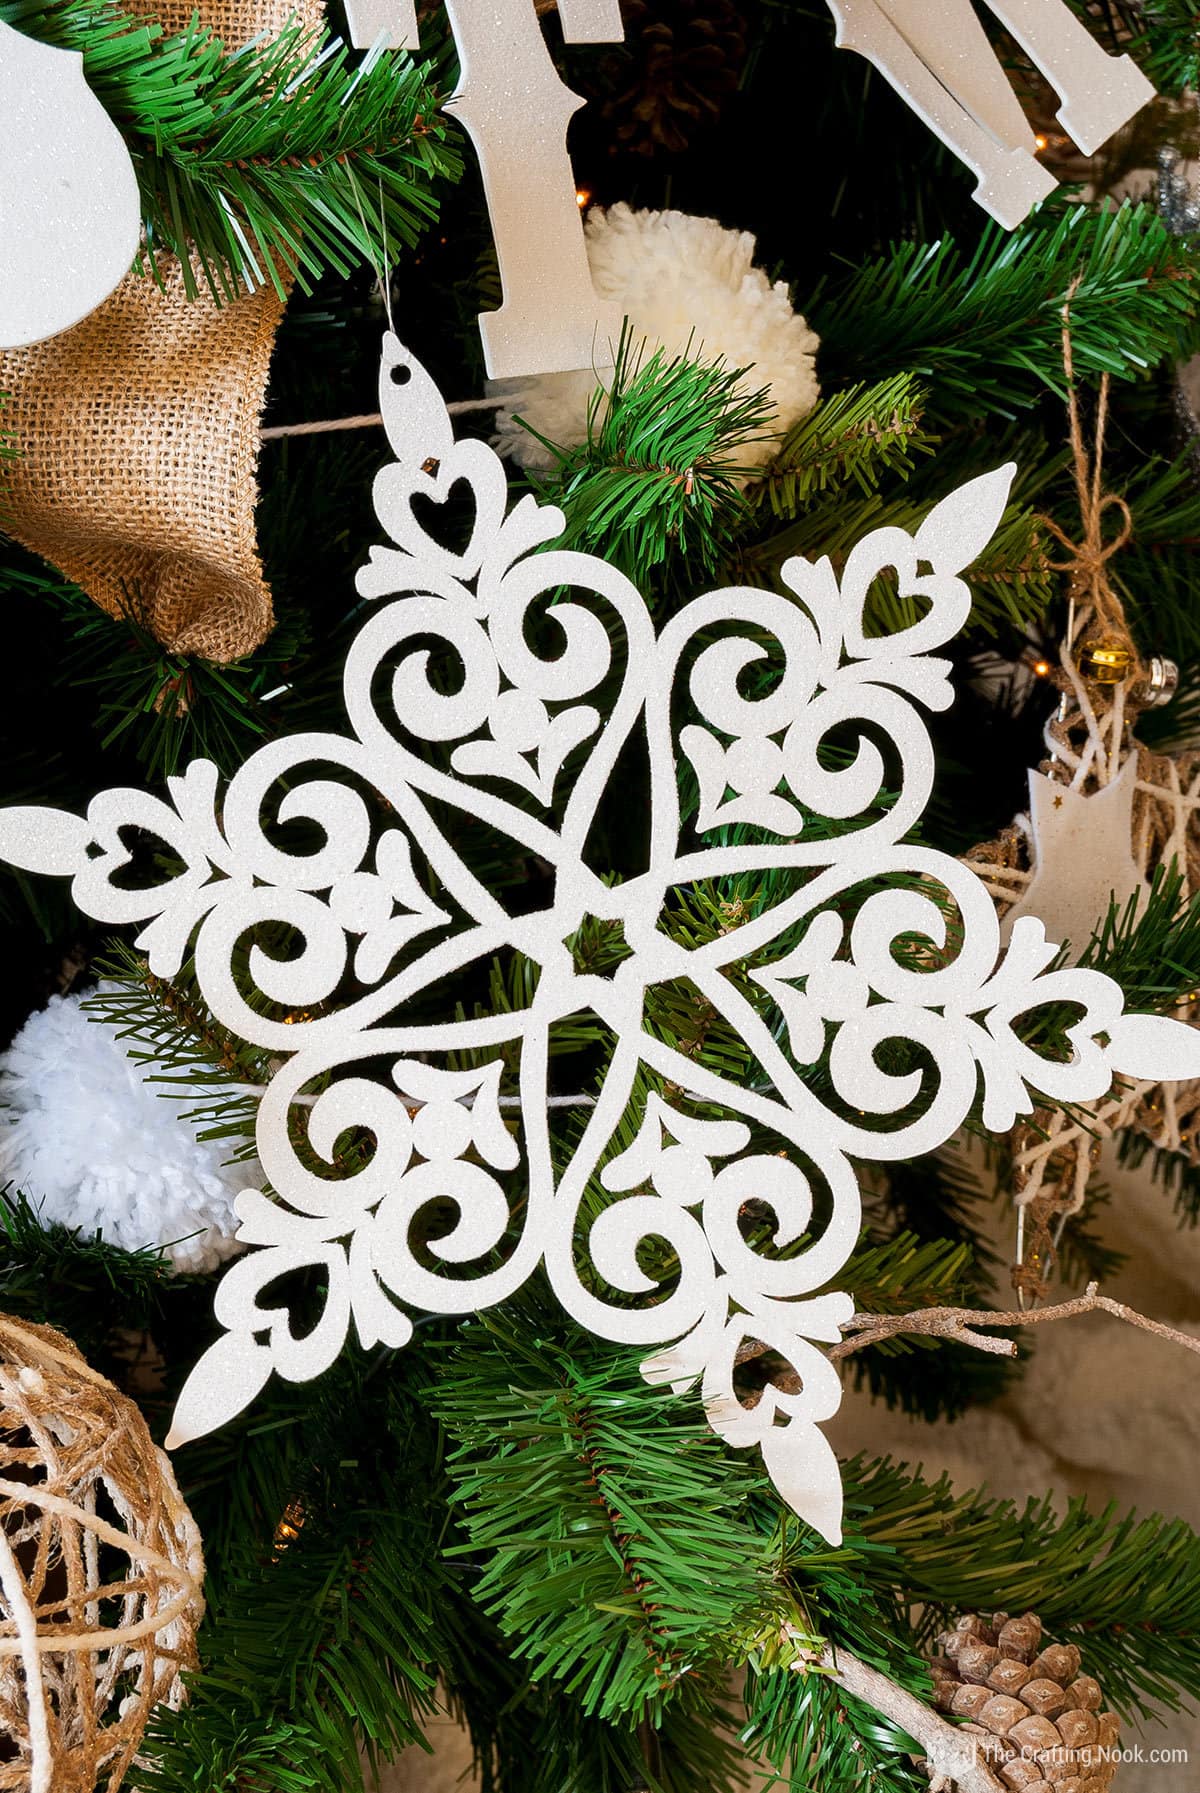
Then I put on the pompom garlands {the snowflake was a testing… shhhh}. It was tricky since I didn’t have much space to go around the tree. I had to toss the garland over the top of the tree to keep looping but I made it! LOL. If you like the cute garland you can find the tutorial here
My next step was hanging the burlap ribbons on the tree. I used 4 strands of jute ribbon. The length will depend on each tree and how fluffy you want each segment. I used about 4 yards for each strand. I started at the top of the tree adding the first strand towards the top of the tree, and tuck the tip of the ribbon around a branch to secure.

Working my way down the tree with the ribbon I went finding the next good stopping point to wrap the ribbon tightly around the branch to secure. Also made twists to make them more natural. Then push the ribbon back towards the base of the tree to hide the knot. Once secure fluff beautifully your ribbon. Did this with the other 3 strands.
Hanging the Ornaments
Here I had the amazing help of my sweet little girl. She handed me the Christmas tree decorations and then told me where to put them. I had to adjust a little otherwise we would have all the ornaments on the same spot at the base of the tree LOL. She was the sweetest.
We started the handmade ornaments, specifically with the larger ones like my Twine ornaments and Glittered Twine Stars. I had made larger ones and smaller ones so I used larger ones at the bottom half and smaller on the top half.

Then I hung the glittered snowflakes placing the larger ones at the bottom and the smaller ones at the top. I will publish the tutorial very soon!
Next in line was our Family Rustic Monograms. So pretty! There were only four of them so I tried to spread them evenly.

Then I hung our Memory Keepsake Snow Globe ornaments. There were also 4 so I did my best. Wish they were larger but I still love having photos of our best and most meaningful moments on our tree! If you like them, you can get the tutorial here.

Added a few regular Christmas metallic ornaments, reindeer silver ornaments, and others all over the tree.
I also made a lettered Merry Christmas garland with glittered craft foam. These were super easy to make. I LOVE how it looks on the tree.

Finally, as a Christmas tree topper, I used a glittered and rustic star I found on a shop. I just loved it. I wasn’t sure if I should go for a bow or a star but when I saw the star I fell in love.

Well, that’s it. That’s our Neutral Rustic Christmas Tree in our living room and hope you like it as much as we do. As imperfect as it can be, it’s perfect to us because we put so much love into it.
Crafting Tips
- Instead of using a regular star or angel to top your tree, try using twine for a different and special look. Make a pretty bow or shape it like a star for a unique and eye-catching finishing touch.
- Use natural things like pinecones, dry flowers, or small branches to decorate your tree. You can either paint them with shiny colors or keep them as they are for a nature-inspired and old-fashioned appearance.
- Make your own unique ornaments using clay, pieces of wood, or leftover pieces of fabric. Make them personal by adding initials, quotes, or dates. These special items can be treasured for a long time.
- Create a more interesting tree by putting ornaments and decorations of different sizes all over. Mix things you made yourself with things you bought from a store to make your style look different and interesting.
- Use plain brown paper or kraft paper to wrap gifts and keep the rustic theme going. Decorate them with string, rough fabric ribbons, or little homemade decorations to add a cozy and country feel.
- Scented pinecones: Make your tree smell nice by adding a great smell to it. Just spray some essential oils like cinnamon, vanilla, or peppermint on pinecones and then put them on the tree branches.
- Make your own special tree skirt using burlap fabric, stencils, and fabric paints. To make your Christmas tree unique, you can add special details such as the names of your loved ones, quotes related to holidays, or even handprints. This will give a personal touch and make your rustic Christmas tree stand out.
- Create your own decorations. This is the place where you can be imaginative and make your tree unique to you. You can use anything you have, like pieces of wood, pine cones, buttons, beads, fabric leftovers, and more. You have the option to paint them, glue them, or tie them with twine or yarn. You can also use cookie cutters, stamps, or stencils to create different shapes or designs on your ornaments. Put them on the tree using hooks or loops made of string or thin rope.

It looks so majestic at night! don’t you think?
If you like it, would you share it? It would mean so much to me!
Frequently Asked Questions
You can use either a fake or real tree that you prefer, as long as it is stable and has strong branches. If you have a real tree, remember to give it water often and keep it away from anything hot.
The answer to this question depends on how big and what shape your tree is. But a general suggestion is to measure how tall your tree is and then multiply that number by four. This will give you plenty of ribbon to wrap around the entire tree, with some extra on top. You can cut off the extra ribbon later.
Definitely! Burlap fabric is strong and can be used again for many different holiday times. After you take it off the tree, put it in a cool, dry place so it stays good.
You can get ideas for making your own ornaments from many different places but you can start here on my blog under Christmas Projects. ALso, You can try looking at other websites where people share step-by-step instructions for making things yourself, or on social media sites like Pinterest or Instagram. You can also search on YouTube to find videos about specific topics or ways to do things. Don’t be scared to show your creativity and add your own special style to the designs.
You can use string, thread, or fishing line to hang the decorations on the tree. Attach one side of the string to the decoration and the other side to a tree branch. You can use hooks or clips if you like. Put the decorations on the tree in a way that they are spread out evenly. Make sure that the colors and shapes are balanced.
You can use any decorations that go well with your natural rustic theme, like wooden stars, pine cones, berries, snowflakes, and so on. You can also create your own decorations using string, wool or other things. For instance, you can create fluffy decorations using yarn and connect them to the tree using twine.
More Christmas Tree Ideas to Try
If you liked this cute Neutral Rustic Christmas Tree idea, you might also love these other Christmas Projects ideas too:


Share and PIN ME!!!

Til’ next time…


FREE WORKBOOK
Keeping your Sweet Home Organized
Learn how to create intentional habits and simple routines to Keep Your Home Organized. Plus freebies, printables, exclusive content, and tips.
Disclaimer: By clicking on the “Yes” button above you are giving me your consent to collect and use your information according to the law and My Policy Privacy. Zero Spam I promise!