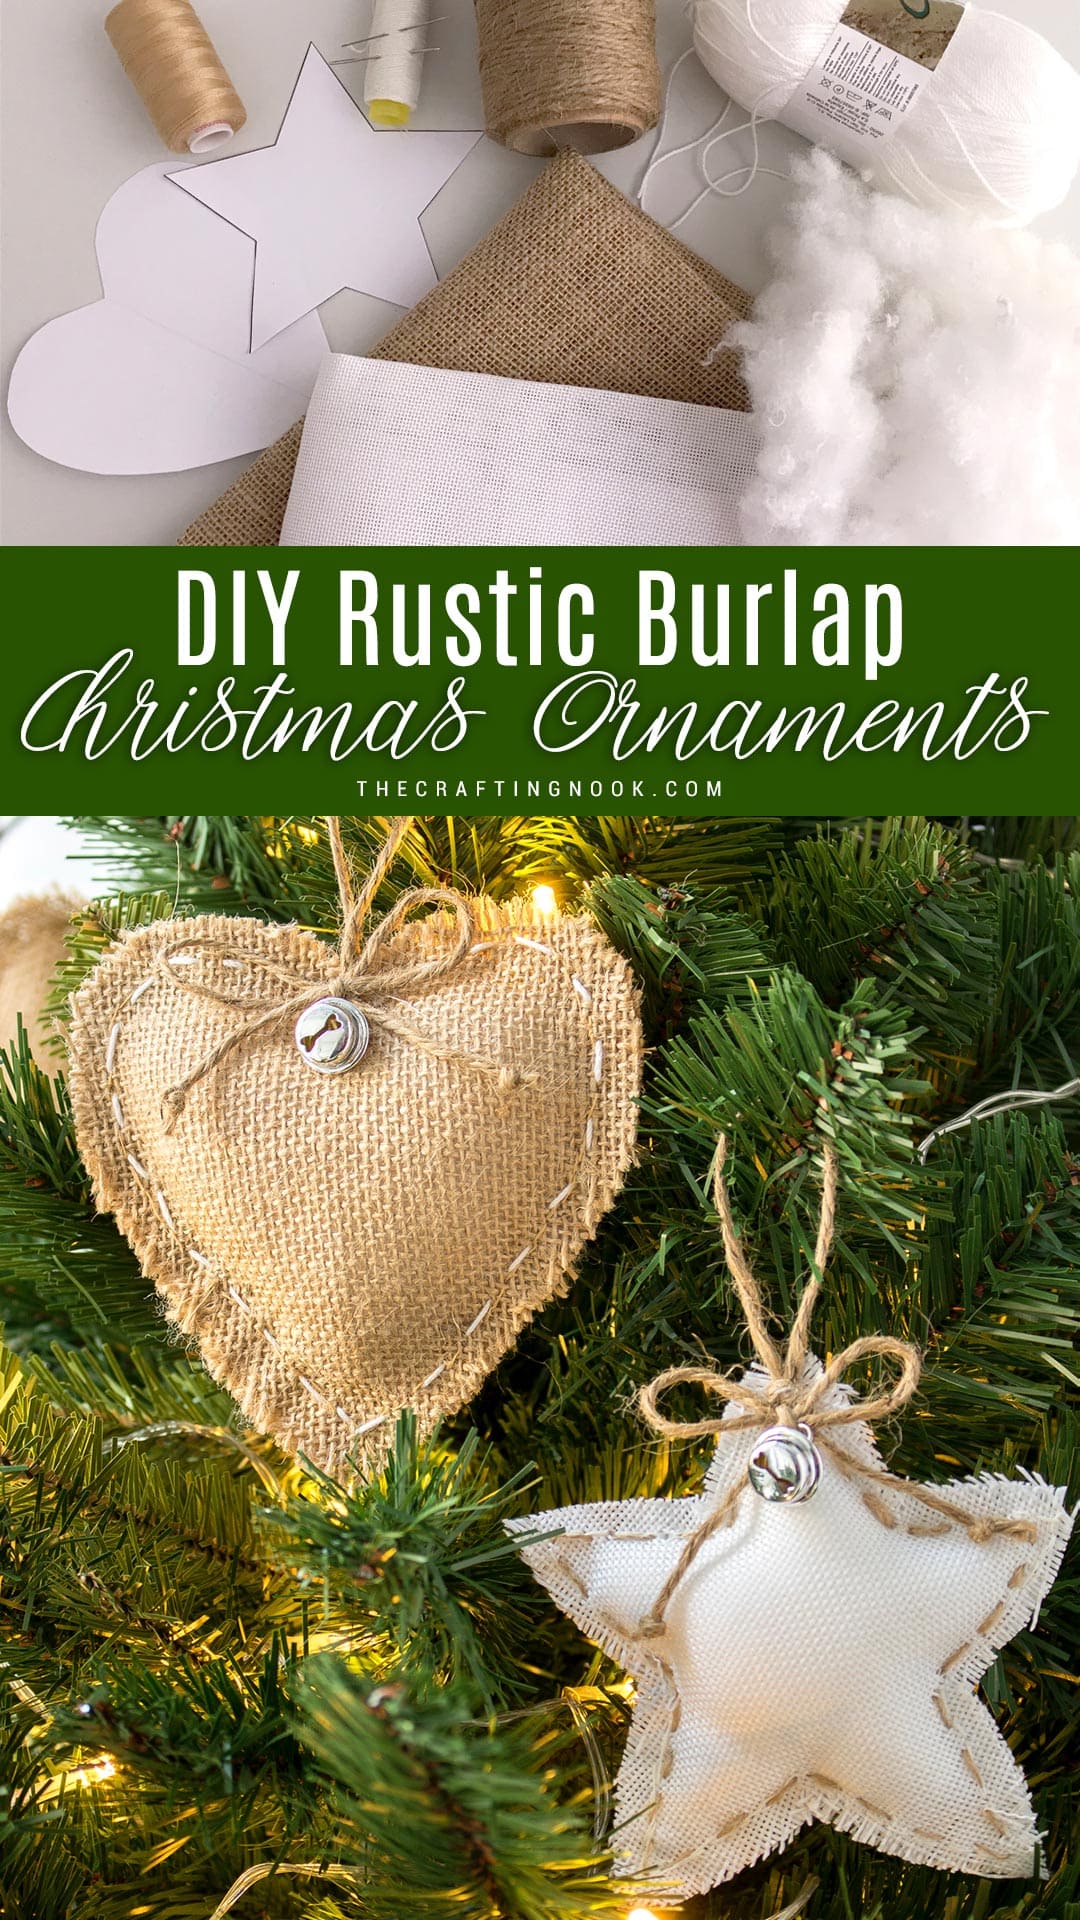
DIY Rustic Hearts and Stars Burlap Christmas Ornaments
This post may contain affiliate links. Please read our Disclosure Policy.
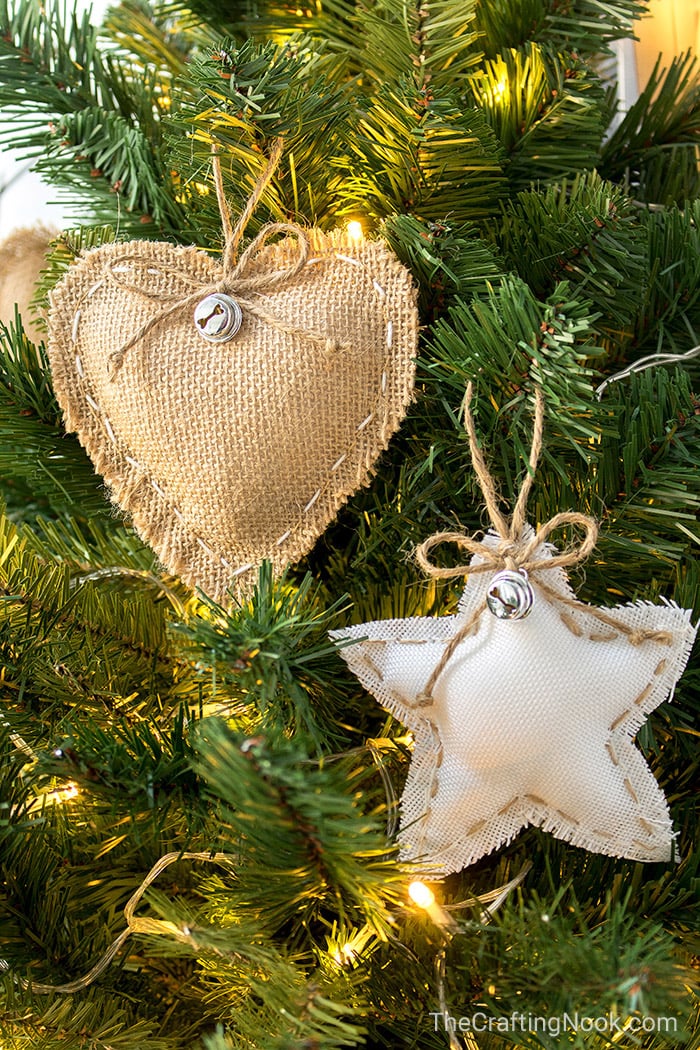
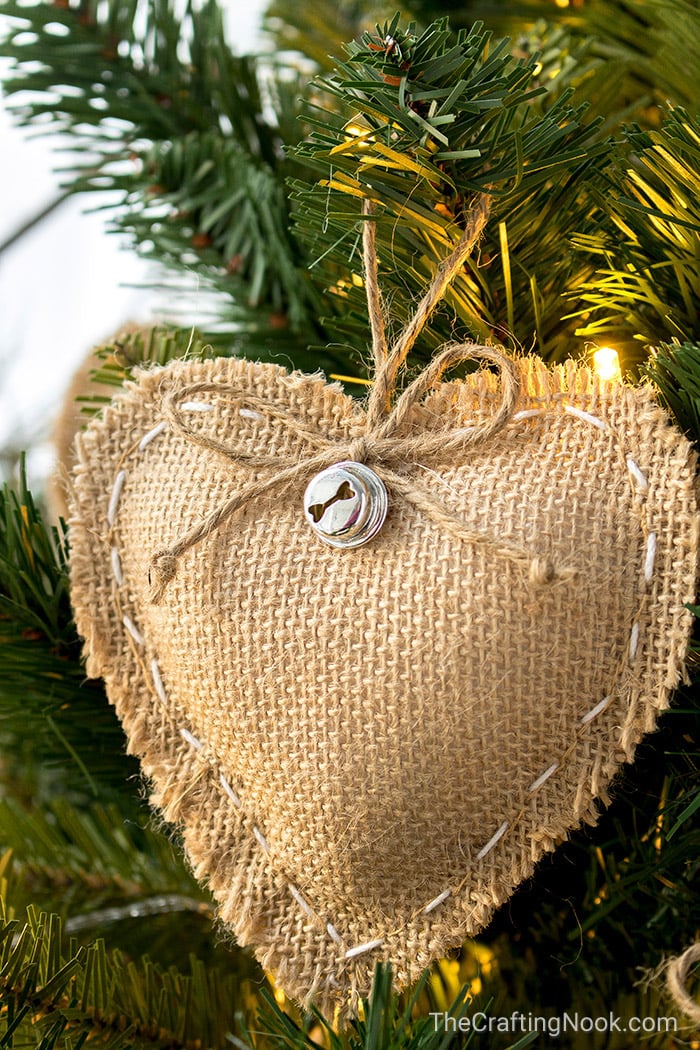
These cute and easy Rustic Hearts and Stars Burlap Christmas Ornaments are so fun to make this Holiday season and will be the perfect touch to your Christmas Tree. Continue reading below!
It’s this time of the year my friend!!! Can you smell it? I can, even though it’s not December yet.

As many of you may know, I LOVE Christmas and I look forward to it every year from January. I know I’m a bit crazy but it’s true. As soon as Halloween is over I start planning my Christmas decor, last year I aimed for neutral rustic decor and his year I decided to still go for the farmhouse style making a rustic Christmas tree but with lots of white in it!
Today I’m sharing with you these super cute rustic ornaments made in natural rustic burlap and also in white-kind-of burlap. Hope you like them.
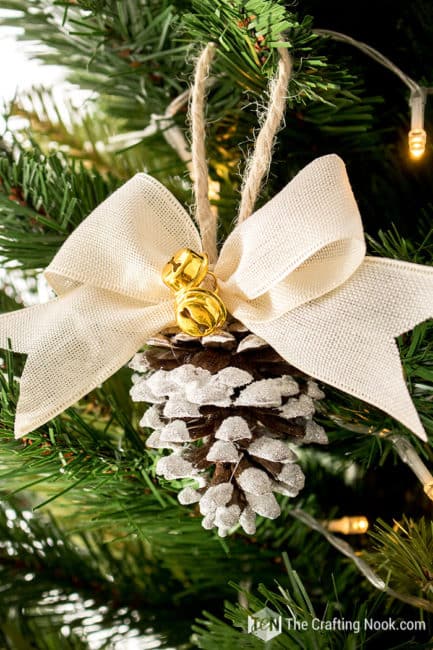
You might also love these other rustic Christmas decorations: Rustic Flocked Pinecones Christmas Ornaments, Rustic Burlap Christmas Wreath and Rustic Christmas Mantel.
Table of Contents
Why Rustic Burlap Christmas Ornaments
The thing with Christmas is that makes you fill your spirit with motivation and hope. It also makes spaces sparkling and cozy. With this, you also want to add things handmade so your whole decor has something from your heart.
Even though I buy some decor, of course, I always love to have things made by me in every space I decorate, especially the Christmas tree.

Last year was my very first Christmas in my new home country so I made pretty much everything. It was quite an achievement. I loved how my Neutral Christmas tree turned out and I so look forward to seeing how this year’s turn out.

These rustic Christmas tree ornaments are super easy to make although a bit time-consuming so I definitely recommend sharing the crafting process with family even kids if they are old enough to sew a bit. These can make super cute gifts too!
These ornaments are not limited to just main the Christmas tree decoration, you can use them on garlands (a burlap garland would look gorgeous), wreaths, and mini trees, and imagination is the limit.
Making one can be done within 10 to 20 minutes but making a dozen or more for a 7 feet tree is another story. I end up making 8 natural and 8 white ornaments.
Working with burlap can be quite messy so get ready to be all sprinkled with burlap dirt. But don’t get scared, it’s so much fun making these cuties!
How to make Rustic Burlap Christmas Tree Ornaments.
Supplies:
- Burlap {your favorite ones}
- Pillow stuffing.
- Thread and needle {preferably use the same colors of your burlap}
- White yearns {thin like for embroidery}
- Twine (or even burlap ribbon)
- Twinkle bells {size of your choice to add a touch of charm}
- transparent glue {optional for burlap edges}
Tools:
- Hot Glue tool.
- Scissors
- Thread and Needles

Before we begin, be sure to follow us on Pinterest, Facebook, Instagram, and YouTube, and also sign up for our email list (at the end of this post), so you’ll never miss a post!
Step 1: Building the burlap hearts and stars:
First, print and cut some starts and hearts {or other shapes of your choice} in the size you think will fit your tree best.
I made the heart by hand folding a piece of paper and drawing half heart making sure both ends of the line finish on the fold. Then I cut it and voila!
I tried the same for the star but didn’t get far so I just found one, printed it, and cut it LOL.
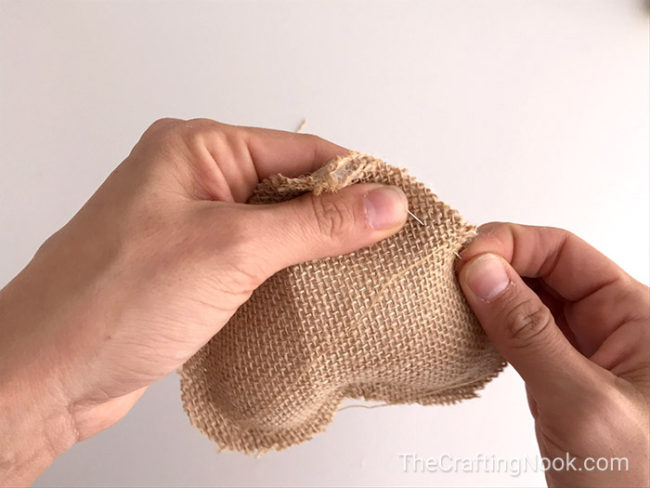
Using your shapes as your pattern, transfer them to your burlap and cut them. Since the heart is a symmetric shape, I fold it, also fold the burlap, and with folded sides together I cut several hearts.


Place together 2 burlap hearts and stitch them together leaving a few millimeters of the seam allowance. You are not turning the hearts inside out, it’s just for design.
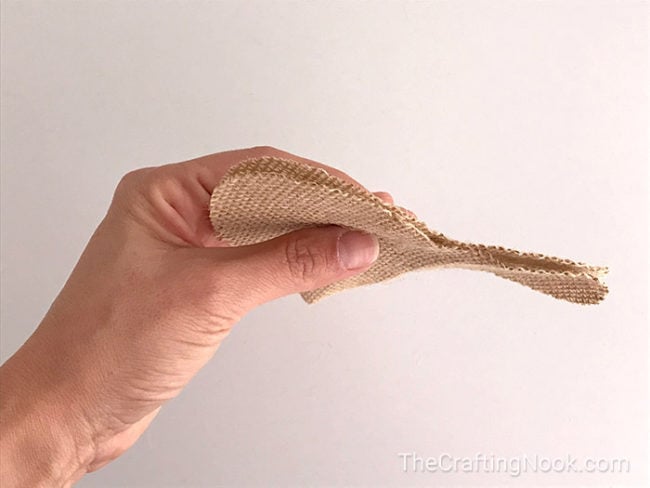
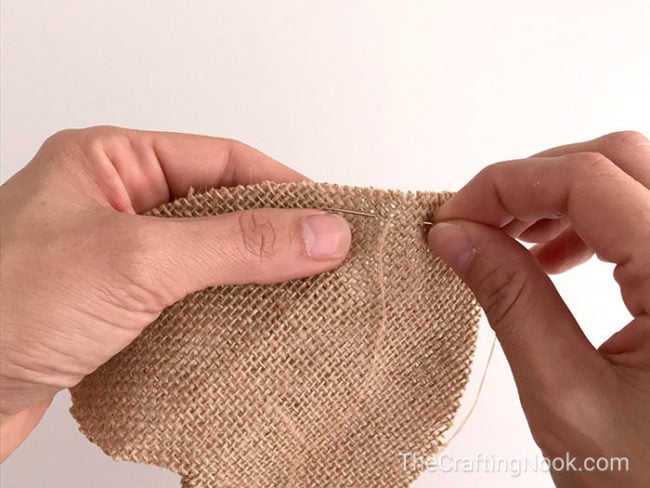
Stitch all around but leave a space opened to stuff it.
You can always sew the ornaments with your sewing machine if you have one, I decided to go hand-sew to show you all its easily doable, or like my dear friend Amy from amylattacreations always says, to show you it’s Honestly Doable.
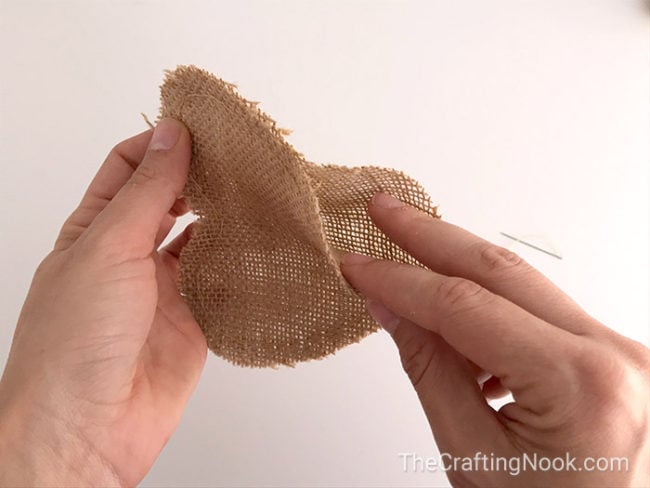

Step 2: Stuffing the ornament
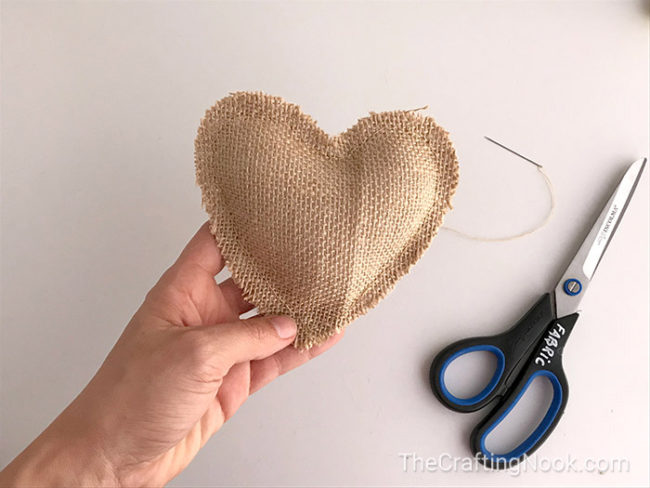
Stuff the heart {or the shape you are making} as much as you like, try not to get carried away though, you might actually want to be able to see the shape, LOL.
When you are happy with the stuffing stitch to close the heart.
There you go!
Step 3: Decorating the burlap Christmas ornaments
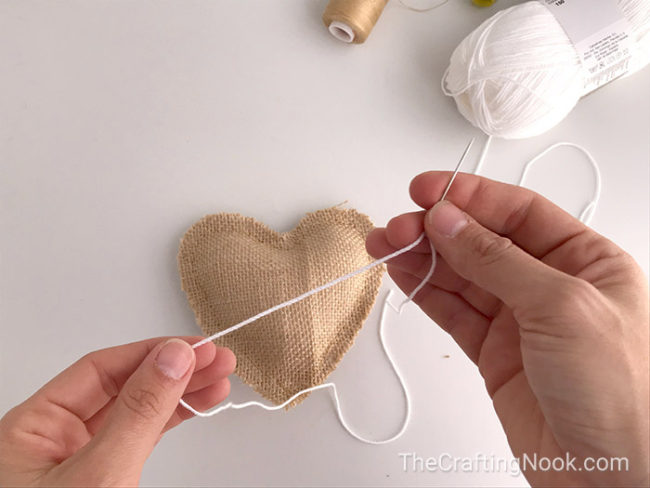
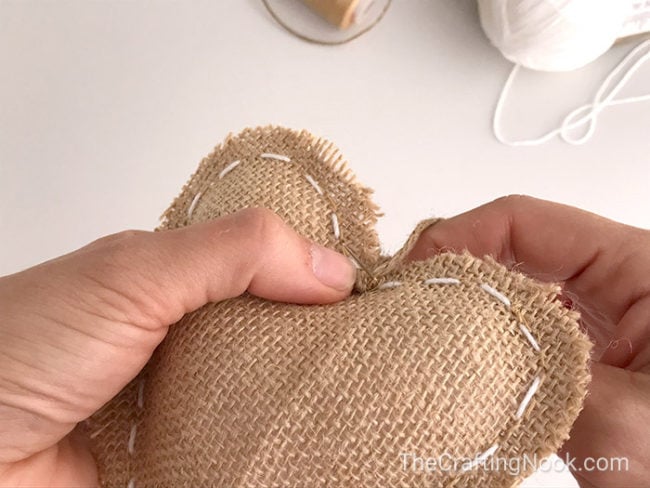
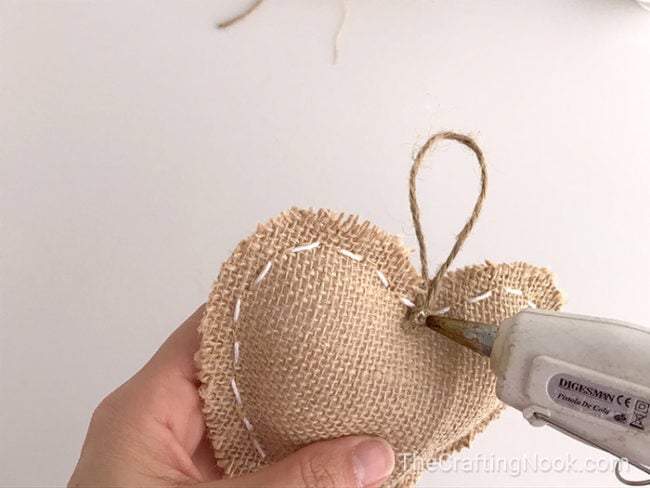
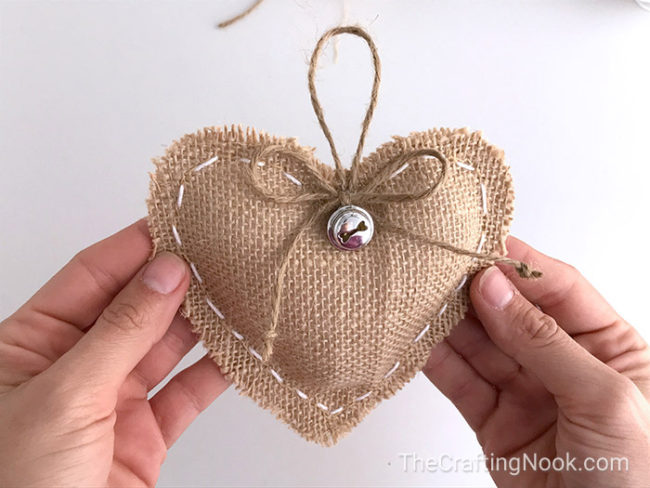
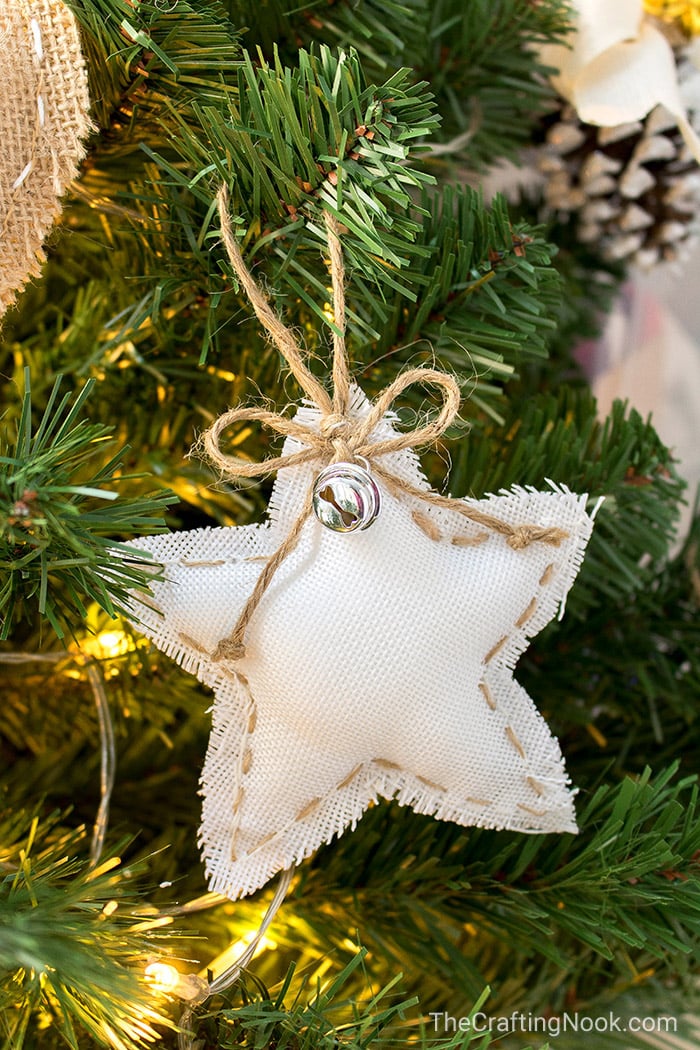
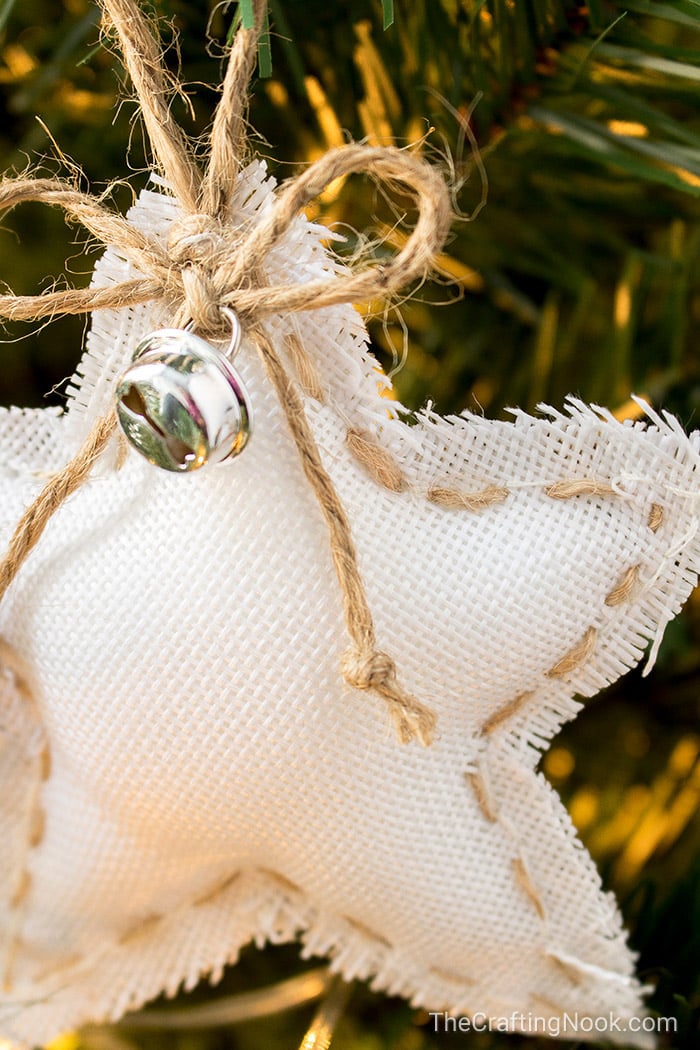
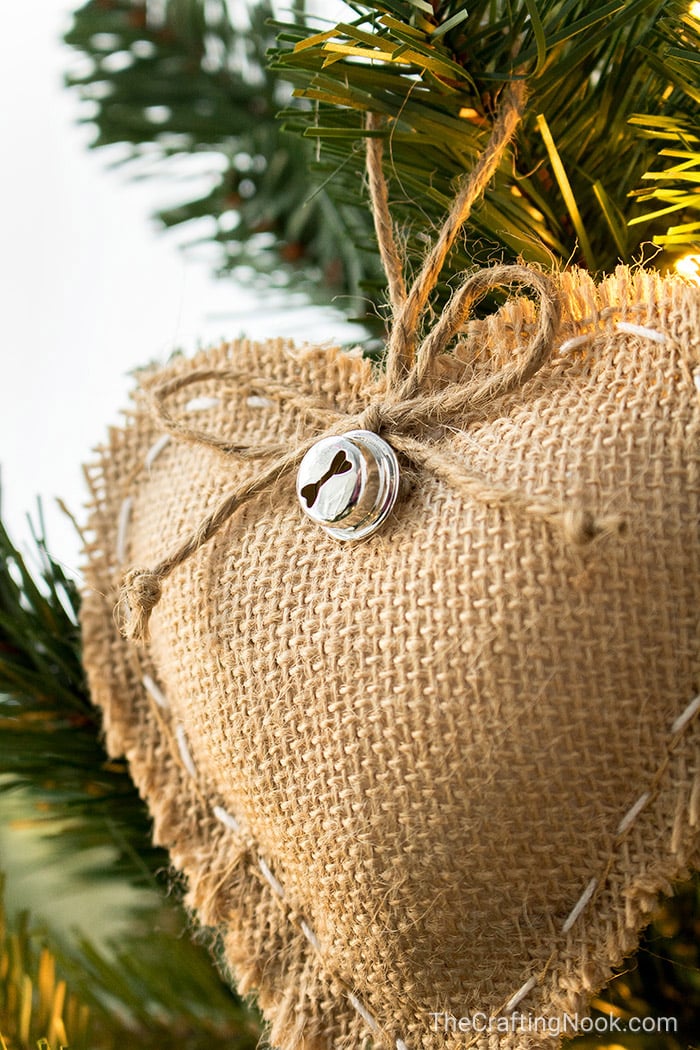
Now, using a yarn needle and your white yarn, make some long stitches along with the previous stitches. This gives that rustic sewing look.

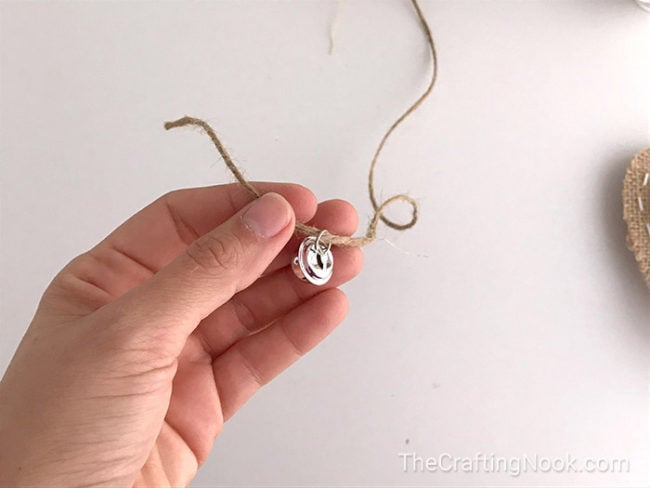
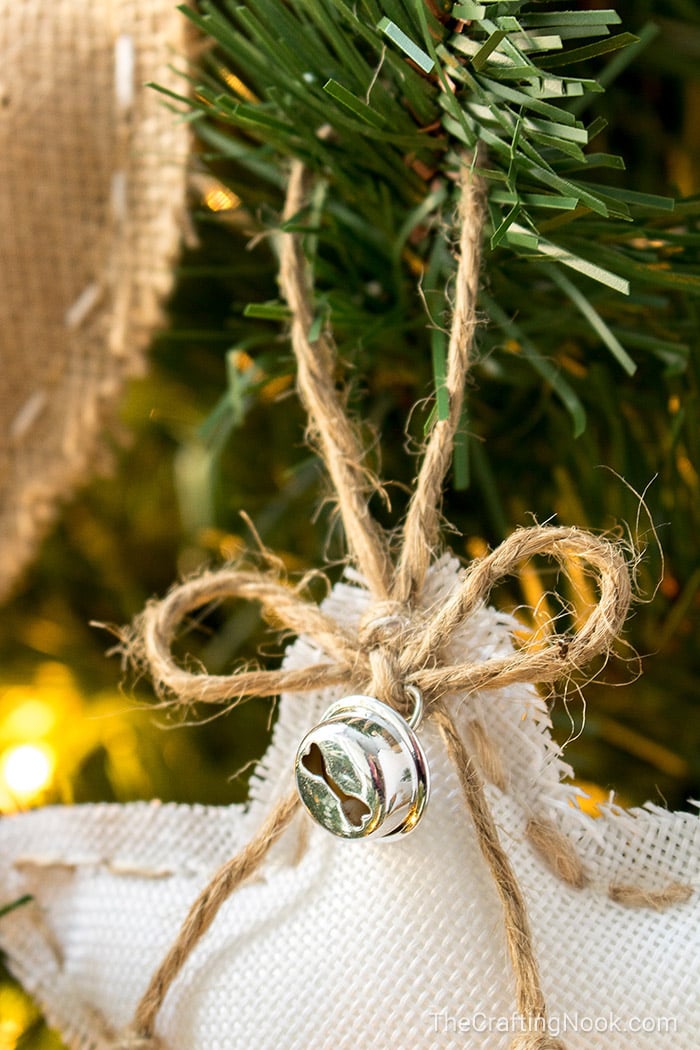
Cut a string of twine to hang your ornament. Make a knot and stitch it to your ornament right on top of your shape {you can also glue it if you prefer}.

Then cut another string of twine, this time a bit longer so you can make a cute bow.
Insert the string in your single bell ring, place it more or less in the middle of your string and make your bow.

Stitch or glue the bow to the hanger.

…And your are done. Easy peasy, right?
Step 4: Repeat with the start and more ornaments
Now go and make a couple dozen and come back and tell me how did it go!!! LOL.
Hey! I did it! You will see when I finish my Christmas tree.
Now seriously, you can do the same process for different shapes and colors.

I’ve seen similar ornaments with more decoration, like pine branches, cotton branches, cherry, balls, you name it and they all look so cute but I decided to go simpler.
Crafting tips
You can create any shape you would like. Try circles and paint snowflakes on them, little trees, snowmen, bells, and so much more.
You can use a sewing machine if you have one.
If you don’t have normal stuffing, you can use cotton, and even fabric scraps.
But for now, how do my lovely Ornaments look?

Frequently Asked Questions
You definitely can and you are more than welcome to. You can use any type of fabric that you love. Between you and me, plaid fabric might just rock!
Absolutely! You can go for pretty ribbons, yarn, and anything else your creativity calls!
In theory yes, you can but I don’t know the result. If you have a sewing machine, you can use it too but to make these ornaments you don’t need to be a sewer, the stitches are super simple, enough to hold the stuffing. In the crafting world, it’s all about trying and testing. Don’t be scared and just try, there’s no perfection expected!
More Christmas Ornaments to Try
If you enjoyed these cute Heart and Stars burlap ornaments tutorial, you might also want to check out these other Christmas Projects too:
✂️ Tutorial

DIY Rustic Hearts and Stars Burlap Christmas Ornaments
Tools
- Hot Glue tool.
- scissors
- Thread and Needles
Supplies
- Burlap {your favorite ones}
- Pillow stuffing.
- Thread and needle {preferably use the same colors of your burlap}
- White yearn {thin like for embroidery}
- Twine or even burlap ribbon
- Twinkle bells {size of your choice to add a touch of charm}
- transparent glue {optional for burlap edges}
Instructions
STEP 1: BUILDING THE BURLAP HEARTS AND STARS:
- First, print and cut some starts and hearts {or other shapes of your choice} the size you think will fit your tree best.
- I made the heart by hand folding a piece of paper and drawing half heart making sure both ends of the line finish on the fold. Then I cut it and voila!
- I tried the same for the star but didn’t get far so I just found one, printed it and cut it LOL.
- Using your shapes as your pattern, transfer them to your burlap and cut them. Since the heart is a symmetric shape, I fold it, also fold the burlap, and with folded sides together I cut several hearts.
- Place together 2 burlap hearts and stitch them together leaving a few millimeters of seam allowance. You are not turning the hearts inside out, it’s just for design.
- Stitch all around but leave a space opened to stuff it.
- You can always sew the ornaments with your sewing machine if you have one, I decided to go hand-sew to show you all it’s easily doable, or like my dear friend Amy from amylattacreations always says, to show you it’s Honestly Doable.
STEP 2: STUFFING THE ORNAMENT
- Stuff the heart {or the shape you are making} as much as you like, try not to get carried away though, you might actually want to be able to see the shape, LOL.
- When you are happy with the stuffing stitch to close the heart.
- There you go!
STEP 3: DECORATING THE BURLAP CHRISTMAS ORNAMENTS
- Now, using a yarn needle and your white yarn, make some long stitches along with the previous stitches. This gives that rustic sewing look.
- Cut a string of twine to hang your ornament. Make a knot and stitch it to your ornament right on top of your shape {you can also glue it if you prefer}.
- Then cut another string of twine, this time a bit longer so you can make a cute bow.
- Insert the string in your single bell ring, place it more or less in the middle of your string and make your bow.
- Stitch or glue the bow to the hanger.
- …And your are done. Easy peasy, right?
STEP 4: REPEAT WITH THE START AND MORE ORNAMENTS
- Now go and make a couple dozen and come back and tell me how did it go!!! LOL.
Some gorgeous rustic crafts from my favorite bloggers:
- Snowy Pine cones luminaries made with mason jars from Crafts by Amanda.
- Red and Rustic Christmas Mantel Decor by Inspired by Charm.
- Rustic Twine Wrapped Candy Cane Ornament by DIY & Crafts
- Christmas Place Settings {Easy, No-Sew Flatware Pouch} by Love, Family and Home
- Lighted Burlap Garland for Christmas by Create Craft Love
Share and PIN ME!

Til’ next time…


FREE WORKBOOK
Keeping your Sweet Home Organized
Learn how to create intentional habits and simple routines to Keep Your Home Organized. Plus freebies, printables, exclusive content, and tips.
Disclaimer: By clicking on the “Yes” button above you are giving me your consent to collect and use your information according to the law and My Policy Privacy. Zero Spam I promise!
